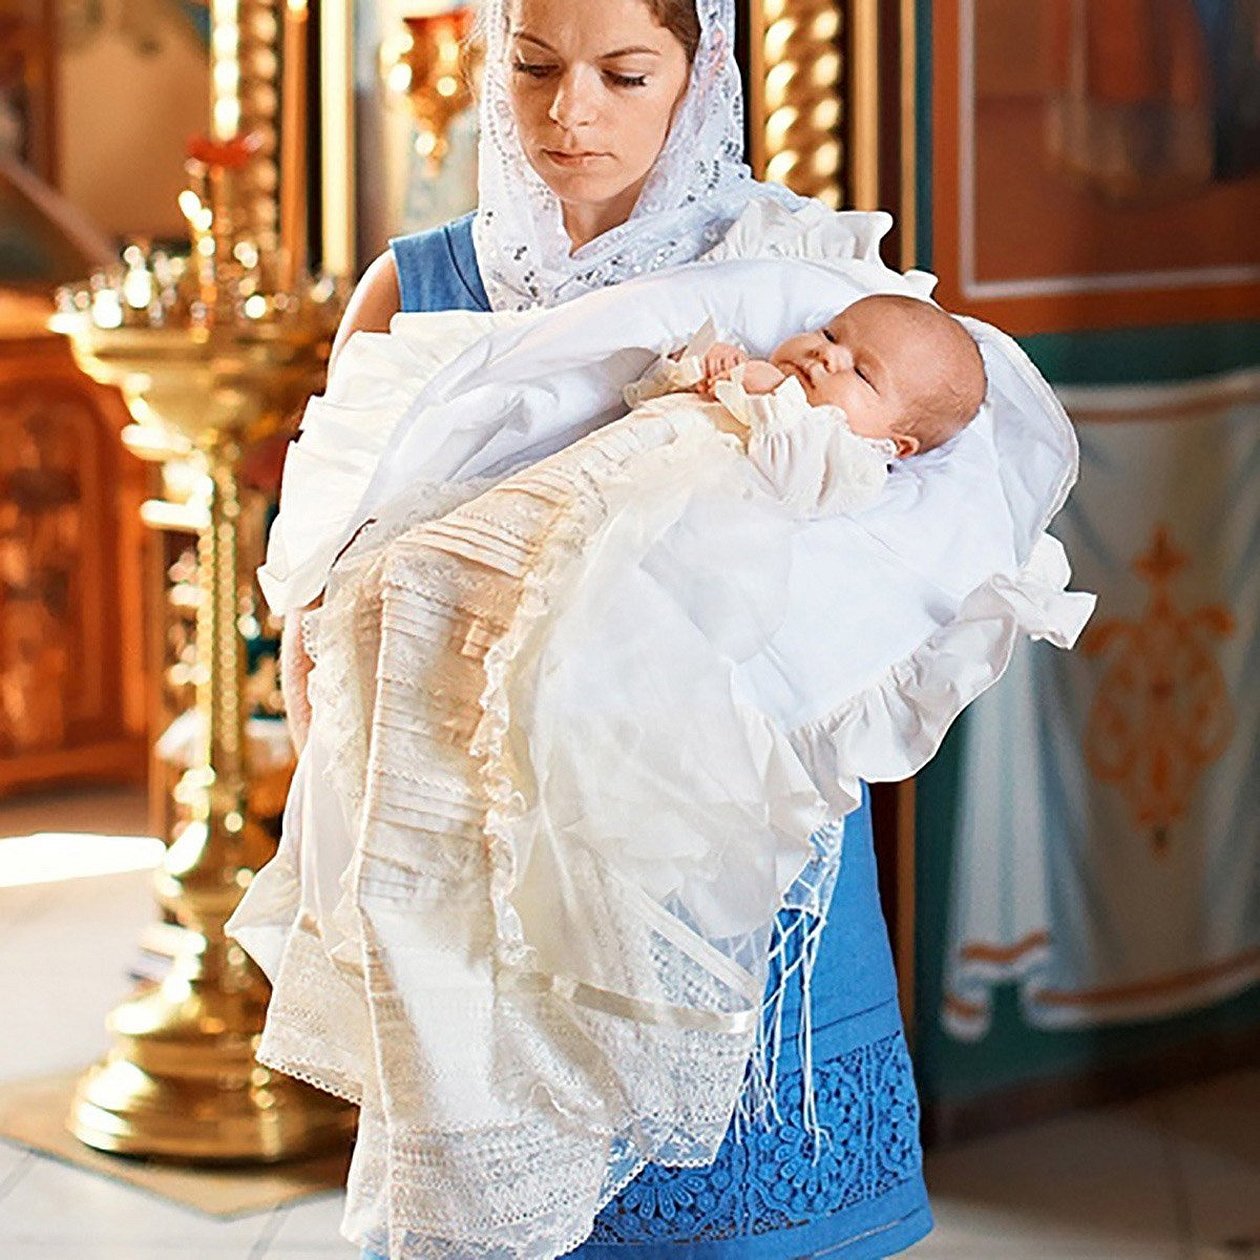
Baptism is an important step for a child and his family. It is necessary to be able to properly prepare for this solemn event, collect the necessary things and pass an interview with the priest. This article tells how to sew a baptismal set with your own hands and what is needed for this.
- What is a christening gown
- Choice of fabric
- Batiste or muslin
- Satin
- How to sew a christening gown for a boy or girl
- Choice of style
- Construction of the pattern
- Cut out the pattern
- Sew the blank
- Process the seams and neck of the shirt
- Shirt decoration
- How to sew a christening dress
- Examples of ready-made models for a boy and a girl
- What else is needed for a christening?
What is a christening gown
A christening shirt is the first item of clothing that a child is dressed in after the christening procedure. According to the rules, such a shirt should be long and light, and is mainly made of natural fabrics. Traditionally, the shirt is provided by the godparents.
Choice of fabric
Calico is a completely natural material that is made from thick, untwisted threads using a standard plain weave. The yarns in this method are woven crosswise with each other. Because of this, calico will be the most common fabric for the sacrament of baptism or bed linen.
Batiste or muslin
In the 70-90s, christening shirts were made of batiste. This is a 100% cotton material made of fairly thin twisted linen weave thread, which makes batiste durable, but at the same time soft, a little silky.
Please note! In the Soviet Union, it was manufactured according to GOST standards in various factories, but now only a few enterprises adhere to GOST standards for cambric.
Satin
This material is soft, beautiful and quite durable. Satin is made from two types of yarn, the thick one is for the base, and the thinner one is for the outer side. This gives the product softness and a glossy shine that is similar to silk.
Material composition: 100% cotton. Mainly produced in Russia.
How to sew a christening gown for a boy or girl
The product for a boy or girl differs only in the type of decoration. Below is how to sew a christening shirt with your own hands.
The first thing you need to do is take measurements.
What needs to be measured:
- ½ neck;
- ½ chest;
- shoulder circumference;
- sleeve length;
- shirt length (depends on the child's height).
Choice of style
The style should be such that the child feels free in the product, and movements are not constrained.
The color of the shirt is most often white or cream - this symbolizes the innocence of the child. After the baby is lowered into the water, it is necessary to put on a shirt or a baptismal robe, here the parents themselves make the choice. Below is how to construct a pattern for a shirt for the christening of a boy.
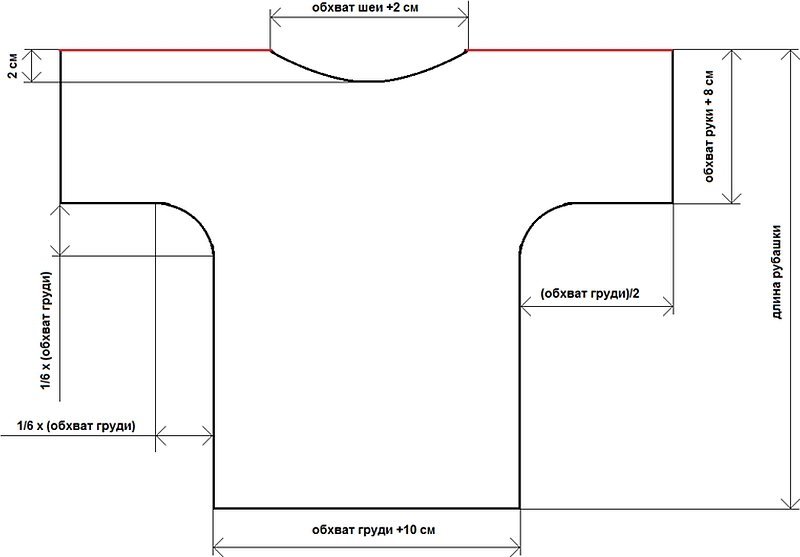
Construction of the pattern
Step-by-step process of sketching:
- The drawing is constructed from the sleeve, to draw it, it is necessary to measure the half-girth of the arm, and make allowances for freedom of movement. It is also necessary to measure the length of the sleeve and indicate on the drawing;
- Draw a sketch of the back and front in the middle. To do this, measure the half-girth of the baby's chest and add about 10 centimeters to the measurement;
- Mark the sleeves on the wrong side with a smooth line;
- Next, you need to draw a neckline section for the product. In the center of the shelf, set aside on both sides from the middle mark of the product a value equal to 1/4 of the neck circumference +3 cm on both sides. Draw a smooth line.
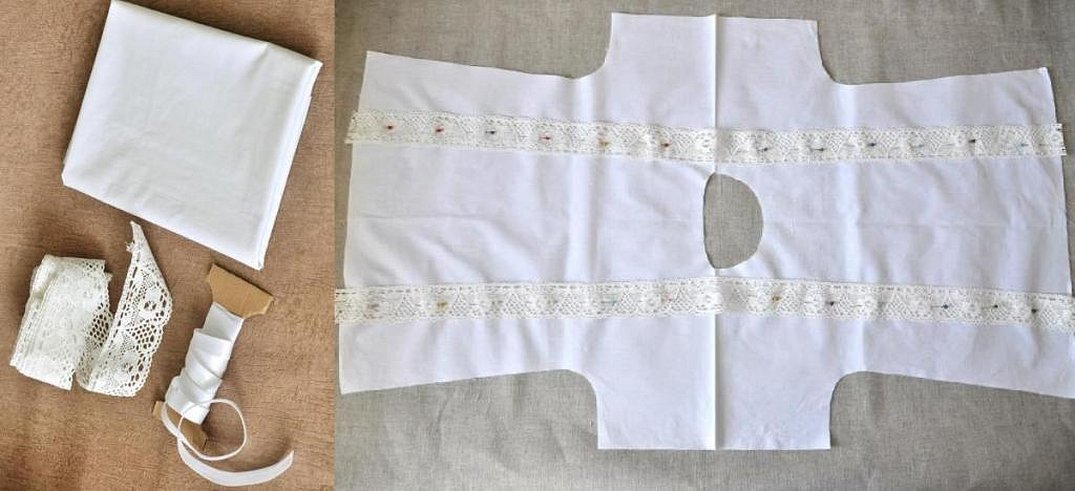
Cut out the pattern
When the sketch is ready, you need to carefully cut it out on paper with scissors. To check the size, you can attach the drawing to the child. If necessary, edit the pattern.
The elements of the product are transferred to the fabric:
- Next, fold the fabric in half along the top contour. Place the paper sketch on top so that two elements of the cut are formed and they are not cut off at the shoulders and sleeves;
- Make seam allowances on the fabric;
- If everything is done correctly, you can start cutting out the pattern from the fabric.
Sew the blank
Sew a christening shirt for a boy with your own hands. First, all the finished parts must be secured with pins or needles. After that, start sewing the shirt along the inside.
It is better to do this with a sewing machine so that the seams are stronger. Once the product is sewn, it needs to be turned inside out and the edges need to be processed.
Process the seams and neck of the shirt
The neckline, sleeves and seams can be finished with a zigzag stitch to prevent the fabric from fraying. This procedure is usually done on an overlocker, which will save a lot of time.
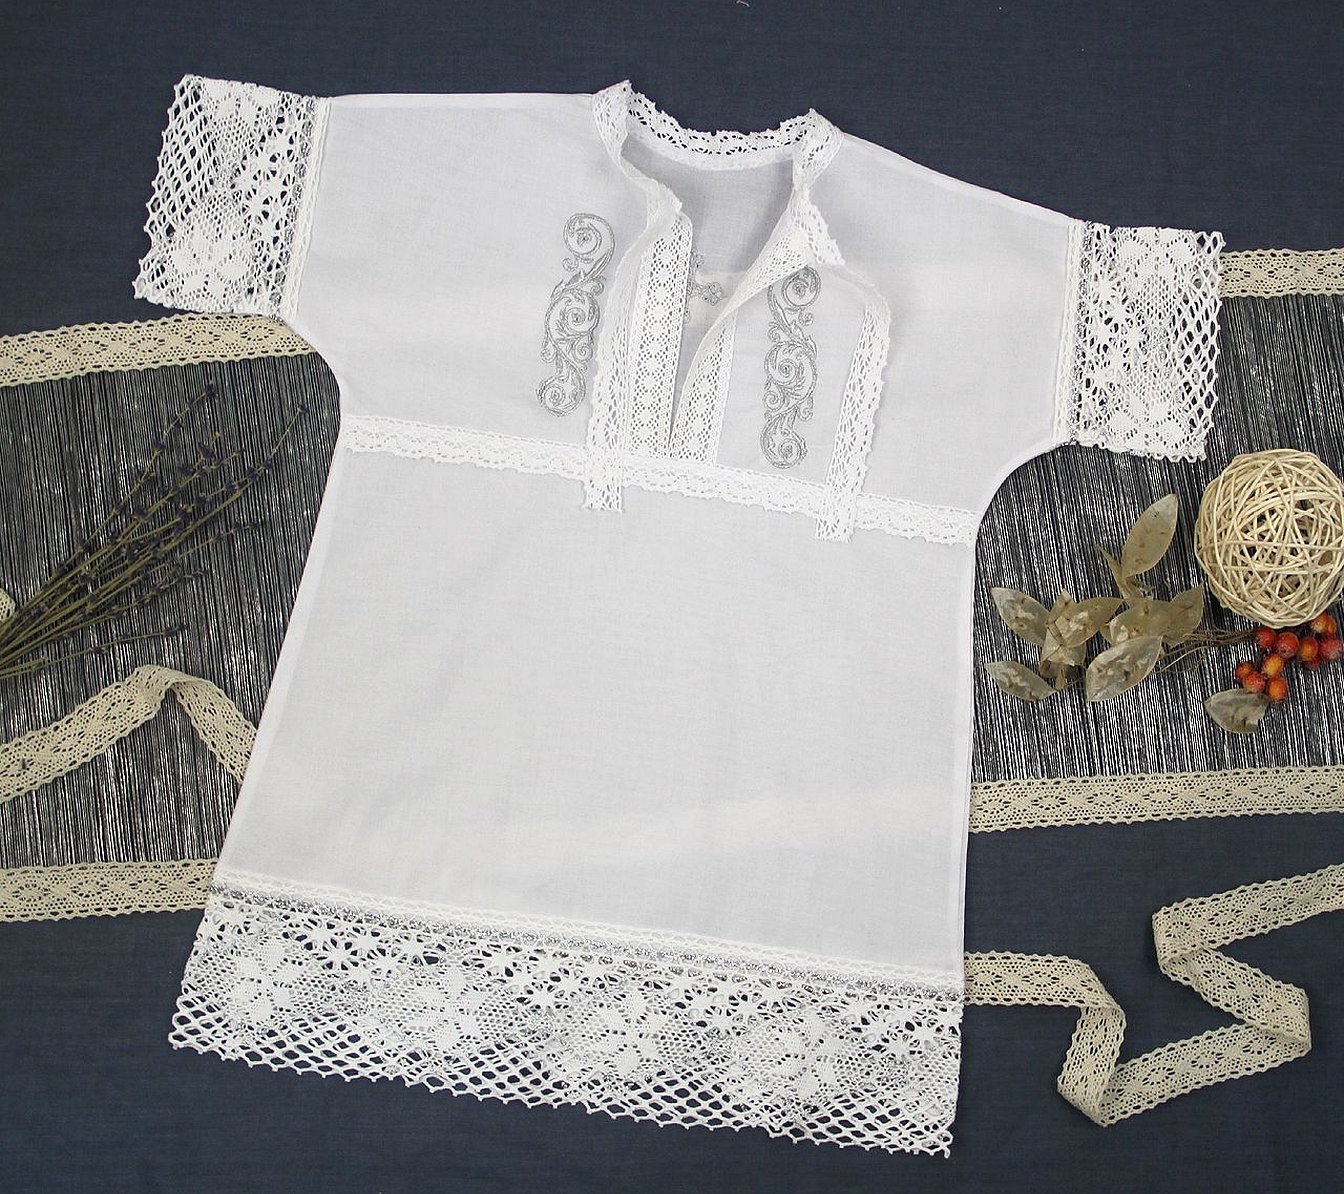
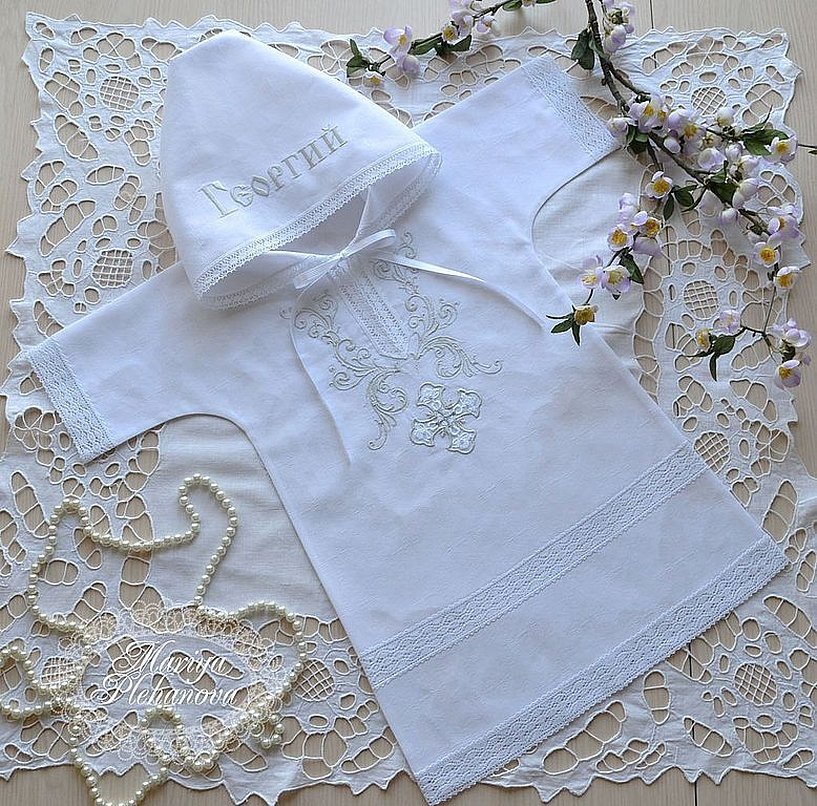
Shirt decoration
Lace or satin ribbon is mainly used to decorate shirts. For girls, it is better to sew a lace braid along the entire bottom of the shirt. And for boys, the ribbon is sewn in a vertical line along the side of the front.
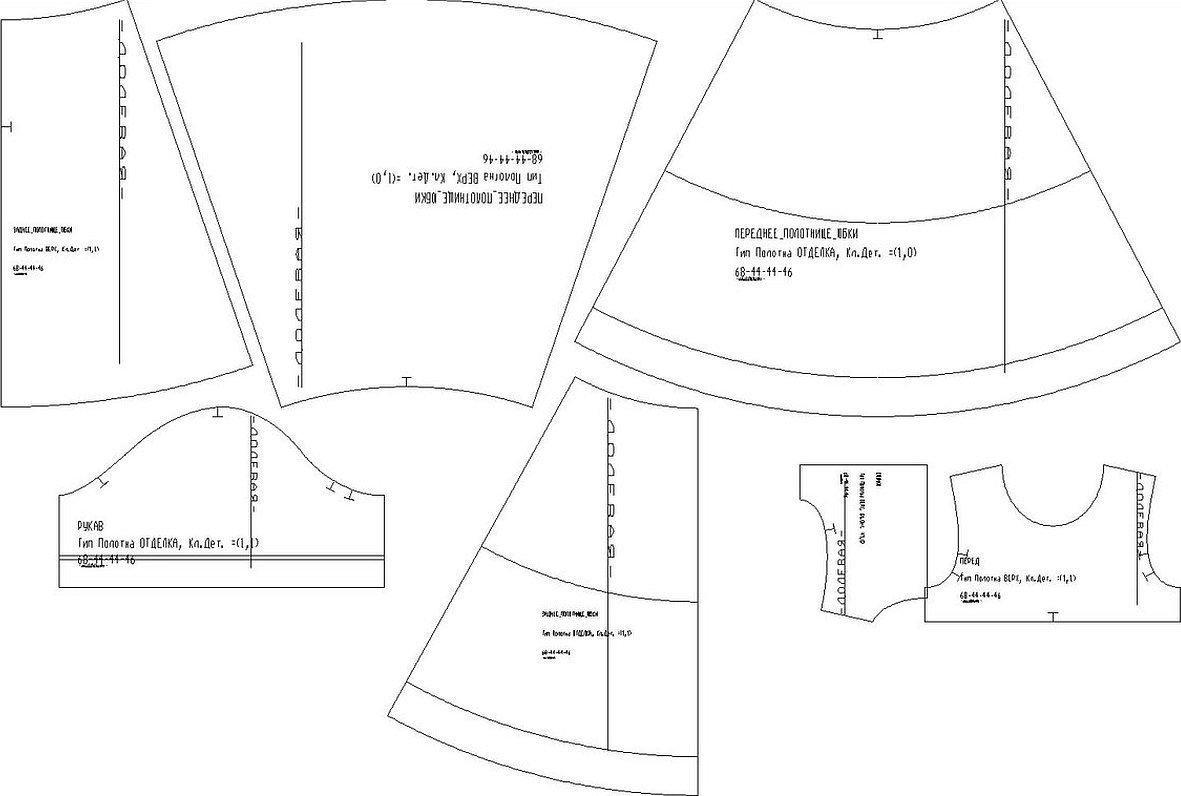
How to sew a christening dress
Materials and tools for work:
- 180 cm of white calico or cotton;
- 180 cm lace;
- satin braid;
- several small buttons;
- dress pattern.
Attach the lace to the back and front of the garment. The edge of the lace should be a few centimeters longer than the main element. Sew the lace tape around the neck, shoulders, and sleeves.
Cut off excess fabric. Repeat the steps with the lace along the back of the dress. Fold the sleeves together in the middle. Attach the lace of a smaller width along the folded edge of the sleeve and secure with pins.
Cut off excess pieces of material. Do the same with the other sleeve. Sew the fixed places and pull the thread to gather the fabric.
Place the front and back together. Make stitches on the shoulders and iron the allowances. Insert the sleeves into the armholes and fix them. If necessary, pull the thread to gather the fabric more.
Process the edges of the dress on an overlock or manually with a zigzag stitch. Fold half a cm and stitch. Process the back of the dress using the same method.
Place the front of the lace skirt on top of the linen petticoat and sew together. Baste the edges with one stitch along the top line of the skirt to gather the material. Pull the ends of the yarn to gather the skirt.
Sew the back elements. Gather the back side of the skirt and sew it to the back. Make allowances along the chest line. Sew a loop and several buttons to the top of the product. Fold the front and back with the outer parts together. Fold the skirt and bodice parts. Fold the bottom of the dress and stitch.
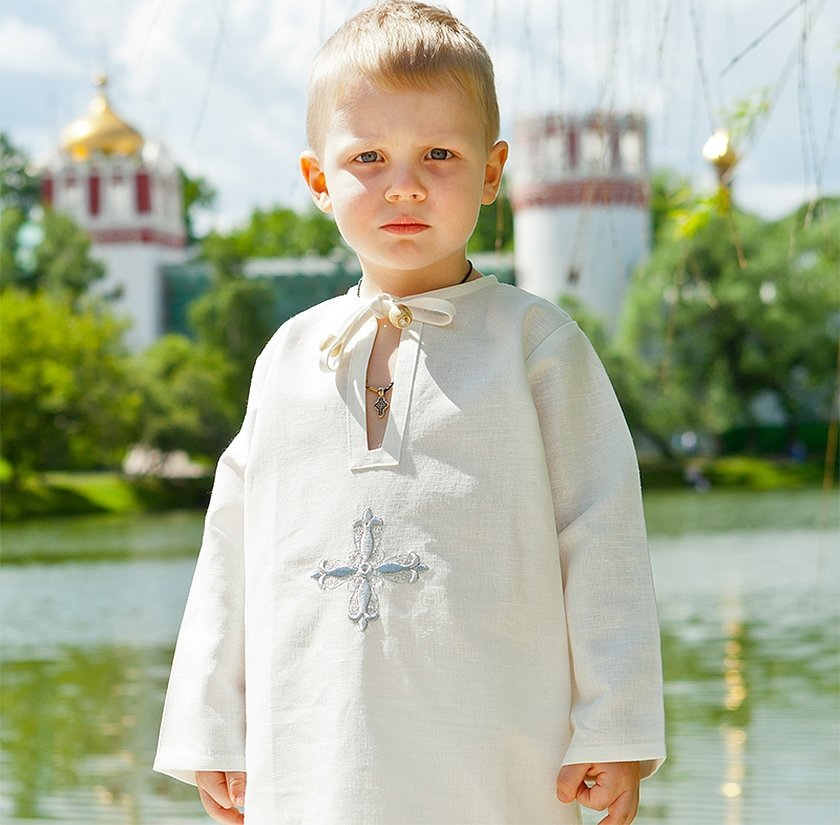
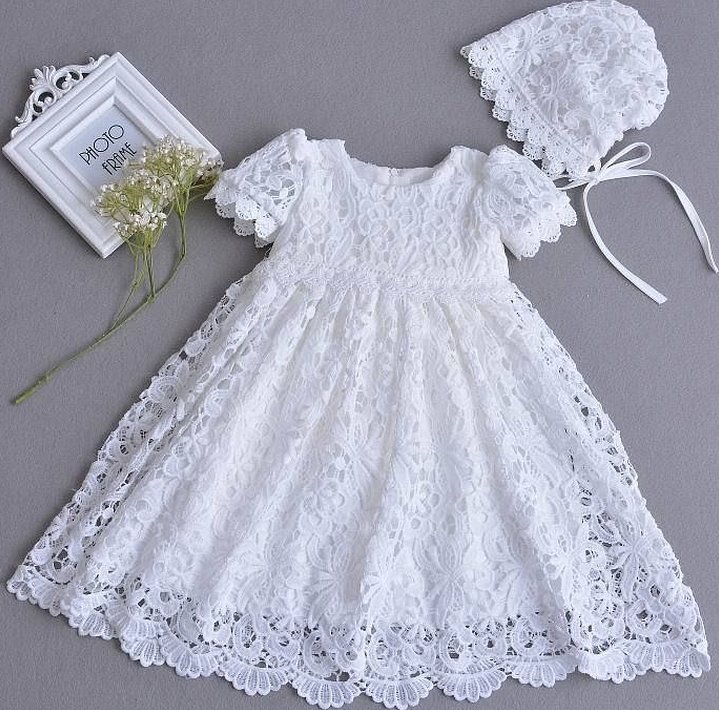
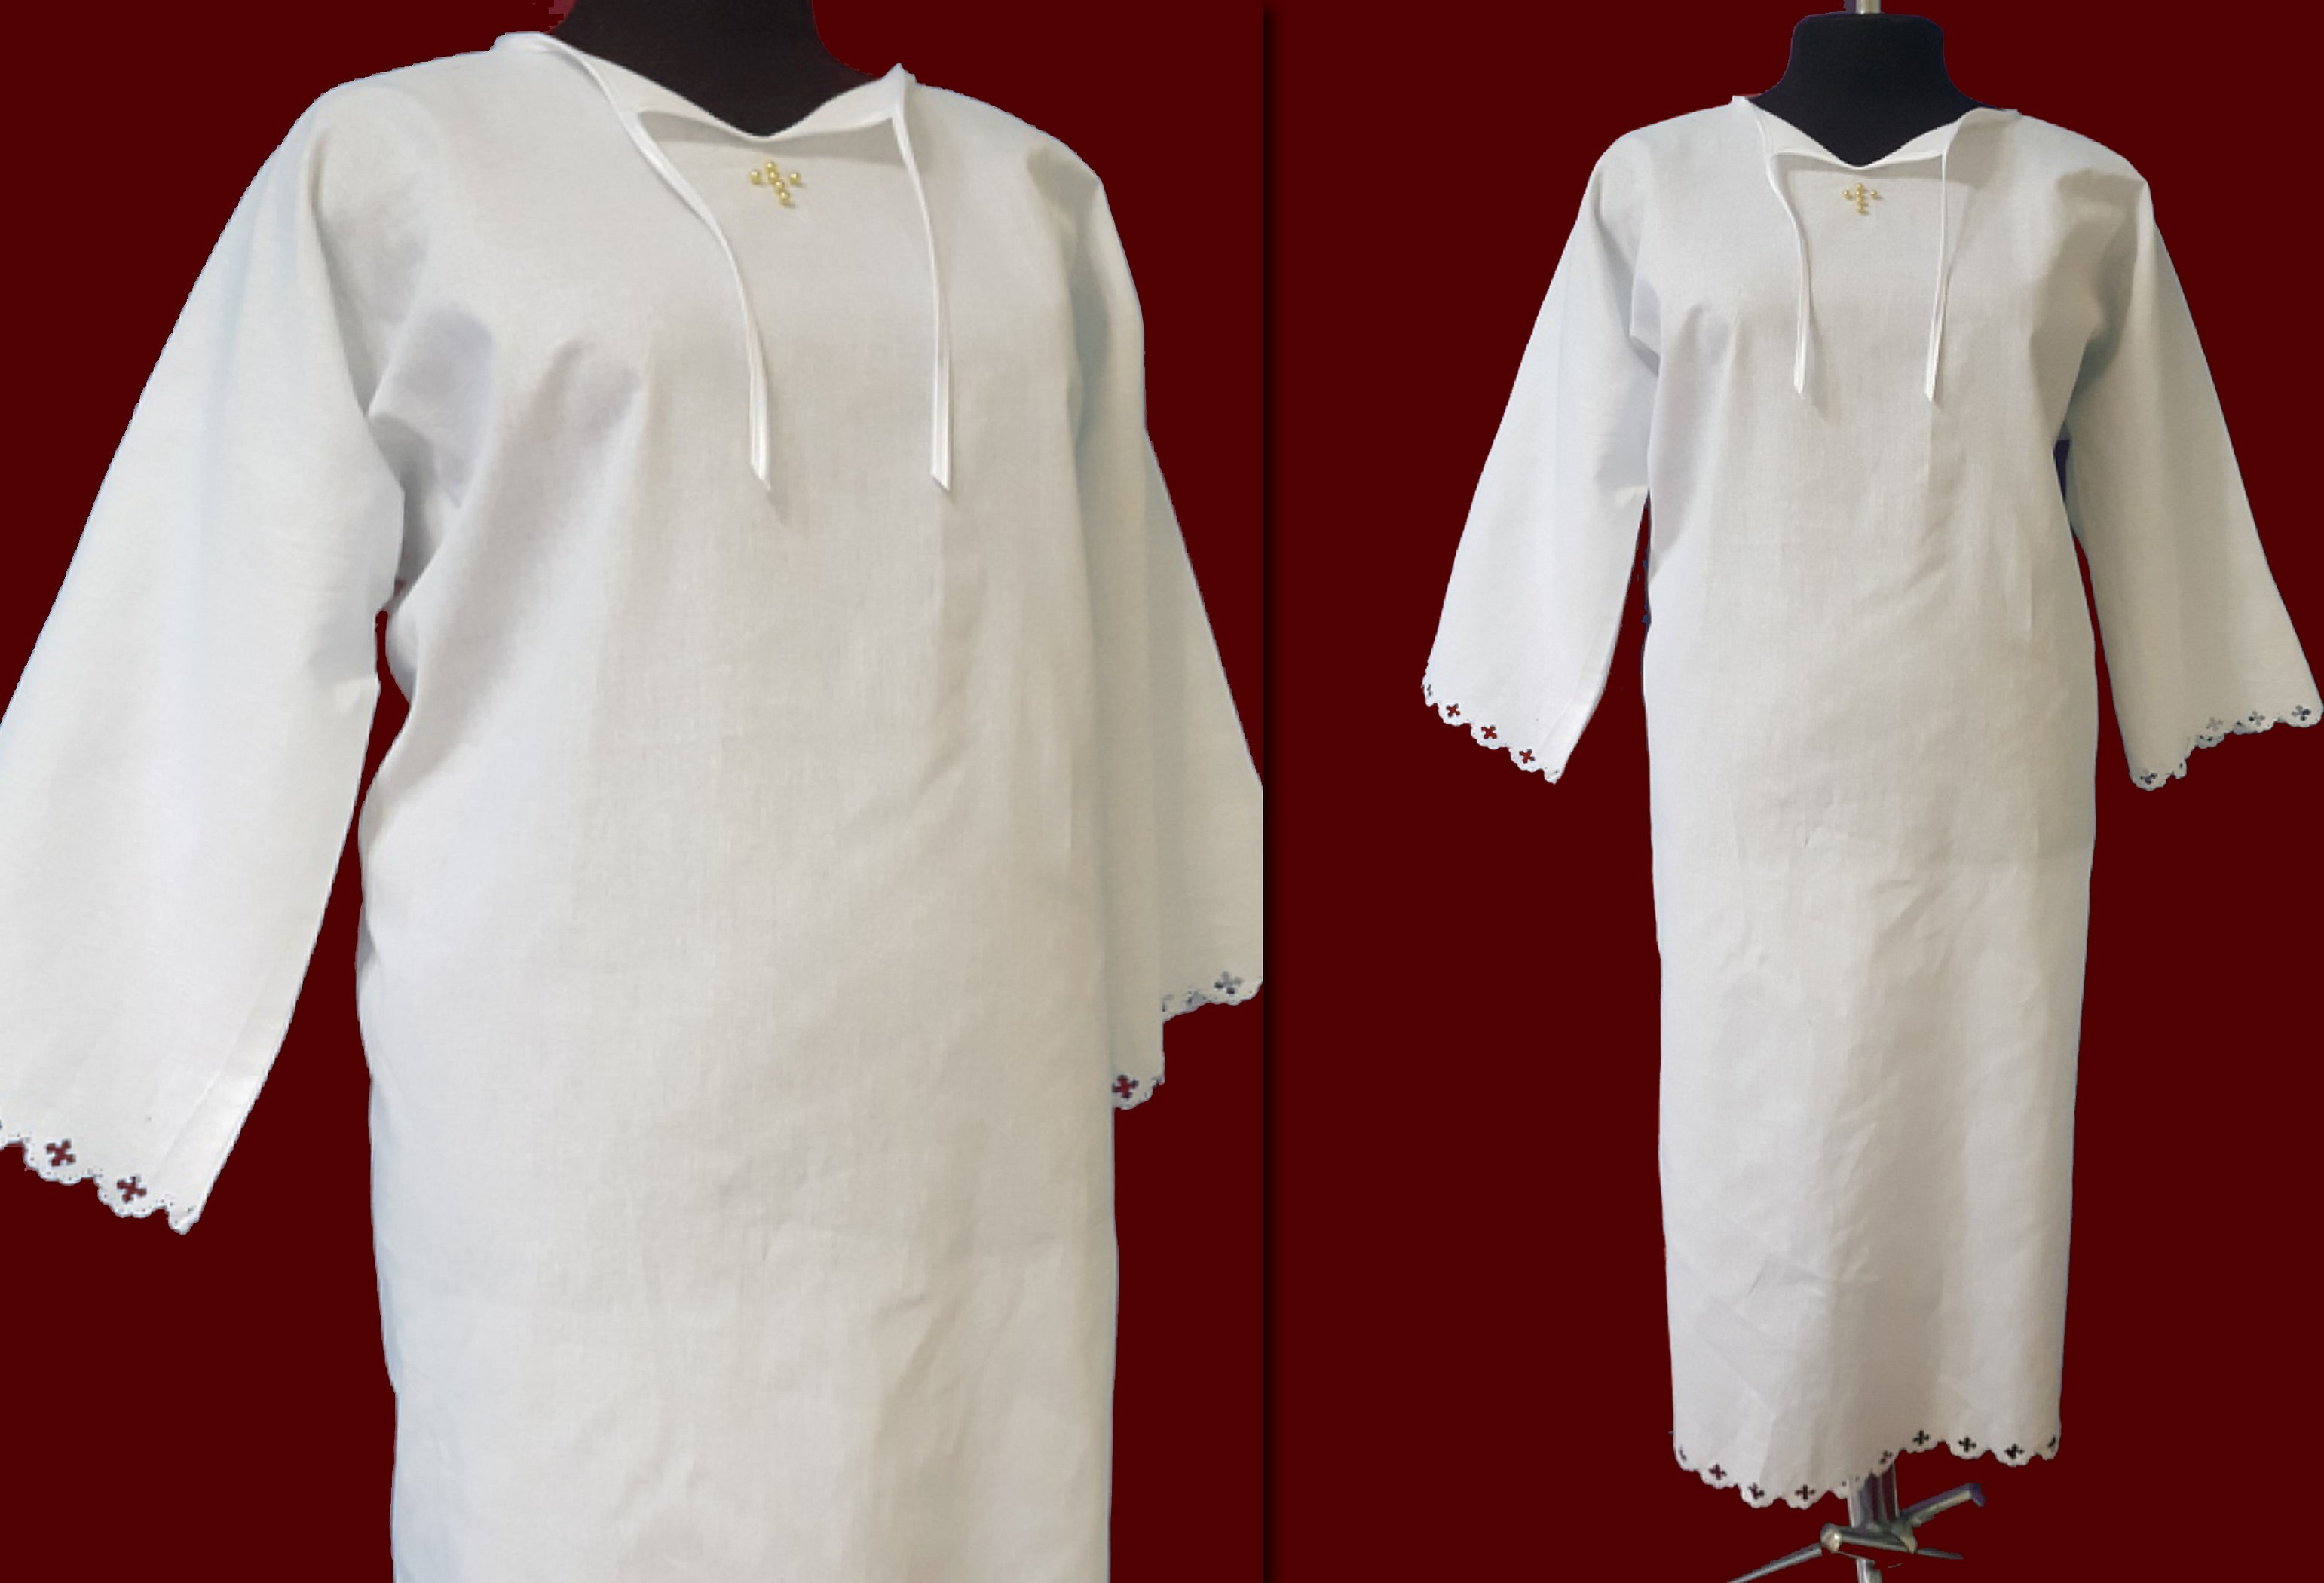
Examples of ready-made models for a boy and a girl
In figures 2 and 3 you can see examples of models for both girls and boys.
What else is needed for a christening?
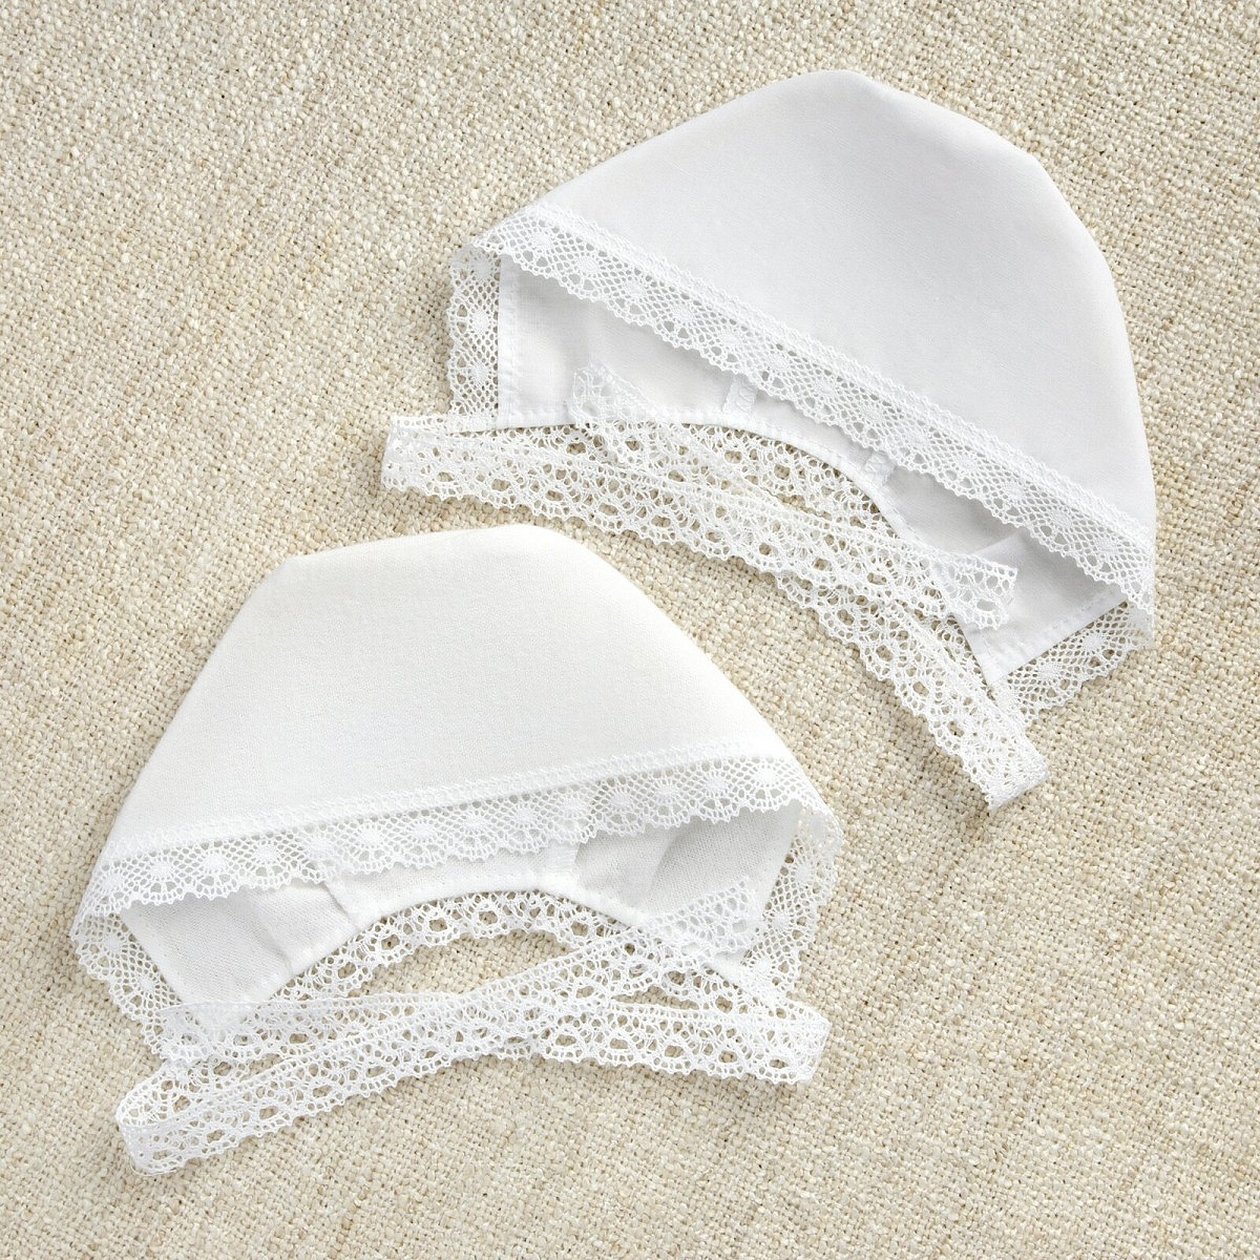
The basic christening set consists of a pectoral cross, a shirt or christening gown, sometimes a baptismal robe, a white cotton cap with lace. It is necessary to buy an icon for the child and candles.
Please note! It is also necessary to have two towels, one for the child, the second for the Father (after the procedure the towel remains with him).
You can sew a christening set for a girl with your own hands using a pattern from the Internet or various handicraft sites. Products can be wrap-around or with ties.
Thus, sewing a christening gown is not very difficult. The main thing is to correctly take measurements from the child and make a pattern. The work process itself takes no more than an hour. You can decorate the products as desired, but most often white lace or bias tape is used.


