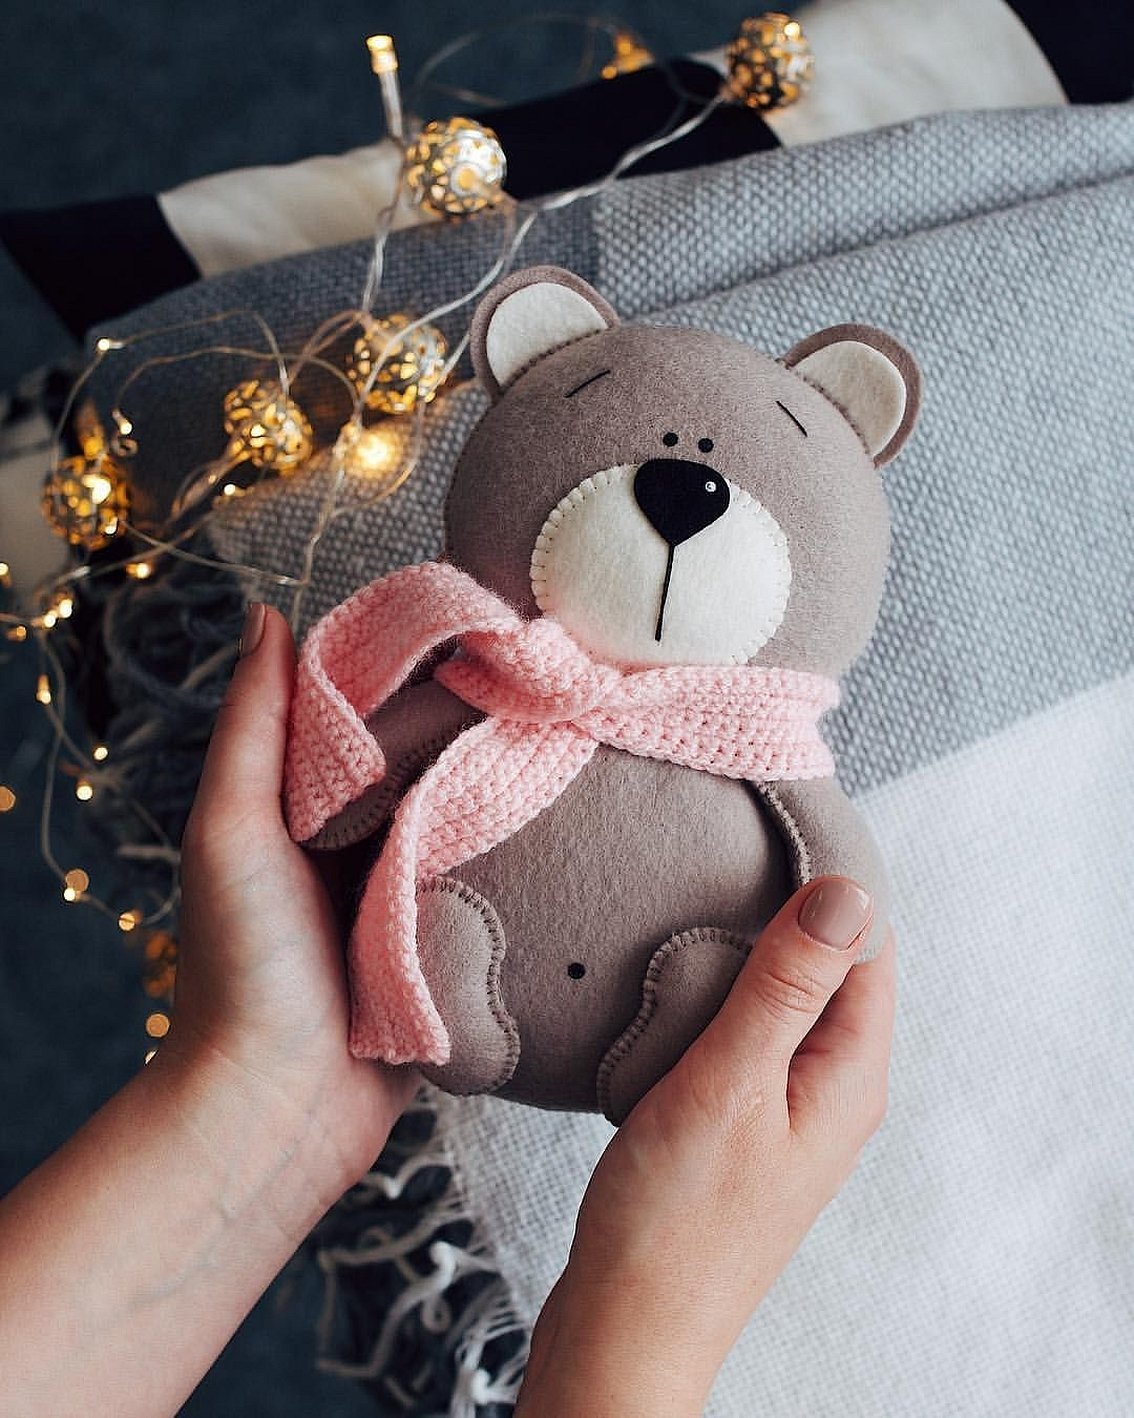
Teddy bears are loved by adults and children. They come in different colors, sizes, or look like cartoon characters. However, not everyone can afford to buy a plush friend because of the high cost. Therefore, as an alternative, a felt bear is sewn with your own hands using a pattern.
How to make a felt teddy bear with your own hands
To sew a toy, you will not need much effort. It is enough to have desire and follow step-by-step instructions. And even a novice seamstress can cope with the work algorithm.
For your information! You can involve children in the work. Sewing a bear will help develop and strengthen skills in working with a template and scissors.
To sew you will need the following:
- the main material is felt. The color scheme is selected depending on personal preferences;
- thin, transparent paper;
- pen, pencil or disappearing marker;
- needle, thimble and thread;
- sharp scissors.
Advice! For toys, it is recommended to use hard felt. Soft felt is suitable for decorative details.
Algorithm of actions:
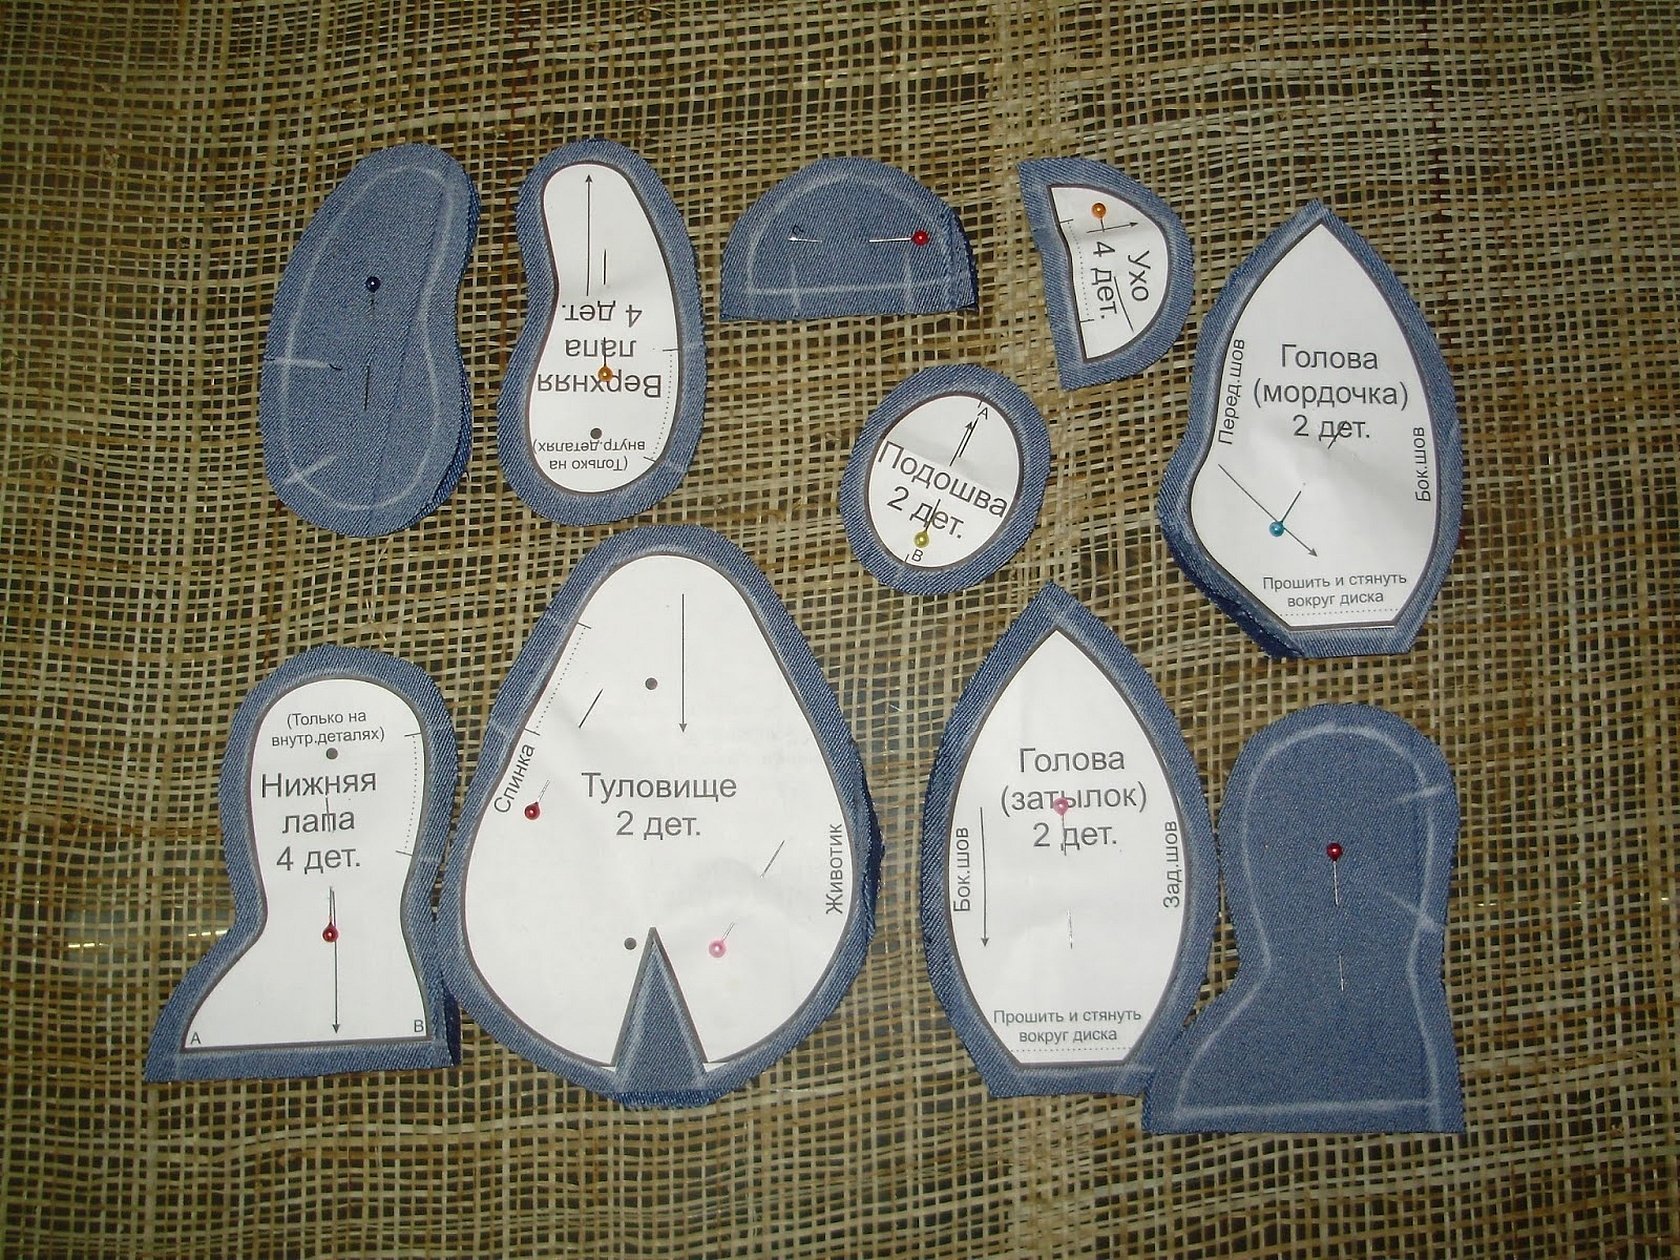
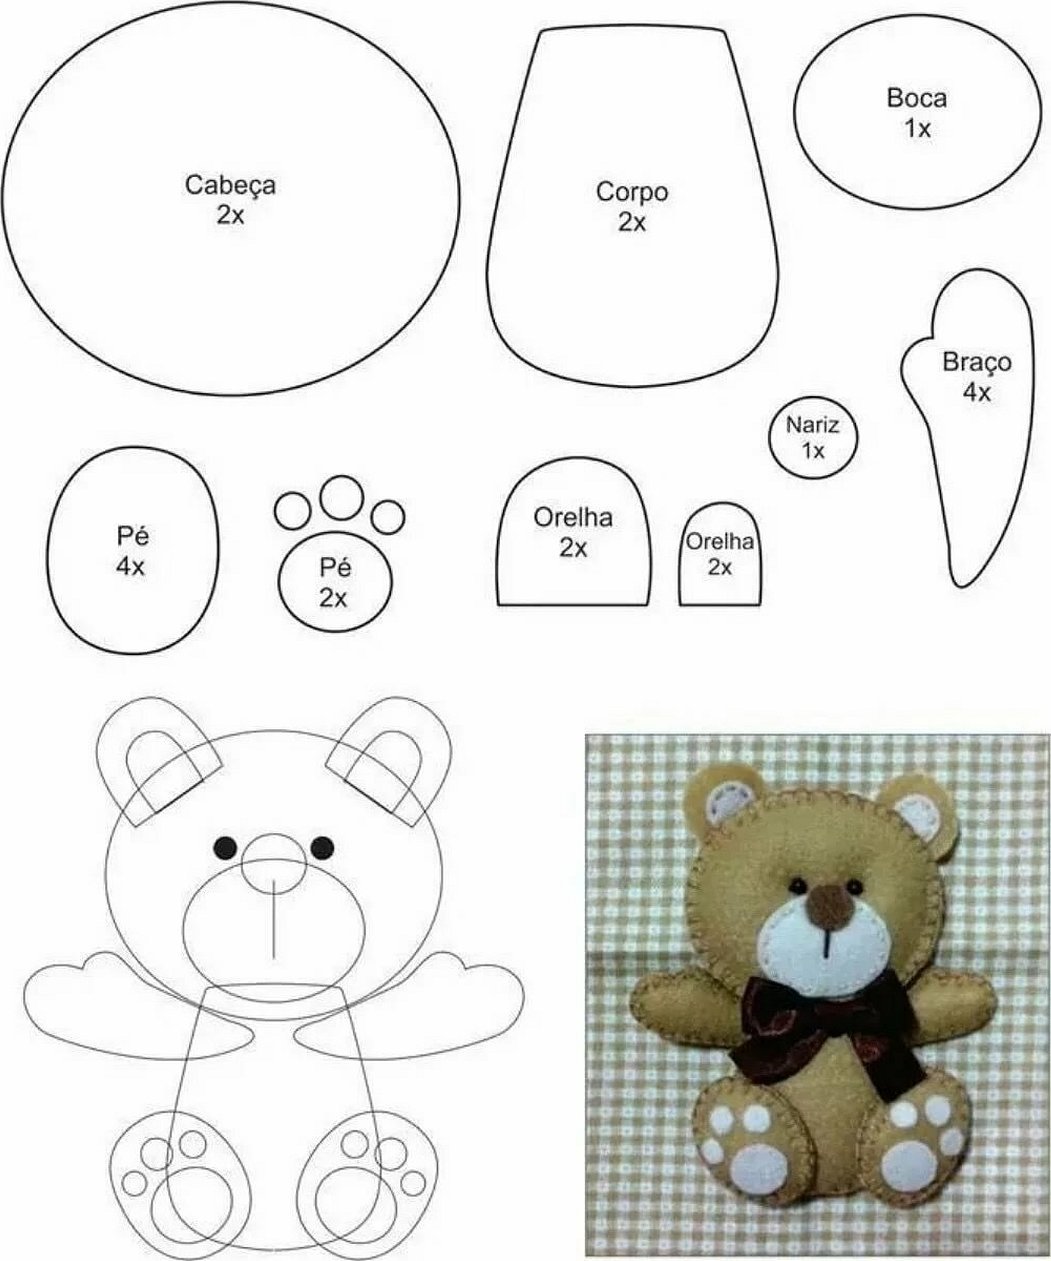
- Before you start sewing a felt bear, you need to find a pattern. You can come up with it yourself or download it from the Internet and print it out. This also applies to cartoon characters. For example, felt teddy bears. Any character from a popular cartoon can be copied from the screen and the drawing can be cut into pieces.
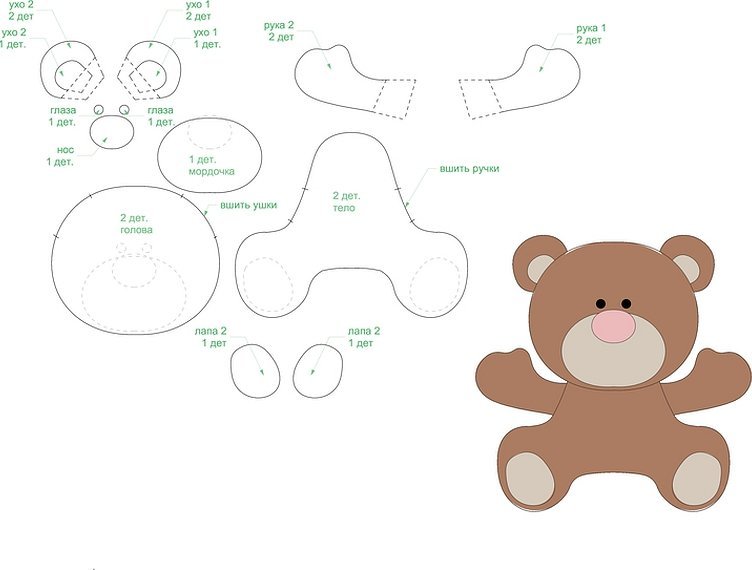
- The details of the future bear are cut out from the general scheme and traced on felt in pairs. One detail goes to the front part, the second to the back. The legs, arms and ears are traced 4 times.
- The bear elements are cut out of fabric and laid out on the front and back sides.
- You can decorate the muzzle with a marker, embroidery or sewing on additional elements: eyes, nose, mouth, whiskers, etc. Combinations will not spoil the toy. For example, ready-made eyes made of plastic or beads are sewn on, and the muzzle is drawn with a marker or made from fabric of other colors.
- After the muzzle is ready, it is sewn. Threads are selected to match the color of the felt. If you want a contrasting seam, you can select a thread that matches the color of the fabric.
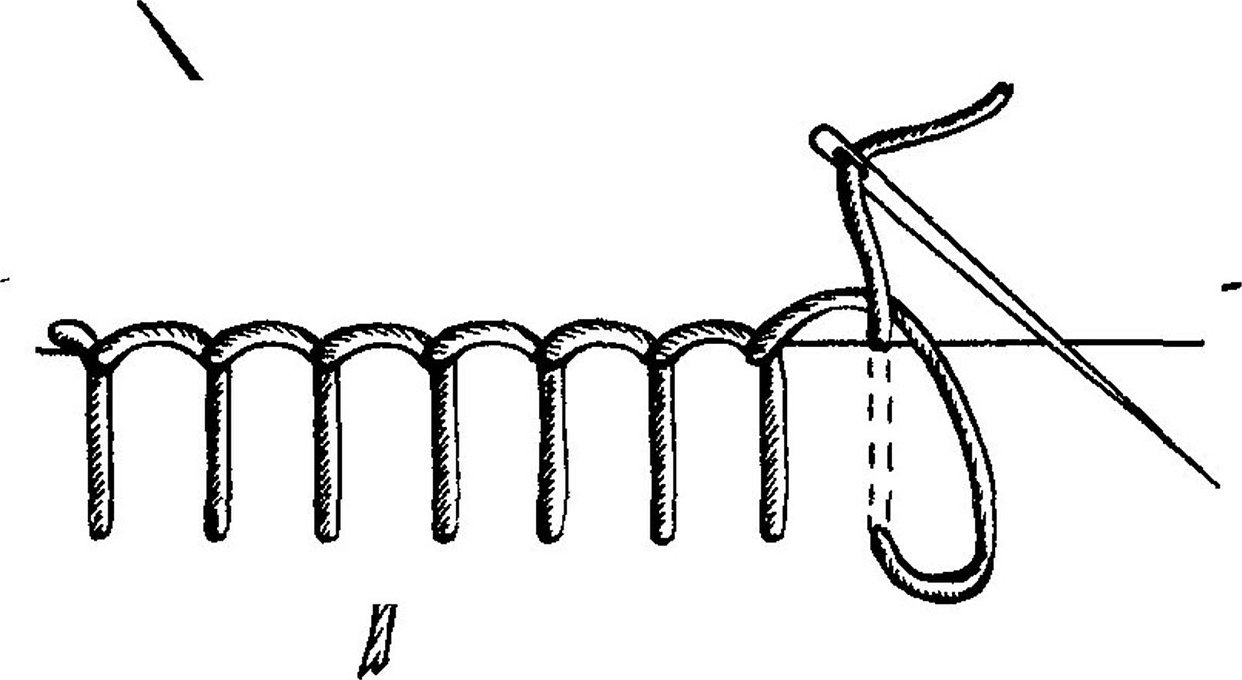
There are 5 types of stitches for working with felt:
- “Needle forward” - useful for joining small parts along the edge;
- “Back needle” - imitation of machine stitching for the main stitching of the body, etc.;
- "Assembly" - the essence of the seam is like "needle forward", only in the process the thread is pulled. Suitable for round, volumetric elements of toys;
- "On the edge" - uses a tilt to the right or left, but not in different directions on the same side.
- "Obstitch (loop)" - can be used instead of the "back needle" stitch. The toy will become durable and attractive.
- After sewing 3 sides of the future toy, you should add volume by filling it with synthetic padding or holofiber (you can use cotton wool and other materials).
- The other parts of the bear are sewn together using the same pattern. The heels can be sewn to the legs from another piece of fabric. Before sewing, you can embroider the fingers and claws.
- The finishing touch is decorative elements. The toy can be dressed in knitted or fabric clothes, additional accessories in the form of a heart, a box with a gift, etc. can be sewn on.
- All that's left is to come up with a name and the felt bear is ready to delight its owner.
How to make a felt teddy bear on the moon
The following needs to be prepared:
- felt in yellow, blue (pink or other colors for shorts), gray and brown colors;
- satin ribbon;
- thin, transparent paper;
- pen, pencil or disappearing marker;
- needle, thimble and thread;
- toy filling (synthetic padding, holofiber, cotton wool);
- sharp scissors.
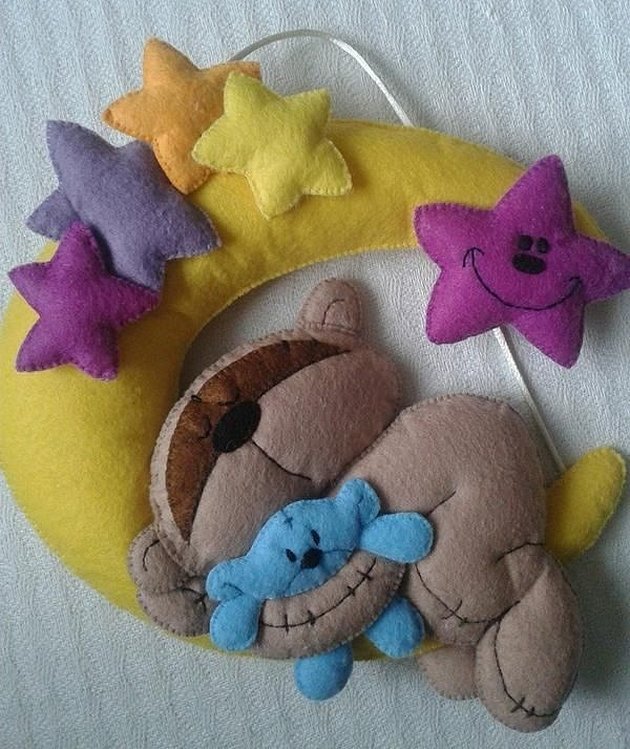
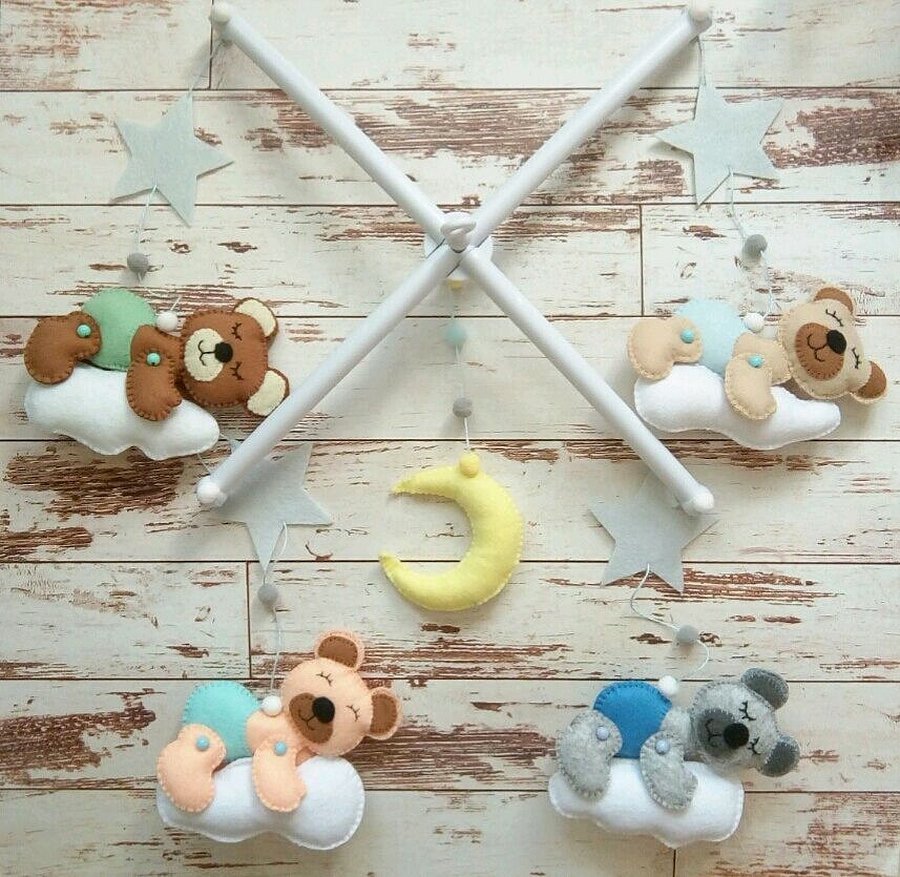
Sewing a felt toy "bear on the moon" will not take much time. Such an applique can be used to decorate a child's room or sewn as a gift as a birth certificate for a newborn baby.
Step-by-step master class:
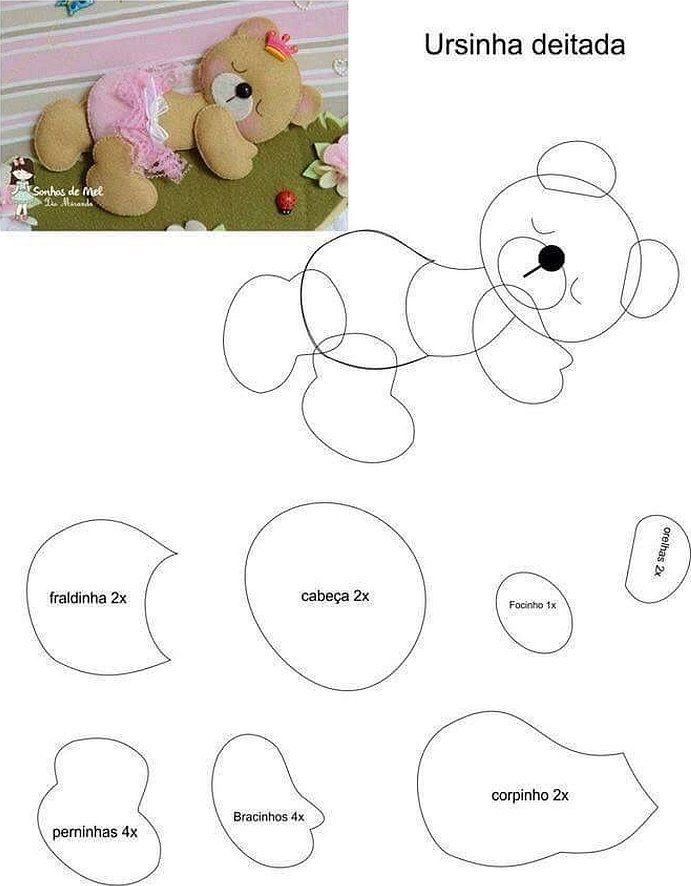
- Before work, it is necessary to cut out the templates of the parts from the pattern. You can draw it yourself or download a picture, set the necessary scale (according to the required dimensions) and print it on a printer.
- Trace the templates of the month, bear and other applique elements onto felt of a suitable color in 2 copies for the front and back parts.
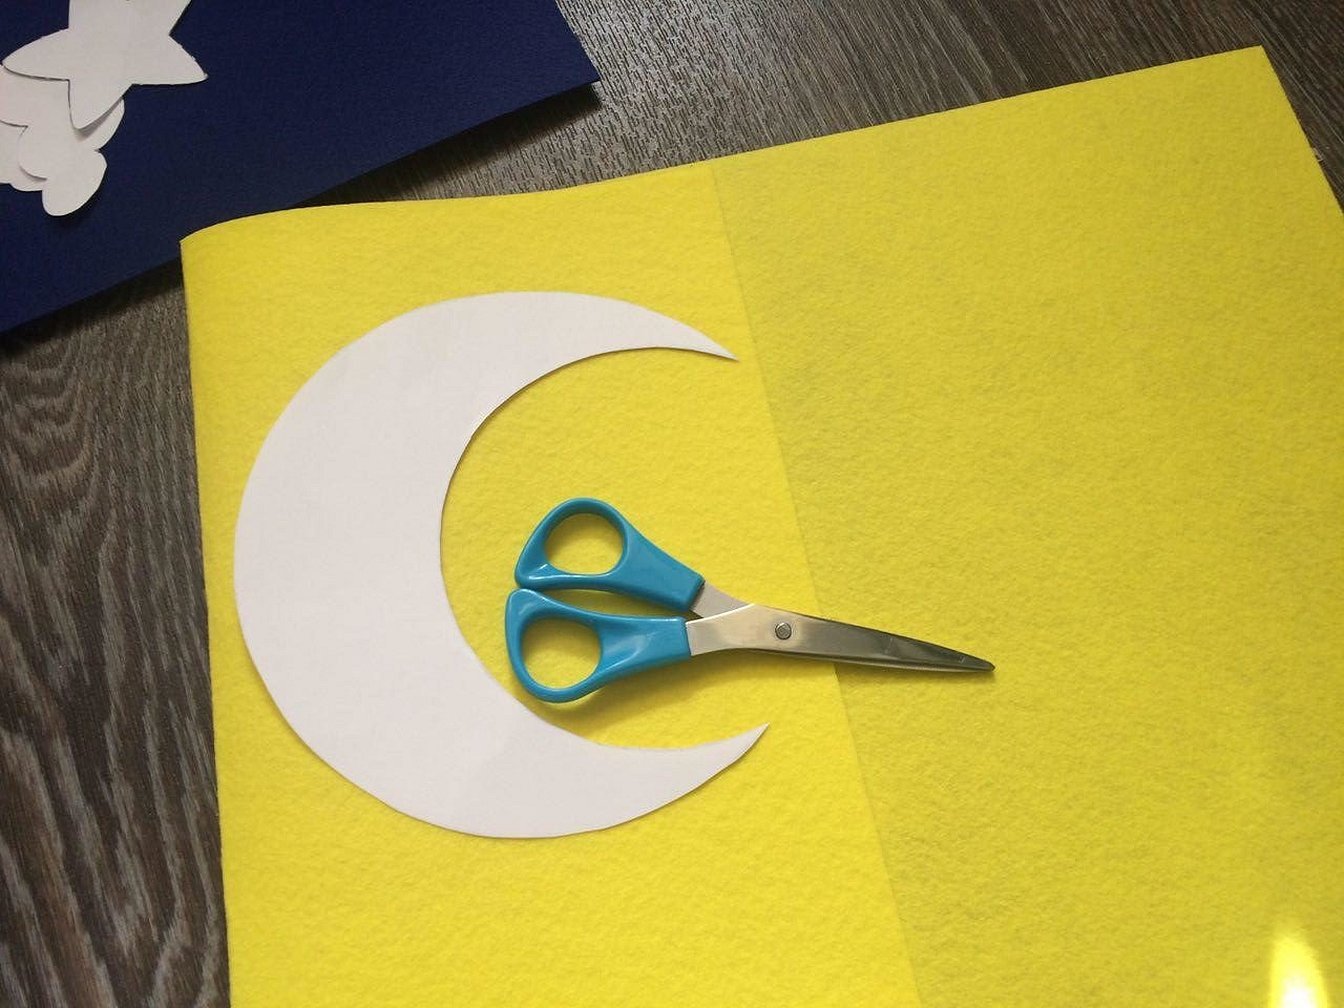
- Cut out of fabric. It is recommended to sew the moon parts first, as the rest of the panel will be attached to it. The bear is sewn after the muzzle is formed.
- Additional information: when connecting elements, a loop stitch is used. If embroidery of elements is required, a "back needle" is used.
- The applique can be flat, then both sides are simply sewn together. Or three-dimensional, then the elements are sewn to the end, after they are filled with filler.
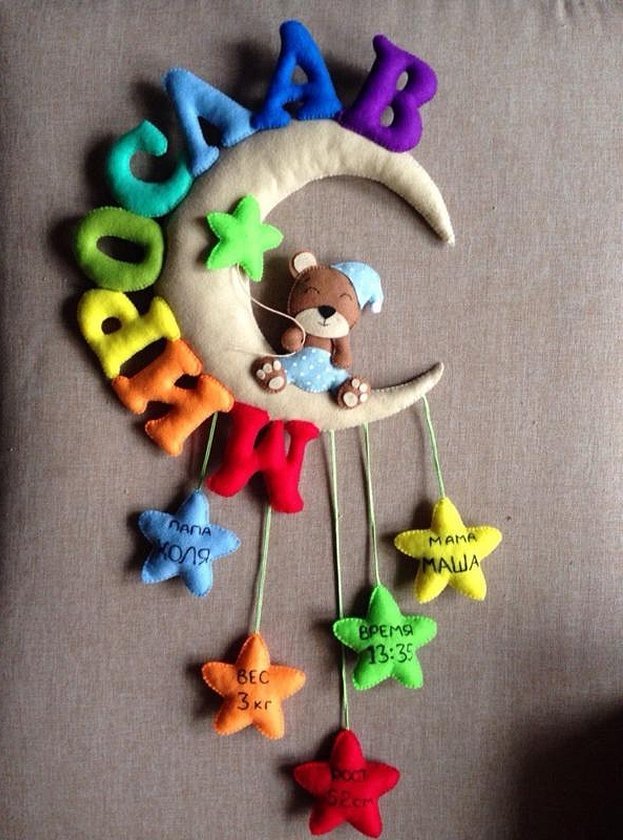
- The bear sits or lies down on the moon and is attached to it with stitches on 4 sides. If it is a metric or a mobile for a baby crib, you can attach a ribbon to which stars, balls, and clouds are sewn.
- If this is a personalized gift, letters are sewn onto the moon or bear, and numbers are embroidered on the stars.
An unforgettable DIY gift for a child in the style of a panel, a bear on the moon made of multi-colored felt, ready.
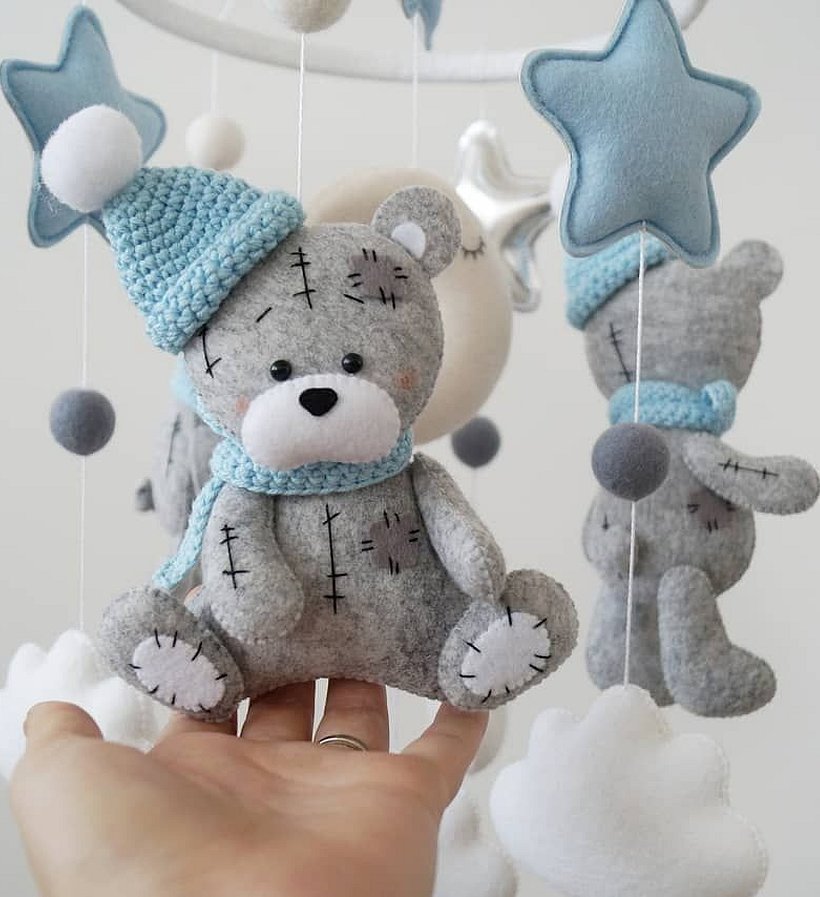
How to make a felt teddy bear
Materials for work:
- felt in dark and light gray, a little white and blue;
- beads for eyes (you can buy special ones or cut them out of black fabric);
- thin, transparent paper;
- pen, pencil or disappearing marker;
- needle, thimble and thread;
- toy filling (synthetic padding, holofiber, cotton wool);
- fabric glue or instant glue;
- if necessary, decoration material (bow, box);
- sharp scissors.
Despite the variety of toys in the store, the felt Teddy bear does not lose its popularity. Such a friend is closer to any purchased one, because it is made with your own hands. If you involve a child in making a bear, this will not only allow you to have a good time with adults, but also contribute to the development of fine motor skills and imagination. In addition, the sewing technique will not cause difficulties even for preschoolers.
Operating algorithm:
- Print or draw a pattern of a teddy bear and decorative elements.
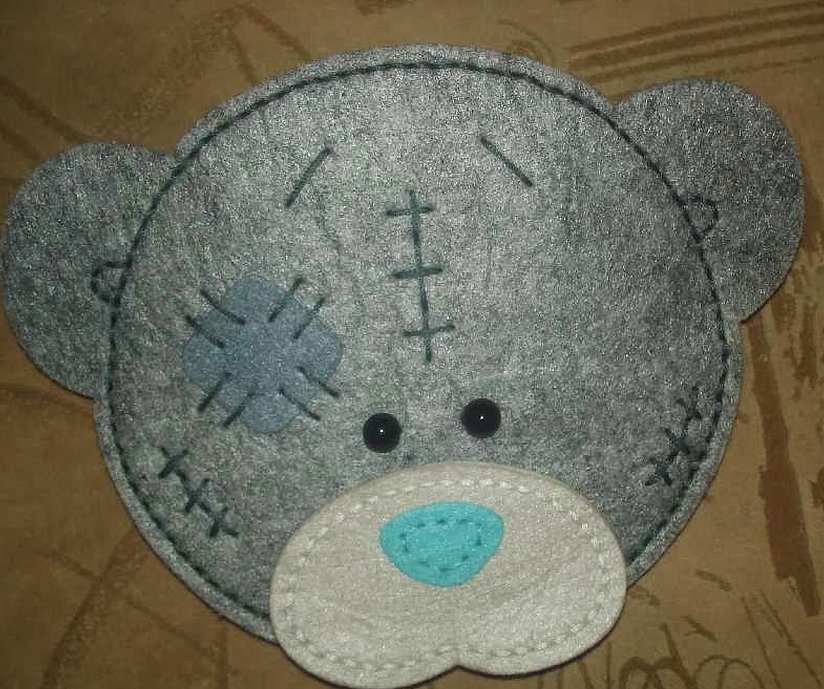
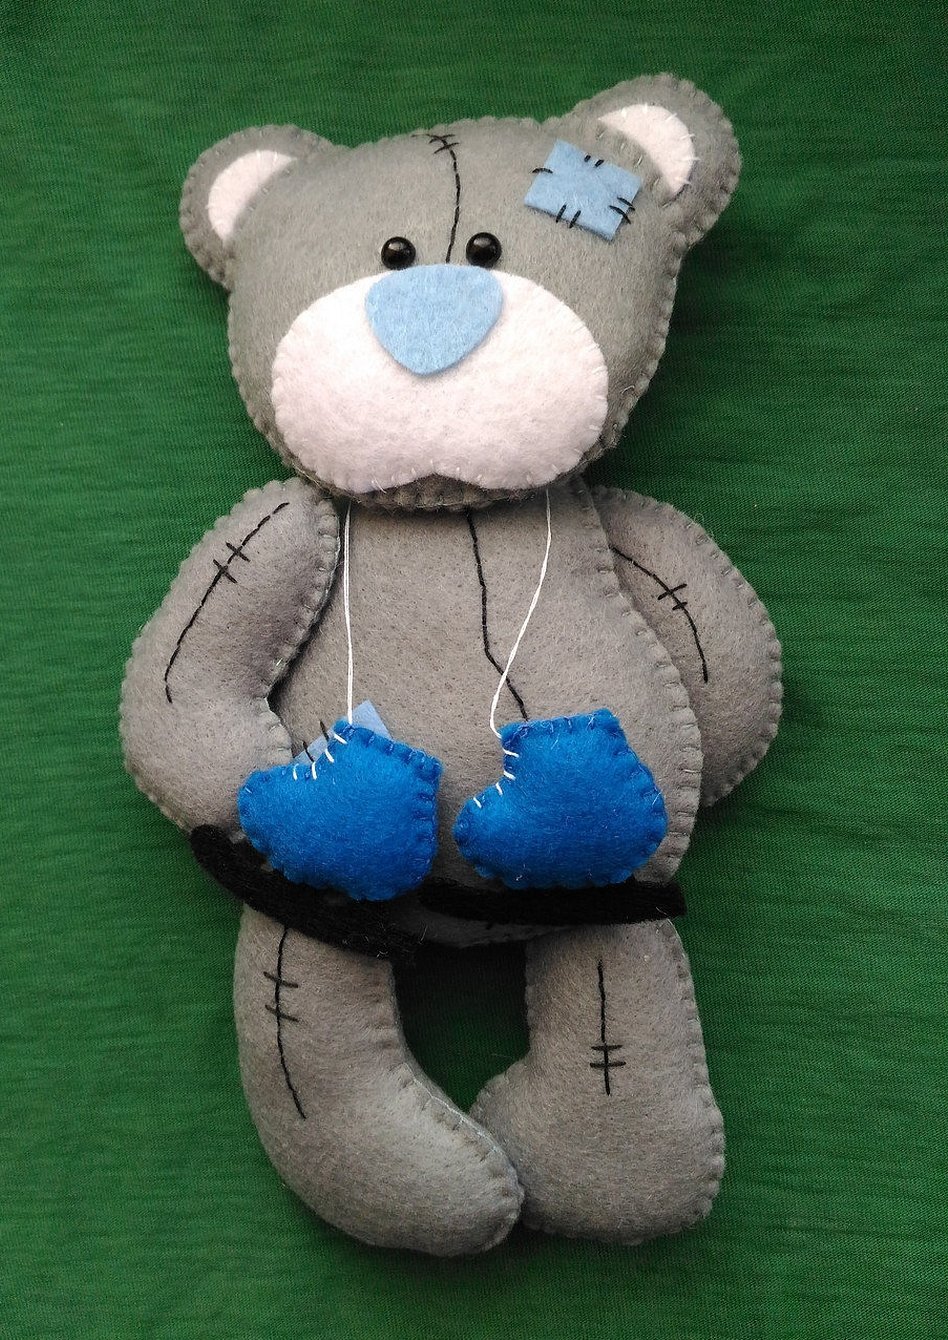
- Trace the details according to the template in two copies. The head, body and paws are traced on dark gray felt. The heels and muzzle are on light felt, and blue is for the nose. Small squares for patches are cut out of white or light gray.
- Cut out the toy elements.
- Before sewing the bear, you will need to prepare the head (sew on the eyes, muzzle, patch and nose), attach the heels to the paws. For this, use the stitch "forward needle" or "back needle". The remaining seams on the head, eyebrows and whiskers are drawn with a marker or embroidered. If desired, the muzzles and heels can be carefully glued with glue.
- A second patch is sewn onto the body and the seam is either embroidered or drawn.
- All the parts are sewn together, and simultaneously filled with filler for volume. If you decide to make an applique, the toy is left flat, and then sewn or glued to the object.
- Additional decorative details are attached: a heart, a box, a bow, etc. They can be made of felt or other fabric. If desired, you can dress the bear.
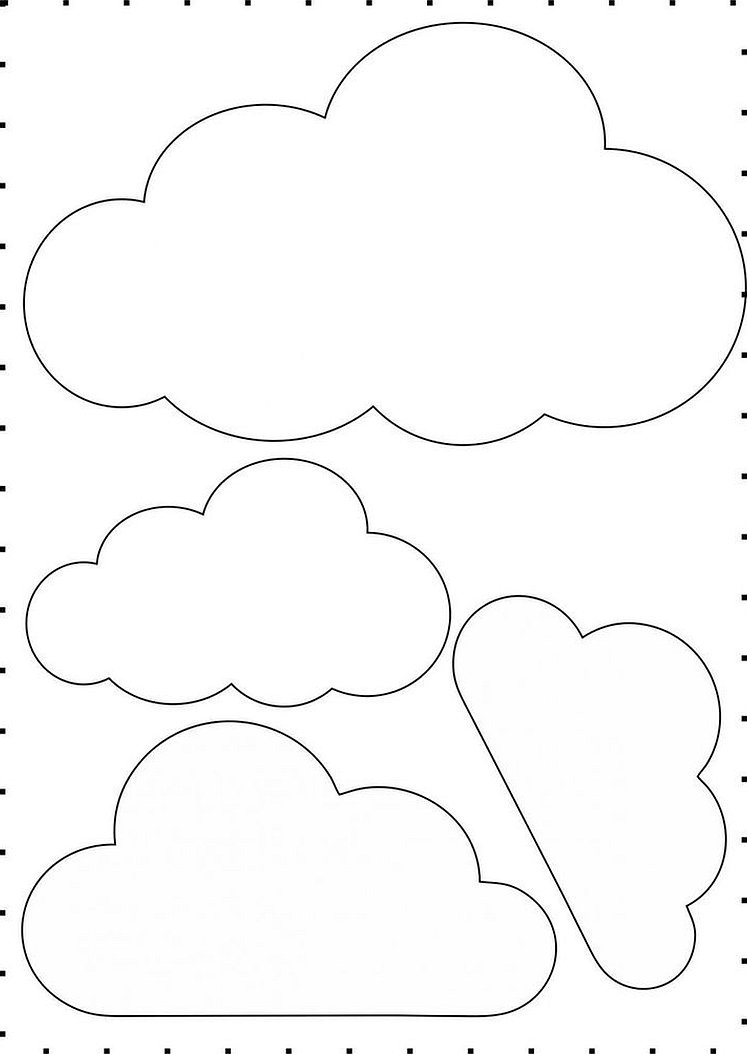
Pattern of a bear on a cloud made of felt
Thanks to the unlimited imagination of people, there is a wide variety of DIY bear appliques. It can be on the moon, a ship, a picture.
The pattern of a bear on a felt cloud is shown in the pictures.
Thus, a felt teddy bear does not require a lot of effort when sewing. Even a beginner needlewoman can handle this toy. If you have imagination and desire, you can create panels for metrics, wall hangings or mobiles for babies from felt. And to decorate a child's bed, you can sew a bright pillow. Good luck with your needlework!


