Nowadays, there are many ideas for storing various things. From pencils to shoes. This article tells you how to make a fabric organizer with your own hands and what you need for this.
- DIY Wall Mounted Cosmetic Organizer: Craft Ideas
- Sewing Supplies Bag
- Convenient storage of jewelry
- DIY Laundry Organizer
- Wall mounted magazine organizer
- Bathroom organizer
- Craft organizer
- DIY Stationery Organizer
- Headphone Organizer
- Phone organizer
- Cup Organizer
- Organizer for the artist
- Shoe Organizer
- Convenient car organizer
- Cosmetics basket bag
DIY Wall Mounted Cosmetic Organizer: Craft Ideas
Using a metal sheet, you can create a wall product. Many craftswomen have skillfully used a baking sheet in the oven that has become unusable.
The metal sheet must be covered with fabric. Cotton or chintz fabric can be used. It is important that it is not translucent. The edges of the sheet must be decorated. For this, you can take a wooden photo frame, lace, boards, etc.
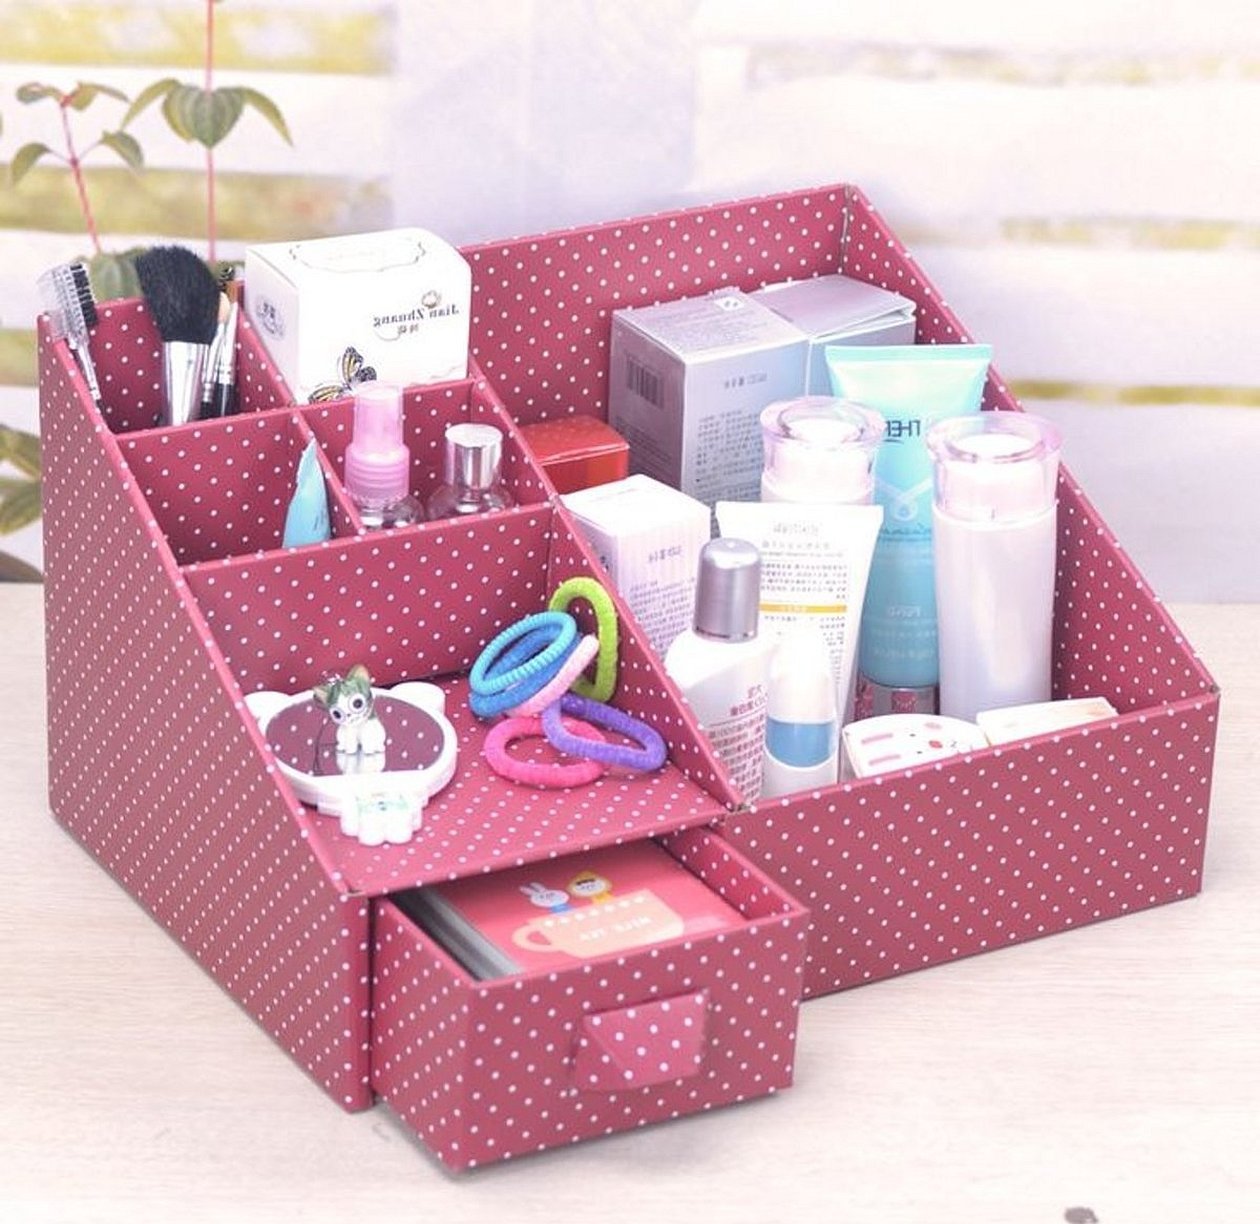
This organizer is very convenient because all the cosmetics are in front of your eyes. You need to stick a magnet to each product and place it on a metal sheet.
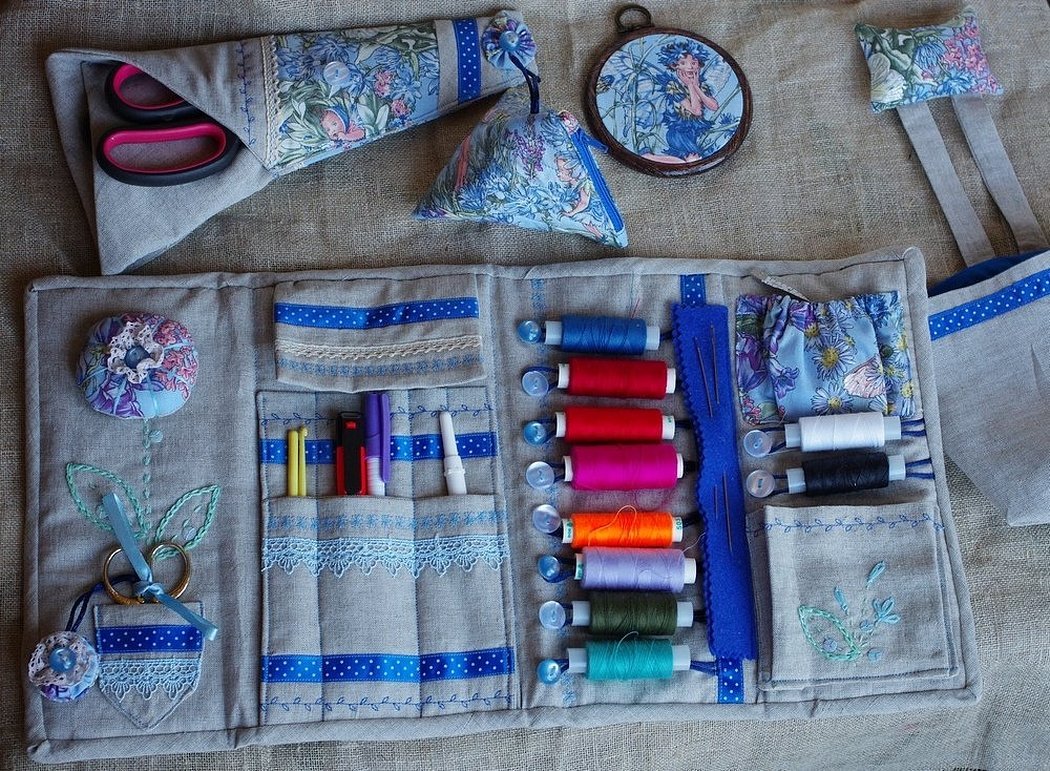
Sewing Supplies Bag
Making a sewing accessories organizer with your own hands is not very easy, but experienced seamstresses can make it in just a couple of hours.
Materials for work:
- Any fabric of your choice and lace;
- Lightning 60 cm;
- Lining material;
- Foam rubber;
- Threads to match the bag;
- Scissors, needles, pencil, ruler;
- Sewing machine.
To form the bottom, you can take small plates and trace them on the fabric. Cut out two pieces. Then you need to cut out the same part from the lining. Measure with a ruler on the main fabric a line of 10/60 cm. Add an allowance of 1 cm and cut off. Do the same from the second fabric. Next, draw a segment of 15/60 cm on the lining and foam rubber, and cut it out. All the resulting parts need to be stitched.
Sew together the bottom and the main part of the bag. Secure with pins and stitch the entire resulting structure, then lay parallel lines at a distance of 1 cm on the bottom part.
Pin the zipper part to the lid of the garment. Sew at a distance of 1 cm from the edge. Make lace along the edge of the garment and sew on a handle.
Also, a sewing organizer can be made from regular fabric and synthetic padding.
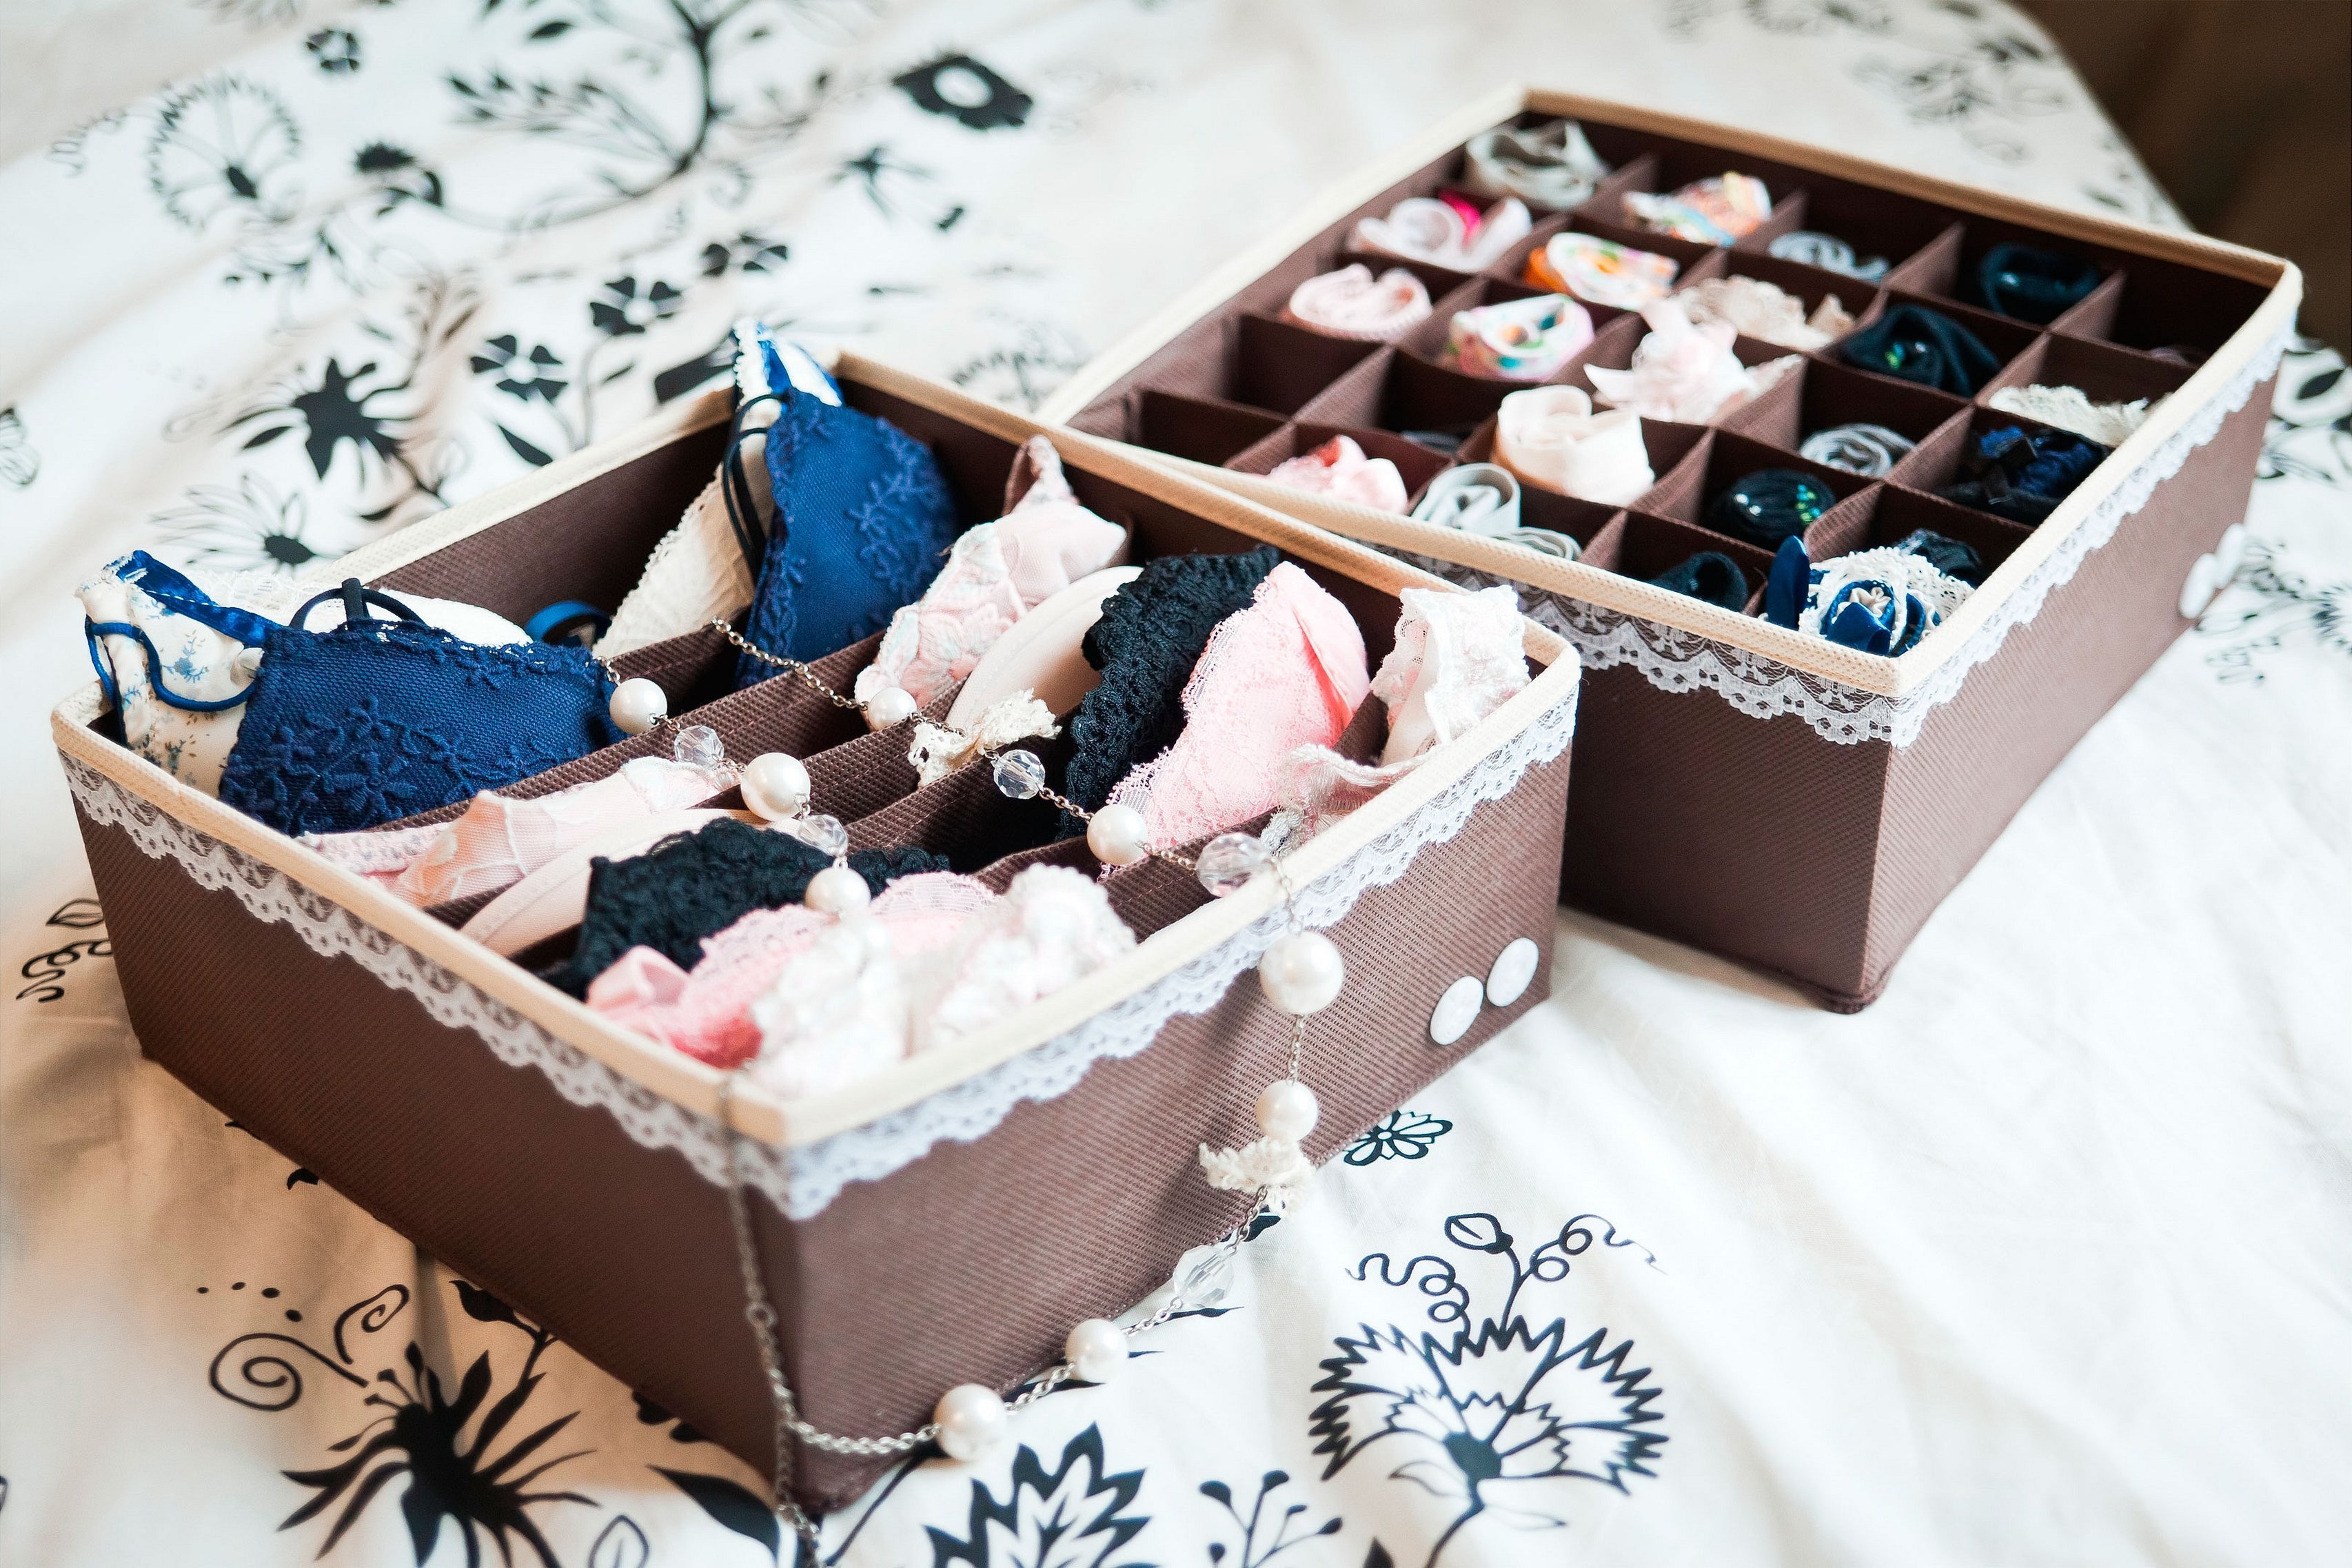
Convenient storage of jewelry
The easiest to make is from a regular board, decorated as you wish. Make as many hooks and loops as possible, to which you can hook decorations.

If a person already has a lot of experience in handicrafts, then you can try to make a homemade organizer for accessories. It is made from photo frames of the same size with a soft center, installed on a ball guide.
It will look great to store things in plastic boxes lined with a sealant and fabric. For decoration, you can sew on various beads and brooches. Or paint the product yourself, it will be very original and beautiful.
DIY Laundry Organizer
Materials for work:
- Regular box;
- Wallpaper of any colors;
- Wallpaper glue;
- Brush;
- Large ruler;
- Pencil;
- Stationery knife;
- Stapler with scrapings.
Draw a line along the bottom of the box, along the entire perimeter. Using a knife, cut the box along the line. Paste it with wallpaper. Make a bottom out of cardboard and paste it with wallpaper.
To make partitions, you need to decide what size the storage compartments will be, based on this, make partitions from cardboard equal to the length and width of the product. They are also pasted with wallpaper. Insert the partitions into the box and fasten with a stapler. You can store clothes.
Wall mounted magazine organizer
Materials for work:
- Textile;
- Wooden stick;
- Tourniquet;
- Scissors;
- Sewing machine and threads;
- Hook for the product;
- Transparent PVA glue.
Make three pieces from 50x40 cm fabric. Fold each piece in half along the long side to get pieces of 50x20 cm. Sew the long edges so that the cover is in the shape of a tube. Turn the product inside out and iron. Do these steps with all the pieces.
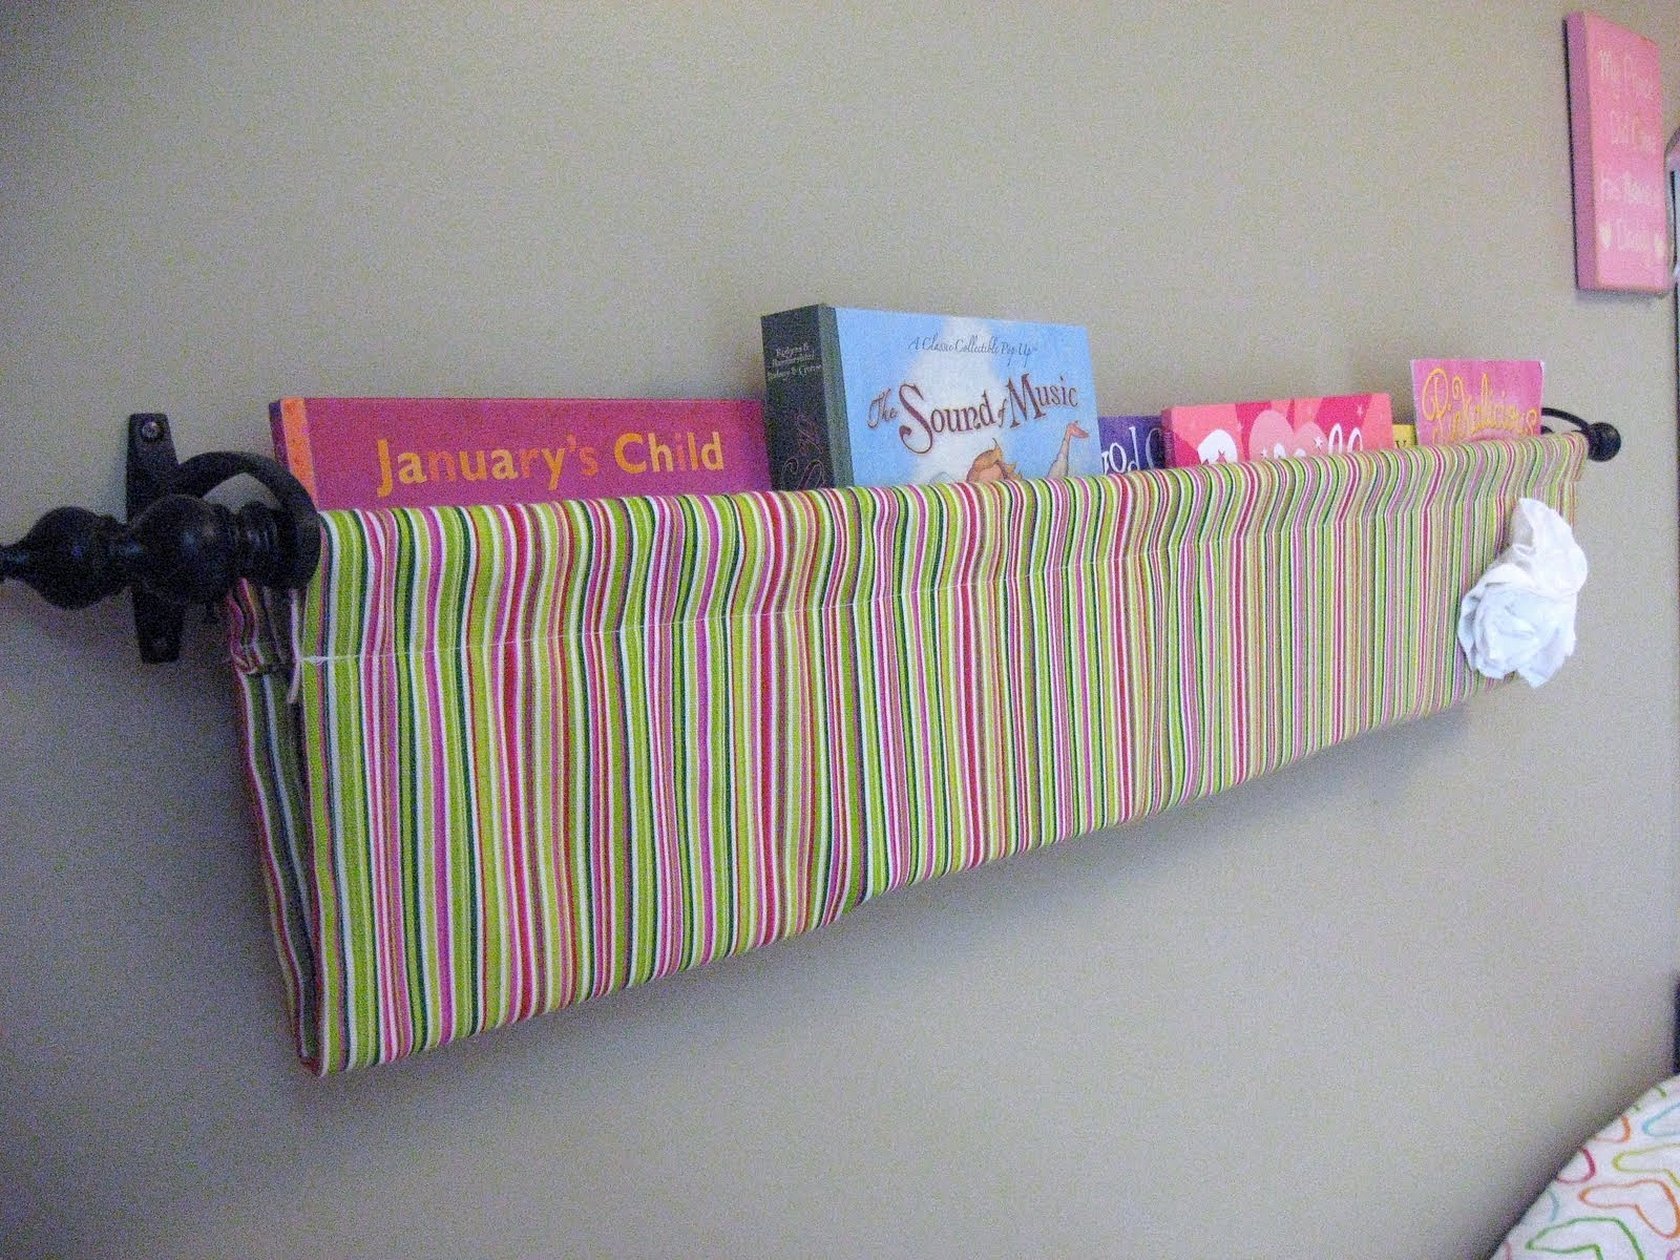
Fold one of the sleeves in half lengthwise. Lay the other one out on the table. Place the sleeve on top so that the fold is 10 cm from the bottom of the first sleeve. Insert pins into the blanks, and then sew all six layers of material along the edge of the sleeve.
Attention! The seams on the product should not be visible.
Take the last unsewn sleeve and place it on top of the two sewn ones. The lower parts of the blanks should be on top of each other. Pin the upper part of the lower layer. Sew along the edges. This time, fold the last sleeve in half, making sure that the front edge is 4 cm longer than the back edge. Insert a wooden stick of the required width on top. Sew the resulting allowance around it. Pin the material and sew, removing the stick in advance. Insert it into the resulting compartment.
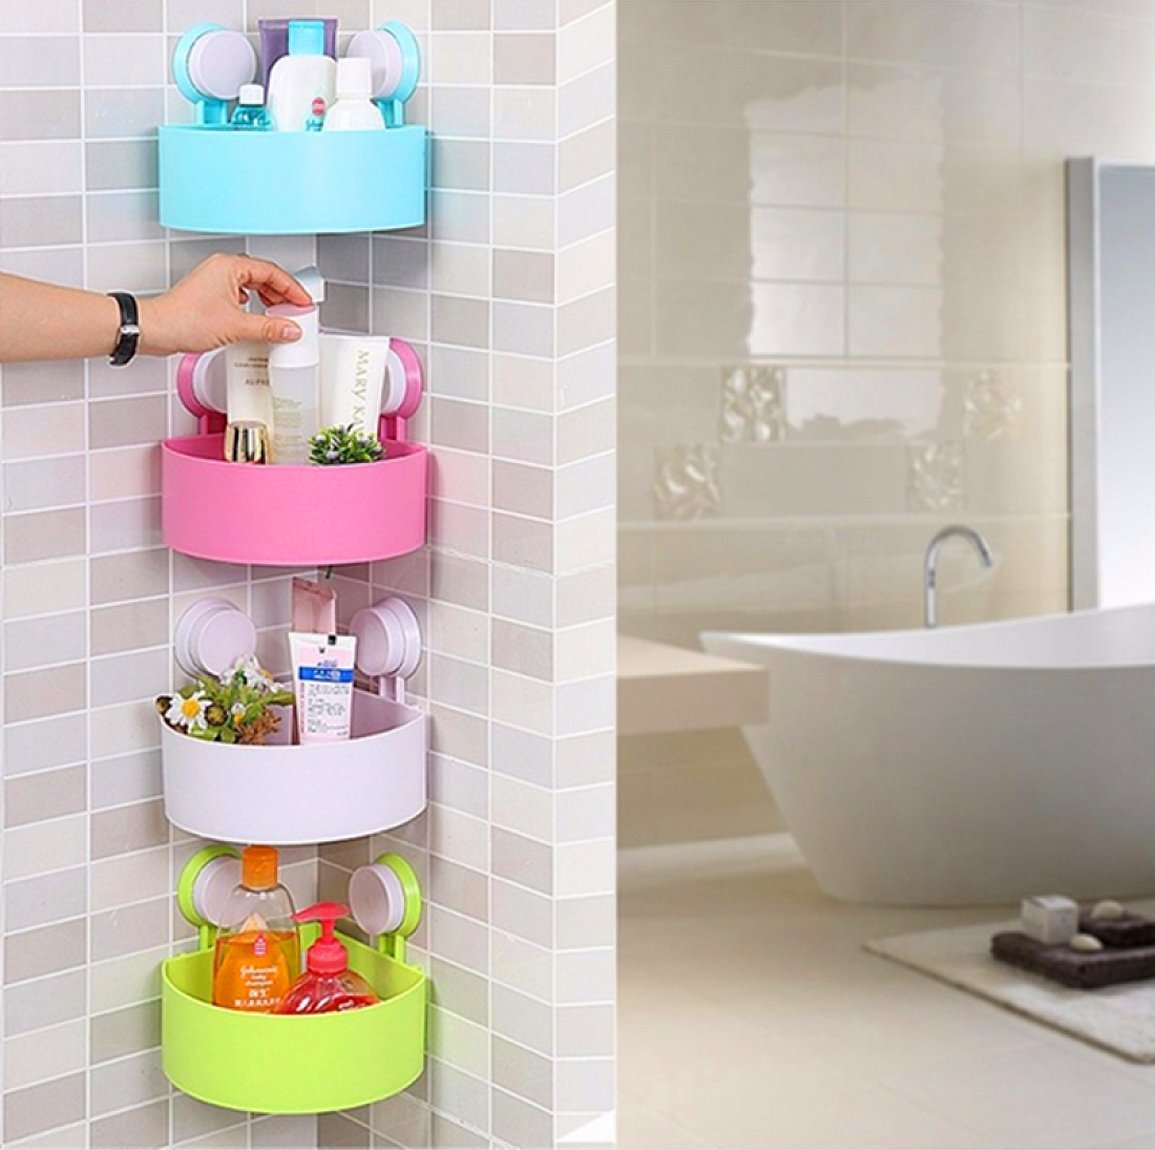
Bathroom organizer
A beautiful container can be made from ordinary tin cans. They need to be primed, painted to any taste and glued together. You can store brushes, toothpaste or cosmetics in it.
Craft organizer
You can make a simple and lightweight organizer from regular fabric and padding polyester. Take your favorite color of material, cut out two pieces of the desired length and width. Sew them together, leaving an opening. Stuff it tightly with padding polyester and sew it up. Sew loops to the front side of the organizer, into which the needlework items will be inserted.
DIY Stationery Organizer
Stationery can be stored in regular glass jars. It is advisable to choose jars of the same size for this work.
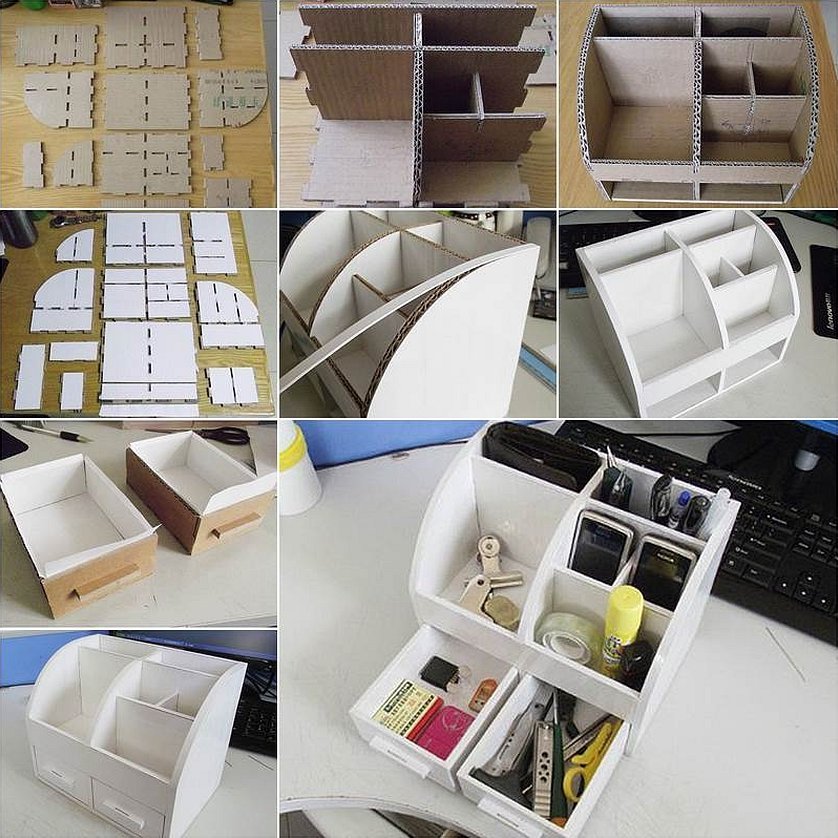
Materials for work:
- Banks;
- Light acrylic paint;
- Pencil, brush, markers, tape.
You can paint the jars using any means (paints, varnishes, felt-tip pens).
Before work, you need to pour some PVA into the paint so that it lays well on the glass. You can also store some makeup products or brushes.
Headphone Organizer
For such a product, it is better to use felt. Its edges do not crumble, so they do not need to be processed on an overlock. All that is needed for a small organizer is buttons or Velcro and an overlock hand stitch.
Phone organizer
It is done in the same way as for headphones. Only it is desirable to sew a zipper instead of a button. So that the phone is stored securely.
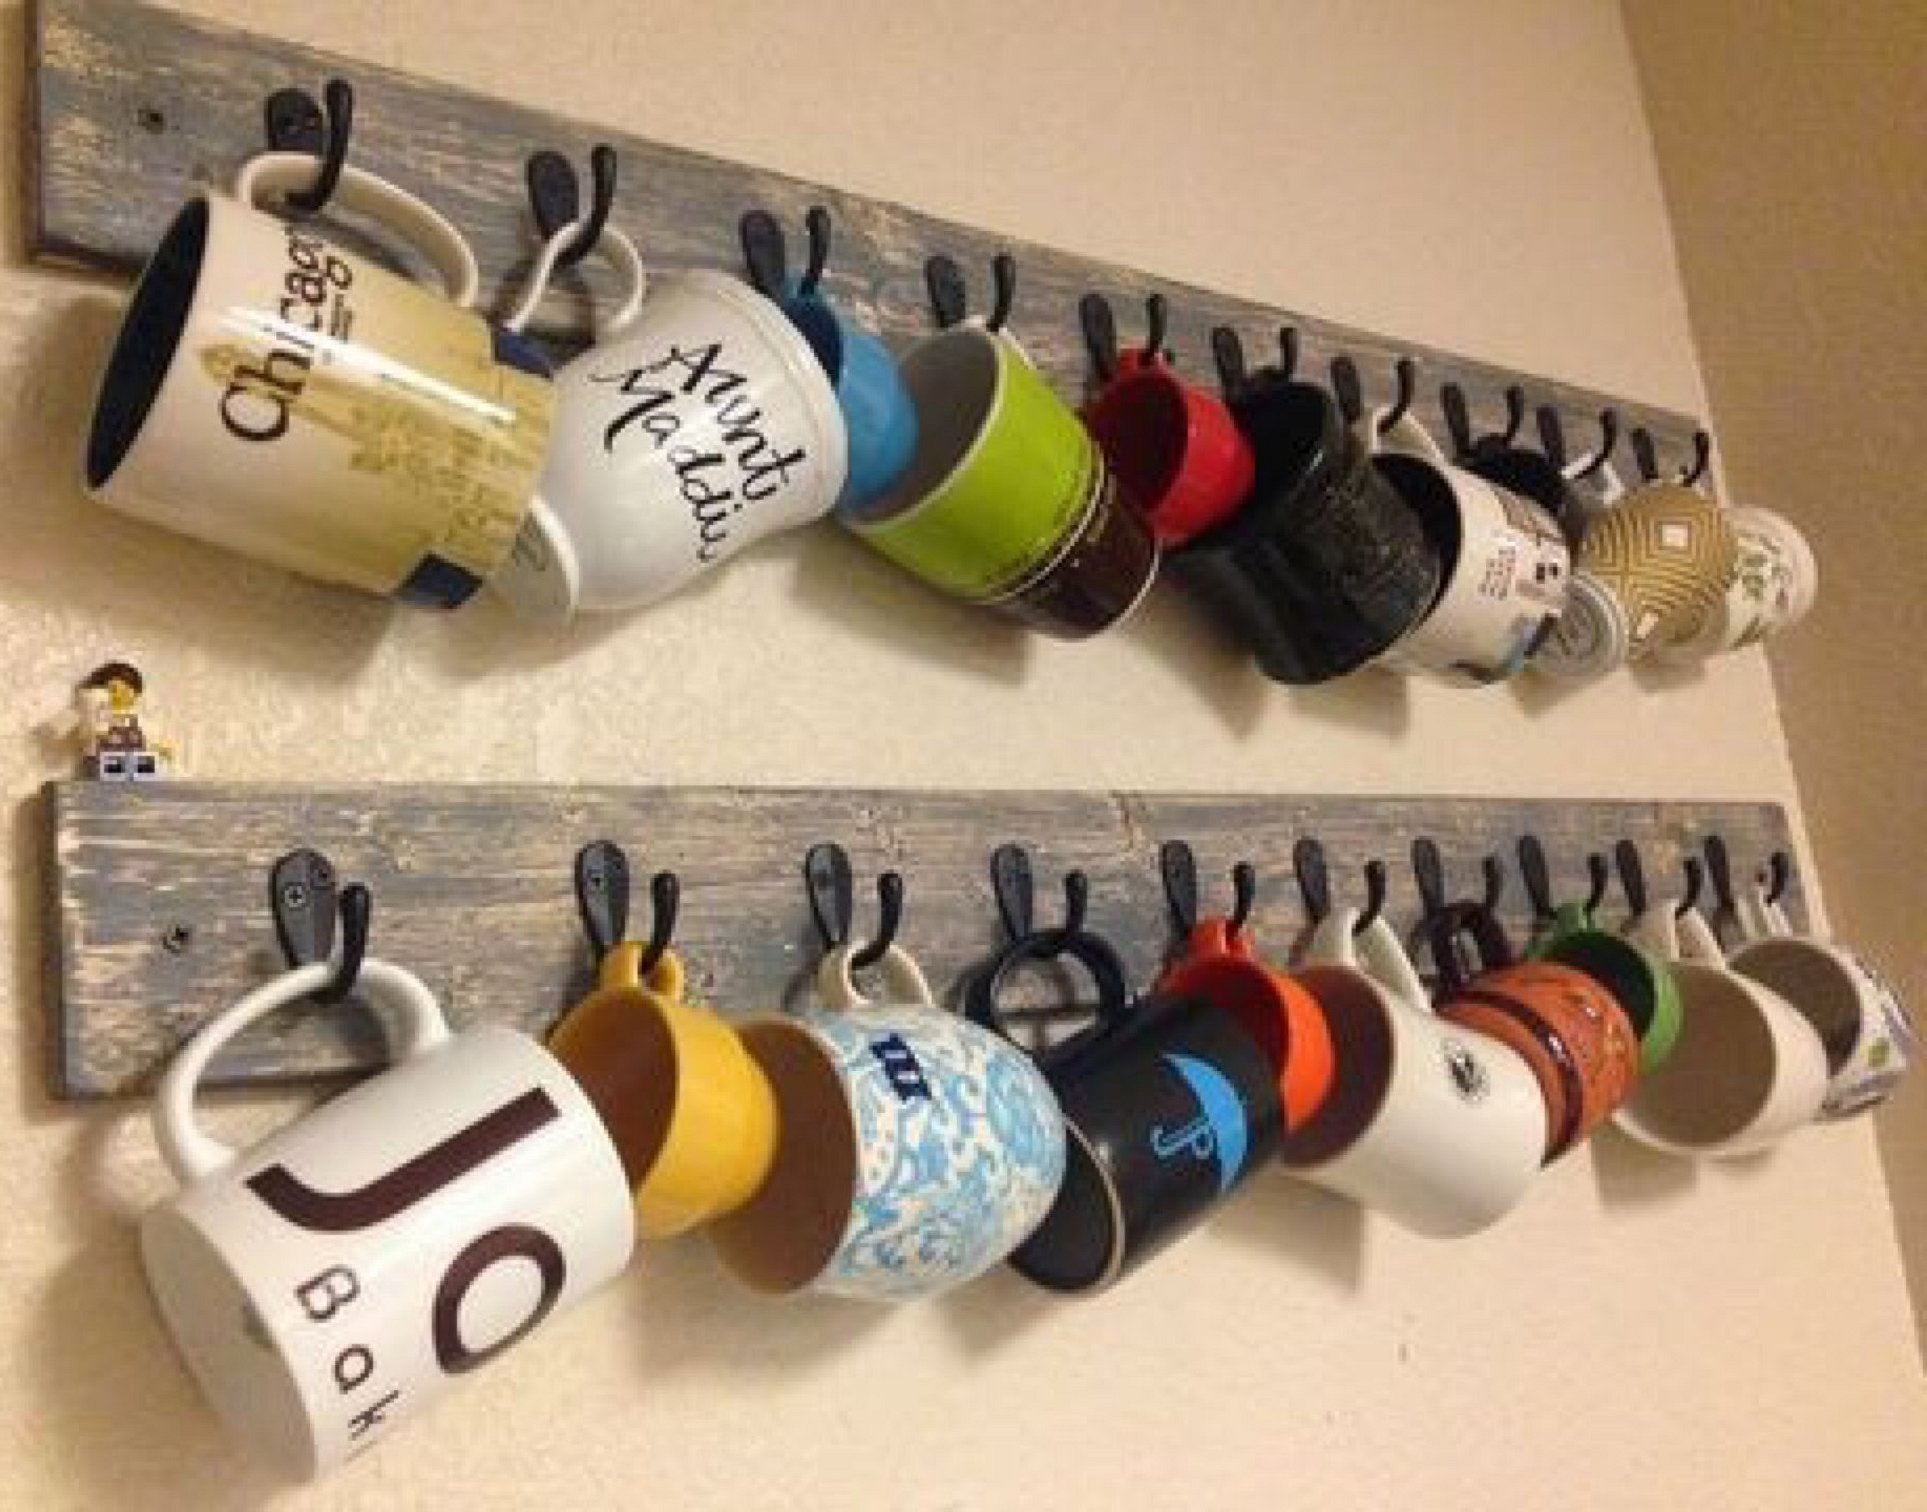
Cup Organizer
A fairly simple option for cups, made from a board. First, it needs to be covered with varnish or stain. Next, you need to hammer in hooks for the mugs. It turns out to be an original and impeccable element of decor for the kitchen.
Organizer for the artist
Materials:
- Fabrics of different colors;
- Cardboard;
- Office paper;
- Sealant;
- Felt fabric;
- Rubber;
- Magnetic button;
- PVA glue.
First, you need to cut out the parts from cardboard and paper.
Glue the cardboard to the seal and cover it with fabric.
For decoration, you can use different pictures to your taste. Transfer them to felt. Iron the picture for a few minutes so that it is well absorbed into the fabric.
Stitch it on the machine with a dense stitch. The cover is ready. Make loops inside for storing brushes and other materials.
Shoe Organizer
The most convenient option is to make boxes out of wood. It is better to use high-quality wood so that the boxes last a long time. The sizes can be any, preferably such that boots fit freely. You can make small boxes for socks or shoe cleaning products nearby. If wooden boxes are too expensive, you can use cardboard and lining, but such a product will not last long enough. Shoes should only be stored dry and clean.
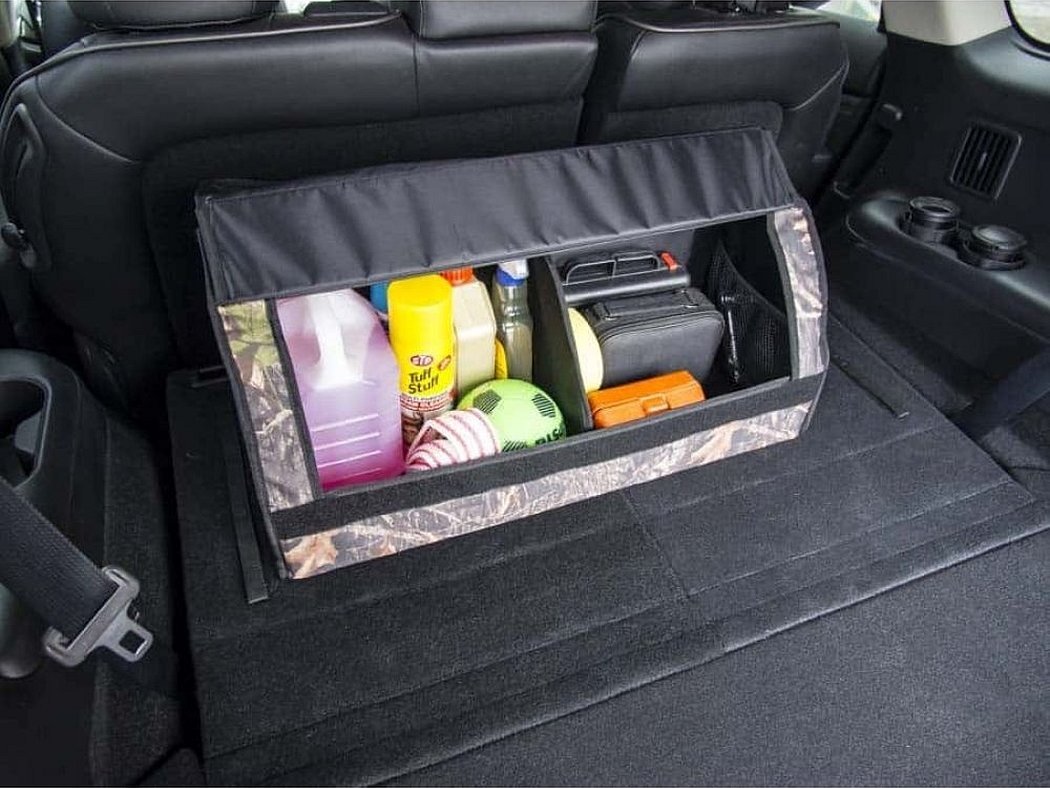
Convenient car organizer
Materials for work:
- Plastic container;
- Fabric of your choice;
- Velcro tape;
- PVA glue;
First, you need to cover the container with the selected fabric. After that, you will need to stick the pre-cut Velcro to the bottom of the container.
This is done to prevent the bag from moving around when in use.
The Velcro is attached to the fabric in the trunk. You can store cleaning products, a first aid kit or car tools in it. You can also make a separate high box for storing a fire extinguisher so that it does not just lie around in the trunk.
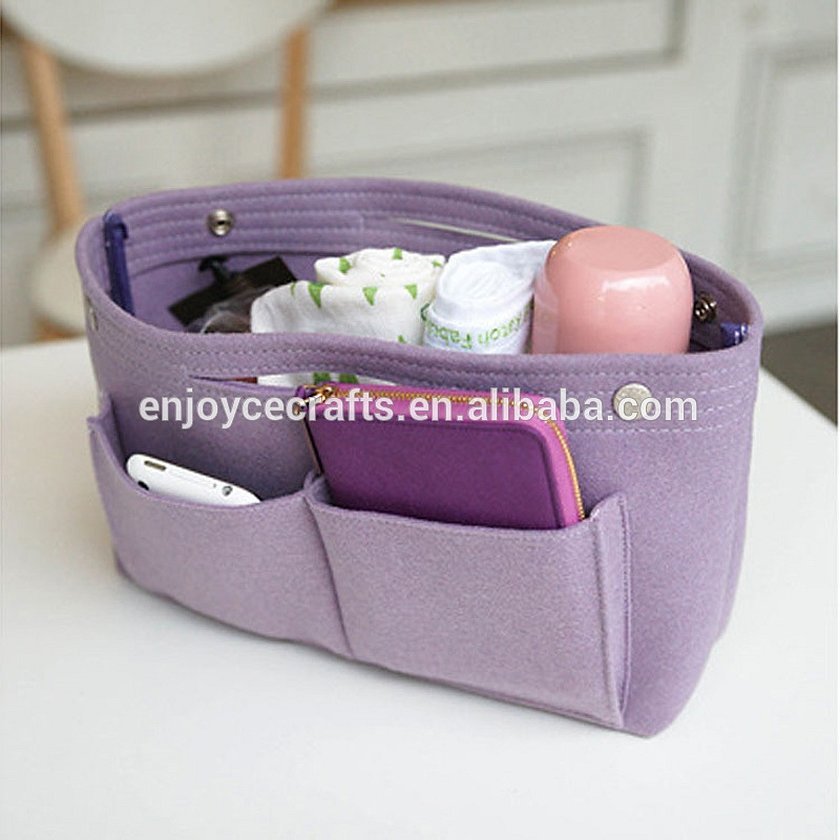
Cosmetics basket bag
To make a DIY fabric cosmetic organizer, you first need to decide on the shape of the bag. It is made in the same way as a sewing organizer, only with minor changes.
Materials and tools:
- Two pieces of felt. One: length - 40 cm, width - 22 cm. The second: 2 cm longer than the first, width - about 15 cm.
- Velcro or tape;
- Cardboard;
- Glue;
- Lightning;
- Scissors, needles and threads.
Cut out the side parts of the product from cardboard. Cover them with felt and glue them together. Also make the bottom and top out of cardboard and cover with fabric, sew to the base of the product. Sew a zipper into the top of the bag. You can safely store makeup and other small items.
In conclusion, it should be noted that it is quite easy to make an organizer for different things with your own hands. Many master classes, patterns and drawings can be found on the Internet. There are more than a hundred types of organizers for cosmetics or underwear. The main thing is to include all your imagination and creativity. You can make an original organizer for sewing with your own hands from ordinary cardboard and glue.


