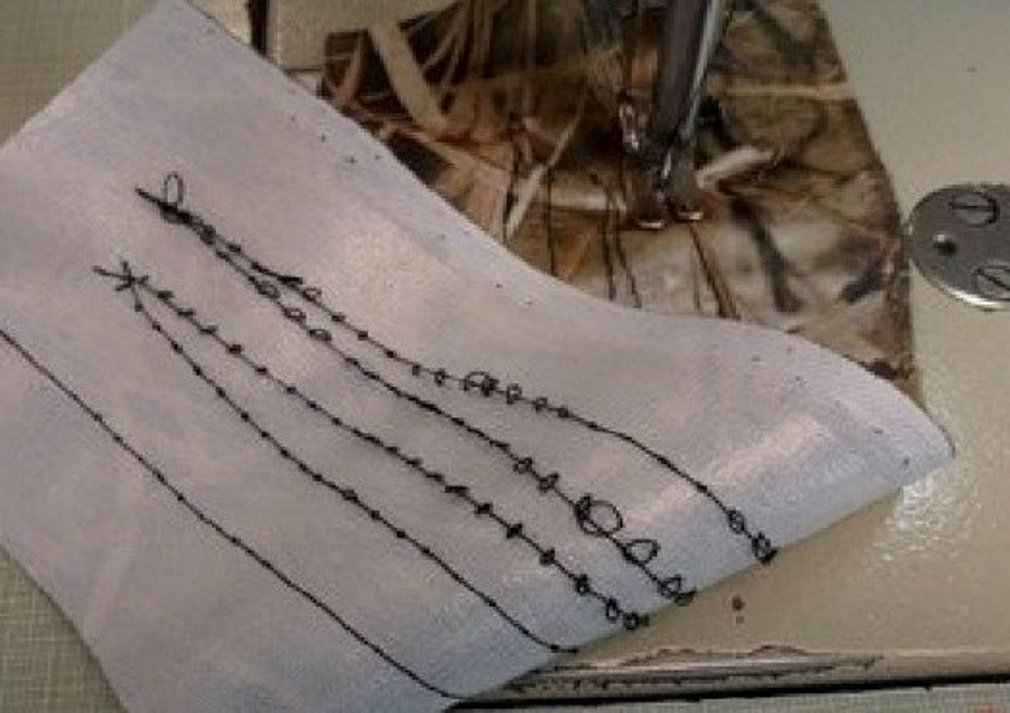
It happens that after working on a sewing machine, the housewife notices a crooked line, this is considered a major drawback that affects the quality of sewing clothes. Having noticed this, it is necessary to immediately eliminate the defect.
- Why does a sewing machine loop: useful information for everyone
- The spring on the tension regulator does not press the thread well
- The tensioner washers remained in the relaxed position
- Notches on the needle plate cause the thread to loop
- Washer tappet failure
- The lower thread (on the bobbin) is thicker than the upper thread
- The shuttle is too low relative to the needle
- A thread that has come loose from a washer
- Incorrect threading causes looping
- Excessive thread tension
- Thread lint has accumulated between the tensioner plates
- Rough surface of the shuttle
- There is no compensation spring on the tension regulator
- How to Avoid Looping and Other Sewing Machine Problems
Why does a sewing machine loop: useful information for everyone
Why the bottom line loops on a sewing machine is discussed by craftswomen whose products turned out with an uneven line. The reasons for such a breakdown:
- incorrect sewing machine settings;
- sewing machine breakdown.
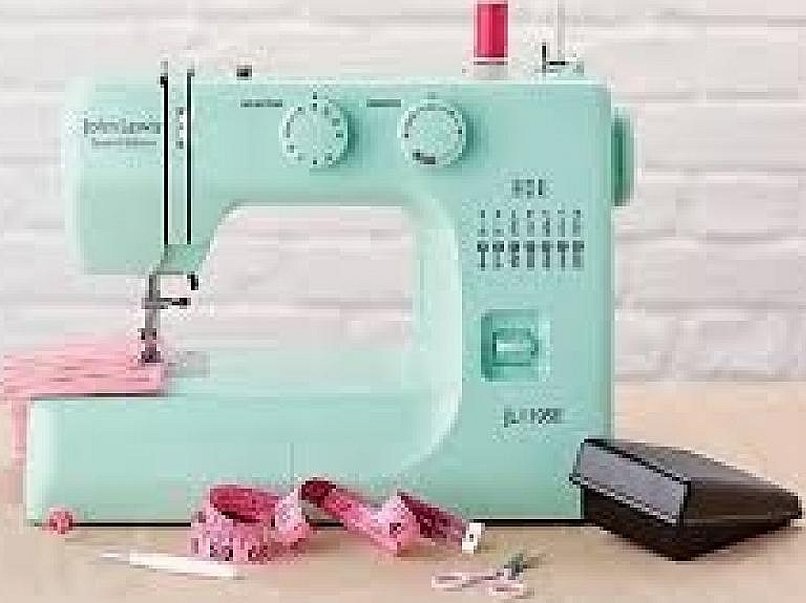
Attention! If the machine is faulty, you need to contact a specialist at the service center. This must be done with domestic models (Podolsk) and with foreign ones, such as brother, jack, Astralux, Singer, Janom.
Minor adjustments can be made independently to eliminate:
- thread breakage;
- broken needle;
- skipped stitches;
- tight movement of fabric during sewing;
- looping or tangling of the upper or lower thread.
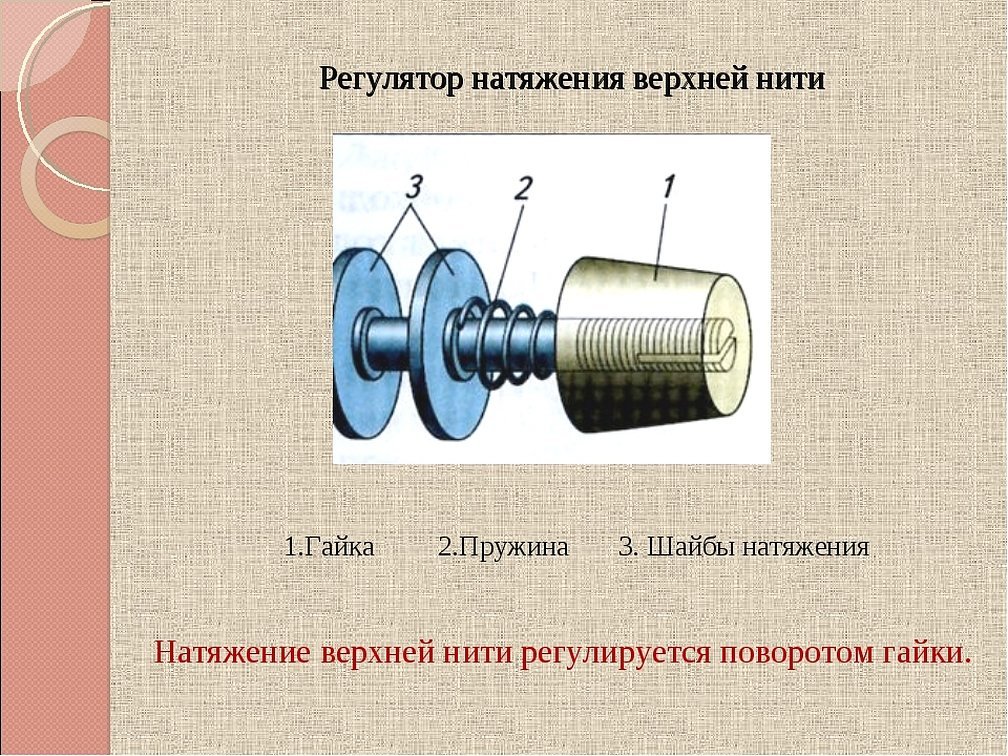
The spring on the tension regulator does not press the thread well
The bottom line of the sewing machine loops if the thread in the tensioner is pinched. You can check this in a simple way. You need to slightly tighten the upper thread, without threading it into the needle, with the foot lowered and raised. Repeat this several times. If the thread begins to sag or stretch weaker than usual, there is a problem.
Important! The upper thread is not tensioned correctly, getting caught between the spring, which causes the lower thread to loop.
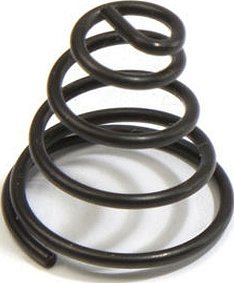
If the spring is deformed, it can change the distance between its coils during operation. This leads to incorrect feeding of the upper thread.
To troubleshoot the Podolsk plant recommends inspecting the spring. If the spring moves with a bite, then its coils should be spread apart with a screwdriver.
The tensioner washers remained in the relaxed position
One of the common causes of looping is considered to be loose washers. When lifting the paw, the washers loosened and did not return to the opposite position.
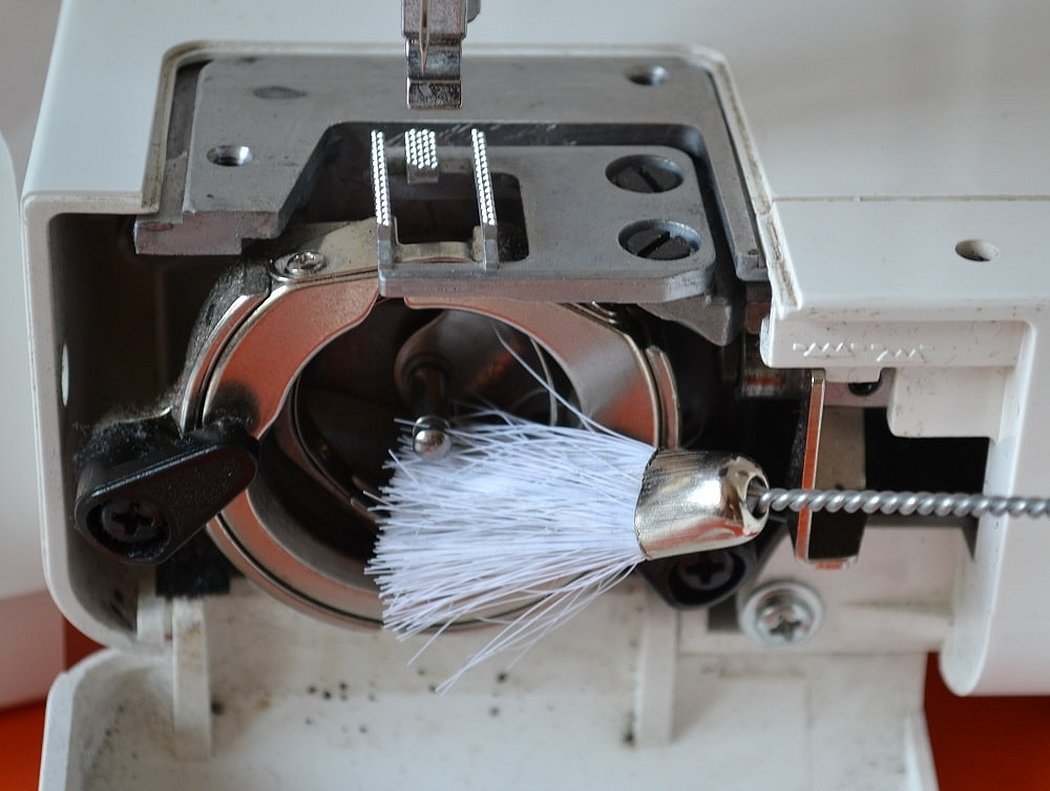
This most often occurs when dirt, threads, dust and rust get into the space between the washers. To fix the problem, you need to clean this space.
Attention! Timely cleaning of the device will help ensure high-quality sewing of clothes.
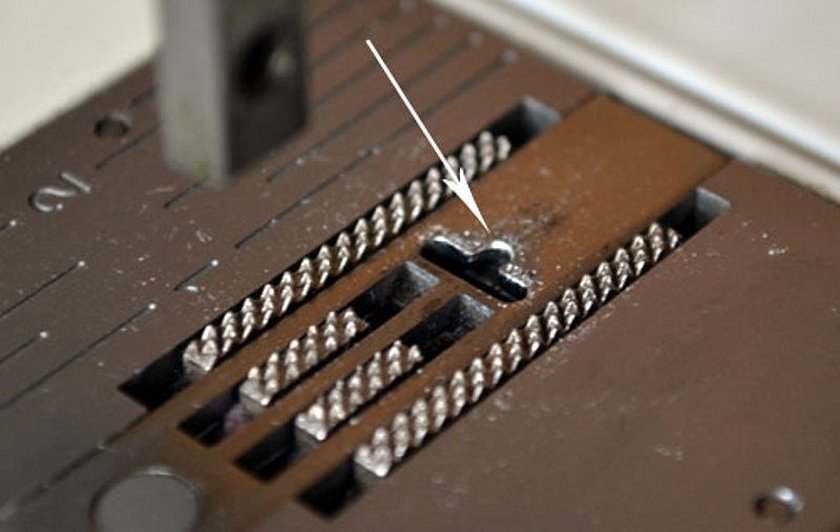
Notches on the needle plate cause the thread to loop
The needle plate can affect the appearance of the stitch. If it has nicks, the thread can catch on them and form loops under the fabric.
To fix the problem, you will have to clean or replace the plate. It gets damaged if you help with your hands, pull the fabric when sewing. For the machine to work correctly, you should adjust the foot so that it does not clamp the fabric too much.
Washer tappet failure
The pusher helps move the washers when the presser foot is raised. When broken, the pusher moves the washers when raised, and when lowered, it remains in almost the same position. The washers do not provide a delay for the thread, and it, dangling freely, begins to get tangled under the fabric.
Attention! The reason for this malfunction is dirt that got into the mechanism and damaged it.
To eliminate the malfunction, the parts should be cleaned of dirt and rust.
Attention! In case of such a breakdown, a new pusher is usually purchased.
The lower thread (on the bobbin) is thicker than the upper thread
In a sewing machine, the upper thread is the leading one, it seems to pull the lower thread along with it. The more elastic the lower thread is, the easier it is to pull it out with the upper one. Experienced seamstresses often take the lower one a number thinner than the upper one. This is necessary to make it easier to pull out.
Attention! It is better to work on the machine with the threads it is set up for.
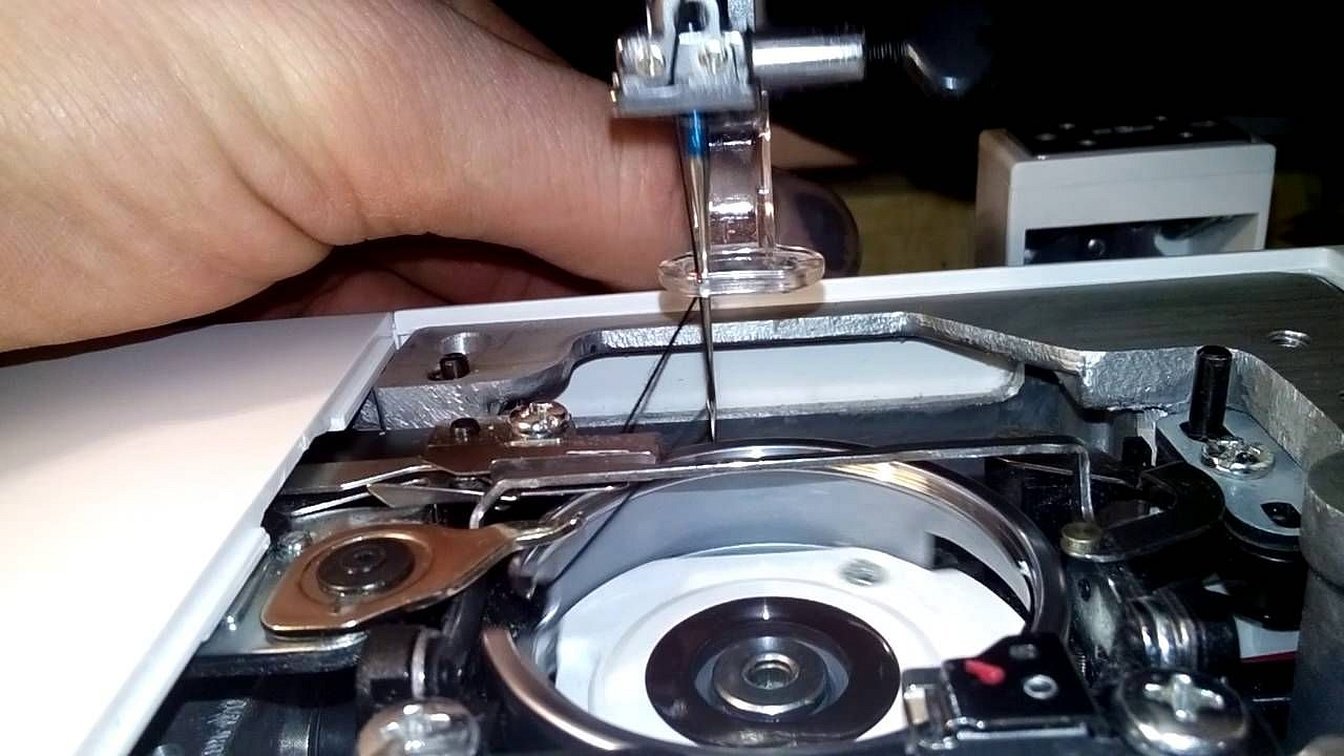
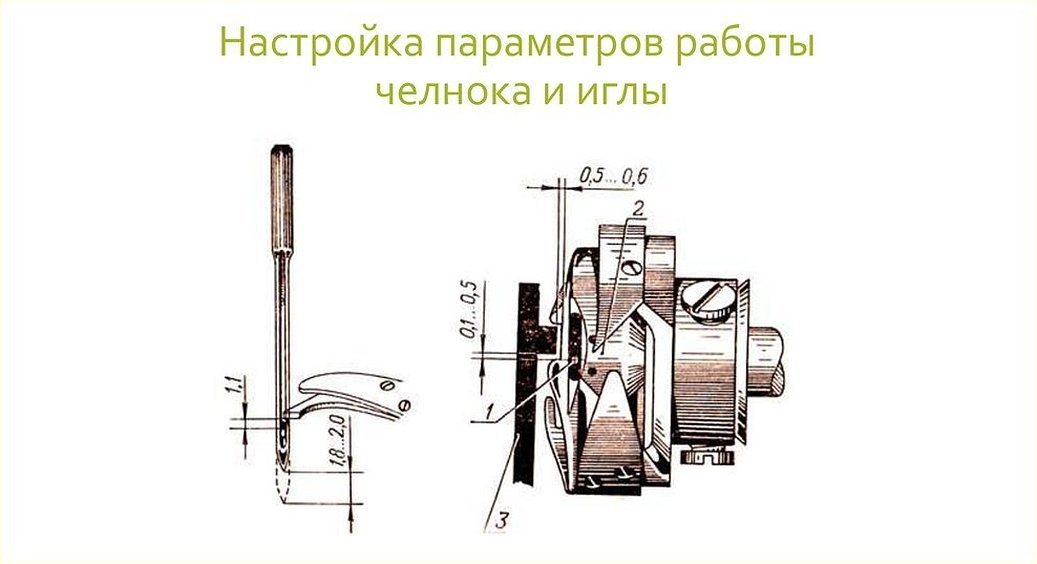
The shuttle is too low relative to the needle
In many models, the stitching starts to get tangled if the shuttle in the extreme position extends beyond the needle by a couple of millimeters.
Attention! If there is a gap on the plate, the thread, clinging to it, will slowly break off. Everything depends on the shuttle fastening.
How to fix the problem:
- Disassemble the faulty part.
- Burn a part with a hole over a fire.
- Leave the work area without burning.
- File down the holes from the work area.
- Assemble the parts and make the gap less than a millimeter.
A thread that has come loose from a washer
When threading a new thread, an unpleasant moment may occur. The thread may not be taut and be loose inside the machine regulator - it will not be able to regulate the thread tension, which is why it will get tangled, and there will be no stitch. It will take a long time to untangle.
To correct the error, carefully pull out the thread and thread it again. To prevent the error from happening again, use the machine strictly according to the instructions.
Attention! If the thread breaks inside the machine, you need to remove it using improvised tools, such as tweezers.
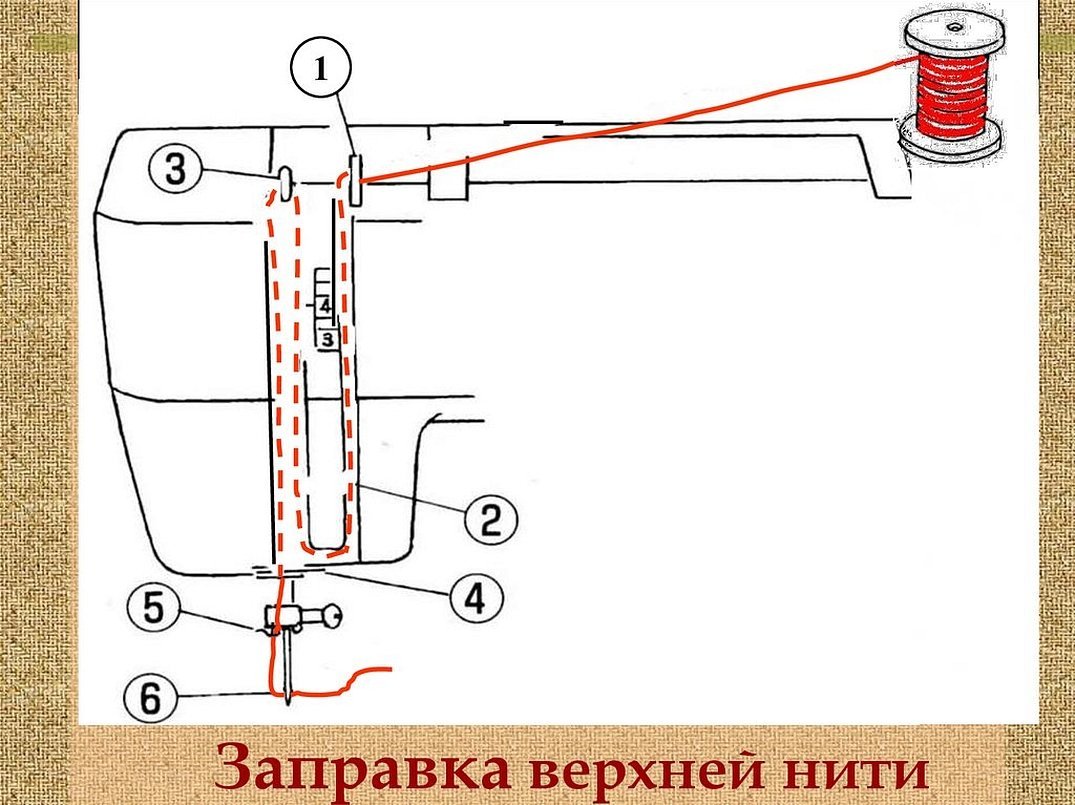
Incorrect threading causes looping
Incorrect upper threading may result in uneven stitching. To correct the problem, start threading again.
Incorrect threading of the lower thread also leads to the formation of a crooked line. The lower thread must be wound correctly on the bobbin. To check, lift the bobbin by the thread. It should not be completely unwound, but hang on the thread, which will be unwound only one turn.
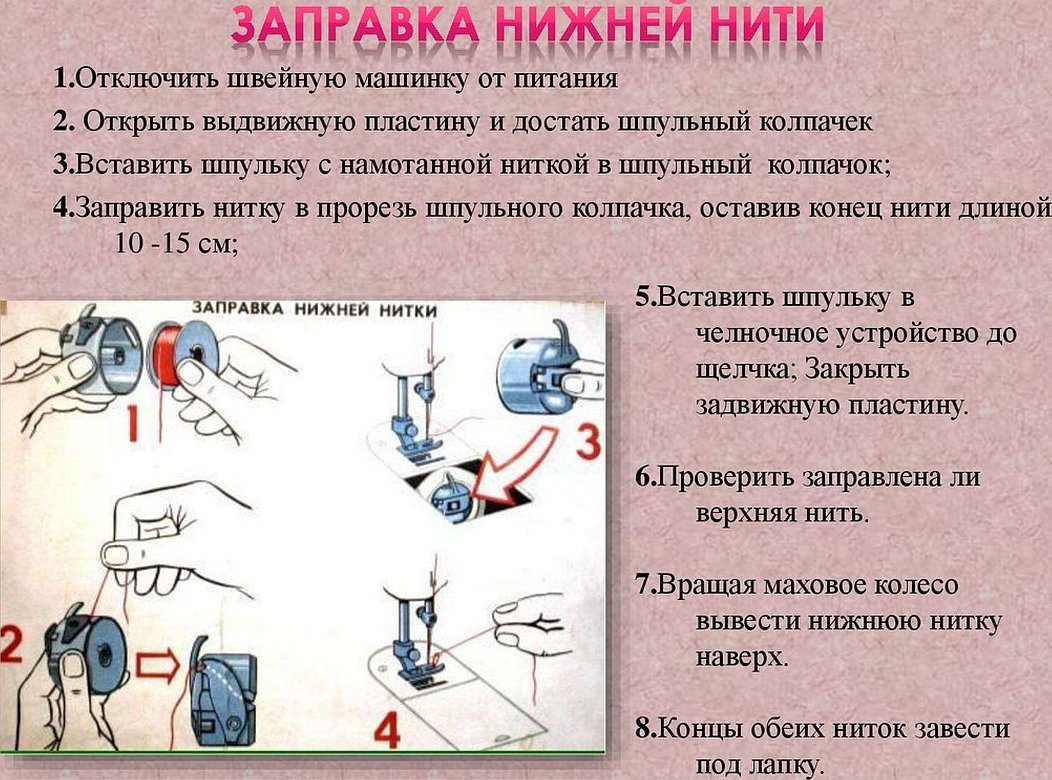
Attention! The top thread should pull the bottom thread.
Excessive thread tension
When the thread tension is too high, the sewing machine loops from below – experienced seamstresses know how to eliminate this defect. This defect appears on the fabric. The lower thread is easily separated from it. To do this, you need to adjust the thread tension regulator.
Attention! Each thread has its own tension on different fabrics.
Thread lint has accumulated between the tensioner plates
When a sewing machine is running, meters of thread pass through it, leaving behind a virtually invisible trace – thread fuzz. It accumulates and harms the sewing machine. The result of filling the plates with fuzz is a looping stitch.
To fix the problem, remove any debris between the plates.
Attention! The machine requires a special piece of cloth to remove dust and lint.
Rough surface of the shuttle
If the sewing machine is rarely used or is kept in a damp room, the shuttle becomes rough. This defect will have to be corrected by rubbing the shuttle with old cloth. If you do not want to do this, the thread itself will remove the roughness over time as a result of friction. But this will take a lot of time and patience of the seamstress.
There is no compensation spring on the tension regulator
The upper thread in a sewing machine often loops due to the spring in the tension regulator. Its absence has a detrimental effect on the stitching and quality of sewing clothes.
Attention! In rare cases, the machine does not have a spring, or it is broken, but the device works properly. This is simply a miracle, but nevertheless, this happens on old manual sewing machines.
This spring helps to form a beautiful stitch by pulling the upper thread into the fabric. If a problem occurs, you will have to fix it by disassembling the tensioner. Different models have their own way of disassembling the tensioner.
Important! It is always easier to disassemble than to assemble, so when disassembling, you need to carefully study the design, or better yet, draw a diagram on a piece of paper.
How to Avoid Looping and Other Sewing Machine Problems
When working with a sewing machine, many problems may arise. In order to avoid all sorts of problems, you should follow some rules:
- use the device only as instructed;
- remove dirt in a timely manner;
- thread the thread carefully;
- After work, the unit should be covered to protect it from dust, and the needle should be kept dipped in a piece of rag.
Correcting the looping in the line must be done very carefully. Eliminating the cause of the breakdown will require disassembling the elements of the sewing machine. Before repairing, you should carefully study the device and make sketches of the diagrams in order to correctly assemble all the components. If serious problems arise, you should contact a specialist.


