Not every novice seamstress will be able to make even the simplest skirt for herself. It is worth starting with sewing things for dolls. In addition, this training option will be a joy for the daughter, since her toy will become fashionable and beautiful due to a significant expansion of the wardrobe. There are many options for patterns that can be easily used for sewing doll dresses. You can even take sketches from fashion magazines and interpret them to the size of the toy.
Beautiful clothes for dolls
To please your beloved daughter, you can start creating new outfits for her doll. There are many options for interesting images and principles of sewing things. To get started, you should initially pay attention to the type of doll. Then you can choose the type and model of the outfit, choose the material and decorative elements to decorate the finished product.
Satin ribbons are especially relevant in terms of decoration. With their help, you can hide unsightly seams, emphasize the advantages of the naiad, use the ribbon as a piping or edging. Plus, a strip of fabric will decorate even a very boring fabric in color and print.
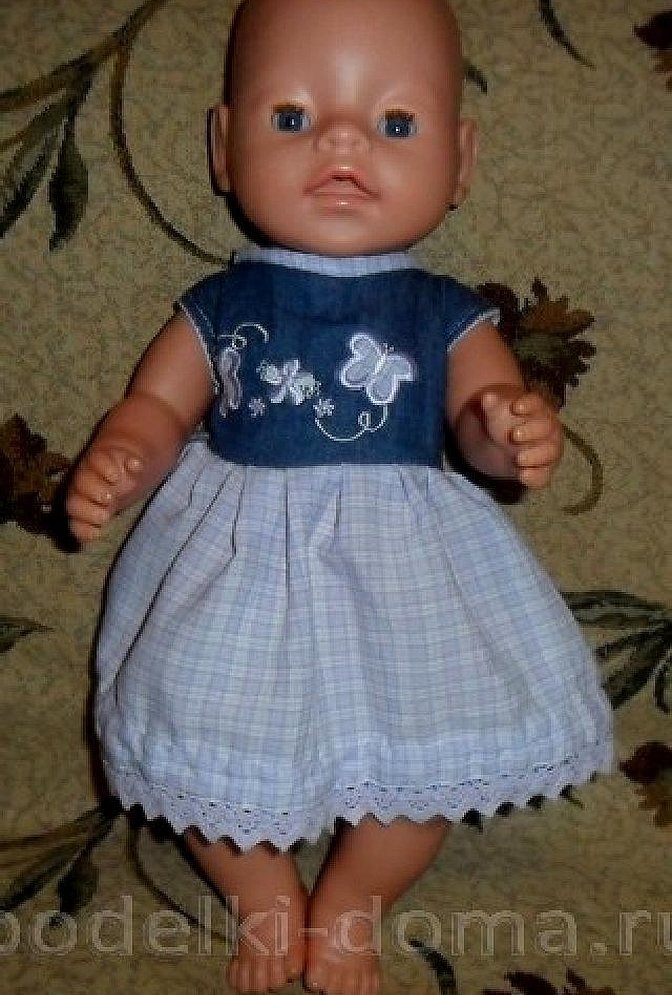
Outfits for Baby Born doll: how to sew a dress
Baby Born dolls are considered very popular due to their unique appearance - these are dolls almost in the life-size of a newborn child. Girls love to take care of such a baby and even more so to dress it in different outfits.
How to sew a dress for a doll with your own hands in a few hours:
- Zigzag the bottom of the dress hem. You need to stretch the fabric to make the skirt fluffy.
- Sew a line at the top and gather so that this part of the dress is aligned with the top piece.
- Neaten the top of the dress. Sew the bottom to the top. Topstitch all seams.
- Next you need to sew the shoulder sections.
- Finish the armholes with bias binding. You can use satin ribbon.
- The fastener on the top of the product will be Velcro.
- Sew the neckline with bias binding.
- The top can be decorated with an applique made from fabric of a different texture.
The principle of making such a dress for a doll is not at all complicated. At the same time, the product partially resembles a sarafan.
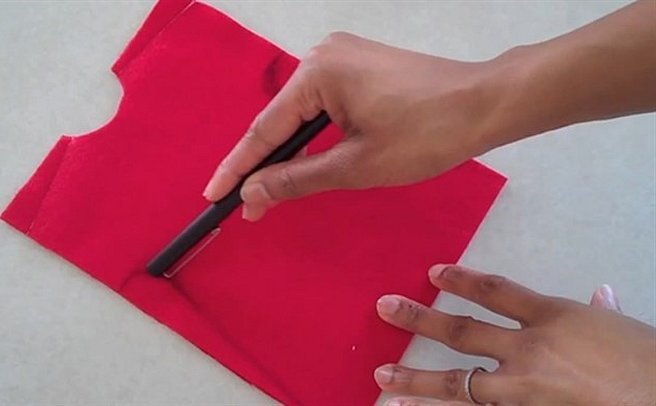
Felt Doll Dress
To create a dress for any doll from felt you will need:
- 2 pieces of felt;
- threads of a suitable color;
- needle, scissors, pencil.
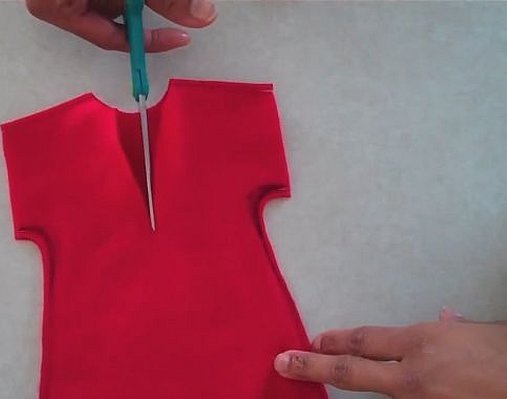
First, take measurements and size marks from the presented toy. Place the doll on a piece of felt. The height of this piece should be approximately equal to the desired length of the dress. Measure the width of the torso on it with a small margin and cut off the excess.
Make another similar detail. Fold the blanks together, and then in half along the length of the future product. Make a cut along the fold. Based on it, a semicircular neck is made, the silhouette is formed.
Usually such outfits are made for uniquely shaped dolls, namely tildes and big-legged ones.
The final stage is sewing the pieces together. There is no need to process the edges of the felt - the threads in these places do not fray.
Dress or skirt made from a sock
A doll's outfit made from a sock is the easiest way to create clothes, which even a child can handle. You only need one tool for the job - scissors, and only one sock as material. You can also take a ribbon.
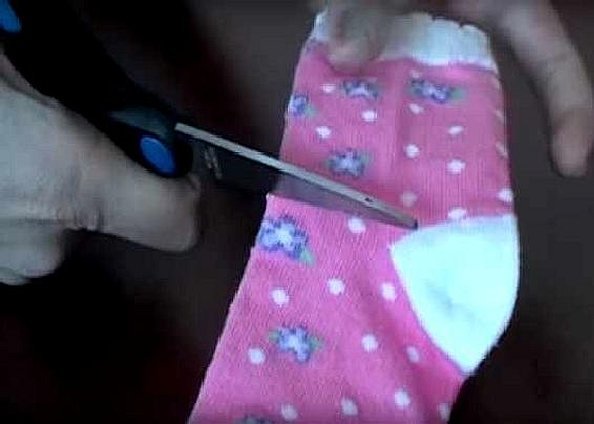
You need to cut the sock where the heel flare begins. You need to take the part where there is an elastic band. It is along the elastic band that the satin ribbon is sewn, which is fixed with a bow.
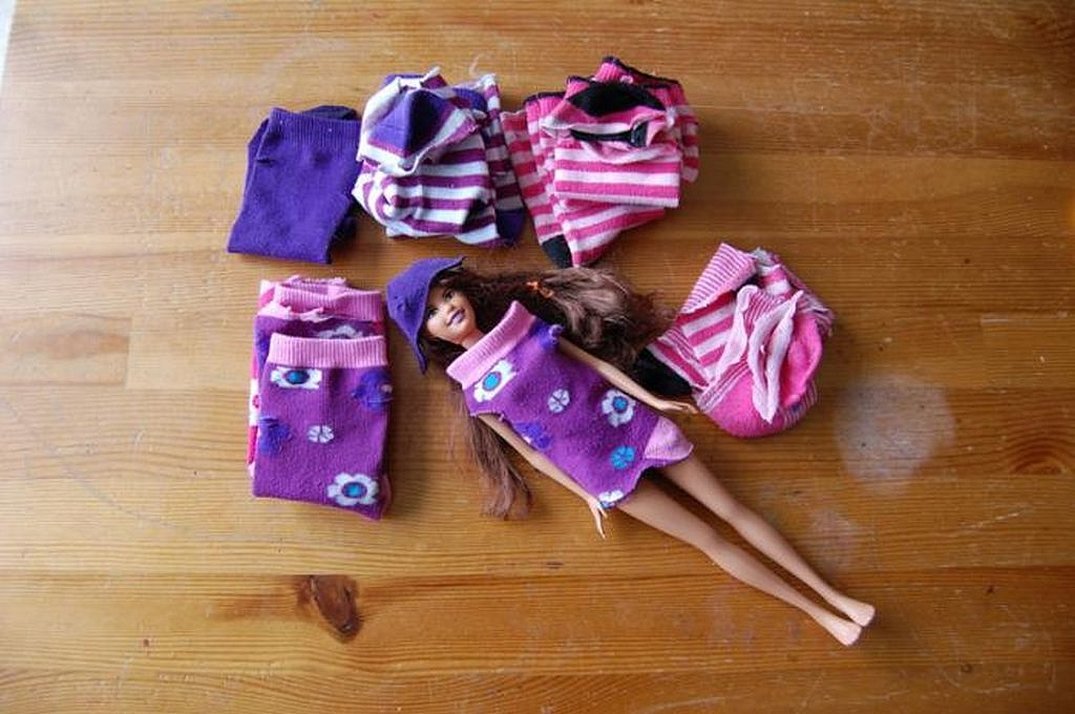
This outfit option is suitable for Monster High and Barbie dolls.
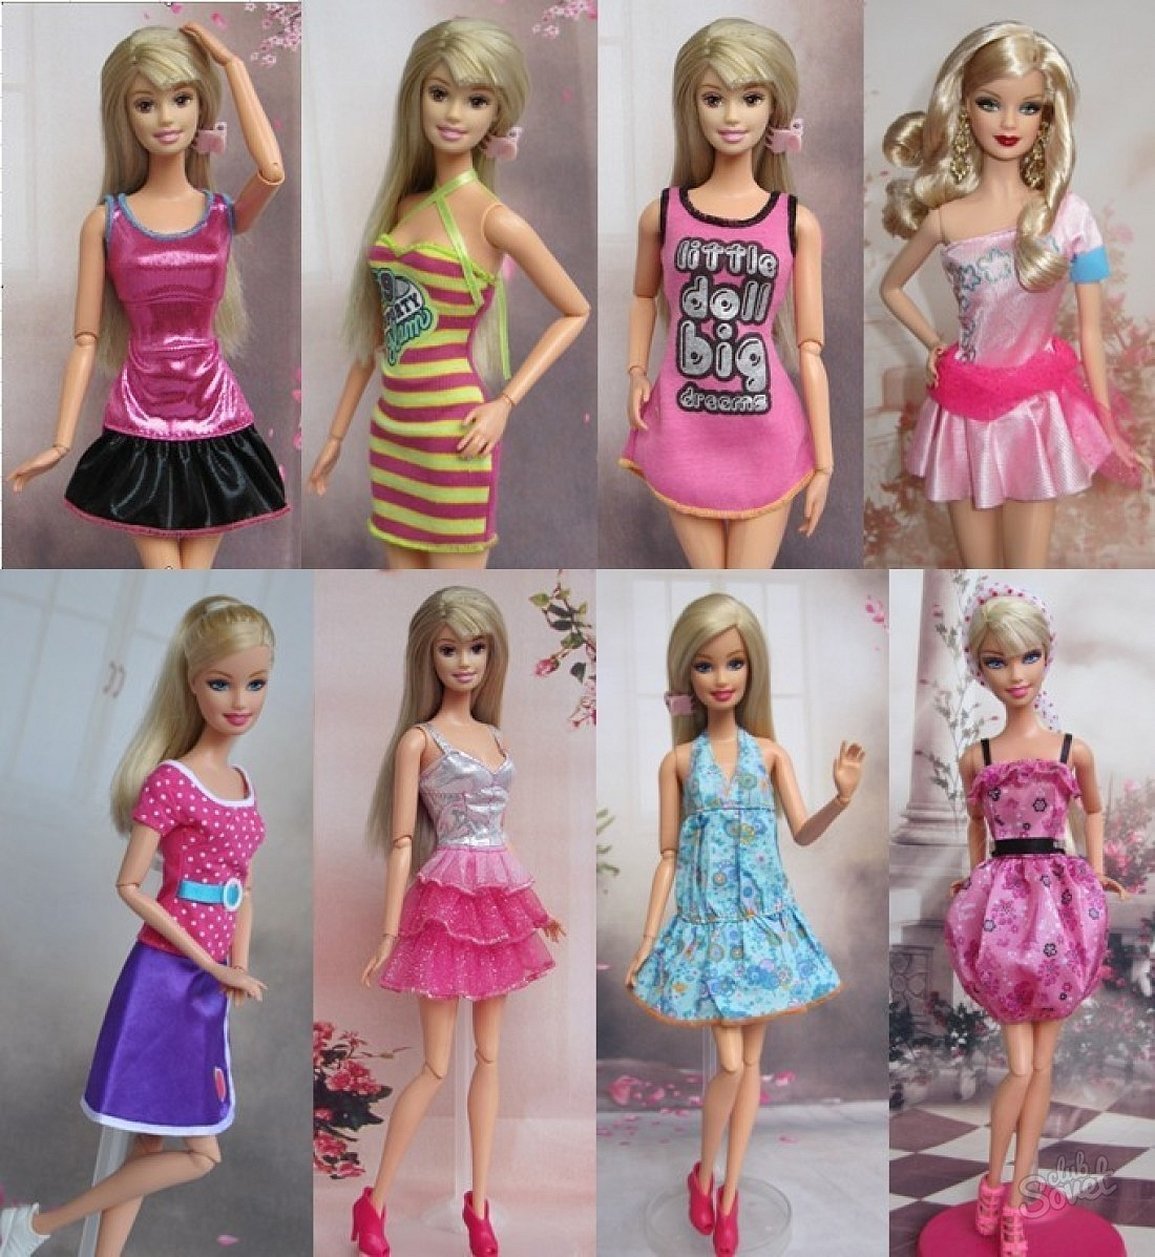
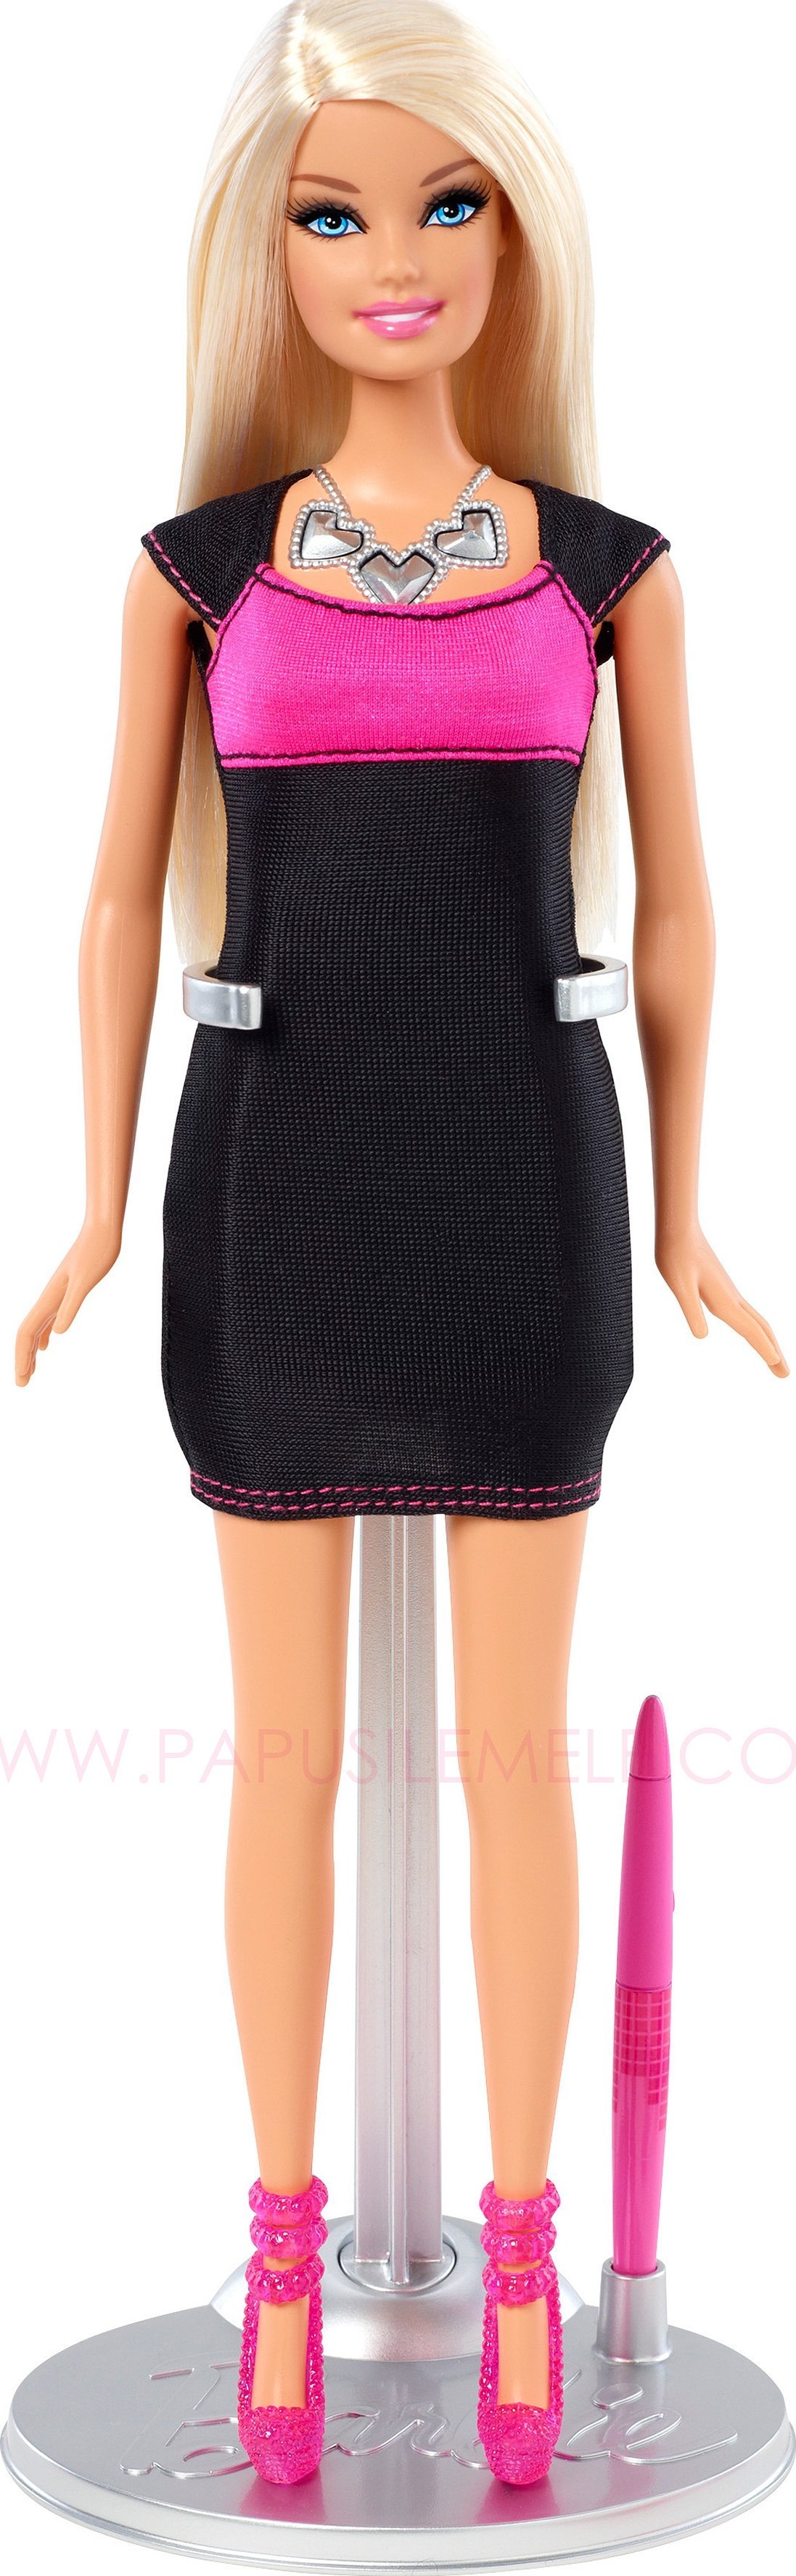
Outfits for Barbie doll
Basic dress shapes are a rectangular silhouette that can be smoothed out with accessories or textile inserts. A simple dress for Barbie can be sewn using a basic pattern:
You can use any fabric to sew a straight-cut dress. To add some variety to a simple model, take a few scraps of brightly colored fabric that will contrast as much as possible with the main tone of the textile.
Royal Evening Dress
The most popular image for a doll is a princess. Sewing such a dress is quite difficult, since the outfit will definitely consist of many details, it will require creating darts and a lot of time will be spent on decorating. An approximate version of a royal outfit can be such a pattern:
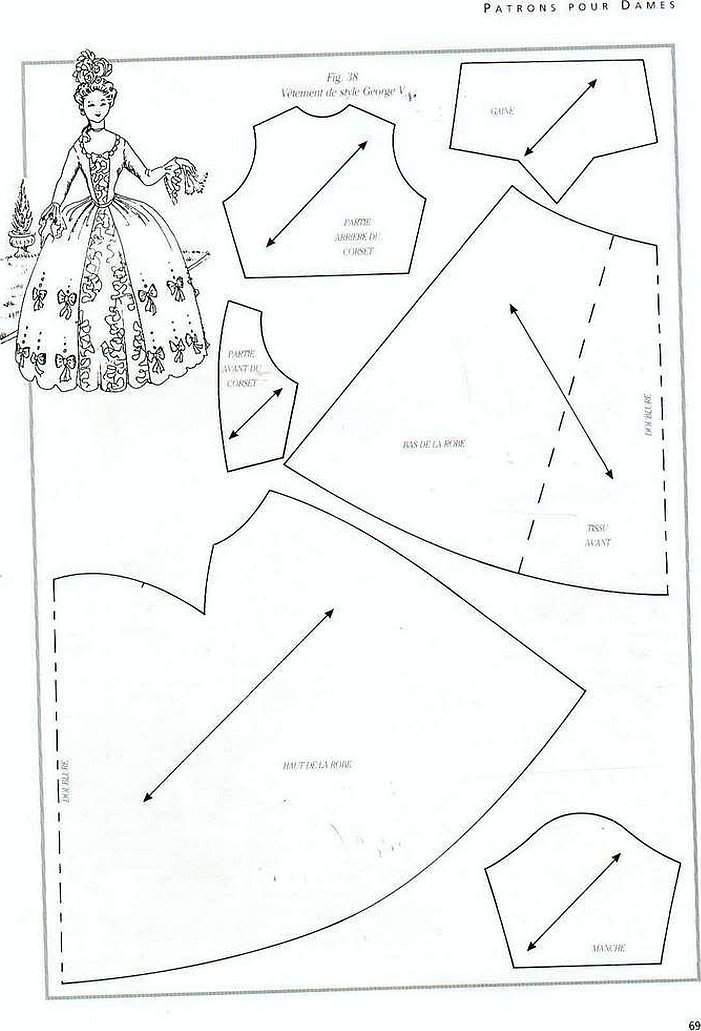
There are many types of royal evening dresses. You can use another pattern option as a sketch:
In any case, the “doll princess” will look colorful and bright if you decorate the finished dress with beads, rhinestones, and glass stones.
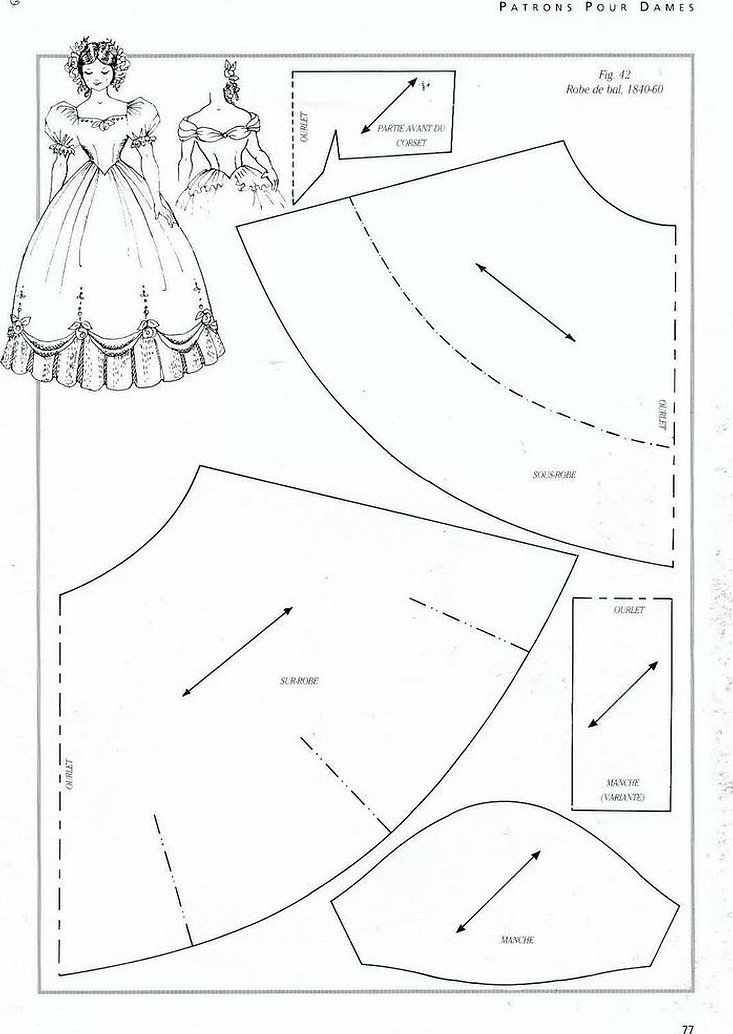
Retro Dress for Barbie
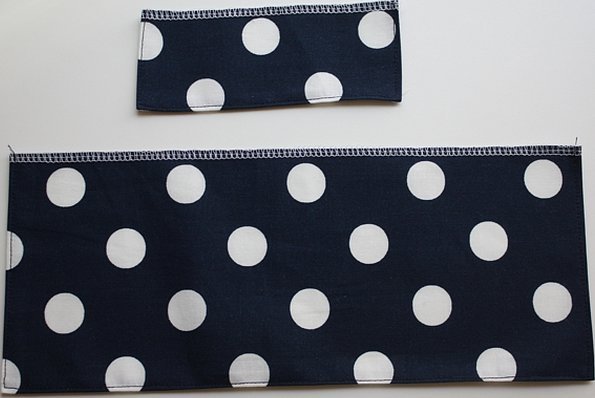
The vintage version of the dress has its own distinctive features in comparison with other examples. Firstly, the coloring. Usually, fabric with a bright floral print or polka dots is used. Secondly, the silhouette itself. Usually, it is a strapless top or with straps on the shoulders, and the skirt is lush, reminiscent of a tulip. To sew a vintage dress, you can prepare such details by pre-overlocking the fabric cuts.
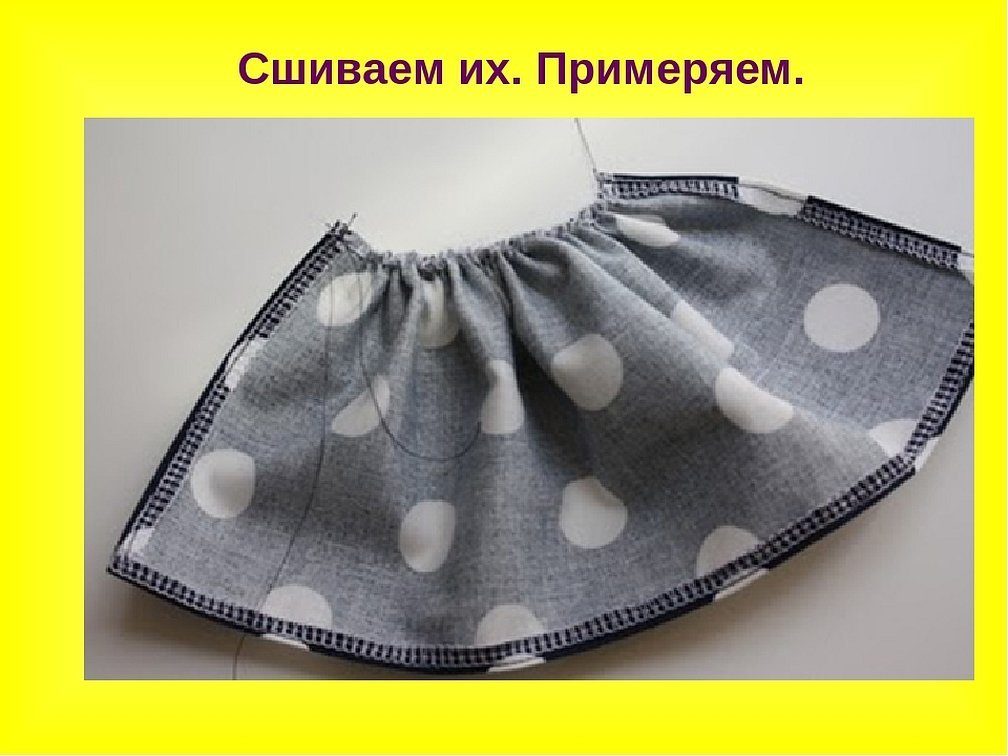
Next, prepare the skirt. You need to stitch the fabric along the larger side with a small basting stitch and tighten the thread a little. You will get the following version of the part:
The next step is to sew the skirt and top together only along the joining line. Sew a thin Velcro on the back. The finished product looks like this:

A retro-style handbag can be a great addition to your look. You can also choose a suitable pattern to make this accessory.
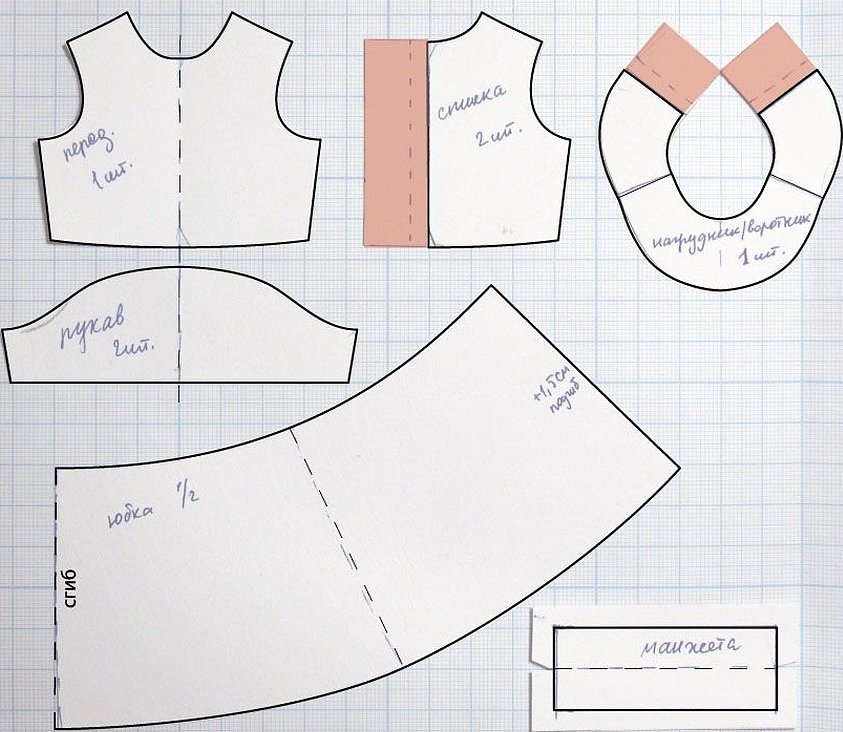
How to make a dress for a doll yourself
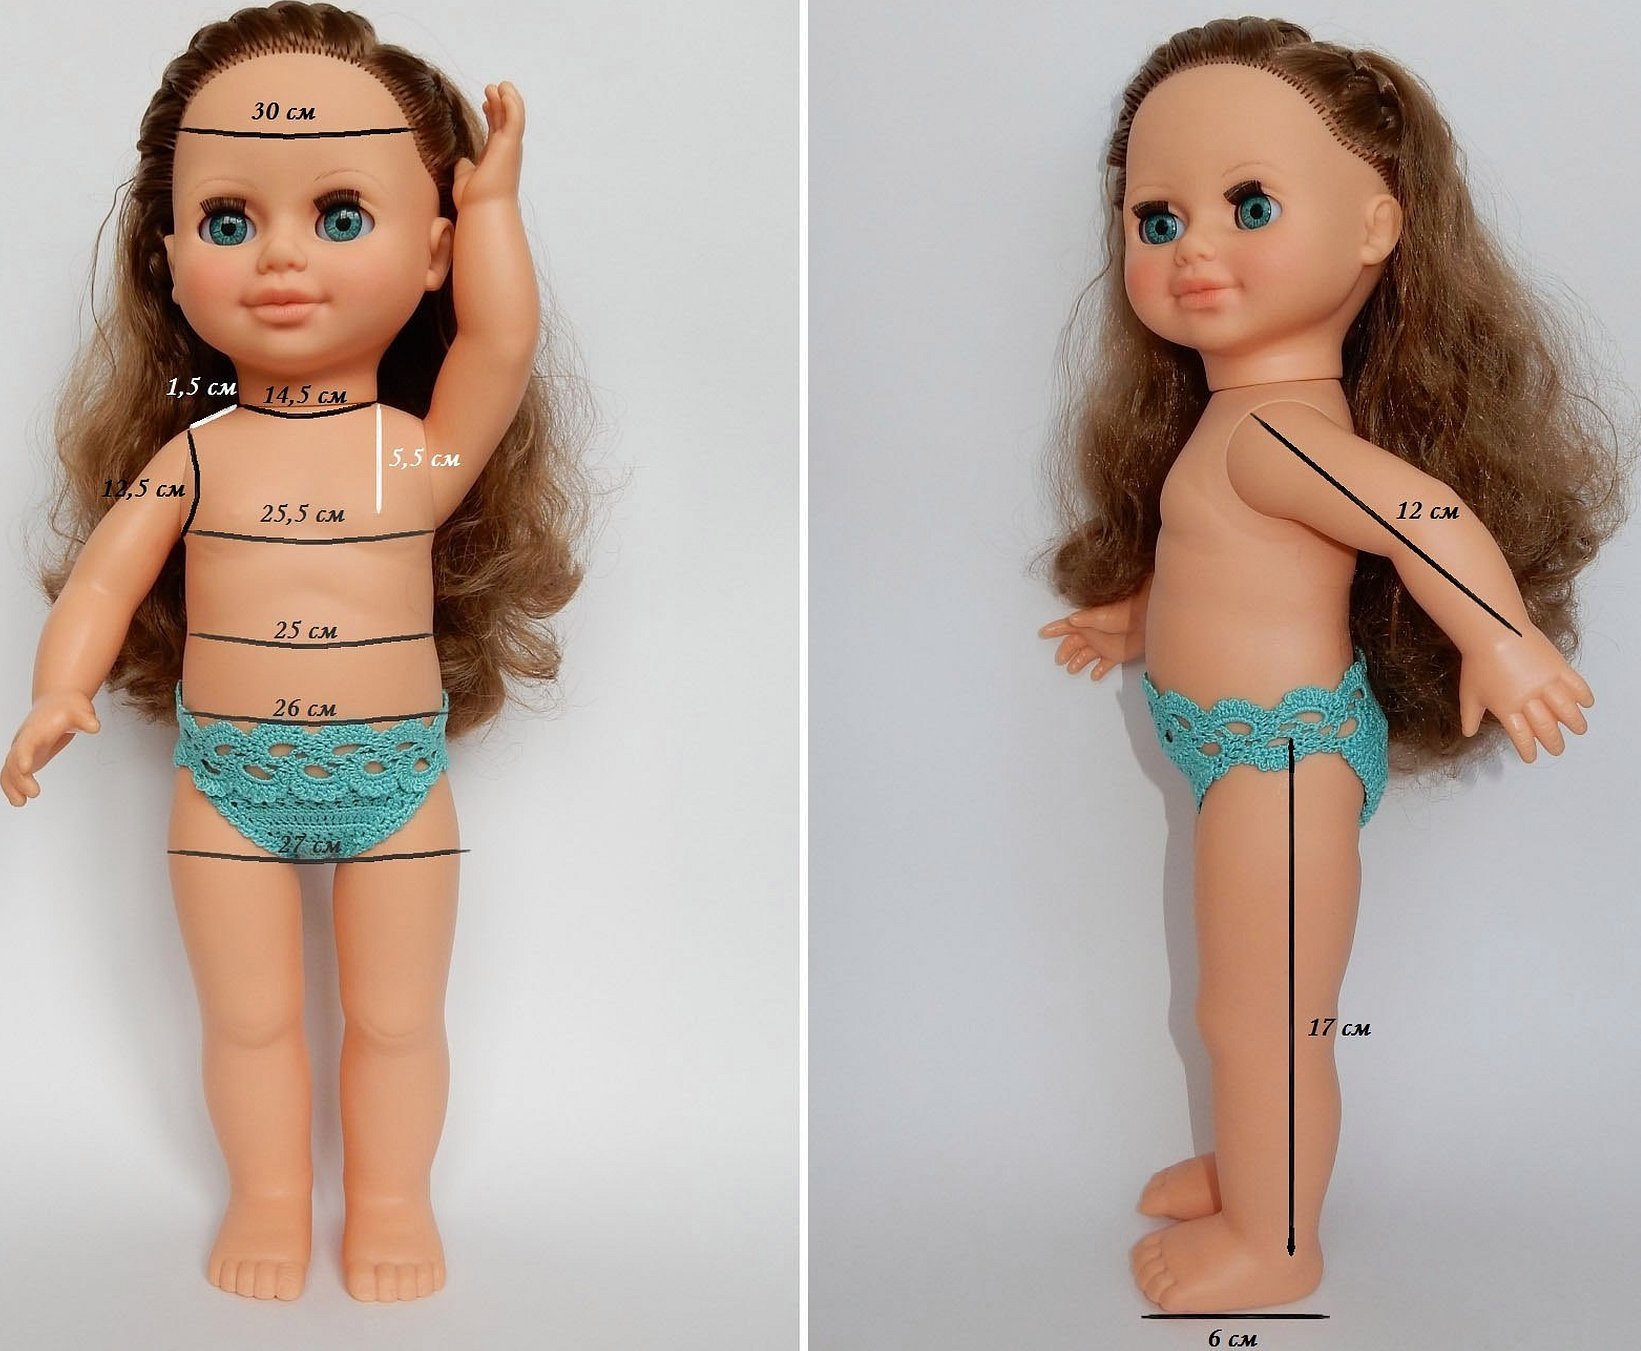
Before sewing a dress for a doll, the dress must be calculated down to the smallest detail. First, you need to take measurements of the doll. For this model, the following parameters are needed:
- To make a pattern for the top of the dress, you should measure the doll's chest circumference, as well as the waist and hips.
- Measure the height of the bodice from the hip line to the waist and to the chest. Then these measurements need to be transferred to a sheet of paper.
- Measure the height of the toy to determine the main parameter of the future product.
Once the measurements of the “model” have been taken, you can begin to create a sketch of the model and construct a pattern.
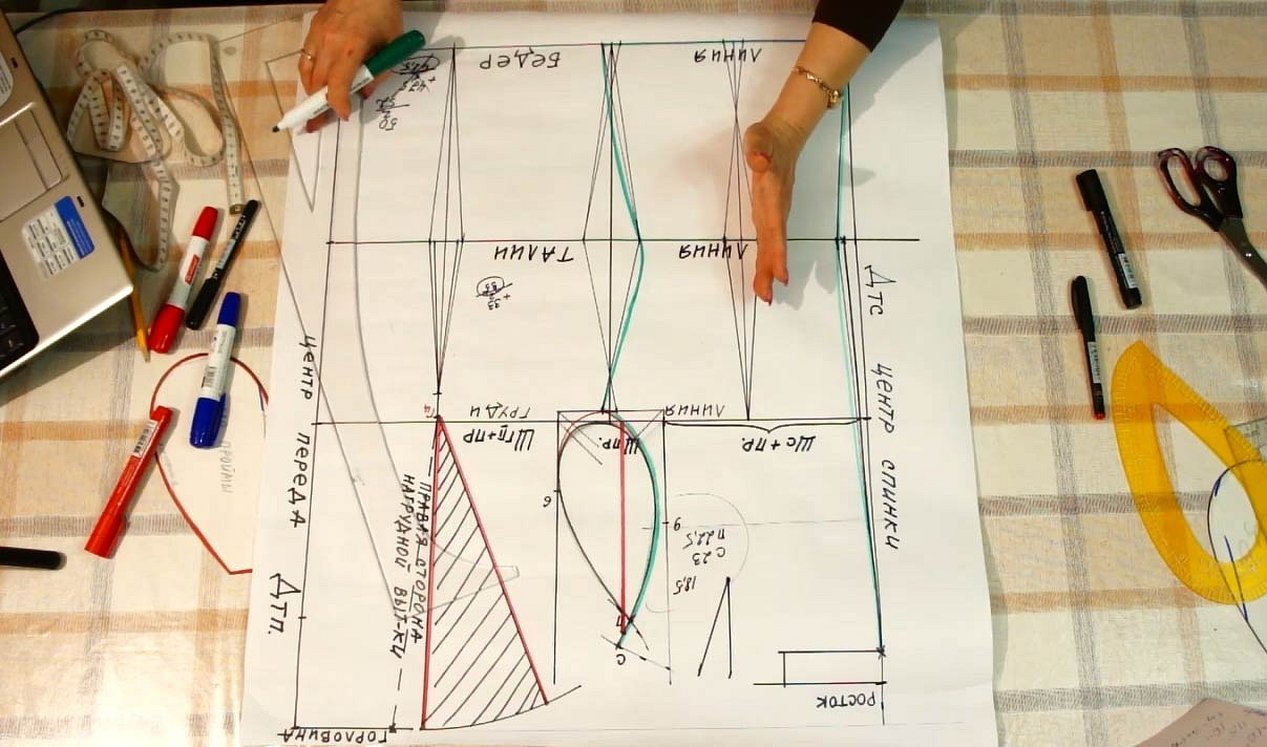
Pattern
The obtained measurements need to be transferred to a sheet of paper. To do this, draw a vertical line on it and, based on the measurements taken, mark three points: chest, waist and hips. Then, from these points, put aside ¼ of the values of the corresponding circles. Finally, from the chest line, lift the top of the bodice to the desired height, and shape the side line.
Important! If the dress is intended for a Barbie doll or another model with large breasts, then the waist measurement should initially be increased by about one and a half centimeters, which will then be closed in darts.
As a result, the drawing should have half of the bodice front template. For a more precise fit, darts are made under the bust, thereby reducing the shape of the side seam line. Additionally, you need to prepare a skirt pattern. It is easier to make a sketch in the form of a sun. You need to use a compass to draw a circle, the radius of which will determine the length of the hem. In the center of the figure, make another small circle, the radius of which will determine ¼ of the length of the waist circumference.
Trying on the product
In order for the product to look attractive on the doll in the future, it is necessary to make an initial fitting. Often the first sketch for fitting is made of paper.
Additional information! The first fitting will help to correct any defects or imperfections in the pattern.
The finished parts are sewn together using a basting stitch. It is necessary to bring the sewing principle as close as possible to the final stitching, so as not to make mistakes later. If there are problems with the sizes at this stage, then you can compensate for the shortcomings using inserts or removing parts of the fabric.
Assembling the parts
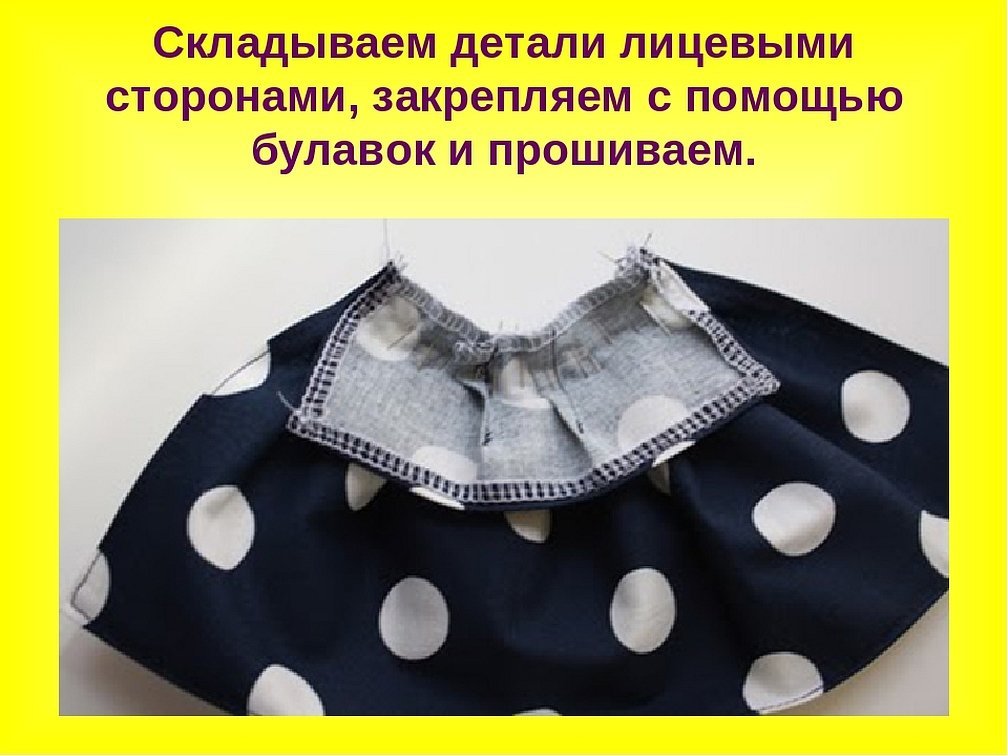
The assembly instructions are elementary. When the bodice and skirt are ready, it's time to join them into a dress. To do this neatly, you should first sew a running stitch, then trim the excess fabric, leaving a 0.3 cm edge, then finish the edge with an overlock stitch.
Afterwards, a narrow satin ribbon is carefully sewn on top of it, turning it up at the edges where the fastener will be. At the end, a strip of Velcro is sewn on to cover the seam in the middle of the back. Additionally, decoration is done at the finishing stage.
Sewing clothes for a doll is not difficult if you take a pattern that is understandable to you and know how to use a sewing machine at least a little. There are many models of dresses for dolls that will become a valuable addition to the wardrobe of a "plastic fashionista". To create a real masterpiece, you need to carefully work on each detail.


