Various soft accessories add coziness to the home. A potholder for the kitchen will not only protect the hands of the hostess, but will also make the interior of the room more delicate and beautiful. This article tells how to make potholders with your own hands and what is needed for this.
- What are potholders for?
- The history of the appearance of the potholder in the kitchen
- How to choose the right filler and fabric for a kitchen accessory
- Key Features of Cutting and Sewing
- How to sew a square potholder for the kitchen with your own hands
- DIY Potholder from Old Jeans Remnants
- Patchwork style for potholders
- Made of felt
What are potholders for?
Kitchen potholders are quite practical accessories for cooking. With their help, you can remove a hot frying pan or saucepan from the stove, pull a tray out of the oven, etc. There are a large number of types and colors, execution techniques and internal filling, but they all have a common function - to protect a person's hands from burns.
Almost every housewife has potholders, and those who don't have them have to spend a long time and painfully choosing this accessory. But not many girls want to buy it, because it is easier to make it yourself to match the design of the kitchen or apron. Not many girls and women know the basics of sewing and patterns, although this skill is always necessary in life. The work process will take about a couple of hours, you won't even need to use a sewing machine.
The history of the appearance of the potholder in the kitchen
In the last century, this item of home accessory was made by hand, and for this they used parts of yarn, material, various leftovers. Since the kitchen is one of the permanent places of residence of a woman, each tried to make it as comfortable and cozy as possible. And as a fashionable and beautiful accessory, they used potholders. One or many small beautiful rags brought some elegance to the kitchen design, and not just protected hands from burns.
The twentieth century saw the rise of patchwork, which helped to bring the beauty of hand-made stitches and blocks to life with the help of potholders.
In the 20s, the popularity of such an accessory fell, since the kitchen fabric potholders were made entirely of lace, they could not protect hands, so they were used as decoration for the room. It looked quite luxurious and beautiful.
In the 30s, they started making faces of people, animals, cars, fruits and even flowers on mittens. And in the 40s, they started producing complete sets of mittens, aprons and towels in one. Every year, this item gained popularity.
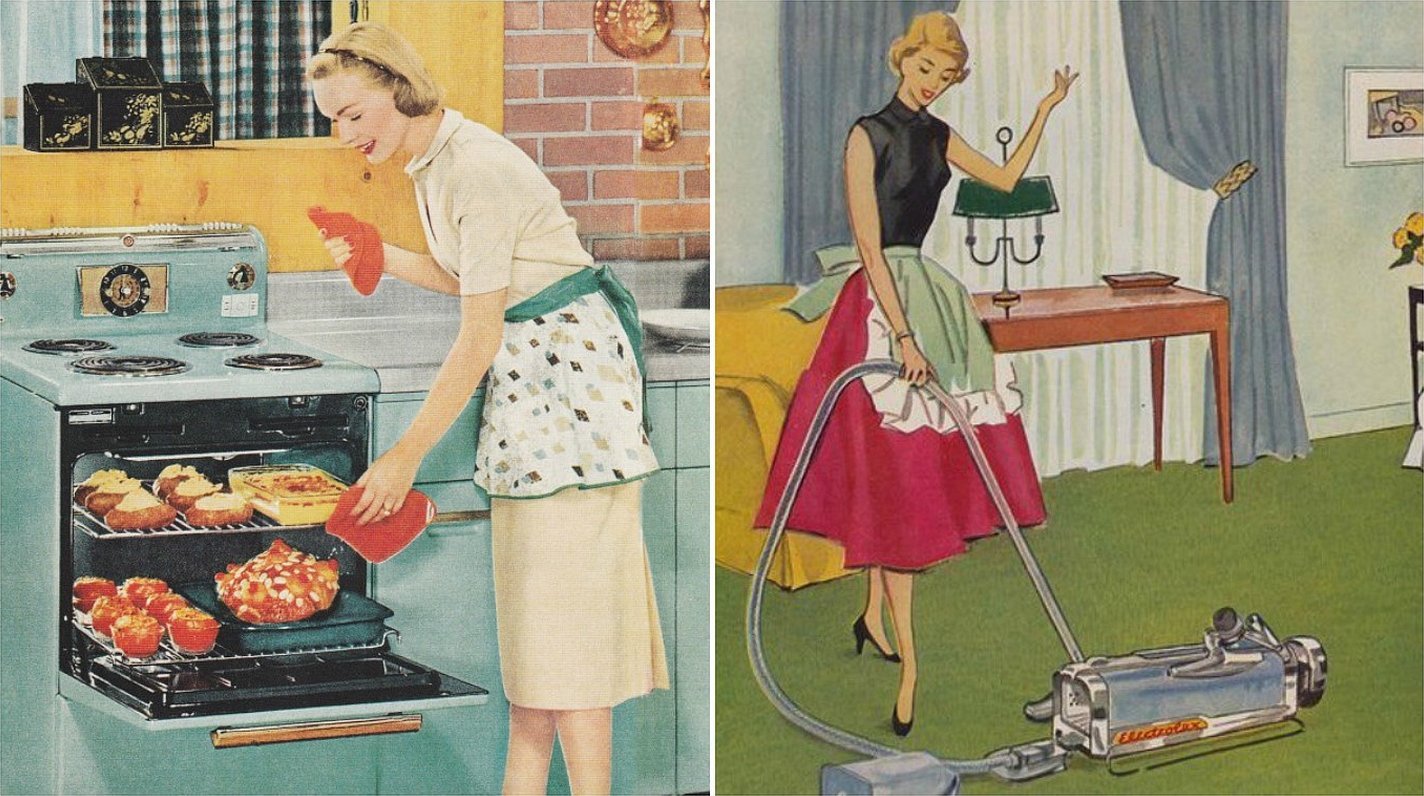
In the 50s, the love for this product began to grow. Passionate needlewomen took up sewing individual projects and beautiful models. Basically, fabric potholders were valued by American housewives. Every advertisement and magazine had posters with a housewife holding a pie with this accessory. It became a kind of symbol of a real housewife. Every advertisement and TV store sold sets of original and interesting mittens.
Very often in the 50s people collected potholders. It was one of the best gifts for any holiday. Grandmothers taught their granddaughters how to sew and decorate them correctly. It was believed that if a woman does not have such an item in the kitchen, then she is not a real housewife.

In the modern world, products are not given such preference as before, but even now many housewives use them with pleasure, and in stores there is a huge variety of models, sometimes they come complete with aprons, so that everything is in the same style.
How to choose the right filler and fabric for a kitchen accessory
The main thing in creating potholders with your own hands is the right choice of material and filler. Suitable fabrics for work are natural, such as linen, chintz or cotton. It is advisable to take dense fabrics so that they last longer.
In addition to fabrics, you also need to choose the shape of the product. You also need to remember that different types of mittens differ in characteristics, which means it is best to make a whole universal set: separately for pots, for a tray, etc.
Filling is always added inside the product. This is mainly synthetic fluff, batting, felt or drape. Felt and other materials are best suited for filling and sewing kitchen products because they are dense, and your hands will not even feel the hot dishes.
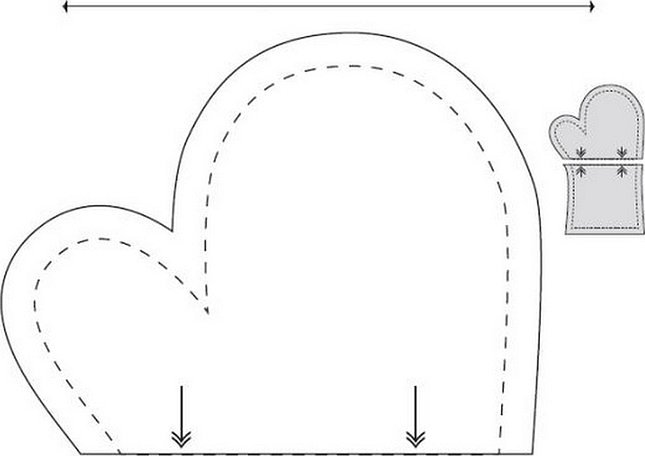
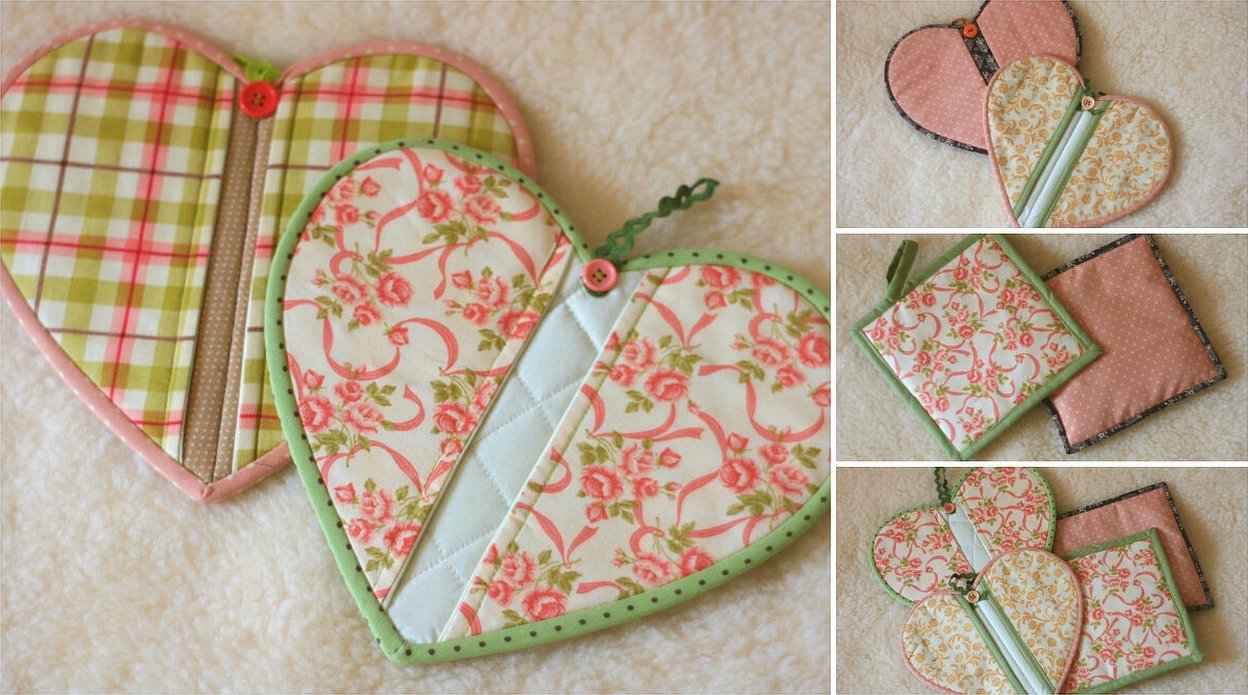
You can draw templates for work yourself or find them in various master classes. The favorite shape of mittens is a heart, circle or star. To decorate the kitchen, you can sew mini squares with padding polyester and hang them on loops.
Attention! It is recommended to wash the products by hand in warm, soapy water. Since when machine washing, the filler will clump and the glove can be thrown away.

Key Features of Cutting and Sewing
You can find DIY potholders made of fabric with patterns on the Internet. There are many master classes on how to do the job. You need to remember the main factors when sewing:
- To ensure that the finished potholders comply with all the rules of heat resistance and density, it is advisable to choose natural cotton materials;
- It is important to know that synthetic materials melt and burn quickly, so their use should be avoided.
- In order not to burn your hands, the product must have the required thickness to protect them from hot dishes. The following will work as dense filling: cotton wool, synthetic fluff, batting or felt.
- To avoid wasting money on fabric, you can use sweaters and blouses that have lost their appearance;
- For dense materials, you need to use sewing machines.
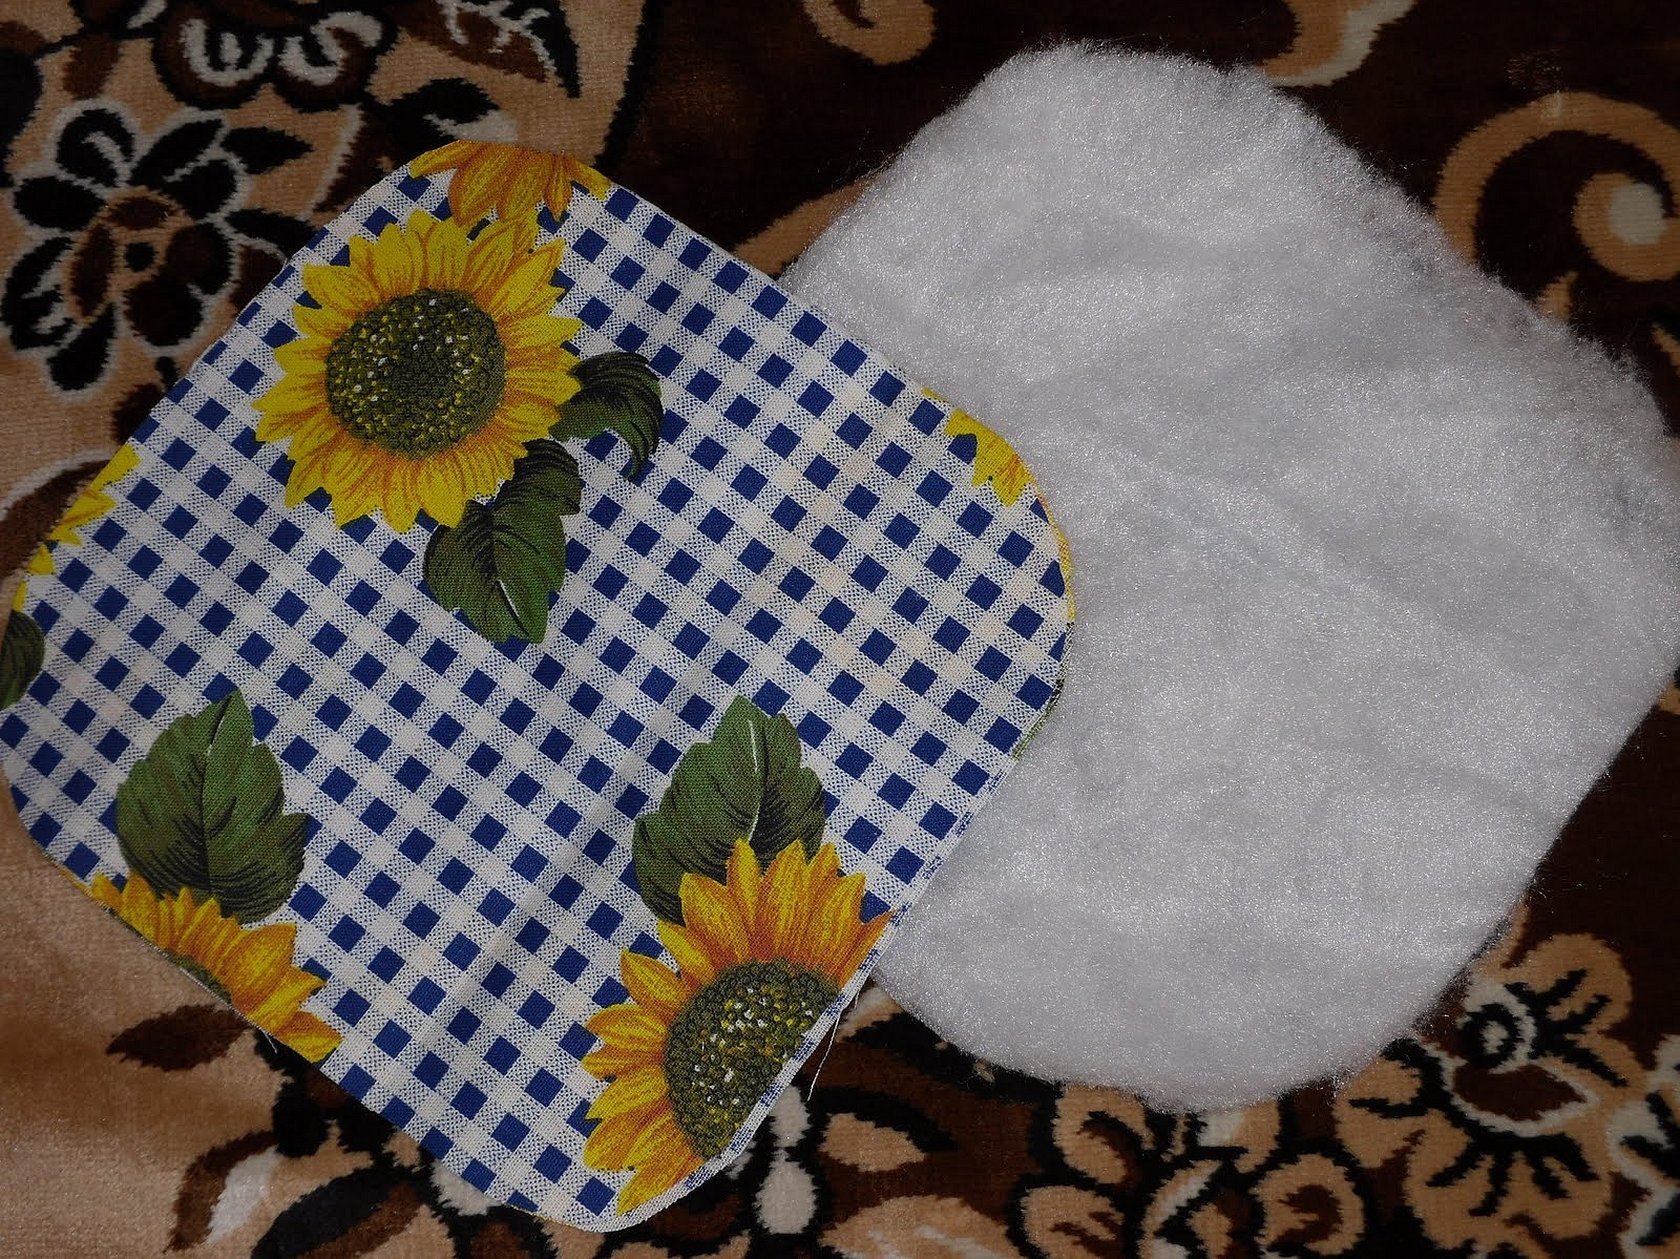
How to sew a square potholder for the kitchen with your own hands
The easiest method, which even a beginner can do, is a square-shaped mitten. If you sew the loop not on the side, but in the corner, the product will automatically look like a rhombus.
Materials for manufacturing:
- Fabric for the base;
- Filler;
- Scissors, threads and needles;
- Braid.
Execution of work:
- Draw a pattern on paper in the form of a square measuring 30 x 30 cm;
- Transfer the template onto the main material and filler, leaving 0.5 cm allowances along the edges. Make two outer parts and two inner parts (4 pieces);
- Place the outer parts on top of each other with the right sides facing each other, then place the filling on top of them;
- Sweep on a machine, leaving an opening for turning;
- Turn the product inside out. Make a braid along the edges and sew a loop on the side. The work is ready.
It should be added that very often experienced needlewomen embroider various animals, flowers or words on the finished product.

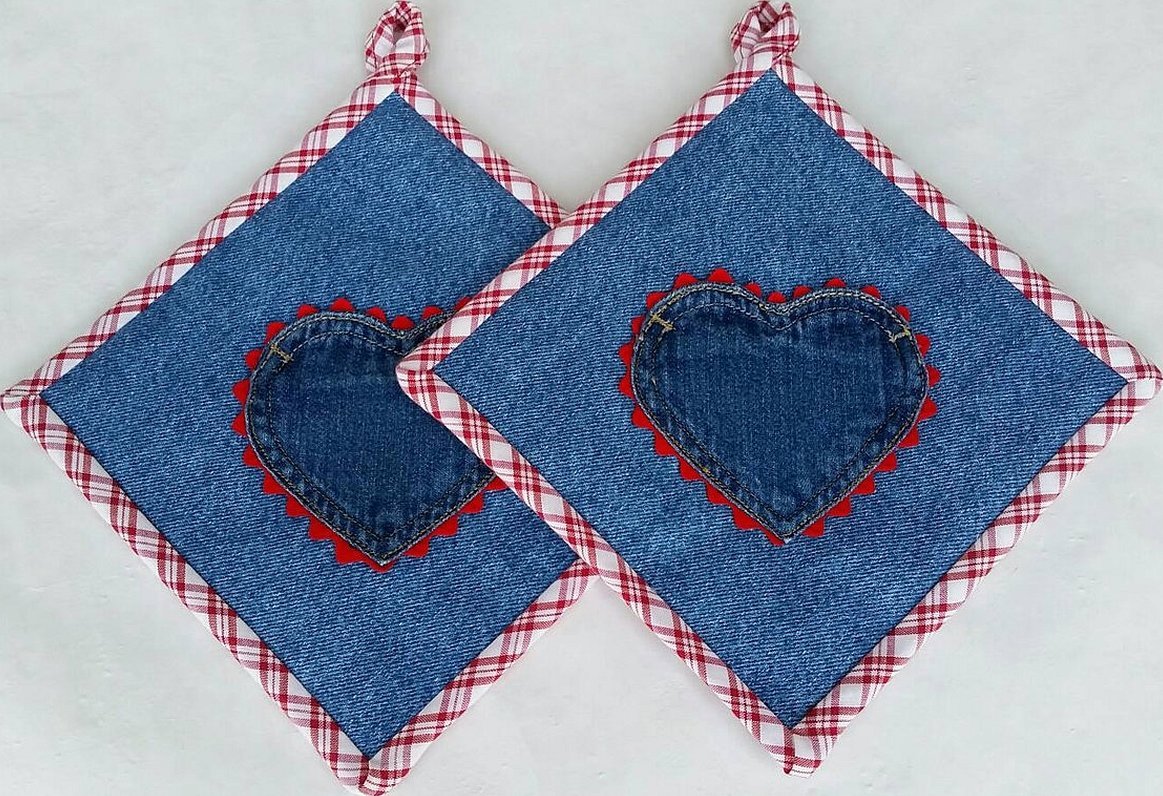
DIY Potholder from Old Jeans Remnants
In no case should you throw away old jeans, this is a very valuable fabric. In addition to potholders, you can make a bag or children's toys from them. Even scraps of fabric will be needed. The patchwork method is used in the work.
Materials and tools for work:
- Denim;
- Scissors and threads;
- Iron.
Progress of work:
Cut old jeans into equal strips. Fold them together in half and then in half again. It is advisable to secure them with threads, or you can simply iron them. Next, braid the strips together, as if decorating the top of a pie. Sew the edges and wrap them with the largest strip of material. At the end, sew a loop in any place. The product is ready. This technique is the easiest and most common, even a beginner in needlework will not encounter problems when working.
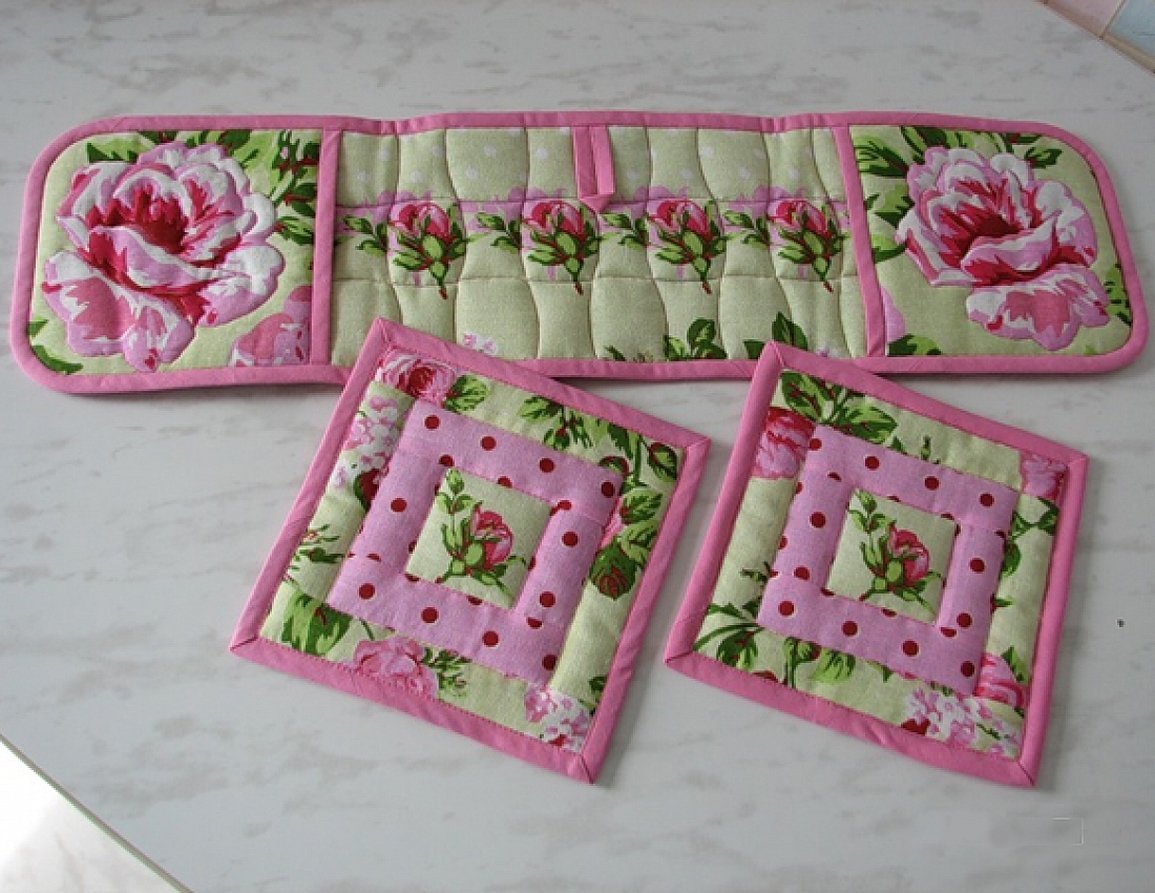
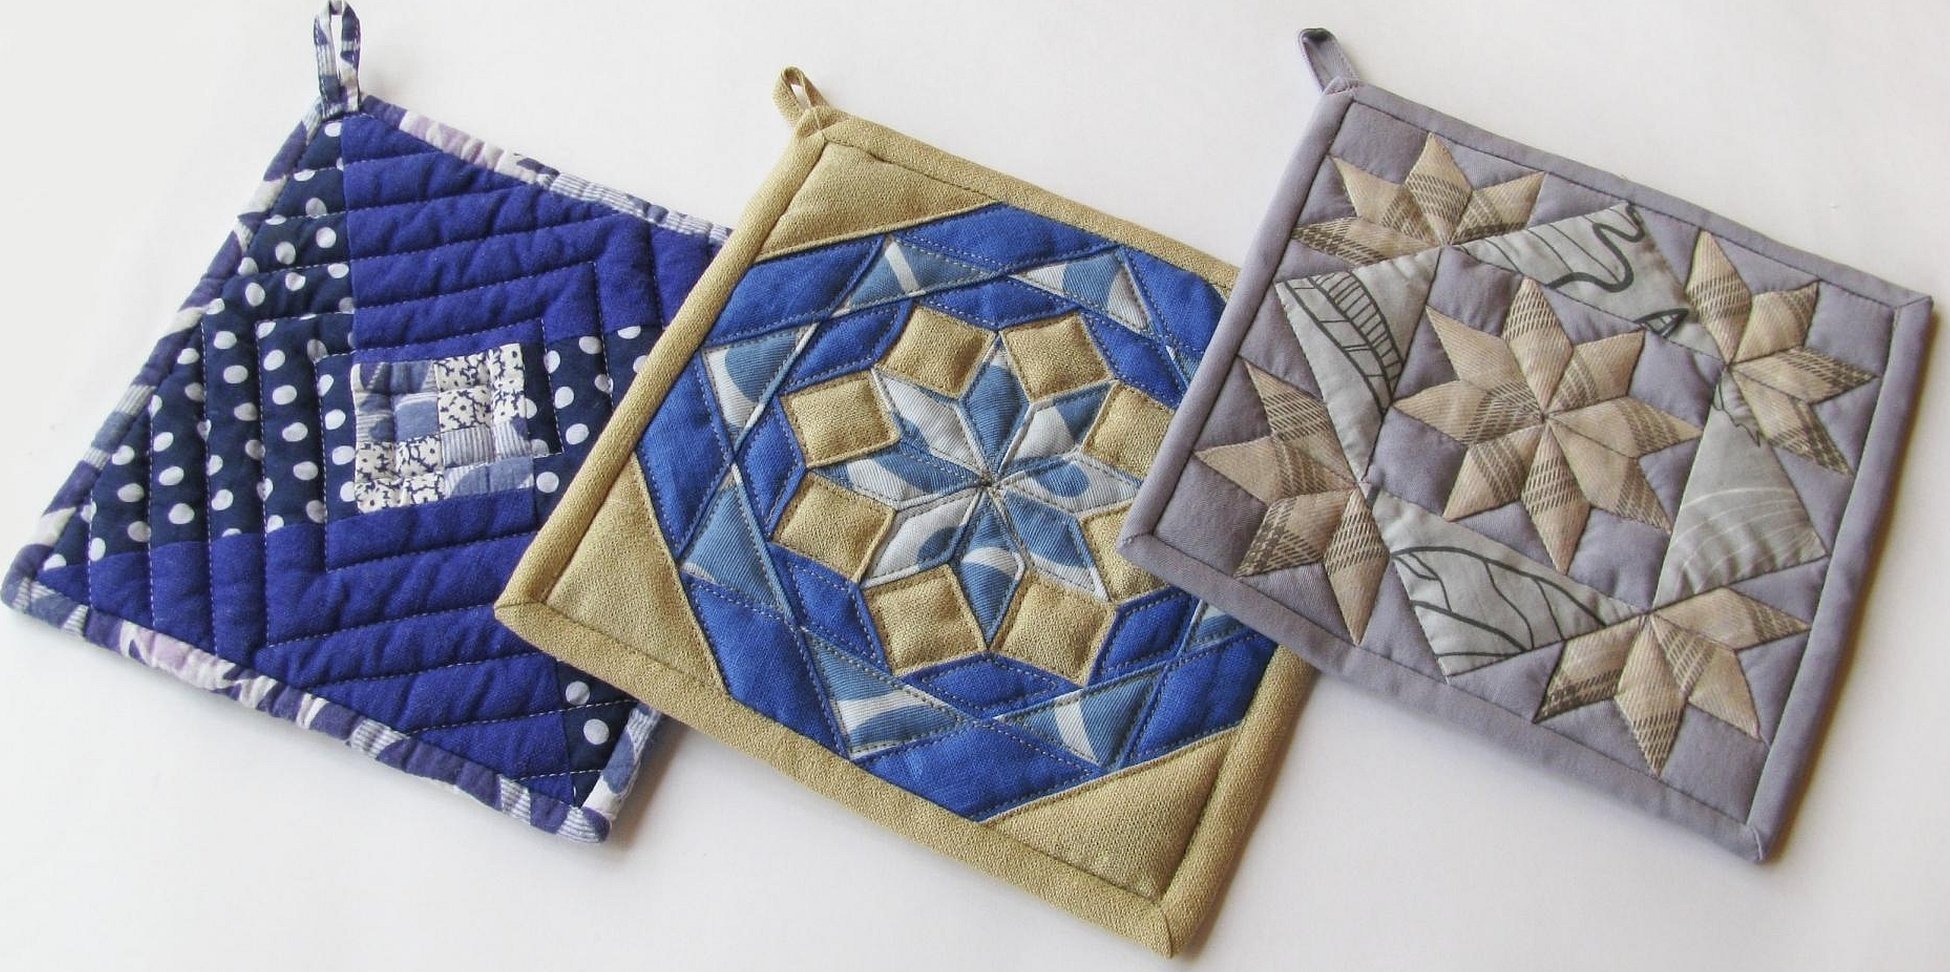
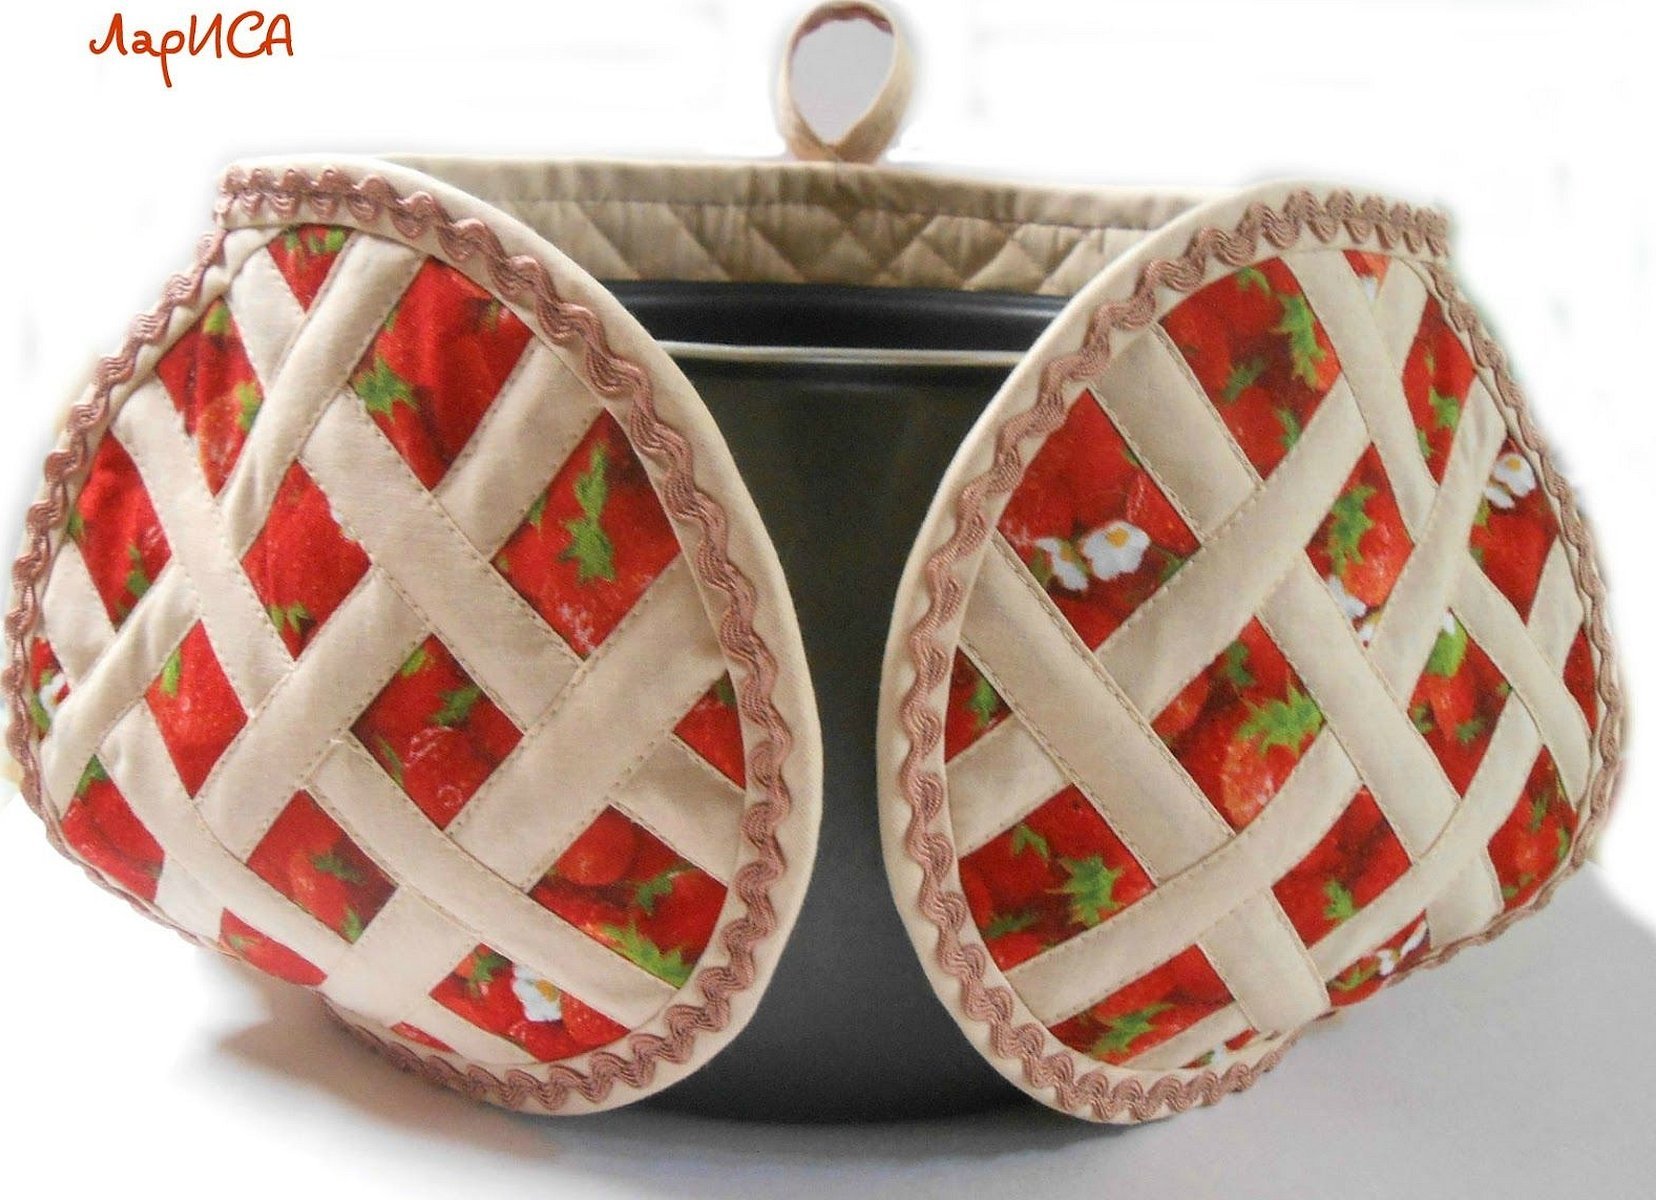
Patchwork style for potholders
You can choose any material. It will be more beautiful to take contrasting fabrics, for example, red, blue and brown.
Make a pattern and cut out five parts. For safety, make additional marks on the material at the joints and reinforce with a thick sheet.
Cut out the pieces with a 0.5 cm allowance.
It is made of six parts connected one after another. First you need to sew 1 and 2, 3 and 4 parts.
Then you need to take 1 part (1 and 2 parts) and sew with the central part. Stitch from the edge to the left allowance.
Iron and sew on the right (clockwise) the other part (from parts 3 and 4) and sew.
Connect all the parts in this way.
Attention! To sew the last part, you need to carefully fold the first part inside out and pin it. And also, as described above, connect, not reaching the allowance.
At the end, insulation is sewn on, for example, holofiber.
Made of felt
To sew felt potholders with your own hands, you must have a sewing machine or a very thick needle.
To work you will need:
- Felt of several colors: dark brown and crimson;
- Scissors;
- Overlock machine;
- Filler (synthetic fluff).
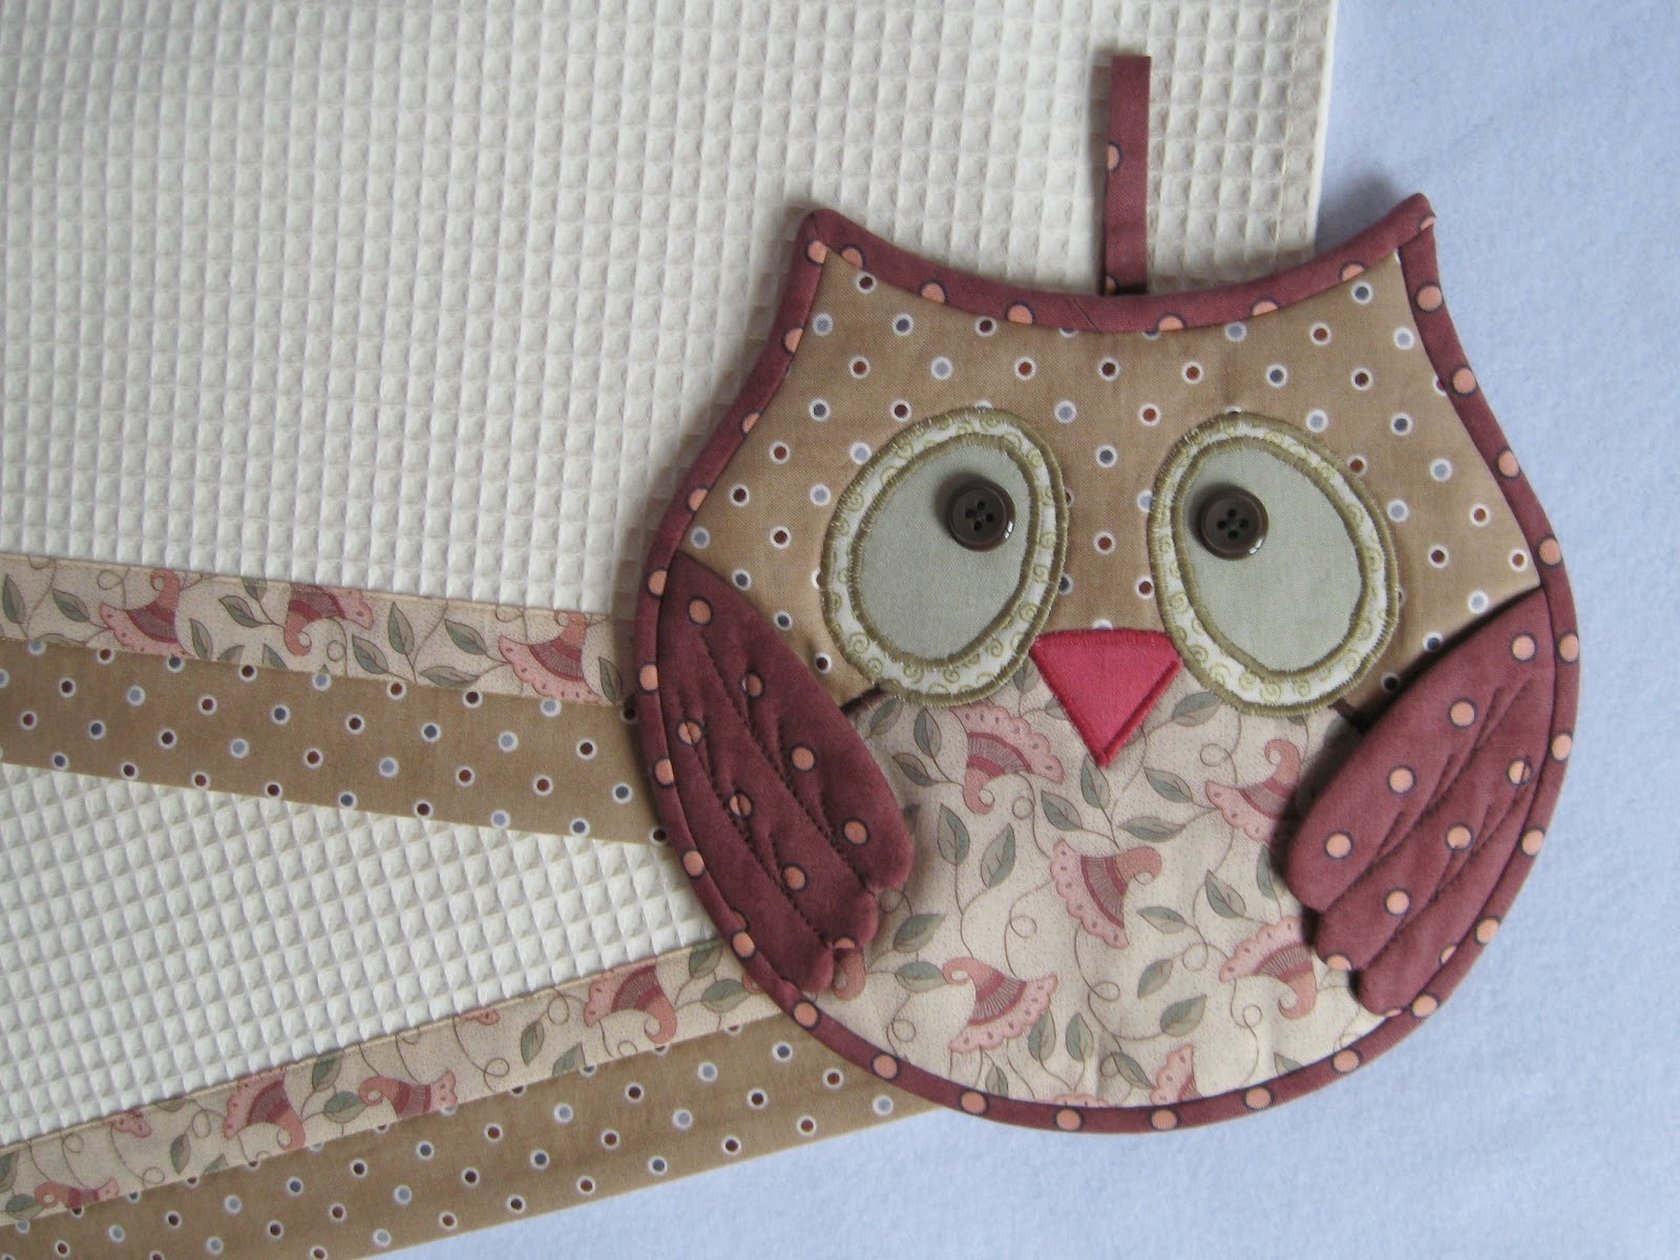
Cut two equal round pieces with carved edges from brown fabric. To make the potholder withstand high temperatures, you need to use either a layer of synthetic fluff or an unnecessary potholder of approximately the same size. Make a circle in the center of one of the blanks. Cut a circle from the raspberry fabric a few centimeters larger than the brown one. Put six strips woven together on top and sew them on.
Sew both circles to make a pie. Next, you need to assemble the mitten: the lower brown part, a layer of synthetic fluff (or you don't need the product), a loop, the upper raspberry part. The felt potholder in the shape of a pie is ready. You can make a thick hot stand from felt, of the same design.
Do-it-yourself potholders made of fabric look very stylish and original. The work will not take much time and money, but no one will have such a product. Nowadays, textile stores have a lot of choice of fabric with beautiful patterns, so choosing the material will not be difficult. It is advisable to choose a fairly dense material for work so that the product will last a long time.


