Cutting and sewing may seem complicated at the first stages. However, later all actions are performed quickly and automatically. You can start the seamstress's path by creating a simple dress. To do this, you should familiarize yourself with the theory of cutting and sewing, taking measurements.
Where to start learning to cut and sew
Sewing and cutting will come easy if you start learning step by step. You need to start learning from scratch with the theory of sewing products.
- The path begins with purchasing the necessary tools. To do this, you should watch master classes and pay attention to what seamstresses work with. At the first steps, it is enough to purchase basic tools. These are scissors for fabric and threads. They must be of high quality. A ripping tool will come in handy at the first stages. A measuring tape and pins are also a must in the arsenal of a needlewoman. Threads, needles, marking tools, and a threader should be put in a purse. It is recommended to find a round cutter, an awl, and a steam iron. Purchase fabric in basic colors and shades. You should not take complex materials for a bright design that are not easy to process. These are silk, chiffon, and thick fabrics.
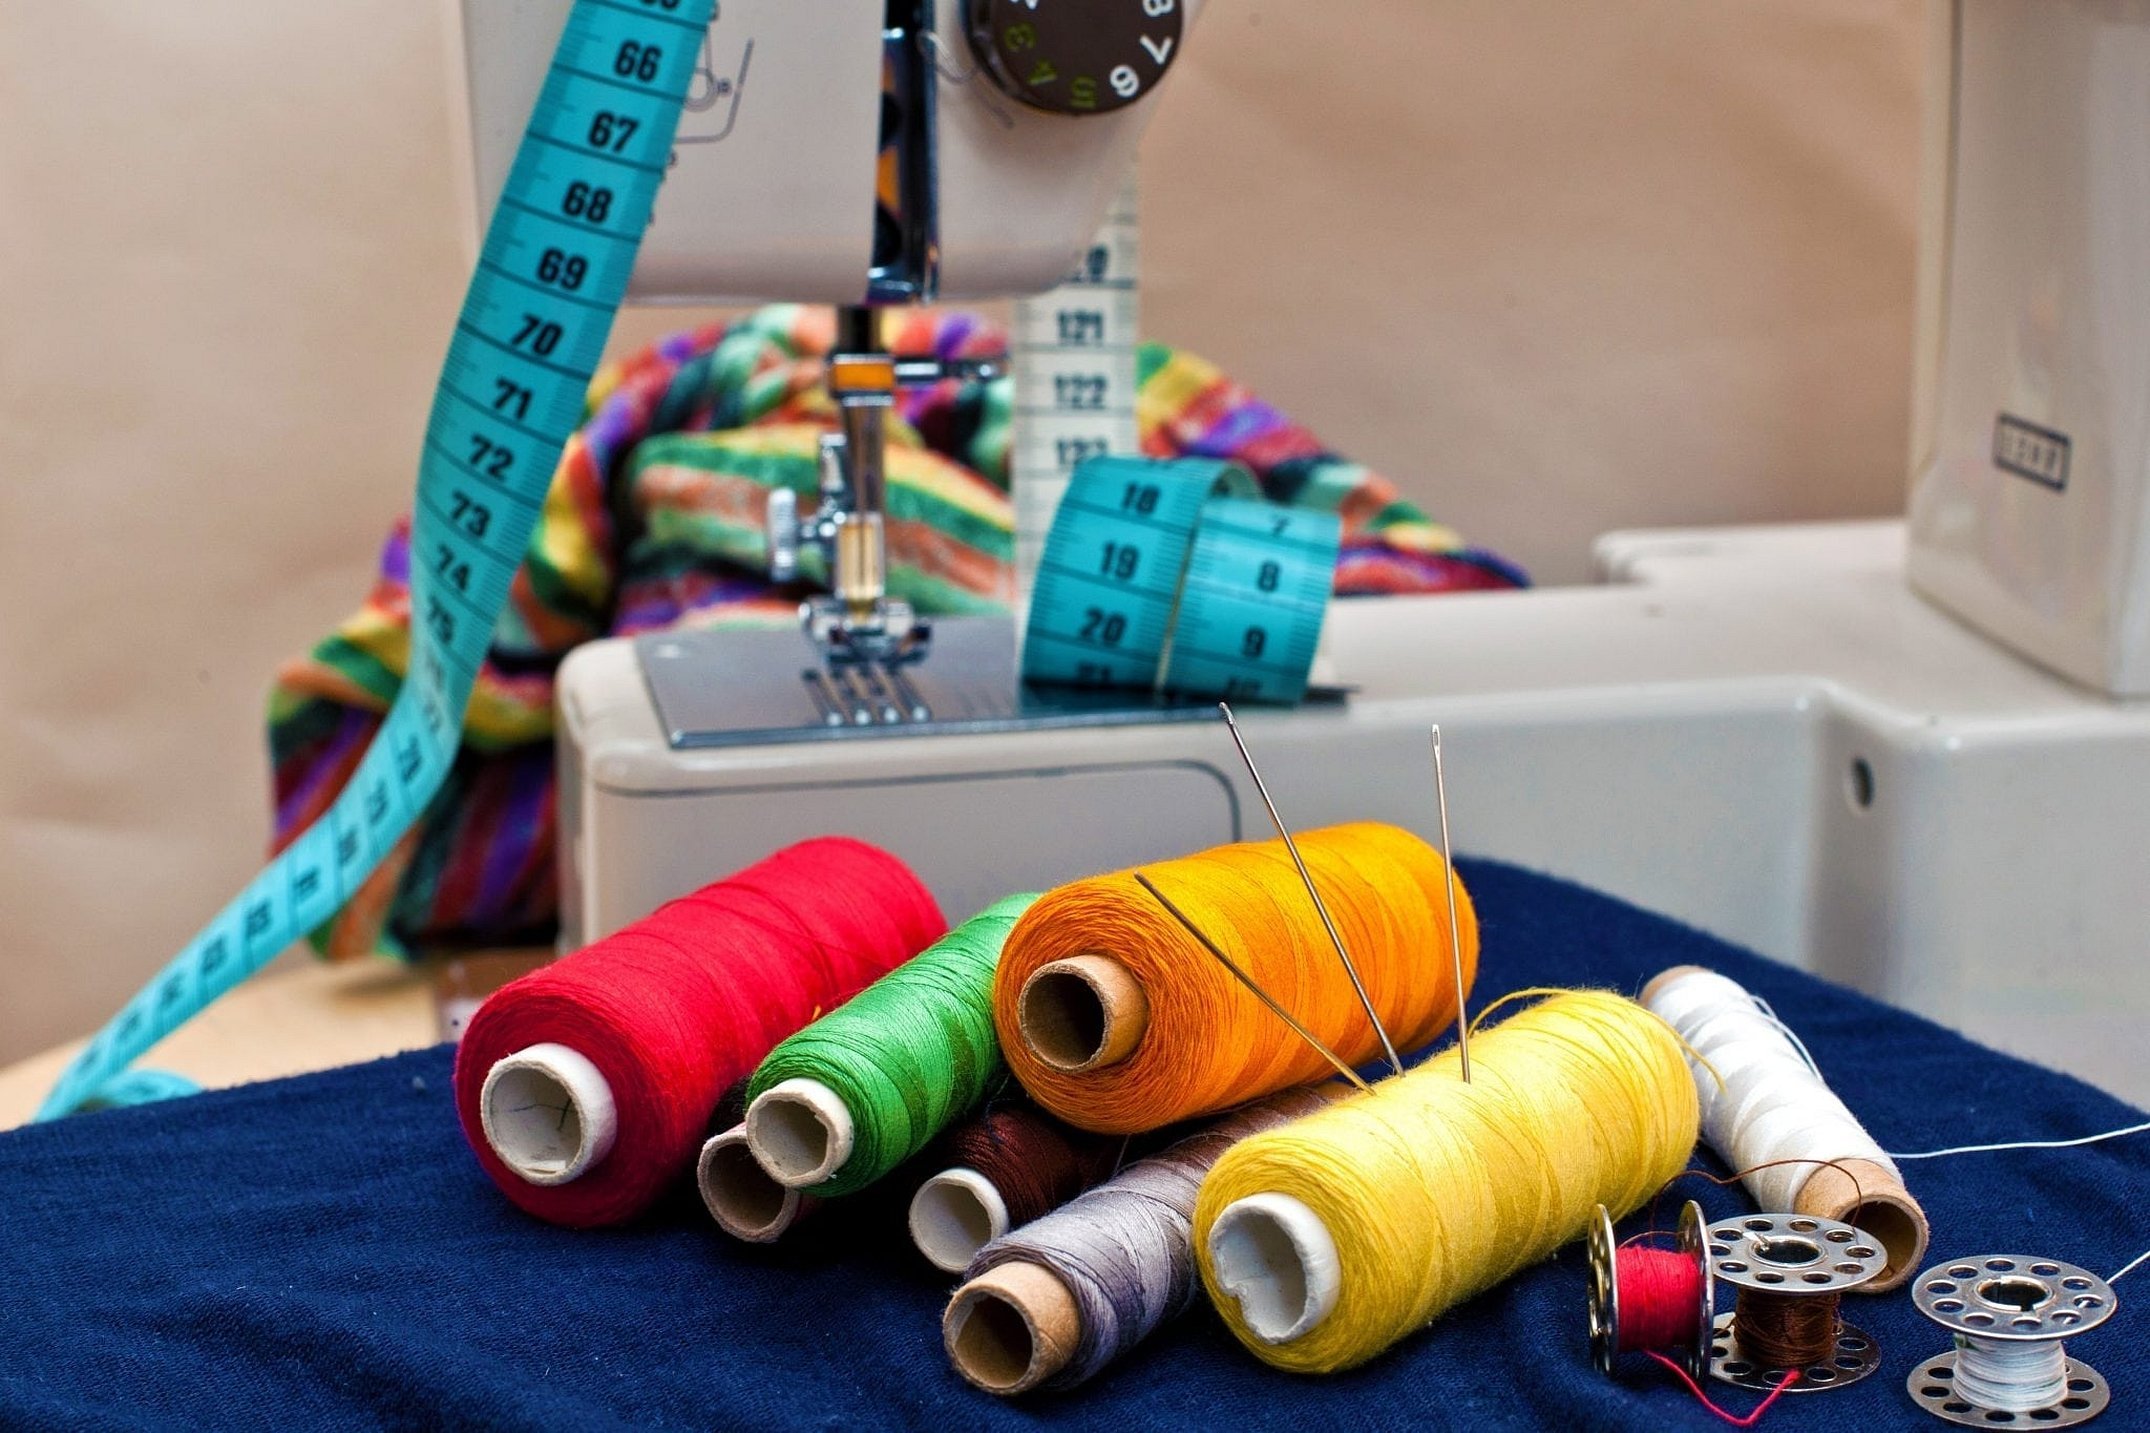
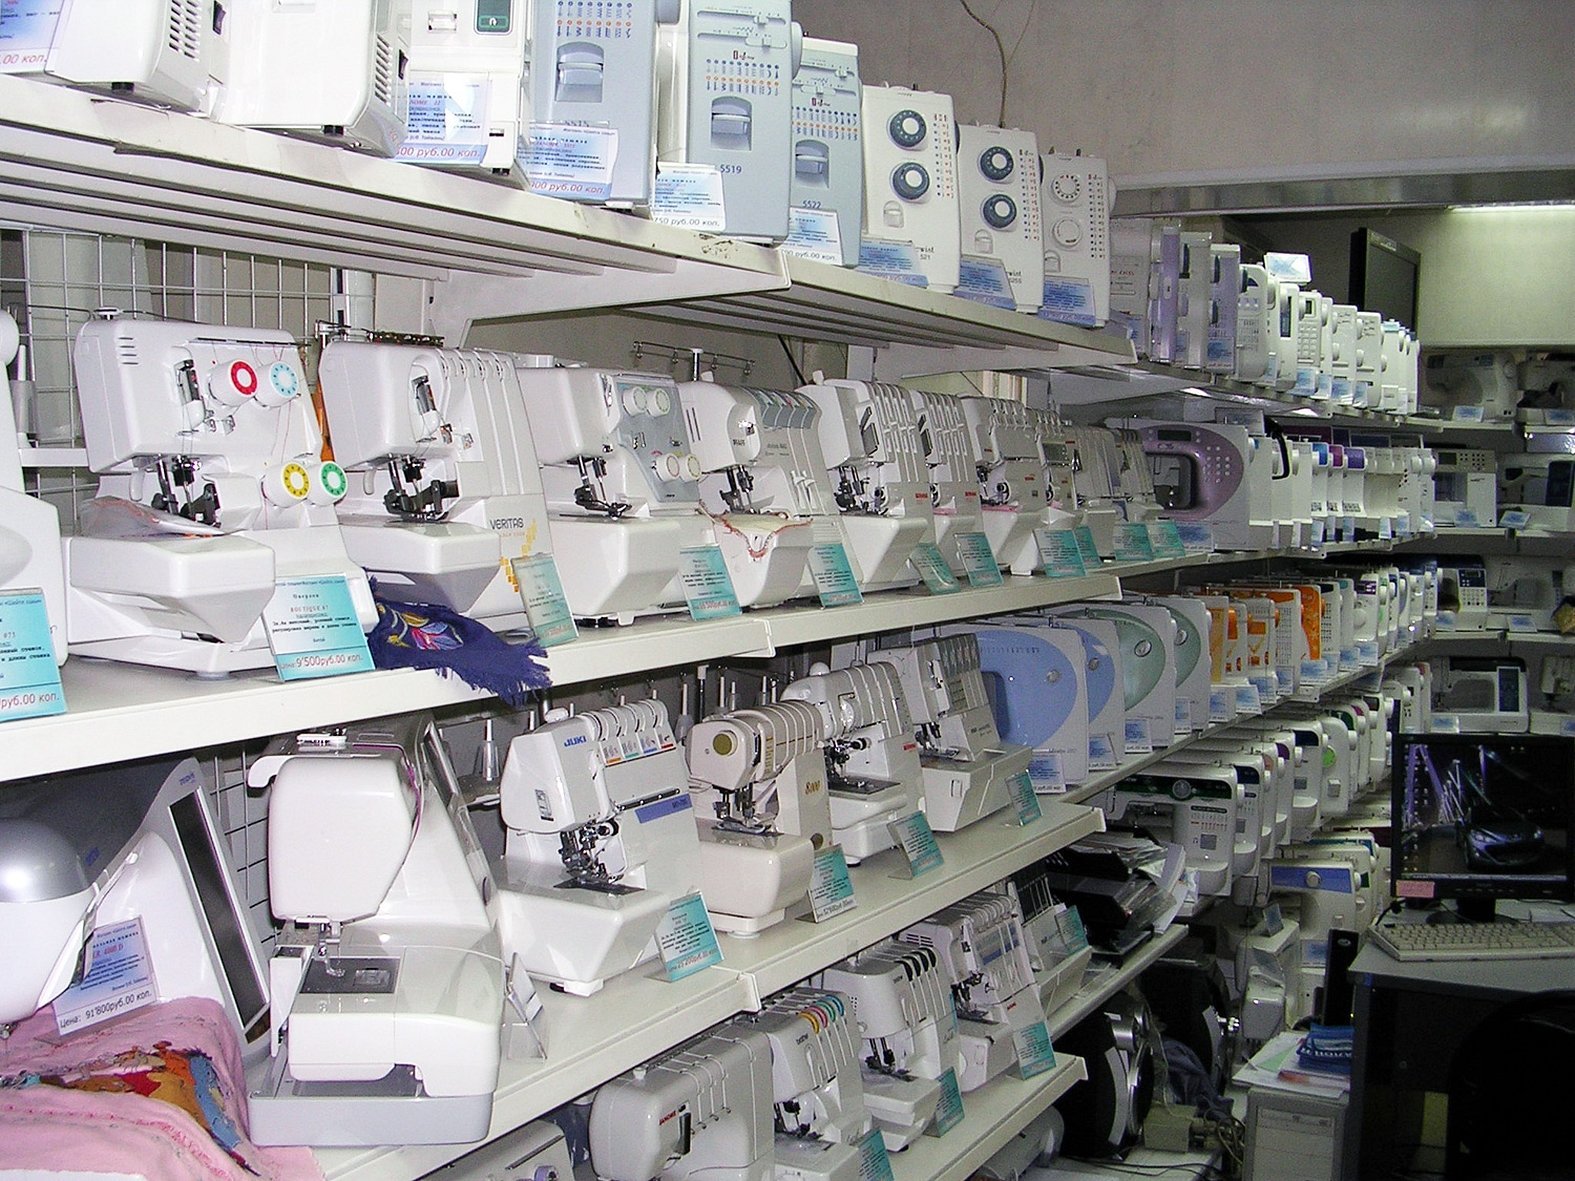
- Decide on the main tool - a sewing machine. The choice depends on the purpose. If you do not want to professionally sew custom-made items, do not spend money on expensive options with hundreds of functions that you will not need. Working with professional models is difficult. You should choose household machines.
- Review typical sewing mistakes. This is often explained in lessons for beginners. It is better to take them into account right away than to learn later by correcting them on materials.
- Next, they learn to take measurements. The entire subsequent work depends on the correctness of this process. Men's or women's clothing will be too small, too big, or will lie uncomfortably if the parameters are determined incorrectly.
- Familiarize yourself with basic patterns. Find examples of skirt or lambrequin cuts. It is necessary to understand the essence of pattern construction and learn to determine the type of finished item. Or, using finished clothing as an example, mentally lay it out on paper.
Important! It is recommended to use several sources for training beginning seamstresses.
Features of taking measurements
When reading about sewing, it is necessary to dwell for a long time on the peculiarities of taking measurements. If you skip this stage of training, you will not be able to develop further. The basic rules that you need to adhere to:
- Before measuring the parameters, put on only underwear. It is not recommended to choose push-up, it changes the volumes.
- Take the most natural pose possible. The pogs are placed at shoulder level.
- Each measurement is taken several times.
- The measuring tape is placed so that it lies snugly, but not tightly.
- The shoulder points and the location of the seventh cervical vertebra are marked.
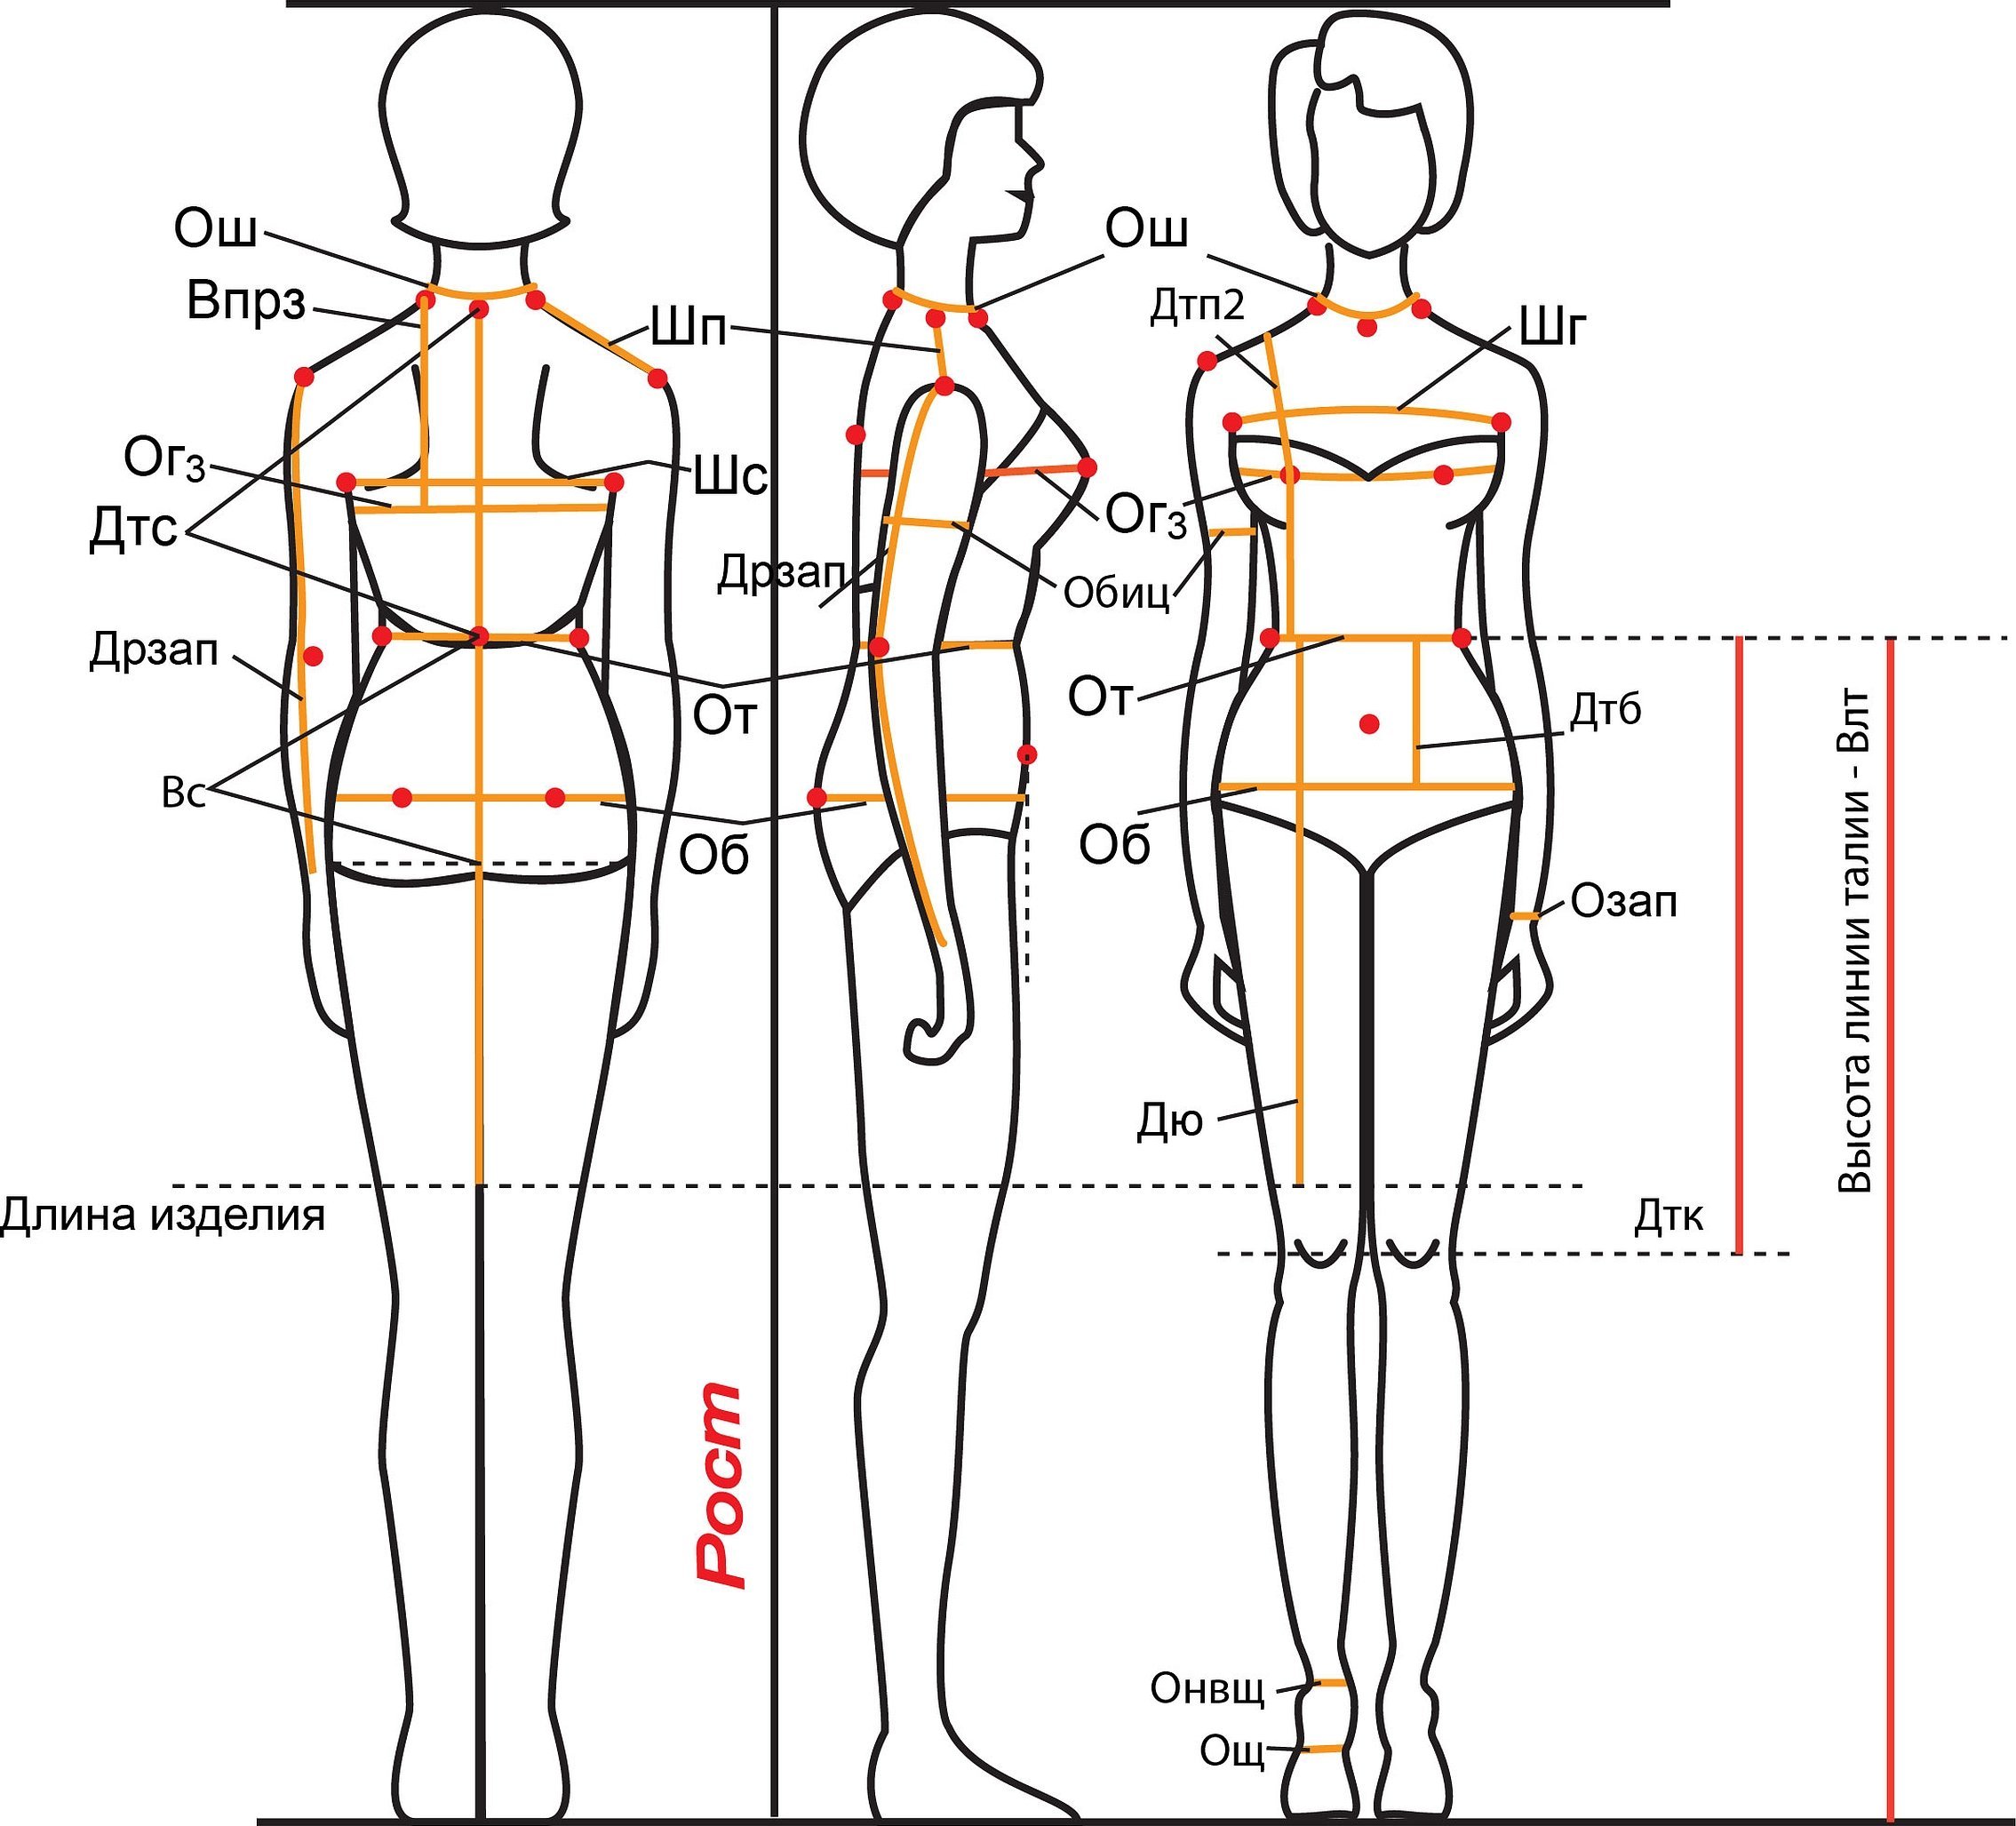
Important! In the diagrams, "H" is the height, "L" is the length, "O" is the girth, and "W" is the width.
To measure the total length of the garment, measure the height of the model with a centimeter. The first point of the centimeter tape is the seventh cervical vertebra. Then the tape is lowered down the vertebra to the waist and further to the end of the garment. This is an example for a dress.
The length in front starts from the waist, dropping a centimeter along the stomach to the floor. The measurement on the side also starts from the waist along the hips. The shoulder length starts from the neck to the beginning of the arm. The arm is measured from the shoulder to the little finger. If the sleeve is three-quarters, the tape stops at the elbow. The height of the hips is measured from the side from the waist to the hip line. The height of the seat is also necessary.
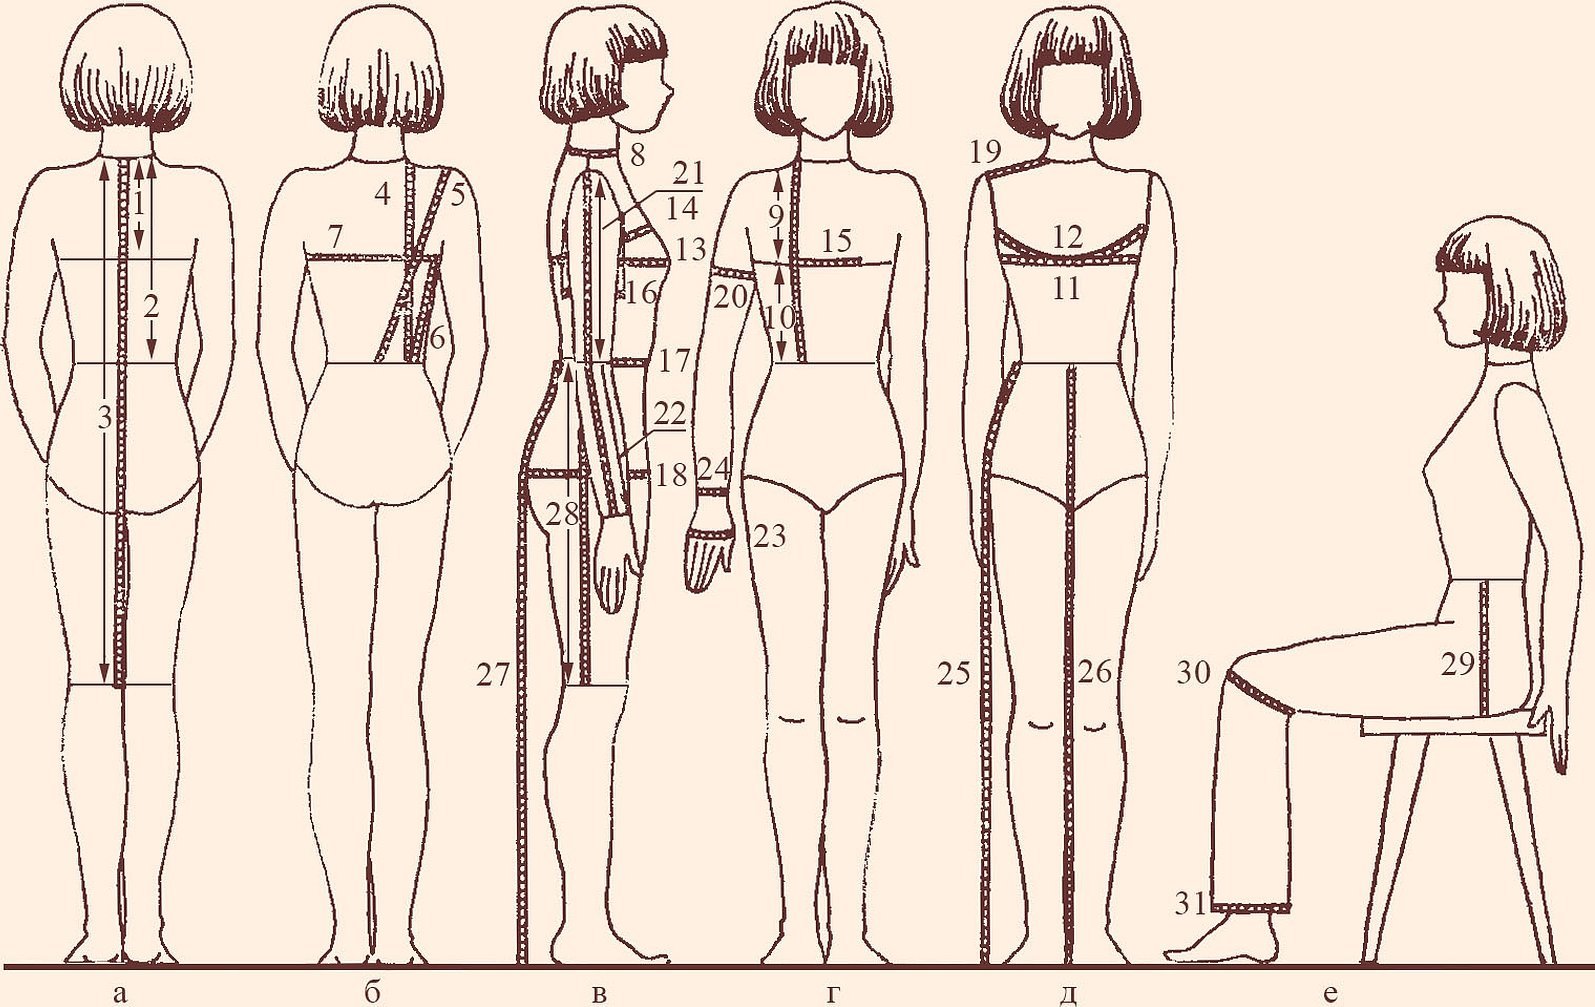
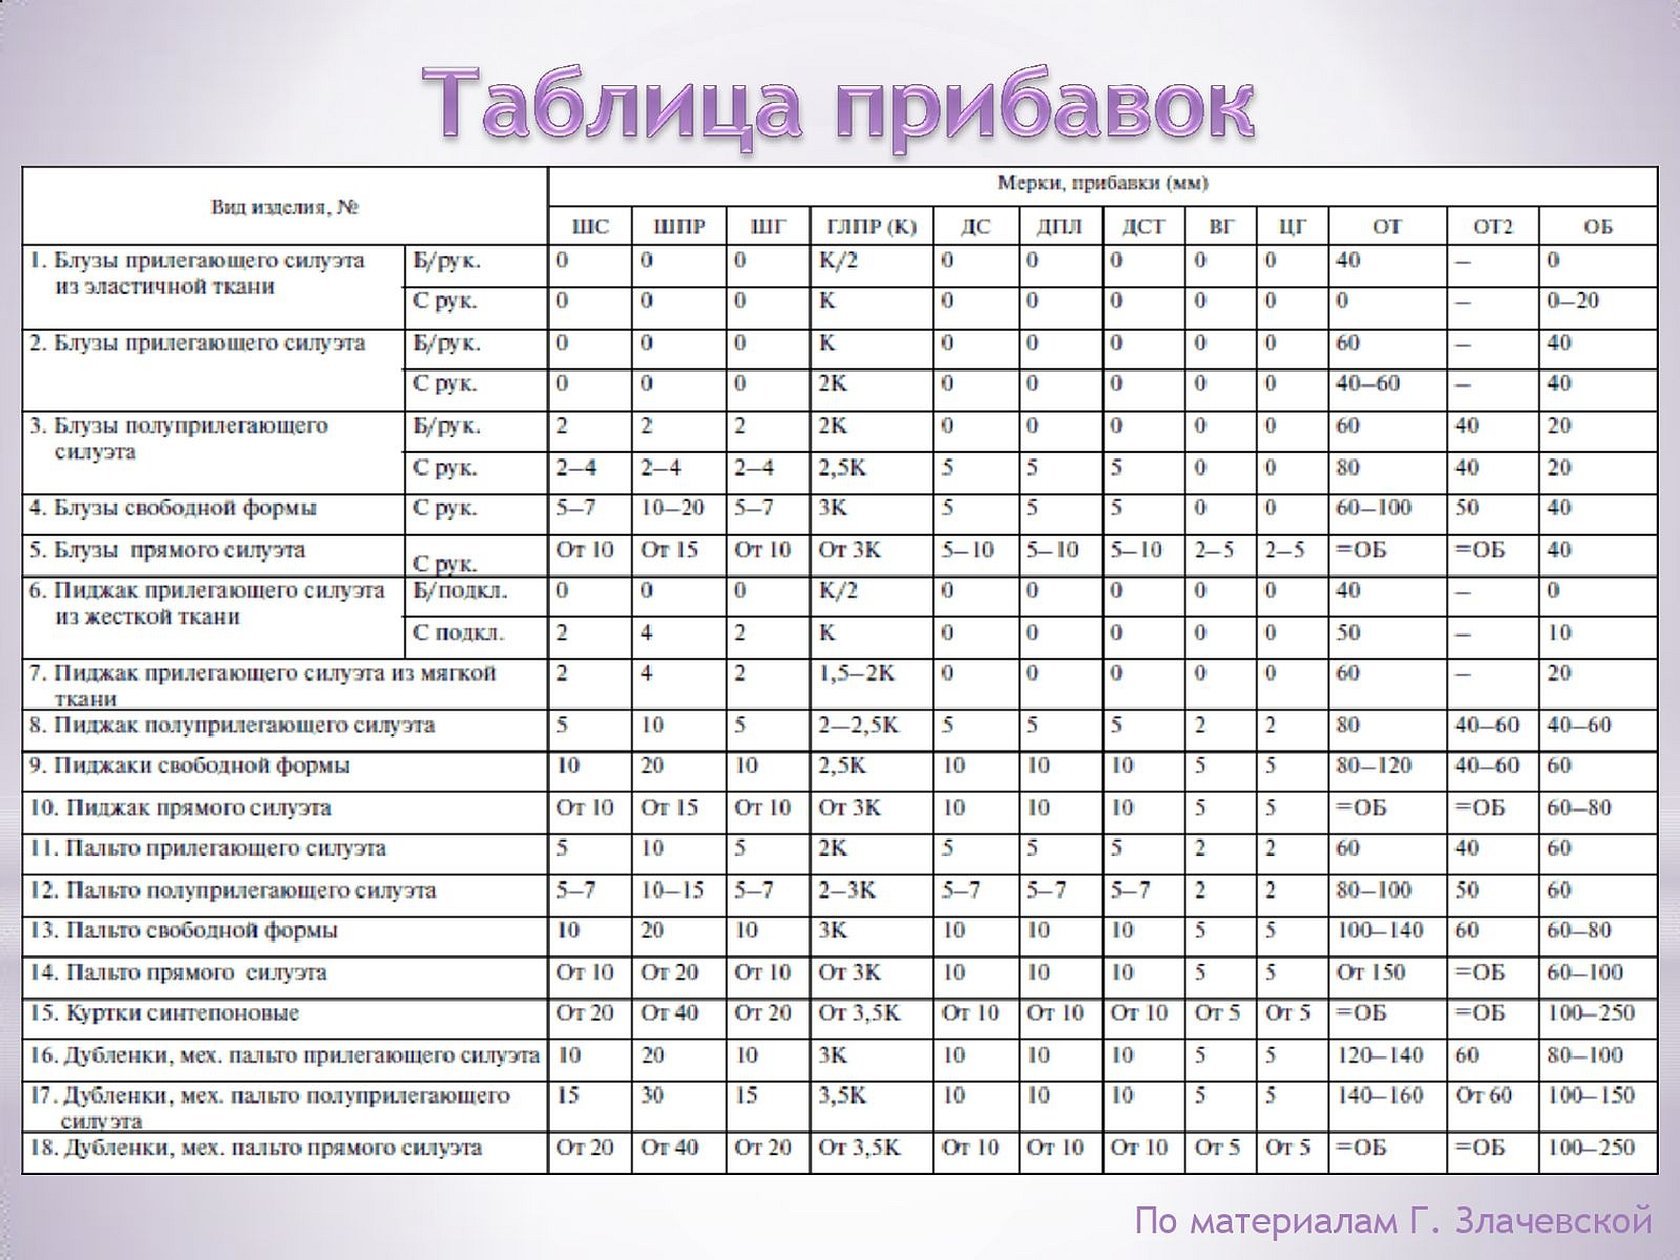
For women, measure the chest circumference, as well as under and above it. Determine the parameters of the waist, hips, legs. Legs are measured 15 cm above the knee. Look at the circumference of the calves, neck, wrist. It is important to make allowances so that the clothes are loose or tight-fitting, tight-fitting. Each type of product has its own number of allowances.
Important! An apron is one of the easiest options to sew when you are first getting to know sewing.
All about pattern making and fabric cutting
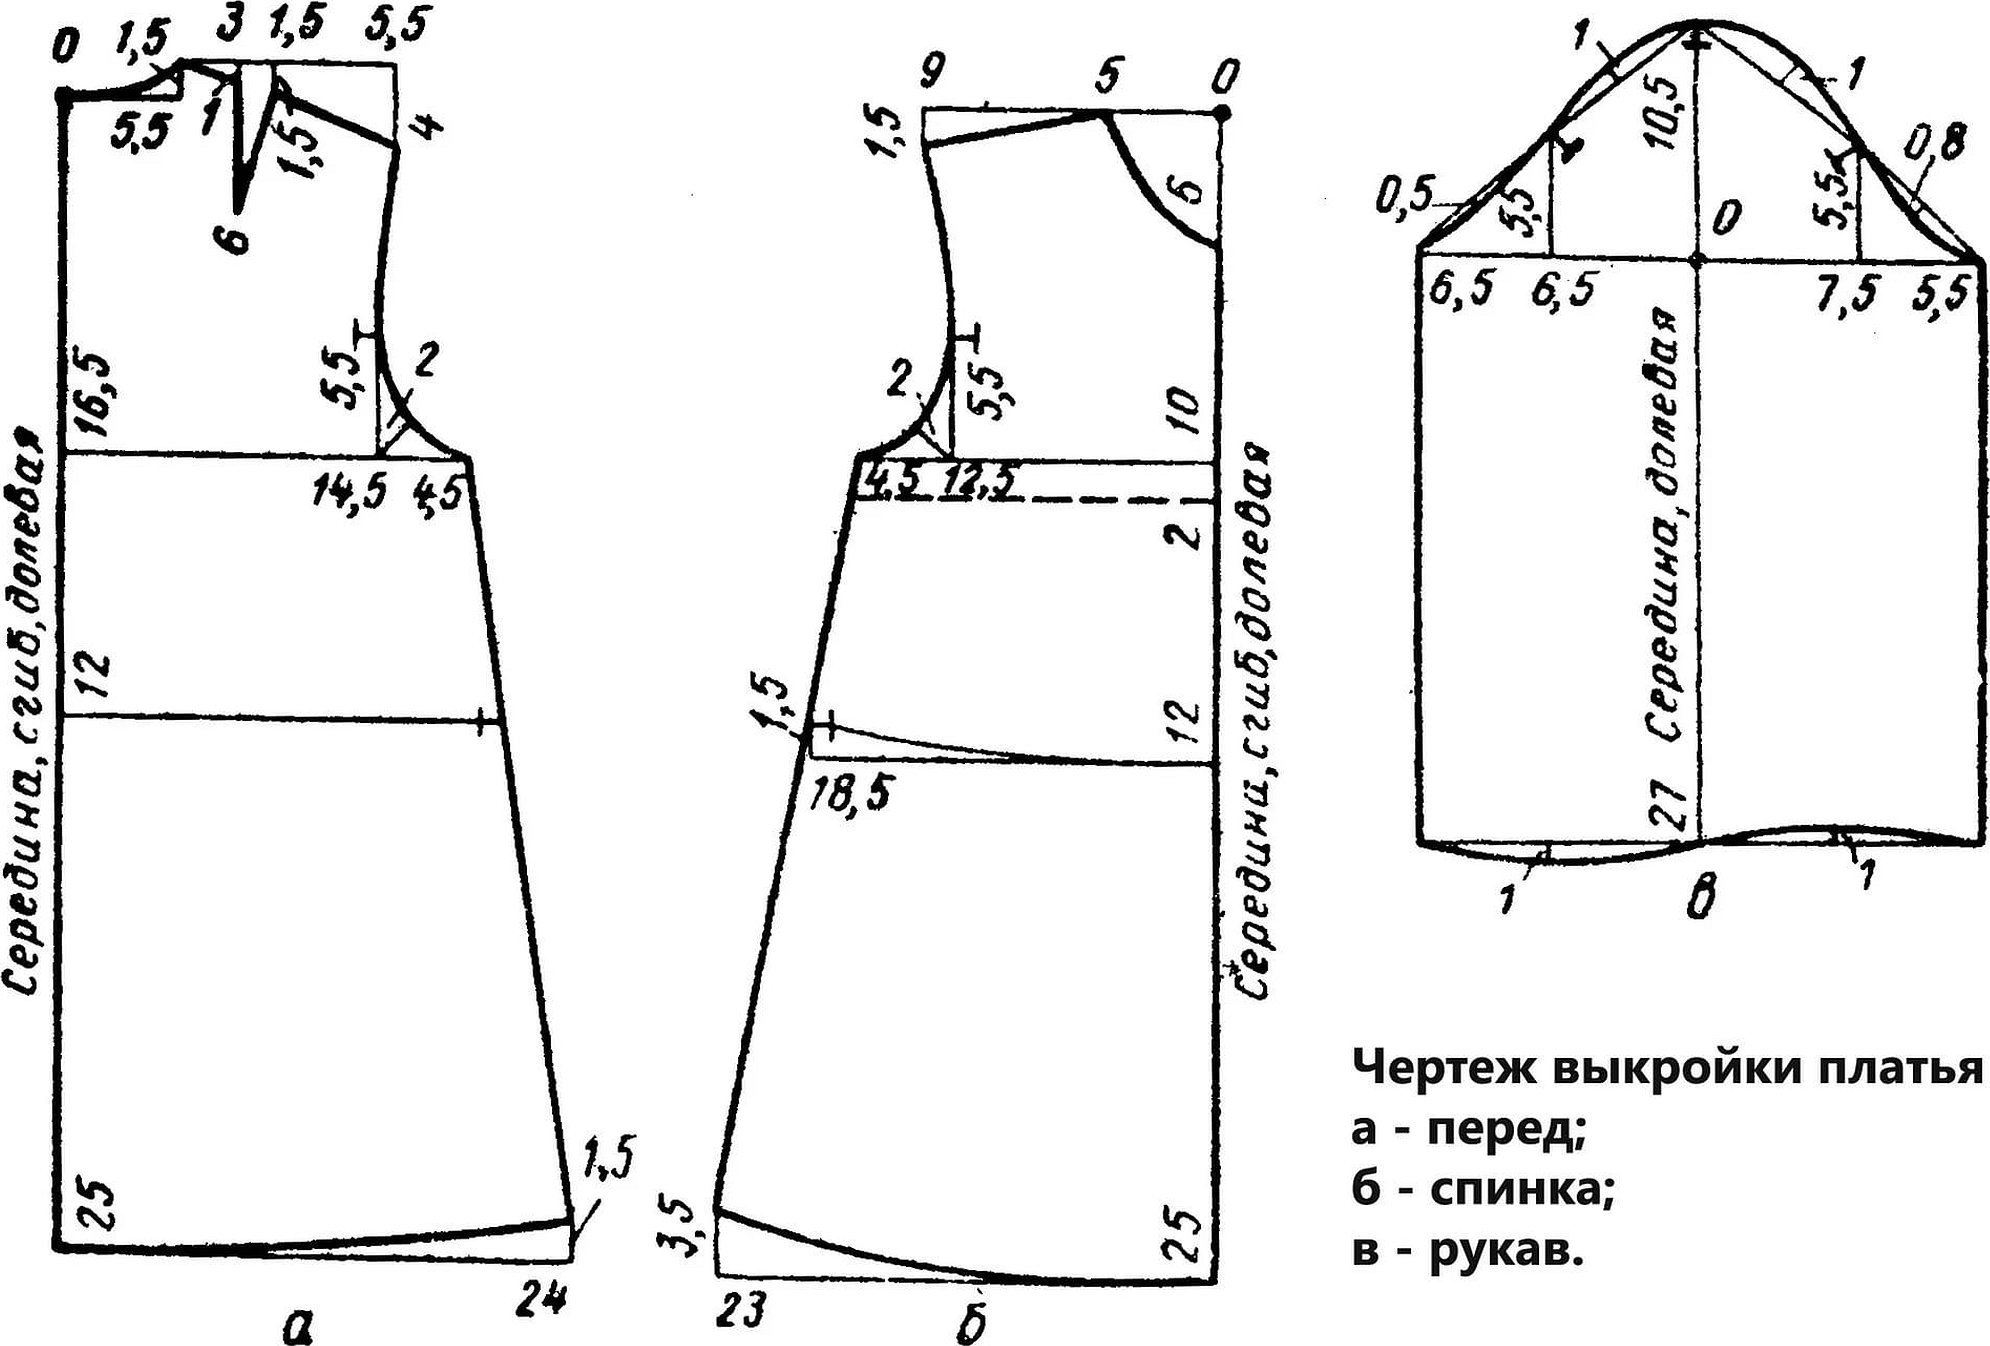
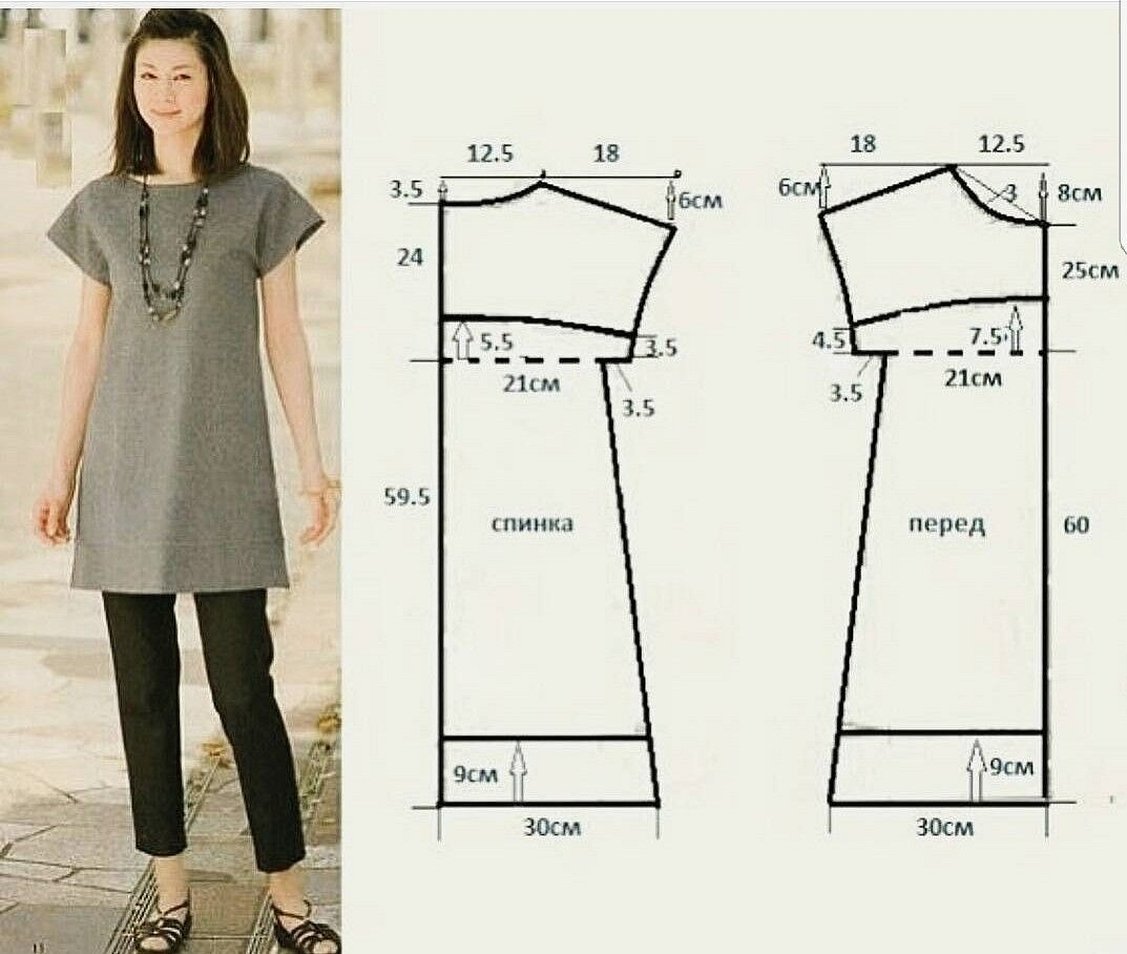
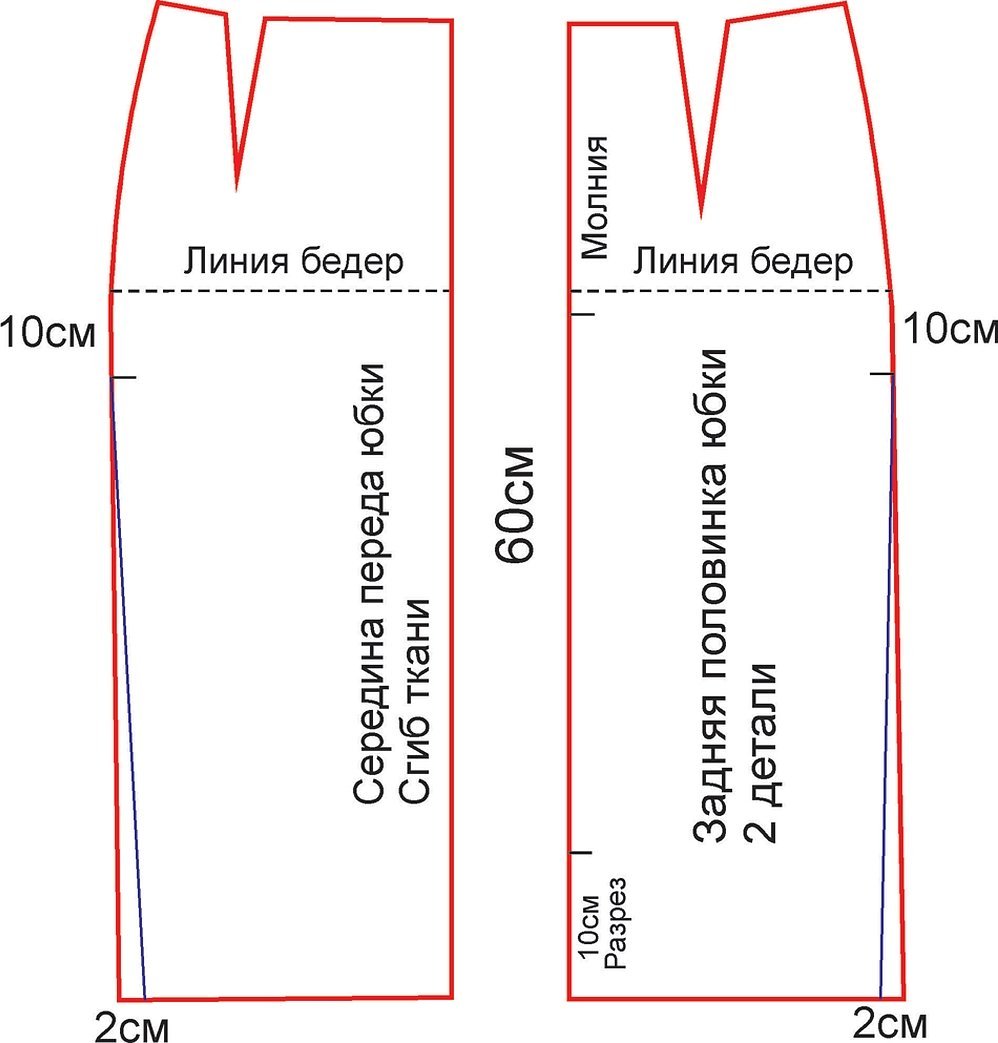
Cutting and sewing from a pattern should be studied starting with simple items. This could be a skirt or a light, simple dress. The clothes should be made of medium-density fabric, as light materials are also difficult to work with.
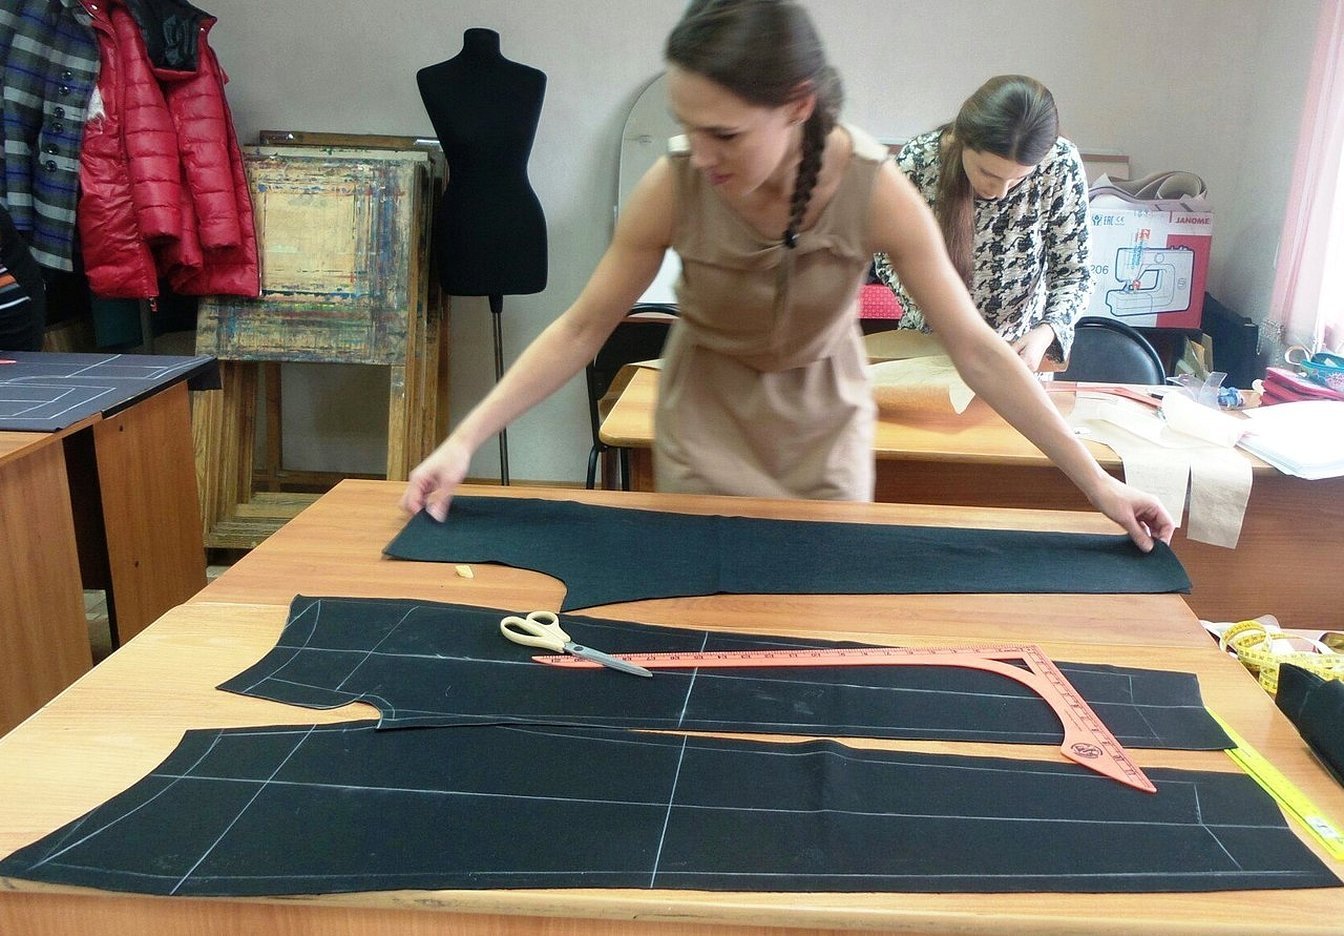
A large table is used to lay out the basic product parts. It is inconvenient to lay out the fabric and patterns on the floor. At this stage, chalk, pins, a ruler or a measuring triangle are required.
Important! When sewing and cutting, you should double-check the measurements and allowances several times.
After the basic pattern is constructed, it is checked for accuracy, and the control lines are also reviewed. The waist and hip lines are checked. The girths of body parts are measured. All allowances for the convenience of clothing are recalculated.
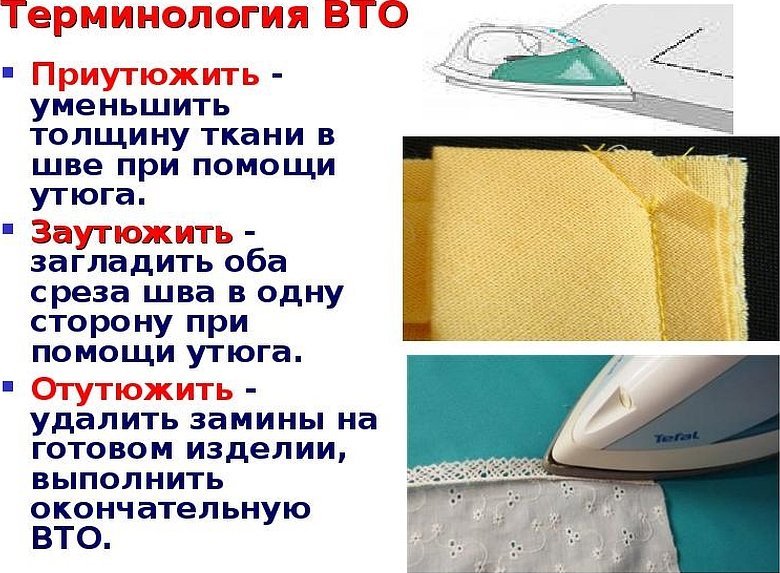
Before cutting, prepare the material. The fabric is treated with a steam iron. Wet-heat treatment is carried out depending on the type of fabric.
What you need to remember when cutting:
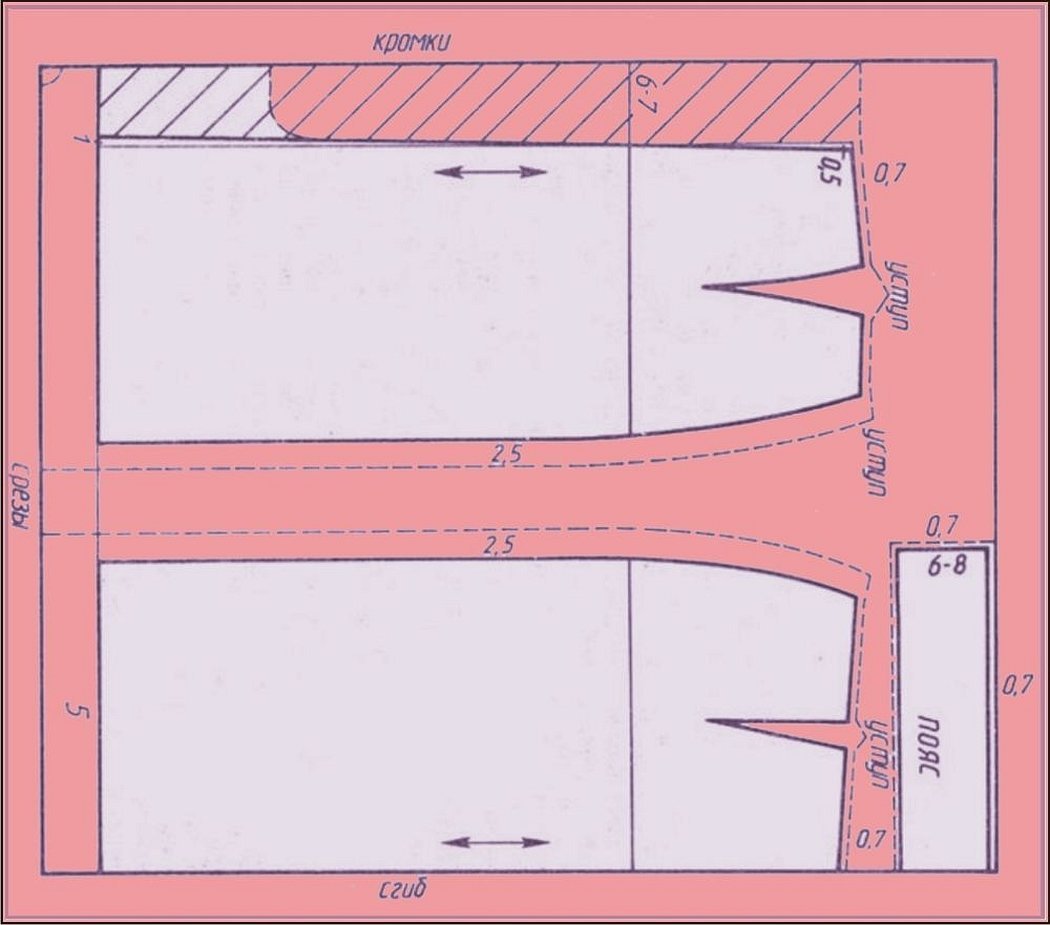
- The grain line is parallel to the edge. The cross line is perpendicular.
- To determine the direction of the threads, the flap is pulled sharply. The material will not stretch along the grain threads. Cotton appears when pulled sharply.
- The cut is folded in half. The pattern pieces are fastened.
- Belts, facings and small pieces are placed between the main pieces to save money.
- If the material has pile, it should be directed from top to bottom.
- Next, the parts are secured and the outline is outlined with a marker. Allowances are made. Control lines are transferred to the front side with snares.
Patterns are laid out on fabric in different ways, depending on the type of product. Here are the main options:
- The layouts are laid out in half.
- The layouts are laid out in half. They are connected cut to cut. The details lie along the transverse thread. Most often, the dressmaker prepares the future blouse in this way.
- The pieces are laid out at an angle when going to sew skirts or dresses.
- Also used are the two-fold and partial-fold layouts for men's and women's clothing.
To ensure that everything is done technically correctly, it is important to understand the direction of the threads and its importance for self-sewn clothing.
How to make a sewing pattern yourself
In cutting and sewing courses from masters for beginners, the topic of the need for a pattern is discussed. And they also tell you how to make one at home. First, you need to understand what it is and why a beginner seamstress needs a device.
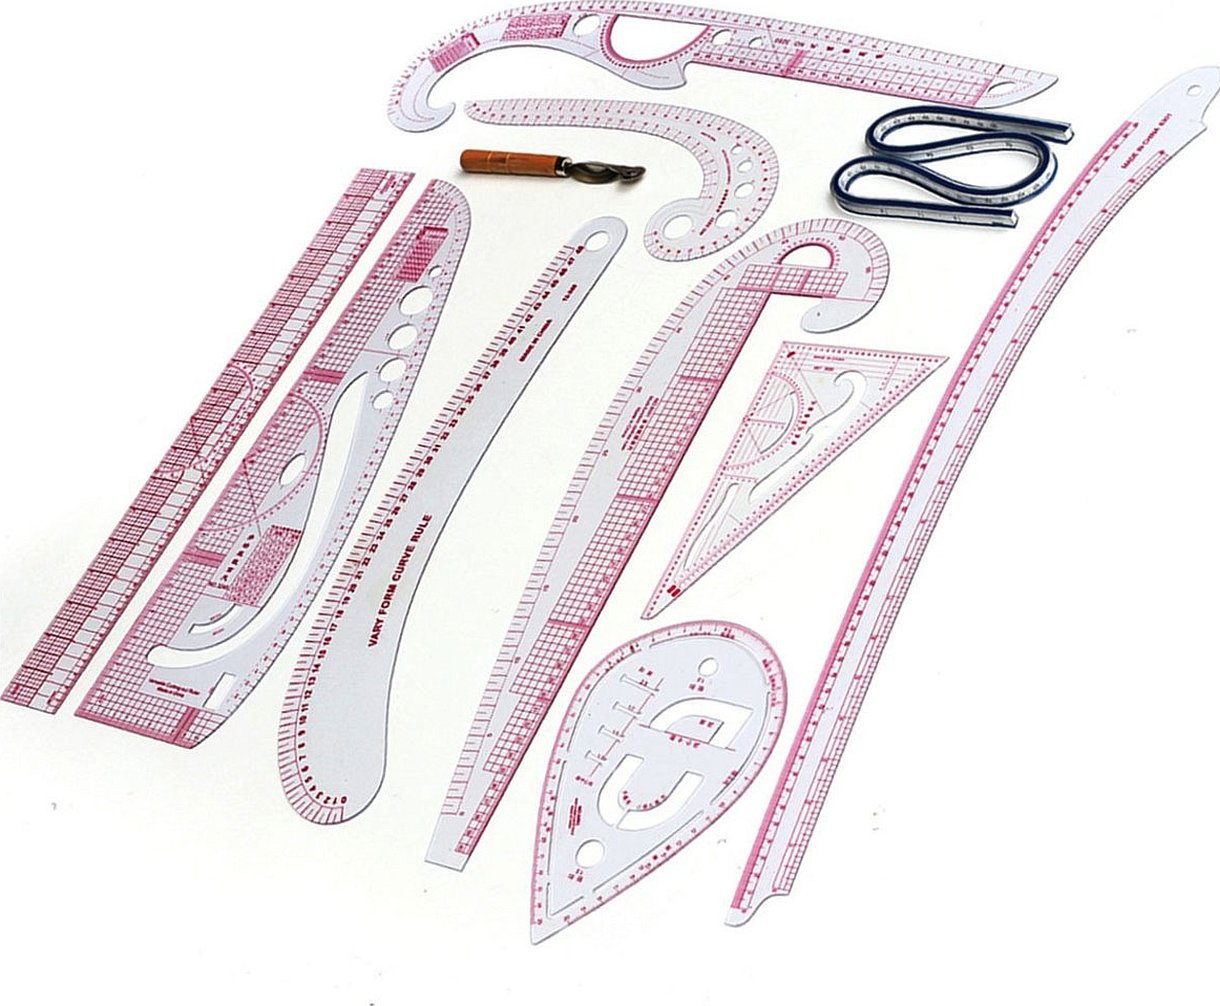
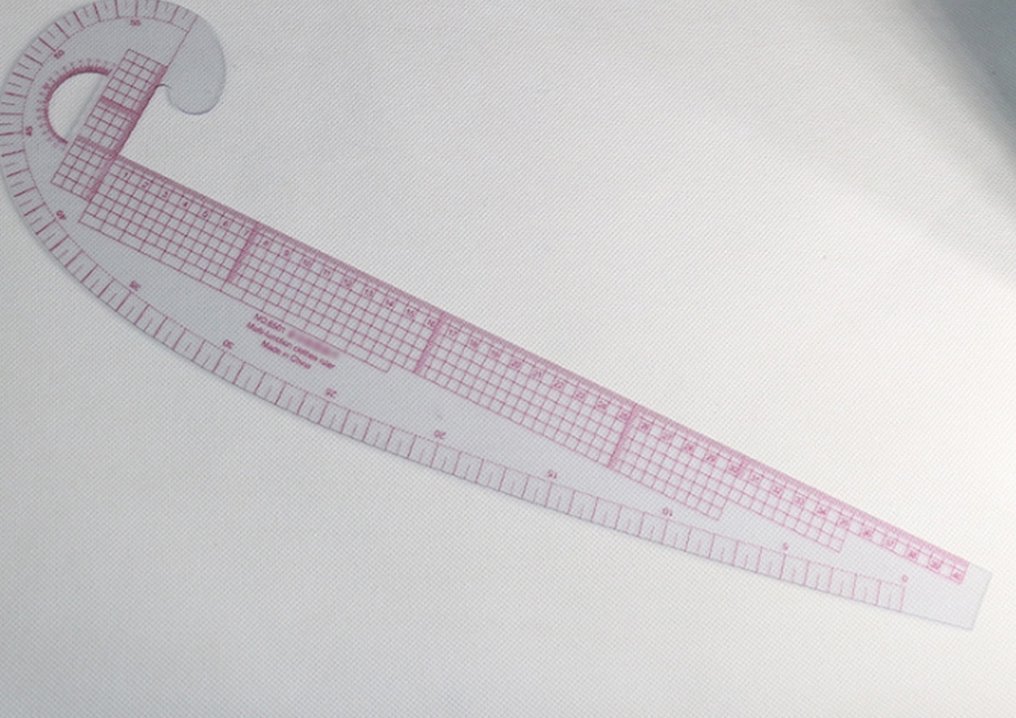
A sewing pattern, made by hand or purchased, is necessary for constructing a drawing on fabric. Curved patterns make the work of tailors easier. Only experienced specialists can draw an intricate pattern by hand. Beginners do not have a trained eye. At the initial stage, it is recommended to have an oval pattern like a drop at home, as well as a long one like a saber.
The droplet helps to shape the shoulder joints. The saber is designed to draw smooth lines of side seams. There is also a French pattern, it suits everyone.
How to make a pattern:
- Download file for printing. Easy to find on the Internet. You can first choose two main types.
- Print at 100% scale. It is important that the image is of high quality and the marks are clearly visible.
- Cut to shape. Glue paper to thick cardboard. If it is possible to cut the shape out of plywood, that would be good. Patterns are not used once.
Important! One of the options for the first job on a sewing machine is bed linen.
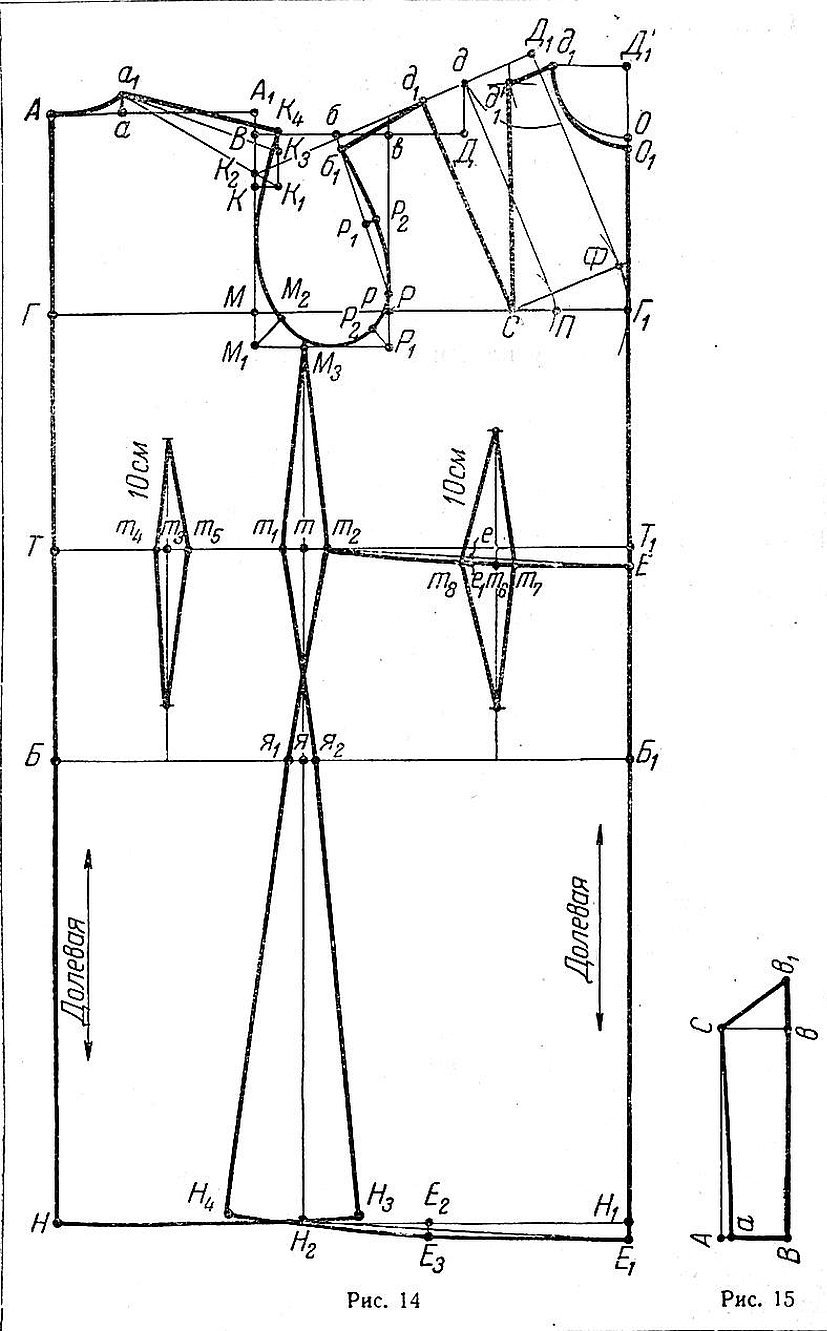
Construction of a dress base pattern using the 10 measurements system
The construction of a dress base pattern using the 10-measurement system is suitable for beginning dressmakers. Even professionals use this method. Since the patterns are precise according to the method, and the clothes fit the figure well, repeating the size.
The pattern of the base of a dress or other clothing according to the 10 measurements system has the following features:
- Patterns are easy and quick to build. There are only a few formulas for calculation. This saves time and effort. Even a beginner needlewoman can build a basic grid.
- To create a pattern, you need 10 measurements. But at this stage, it is recommended to stop for a long time. The parameters must be as accurate as possible.
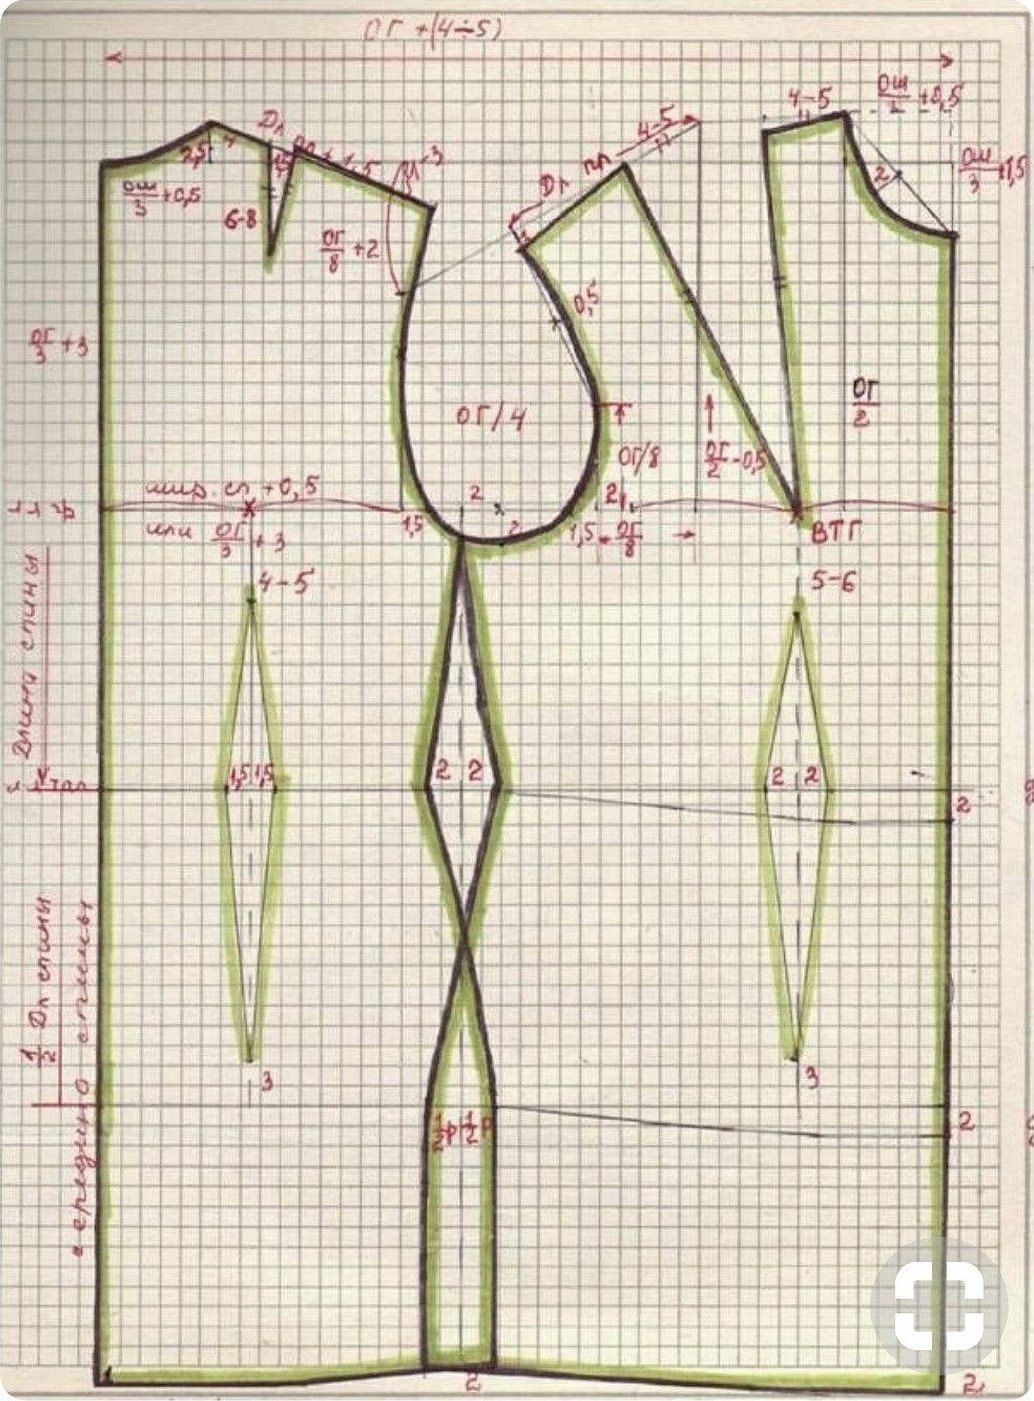
- To form the armhole, you do not need to make additional calculations on your own. The sleeve joint is built in the system.
- The bust dart is calculated residually. When performing basic calculations, it is possible to reach this figure.
- The pattern is rebuilt. Darts are suitable for creating any clothes. It can be a dress or a coat. A jacquard skirt or jackets of different styles.
- It is important to make a 3 cm allowance for those who have a size larger than 44. Allowances are not made for corsets, stretch fabrics. For those who have a size smaller than 44, a 2 cm allowance is made.
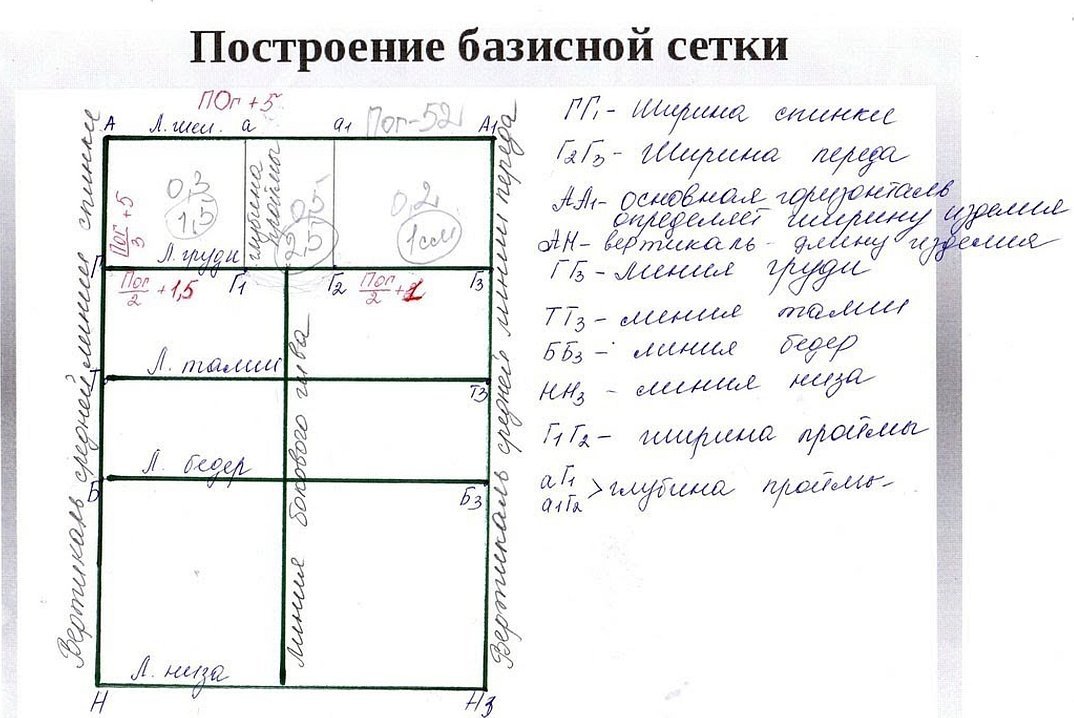
The author of the method records the courses and constantly updates them. It gives a clear example of products that were made using the Riga calculation system. What is included in the course:
- The procedure for taking measurements from a female figure. Features of 10 parameters.
- Building a basic grid of 10 lines. Creating calculations for the back, shelf and armhole. Determining the waist and hip levels.
- Calculations of shoulder dart, determination of shoulder slope.
- Calculations for the shelf. Location of the bust dart.
- Calculations for the armhole. Determining its depth and deduction without formulas.
- Definition of waist darts.
- Construction of a sleeve on a drawing.
- Estimation of parts, use of a model.
- Analysis of the landing, making adjustments.
- Working with different sizes.
Thanks to the system, you can work with different fabrics, sizes and styles. And also save energy and time.
Sewing and processing technology
Dress cutting and sewing is divided into several stages. Step-by-step guide:
- Prepare collar, pockets or cuffs if any. Iron and save.
- Process the darts on the back and front. If there are patch pockets, topstitch them.
- Prepare the skirt. Process and stitch the edges.
- Prepare the sleeves.
Assembly:
- Connect the back and front along the shoulder cuts.
- Sew the collar or prepare the neck. Work on the fasteners.
- Sew the side seams.
- Process the bottom of the fabric.
- Sew in the sleeves.
- Connect the bodice and skirt.
- Iron the dress.
- Sew on buttons and other small details. Lace and cuffs.
Basting and stitching of parts, ironing:
- The basting is done with temporary hand stitches. They are easy to detach.
- Before starting the process, the parts are laid out with the front side down and connected in several places.
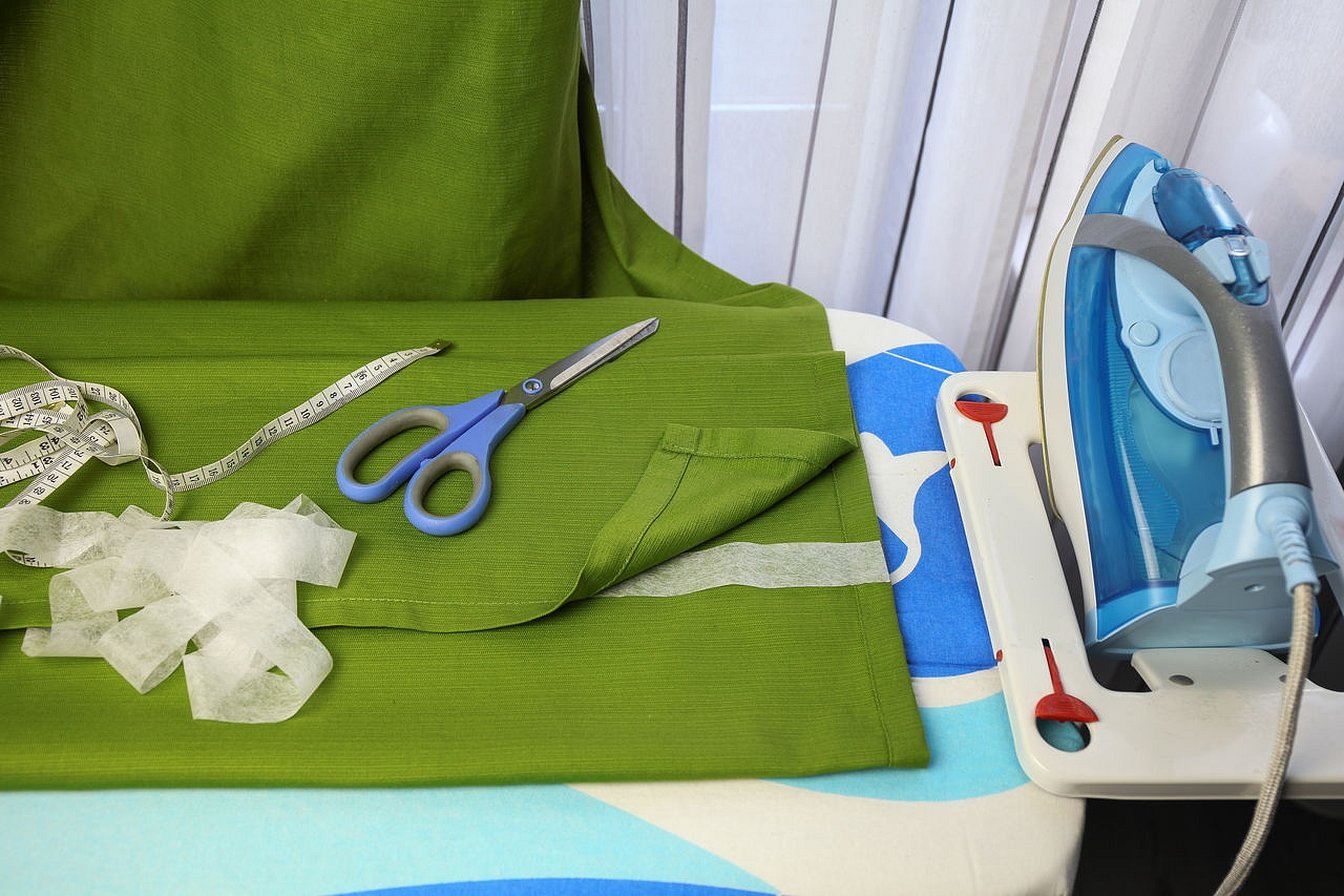
- After stitching, the fabric is ironed with a damp iron until completely dry.
- When ironing, place thick paper under the seam allowances.
- When processing the collar, cuffs, and flaps, use templates made of thick paper.
Important! It is easy to find many fashion ideas in the magazine "Chic: sewing and cutting".
To process the dart, the piece is placed face down along the center line. Its sides are aligned. The edges are connected with pins.
Before sewing for the first time, you should carefully consider the choice of fabric. The pattern may only suit a material that stretches, or vice versa. If there is a pattern on the fabric, you need to consider that you will have to connect the pattern at the joints.
Some dress styles may seem simple at first glance. But you need to pay attention to the description of the master class and roughly imagine the scale of the work. Many difficulties arise with the sleeves.
Bodice pattern
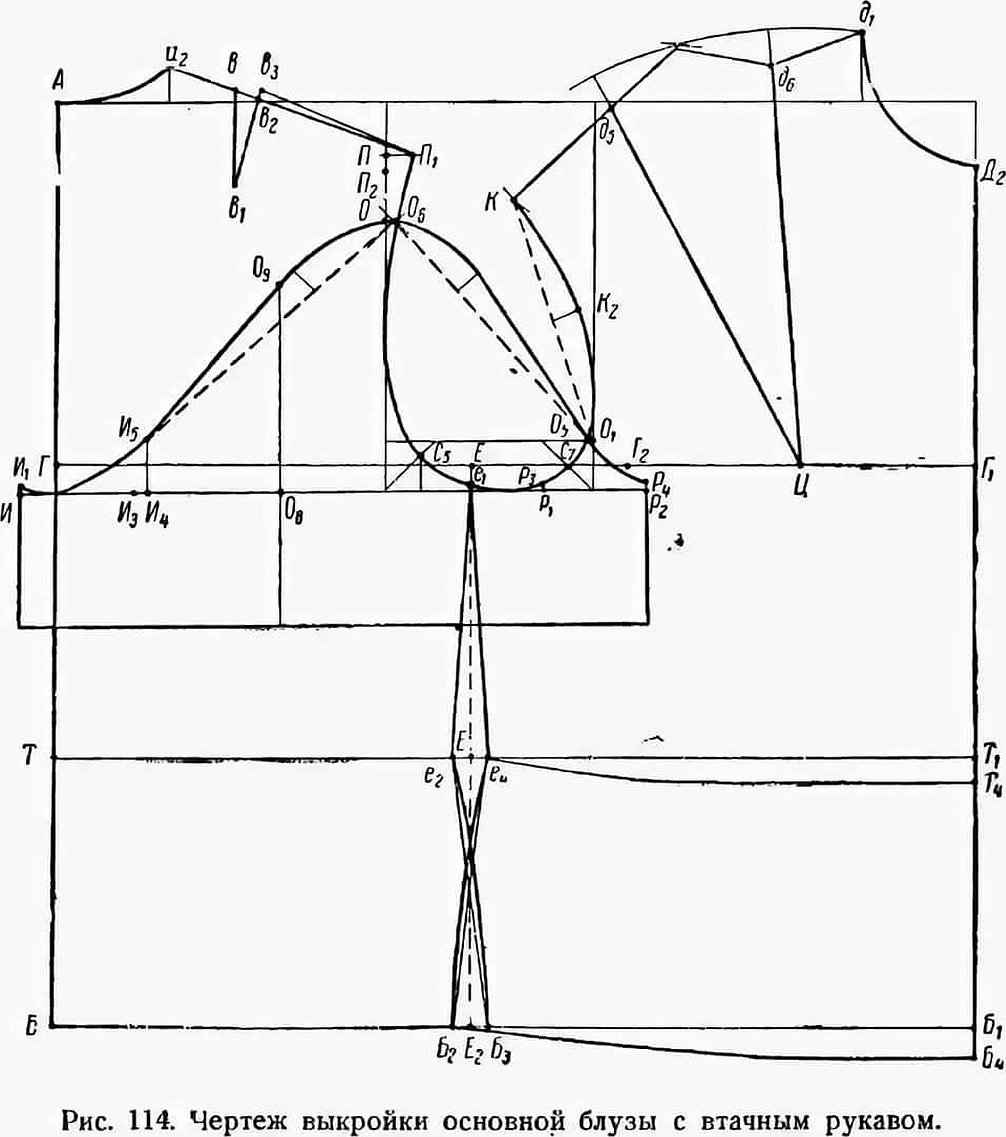
The pattern of the bodice base can be made using the French method. How to get started:
- Take measurements from the model. This is the length from the back to the waist. And also the front to the waist. The height and the center of the chest.
- The shoulder length and chest circumference are required. Then the neck and italy circumference are measured.
- Complete the construction of the bodice.
The middle of the back, the vertical left line are equal to the measurement of the length of the back to the waist. The middle of the strip is equal to the length of the front to the waist. The width of the back will be the chest circumference divided by 4 - 1. The width of the front is equal to the chest circumference divided by 4 + 1.
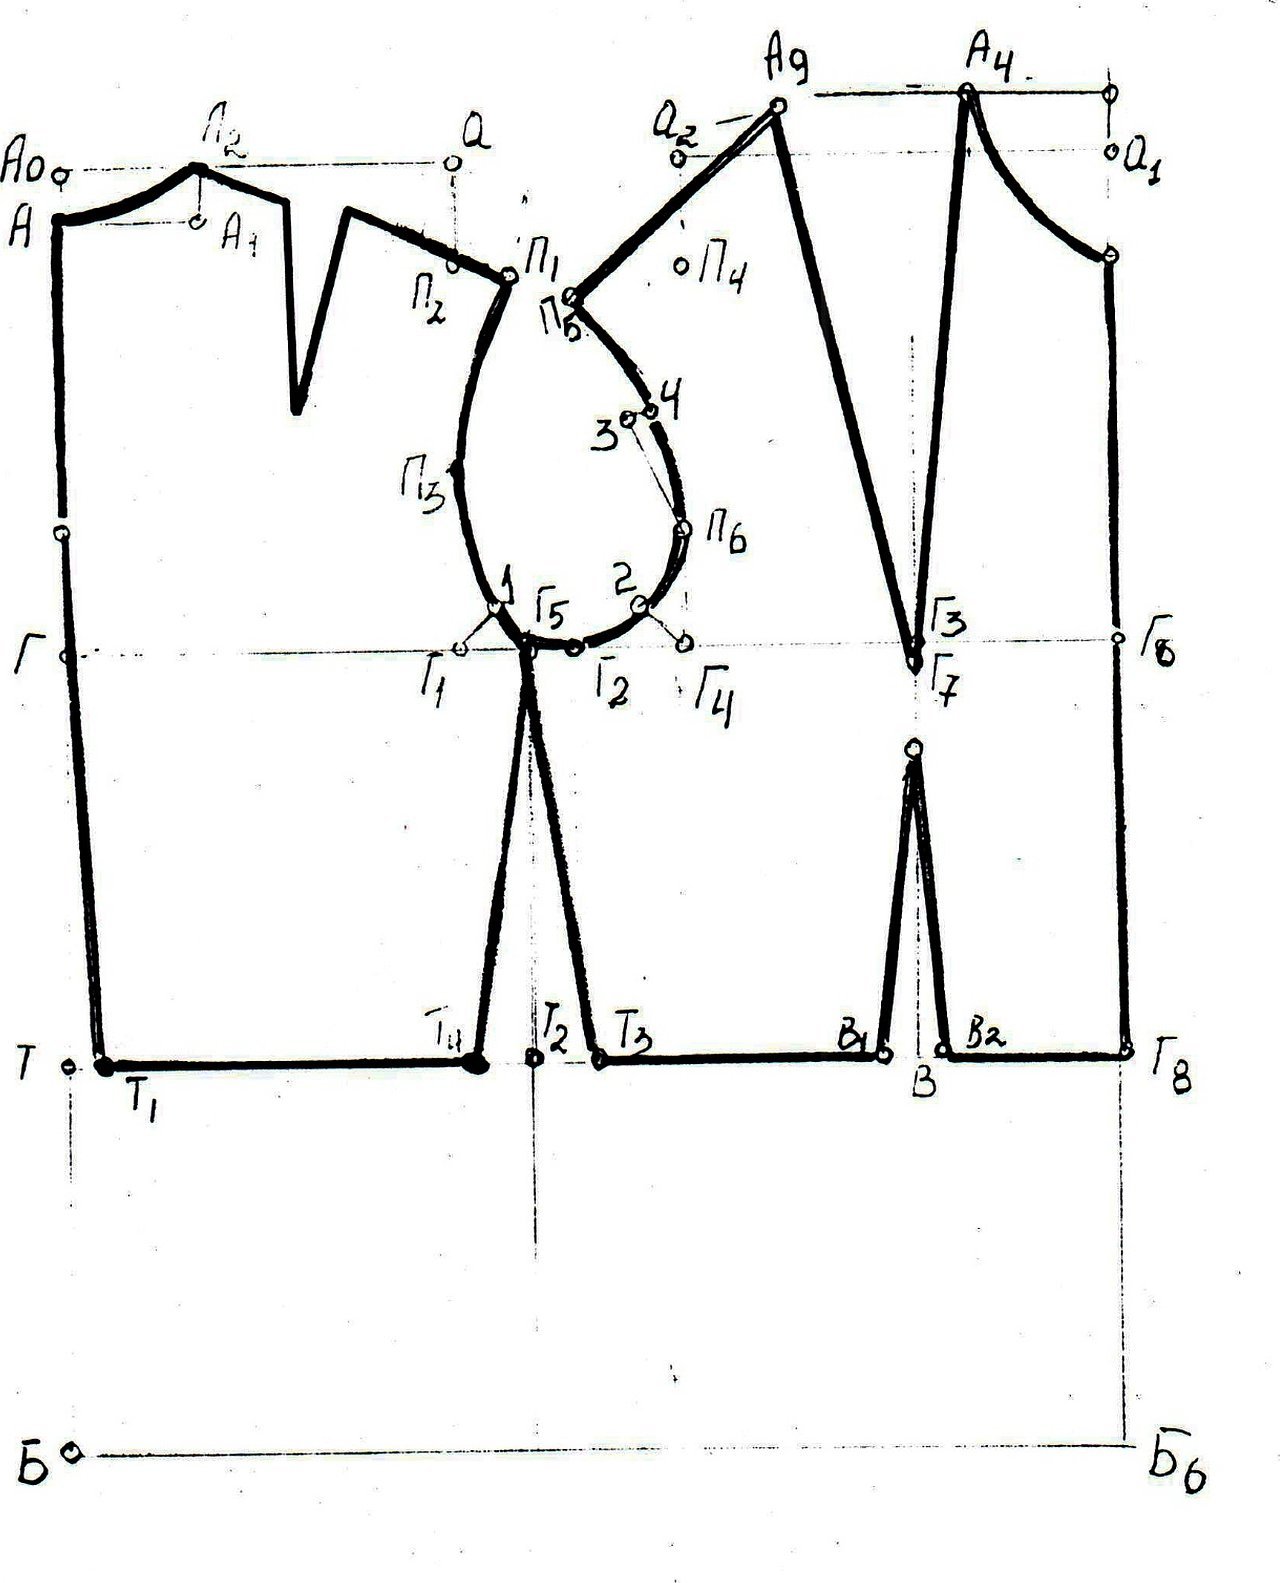
To calculate the depth of the back neckline, divide the neck circumference by 16. If you divide it by 6, you can get the width of the back and front necklines. The depth of the front neckline is equal to the width of the neckline + 2.
An angle of 18 degrees is marked along the shoulder line and 26 for the front. The shoulder lines are drawn. To get the bottom point of the armhole, the length from the back to the waist is divided by 2 and 1 is added.
The reference point for constructing the armhole is equal to the length of the back to the waist - the length of the back to the armhole - the depth of the back neck made on 3 and + 1. To find the center of the dart, put the height of the chest on top and half the center of the chest to the side. The solution of the dart = 1/20 of the girth. Waist darts are equal to the girth of the chest - the girth of the waist.
In order to sew your first clothes yourself, you need to familiarize yourself with the theory of pattern and sewing. It is recommended to first familiarize yourself with the process of creating simple skirts, dresses. Perhaps bed linen and curtains. One of the important stages in the work of a seamstress is taking measurements. To facilitate the process, use the 10 measurements system.


