Sewing boxers is a fairly simple task and even a novice needlewoman can handle it. Their production does not require large financial outlays, and the resulting product will undoubtedly please the person for whom they were made. In order to avoid any difficulties during work, it is necessary to determine in advance all the nuances of sewing this underwear.
- Preparation of materials and tools for drawing up drawings
- Master class and pattern of boxer shorts for men
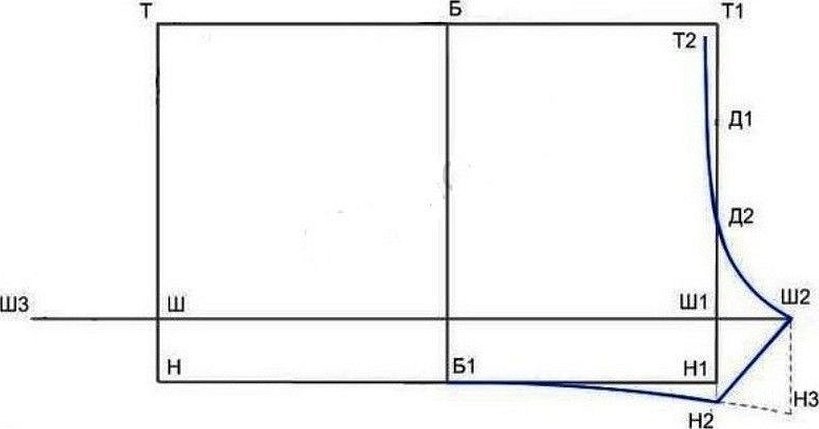
- Layout of the drawing grid
- Side seam line
- Step line
- Front cut line
- Front half step cut line
- Seat line (rear cut line)
- The crotch line of the back half of the underwear
- Top cut line (or waist line)
- How to cut and sew boxers
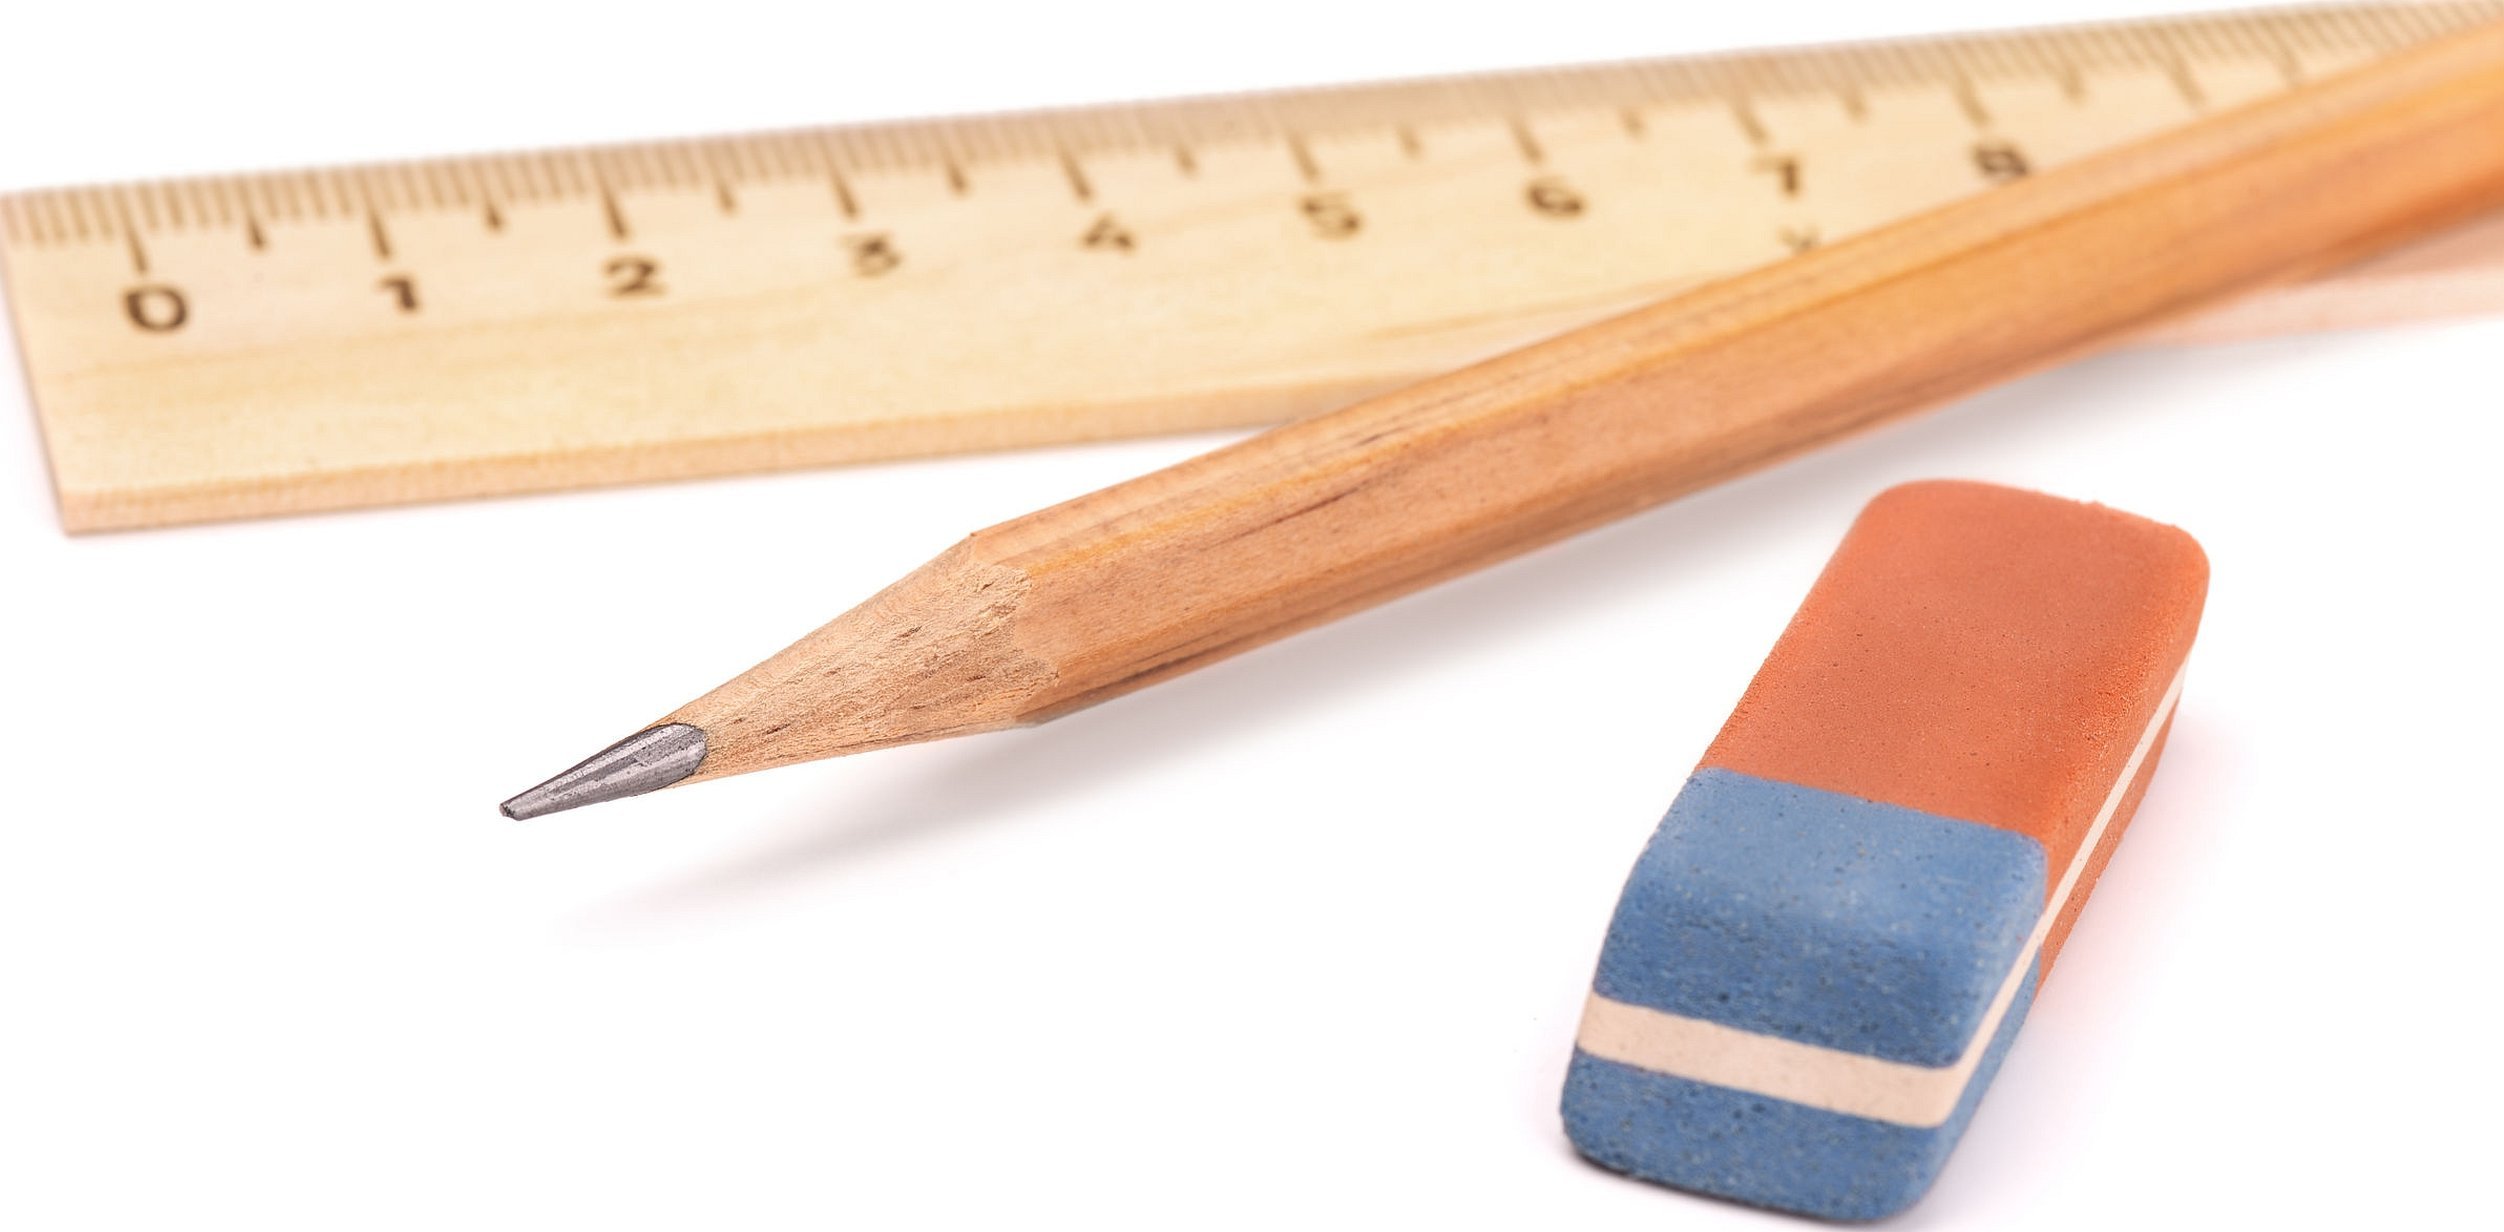
Preparation of materials and tools for drawing up drawings
The first stage of work will be the selection of the necessary materials and tools that will be needed when constructing the product drawing:
- graph paper;
- simple pencil;
- eraser;
- protractor;
- long ruler.
The dimensions of the paper sheet should be selected based on the following values:
- the height of the sheet is equal to the length of the product plus 15-20 cm;
- The width of the sheet is equal to the hip allowance plus 25-30 cm.
Important! The length of the product is defined as the distance from the waist of a straight person to the required length of the panties. Allowance for freedom of the hip is 2-8 cm. The final value depends on the material chosen for sewing.
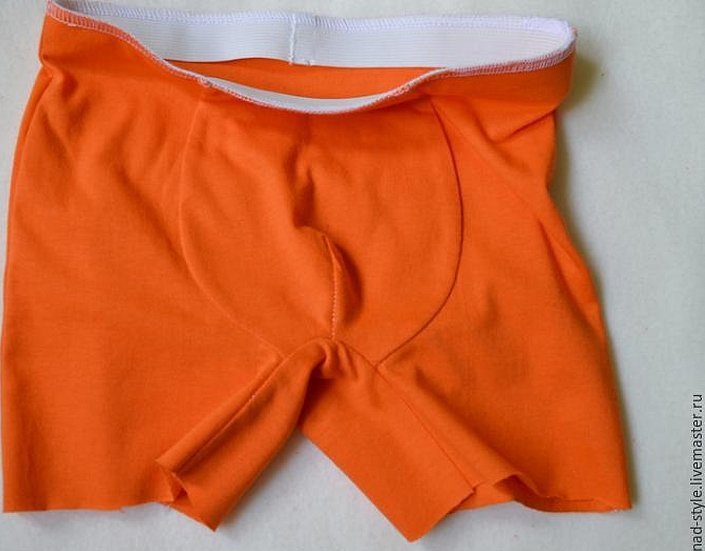
Master class and pattern of boxer shorts for men
After the preparatory stage, you can start cutting out the underwear. To avoid mistakes, the work should be done step by step.
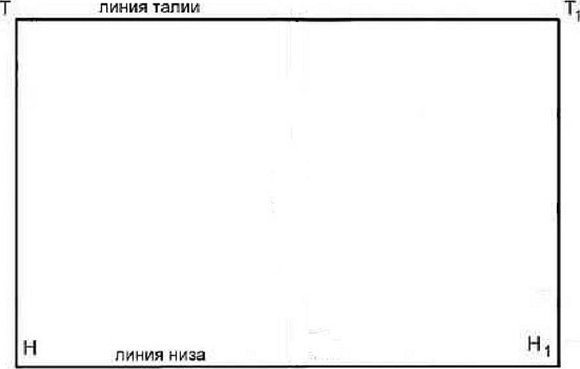
Layout of the drawing grid
First of all, an indent of 7-10 cm is made from the top of the fabric, 15-20 cm from the left edge and a point T is put, which will be the starting point in constructing the diagram. After that, a segment TT1 is drawn from it, equal to half the hip circumference (HC) plus allowance. A straight line TN is drawn down from point T, equal to the length of the product. A rectangle T-T1-H-H1 is built using the resulting three points.
Additional information! Example: TT1=SB+PB=50+4.0=54.0 cm; TN=Dizd=36 cm. This will result in a rectangle with sides of 54×36 cm.
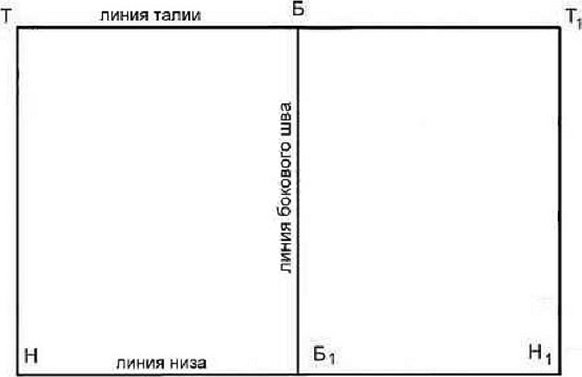
Side seam line
To construct this seam, a distance equal to half the length of the segment TT1 plus 1 cm is measured from point T and point B is placed. A segment is drawn down from it to the intersection with HH1 and point B1 is placed.
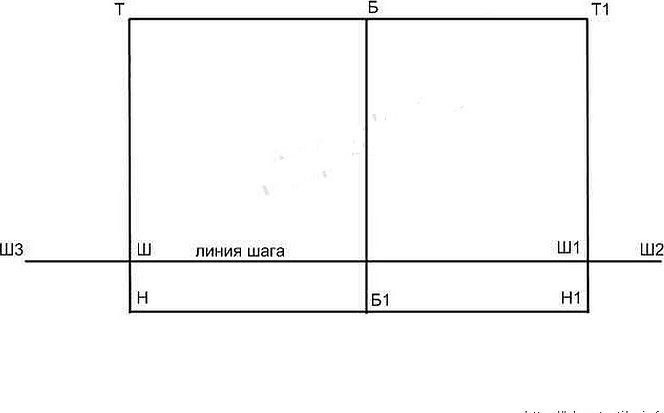
Step line
Along the side TN, a segment TS is constructed equal to half the hip circumference (HC) plus allowance (AC). Through point Ш, a ray is drawn parallel to side НН1 until it intersects with line Т1Н1. The intersection point is marked with the letter Ш1. From it, to the right, a segment Ш1Ш2=СБ/8+1 cm is set aside. Then, from Ш to the left, a segment ШШ3=СБ/4-1 cm is drawn.
Front cut line
The segment T1Ш1 is divided into three equal sections and the division points are marked D1, D2. First 1 cm is set aside from T1 to the left, then 1 cm down and point T2 is placed, which is connected to D2 along a smooth arc. After this, also smoothly, D2 is connected to Ш2.
Important! If the segment D2Sh2 is drawn along too steep an arc, then the finished product may develop creases along the step line of the front part.
Front half step cut line
The construction begins with measuring 2 cm down from point H1 and placing point H2. A smooth arc is drawn from B1 to H2, which continues to an imaginary vertical beam lowered from point Ш2. The intersection of the arc and the perpendicular is marked with the letter H3.
Depending on how the underwear fits the leg, the crotch cut can be constructed differently.
In the event that it is necessary to ensure a tight fit to the body, then a straight line is drawn from Ш2 to Н2. When a pattern of boxers of a more free form is planned, then the line of the crotch cut should be drawn to the intersection with point Н3.
Seat line (rear cut line)
At this stage, the construction begins with the fact that the segment ШШ3 is divided in half by the point Ш4. Down from Ш3, 1 cm is measured and the point Ш5 is placed. After this, a distance of 2 cm is marked along the side TT1 from T, and the letter Т3 is placed. From Ш4 to Т3, a straight line is drawn protruding above Т3 by 5-6 cm. Along this line from Т3, a segment is drawn equal to half the hip circumference SB divided by 10. The resulting section is marked as Т3Т4. The straight line Ш4Т4 is divided into three equal parts limited by points Д3 and Д4. On the left, at a distance of 5 mm. from Д3, the point Д5 is placed. After performing all these actions, the points Ш5, Д4, Д5, Т4 are connected by a smooth line. The arc thus obtained will be the seat line of the back of the underwear.
The crotch line of the back half of the underwear
The construction begins with drawing a segment НН4 equal to half the hip circumference divided by 10. Through point Н4, a segment Ш5Н6 is drawn equal to the section Ш2Н2 drawn on the diagram of the front half.
If you plan to sew loose-fitting underwear, and the crotch line according to the diagram of the front half is drawn vertically, then the crotch line of the back part is done similarly and is designated Ш5Н5.
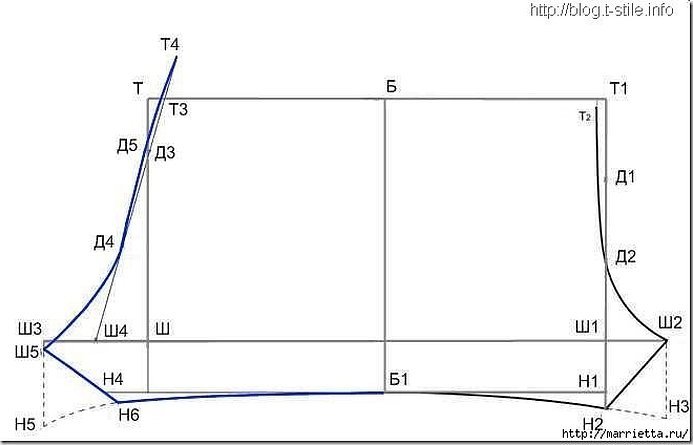
Top cut line (or waist line)
The waist line is drawn by connecting points T4, B, T2 along a smooth line. Using a protractor, the angles at points T2 and T4 are checked. If the construction is correct, they should be equal to 90°.
The pattern of men's boxers is made either with a side seam drawn along the line BB1, or without it. It is also important to remember that the step line on the drawing is indicated by the maximum and minimum values:
- a pattern using sections Ш5Н6 and Ш2Н2 is made when it is required that the finished product fits tightly on the leg;
- the pattern according to Ш5Н5 and Ш2Н3 should be made to obtain loose underwear.
Depending on how you want the finished panties to look, the step line can be drawn anywhere between these segments.
How to cut and sew boxers
Before cutting, the material is washed and ironed well. Next, you need to decide on the size of the product. So, for a pattern of men's boxer shorts of size 48, it is necessary to take into account seam allowances, for underwear of size 52-54, there is no need for allowances.
The work begins with cutting out two pieces according to the prepared pattern. The best option is to fold two pieces of fabric in half with the right sides facing inward. This way, the front and back will be completely symmetrical.
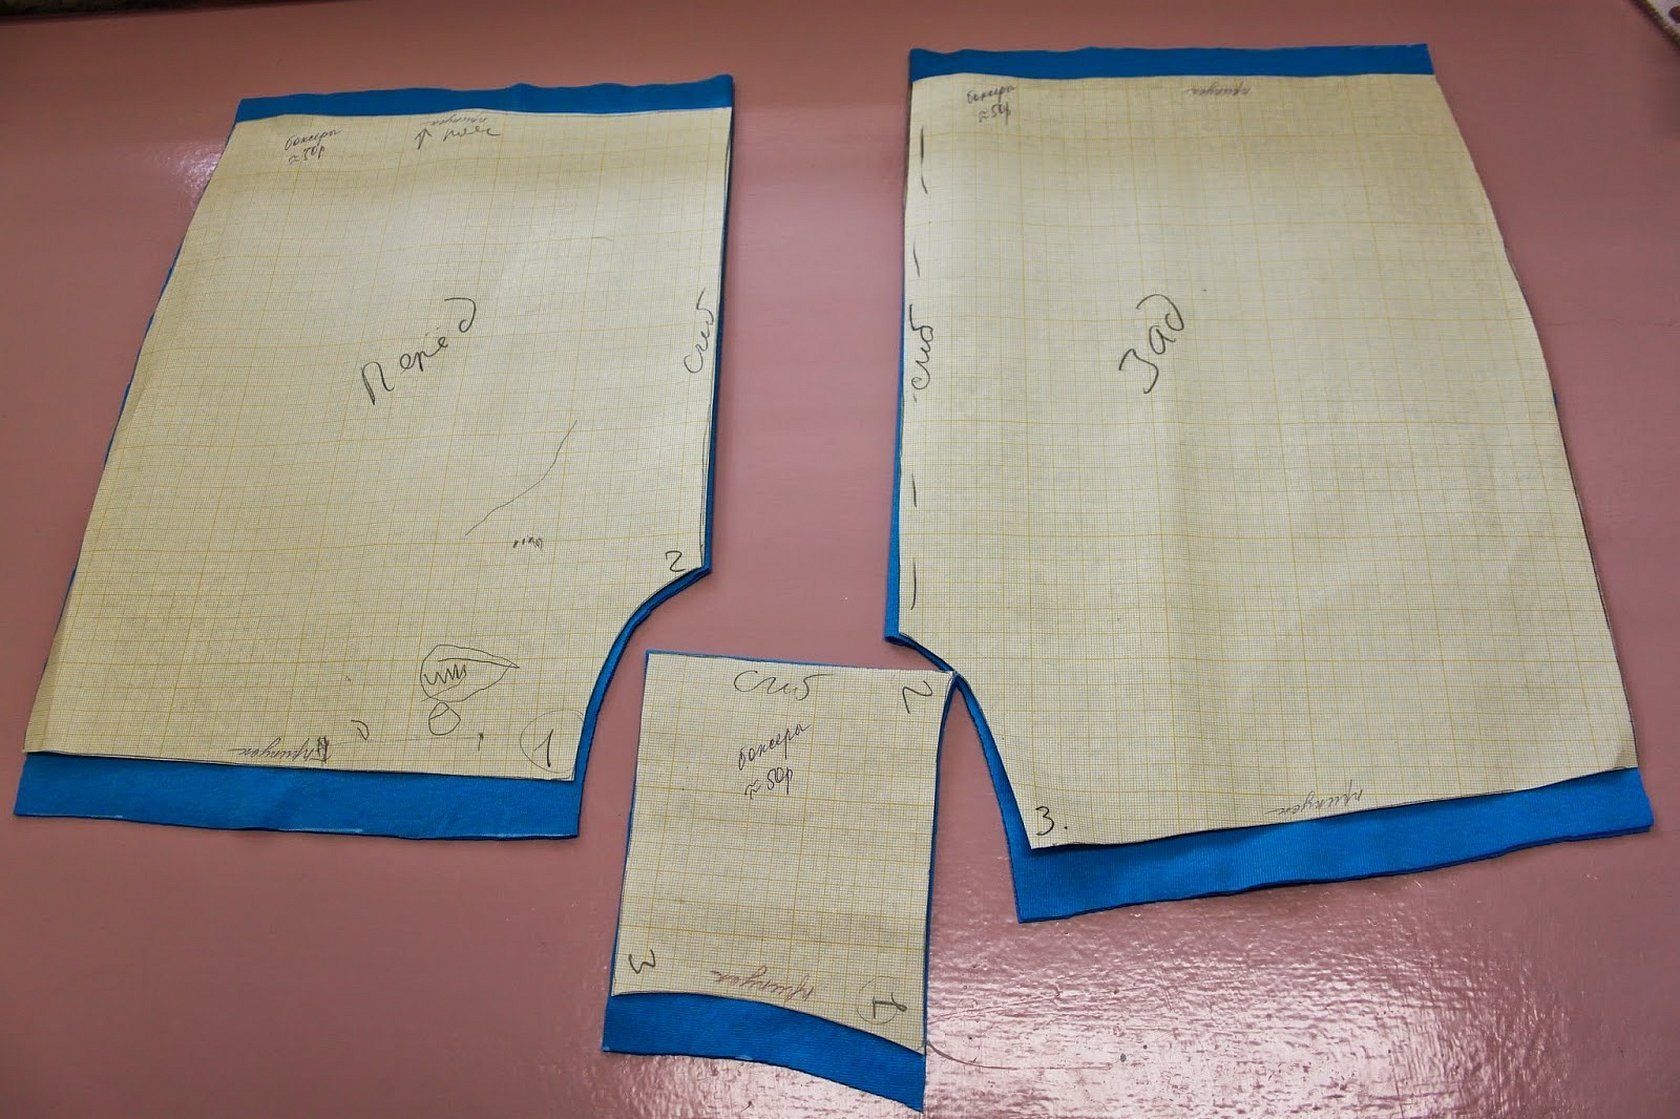
If you want to prepare each part separately, then the pattern for one of them is placed face down on the material. For allowances, leave a reserve of 2 cm at the bottom and top and 1 cm on the sides.
To sew the product, you should stock up on the following items in advance:
- textile;
- rubber;
- threads, scissors, pin (awl, if hard fabric is chosen).
After this, you can start working.
If the workpiece consists of four parts, then first each side is connected to each other with a side seam.
After this, the pieces of fabric are placed face to face, and the crotch seam is pinned on the front side. The secured section is stitched with two seams. The allowance is trimmed along the seam line and processed with a zigzag or overlock stitch, after which it is ironed.
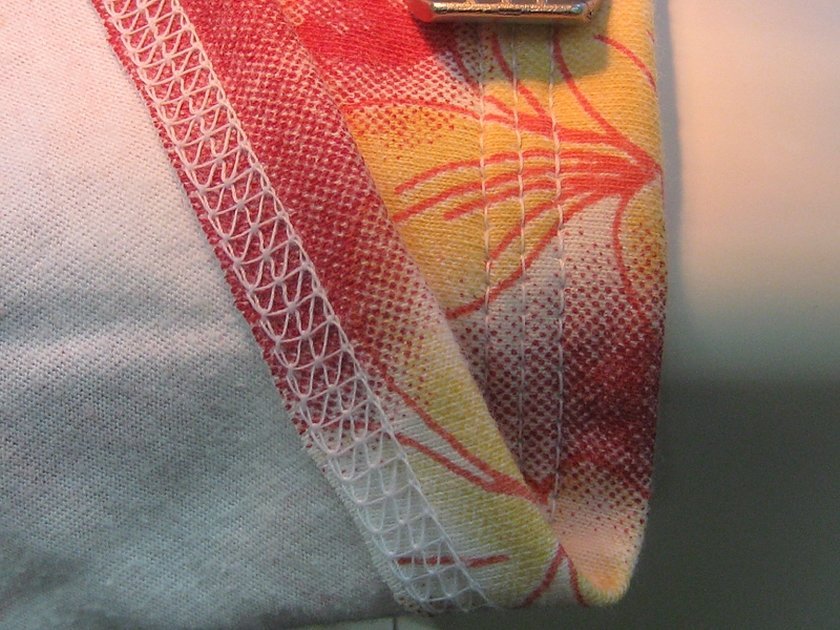
Then the seams between the front and back are stitched, and the boxers are turned inside out. The bottom of the product is first folded 5 mm, ironed, folded again by 1 cm and stitched next to the fold line.
At the waist, the fabric is folded by 1 cm, ironed and folded by another 2 cm, then ironed and stitched along the second fold. It is important to leave an unsewn area through which the elastic will be inserted. It can be pinned, but it is better to sew it. To prevent the ends of the elastic from fraying, they are stitched using a sewing machine or by hand. After this, the seam on the hem is stitched to the end. You can use another option and instead of elastic, sew an elastic strip to the top of the underwear.
At the final stage of work, it is necessary to check that all seams are stitched and iron the entire product again.
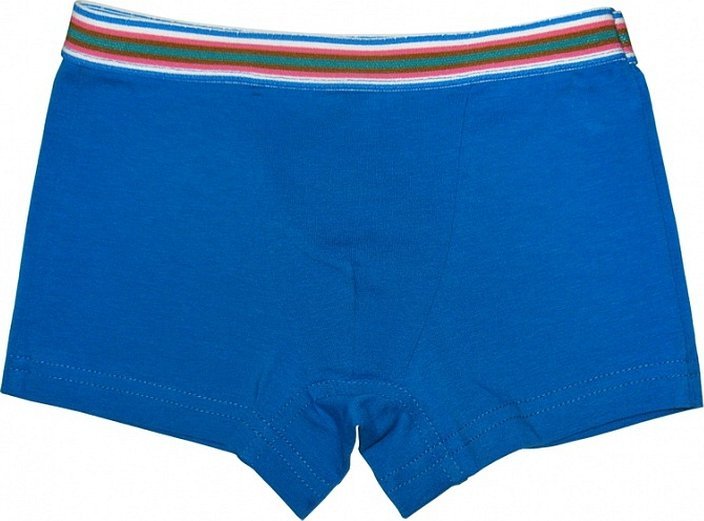
Following all the recommendations and using the underwear sewing patterns, it is quite easy to make boxers that will be a great gift for male family members - father, husband or son. Any novice needlewoman can handle such work. With experience, the sewing process will not take much time, and everyone will be happy with the final result.


