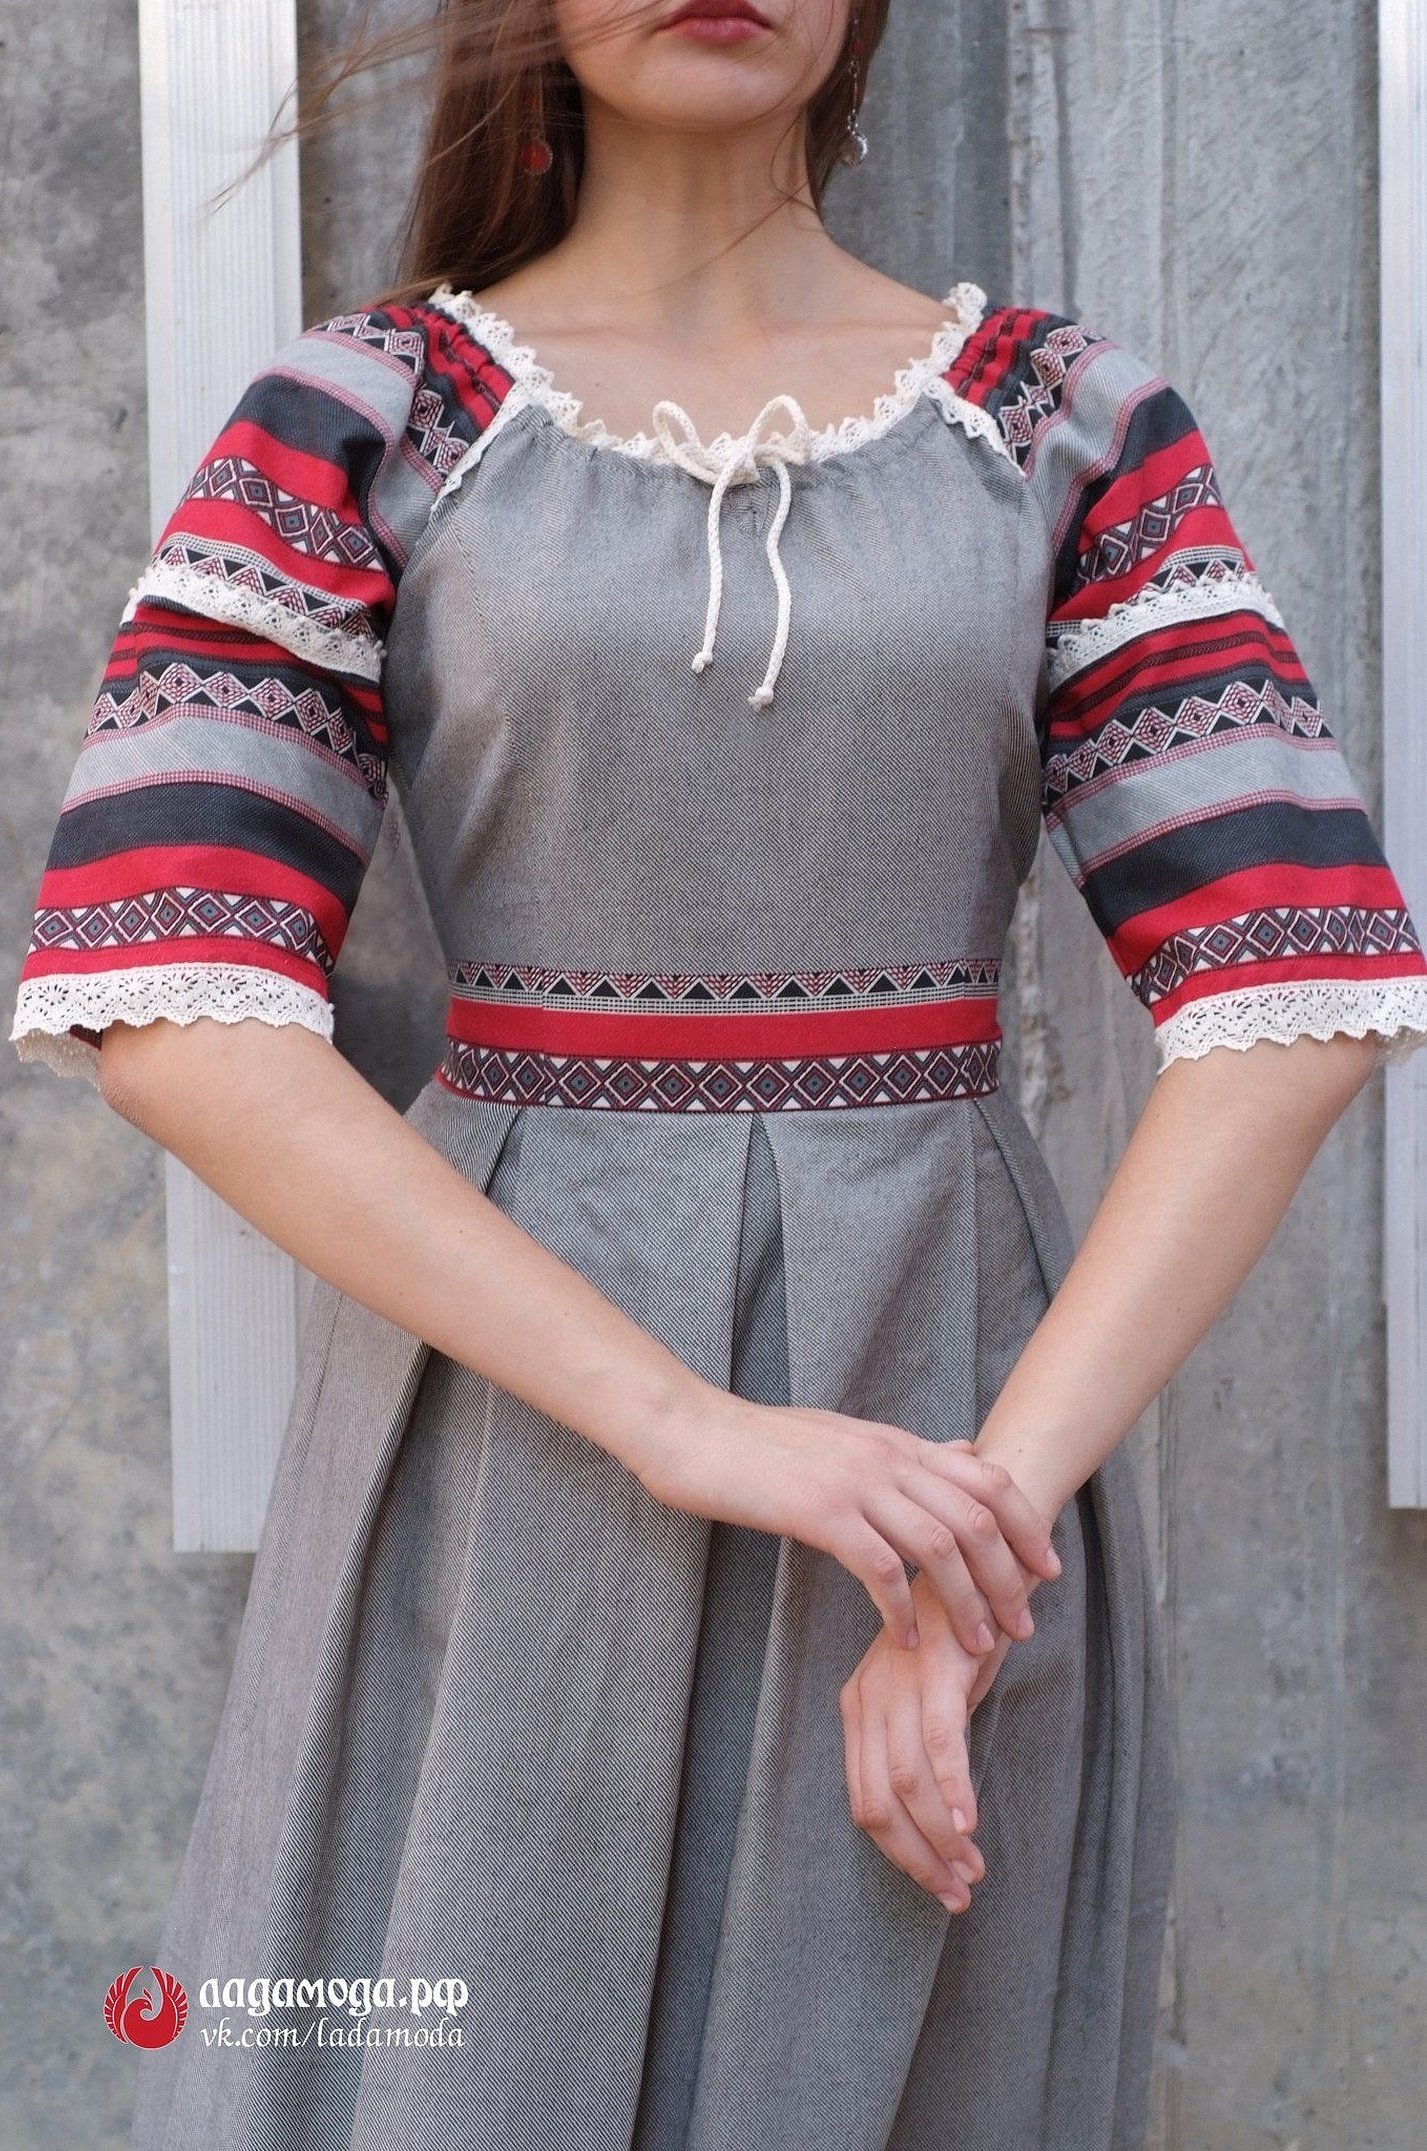
Modern fashion often returns not only to past trends, but also to the origins of antiquity. One such example is the Russian shirt for men and women. Such clothes for women are a symbol of chastity and femininity, and for men - simplicity and brutality. Such shirts are usually known from historians and scientists, as well as neo-pagans. This material will tell you what a Russian-style dress is (pattern), which this article will help you sew yourself.
Cut of a women's shirt
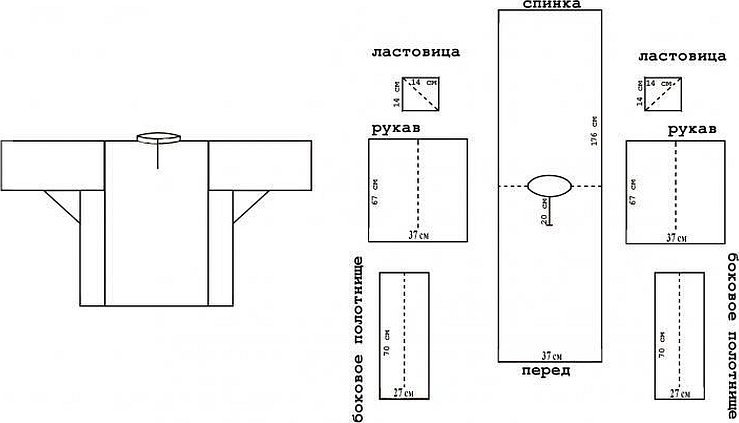
First of all, you need to measure how long the final product, i.e. the shirt, will be. It is recommended to make it at least to the middle of the hips. To begin, you should take the following measurements:
- Measure from the shoulder to the required length - length;
- Measure the size of the product in the shoulders + 10 centimeters - width;

It is necessary to fold the fabric in half and measure the required length. Then cut. On the fold of the material, the center is determined, from the front side of which a special vertical cut is made from top to bottom up to 10 centimeters long. This is necessary so that the head fits through it. In this way, the neck is made.

After this, the sleeve is cut out in the amount of two pieces:
- Upper part - biceps muscle circumference + 5 centimeters;
- Bottom detail - wrist circumference + 5 centimeters;
- Gusset - sewn to the sleeve from the inside to the armpits. Its dimensions are 15 by 15 centimeters;
- Wedges in the amount of two pieces. For the female version, the size 80 by 50 centimeters is suitable.
Sewing involves the following steps:
- Sew the sleeves together from the pieces;
- Sew gussets into the armpit area of the sleeves;
- Sew the finished sleeves to the shirt;
- Sew the product along the side seams up to the wedges;
- Sew in the wedges themselves;
- Cut out a semicircle of the neckline so that the product fits exactly on the neck.
- Embroider the shirt and it will be ready.
Important! It is recommended to sew in wedges from the waist down. If you do this starting from the hem, the pieces may end up at different heights relative to each other.
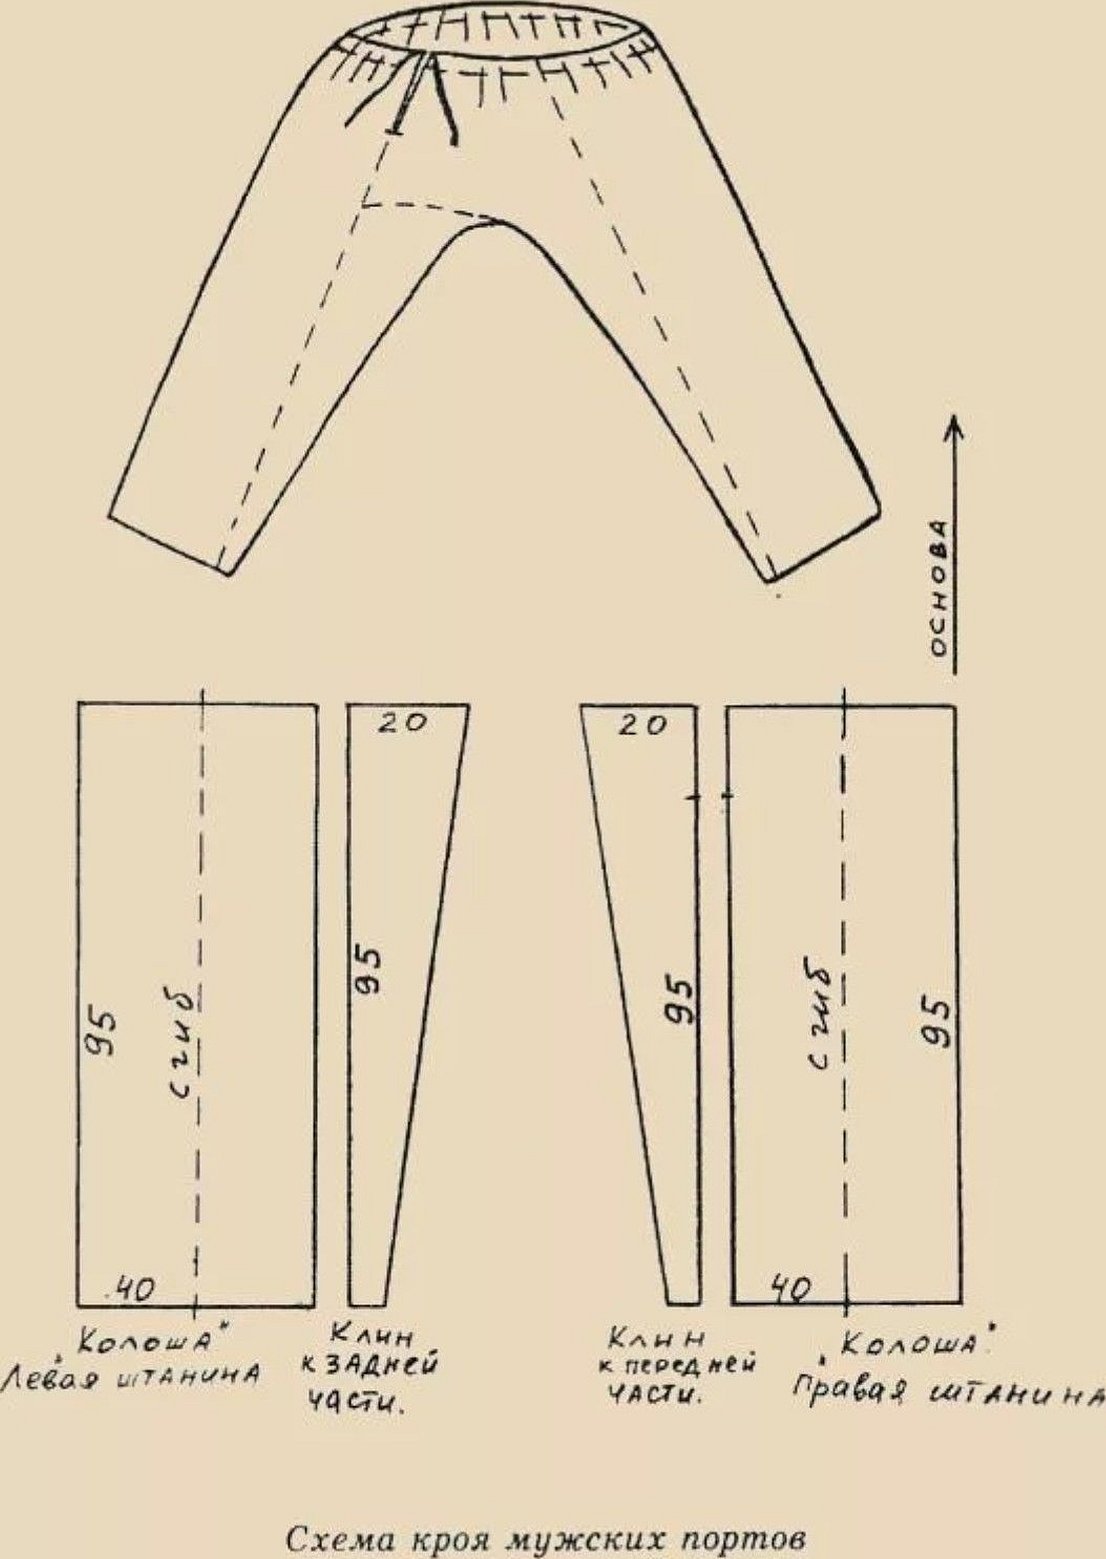
Patterns and sewing sequence
The peculiarity of the cut is that all the details should be no more than 40 centimeters wide. This happened historically because for a long time the fabric was made at home and technology did not allow it to be made much wider.
Modern methods allow you to bypass this limitation and sew a shirt without side inserts. The sequence of actions for sewing a traditional shirt is as follows:

- Cut out all the details from natural fabric and don’t forget to add allowances of one centimeter;
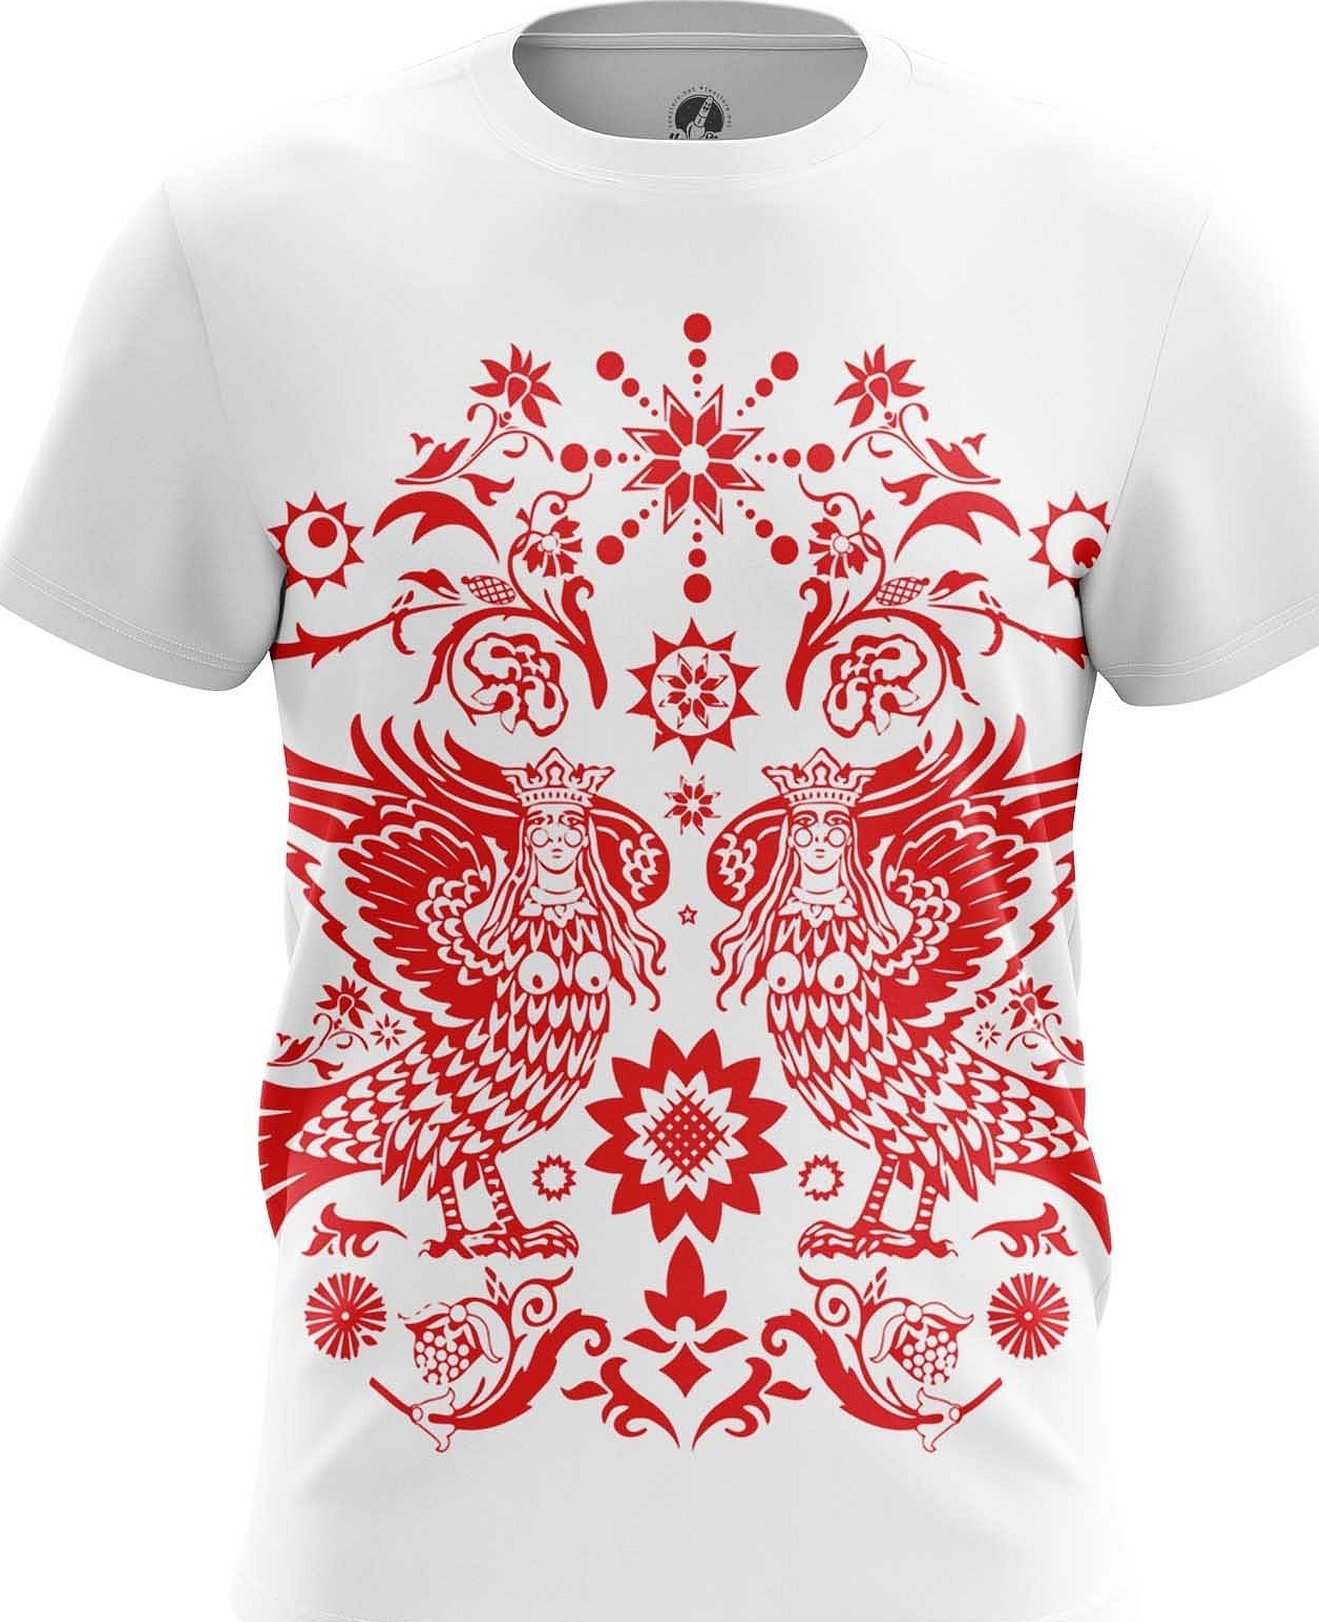
- Decorate all the details with embroidery or buy embroidered or printed fabric;
- Carefully remove the embroidery and tear off the stabilizer around it if it was done by hand;
- Embroider the other part of the design as a joining stitch of stabilizer;
- Place the first piece on it exactly according to the pattern and remove the pins with which it was attached;
- Cut out all the details and embroider them as desired;
- Make a neck opening by cutting a circle across the chest;
- Sew on the sleeves and leave a couple of centimeters unsewn on both edges;
- Attach the gusset through these holes and process the entire cut along the seams;
- Sew the gusset from the sleeve to the base and also process the cut parts;
- Sew the sleeve by sewing in the other side of the gusset;
- Sew the part of the gusset that remains with the boot part of the shirt;
- If desired, make a cord from yarn and sew it into the collar;
- Sew in a stand-up collar, cutting its length if necessary;
- Process the neckline.

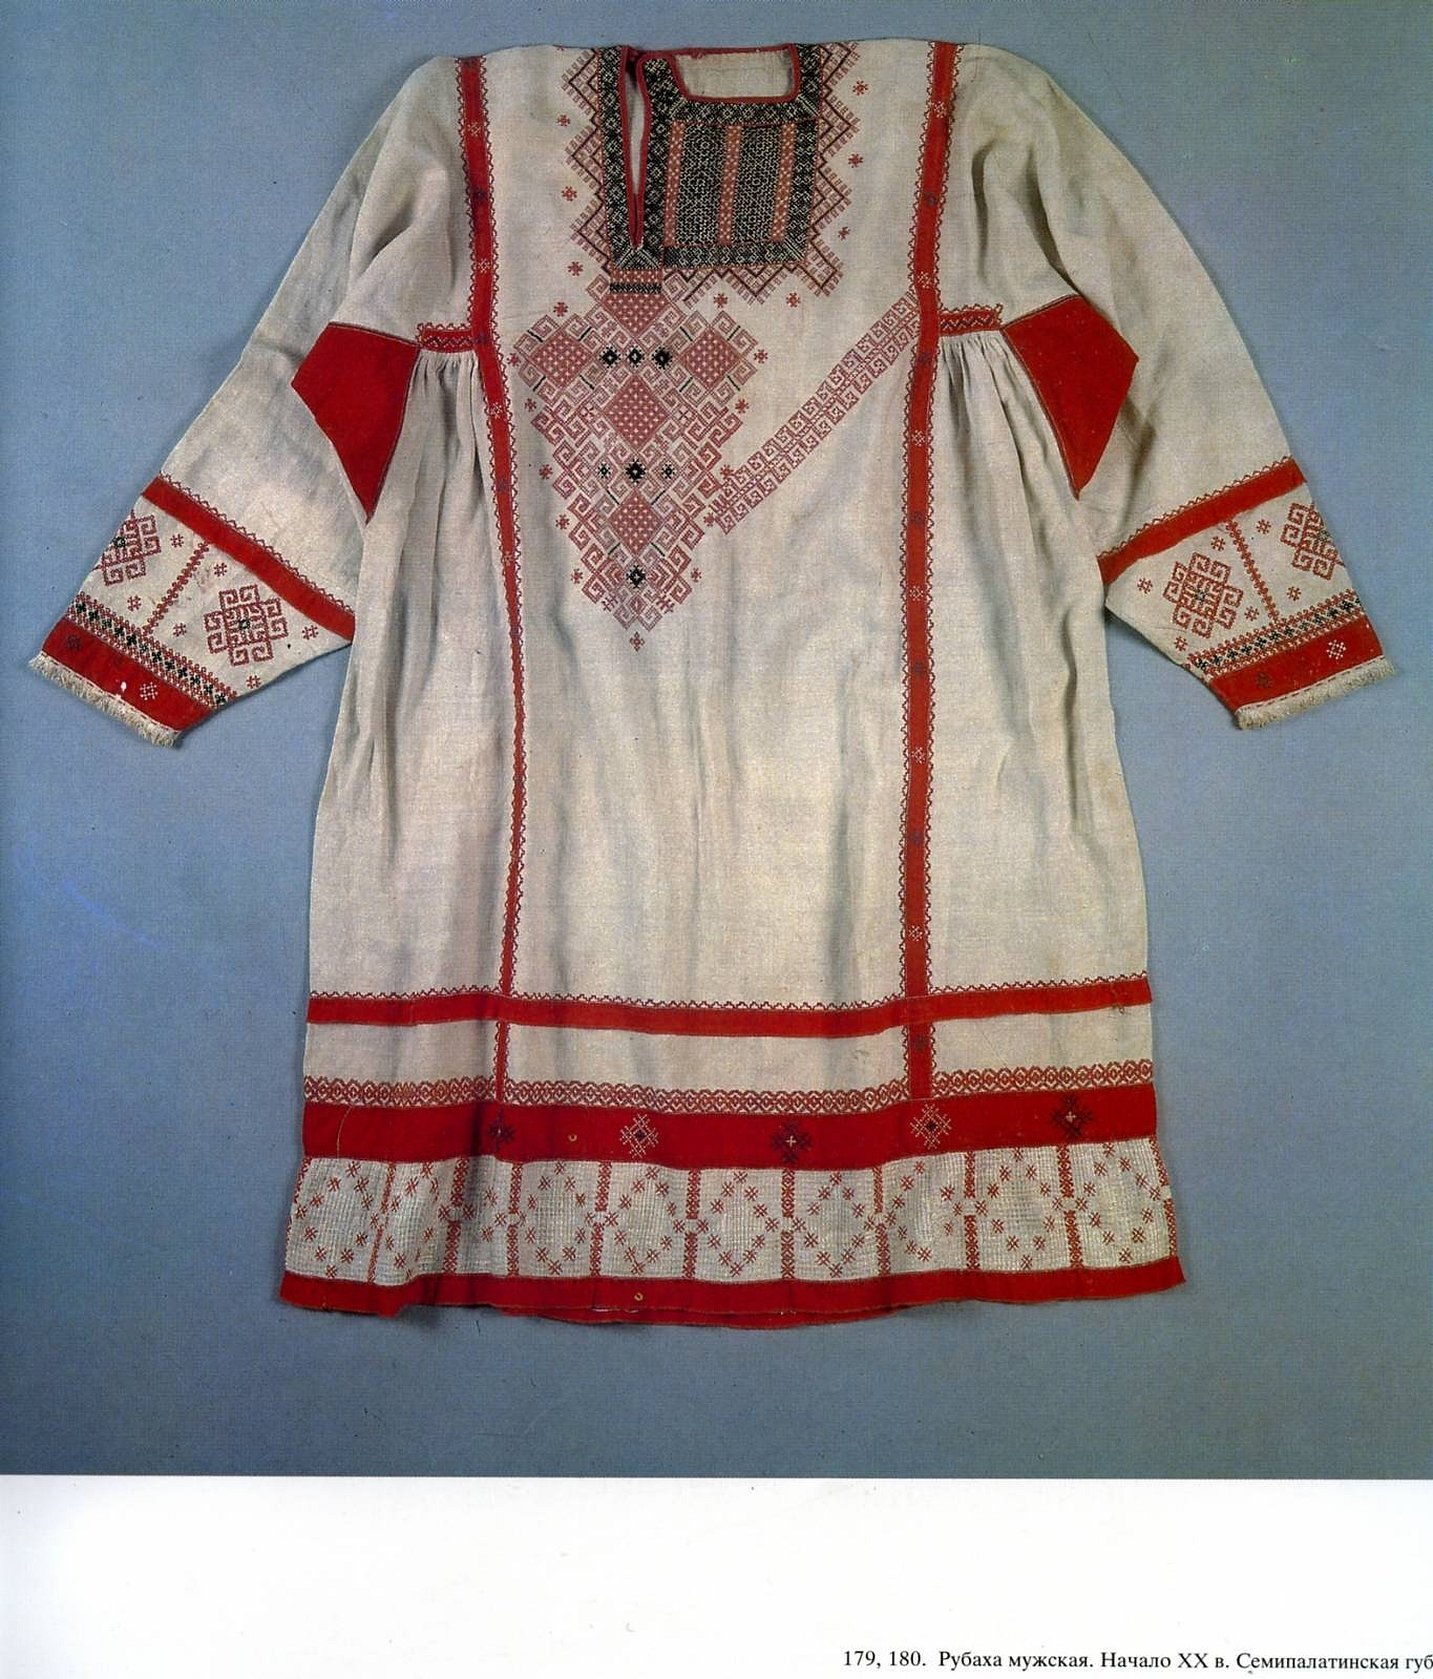
Finishing of the "Kerzhak" shirt
The peculiarity of this type of clothing is that its fastening is always done on the right side. The embroidery is done in a square on the front. For a wedding shirt, small lace was used at the end of the sleeves. If folds were collected, the embroidery went along them. The lower part of the product was decorated with a bright ribbon or fabric.
The peculiarity of finishing the Kerzhak shirt is that the yoke can be made on the lining. For this purpose, a special frame is used on the shoulders, which is made of contrasting fabric and works as a fold limiter.
Important! You can create folds or bows at the ends of the sleeves and trim them with contrasting material or tape. The bottom can also be finished with a bright colored fabric ribbon.

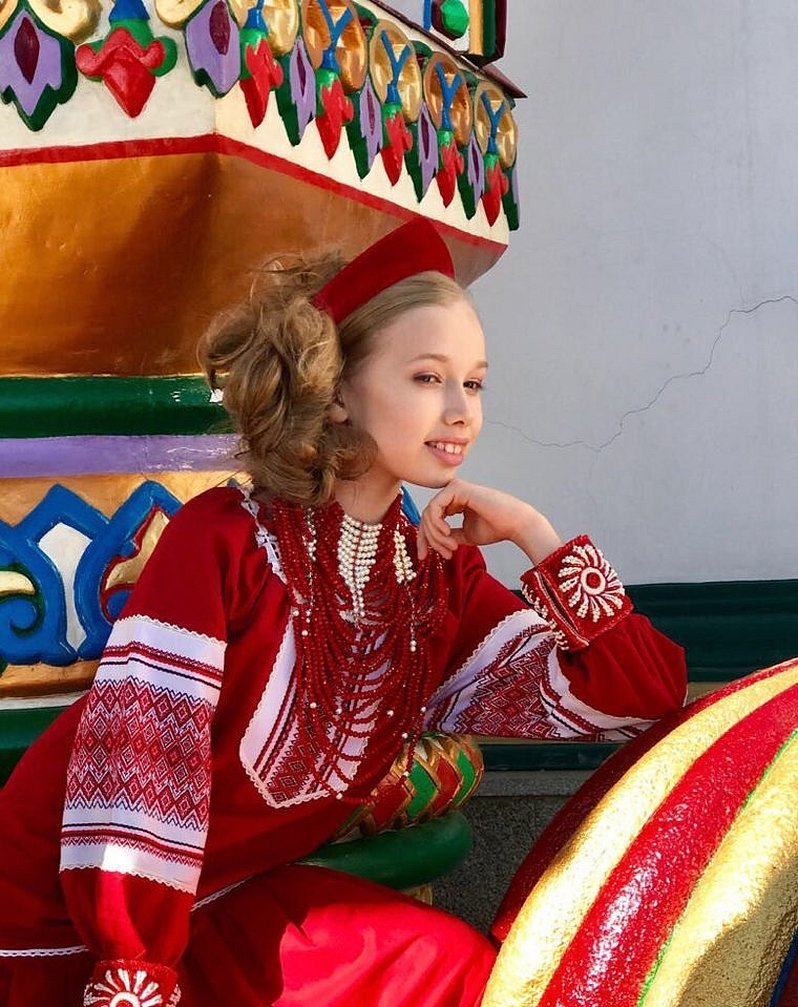
Finishing of the "Polish" shirt
This shirt can be either plain with contrasting elements or colorful. The burs are made on a pair of threads, and embroidery on them is not provided. The collar is approximately one and a half centimeters and is decorated with hand embroidery, lace or bindweed. The neck opening in front is processed in the style of a lock or a placket, and decorated with braid or the same bindweed.
Separately, we can say about the polki and sleeves. They can be embroidered or sewn on as a ribbon and decorated with buttons. The ends of the sleeves can be decorated with dentils.
How to sew a gusset into the sleeve of a Russian shirt
When making a traditional Russian shirt, it is important to sew the gusset correctly. At the stage of sewing the sleeves, the gusset is sewn to them. After that, the sleeve is folded in half and the gusset is inserted into it. The connection is made with a regular stitch on the machine along the edge, but when they reach the gusset, the speed slows down and the seam goes to the edge of the fabric. At the same time, it does not stitch the gusset, but stops at its edge. Then the edge of the sleeve is folded and the needle is directed to the edge of the gusset. From there, the stitch is smoothly rounded upward and the thread is cut.
Pattern of a dress in Russian style
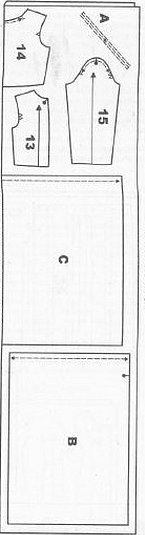
The pattern of the Russian dress is made according to the existing scheme. It is ideal for sizes 48, 50, 56 and 60. After the patterns are copied, the following details should be drawn in the form of rectangles:
- Back of the bodice - 13;
- Front of the bodice - 14;
- Sleeve - 15;
- Detail A - neckline edging 44 x 2 cm;
- Detail B - back panel of the skirt 73 by 100 cm;
- Detail C - front panel of the skirt 73 by 100 cm.
Next, on the fabric, which is pre-folded, all the details are laid out according to the diagram shown in the figure below. Allowances for seams should be taken at one and a half centimeters for the middle and back cuts. For the rest, one centimeter is enough. You should also add 4 centimeters for the hem of the skirt at the bottom and for the sleeves. The neck is cut out without allowances.
Sewing a dress in Russian style
The process involves:
- Sewing the middle sections of the back panel of the skirt so that 11 centimeters remain for the fastener;
- Ironing the seam allowances on the back and stitching on the shoulders and sides of the bodice;
- Laying out seam lines along the sides of the skirt;
- Gather the side of the neck section using basting stitches so that its length is the same as the length of the neck facing;
- Uniform distribution of neck assembly;
- Ironing the longitudinal cuts of the neckline inside out;
- Iron the edging along the front side outwards;
- Gathering from the side of the upper edge of the dress skirt to the length of the lower edge of the face;
- Attaching the skirt to the very bottom edge;
- Sewing in the zipper at the back in the previously designated place;
- Processing longitudinal seams on the arms and sewing them into the armholes;
- Processing the bottom of the dress and the bottom of the sleeves and creating a special “hem” seam.
This material showed a Slavic women's shirt, a pattern of its parts. As the practice of seamstresses and craftswomen shows, a Slavic dress is very easy to sew, the pattern of which is not particularly complex. The Russian cut is very simple to perform and does not require great knowledge of cutting and sewing.


