A hammock, hung in a room, garden or on a veranda, gives the opportunity to relax comfortably. It can also be used for communication or work. It is believed that the hammock was first used by South American Indians. There are many varieties of it. Resting on such an unusual bed leaves an unforgettable impression during a hike or when relaxing after lunch on a summer day on the veranda.
- General recommendations for choosing the right type
- Preparatory work
- Tools and materials for DIY sewing
- Step by step instructions for making a homemade fabric hammock
- Moroccan hammock manufacturing technology
- Mexican hammock
- Hammock-cocoon on carabiners
- On the eyelets
- Hammock on slats
- Hammock from a blanket - do it yourself
- DIY Hammock Tent
- Advantages and Disadvantages of Handmade Hammocks
- How to secure a hammock at a dacha to a ready-made base
General recommendations for choosing the right type
The choice of a hammock is based on preferences, financial capabilities and planned use. Each type has its own distinctive features that must be taken into account when choosing:
- The mesh design is the least expensive option. It is used with a blanket and a mattress because the knots and ropes put pressure on the back. The mesh hammock is easy to install, remove and store. It is not designed to withstand loads exceeding 100 kg.
- Fabric structures are the most popular. The maximum permissible load for such hammocks is 160 kg. They are not moisture-resistant and are vulnerable to ultraviolet radiation. With the right choice of material for production, such hammocks will suit most people.
- If they are made of polyester and nylon with natural fabric additives, such hammocks retain all the advantages of fabric ones, but are more expensive. Such structures are moisture-resistant and resistant to sunlight.
Important! The hammock needs to be strong enough for all family members to use.

Preparatory work
If we sew a hammock with our own hands, we need to prepare for this. Before starting work, we need to choose a design, prepare drawings, materials and tools.
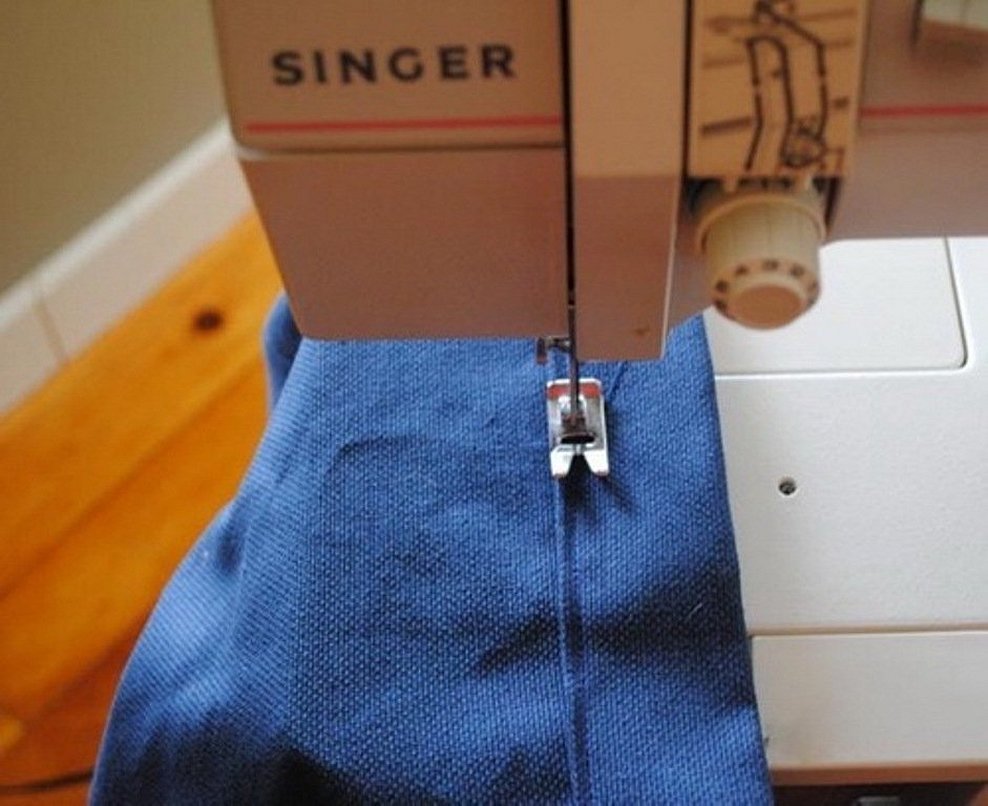
When manufacturing, in most designs it is necessary to strengthen the edges of the canvas that will be attached to the support. To do this, they are bent and sewn.
Tools and materials for DIY sewing
To work, you will need to prepare the necessary materials and tools:
- The base requires a fabric that is strong enough to support the weight of a person.
- You will need cords, slats, carabiners, hooks for attachment, eyelets, threads, needles (depending on which model is chosen for production).
- A special tool may be required to install the grommets.
- Sometimes cord or strips of fabric are needed to make loops for hanging the hammock.
Wooden or metal structures can be used for fastening. They can be purchased or made at home.

Step by step instructions for making a homemade fabric hammock
Having a hammock at home or in the country makes life more comfortable. There are several options for such structures, available for self-production.
Moroccan hammock manufacturing technology
One of the ways to sew a hammock for a summer residence with your own hands is to create a Moroccan design. It is relatively simple, but has important advantages:
- There is no chance of a person accidentally falling out while sleeping or turning over while swinging. It can be used as a baby hammock.
- Using it, you can relax and unwind as much as possible.
- This design is compact and can be taken with you on a hike.

Step-by-step instructions on how to sew a hammock are as follows:
- To make it, you first need to process the fabric. It needs to be folded over and carefully stitched along the entire perimeter.
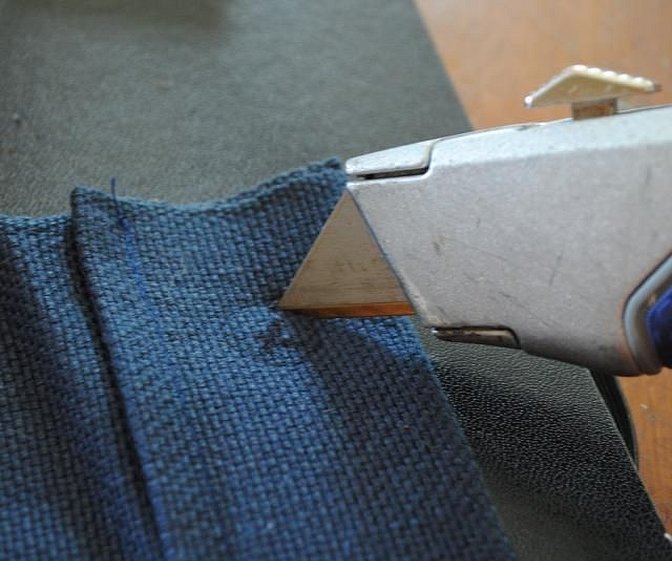
- Loops of durable fabric or luggage strap are sewn to the short sides at equal distances. The recommended step between them is 15-20 cm. For this purpose, you can use fabric from old jeans.
- The edges of the fabric with sewn-on loops are additionally stitched with strips of fabric. On the one hand, this increases the strength of the connection. On the other hand, it will give the hammock a more aesthetic appearance.
- The cord that is threaded through the loops must be at least 8 mm thick. It is threaded in a special way. First, it is passed through the loop, then a loop half a meter long is made. Then it is threaded through the next loop on the fabric and this procedure is continued further.
- The ends of the rope loops on each side are gathered together and made into a loop. It is recommended that its size be 10 cm. The loop should be located in the middle.
For your information! The structure is suspended on supports using the resulting loops on both sides.
Mexican hammock
To create this type of hammock you need to prepare the following:
- A rectangular piece of fabric measuring one by two meters.
- A strip of leather or fabric from old jeans.
- A little bit of grosgrain ribbon.
- Thin cord.
You will also need to prepare two pieces of rope to hang the structure on the posts.

The step-by-step instructions for making it are as follows:
- You need to take the fabric and bend the short sides of the rectangle a little according to the pattern. Put a strip of corset fabric inside. Now the edges of the fabric need to be carefully stitched.
- Several small strips need to be cut out of the leather. They should all be the same size: 2-3 cm wide, 15 cm long.
- Each of them is folded in half and sewn to the narrow edges of the fabric piece at a distance of 10 cm from each other. This must be done in such a way that loops are formed.
- A 1.5 m long cord is threaded through each. On both sides of the hammock, the loose ends are gathered into a bundle and tied with another piece of cord to make the connection stronger.
The home hammock is hung by the resulting bunches. This can be done using pieces of rope or hooks.

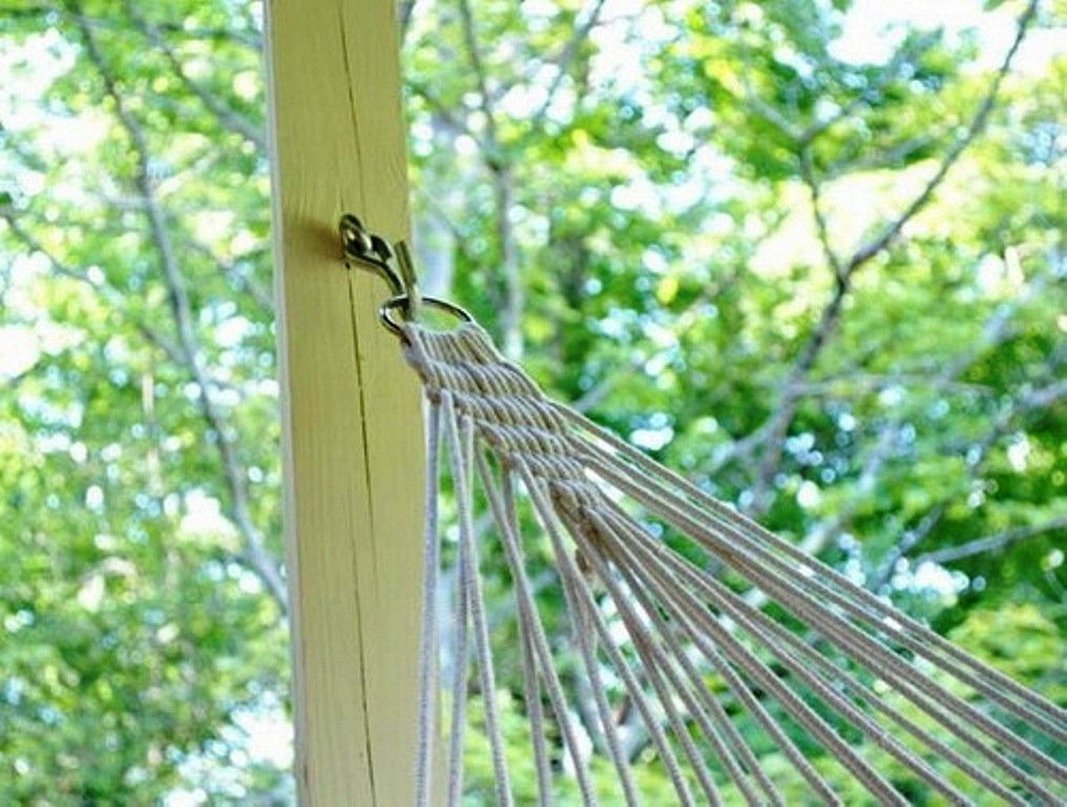
Hammock-cocoon on carabiners
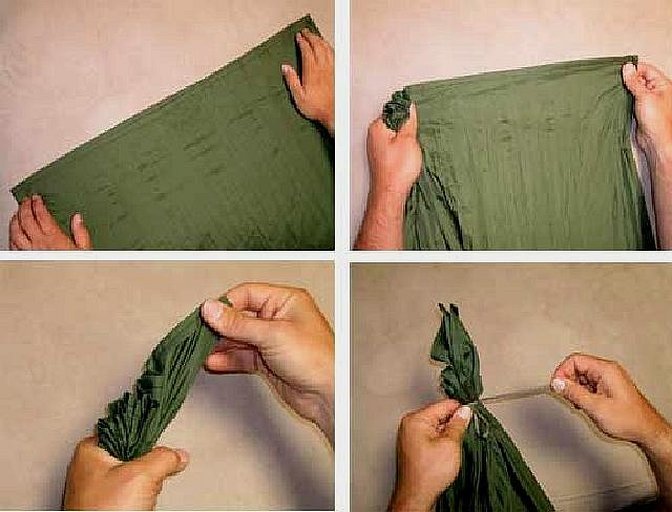
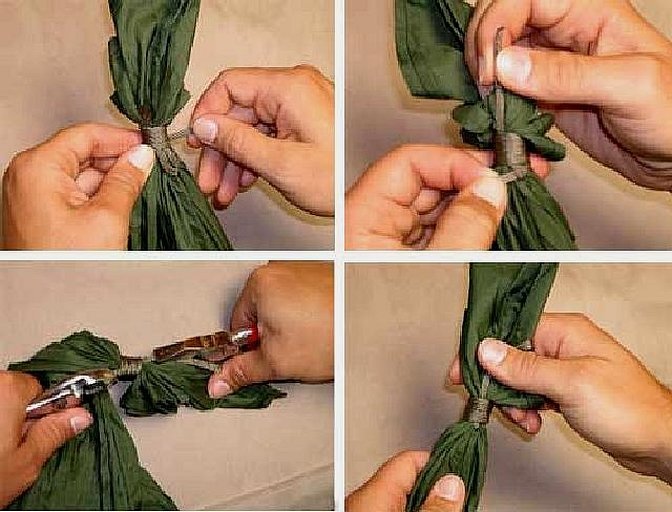
To make it, you need to stock up on a piece of strong fabric of the appropriate size. It should not be old. Tarpaulin, burlap or flax are good options for this. Additionally, you need to prepare two pieces of rope on which the hammock will be suspended and two pieces to tighten the fabric. For hanging, you can use two poles located at a distance of 3-4 meters.
To make a cocoon, the narrow edges of the fabric need to be folded and a loop made from each of them with a hoop. Then they are threaded through the carabiners. The fabric does not need to be stretched. The fabric loops are tightened with a rope knot. Ropes are threaded through the carabiners and tied. The hammock is hung on poles by the free ends. This design will be inaccessible to pigs and other animals.

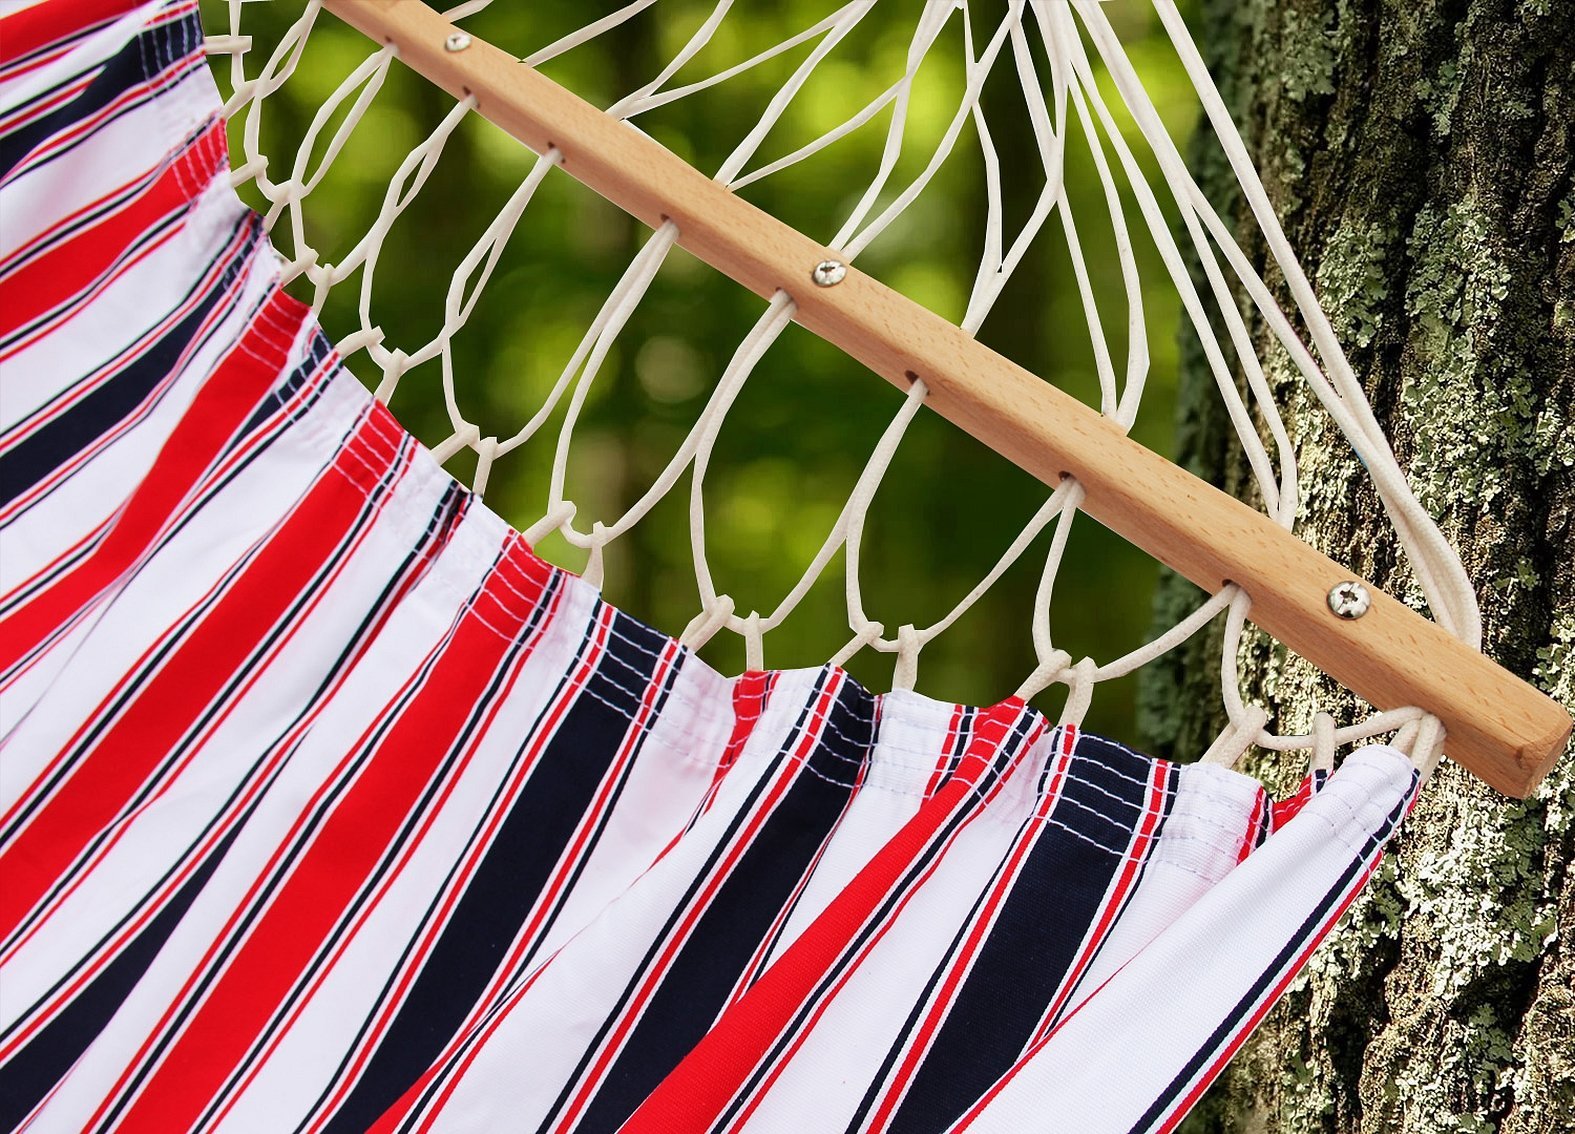
On the eyelets
To make it, you need to prepare the following:
- A piece of durable fabric for sewing, at least 3 m long.
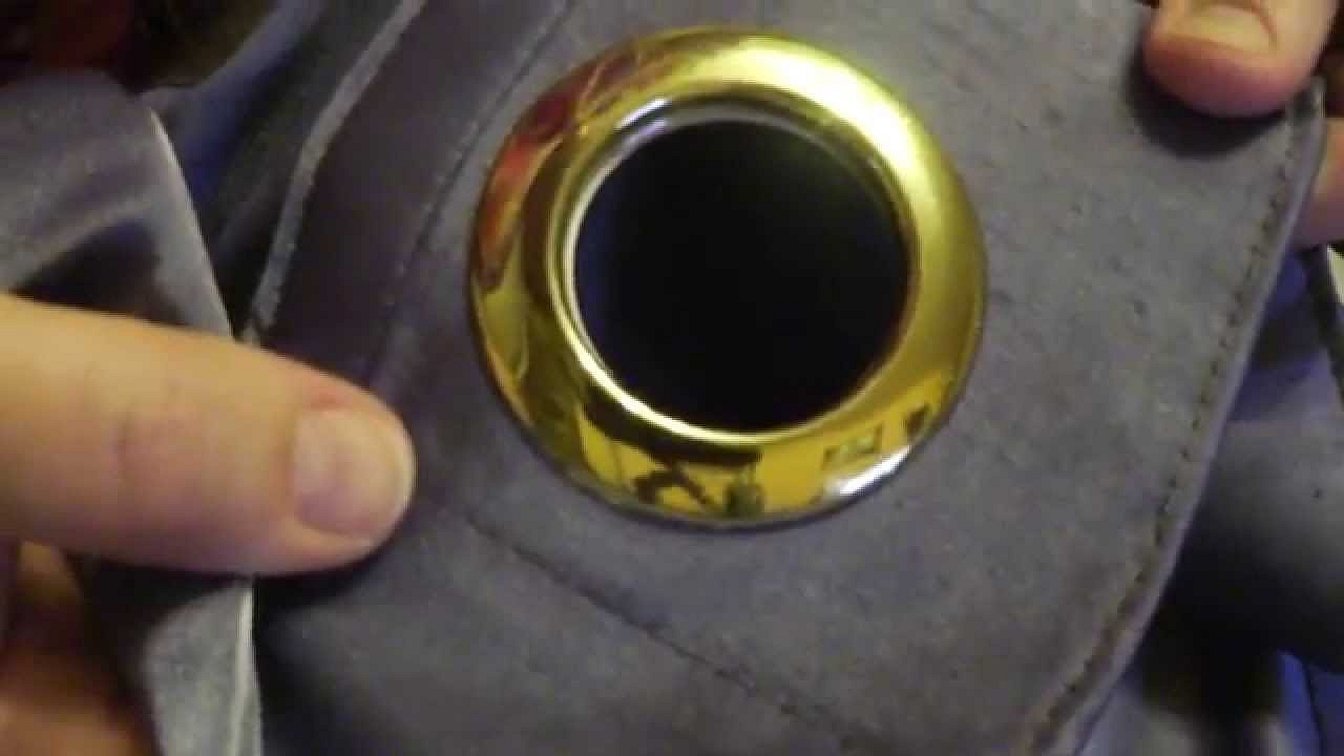
- 22 eyelets.
- Eyelet insertion tool.
- The rope is 6 mm thick and 35 m long.
- Metal rings.
- Drill with a 12 mm diameter drill bit.
- Wooden beams of rectangular section 30 by 50 mm.
It is advisable to use a sewing machine for the work. You will also need an iron, scissors and chalk.

The step-by-step instructions for completing the work are as follows:
- A suitable piece is cut out of the fabric.
- Its two edges from opposite ends are folded outward by 6 cm, ironed and hemmed on a sewing machine.
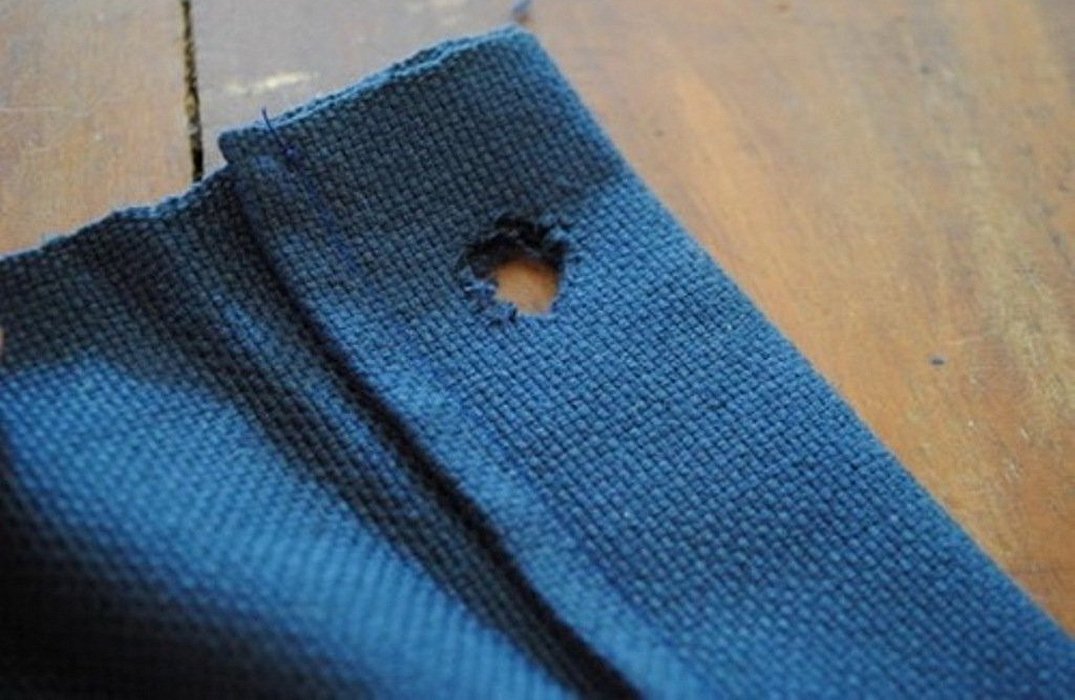
- Now you need to use chalk to mark the places where the eyelets will be threaded, cut holes and insert these parts.
- It is necessary to drill holes in the pre-prepared beams. They should be located in the same way as the eyelets. The length of the beams being processed should correspond to the width of the structure. To make an accurate marking, it is necessary to apply the fabric to the spacers and mark the places opposite the holes on them. Then you need to drill the holes using a drill.
- It is recommended to sand the beams with sandpaper and treat them with linseed oil, paint or varnish, as desired. This is necessary to give them a beautiful appearance.
- Now you need to thread the rope prepared in advance. This is done using the following sequence of actions: first, pass it through the outermost eyelet, then pass it through the corresponding hole in the bar, then pass it through the metal ring that will hold the hammock. After this, repeat the sequence of actions, moving on to the next eyelet.
After threading the rope through these holes, it must be securely fastened. Now the hammock can be used by hanging it on the rings. For beauty, the part of the rope next to the ring is sometimes braided. Usually, the rings are hung on steel screw-in hooks. Both a cat and a person will feel comfortable in such a hammock.
Hammock on slats
To make it, you will need:
- A rectangular piece of fabric.
- Two strips, each the size of the narrow side of the canvas.
- Cord.
- Strips of strong fabric or leather.
The step-by-step instructions for work are as follows:
- On the narrow sides of the canvas, the fabric is folded and stitched to increase strength.
- At an equal distance (it is enough to take it equal to 10 cm) sew on loops for the cord.
- Holes are made in the planks at equal distances from each other. Their diameter should be sufficient to thread the cord through twice.
- The cord must be threaded through the loops and through the holes in the bar. In this case, you need to start from the edge and leave loops half a meter long. After completing this work, they are collected into one bundle and formed into a loop.
For your information! With the help of such loops the hammock is tied to the poles. The planks prevent it from folding, making the tension more uniform.
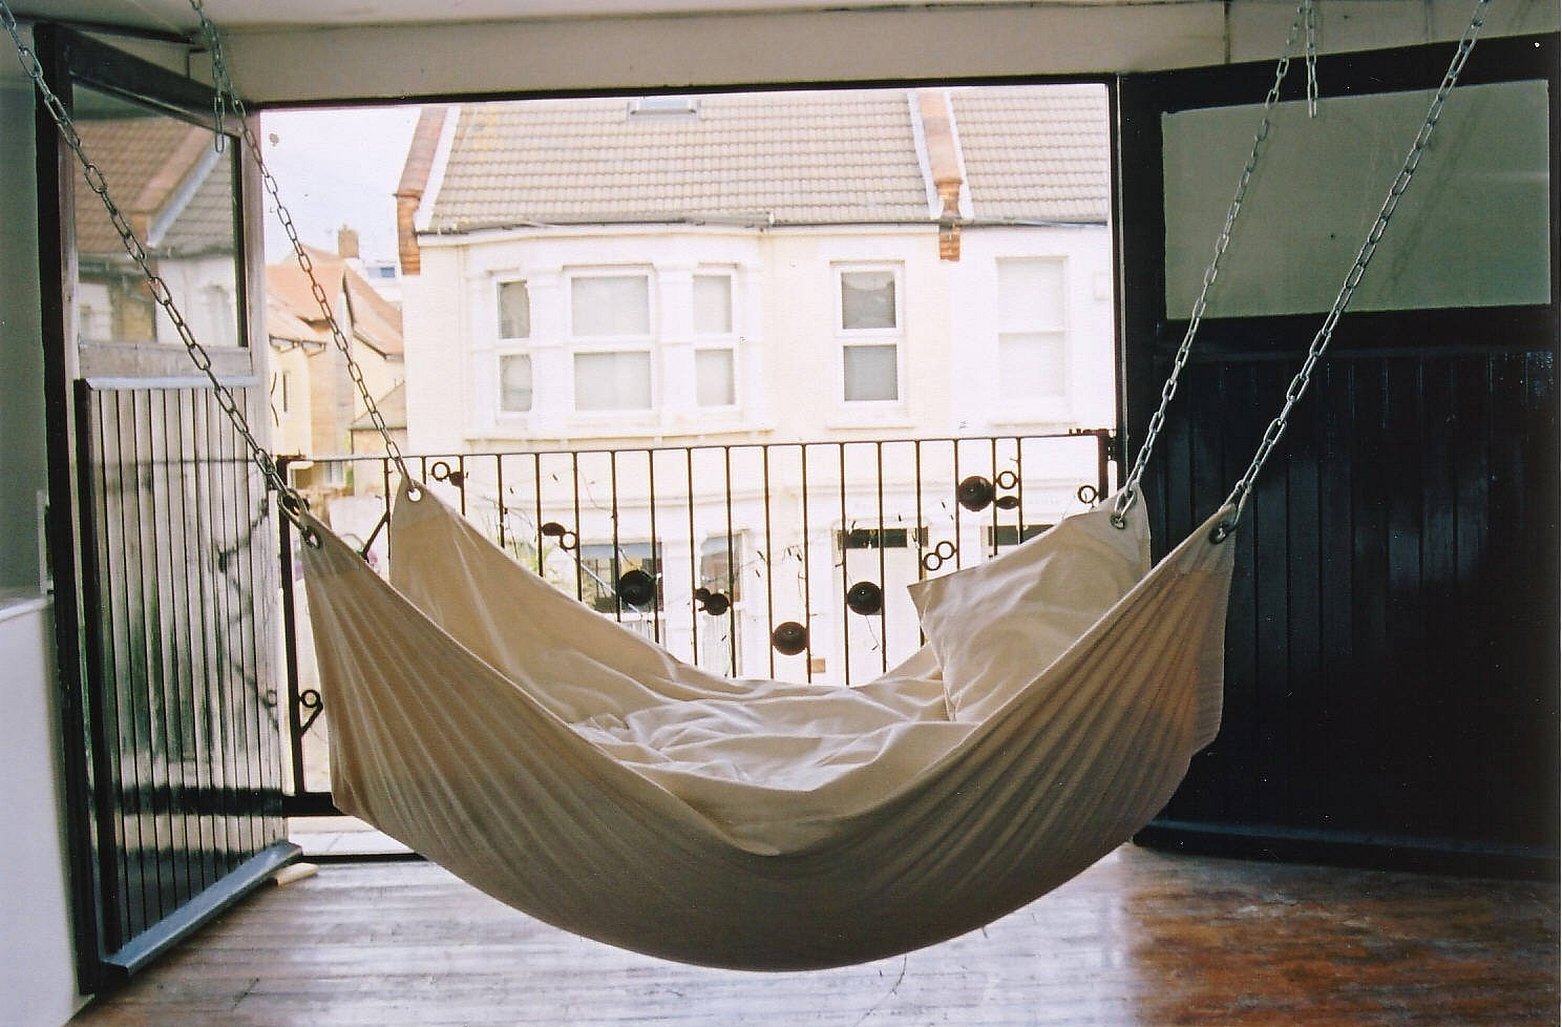
Hammock from a blanket - do it yourself
It is possible to make a comfortable hammock using a blanket or a quilt. A master class for making it is offered below:
- It is necessary to make a duvet cover for the blanket, which will make the structure more durable. Of course, you can use tarpaulin or other types of durable fabrics to make it. However, in cases where a person's weight does not exceed 100 kg, you can use a regular duvet cover. Its strength will be sufficient for comfortable use.
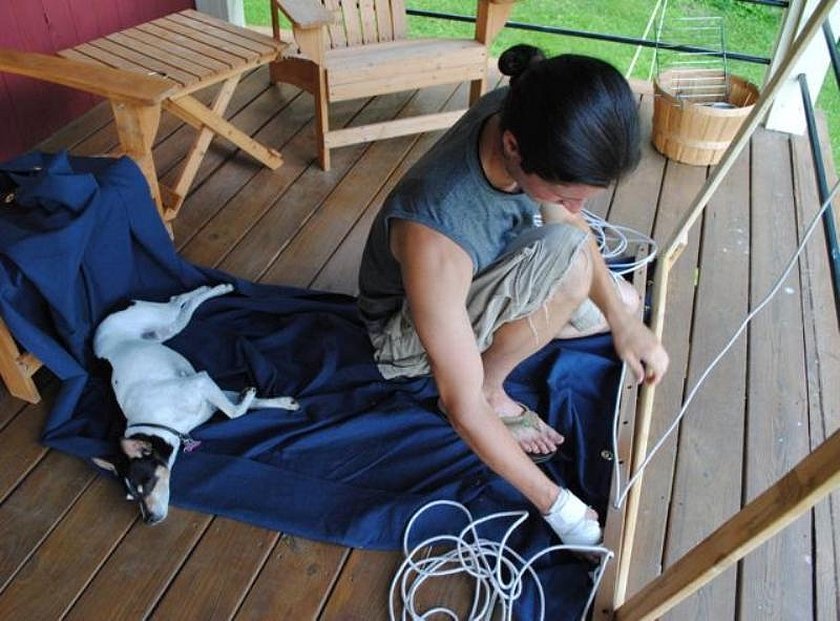
- Small holes are made in the corners and eyelets are installed in them. A special tool is required for their installation. If necessary, they can be installed in any workshop that repairs clothing.
- Ropes or chains are threaded through the eyelets to hang the hammock. They are attached to hooks or tied around poles or trees.
This hammock will be a comfortable place to relax and will decorate any interior.
If you have a blanket with long fringe, you can make a hammock out of it in another way. To do this, you need to gather the fringe on both sides into bundles. They need to be folded into a loop and tied tightly so that they do not come apart. The edges are hung on a stick. In this case, the blanket forms a cozy chair.
If you don't have a blanket with fringe, you can sew loops to the edges (every 10-15 cm) and pass a cord through them. It is folded into a bundle on each side and used to hang the structure.
DIY Hammock Tent
Using this option is a good choice for a tourist or those who want to ensure that bad weather does not spoil their vacation.
To do this, you need to:
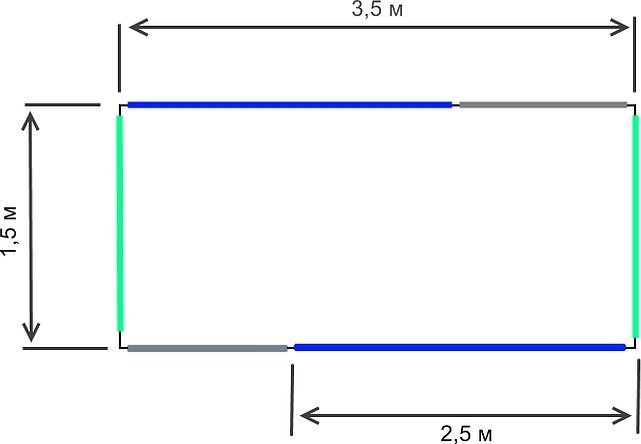
- Prepare two pieces of thick fabric. The hammock pattern stipulates that both should be 1.5 m wide. One of them is 2.5 m long, and the other is 3.5 m long.
- They need to be sewn together to form a cocoon. In this case, one short edge of these two pieces should match.
- The short edges of the resulting structure must be folded and sewn so that a cord can be passed inside the fold.
- You need to thread the cord and tie its ends, gathering the edge together. It is passed through a carabiner. The latter is secured to the tree with a strong rope.
In order to protect from bad weather, the master must make a small shelter or canopy over the open part.
Advantages and Disadvantages of Handmade Hammocks
Making your own hammocks has its advantages:
- Low manufacturing cost.
- Possibility to choose the most suitable model.
- Taking into account individual tastes during production and installation.
- It is inaccessible to rats or other animals.
However, you need to remember the disadvantages:
- It will take a lot of work.
- The quality of manufacture will be lower than that of purchased designs.
- To do this job you need to have certain skills.
To make your life more comfortable, you need to take into account your tastes and possibilities when choosing the best option.
How to secure a hammock at a dacha to a ready-made base
Although hammocks are often attached to poles, trees or hooks driven into the wall, sometimes you can do without it. There are special structures that stand on the ground and allow you to hang a hammock.
Important! They can be made of wooden beams or metal parts. This way, when installing the hammock, it is easier to choose the most convenient place.
Making a hammock will take time and effort. However, the pleasure of using it will more than pay for all the costs. Having made a hammock carefully and reliably, you will be able to use it for many years, bringing joy to yourself and your loved ones.


