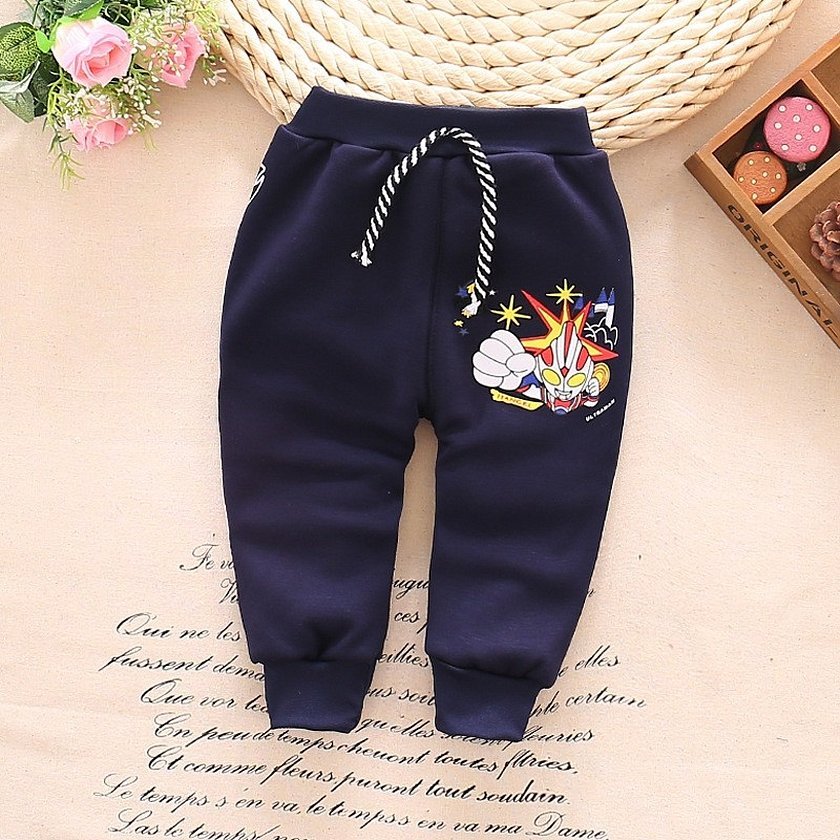
Good habits should be developed from childhood. Having beautiful, practical, comfortable wardrobe items in a child helps to develop neatness, cleanliness and excellent taste.
- Features of children's trouser models
- Measures
- Pattern of trousers for a girl or a boy
- Building the front half
- Additional constructions of length and width
- Side seam line
- Median suture
- Seam of the inner surface of the trouser leg
- Construction of the back half of the trousers
- Side seam
- Waistline
- Median seam
- Processing of the product
- Pattern of Afghani pants
- Pattern for children's trousers with elastic
Features of children's trouser models
Distinctive features of children's trousers:
- The pattern of trousers for a boy of 5 years is no different from the pattern of trousers for a girl of the same age. The only difference is in the colors of the fabrics and the location of the zipper on them.
- Low-slung styles are not recommended because there is a risk of hypothermia in the lumbar region (leads to kidney disease).
- Cuffs are attached to the bottom edge of the legs to prevent cold air from getting under the trousers.
- The external characteristics of the styles of trousers are constant, undergoing only minor changes under the influence of adult fashion. They may include features of the silhouette, decor of fashionable clothes.
- When making outfits, preference is given to bright colors and light tones: green, blue, red, yellow.
- Children's clothes are made from natural fabrics (wool, linen, cotton, knitwear, denim). Synthetic threads can be found in clothes intended for sports.
- When making clothes for children of nursery age, straps are always sewn onto them.
- A one-year-old child, a teenage girl and a young woman have different body proportions, so different styles suit them.
Measures
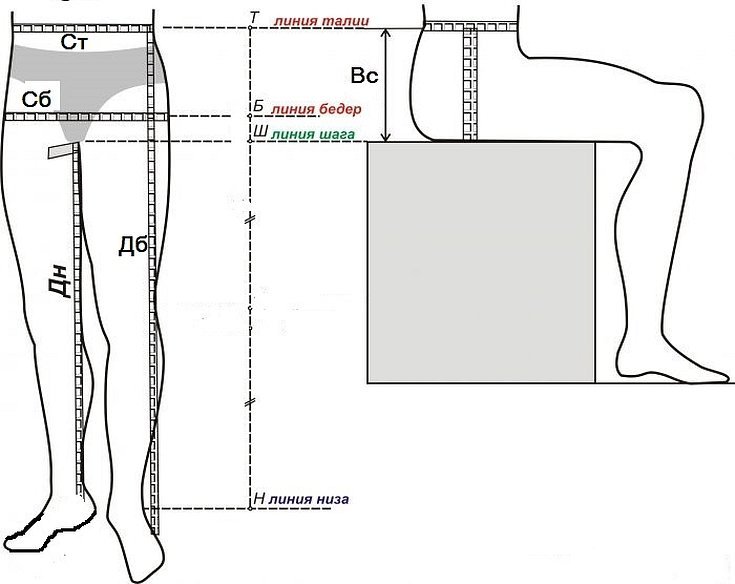
Necessary measurements:
- First, determine the length of the trousers (Lb) from the beginning of the waist to the required length, depending on the child’s height.
- The same measurement is taken, but up to the knee joint (Dbk).
- Half-waist circumference (W) is measured at its narrowest part, the value is divided by two.
- The half-girth of the hips (Sb) is also divided in half, measured along the most convex parts of the buttocks and abdomen.
- Seat height (H) is determined by the person sitting on the chair. From the waist to the surface of the seat.
- The width of the lower part of the trousers (Wbn) depends on their style and is not measured.
Important! Determining the dimensions for constructing a pattern must be done quickly and accurately, because children are extremely active.
To make it easier to find the waist, tie it with a ribbon or elastic band. The waist is difficult to determine in childhood, so you can give the child permission to move so that the ribbon is in the right place. Before taking measurements, it is advisable to dress the baby in close-fitting clothing.
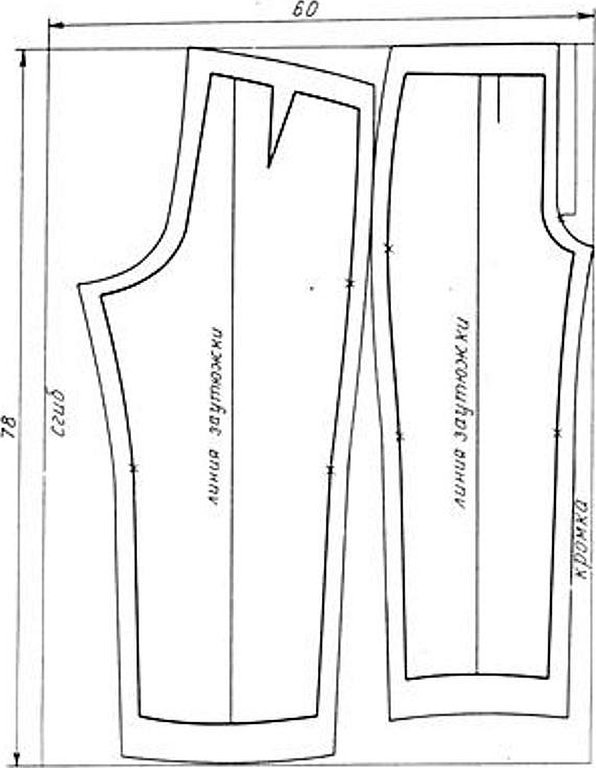
Pattern of trousers for a girl or a boy
One of the options for constructing a pattern with your own hands will be discussed below.
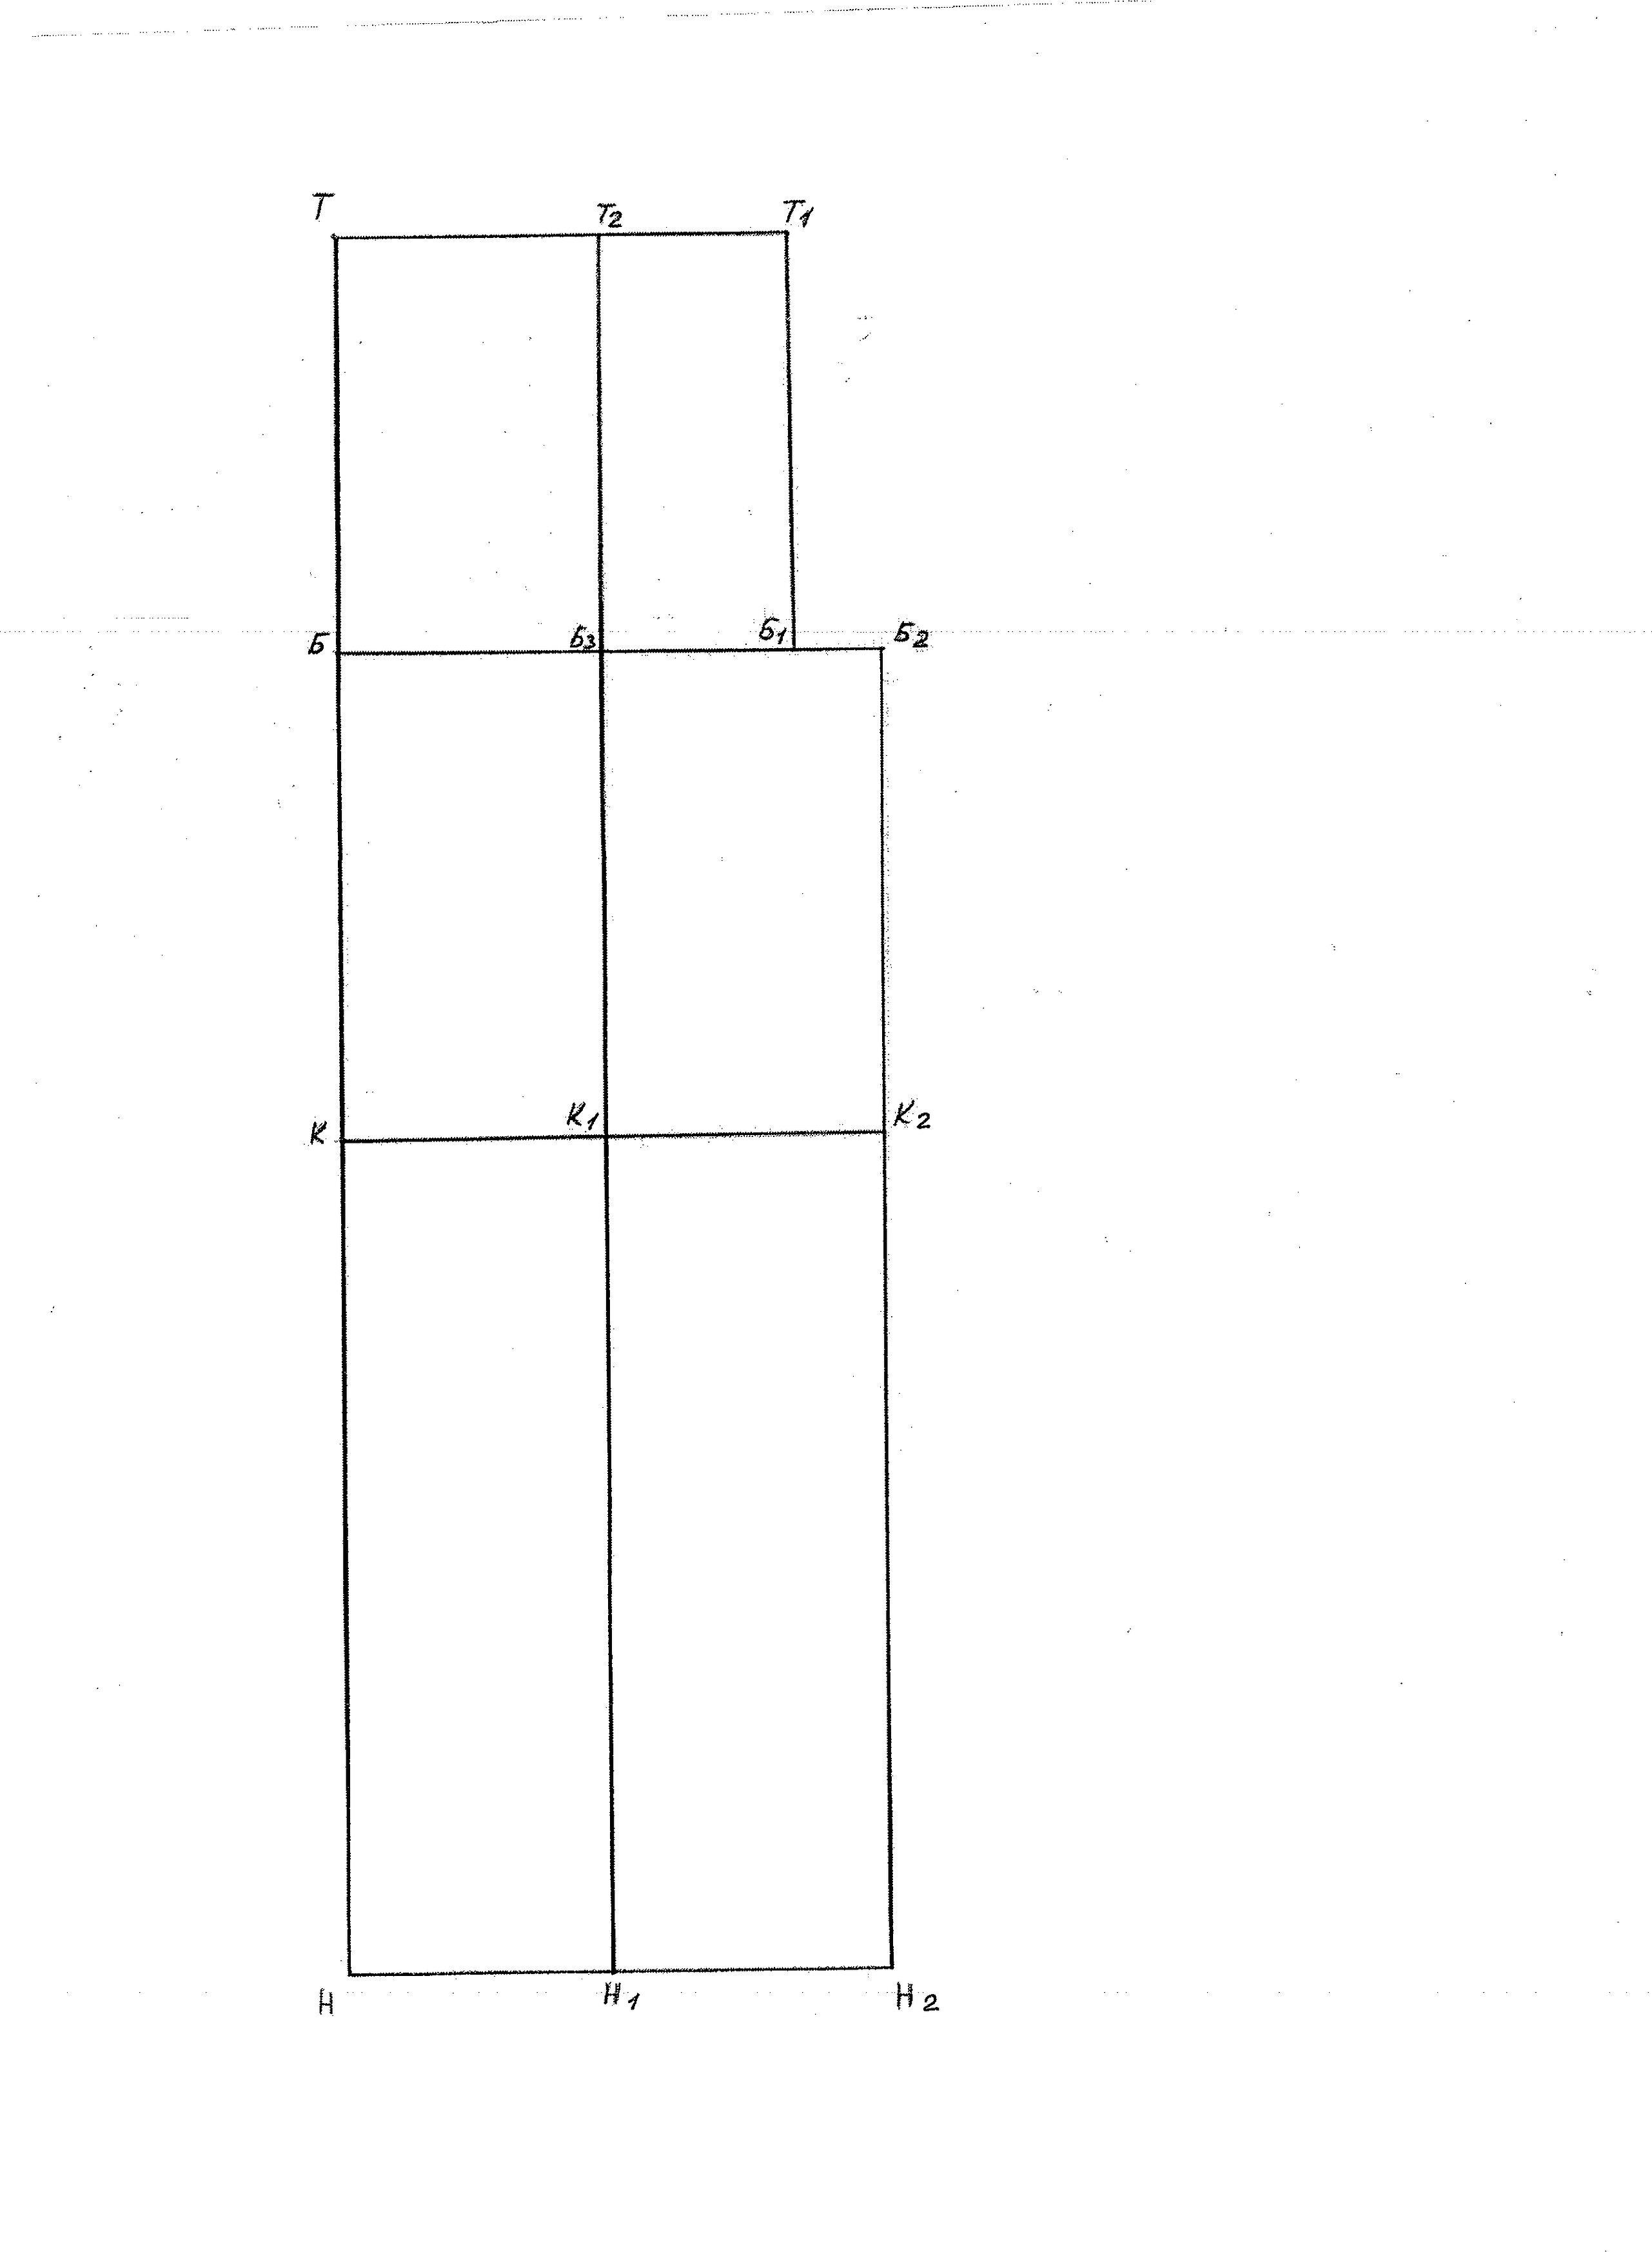
Building the front half
Draw a right angle at the top and left. On the vertical line mark the height of the seat, the distance to the kneecap and the length of the product. Create perpendiculars to them (to the right): the seat, knee and bottom lines, respectively.
On the horizontal side of the corner, mark 0.5 half-girth of the waist, on the seat line 0.5 half-girth of the hips. Connect the extreme points of these lines. Extend the seat line to the right by 0.1 Сб +0.5, divide the entire line in half, draw a vertical through the point for the full length of the product.
Please note! At the waistline, you can add an allowance of 3 centimeters for folds.
The width of the bottom of the pattern is determined by the style of the item being made. For the front half, it is calculated by subtracting two from the average desired width, for the back half, by adding it.
The vertical line that divides the seat line in half is called the iron line (arrow).
Additional constructions of length and width
Let's construct the remaining pattern elements based on the grid.
Side seam line
Take the measurement of the half-girth of the knee, divide the resulting figures in half and set them aside in both directions from the line of the arrow on the knee line. The measurement of the width of the trouser leg is also divided in half and measured from the line of the ironing of the trouser leg.
Along the waist trajectory from the upper left corner to the right, set aside 2 centimeters. From the resulting point, complete a curved line to the knee line, and then down.
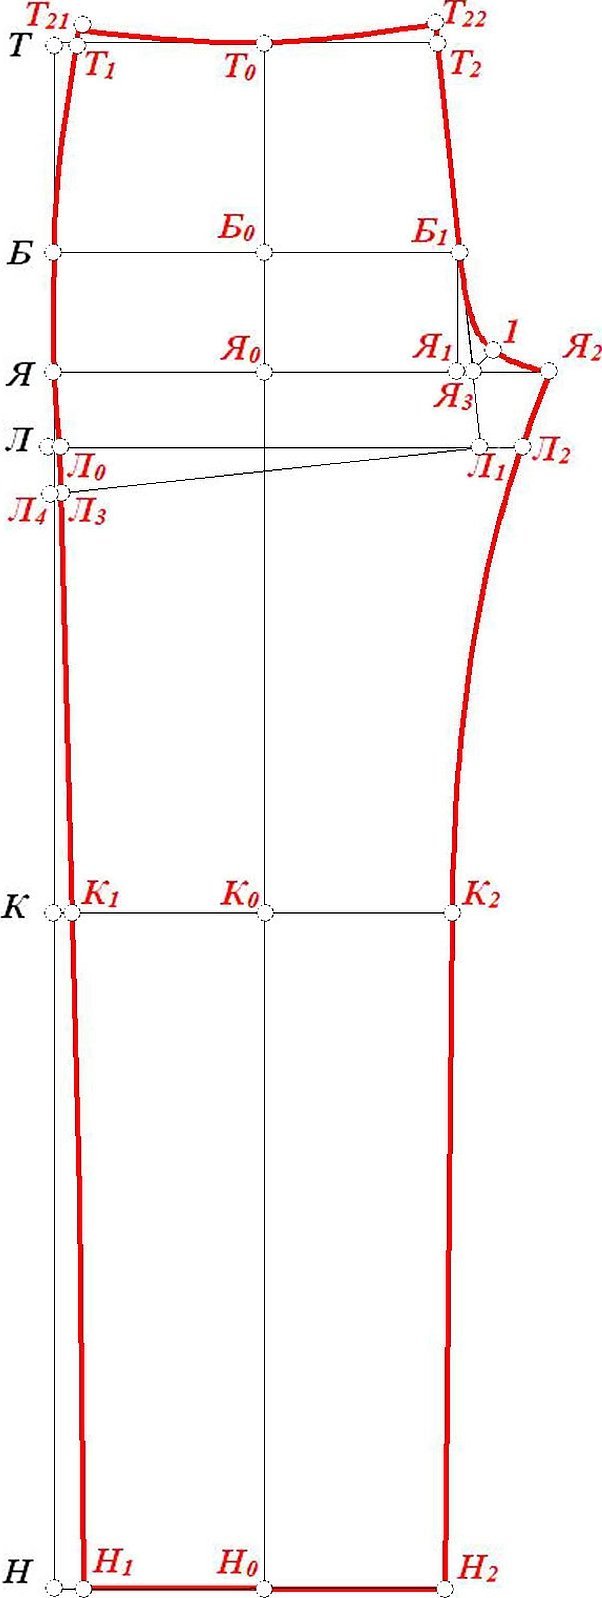
Median suture
From the bottom point of the line connecting the seat and waist segments, a value equal to 0.1 Cb + 0.5 is measured upwards. This point is connected by a concave line to the extreme right point of the seat segment.
Seam of the inner surface of the trouser leg
The extreme right points of the seat and knee horizontals are connected with a dotted line, then along its course a slightly concave main line is depicted. It is continued to the lower contour of the trousers, drawn straight.
The lower edge of the trousers is raised in the center by a centimeter (made arched).
Construction of the back half of the trousers
The grid for constructing the back half is similar to the one described above.
Side seam
The seat straight line is extended by 3 centimeters to the left. The half-girth in the knee area and the lower edge are increased in width by 2 centimeters in each direction, the extreme side points are connected to each other in a straight line.
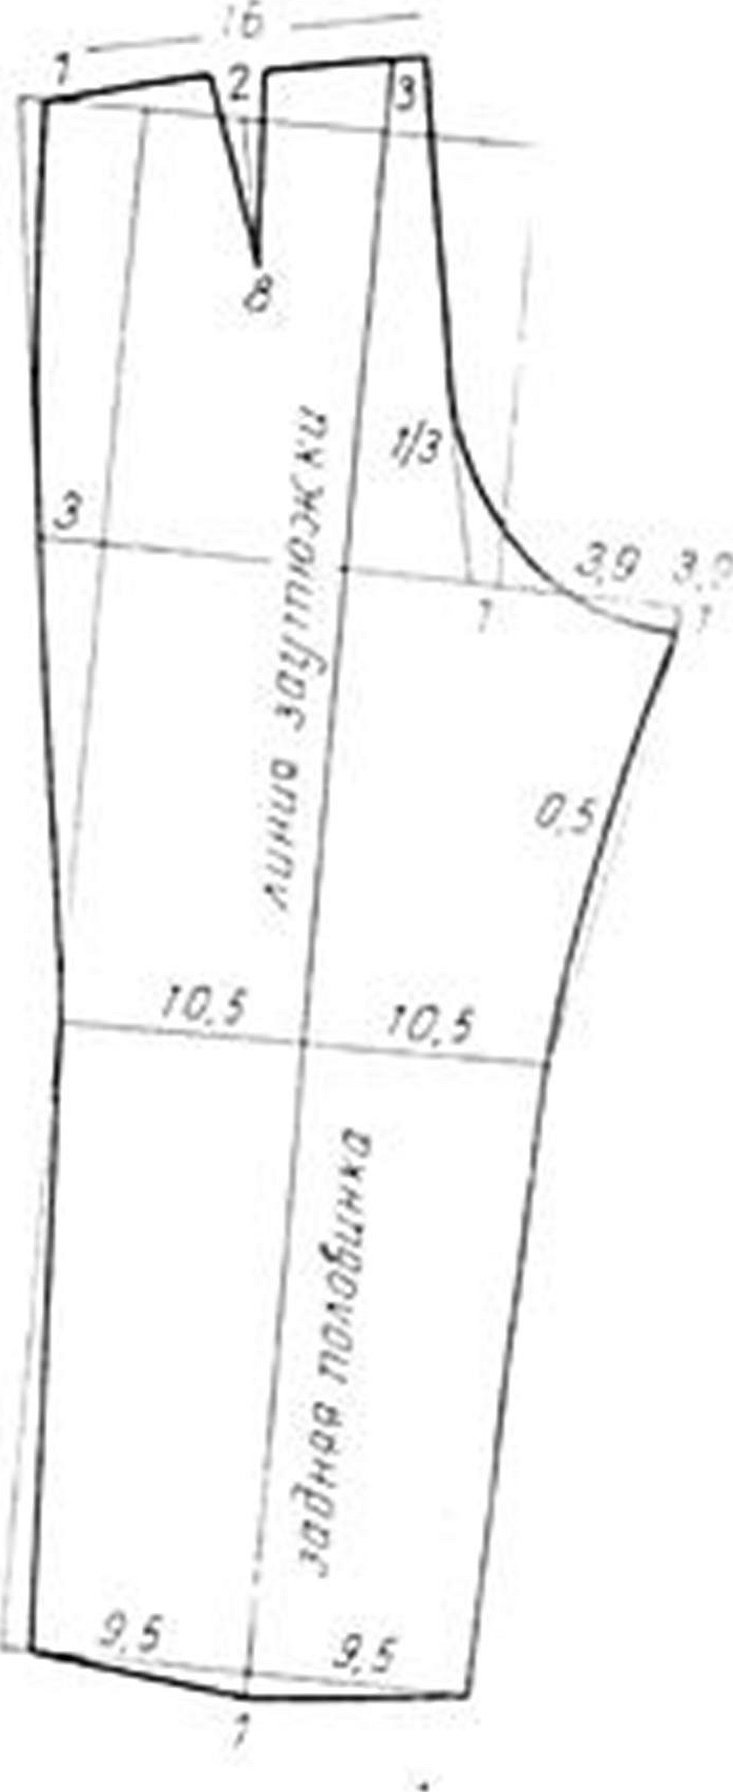
The segment described above continues upward until it intersects with the segment that marks the waist (passes through the left end of the seat line). At the waist line, this line bends a centimeter to the right.
Waistline
From the place where it intersects with the vertical line, measure 3 centimeters upwards and connect this peak with the leftmost edge of the waist segment. From this edge, measure 0.5 St + 2 along the resulting straight line. And in the found place, draw a dart 2 centimeters wide and 8 centimeters deep.
Median seam
From the extreme right point of the seat line, measure 0.1Cb + 0.5 to the right and 1 centimeter down. From the rightmost vertical line connecting the waist with the seat line, measure a centimeter to the left and draw a line at an angle measuring 1/3 of the seat height. The resulting points are successively connected with an arc.
The inner seam of the trousers is drawn in the same way as on the front surface.
The bottom edge is extended by a centimeter in the center and drawn with a concave curve at the top.
Processing of the product
Sequence of product processing:
- 4 pieces are cut out with 1 cm allowance along the edges and the 5th - 6th "for growth".
The pattern of the front half is pinned on the right, the back half on the left, with the ironing line parallel to the direction of the grain line.
- The edges are processed.
- The darts are sewn together.
- Sewn on the sides and in the crotch area.
- The trousers are placed face to face with each other, and the middle seams are laid.
- The clasp is sewn in
- A belt is made from a strip of fabric 9 cm x the length of the top of the trousers + 5 cm.
- The parts for supporting the belt are cut out and sewn on: 6 pieces, 2.5 x 5 cm.
- A clasp and a loop are attached to the belt.
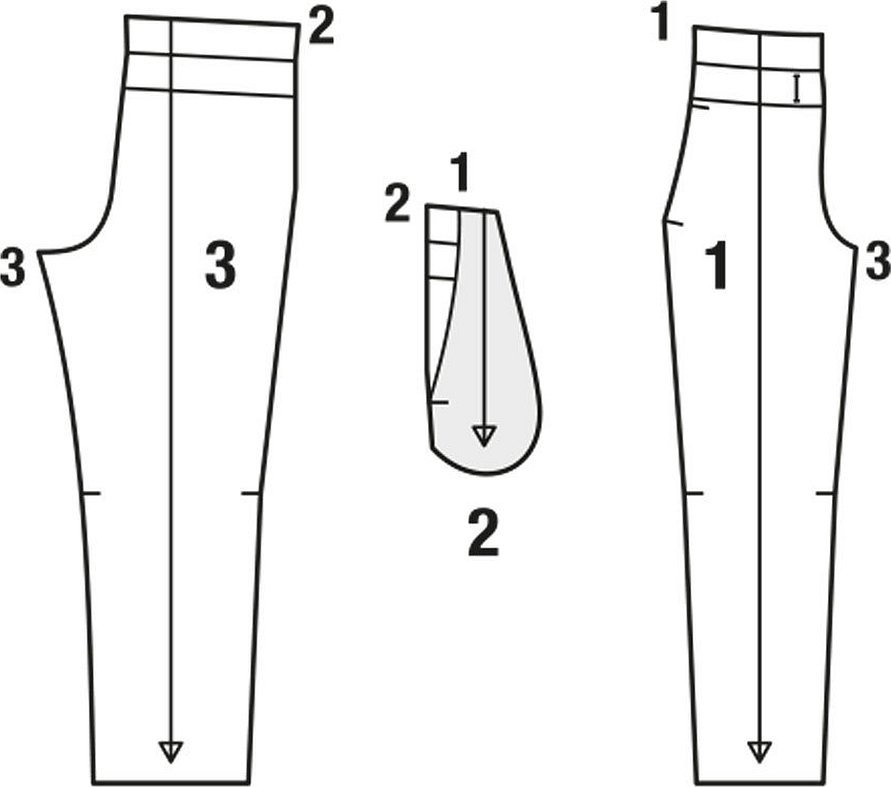
Pattern of Afghani pants
Afghani (harem pants) are spacious pants with an unusually low inseam. This is a great option for summer knitted pants.

You can draw the pattern yourself or print it out.
The desired length of the pants (to the knee, to the middle of the calf, to the ankle) is equal to the length of the side of the square.
Manufacturing:
The red line is sewn to the red line, and the blue line to the blue line. In this case, the green outline becomes the new waist line. In the corner area, openings for the legs are formed, they can be processed with cuffs.

Pattern for children's trousers with elastic
How to make a pattern for trousers with elastic:
- The pattern for children's trousers of the classic style is transformed into a pattern for trousers with an elastic band.
- The pattern of trousers for a boy is duplicated without darts and holes for fastening. From the widest place of the hip girth, a line is drawn to the waist (the width of the structure is no more than the waist girth).
- The line rises above the waist. The width of the elastic band with allowances (2 cm) is marked. At the top, a facing with a sewn-in channel (drawstring) is formed, into which the elastic band is inserted. The edges of the front and back facings should match.
- The cuts are formed and the facing is turned inside out (12 of the width goes inside).
- The detail is sewn on, an elastic band (ribbon) is inserted. The sweatpants are ready.
This is just a specific example of modeling based on classic trousers. Having the skills to build basic patterns, you can build not only a pattern for trousers for a boy with an elastic band, but also make other upgrades: add folds, change the width, shorten, outline a flare line and even change the fit.


