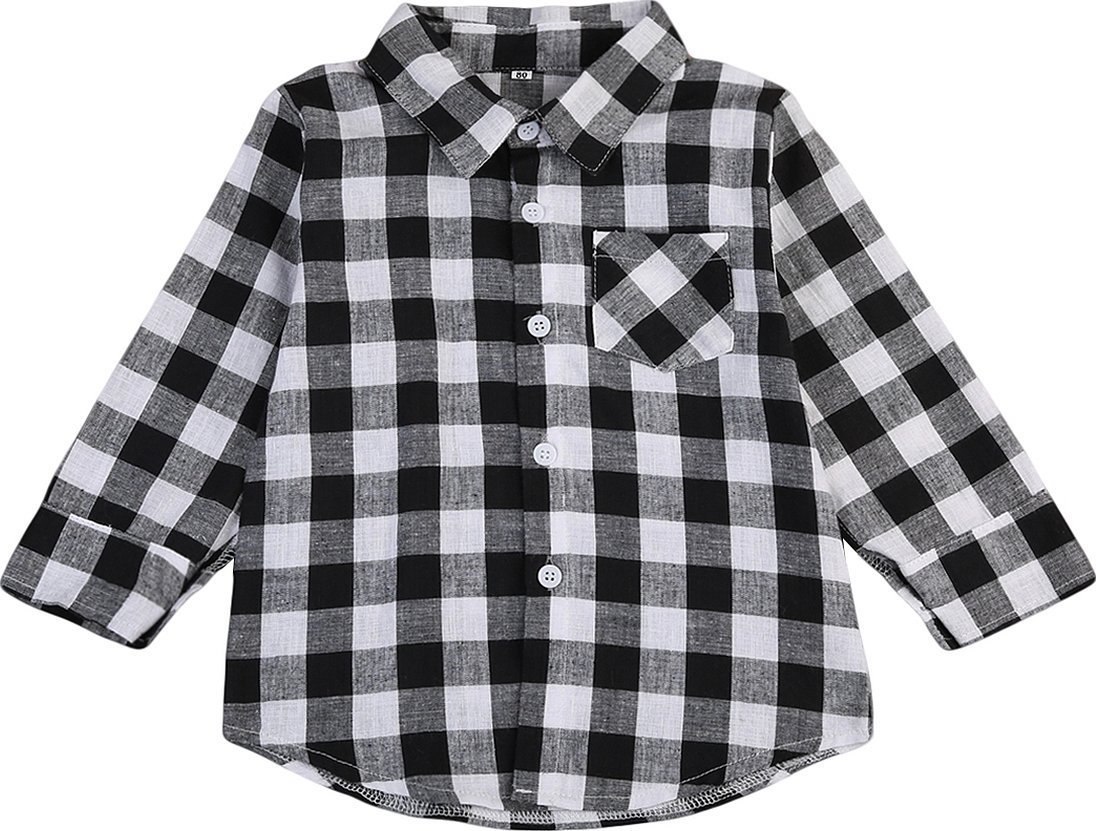
Children's clothing is always distinguished by its originality in terms of colors. But at the same time, the cut is absolutely identical to adult things. To make a shirt for a baby unique in all respects, you can sew it yourself. To do this, you need to take measurements, make a pattern for all the elements and sew the parts together.
Taking measurements
To make a pattern for a children's shirt the right size, you need to take measurements from the baby. The following parameters are needed to sew the shirt:
- Chest circumference. The measuring tape should be positioned so that it is at the point of the largest bulge.
- Waist measurement. The measurement is taken at the narrowest point.
- Hip circumference. Measure the fullest part of your buttocks.
- Neck: Place the tape measure at the base of the body part.
- Back length is the distance from the 7th cervical vertebra to the waist line.
- Front Waist Length - Place tape from base of neck to waistline across chest.
- The armhole depth is from the 7th cervical vertebra to the bottom of the shoulder blade.
- Armhole width.
- Arm length. From the end of the shoulder to the wrist with the arm bent.
- Wrist circumference.
- Shoulder width is from the end of one shoulder to the other.
- Back width. The measurement is taken along a straight back through the center of the shoulder blades. This is a horizontal line.
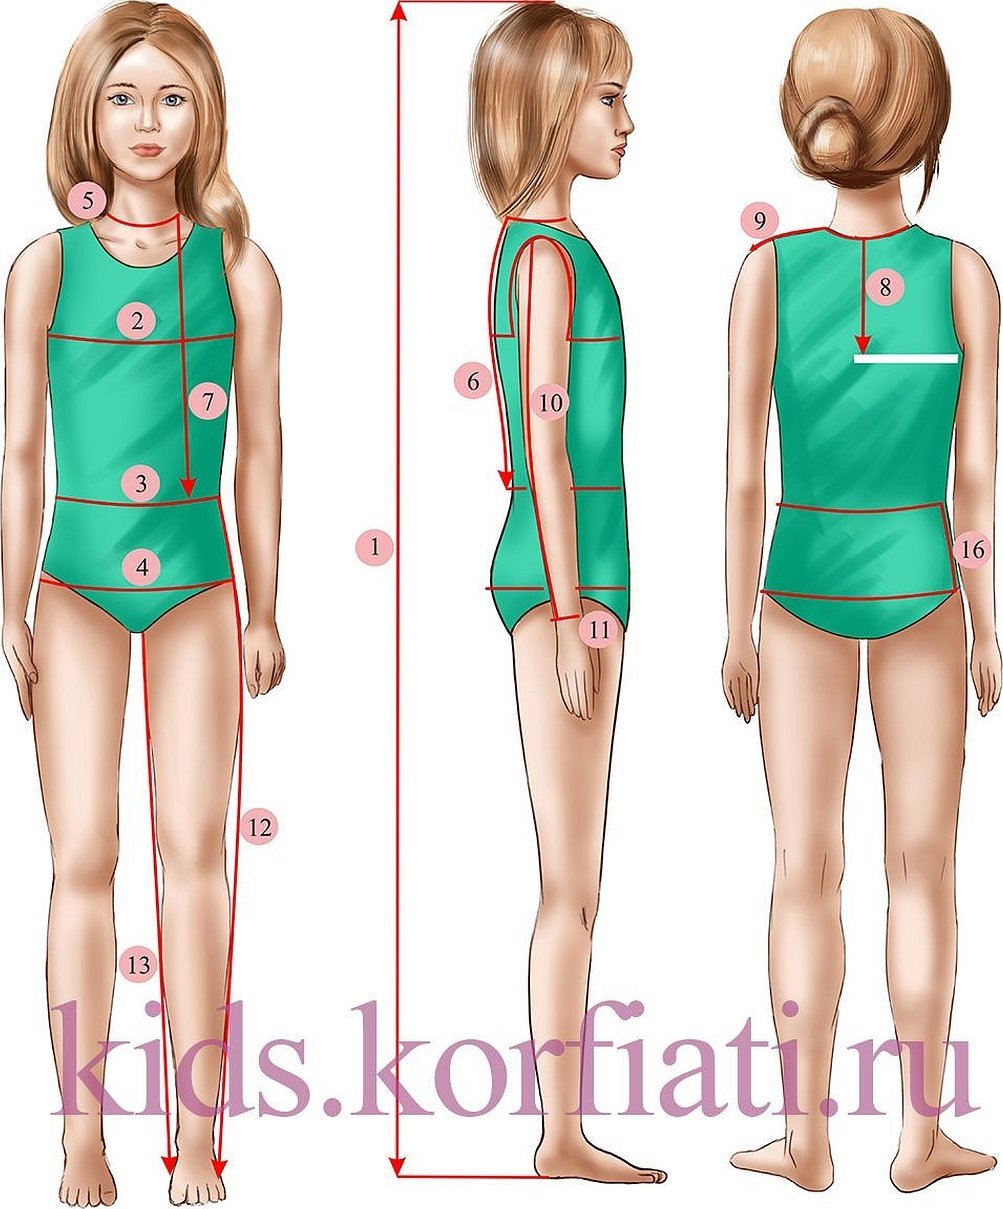
Please note! In the process of making any item, it is necessary to measure the height of the baby. This technique will help to more accurately determine the size of the item.
It is necessary to write down the obtained parameters in order not to get confused in the measurements, using special symbols.
Modeling
A pattern for a boy's shirt is prepared after the style or cut of the item has been determined. This may not only be a classic version of the product. You can create a shirt that will be worn over a T-shirt, turtleneck, and worn loose. If necessary, you can even sew a Russian shirt that will complement a national costume.
After this, the initial sketch is modeled, which may look something like this:
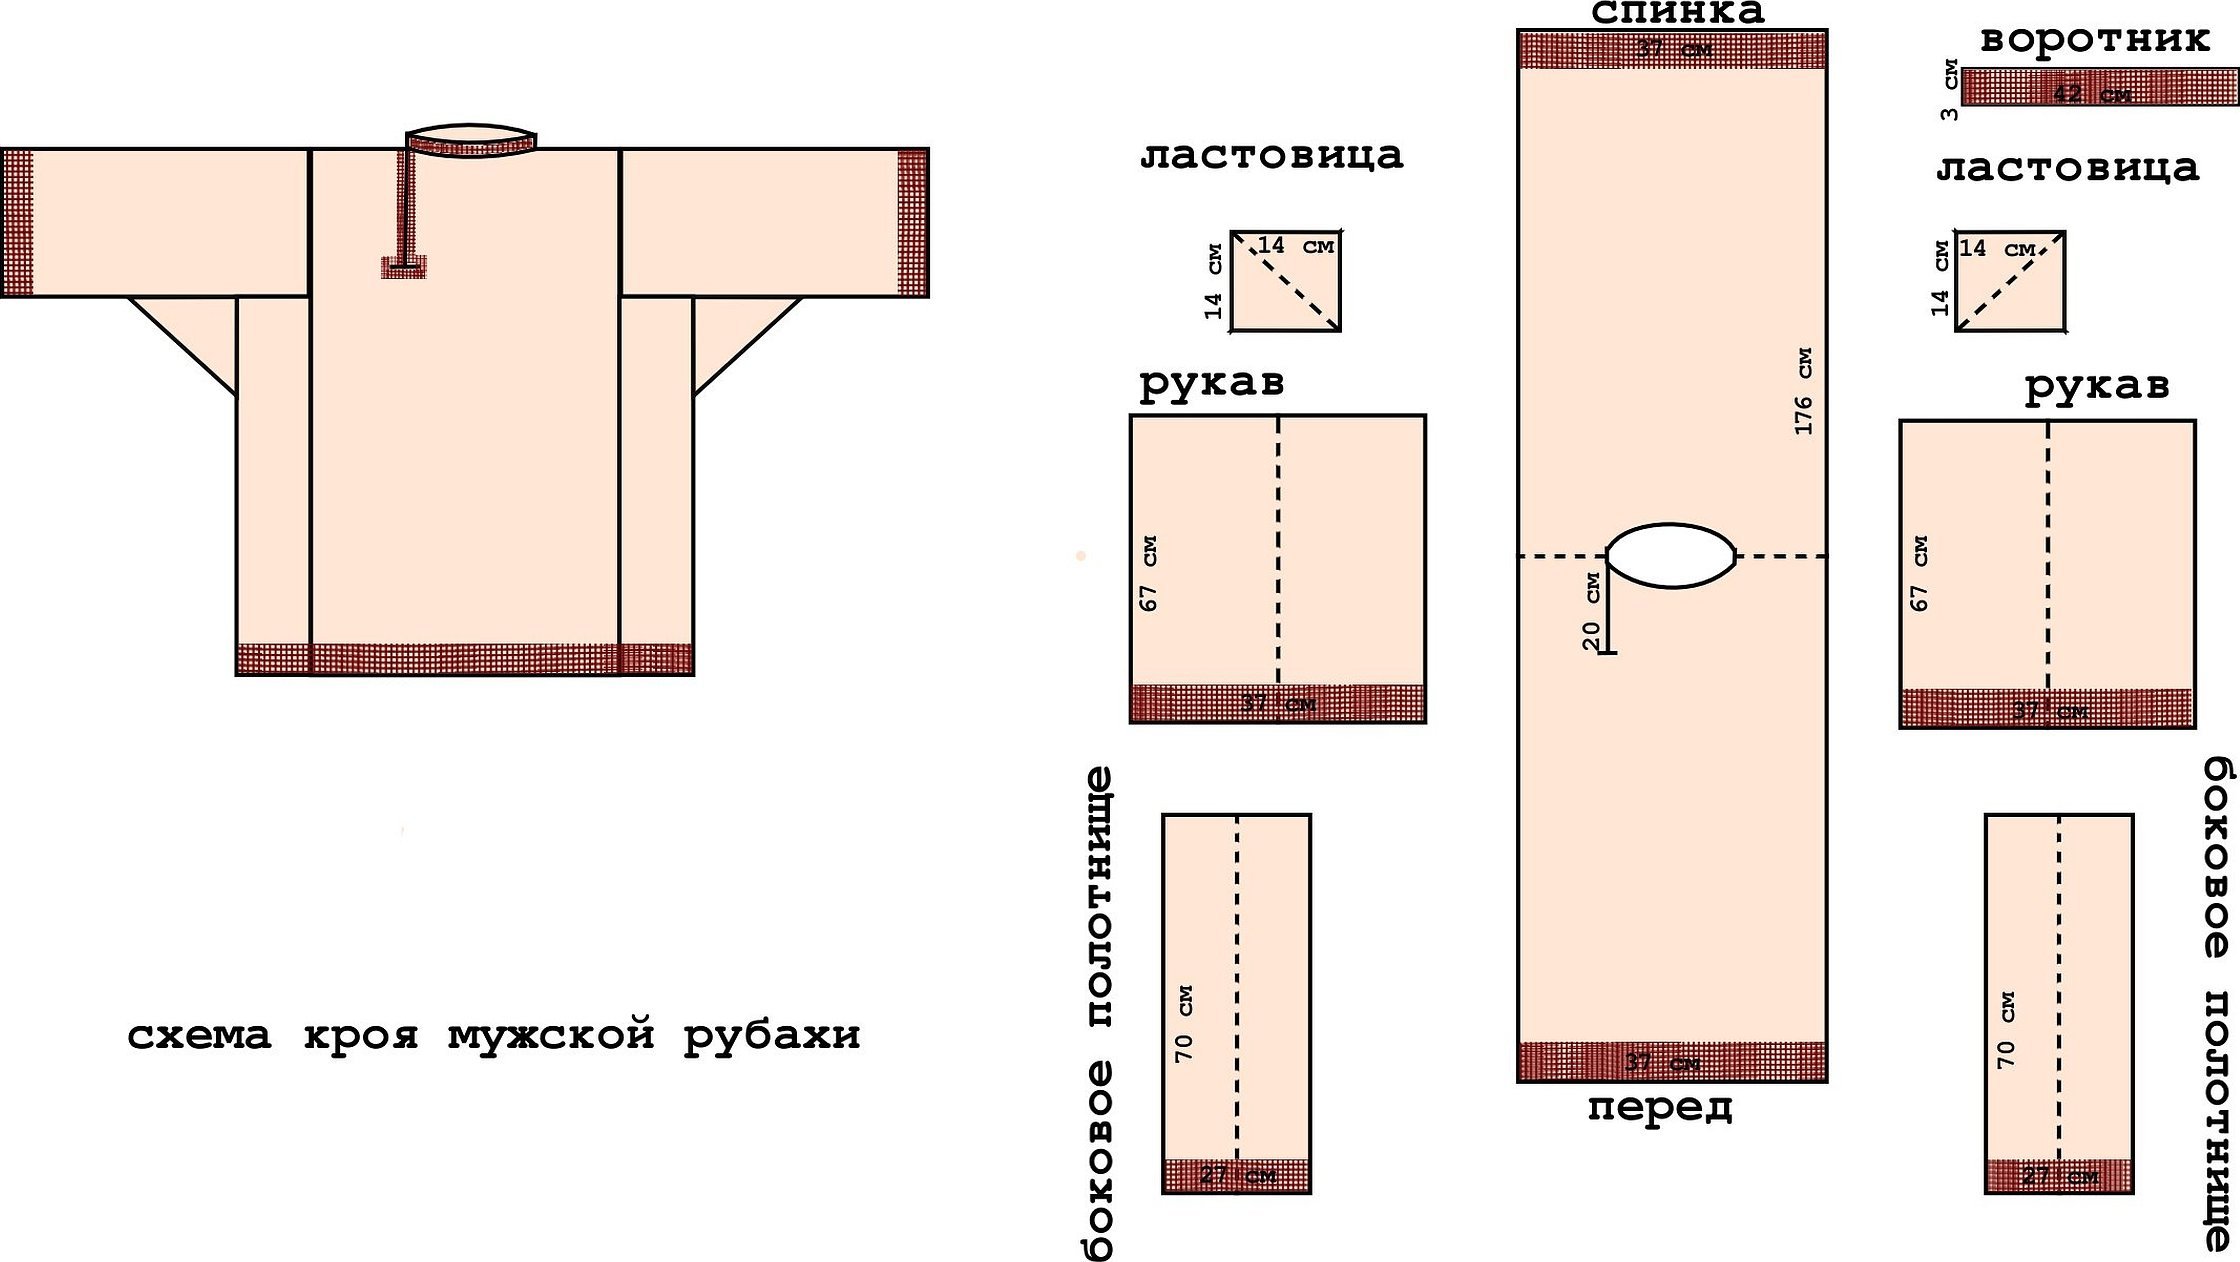
The simplest option for creating a model for making a Russian shirt with all the decorative elements.
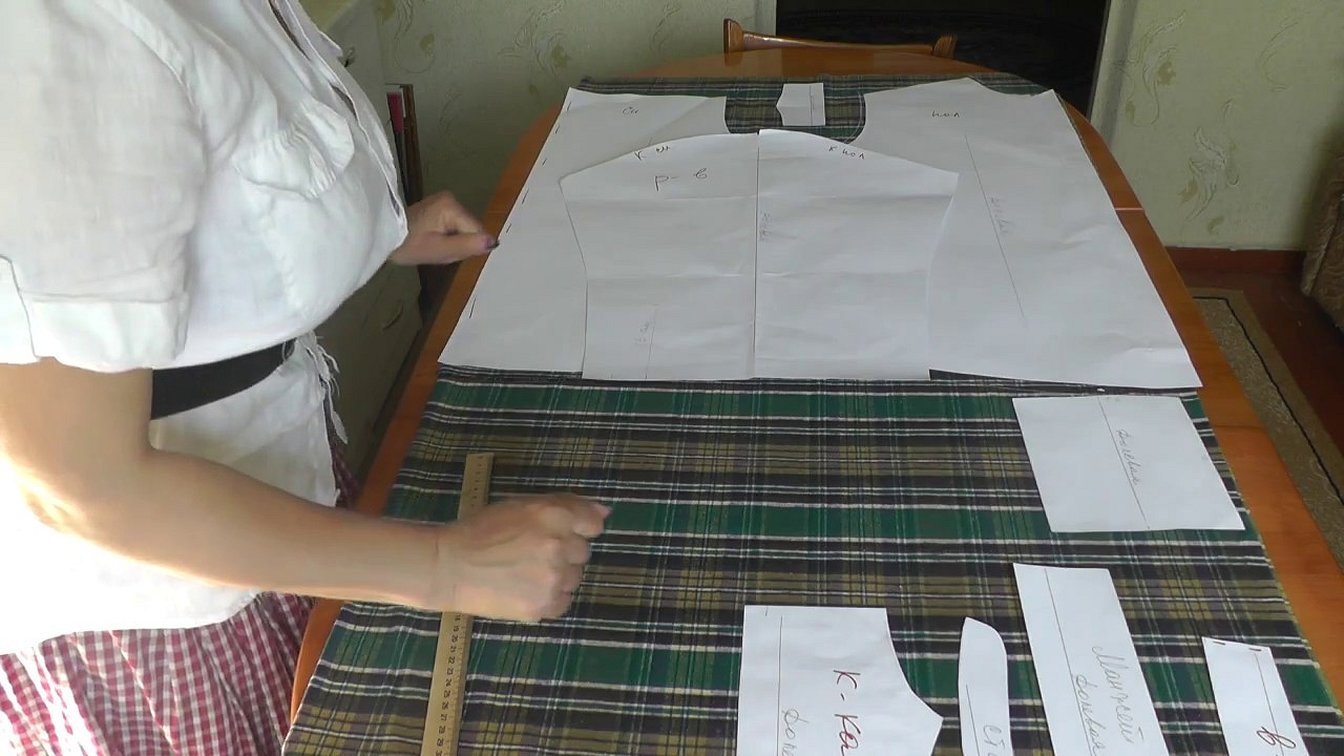
Cutting out the details
A pattern for a boy's shirt is a complex of different parts. Usually, the following are cut out separately:
- front shelves:
- back;
- collar;
- sleeves;
- pocket;
- sleeve cuffs.
It is better to work on each part separately and then make a general assembly of sketches.
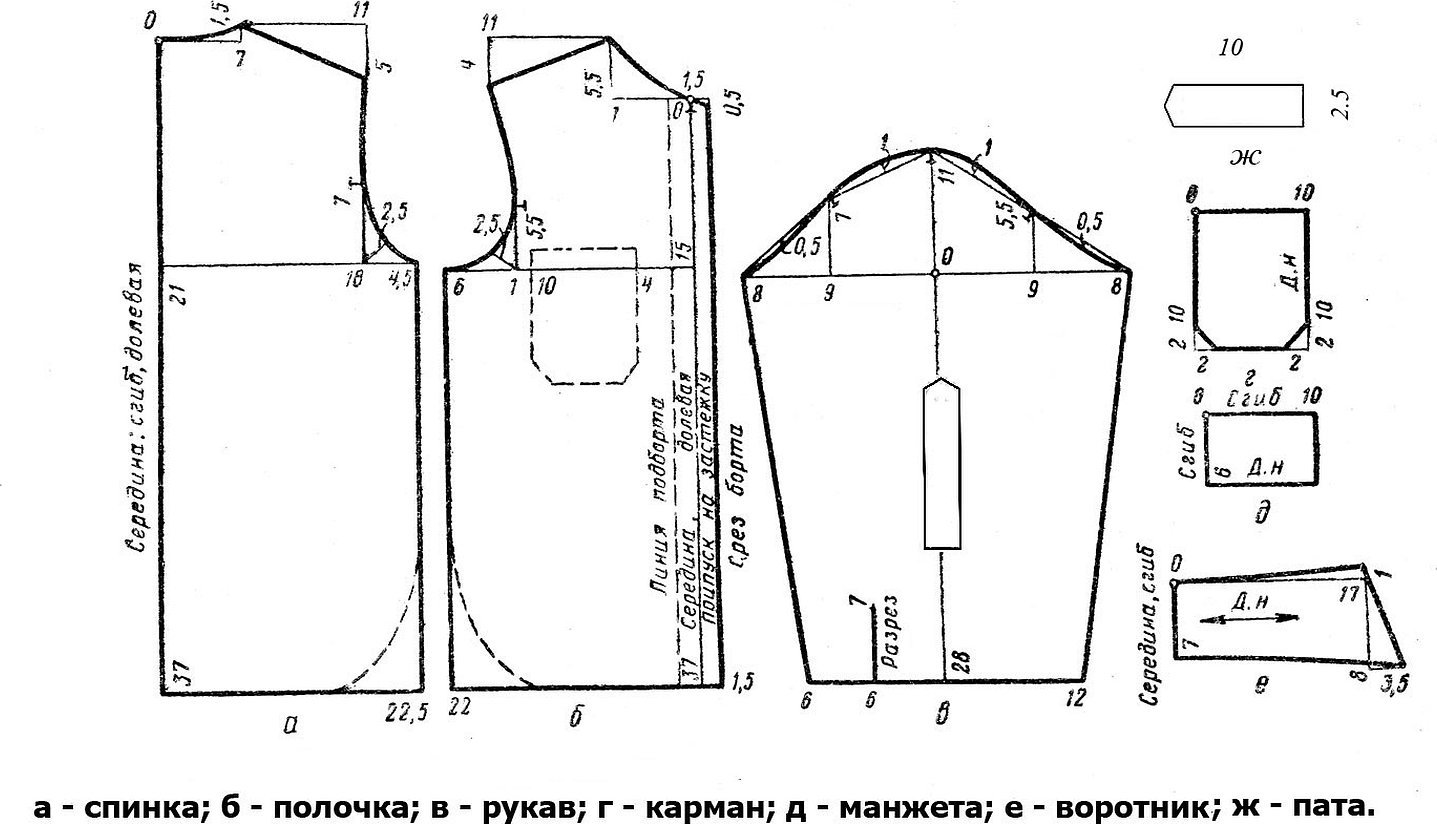
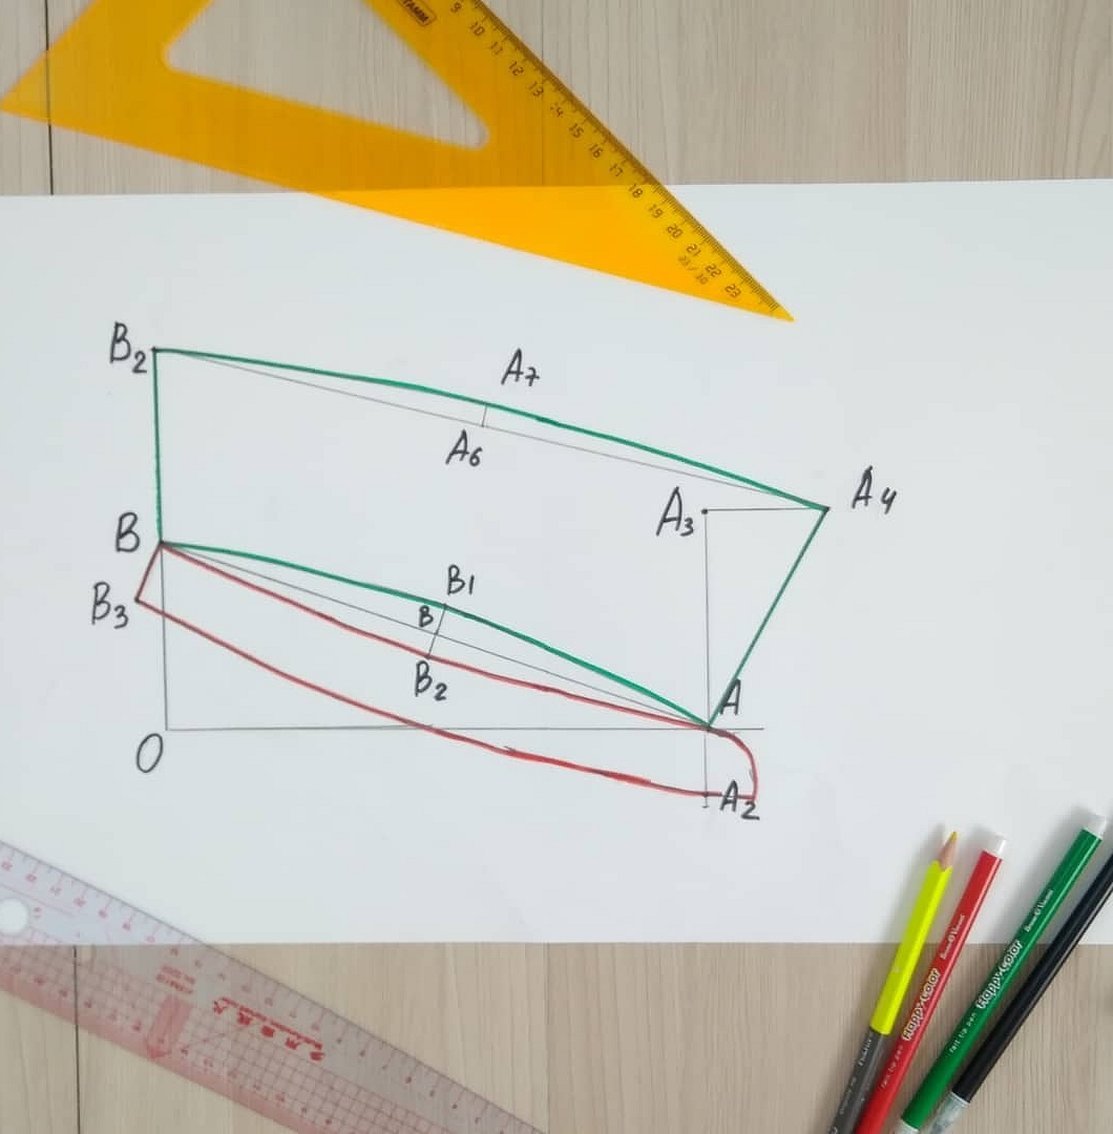
Construction of a shirt sleeve
If you are not making a children's beach shirt, the sleeve pattern will be much more complicated. The general scheme for constructing a sleeve is as follows:

Naturally, it is worth transferring numbers with already defined measurement parameters to such a basis.
Sleeve cuff
The sleeve cuff can be different, there are several variations:
- straight single;
- button-down;
- cufflink cuff;
- narrow cuff;
- one-piece with button;
- for cufflinks with extension.
In order not to complicate the construction, it is worth choosing a straight ordinary cuff. In this case, the construction is carried out as follows:
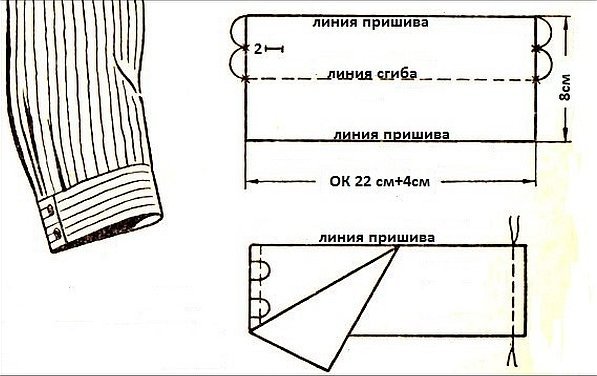
This cuff can be sewn onto tapered or pleated sleeves. Fold the cut cuff in half, face down, stitch the sides, turn right side out, baste and sew along the bottom of the sleeve.
Shoulder cut
The shoulder cut is formed in a matter of minutes. From the point defining the top of the neckline cut on the front shelf, through the point defining the slope of the shoulder, draw a shoulder line. Additionally, you need to add 1.5 cm to the measurement for processing and forming the seam.
Additional information! The shoulder cut is constructed in the same way for a T-shirt.
It is advisable to make marks with a pencil of a different color to highlight this construction among other elements of the pattern.
Backrest construction diagram
To avoid getting a mediocre blouse with an incomprehensible cut, it is worth using the classic version of constructing the back lines:
- From the top of the armhole on the front panel, a vertical line is measured down.
- From the end of this line, a horizontal line is drawn to the right until it intersects with the armhole line of the back of the shirt.
- From the intersection point down the armhole line, measure 1 cm and connect it with a smooth line to the yoke line.
On the back of the product, you can model a counter fold. You need to make an allowance for the fold in the center of the back of 4 cm. Now the detail will be cut with a fold in the center of the fold.
Neck
Usually only the front part of the neck is constructed, which is then transferred to the back piece:
- Determine the symmetrical point on the front shelf and the top of the neckline on the back.
- From this point you need to draw a straight line equal to 1/3 of the neck circumference to the shelf.
- You also need to lower a straight line down, which has the same length + 0.5 cm.
- Connect the resulting points with a concave line.
This can also be applied to beach style items.
Shirt collar with stand
A stand-up collar can be constructed using the following scheme:
It is necessary to carefully transfer all measurements to the workpiece. This will help to recreate the correct shape of the element.
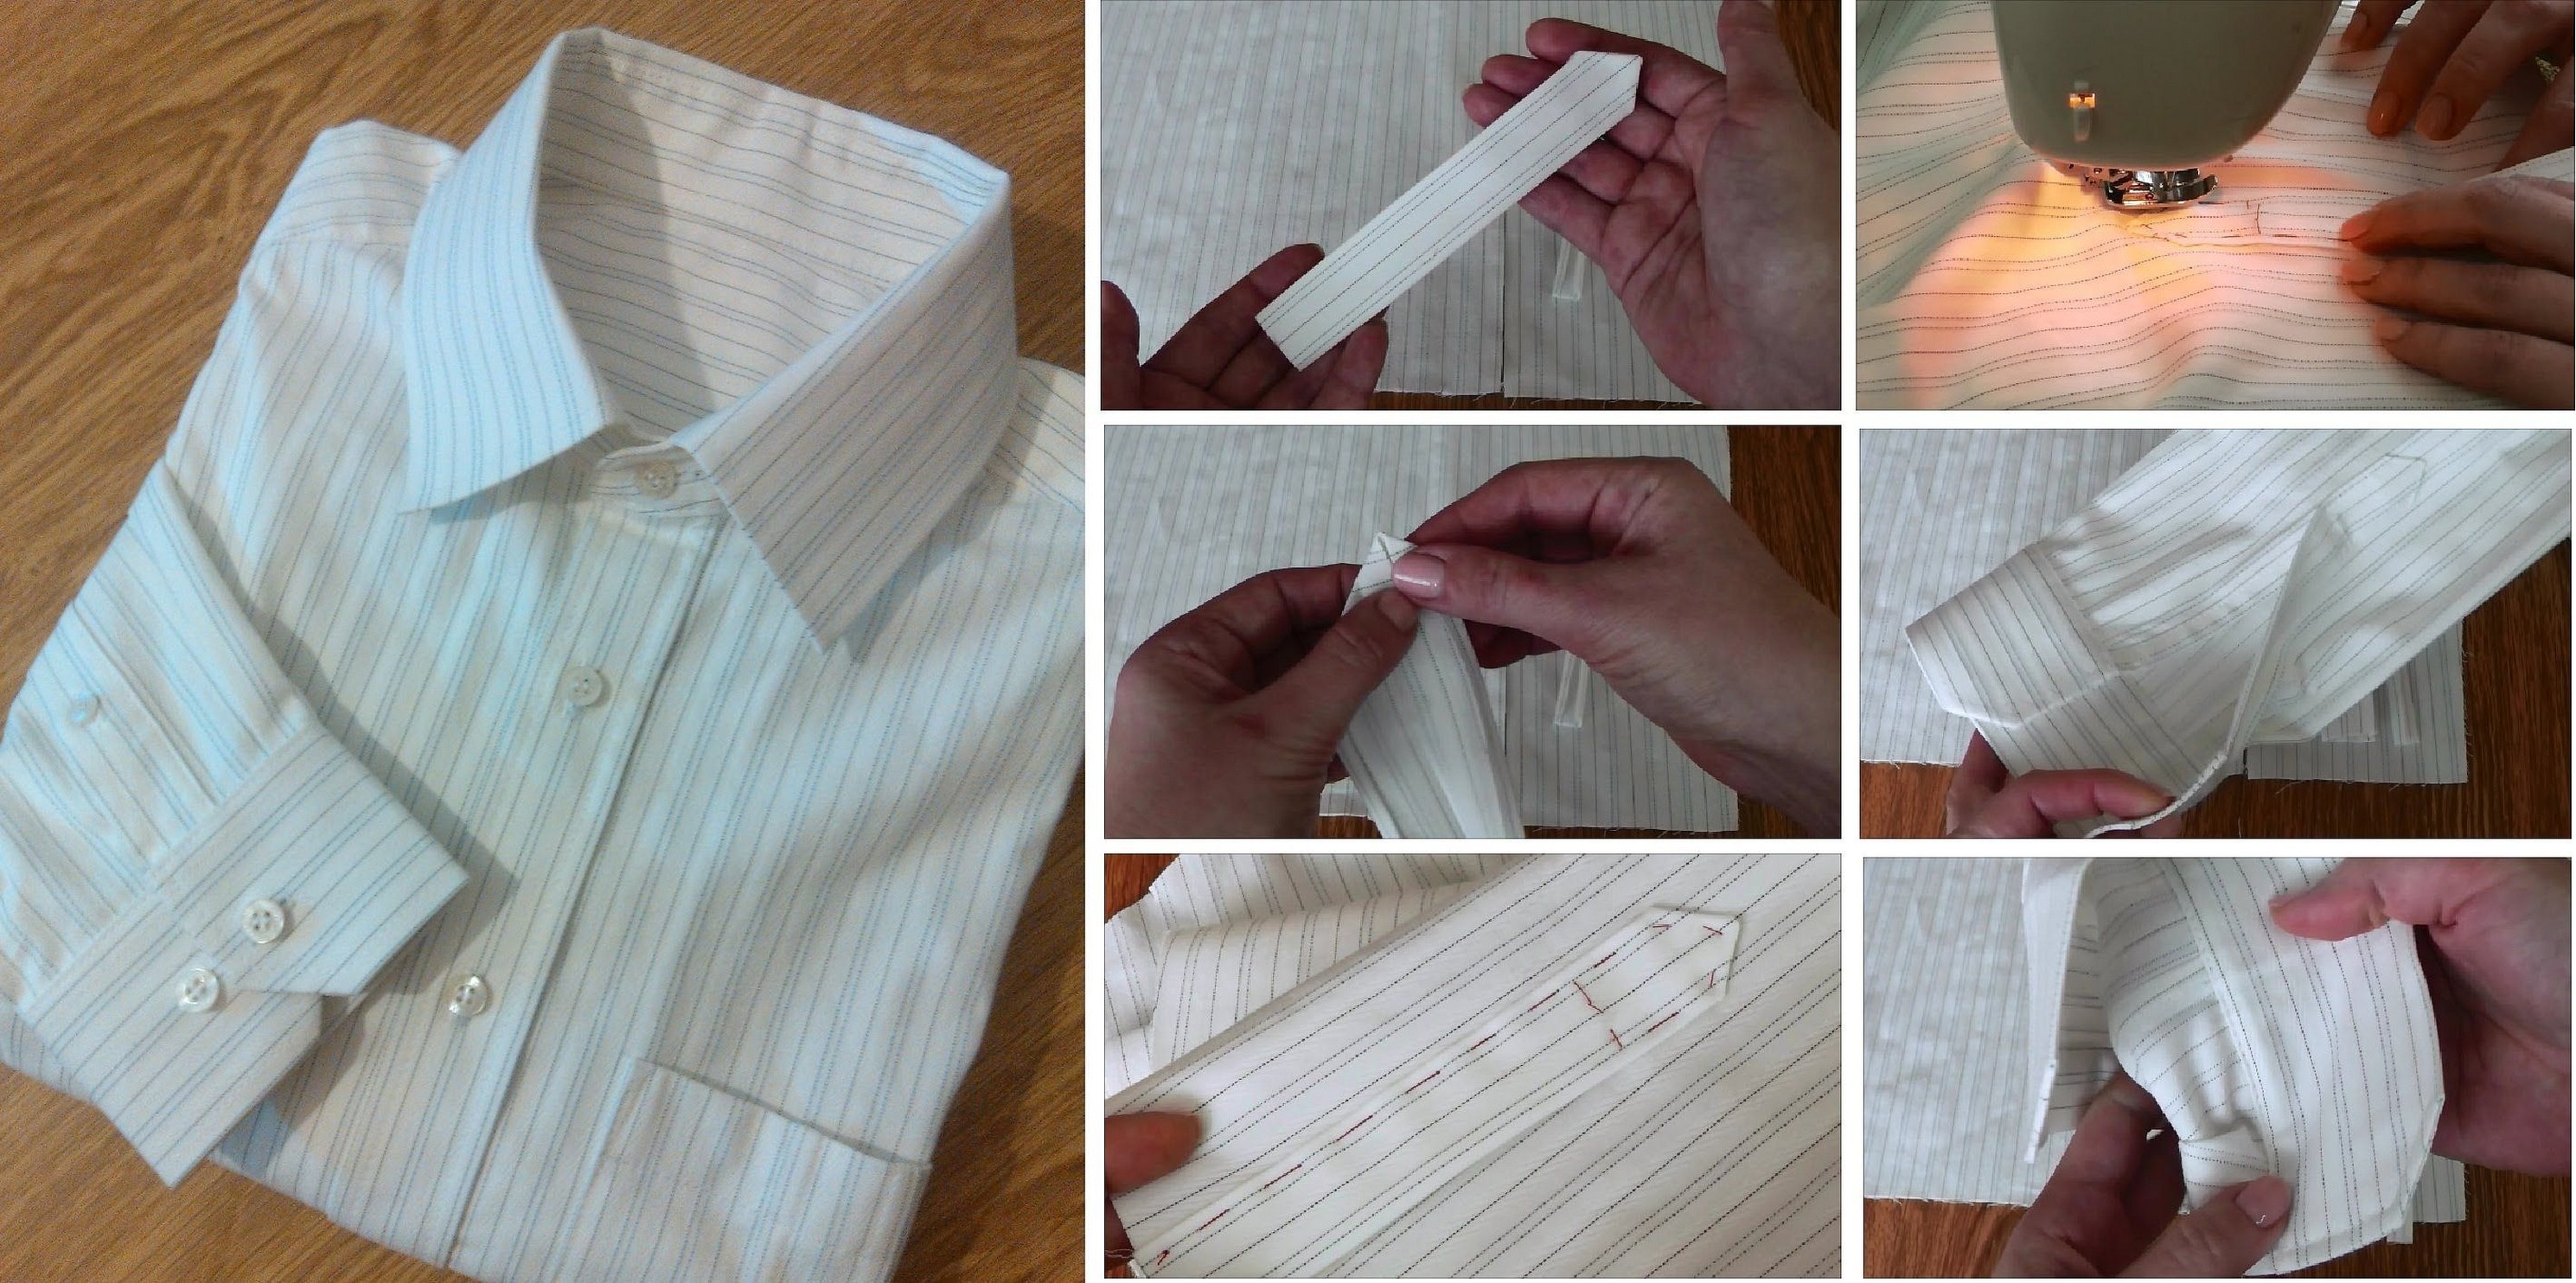
Shirt for a boy: master class
Not many people know how to sew a children's shirt with their own hands for beginners, the patterns of which will be completely simple:
- Choose a simple sketch. Select high-quality fabrics.
- Take measurements from the child. Consider the textile features.
- Make a simple pattern.
- Transfer the patterns to the fabric.
- Overcast the edges and connect all the parts.
- Sew on the fittings.
This is a list of stages of work on the manufacture of this thing. When designing each pattern of all components, it is worth choosing the simplest options.
Processing technology
Each pattern needs to be processed so that the threads do not fray through the cuts on the fabric. This can be achieved as follows:
- Pull out all the threads that have separated along the cuts.
- Finish all edges with an overlock stitch. For this, you should use a sewing machine.
- Next, all the parts are assembled, forming the silhouette of the product.
- All connecting seams on the parts need to be worked out.
Important! To prevent the threads from fraying too much, you need to initially choose the correct direction of the thread.
First, you need to connect all the parts with a basting stitch or safety pins. This technique will help maintain the integrity of the composition.
Pocket processing
Patch pockets are an integral part of the entire shirt design. You need to make a pattern of the element in accordance with this technology:
The processing and construction option is completely elementary, so it will be accessible even to a novice seamstress.
The child will look irresistible in a shirt that was sewn with his own hands. To do this, you can design a pattern for the product, gradually creating details. It is worth choosing the simplest forms of cuffs, pockets, sleeves and collar. It is worth taking care of the high-quality processing of all the details. In addition, you need to make a high-quality assembly of the product.


