Taking measurements is the first step in sewing any garment. If you do it incorrectly, you risk ruining the garment. This article discusses how to correctly take measurements from a woman's figure, and also provides several visual diagrams.
- General rules for taking measurements
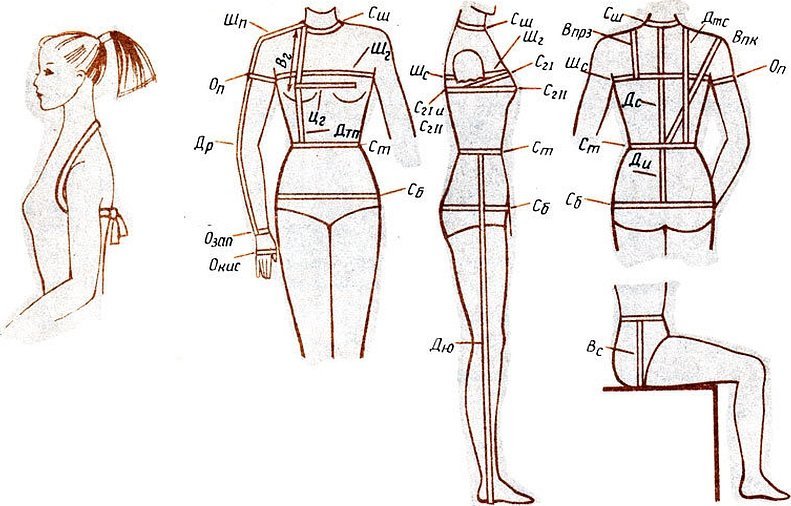
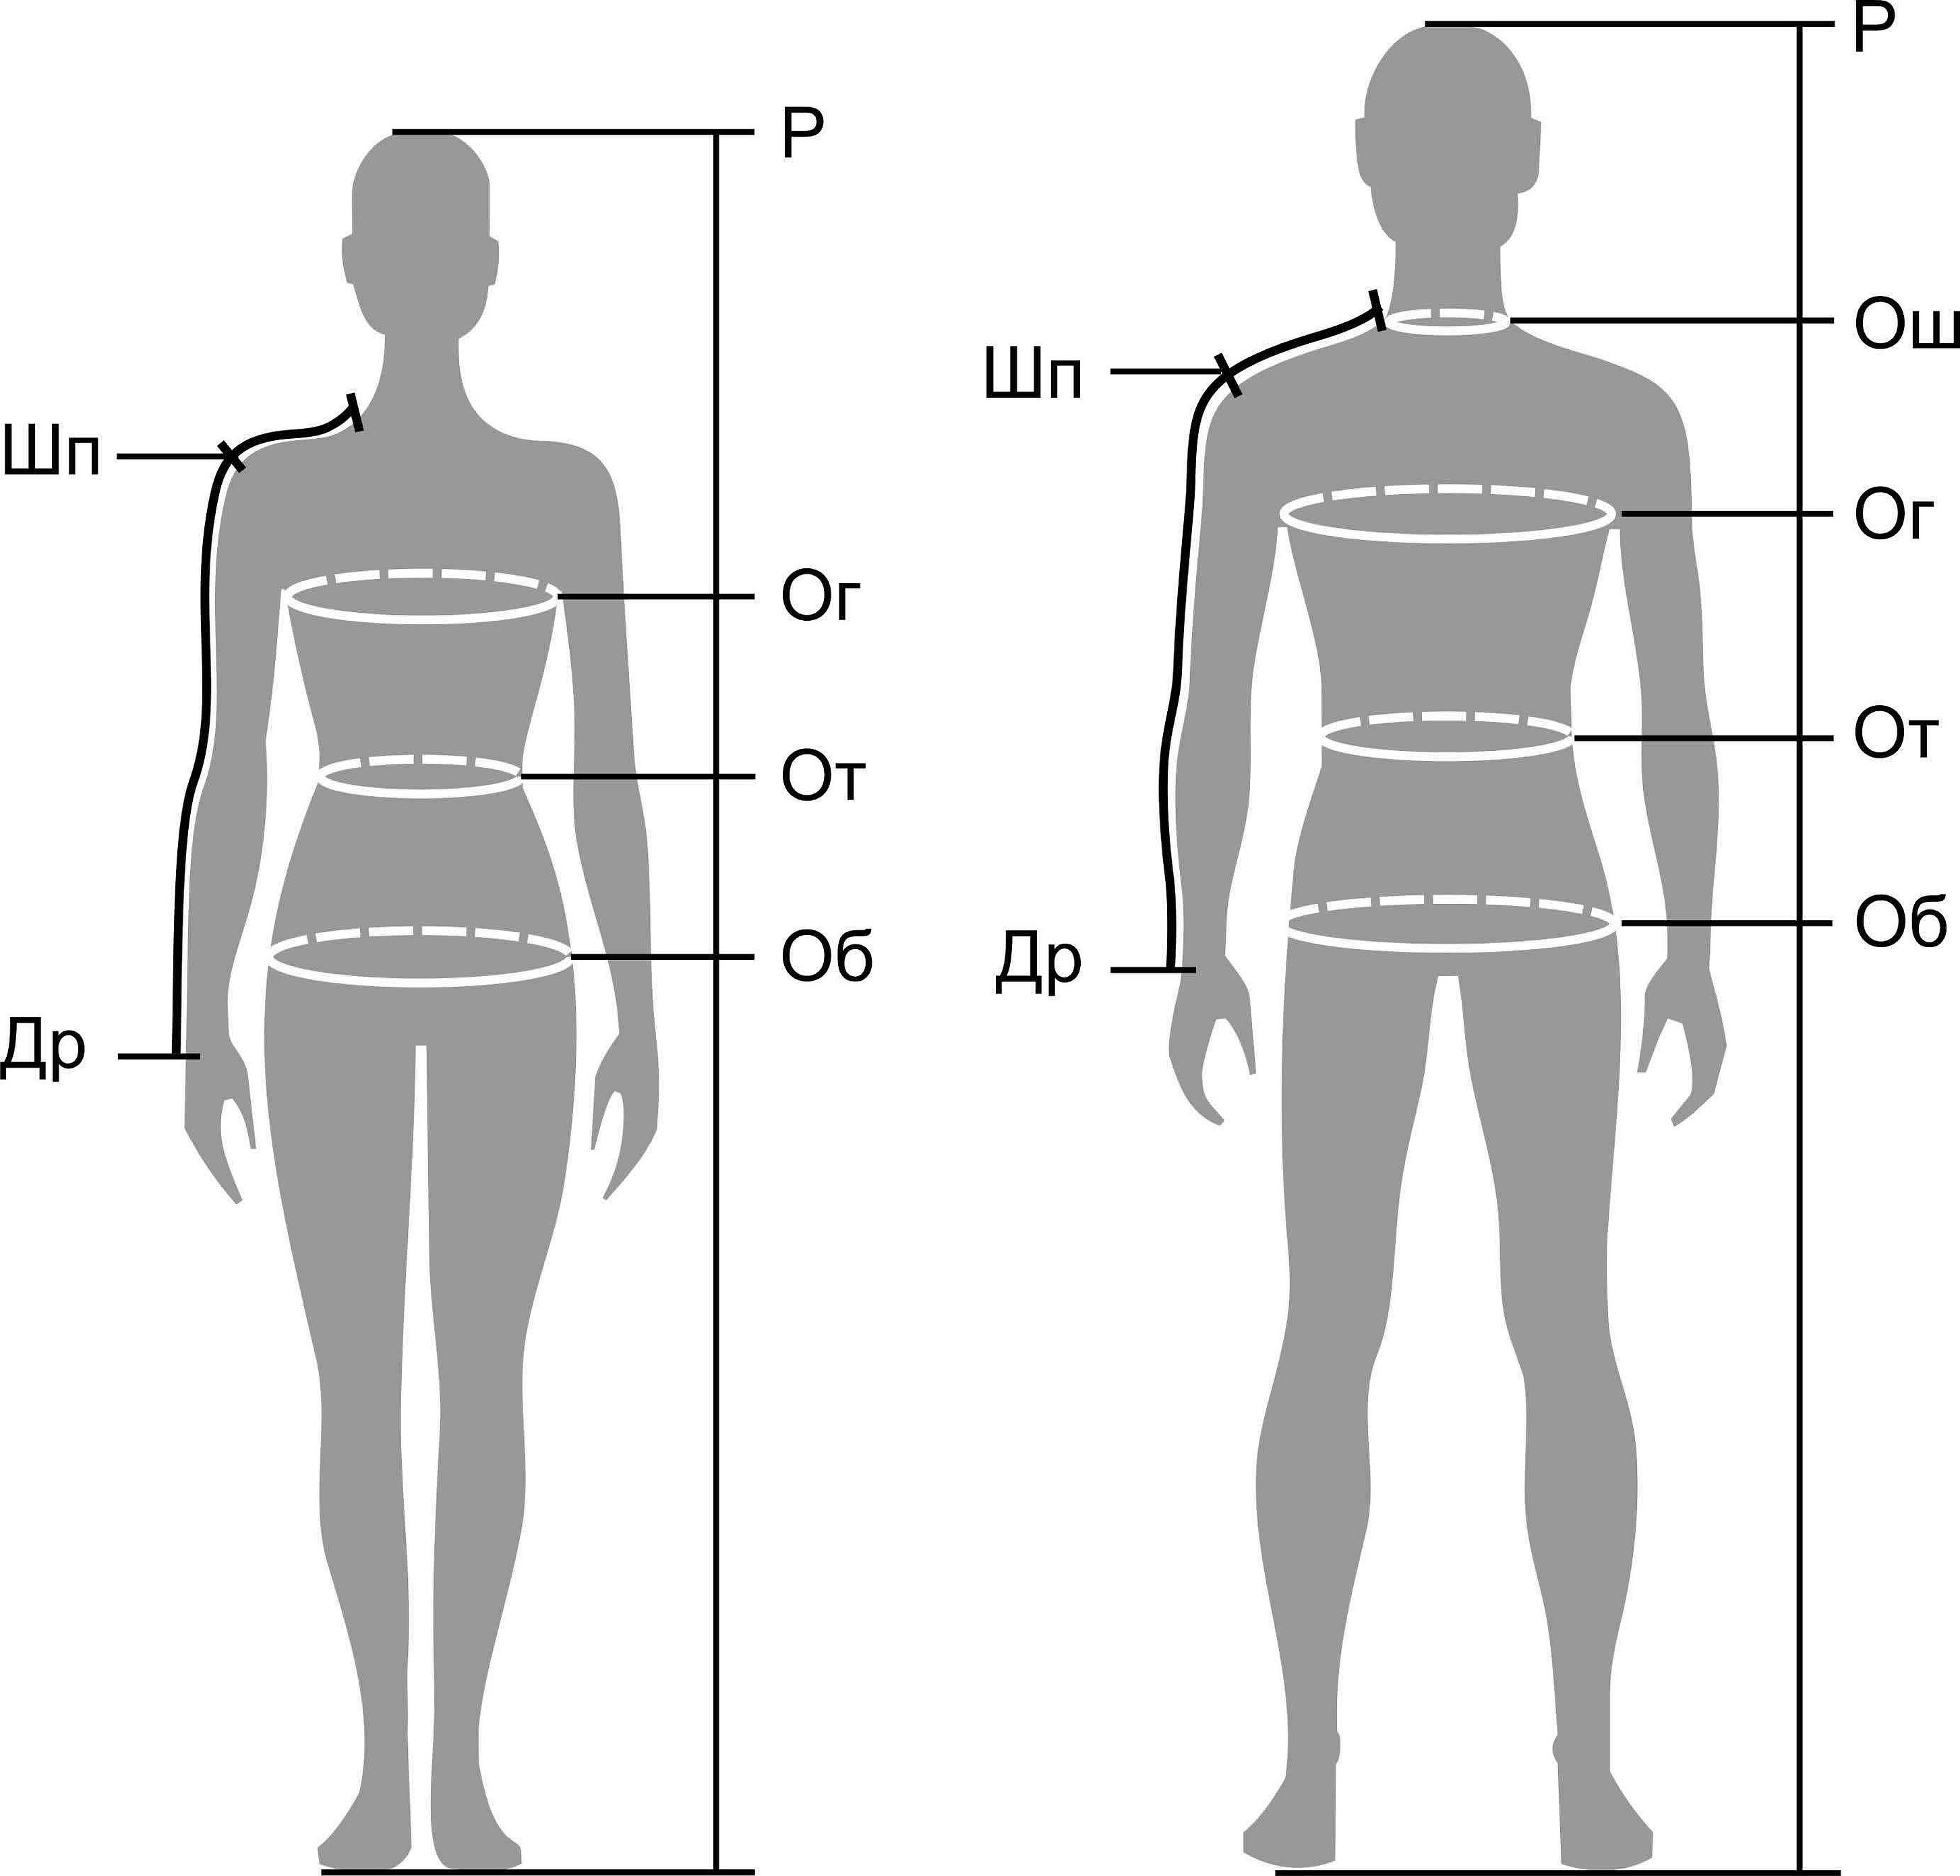
- Taking measurements for sewing clothes
- Neck circumference
- Chest circumference first
- Bust girth second
- Waist circumference
- Hip circumference
- Middle of the chest
- Chest width first
- Chest width second
- Back width
- How to measure the length of the back to the waist line
- Hip height
- Back to waist length first
- How to measure chest height
- Length of the shelf to the waist mark
- Shoulder height along the oblique line of the back
- Sleeve cutout height at the bottom
- Measuring shoulder width
- Arm length to wrist
- How to measure shoulder circumference (Op)
- How to find your wrist circumference (Oz)
- Features of taking measurements for different products
- Trousers
- Dress
- Skirt
- Headwear
General rules for taking measurements
Sewing any item begins with taking measurements. The more competently they are taken, the better and faster the clothes will fit the person. At the same time, taking measurements for weight loss and for sewing are done differently.
These general rules will help you understand how to take measurements correctly the first time:
- it is necessary to put on your everyday underwear. This is due to the fact that underwear can easily add (bra) or take away (shaping shorts or compression stockings) several centimeters;
- During the measurement, you must stand straight, with straight legs and back;
- you need to tie a string tightly around your waist (so that it doesn’t dangle) – it will help you complete the work;
- the measuring tape should fit tightly around the body part being measured, not move, but not tighten;
- the measuring tape should not stretch or turn over, otherwise you will get extra centimeters;

- when constructing a pattern, it is necessary to add 1-2 cm for seams;
- It is always better to undercut than to cut too much. If the product is too wide during the fitting, it will be easy to take it in, but if it is too small, you will have to redo everything;
- If it is indicated that a half-girth is needed, it is necessary to divide the figure by 2, since the pattern is half a part, for example, half of the back.
If you need to take measurements from a child, you need to hold him down, since children are not prone to standing still in one place for a long time.
Below are step-by-step instructions for taking measurements from different parts of the body.
Taking measurements for sewing clothes
To sew pants, dresses, shirts or outerwear, you need to take different measurements. Below is how to take measurements for basic clothing.
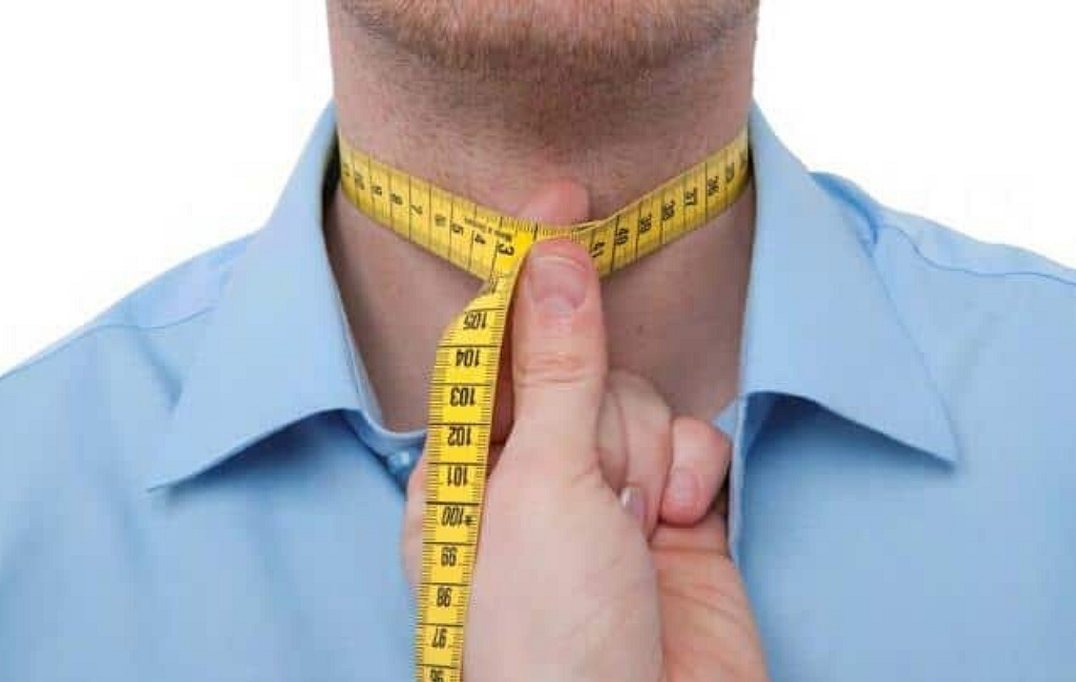
Neck circumference
The measuring tape is placed below the neck, where the throat and body meet. The reference point is the collar of a man's T-shirt.
Chest circumference first
You just need to wrap a tape measure around your entire chest, including the bust bulge, and take measurements. It's easy to do yourself.
Bust girth second
The most voluminous part of the chest. There is no need to tighten the tape, the model should be able to breathe freely.
Waist circumference
You need to measure the narrowest part of the waist. If it is difficult to find this point, then you need to take a string or thread, wrap it around your stomach and go up and down. Where the string lies freely is the waist.
Hip circumference
This is the most voluminous place.
Attention! If the model has so-called ears on the hips, it is advisable to repeat the removal process several times.
From all the readings, choose the one with the largest measurement. So that you don't have to alter the clothes later.
Middle of the chest
This is the length between the nipples or the most prominent points.
Chest width first
Here you need to place the measuring tape above the chest line and move through the armpits. You can also do it yourself.
Chest width second
It is laid along the most protruding points on the chest through both armpits.
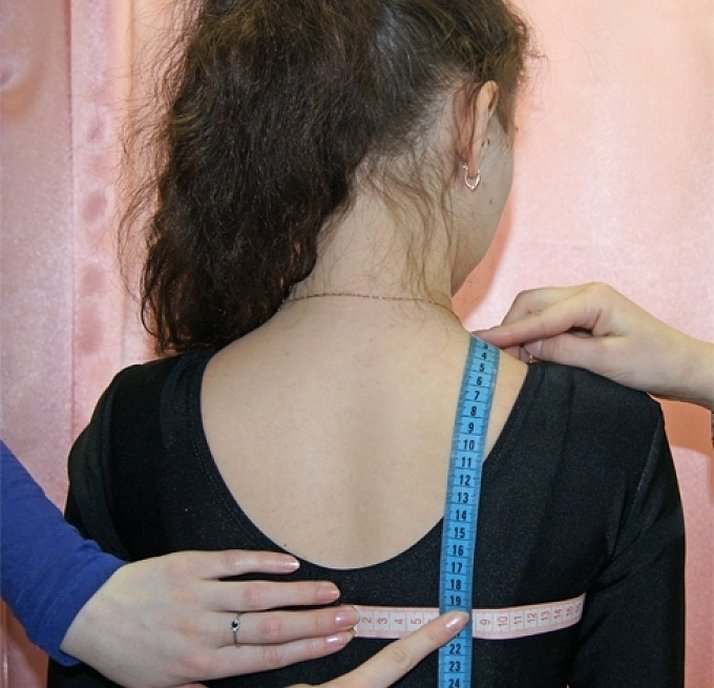
Back width
This parameter should pass as an equal line across the entire back in the center of the shoulder blades. The diagram shows how to measure the width of the back for the pattern correctly. The measurement "back width" can be different, depending on how straight the person stands.
How to measure the length of the back to the waist line
It runs from the sixth cervical vertebra (it protrudes a little, so it’s easy to find) to the waist.

Hip height
For accurate measurement, you need to tie a cord or tape at the waist and hips. The height connects both tapes along the front of the leg.
Back to waist length first
You need to find where the shoulder seam will be and measure the distance from the beginning of this seam near the neck to the waist. The line should be vertical and parallel to the spine. You can find the beginning of the seam using a cord or a chain with a pendant. You need to put on the chain and lower it down your back. The desired point is the place on the shoulder where the tape goes.
How to measure chest height
The tape should be placed from the neck line to the largest part of the chest for women and above the nipple for men.
Length of the shelf to the waist mark
The measurement work is carried out from the front side, from the protruding tip of the shoulder to the narrowing of the waist line.
Shoulder height along the oblique line of the back
It runs from the extreme point of the shoulder to the center of the waist from the back (the intersection of the spine and waist).
Sleeve cutout height at the bottom
It is indicated as Vpr from below. It runs from the side of the armpit to the waist.
Measuring shoulder width
The line runs from the right shoulder to the left and covers all protruding sides.
Arm length to wrist
It runs from the end of the shoulder to the wrist. During the measurement, the arm should be bent, the tape measure runs through the elbow.
How to measure shoulder circumference (Op)
You need to measure the widest point on your hand. You can't do this on your own, so you'll need help.
How to find your wrist circumference (Oz)
This is the simplest parameter. You need to wrap a tape measure around your wrist like a bracelet and take readings.
Features of taking measurements for different products
The number of measurements required when sewing items depends on what exactly was chosen. For jackets and dresses, you need to take many parameters, for pants - only four. Below are detailed measurements for different types of clothing.
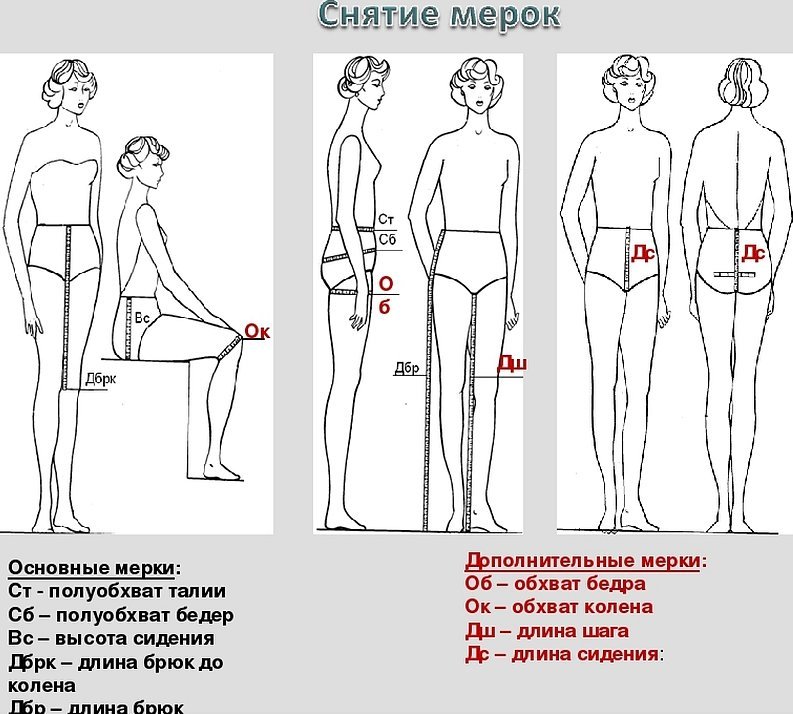
Trousers
The construction of a pattern for women's trousers differs from other clothing. Basically, you need to know the following parameters:
- stride length, from floor to groin area;
- length of the product depends on the style;
- seat height, necessary to prevent trousers from bursting when sitting down. This is the distance along the back from the chair to the waist;
- ankle, shin, knee (slightly below the kneecap), thigh (3 cm below the gluteal fold) circumference.
They can be adjusted, it all depends on the style of the pants, length and material.
Dress
Each dress model has its own construction features, and therefore it is worth focusing on the advice for a specific style.
Skirt
The number of measurements depends on the specific model. For example, for a sun skirt, only the length and Ot are required, for a pencil skirt, the hip volume is added.
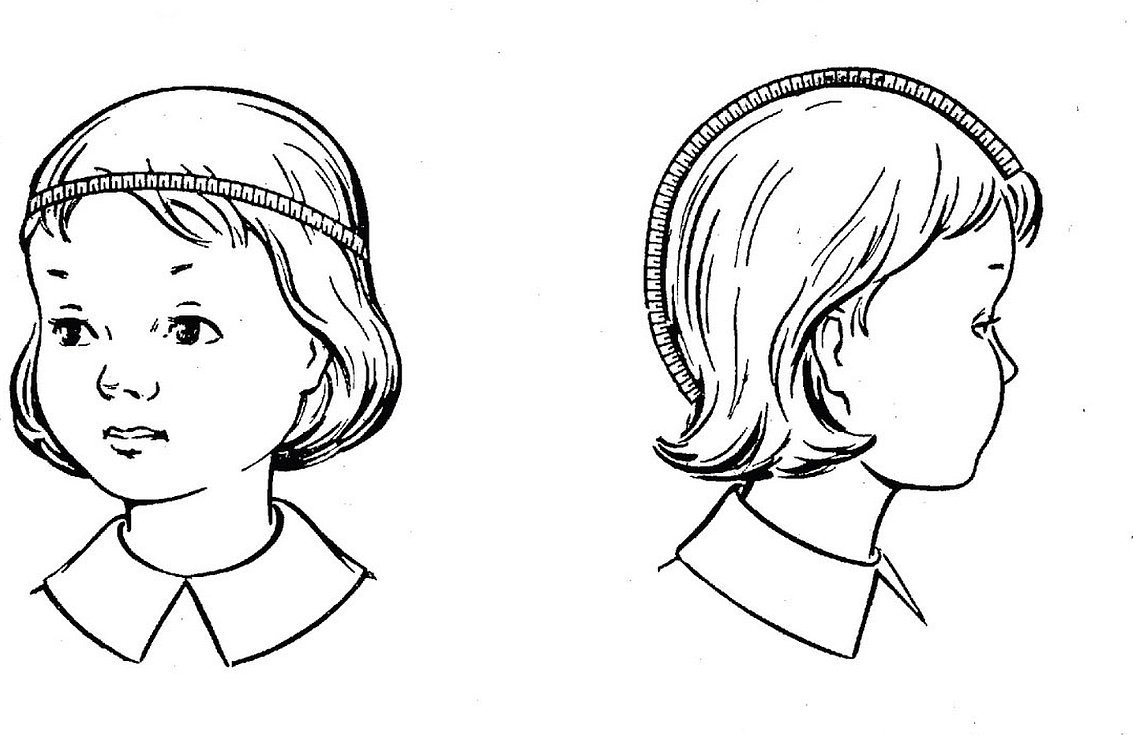
Headwear
To make or knit a headdress, you need several measurements:
- head circumference, the line runs along the forehead and back of the head parallel to the floor;
- head circumference 2, the centimeter should be perpendicular to the floor and cover the face from the bottom of the jaw to the top;
- head height, the tape is "placed" on the head, runs across the crown and connects the marks at the base of the neck on the sides.
In conclusion, it should be noted that it is necessary to take measurements from the model before choosing the fabric. It is not always possible to do this on your own. For beginners, you can watch several master classes on correct measurements.


