In the age of store-bought, shop-bought clothing, there would seem to be no need to sew a dress yourself. But if you have sewing skills and the necessary tools, why not sew a dress yourself, embodying all your ideas in your creation. The article tells how to cut out a dress for a girl, what is needed for this, what is the sequence of actions.
- Pattern of a summer dress with a jersey bodice and straps
- Long sleeve dress with pleated neckline
- Dress with batwing sleeves and three-quarter sleeves
- With long sleeves and gathered neckline
- Simple strappy dress for plus size women
- Summer dress with short sleeves
- Pattern of evening dress for plus size women in full size
- Simple summer dress made of jersey with a cut-off bodice and skirt
- Summer dress with sun skirt 4 patterns
- Summer blouse pattern with short sleeves
- Simple Sleeveless Sheath Dress Pattern
- With one-piece short sleeves
- Sequence of cutting and sewing
- Neckline
- Bust dart
- Front shoulder line
- Back armhole line
- Draw the armhole line of the back
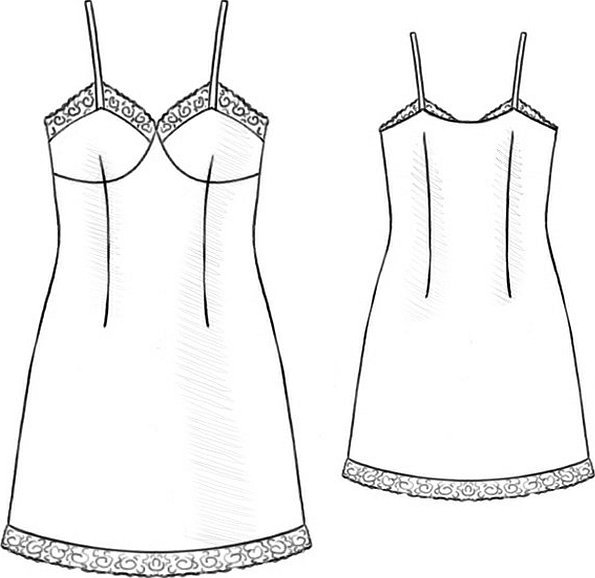
Pattern of a summer dress with a jersey bodice and straps
Knitwear does not require special care, the material stretches, fits well on any figure, does not stick out (there is no need for additional edge processing). When making knitwear, use:
- viscose (artificial thread obtained from wood cellulose);
- cotton (a natural material made from plant fibers);
- lycra (cellulose fibers treated with acetic anhydride);
- silk (obtained from the cocoons of the silkworm);
- elastane (synthetic fibers);
- woolen twisted threads obtained from animal hair.
To sew a beautiful dress with patterns and a knitted bodice and straps for a girl, you need cotton or silk fabric. Before boring, measure the girth:
- breasts;
- waist;
- hips;
- the length of the dress from the waist.
Important! The back and front of the dress are cut out using the same pattern, keeping seam allowances (1 cm is left on the right and left sides).
Sewing a summer dress with straps according to the instructions has the following features:
- the fabric is laid out on a flat surface;
- draw the outline of the future dress on it using a simple pencil or chalk (for convenience, you can make a pattern on paper and trace it);
- cut out the resulting contours from the fabric;
- the pattern is positioned so that there are decorative elements at the bottom of the dress;
- no allowances are needed for the front neckline and armholes;
- allowances at the bottom of the dress should be 2-3 cm.
For the straps you will need a ribbon (the width depends on personal preference, but not less than 1 cm). The product is stitched with an elastic seam using an overlock:
- stitch the side seams, process the allowances, fold and stitch the hem;
- if you plan to make a lining, then baste and stitch the lining fabric, processing the allowances at the bottom;
- the armhole and neckline of the dress are finished with an overlock stitch, and a braid is sewn on;
- the hem of the dress is finished with tape;
- sew the tape to the bodice, having first measured the required amount.
The classic summer sundress is ready, it is easy to sew yourself, without the help of a professional.
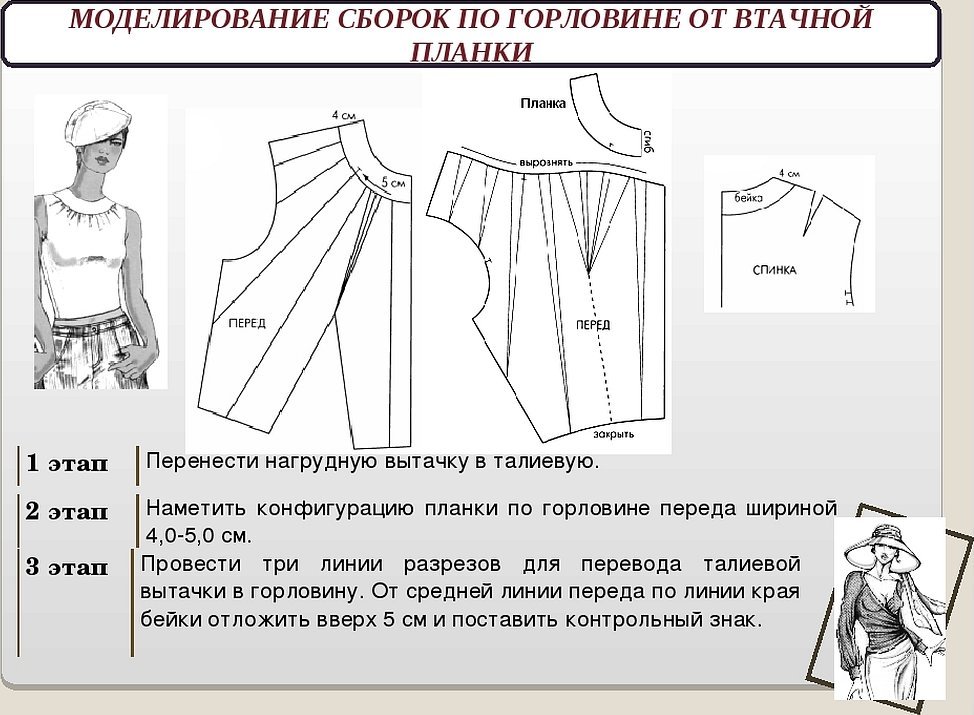
Long sleeve dress with pleated neckline
When sewing a dress with long sleeves and pleats on the neck, take into account that such models are usually sewn on a lining. The fabrics used for the lining and sewing of the product itself must be combined (not electrified, be elastic).
The sequence of actions when sewing is as follows:
- the basic details of the women's dress pattern are transferred onto the fabric;
- Separately cut out the facing for the neck (several pieces) and the lining;
- on the sides, leave seam allowances of 1 cm (at the bottom and on the sleeves, the length of the allowances is 3-4 cm);
- the lining is cut according to the pattern of the top, shortened by 5 cm;
- the product parts are cut out of fabric;
- future seams are trimmed;
- sewn on the sides;
- the front is basted, folds are sewn, 2 cm deep from the neckline, the lines are ironed;
- a similar operation is repeated with the front of the lining;
- stitch the shoulder seams, then overcast and iron them towards the back;
- connect the parts intended for piping the neckline together;
- the inner edges of the facing are ironed to the wrong side, after which the facing is stitched onto the lining, trimming the lining allowance by 0.6 cm and ironing well;
- stitch the shoulder and side seams of the dress and lining, overcast all seam allowances and iron them onto the back;
- the neck of the dress is trimmed with a lining, the product is turned over to the wrong side and the neck is swept by hand, after which a finishing seam is laid;
- the seams on the shoulders of the lining and dress are sewn by hand;
- sweep the lining to the dress along the armhole;
- The seams on the sleeves are stitched, processed and the sleeves themselves are tucked into the armholes (double stitching is used when setting in the sleeves).
The sewing is completed by processing the bottom of the dress, hemming and stitching the seam allowances. The finished product is ironed.
Dress with batwing sleeves and three-quarter sleeves
For items with batwing sleeves, additional darts in the chest area are not made, except for those cases when the dress is sewn for a woman with large breasts. The style for a dress for quick sewing is the simplest.
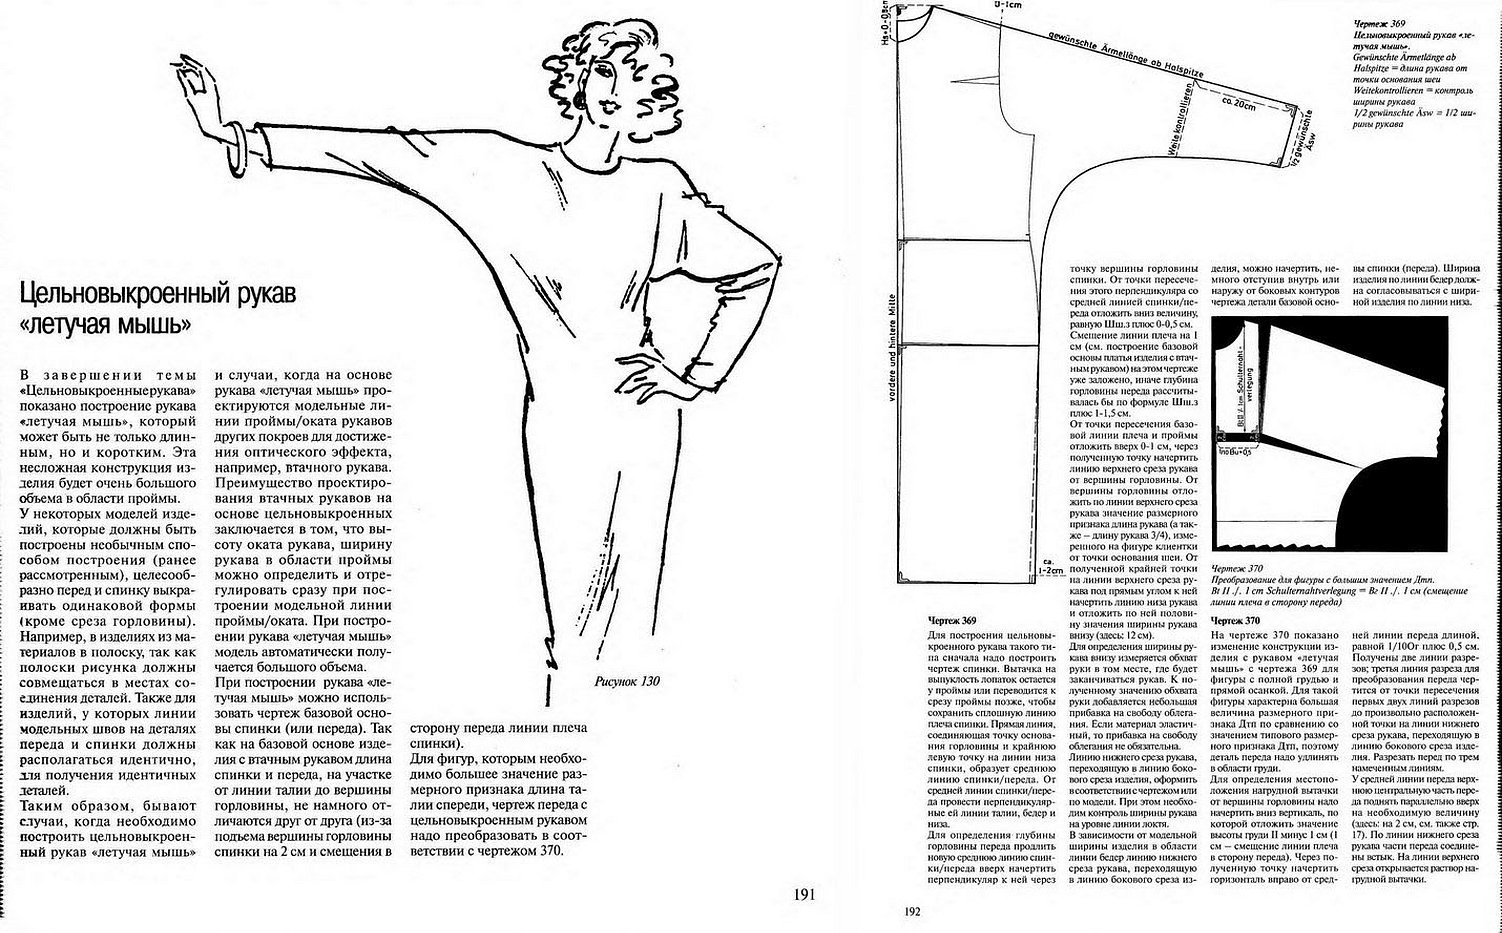
The product modeling features are as follows:
- the neck opening on the back is 2.5 cm;
- To calculate the size of the neckline, use the formula: R = 1/6 ОШ + 1 (ОШ - neck circumference);
- from the extreme mark where the shoulder ends, step back 1 cm and extend the shoulder line (put the shoulder length and sleeve length measurements along the line);
- draw a line along the bottom of the sleeve at a right angle (the length is calculated using the formula 1/2Oz + addition, where Oz is the wrist circumference).
- draw a smooth, slightly rounded line along the bottom seam of the sleeve, flowing into the side.
The paper pattern is traced onto the fabric, the details are cut out, and the side, neckline, and shoulder lines are stitched.
Important! Batwing and three-quarter sleeves are sometimes sewn seamlessly.
With long sleeves and gathered neckline
A dress with long sleeves and a gathered neckline is sewn using the same pattern as a dress with pleats. First, a pattern is created, after which all the necessary lines and features are transferred to the fabric, the front of the dress, its back, sleeves are cut out, the fabric for the neckline is prepared, and it is cut out using a template.
This is a simple dress model, suitable for both the office and a festive outing. The fabric is thick but elastic. You may need to think about a lining if you plan to create a warmer autumn version of the product.
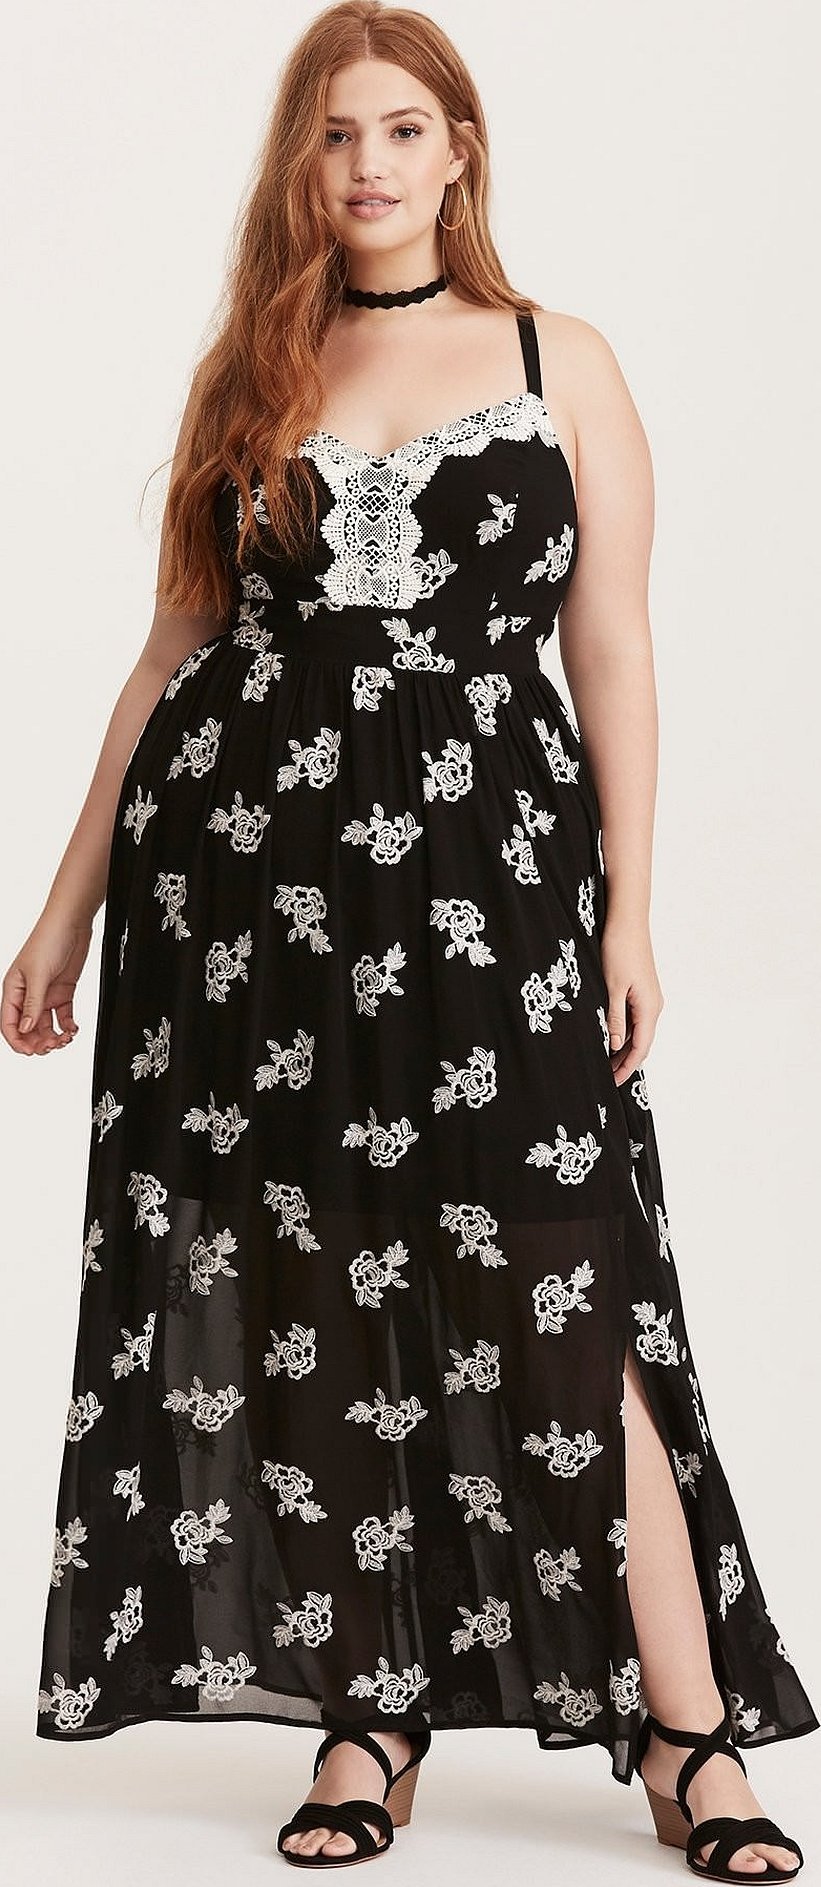
Simple strappy dress for plus size women
To sew a simple dress of a simple cut with straps for a full woman, make a pattern on paper, then transfer it to the fabric. It is important not to forget to transfer the darts from the pattern to the front of the product, stitch them, and iron them well. It is best to use linen fabrics for sewing.
For sewing, you can use a pattern of a regular fashionable sundress with a strap. The main thing is to correctly calculate the dimensions of the future product and remember the importance of leaving allowances for the seams. The strips of fabric intended for creating straps should be made wider than when sewing a product for thin women.
Summer dress with short sleeves
The base of the product is cut according to the same pattern as a dress with a long sleeve. It should be taken into account that there are several options for sewing a sleeve (12). This can be, in fact, a short sleeve, as well as a sleeve:
- flutter;
- petal;
- flashlight;
- raglan.
The sleeve shape should be selected in accordance with the body type. You can also sew a robe using this pattern.
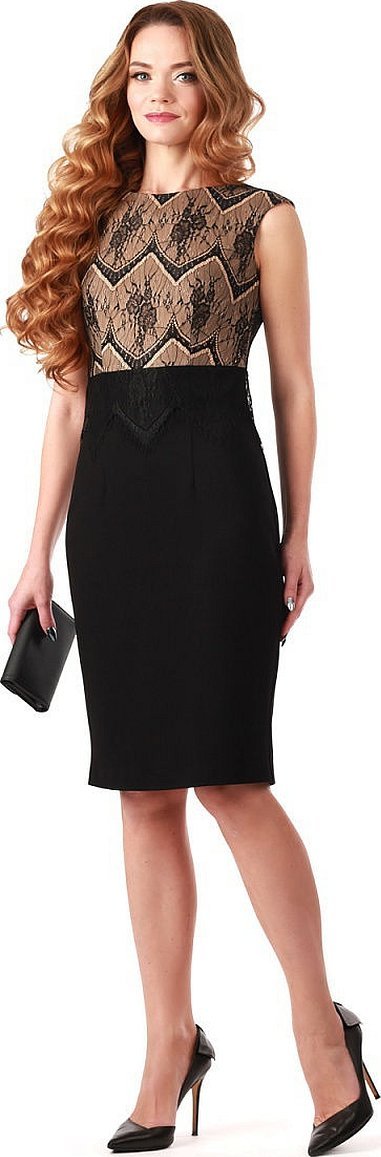
Pattern of evening dress for plus size women in full size
The material can be any, but silk is better. The pattern is made according to your own measurements in full height, leaving large allowances for seams (if the product is a little compressed, you can always remake it).
The back requires 2 pieces, the middle part of the bodice and the skirt also require two pieces with a fold. The upper parts of the bodice are cut from lace (2 pieces), the lower from regular fabric (2 pieces). The sleeve is made of silk (2 pieces) - the length depends on the length of the arm, you can sew a dress without sleeves, with straps. When creating a pattern, it is important to choose the right style, to know in advance whether this product will be with a neckline or with an open neck, with a short or long sleeve. The length of the product is determined independently, the hem can fall below the ankle or be slightly higher. It is better to choose a loose style. The trapezoid style of tailoring looks good on plump ladies. Such models look especially good on older ladies.

Simple summer dress made of jersey with a cut-off bodice and skirt
To make a pattern for a garment with a cut-off bodice, you will need knitted material, a lining for the bodice, interlining and a concealed zipper. Individual parts of the garment are cut out from the fabric along the lines of the drawing previously applied to it, not forgetting about the need to draw and cut out the darts in advance. The sequence of actions is as follows:
- process the bodice;
- fold and stitch the bottom of the skirt;
- sew the skirt to the bodice;
- iron the seam allowances;
- a zipper is sewn onto the middle section of the back;
- darts are sewn on the lining and seams are made;
- process the neck;
- If there are sleeves, then darts are sewn onto them.
The finished product is ironed.
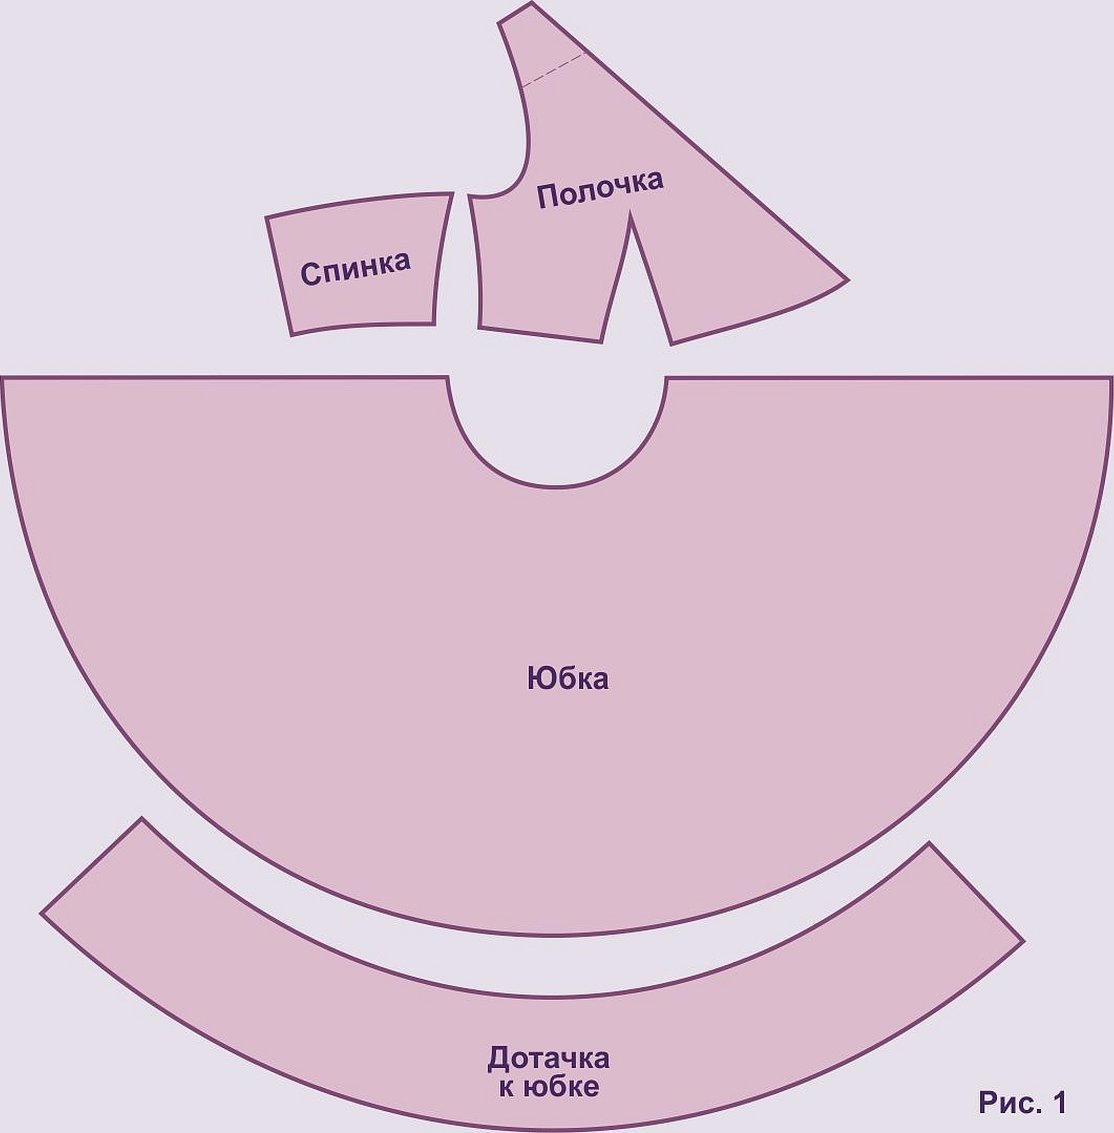
Summer dress with sun skirt 4 patterns
A summer dress with a sun skirt can be sewn using 4 patterns at once and in several variations - half-sun, sun proper, flared skirt, semi-flared. As a basis, you can take the top of any dress you like (with gathers, with long or short sleeves) and a pattern for a sun skirt. The product must be fitted without slits.
Summer blouse pattern with short sleeves
If you have a ready-made pattern of a straight dress with short sleeves, then using its upper part as a basis, you can cut out a summer blouse. The main thing is to immediately decide on the shape of the sleeve, neck, the presence or absence of darts.
The blouse can be beautifully decorated with buttons or fabric flowers. Then it will not just be a summer option, but a smart item that you can wear to a party or to visit.
Simple Sleeveless Sheath Dress Pattern
This dress model is suitable for both everyday wear and as a festive outfit. The dress is sewn using a simple pattern. The sewing process is made easier by the absence of sleeves. They can be replaced with straps or the product can be made with a cut-off bodice.
Important! Do not forget about the need to create darts on the pattern and transfer them to the fabric. As a material for sewing, it is better to choose any knitted fabric, its density will depend on the purpose of the product (for autumn, for summer, for winter).
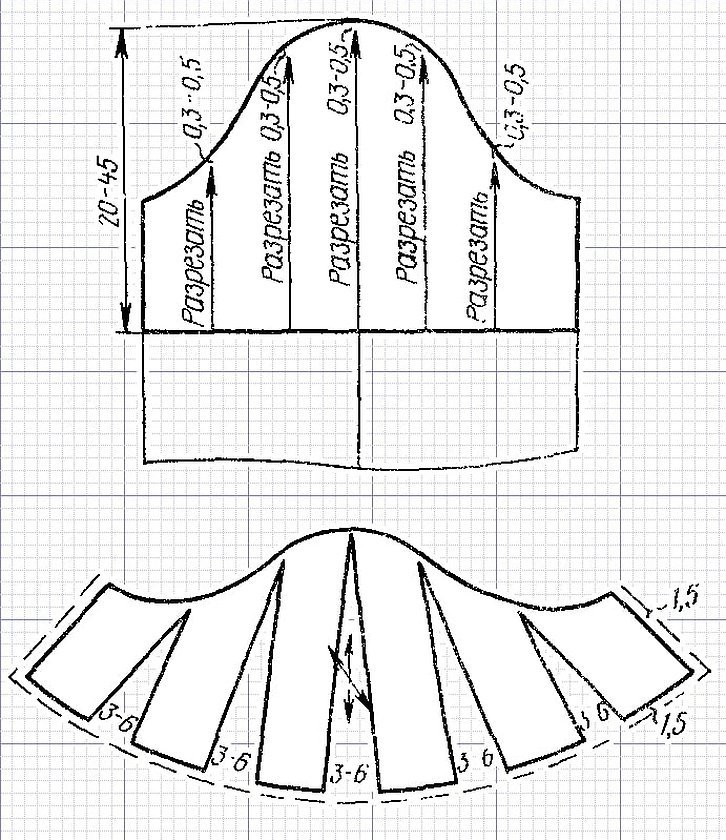
With one-piece short sleeves
When constructing a pattern for such a dress, the following modeling features are taken into account:
- the width of the sleeve is determined by the angle of the bevel of the outer shoulder line and the depth of the armhole;
- the greater the angle of inclination, the narrower the sleeve;
- The width of the sleeve is affected by the depth of the armhole.
One of the variations of a one-piece sleeve is the batwing.
Sequence of cutting and sewing
The cutting and sewing of the finished product begins only after all the details have been prepared, including those intended for finishing the product: collar, pockets, cuffs. There is a standard sequence of cutting and assembly that must be followed when sewing.
Neckline
Before you start creating a neckline pattern, calculate its width for each of the parts. The front neckline and the back neckline have different depths and widths. They are cut out separately, then connected and sewn to the already assembled parts in this form. Separate formulas are used to calculate the depth and width of different parts.
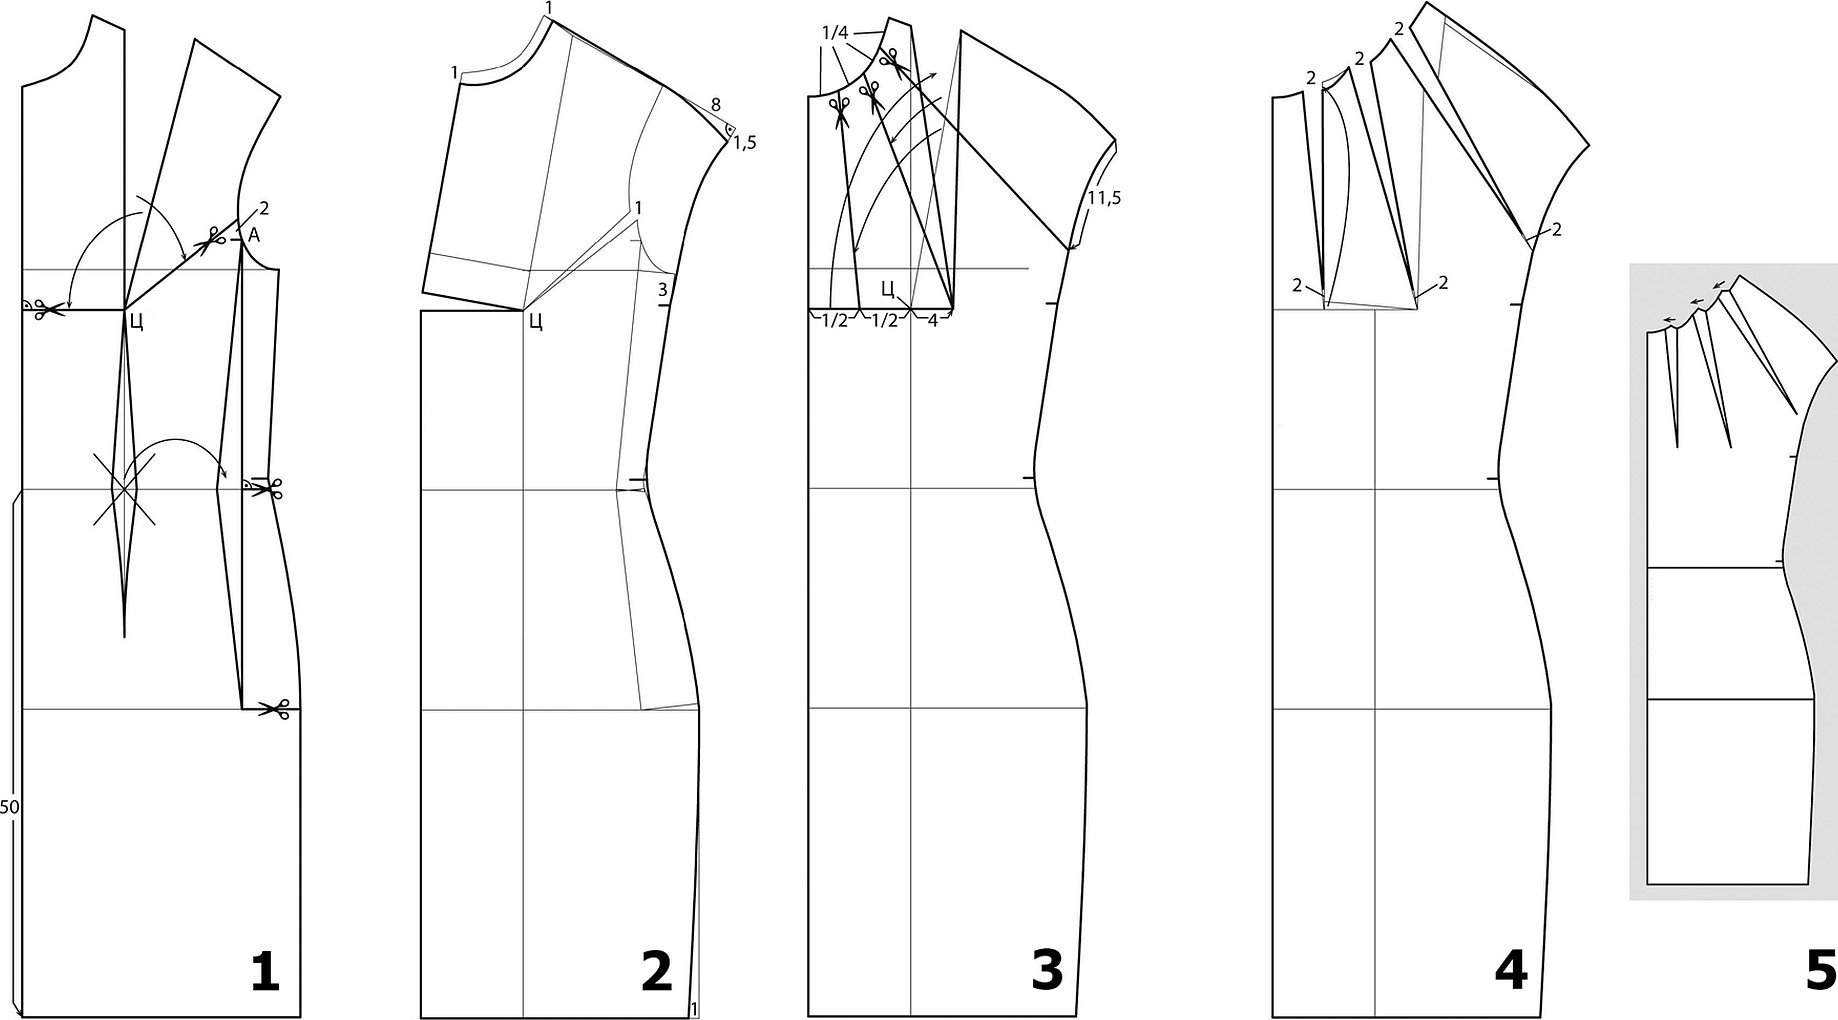
Bust dart
The bust darts are transferred from paper to fabric. They are stitched before assembling the garment itself, i.e. before joining the dress along the side lines and shoulders. To construct the dart, you need to know:
- armhole height;
- chest width (measured twice using two different parameters).
It is more convenient to construct such a dart in a side seam or armhole.
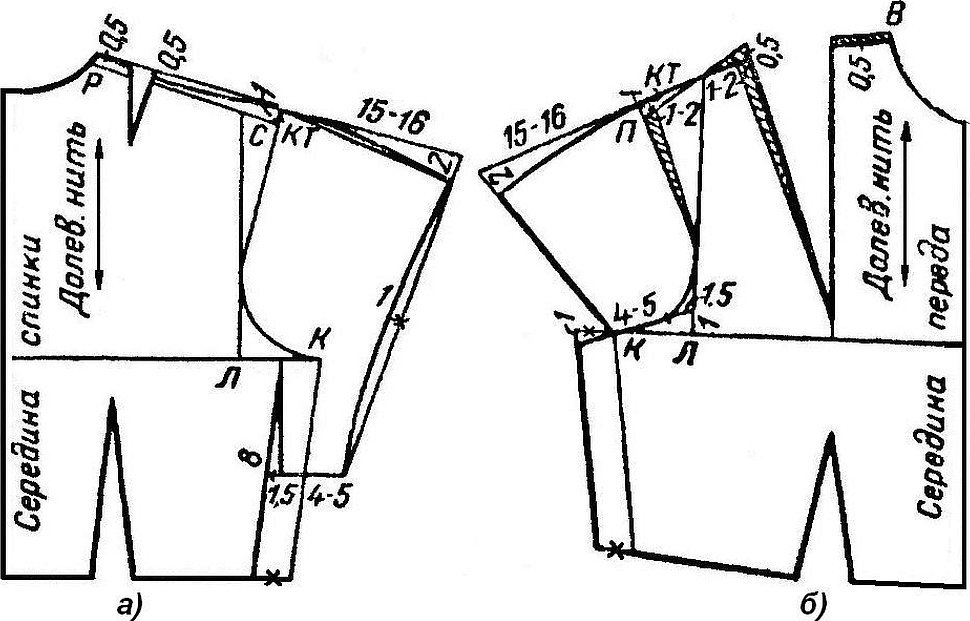
Front shoulder line
To construct the front shoulder line:
- a dotted line is drawn from the upper point of the left side of the bust dart to the upper point of the division of the auxiliary line of the back armhole;
- 8 cm are measured along it;
- From this same dotted line, another line is drawn downwards, 2 cm long, at a right angle.
Draw the front shoulder line.
Back armhole line
To design the armhole line of the back, four key points are determined on the drawing. The armhole line is drawn through these points.
Draw the armhole line of the back
When creating a pattern, take into account that there may be losses in the width of the back. To preserve it, a separate segment is set aside to the right of the armhole line.

Before cutting the product, the style is determined, a large amount of paper is stocked up to apply the drawing to it, which is then transferred to the fabric. The complexity of constructing the drawing and subsequent cutting largely depends on the type of fabric, the idea of the seamstress. The dress is cut, observing the typical sequence of cutting. Even a novice seamstress can handle this.
https://www.youtube.com/watch?v=JvjIgtWH4qg


