A hat is a headdress that is designed to protect against cold, wind and other adverse environmental influences. Some types of hats serve not so much for warmth as for decoration or creating accents in the image. This article talks about how to construct a knitted hat pattern and what is needed for this.
Materials and tools
To complete the work, each needlewoman must prepare the following materials and tools:
- tape measure for taking measurements;
- ready-made basic pattern;
- chalk or pencil to transfer the outline onto the material;
- knitted fabric with approximate dimensions length = 50 cm, width = head circumference + 2 cm;
- fleece for lining;
- cutting scissors;
- sewing machine or overlock, needle with a rounded tip for stitching knitwear;
- tailor's pins for pinning together pieces;
- sewing threads to match the main material.
How to take measurements
A very important issue is to take measurements correctly and draw up a drawing.
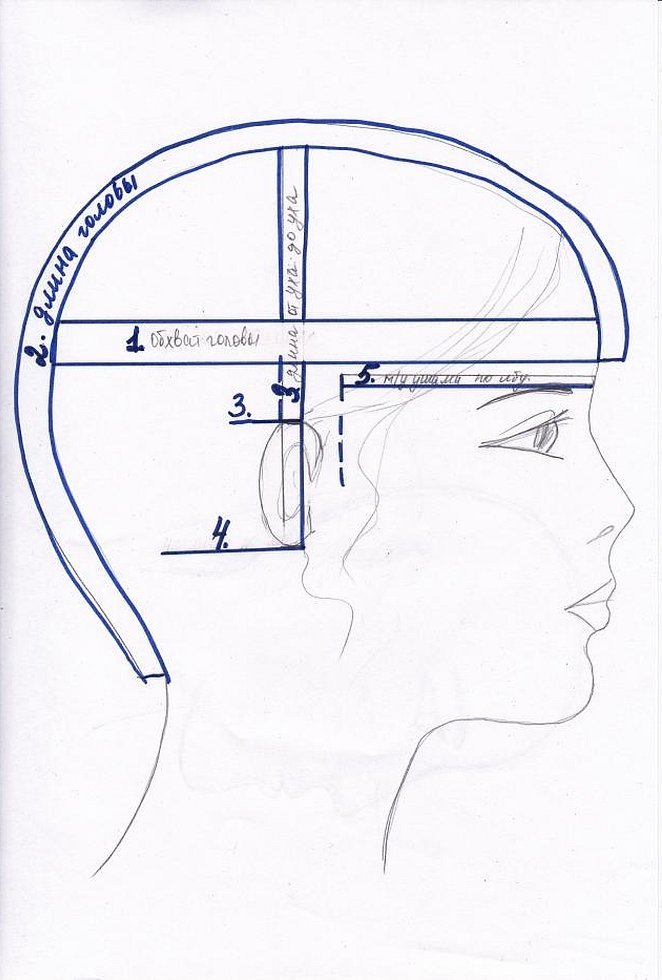
There is nothing complicated, but you still need to be careful. To do this, take a centimeter and measure the circumference of your head. This will be the main size. In order to find out the size of the future hat, you need to subtract 4 cm from the main one (approximate values, depending on the density of the material). To build a blank, you need to know the width. The resulting size should be divided by 2 hats. Further work will be built on these dimensions. Below you can find out how to make a pattern for a knitted hat for a child.
Sewing a knitted hat for a child
First, you need to understand the principle of making a basic pattern of a hat from thin knitwear with your own hands. A design is built, which can then be processed in accordance with your design and needs.

The basis of the pattern is the width of the product, equal to the head circumference measurement reduced by half. The figure may be slightly less or slightly more than the head circumference and depends on the elasticity of the selected material.
Please note! If you already have knitwear, wrap the fabric around your head to determine its stretch. This measurement is used to adjust the width of the pattern.
The length of the fashionable hat is approximately 47 cm, but this measurement can be easily modified depending on the design.
The top edge is formed by a smooth rounded line.
Along the upper contour, lay darts with a 2-3 cm solution.
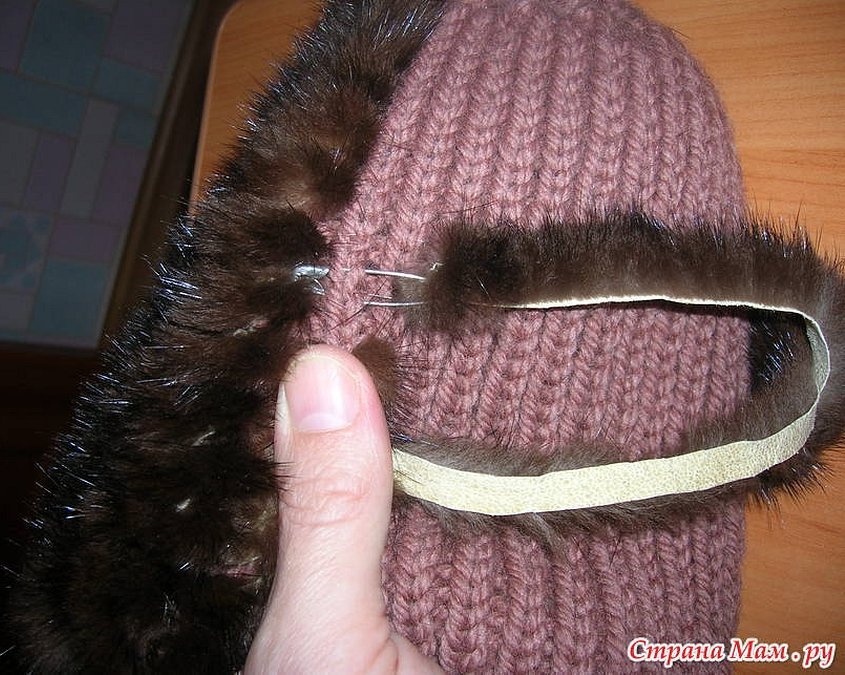
For a lining made of another material, reduce the contour by 0.5-1 cm. This is necessary, since the inner layer adjacent to the head has a smaller contour and volume.
You may want to extend the base to gather or create a flap. You can add a warm lining to protect from the wind.
How to sew a hat and snood from knitwear
The snood has been popular for several years now. It is convenient because it can be worn both on the neck and on the head.
There are several ways to sew a snood from knitwear with your own hands. It can be done quite simply. To do this, prepare a piece of knitwear one meter long and half a meter wide. You can sew a snood from an old sweater. To do this, you need:
- fold the fabric in half with the wrong side out;
- secure the edges with pins, then sew them on the machine. Leave 4-5 cm unsewn at each end of the resulting scarf;
- turn the product right side out, twist it several times in the middle;
- secure the ends of the scarf that remain free with pins from the inside and sew.
Attention! In this case, you need to leave a small gap, then sew it up by hand.
To make a hat of size 52-56, you will need about 60 cm of knitwear in length and 50 cm in width. The material must be folded with the wrong side out. Then fold the knitwear from left to right, since the back seam of the product will be on the right.

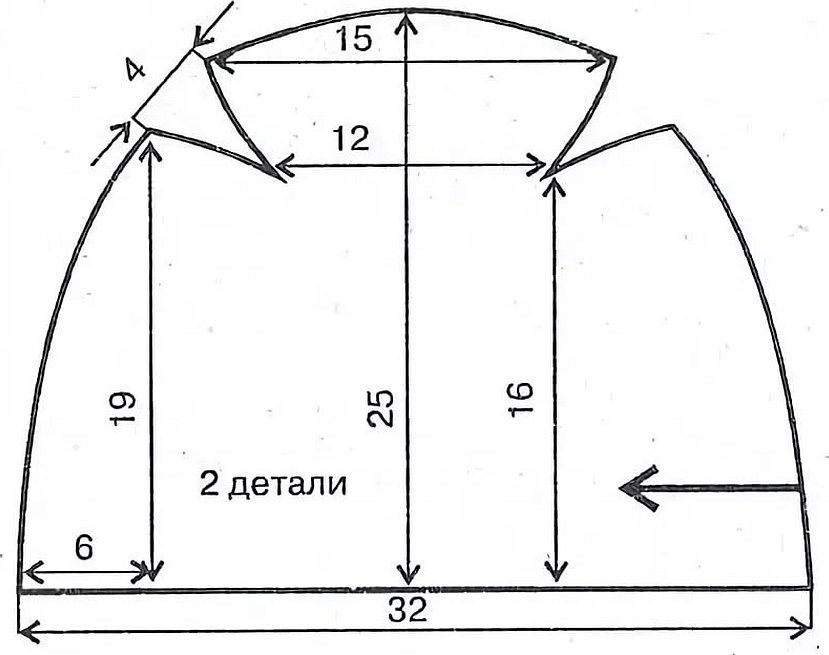
First of all, a pattern on how to sew a knitted hat for women should be prepared. The pattern should be adjusted to the desired size. It consists of four paper parts that need to be placed on the fabric and secured with pins. Trace with chalk with an allowance of 1 cm and cut out.
Unfold the material across its entire width, then fold it with the right side facing inward. Process the back seam on a sewing machine.
Next, you need to sew the top of the hat. Turn the resulting product right side out.
When folding the hat in two layers, make sure that all the seams match. Then pin and sew the top seam on the machine. The back seam will be completely closed. Turn the product inside out. The headdress is ready.

How to sew a sock hat from tricot
To sew a headdress you need to prepare:
- Meter tape;
- Chalk;
- Scissors;
- Threads.
First of all, you need to make a pattern on paper. If you don't have a sewing machine, you can sew a product made of such fabric by hand. The seam will be invisible, since the fabric is fluffy. It will be easier to sew if you pin the parts together beforehand.
After the materials are prepared, you need to measure the circumference of your head. Divide the resulting value by four - this will be the width of one wedge. Next, you need to determine the depth of the hat. To do this, use a meter tape to measure the distance from the forehead to the back of the head through the crown.
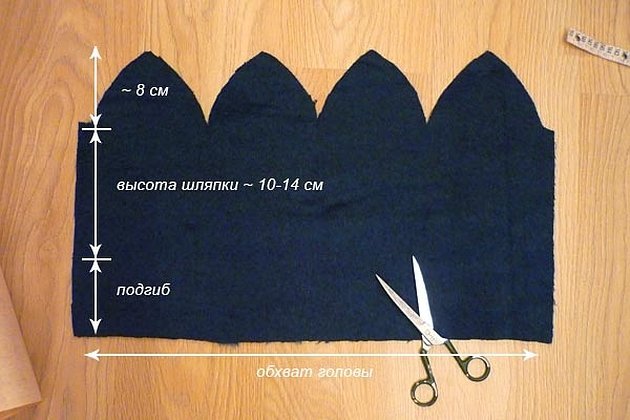
Divide the result by two. You get one wedge, there should be four of them in total. To construct a wedge, you need to draw a triangle, the base of which will form the lower part of the wedge. Then, give a rounded shape to the segments that go from the base to the top.
Since the material does not fray, the internal seams can be left untreated. But if the headdress is not lined, it is worth using an overlock.
Then you need to apply the pattern to the fabric, cut out four pieces and sew them together. It is important not to mix up the front side of the fabric with the back side, otherwise you will have to redo everything. You can sew the pieces together one by one.

You can sew two wedges first, you will get two halves of the product. Then combine them. There are quite a lot of patterns for fleece hats. In this case, the hat will have a folded-up brim. It can also be made into a version with a folded-up bottom seam.
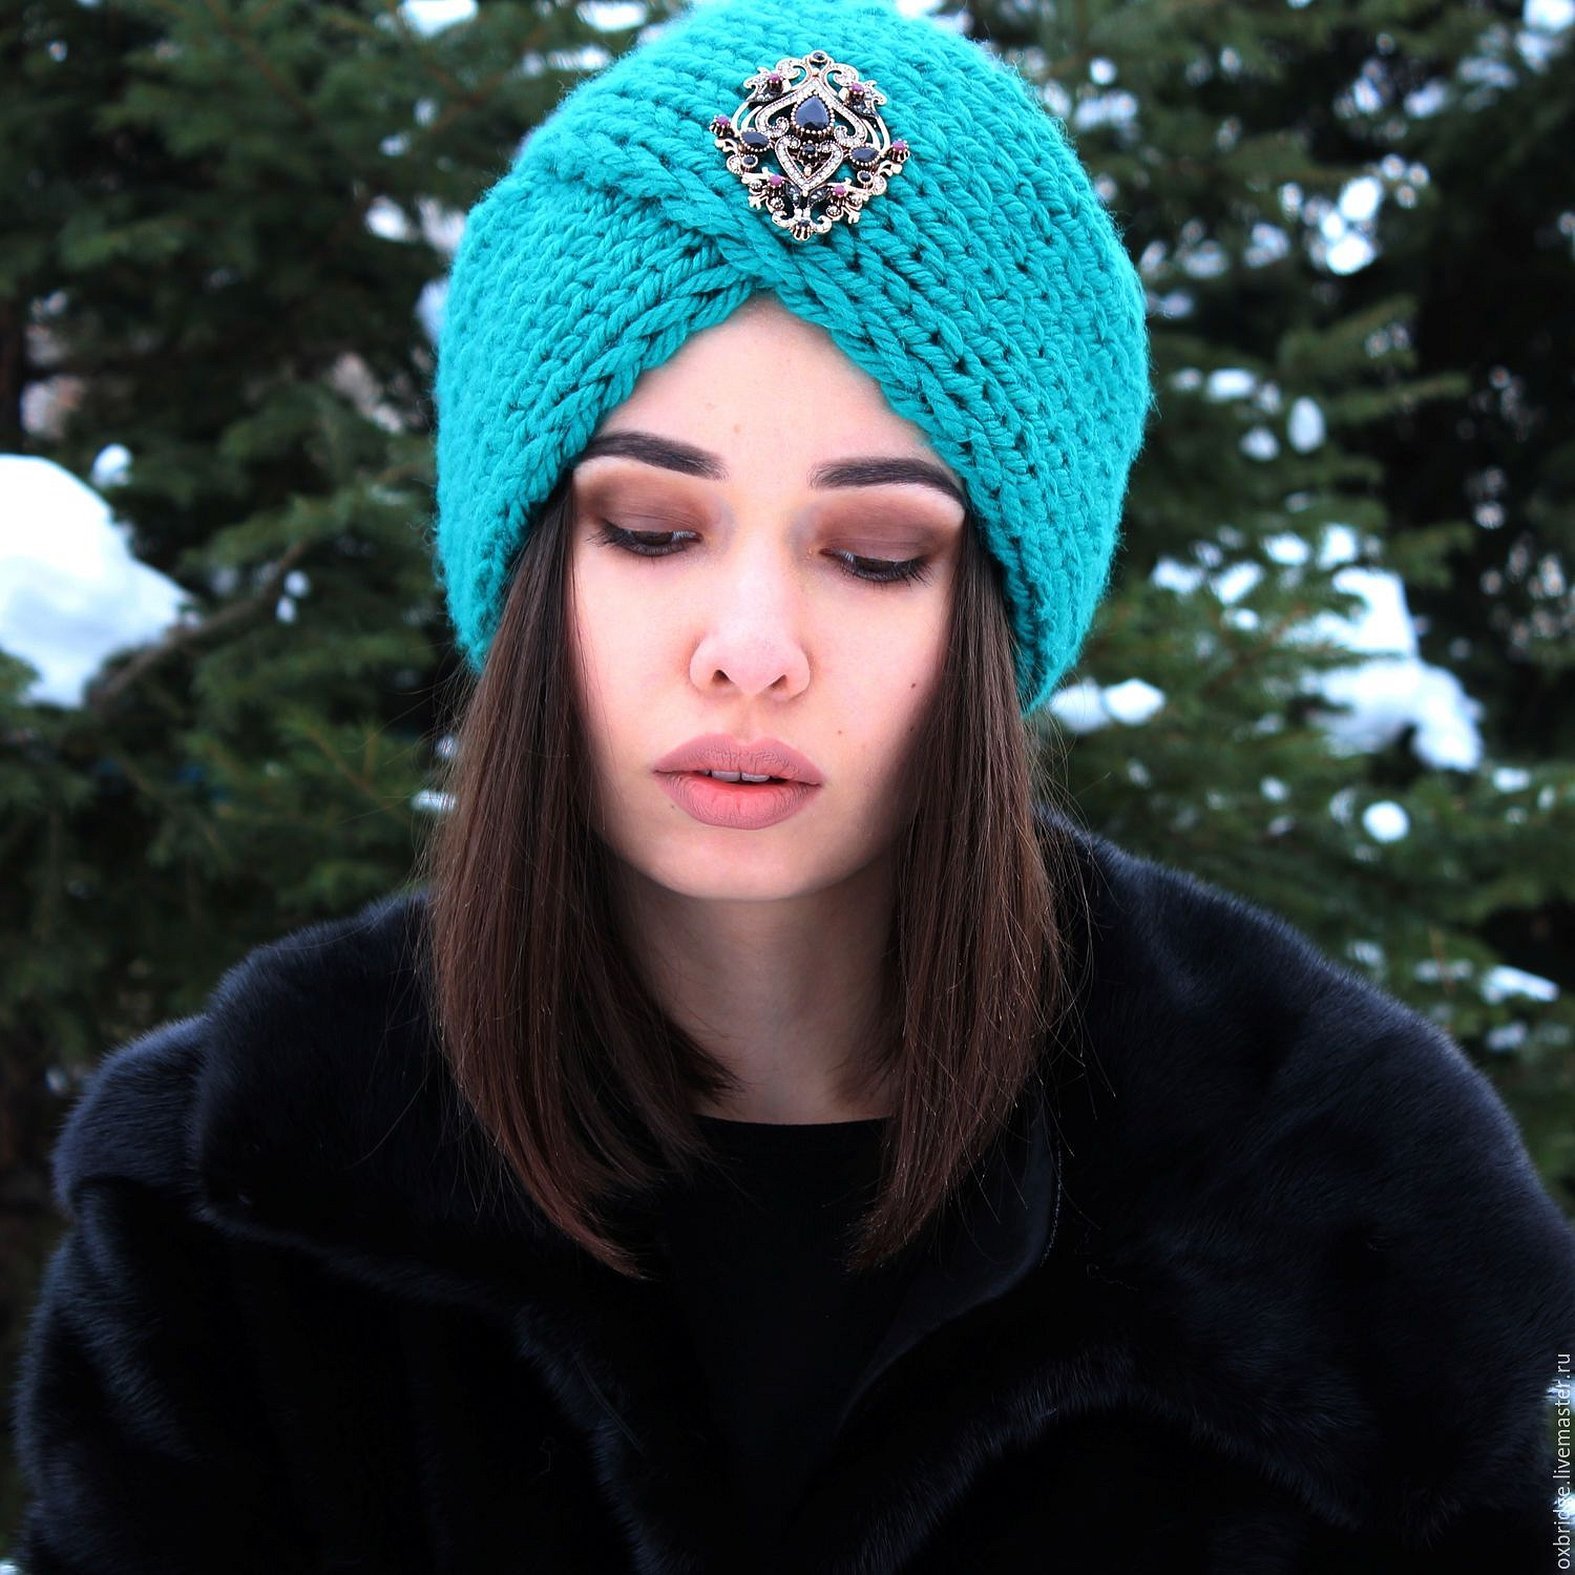
Knitted turban
The turban hat is a headdress that came to Russia from Eastern culture and has long established itself in the global fashion industry. But in order not to spend a lot of money on a designer item, you can easily create a turban with your own hands, taking into account your personal preferences and features. Knitting needles, yarn and knitting patterns will help with this.
You can knit such a headdress with the simplest pattern, and a beautiful brooch can become the central decoration. The main advantage of a knitted turban hat is the fact that it is easy to put on and take off, because you do not need to roll it up, unroll it and fold it back each time.
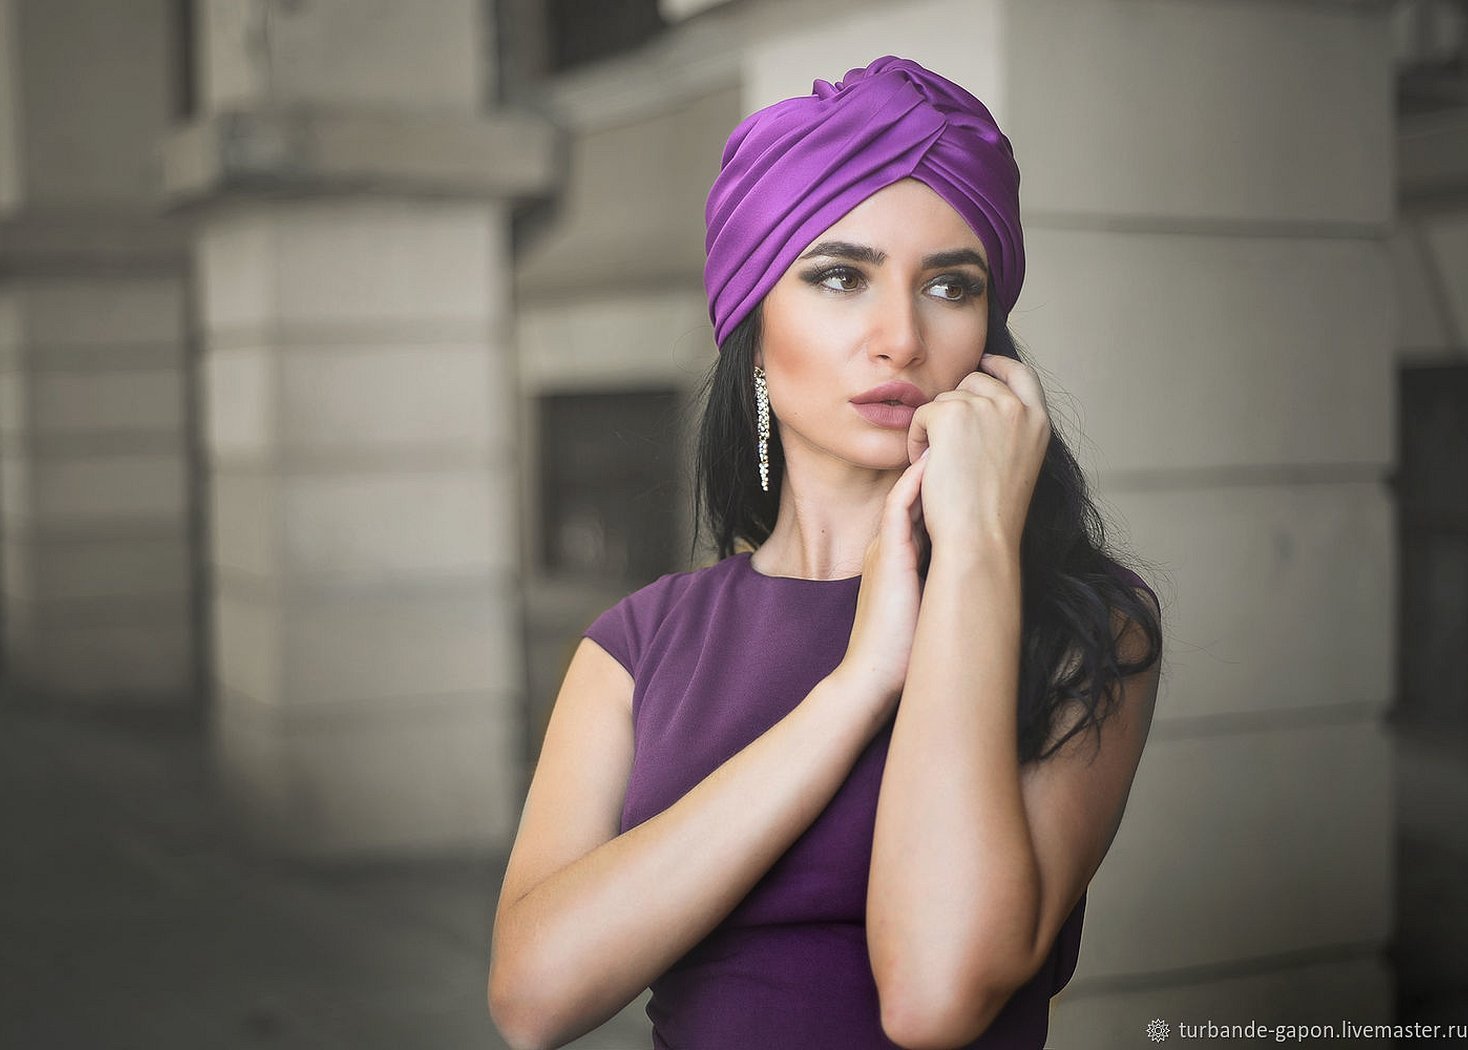
A knitted turban hat can look different, but most models of this type of headwear are knitted quite quickly and relatively simply. The turban itself has several varieties:
- classical;
- eastern;
- retro.
Visually, they differ in the way the front part is folded and the volume of the folds, as well as the presence of decorations. There is also a turban-bandage that covers the ears but leaves the top of the head open. This option is best suited for autumn, while the hat is a universal item for autumn, spring and winter.
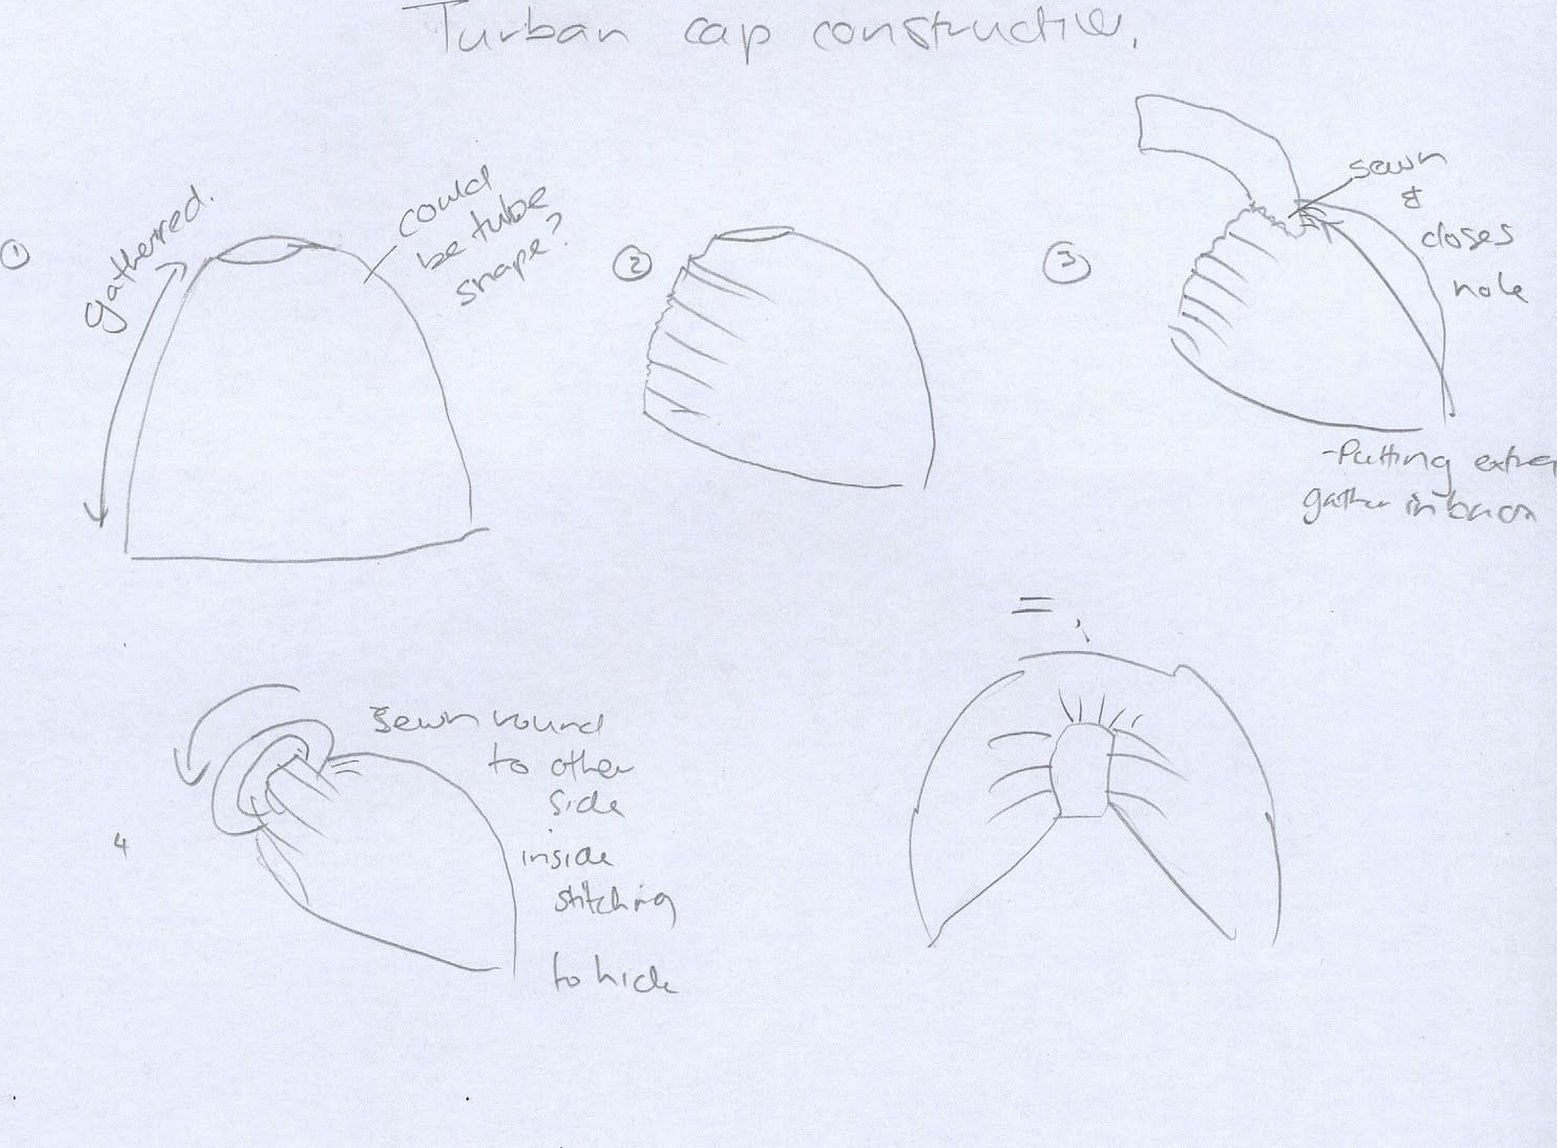
This turban hat with knitting needles for beginners is knitted in one piece. You won't have to connect or sew it, twist it or deal with separately knitted parts.
Materials for work:
- semi-woolen yarn;
- knitting needles No. 5.
You need to calculate the loops. The width should be 10-11 cm, in this master class it turned out to be 19 loops. The sample should be knitted from the obtained yarn, taking into account that the number of loops should be a multiple of six and +1.
Knitting an elastic band for a turban with knitting needles:
- 1st row - 1 out., 2 front., repeat the alternation of loops until the end;
- The 2nd row and the remaining even rows also need to be knitted as in the first option;
- 3rd row - 1 out., 1 loop of the persons. behind the back wall and without removing it 1 loop of the persons. must be knitted behind the front. Thus, this method of knitting three loops is repeated to the end;
- The 5th row is the same as the third.
The elastic band needs to be knitted up to 4 cm.
In each front row, five increases are made in the manner described below.
Additions:
- in the first row after two knit stitches (5 increases);
- in the third row of faces - front knit and 1 purl (5 increases).
The variations of increases alternate. This will give a uniform expansion of the turban cap.
Please note! To avoid holes in the fabric, it is better to make increases before the purl stitches.
Increases are made until there are 6 purl stitches on the outer tracks.
On other tracks you need to stop increasing when there are 11 purl loops. Edge loops should not be taken into account.
5-6 cm should be knitted without increases. And then start making decreases: in the front rows, knit 5 times 2 purl loops. In order to avoid skewing, decreases are placed in turn - first in front of the front, then after.
Decreases are made until there is 1 purl loop left on each track, except for the middle one. There you need to leave 2 purl loops on it.
The loops should be divided into 10 pieces. Each half of 28-29 cm should be knitted separately. They should be arranged, crosswise sewing the ends - rims - along the edges.
DIY knitted beret for women
As with any sewing product, when constructing a beret, the first thing you need to do is make a simple pattern with your own hands. The basis of the beret pattern is a circle with a diameter of 30 cm (standard size). In the center of the circle, you will need to cut out a circle that corresponds to the size of the head.
The size of the head is the main indicator when creating a beret pattern. To determine this parameter, it is necessary to place a flexible measuring tape around the widest part of the head (a line running along the protrusion of the occipital part and the frontal tubercles). The length of such a line, determined in centimeters, will be the size of any headwear.
Usually, such a measurement is also used when buying a ready-made product in a retail network. When taking measurements, you cannot pull the measuring tape too tightly, as well as loosen it. Inaccurate fulfillment of these conditions will be strongly felt when wearing the product. In such cases, the beret will either constantly slip down, so you will have to adjust it often, or you will have to pull it tightly onto your head, which leads to a feeling of discomfort. It is also necessary to take into account the thickness of the edging seam and lining, if any, used in this product.
After determining the head size, we continue cutting the product. The radius of the circle that needs to be cut out is calculated using the formula R = size / 2π. When making a beret from elastic fabric, 1-2 cm must be subtracted from the head size so that it fits well on the head.
In total, you need to cut out three pieces:
- a round piece with a hole;
- beret bottom;
- band.
A strip of the required width and length is cut out as a band.
To make a beret with your own hands, you will need to make only three main seams. The first seam connects the two main parts together in a circle. Then sew the band into a ring. And the third seam is to sew the folded band in half to the opening for the head. After all these operations, it is necessary to iron the seams well.
If the fabric from which the headdress is made frays quite a lot, leaving threads in the hair, it will be necessary to make a lining. To do this, you need to cut out two round pieces, just like for the beret. Put them together with the right sides facing each other and sew them around the circumference, leaving about 7 cm unsewn. Turn the lining inside out and insert it into the beret with the front side facing inward. Then you need to align the band and lining around the circumference of the head and stitch around the circle. Through the unsewn hole, the entire product must be turned over and carefully sewn up.
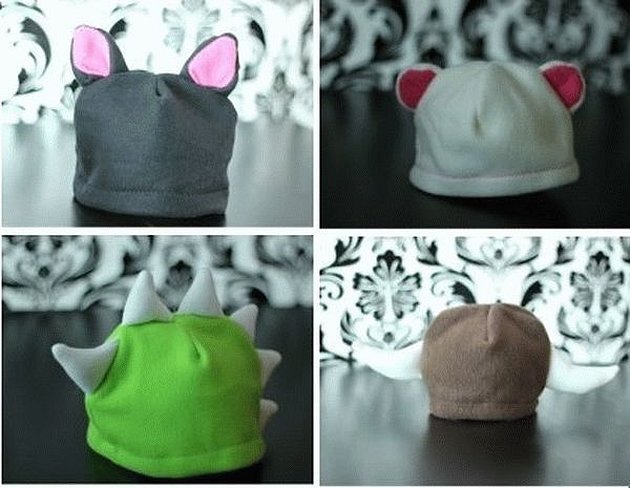
Knitted hat with ears
Before you start working, you need to rip the sweater into separate parts. You should choose a piece of the appropriate size to get a rectangle: width 47.0 cm, height 38.0 cm. (the dimensions are already given with allowances). The fabric should stretch well in width, so the hat will fit tightly on your head.
Then the fabric should be adjusted to the dimensions of the rectangle and the excess should be cut off. If it happened that in some places there is not enough fabric, you can make decorative inserts. The inserts should be cut out with allowances for processing. Next, you need to connect them on the machine, using a double needle to give the seam elasticity. All cuts should be aligned to get a rectangular shape with even edges. You need to stitch the middle seam on the overlock. The seams should be ironed. Next, the middle seam should be positioned exactly in the center, fixed with a pin and stitch the top seam of the hat.
This product is perfect for girls if you make it in pink tones.
The same should be done with the second seam, only in the middle you need to leave a small opening to turn the part to the front side. From the front side you will have to sew up the opening with blind stitches. Fold the part in half inward and mark the seam lines that define the ears. All this should be sewn on a machine. In the end you will have to remove the chalk lines.
In conclusion, it should be noted that a knitted hat is a practical and comfortable item, it does not require special care, it can be worn every day. The pattern of a knitted hat is made quite easily, you can draw it yourself or print a template from the Internet in full size. Sewing a headdress is easy, so any adult can handle the job.


