A hat is an important part of your wardrobe. If you choose it incorrectly, it can highlight the flaws of your head or forehead. This article tells you how to sew a hat yourself and what you need for this.
- What material is suitable?
- The coefficient of extensibility and how to find it
- Measurements for a hat pattern
- Preparing fabric for cutting
- Self-sewing
- Made from knitted fabric with fleece lining
- Knitted sock hat.
- Knitted hat and snood
- Fleece hat with earflaps
- DIY Women's Knitted Beret
- Simple knitted hat for a child
- For a girl
- For a boy
- Final finishing
What material is suitable?
The fabric for sewing hats must be elastic.
Depending on the style, knitwear can be light or thick, footer, drape, children's fabric, fleece, corduroy, lace, etc. The beanie model can be made of light material and worn in warm weather or from textured fabric of a dense structure - for the winter season. It all depends on personal preferences.
The coefficient of extensibility and how to find it
The stretchability of an elastic material along the warp and weft is based on the relative elongation of the item when the fabric is stretched.
The coefficient of extensibility is the ratio of the length of the stretched fabric at the moment the force is applied to its length before the experiment.
Finding this coefficient is quite easy. It is necessary to take the material from which the thing will be made and hold it on the weight together with a centimeter, having marked the reference point in advance. Pull the fabric, put the reference point and the stretching point. This is how the coefficient is determined.
Measurements for a hat pattern
Since the style is the easiest, you can use an old hat as a template.
If there is none, then you need to take these measurements:
- Head circumference Og;
- The depth of the product Gi.
Please note! All readings taken are indicated in full size.
Below is a description of how to sew a hat with your own hands.
Preparing fabric for cutting
Before starting work, make sure that the material is intact and free of defects.
Find the outer and inner sides. Do a decating: check the material for shrinkage, for this you need to wash and iron it before starting work.
Self-sewing
Sewing a headdress is one of the easiest jobs in needlework. It is important to correctly construct a pattern based on two measurements taken. You can sew the product even without using a machine.
Made from knitted fabric with fleece lining
Attach the sketch to the fleece fabric. Draw a template with chalk, choose from 4 to 6 elements. You do not need to cut them out completely.
You can lay it out like a "fence". Then the seams won't take too much time. But you also need to cut off the extra material from the pattern that is on all sides.
Now you need to make the lining. Sweep the cut out elements with a rough seam. Check that the seams match. Place the lining in the product and try it on.
Sew all the elements together, using the same thread as the fabric. The product will have the shape of a dome. Step-by-step work:
- Thread a thin needle;
- Insert the lining inside the finished headdress with the wrong side inward. For convenience, it is advisable to pin it to the crown or sew it in immediately;
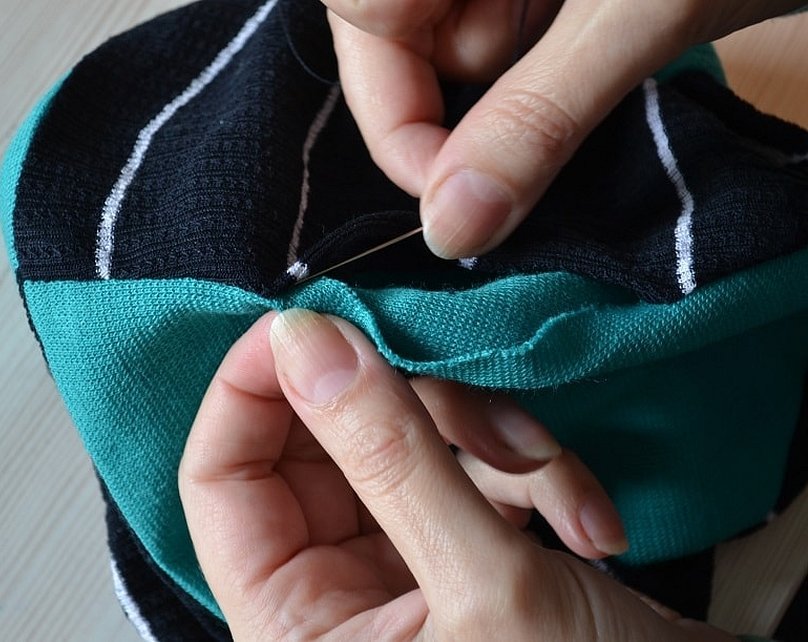
- Sew the lining to the garment using a blind stitch. It is recommended to make small stitches, pulling the thread well. Thanks to this, it will not be visible from the inside.
If the product has ears, it is recommended to insulate them. Cut a fleece lining in the shape of ears, but a little smaller. Insert them inside and stitch along the edge.
Fleece is one of the popular insulation materials for products. It is very easy to work with and also easy to care for.
Knitted sock hat.
Materials for work:
- Fabric of your choice;
- Yarn to match the product;
- Scissors or fabric roller;
- Sample;
- Sewing machine.
Material consumption. If the product is planned to be worn in winter, then it needs to be sewn in two layers, so a lot of fabric will be used. For a head size of 52, you need to take material 60 cm long and 55 cm wide. For summer hats, you will need 35 cm + 5 cm for the bend along the forehead line and a width of 50 cm. Sewing process:
- The piece of material must be folded from the bottom up so that the outer part is on the inside;
- Then you need to fold the fabric from left to right;
- The front seam of the product will be on the left, and the back seam on the right;
- The sketch needs to be changed to the required dimensions. In this example, the measurements are 28 cm high and 48 cm wide. When cutting out the material, you need to leave 1.5 cm for allowances. It is advisable to trace the pattern with a pen or secure it with pins;
- Now you need to unfold the canvas;
- The material must be straightened out evenly and folded along the back seam so that the outer part of the fabric is on the inside;
- It is essential to treat the seams so that they do not crumble.
Next, you need to sew the front part of the product. Turn the sock hat inside out and iron it well. Fold the product in several layers, depending on the season of wearing. Fix everything with pins and sew with a machine. Now the back seam is closed, so the hat is more pleasant to wear and has an aesthetic appearance.
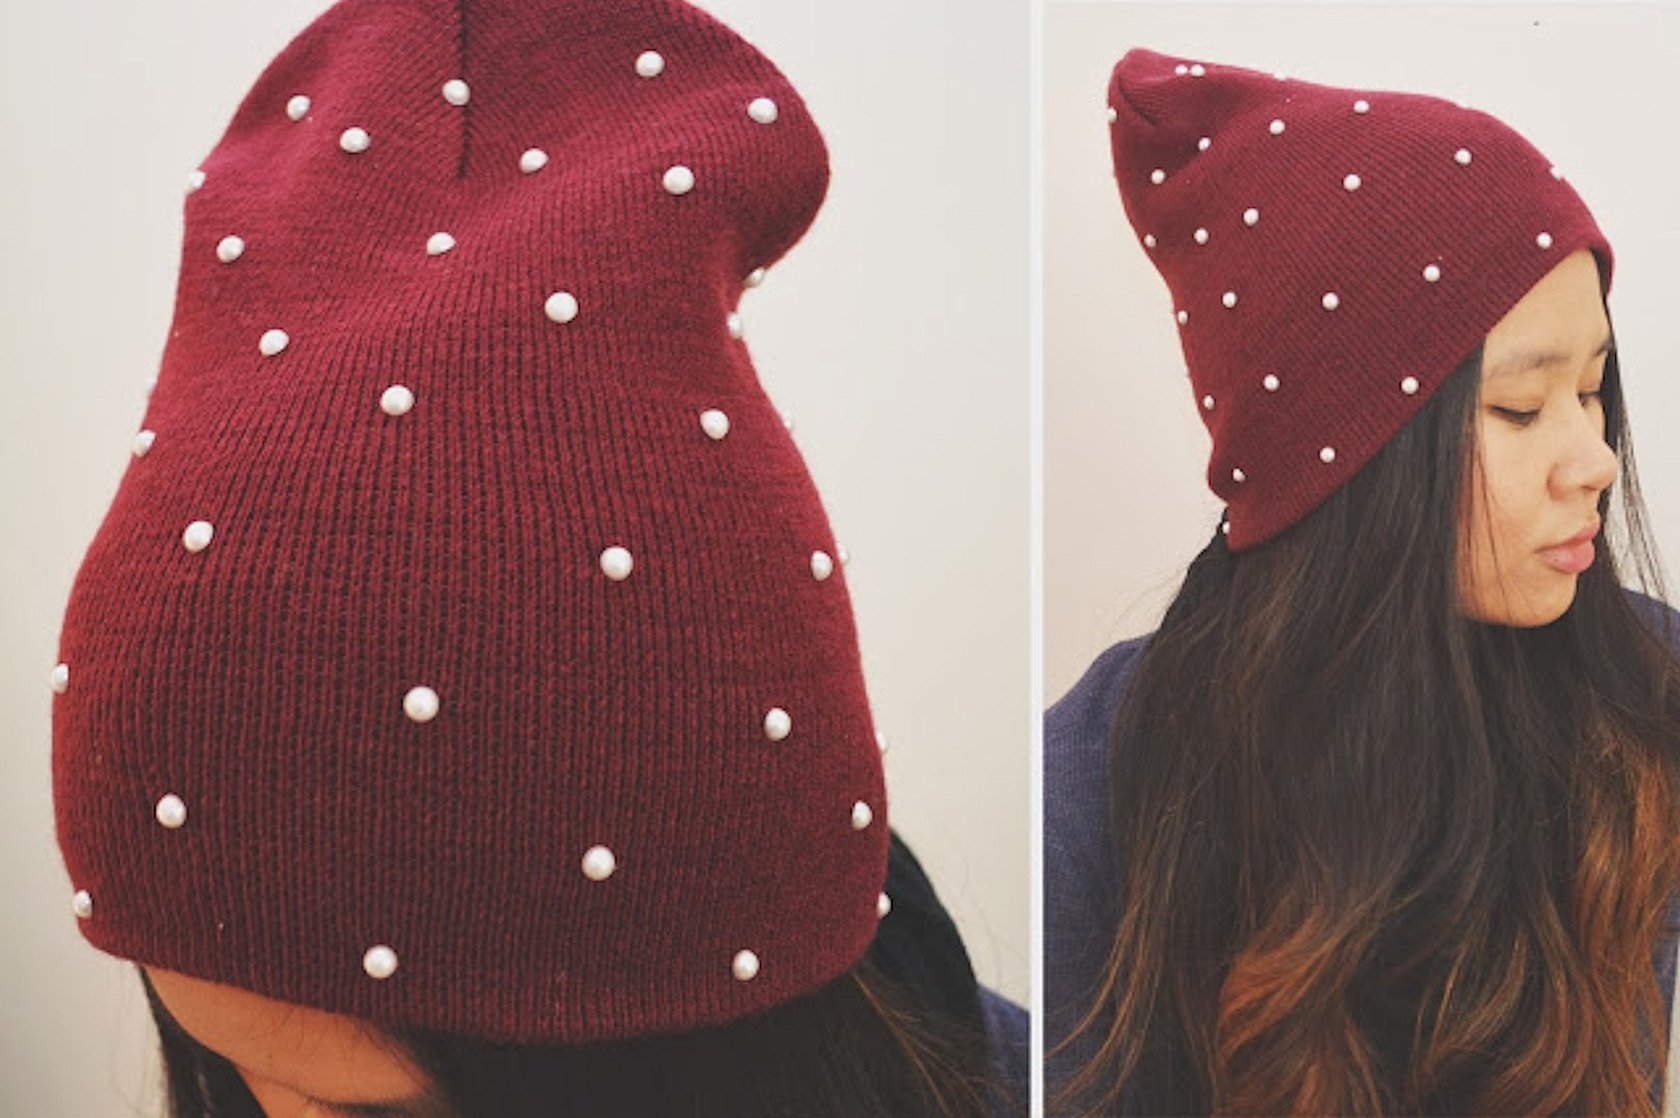
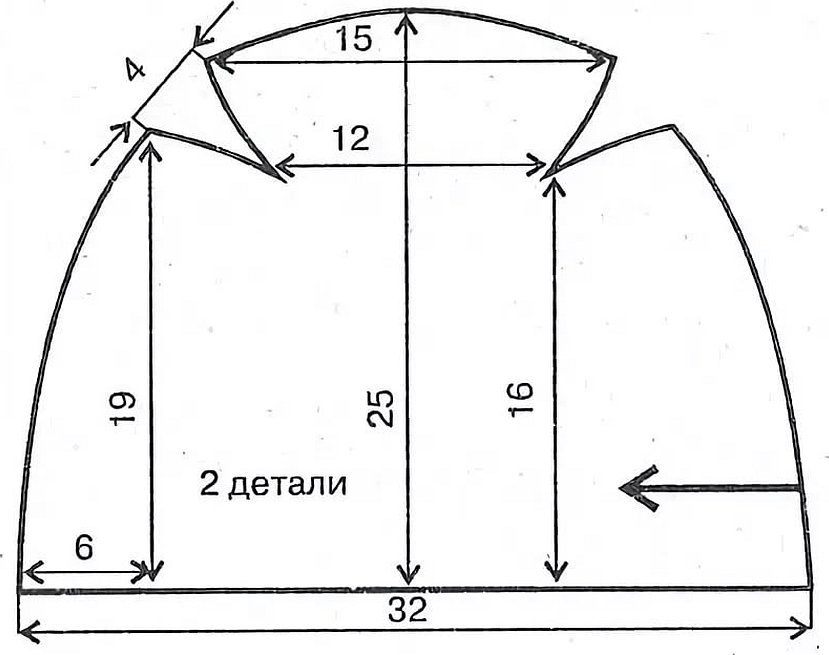
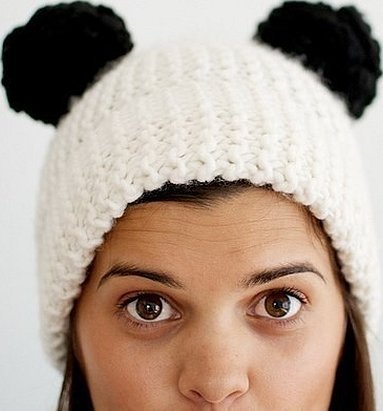
Knitted hat and snood
What you will need for work:
- Fabric size 57/54 cm;
- Pattern on paper or cardboard;
- Threads to match the fabric;
- Needles, pins, textile roller.
How to make a pattern:
- Take measurements from the head and draw a rectangle 55/26 cm. On one part of the triangle make a semicircle;
- On the other part draw the same semicircle. Now the pattern looks more like an oval;
- Draw a rectangle and a semicircle on one side. Do the same for the other side.
The process of sewing the product:
- Fold the fabric in several layers with the right side facing inward, attach the template and trace with soap. Make allowances of about 1.5 cm and stitch (be sure to leave a hole to turn the piece inside out);
- Turn the product inside out and sew up the opening with a blind stitch;
- The work is almost finished. Fold the cap in half and put a mark. Make the second one after 3 cm;
- Now, looking at the first mark, you need to tuck the smaller half of the product into the larger one. Now you need to make a 6 cm fold from the bottom to the outside and sew on the pom-pom.
The product is completely ready.
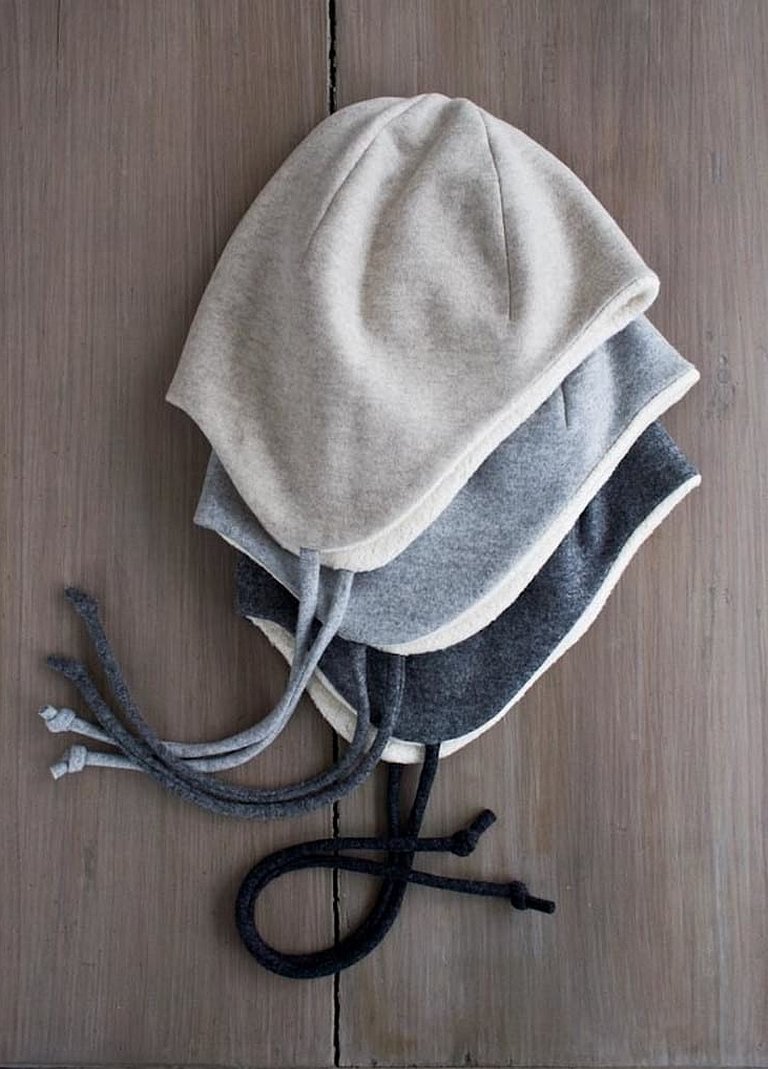
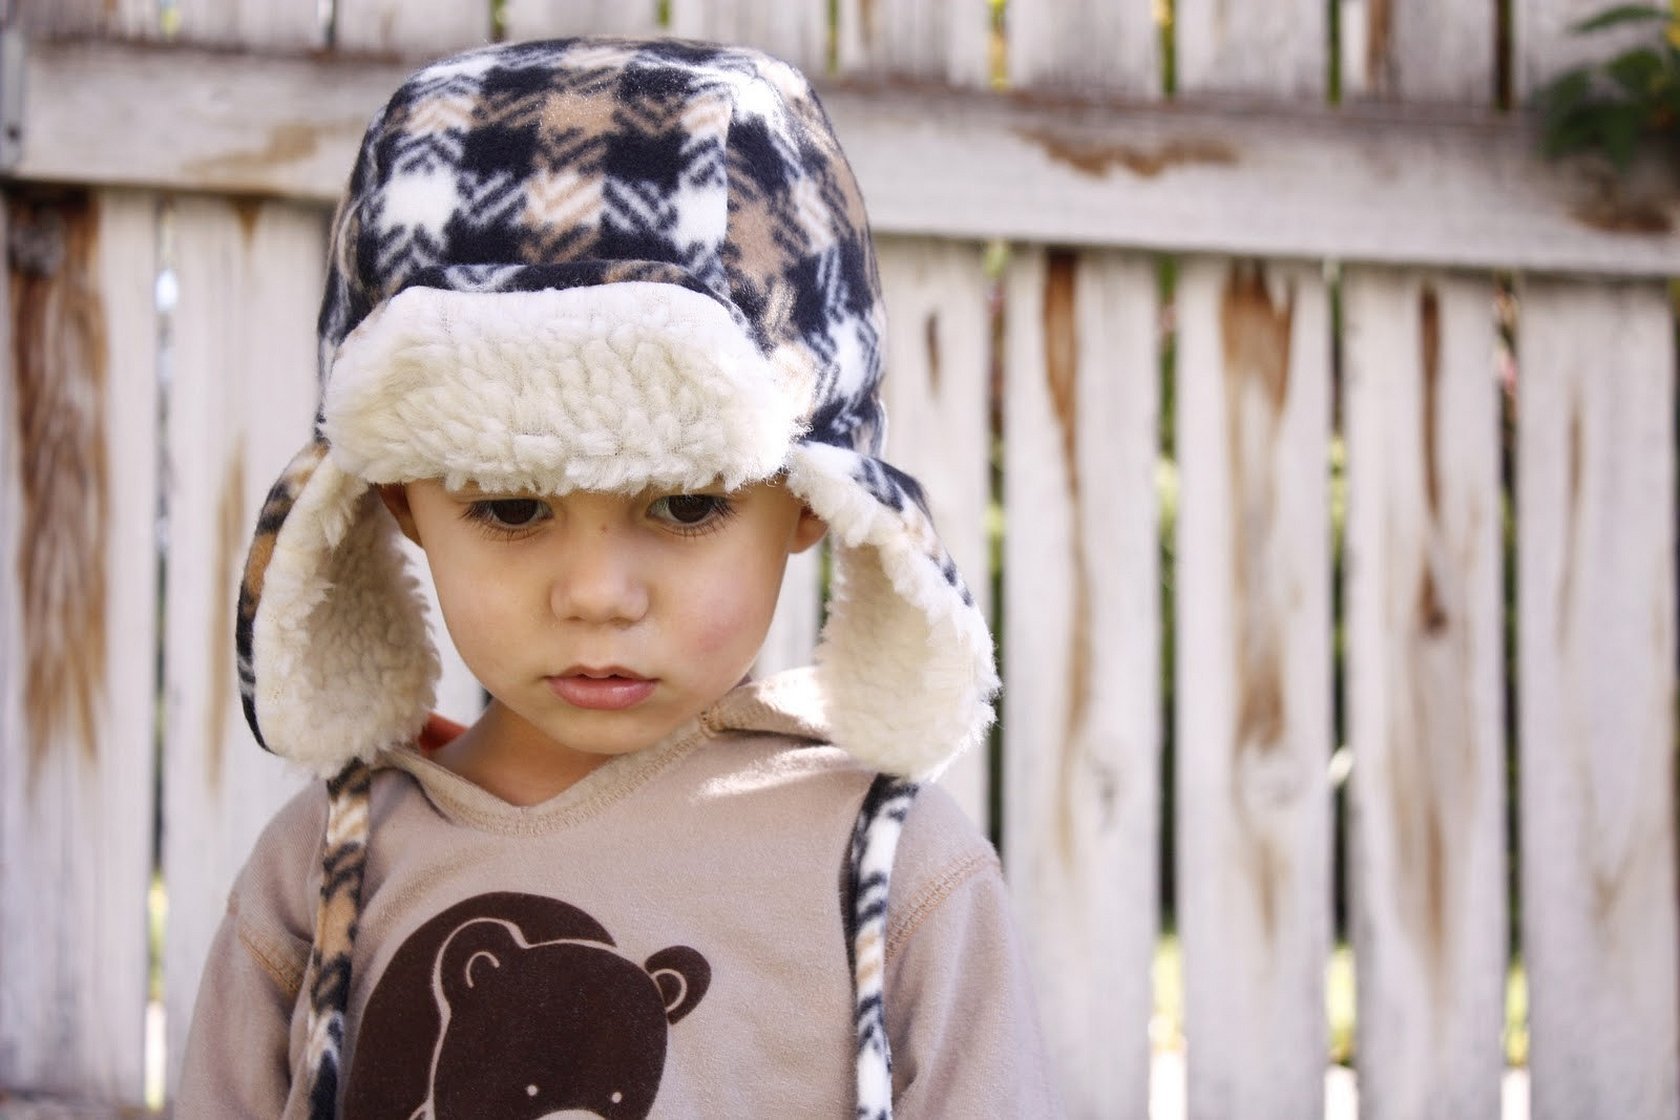
Fleece hat with earflaps
This headdress model definitely needs a lining. You can use multi-colored fleece for this.
These models are mainly worn in winter as they cover most of the head and forehead. You can make a fur hat with or without strings. In this case, wedges are made according to the required measurements.
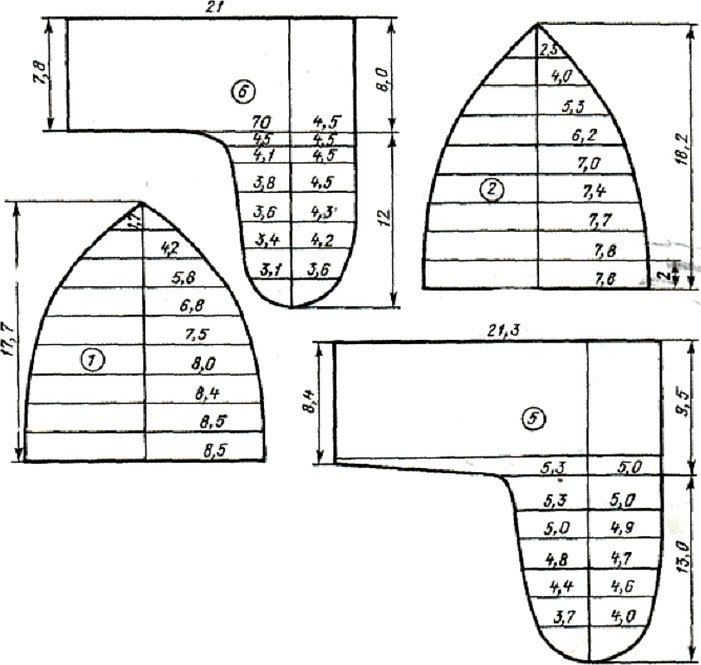
It is important to remember that the pattern should be transferred to the fabric with a 1 cm margin. There are ready-made patterns for the hat on the Internet and in various master classes. It is also advisable to make a visor for the ushanka (two identical-sized elements). Connect the wedges for the lining material together, but make a small open seam (5 cm) to turn the product inside out through it. There should be four elements that need to be sewn to the bottom of the product (2 external, 2 lining), they will be the ears.
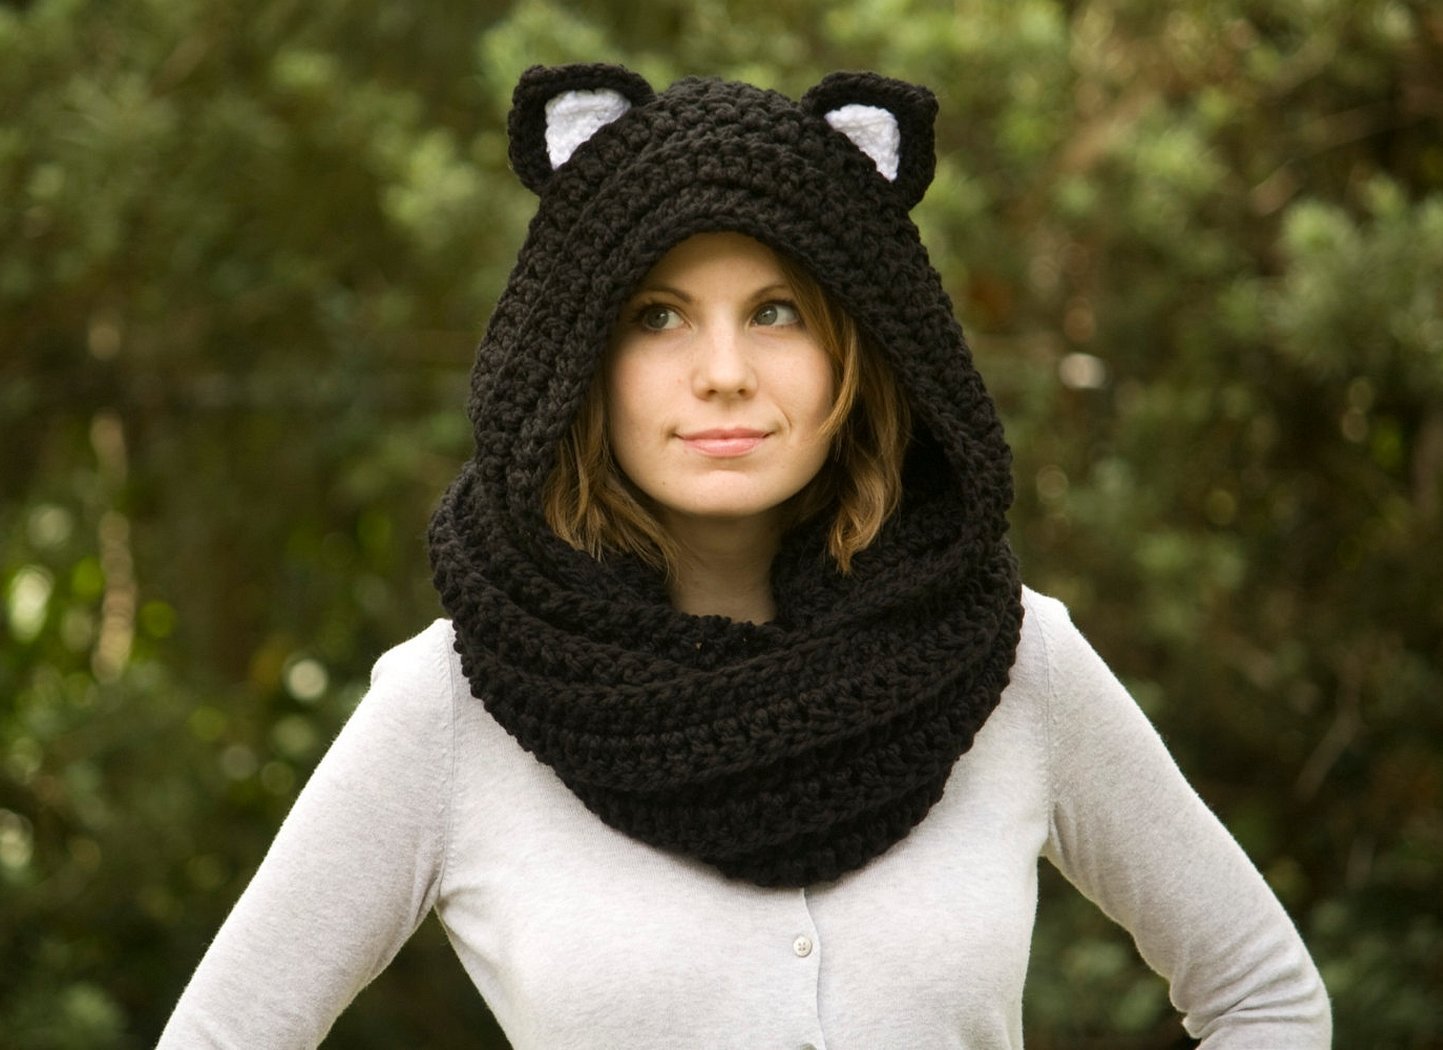
Sew the visor elements together, trim off any unnecessary allowances and turn inside out. Sew the parts that will act as ears and also turn them inside out. Now all the parts need to be sewn together into one product on a sewing machine.
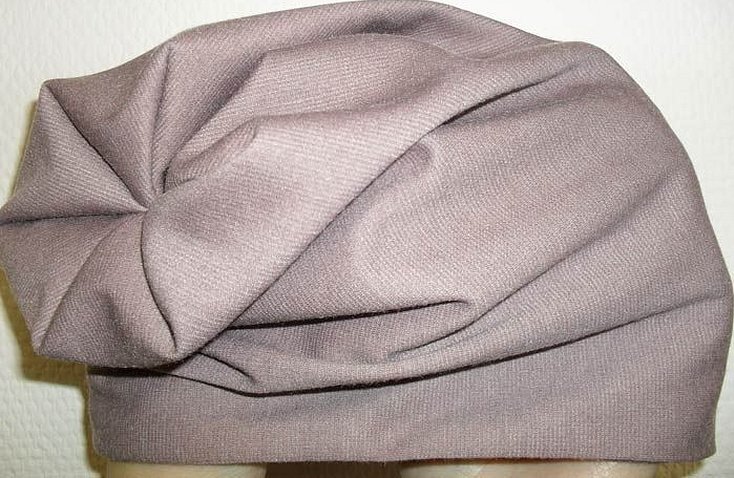
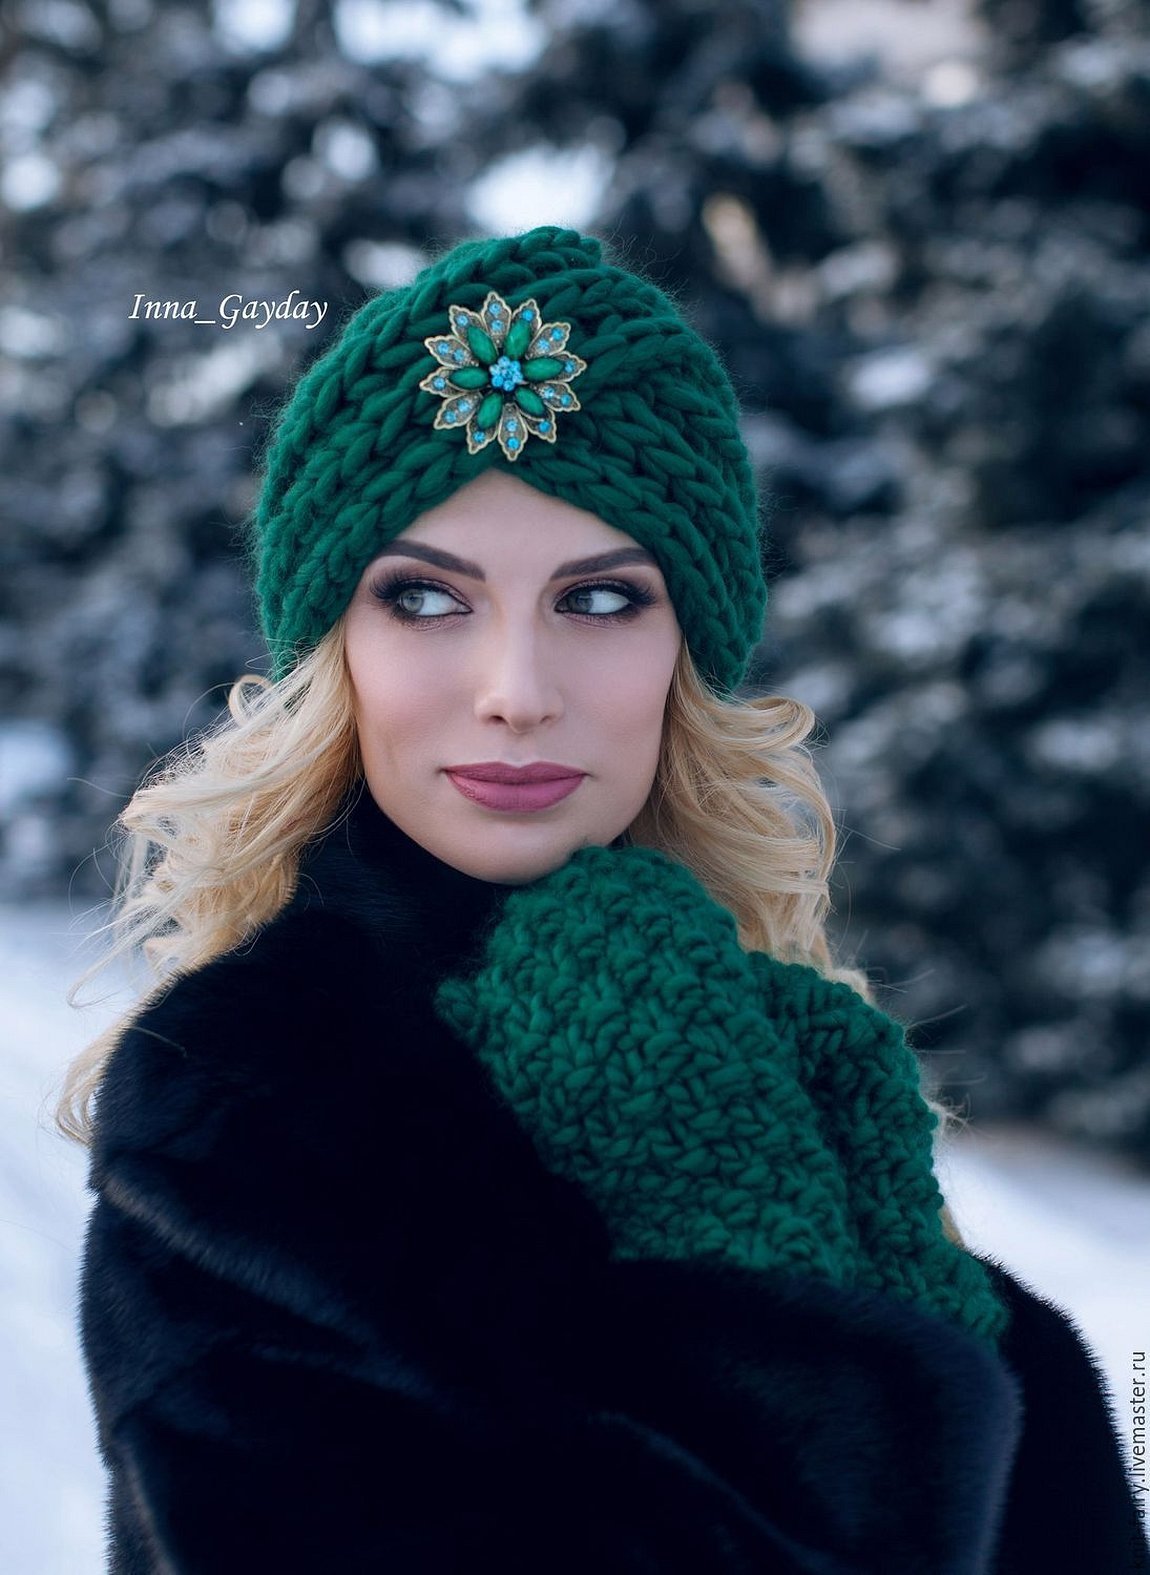
Knitted turban
Step by step instructions:
- You need to take a piece of material with processed edges and fold it in half lengthwise, so that you get a rectangle measuring 60x30 cm. For work, you need at least 100 cm of fabric. You need to fold the material with the outer part inward;
- Now you need to make a small rounding on the upper left corner;
- Sew the top and side edges, then stitch. The thread cannot be cut during work. It is needed to tighten the turban and make folds. Basically, this operation is done directly in the sewing machine;
- Now, for practicality, you need to put the turban on the jar or doll, turning it inside out;
- You need to make an indent of 2 cm from the intended center of the headdress (approximately at a height of 11 cm from the edge) and begin to form the folds;
- Their quantity also plays a role - the wider the grip, the fewer folds will be needed. Secure with a thread so that they are secured;
- Cut the piece of thread with scissors. The turban is ready and you can safely wear it.
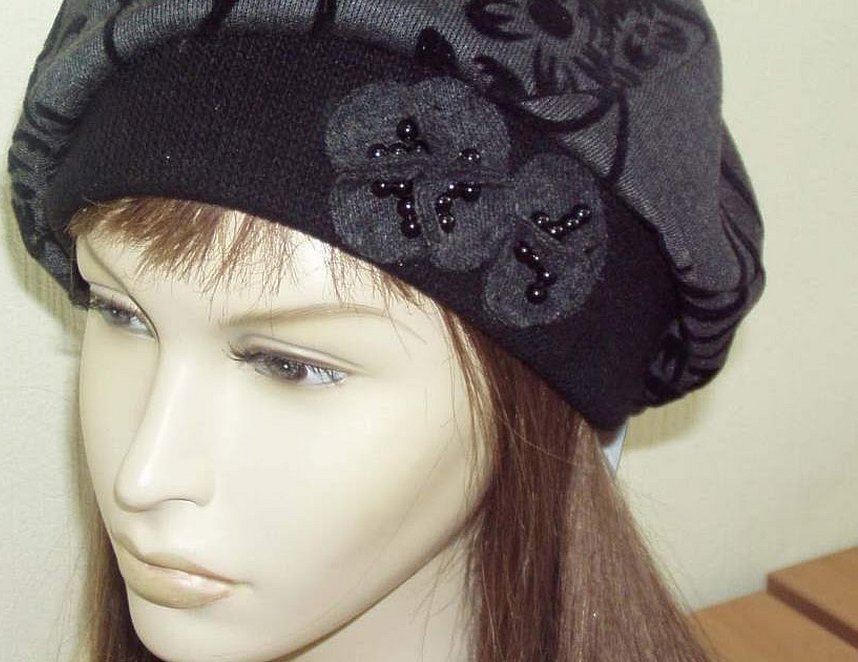
DIY Women's Knitted Beret
The process of sewing a beret:
- You need to sew both parts of the side together so that the piece is whole;
- Iron the seams well;
- Then sew the bottom to the side and make the base of the beret;
- Iron the seams again;
- At the end, you need to sew on the band, while checking the depth of its fit on the mannequin.
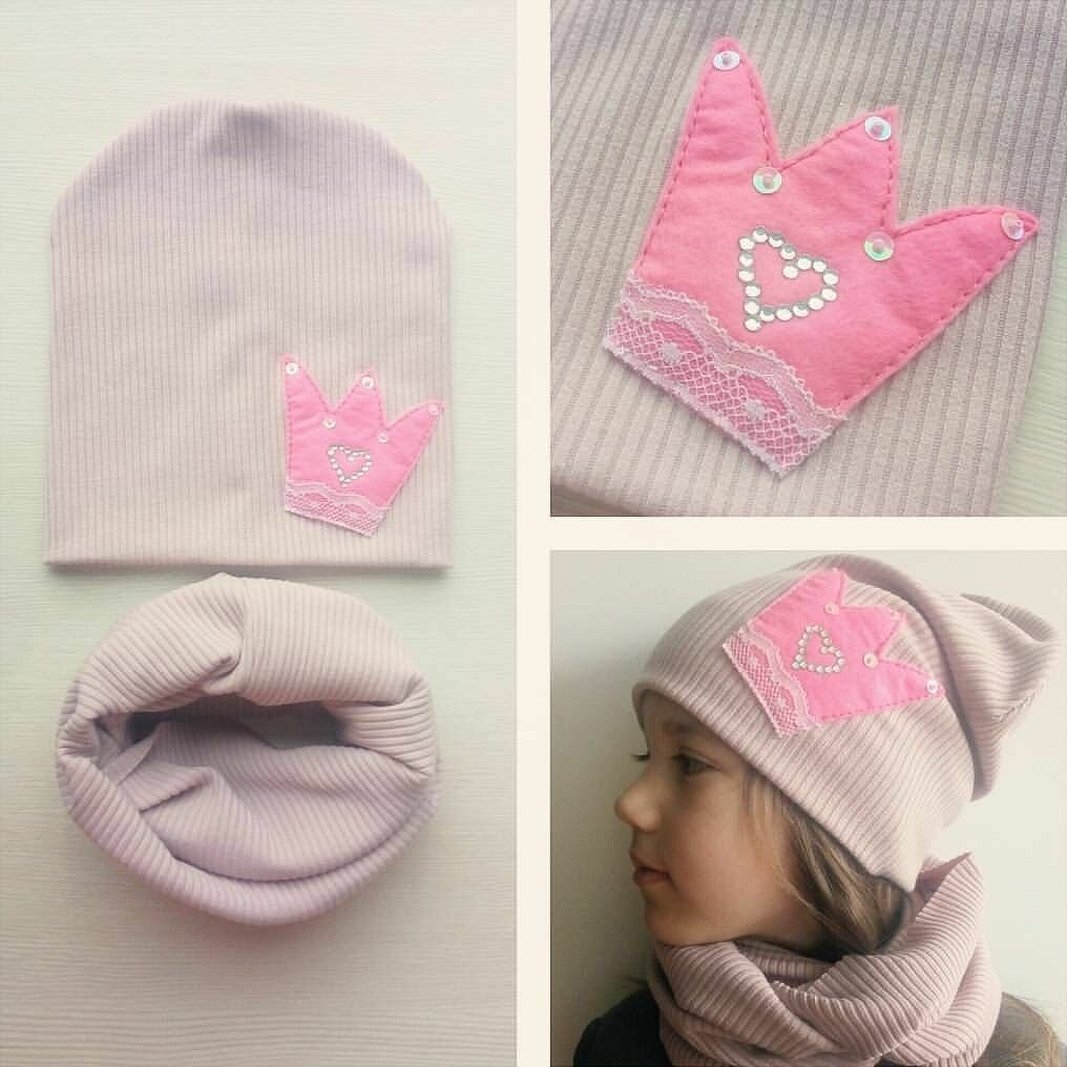
Simple knitted hat for a child
Sewing a headdress for a child is much easier. You will need less fabric, and the work will be shorter. Patterns for children's hats can be made independently without much effort. In extreme cases, just print it on a printer.
For a girl
Sewing execution:
- Like any work, sewing a hat begins with transferring the design onto the fabric;
- Turn the fabric over with the outer side facing up;
- Start sewing the side fold lines;
- After this, sew all the wedges in the middle one by one using a blind stitch;
- Sew the side line and close the hat, giving it a finished look.
If desired, you can sew on beads or a knitted flower. For a girl, it is better to choose delicate tones of material, but not white, so that dirt is not visible.
For a boy
For work, you can use a basic pattern of a knitted hat. It is made of only two parts, front and back. It is necessary to cut them out of knitted fabric and sew them with any available seam, you can even do it without using a machine. The advantage of knitted hats is that they can be washed in both hot and cold water. It is allowed to use any powders and conditioners. Only ironing is allowed at a temperature of no more than 90 degrees.
Final finishing
You need to straighten the connections of the lining material and the base, and then baste the piping. If desired, you can make ties or buttons. Some people use beads or rhinestones for decoration. For winter hats, you can make a border of natural fur. When decorating, you need to use all your imagination to get an exclusive product.
In conclusion, it should be noted that it is quite easy to sew hats with your own hands. Not only a novice seamstress, but even a child can take measurements. The main products consist of 2 or 4 parts that simply need to be sewn. Products can be sewn not only for women, but also for men.


