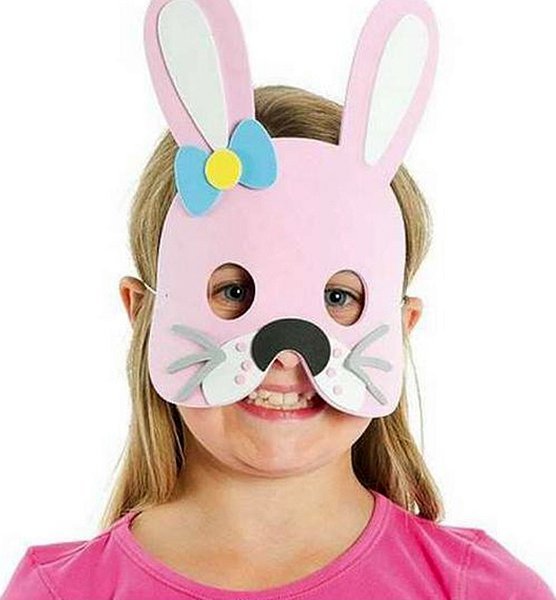
A small fluffy bunny – this cute and kind hero of fairy tales, cartoons and computer games is familiar and likeable to every child. Any boy dreams of being a bunny at a matinee, and a girl happily tries on an “eared” headband.
How to Make Bunny Ears: Ready-Made Template with Description
A hare mask will come in handy for a New Year's party, Easter celebration, a humorous birthday greeting for a person born in the year of the rabbit, or just a fun children's game. When creating any of the hare masks for the head, it is not necessary to strictly follow the patterns and coloring schemes. The child can decorate his creation to his own taste.
Important! There is no need to try to do everything for the child. Cutting, coloring and coming up with different design options helps the child express himself and believe in his strength, and the finished craft, created with his own hands, will become a real reason for pride for him.
Such a cool costume element as bunny ears may be needed not only by children, but also by adults: a matinee in a kindergarten, a costume party, a corporate event at an enterprise or a home performance - the reasons for using this accessory can be very different.
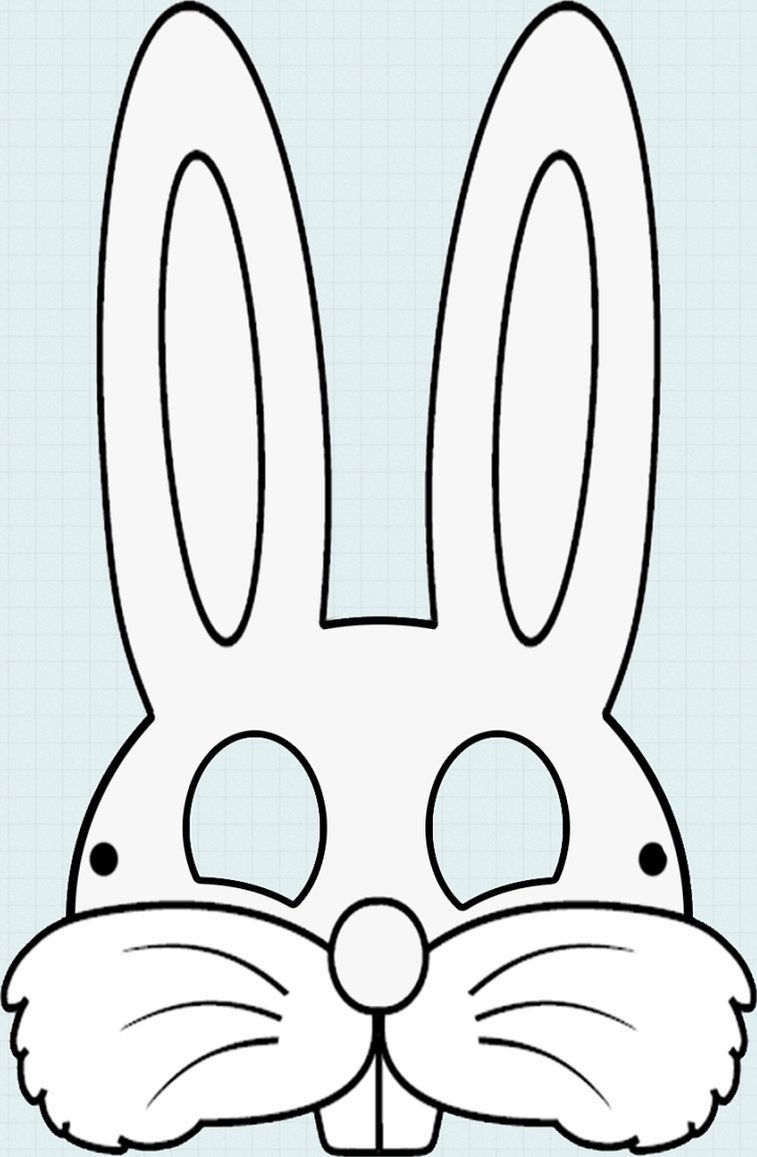
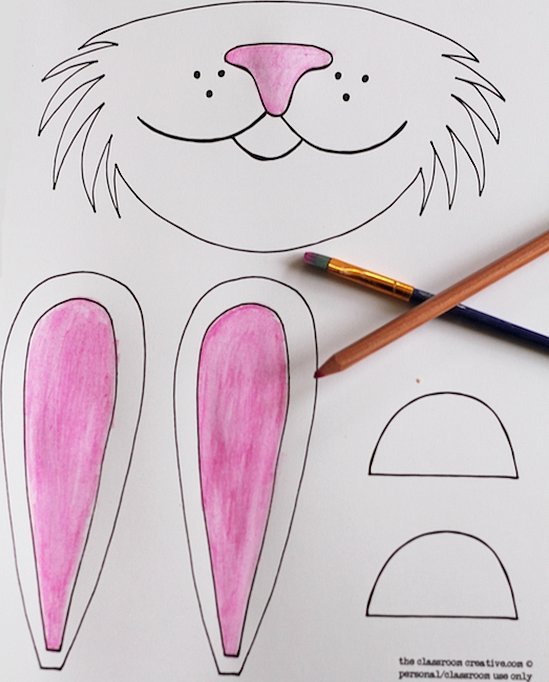
Even without the help of adults, a child can make paper bunny ears for his head using the templates provided below.

To make the bunny ears, you need to print out the template, carefully cut it out along the outline and attach it to a ribbon or a ready-made headband.
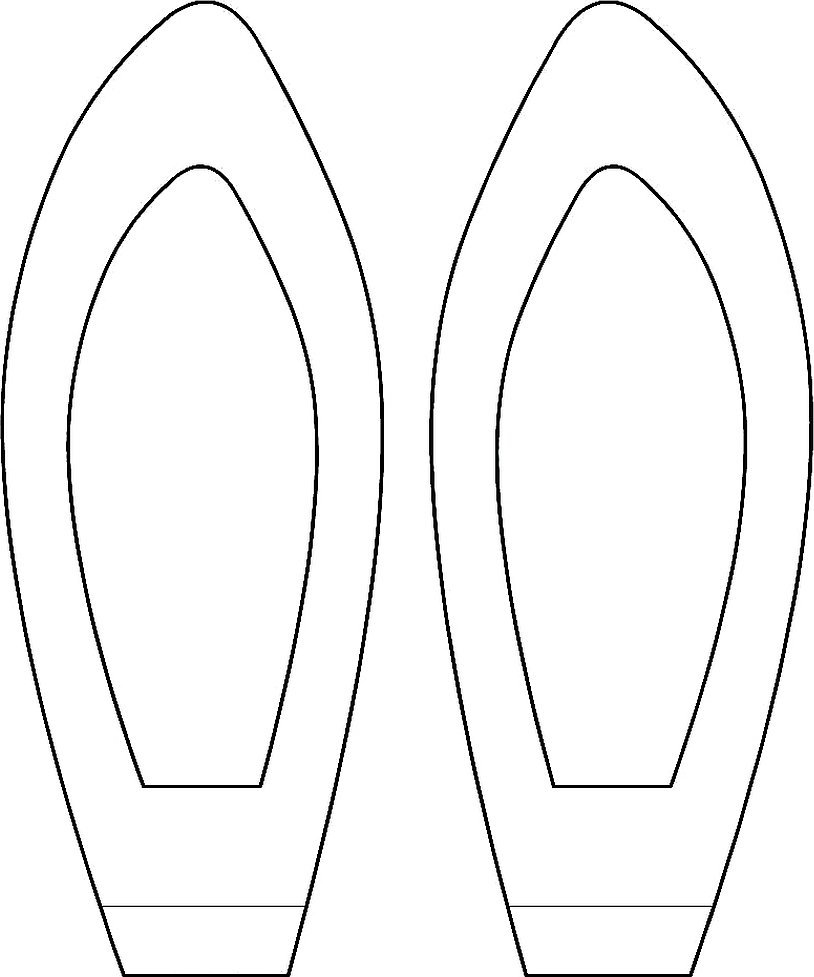
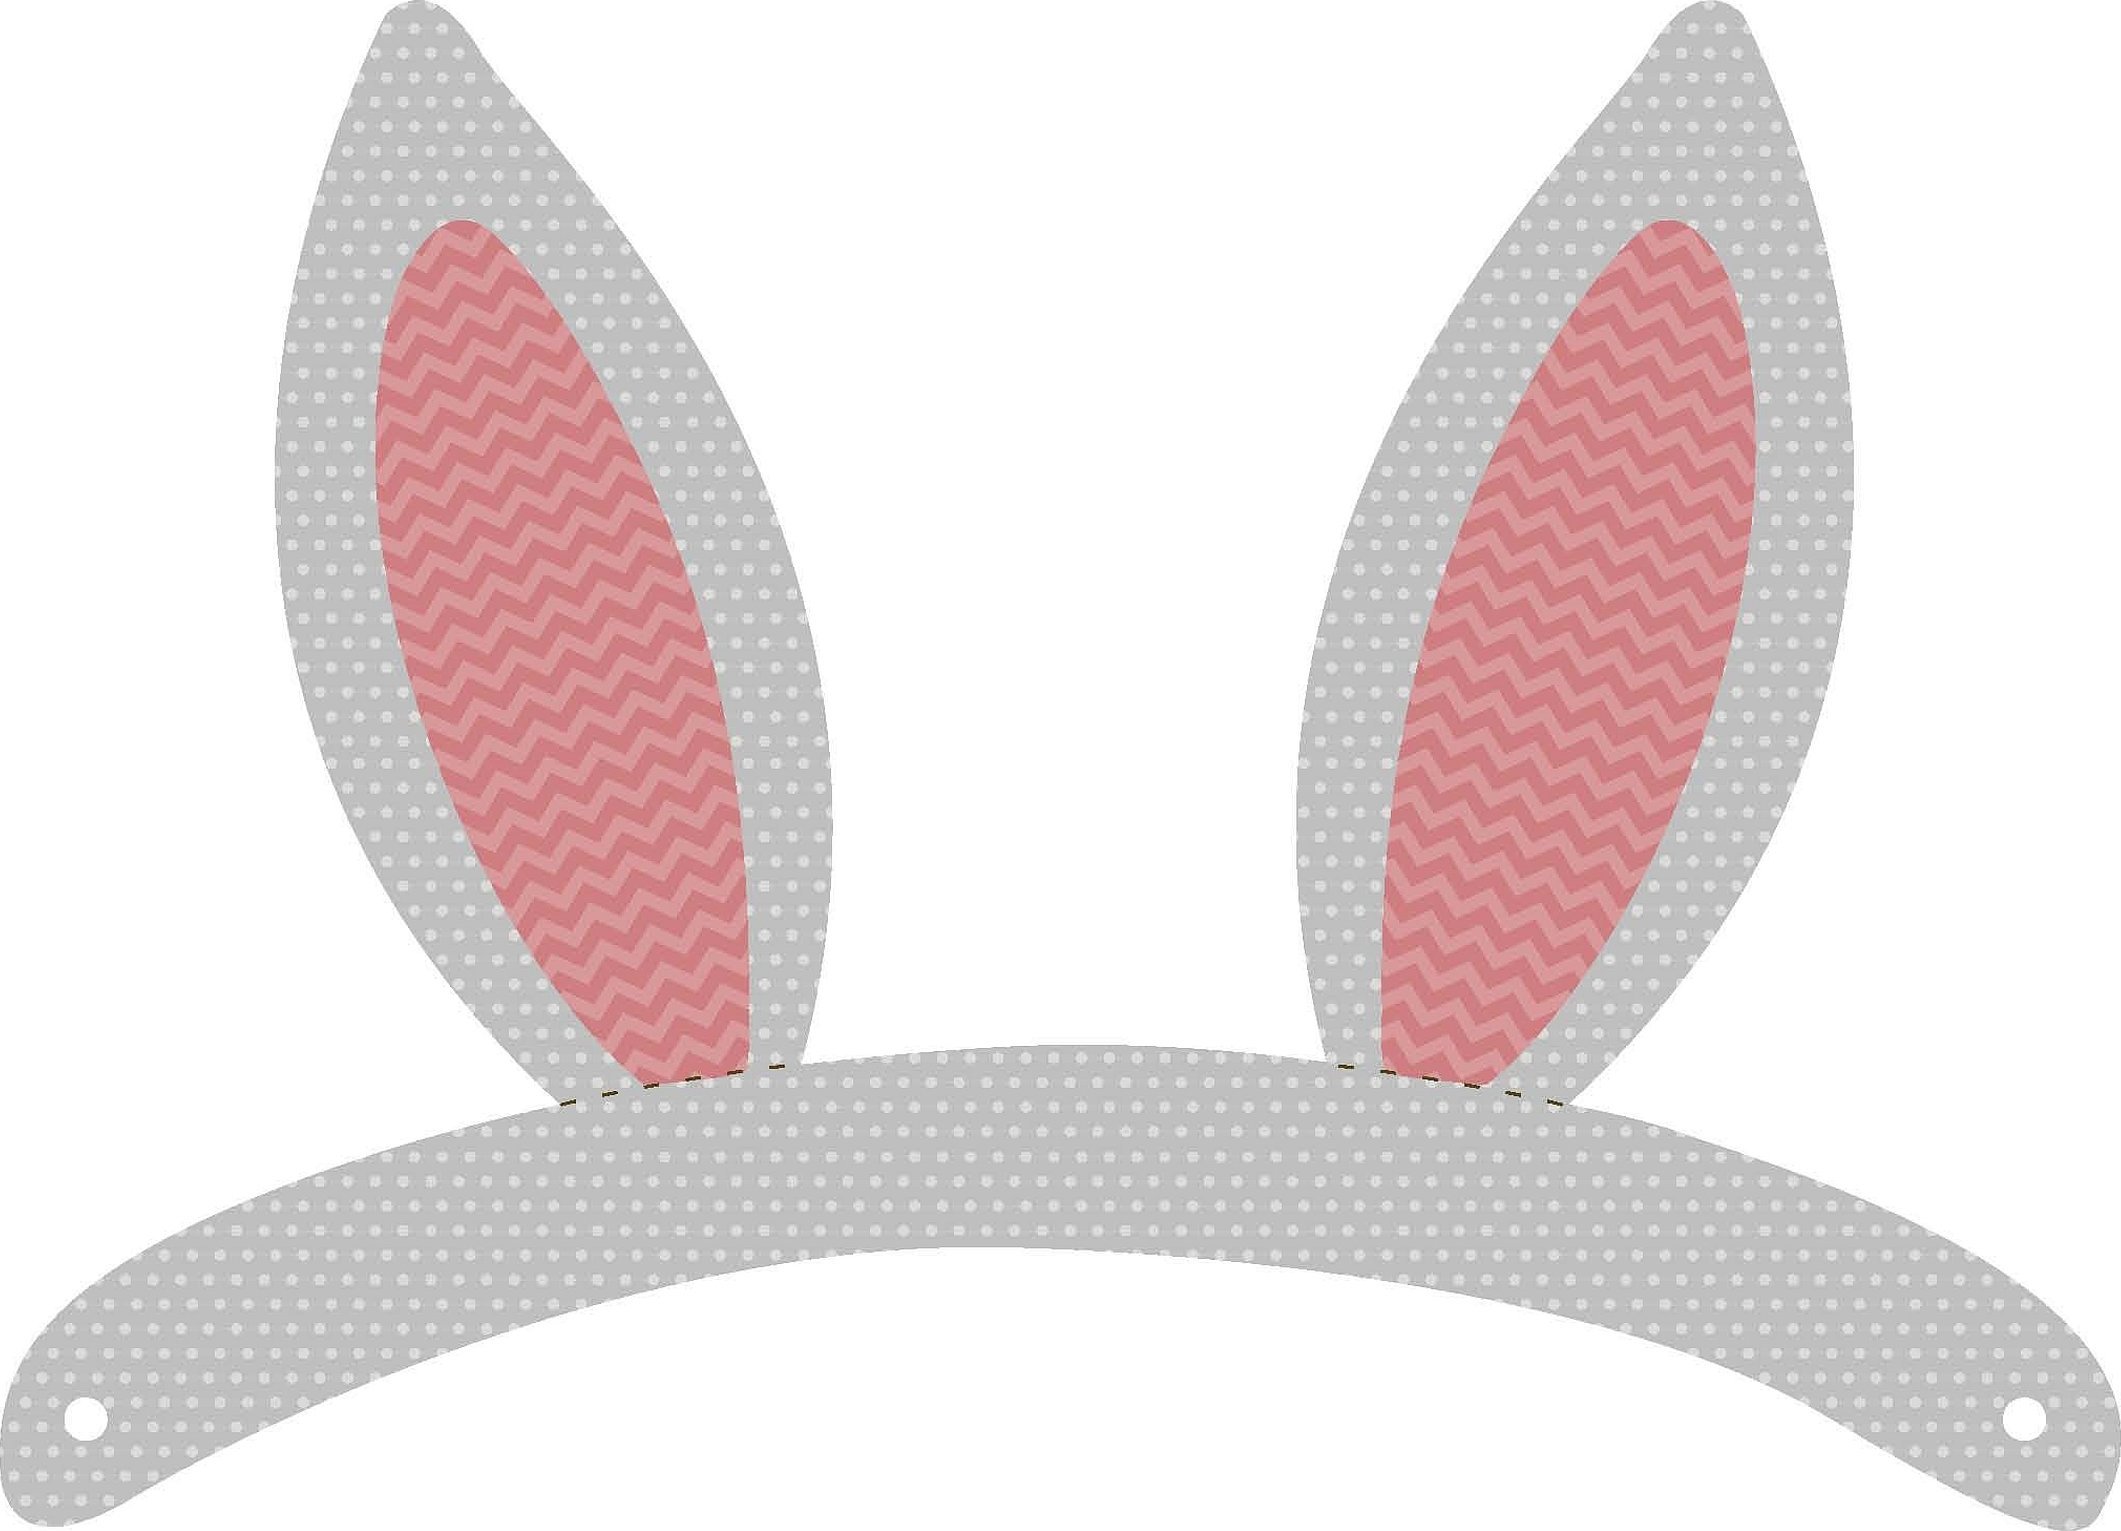
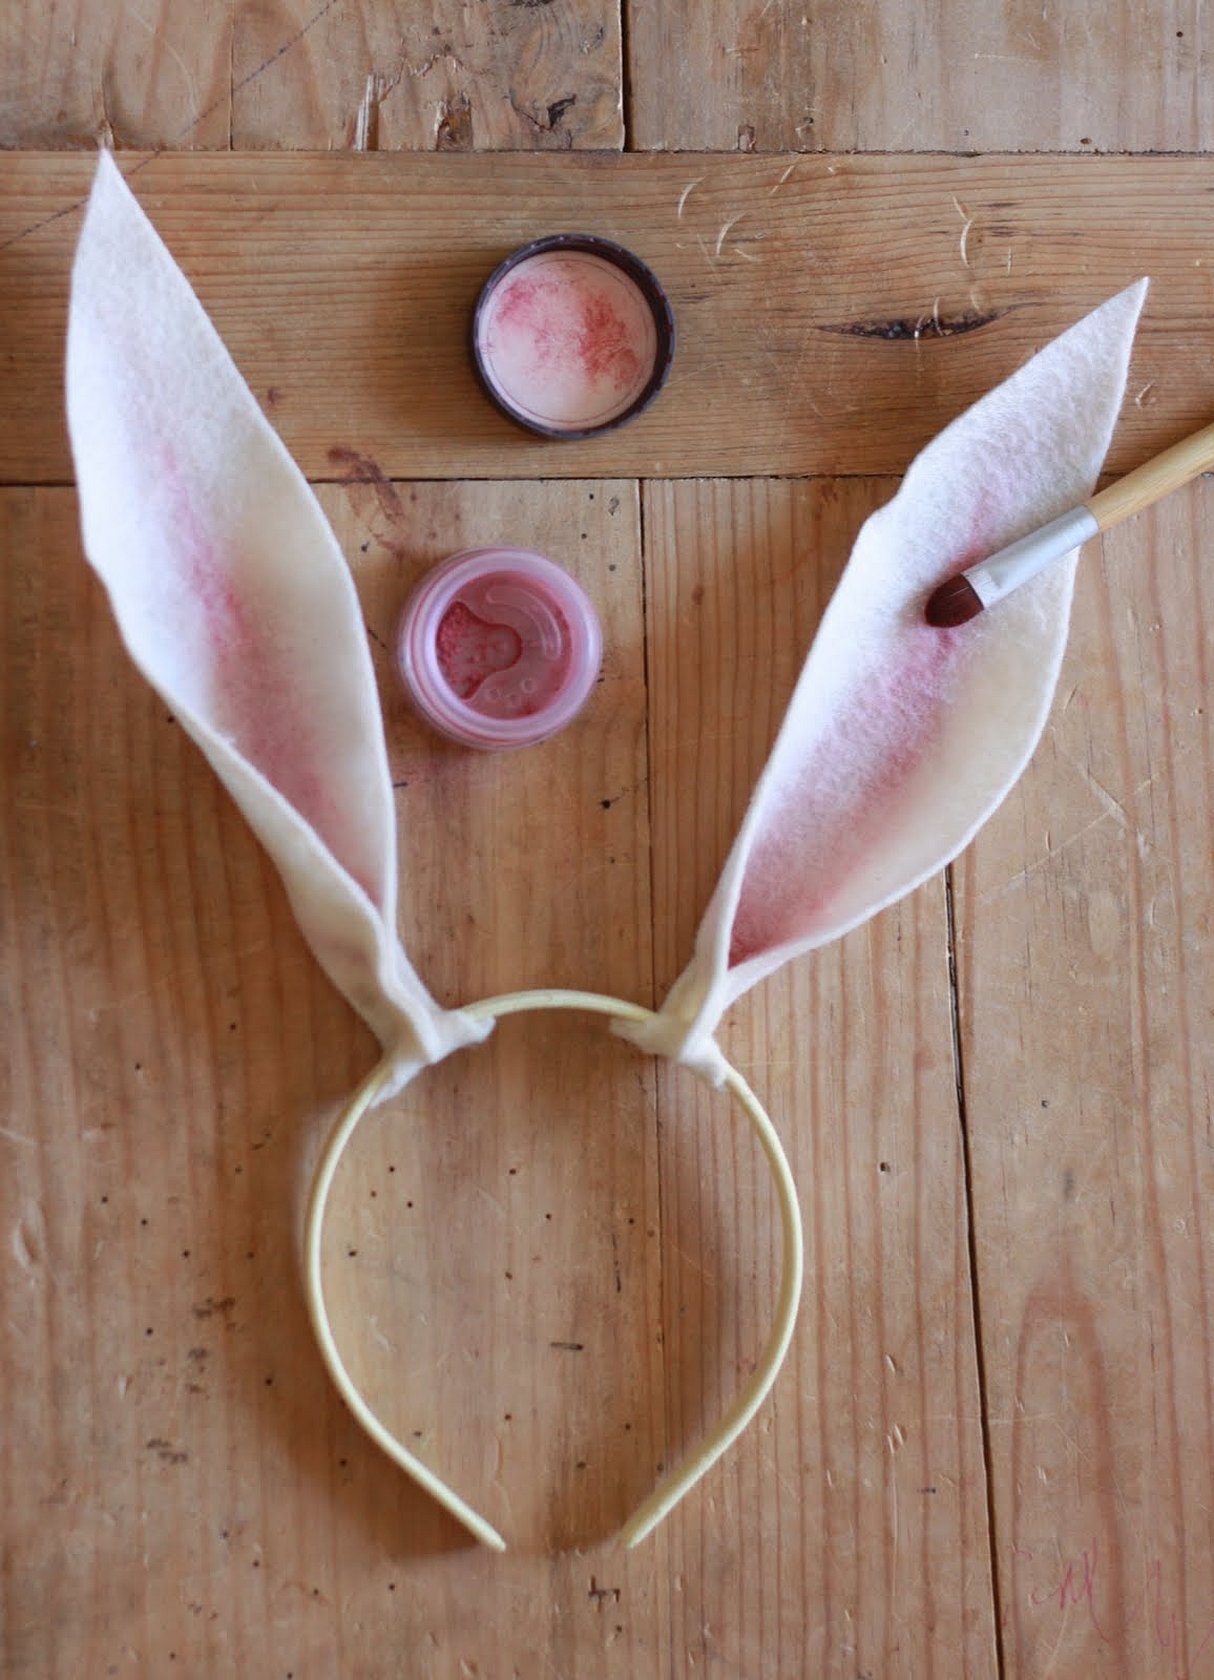
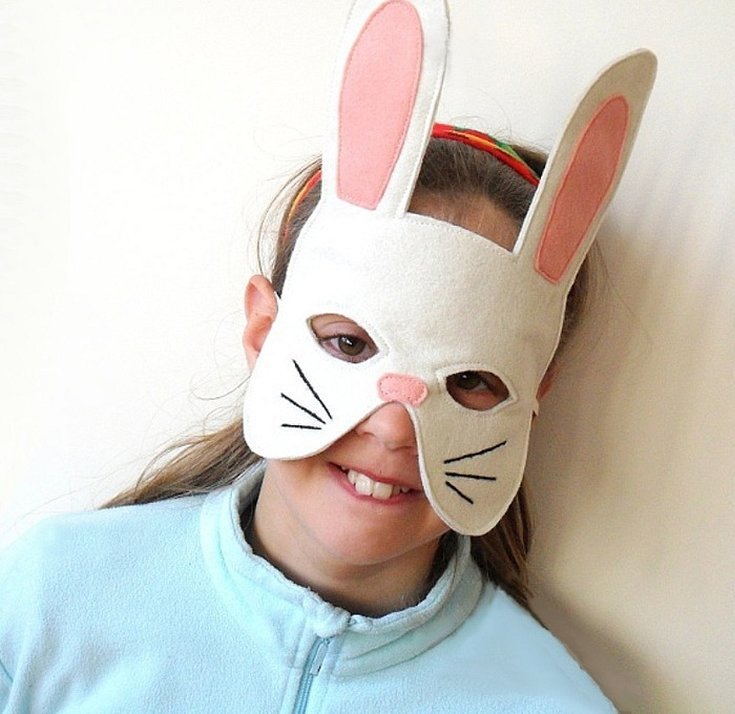
To make bunny ears using a template with a one-piece rim, simply print the design on a color printer (preferably on photo paper so that the craft looks brighter and more festive), cut out the printout along the outline and connect the edges of the paper tape with a paper clip or string. You can use not only paper but also colored felt to make the ears.
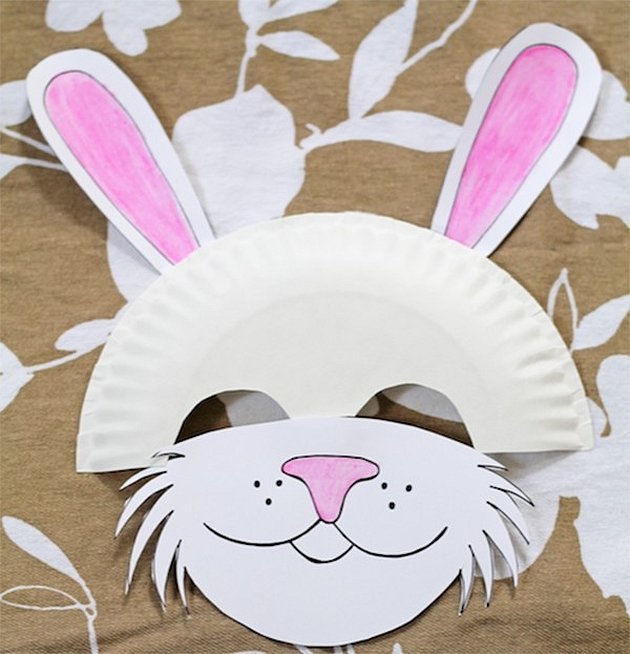
Rabbit ears from plastic plates
A cute decoration can be made quickly and easily from the simplest white plastic plate.

To create such an accessory you will need:
- White disposable plate.
- Scissors.
- A simple pencil or black marker.
- Pink marker or felt-tip pen.
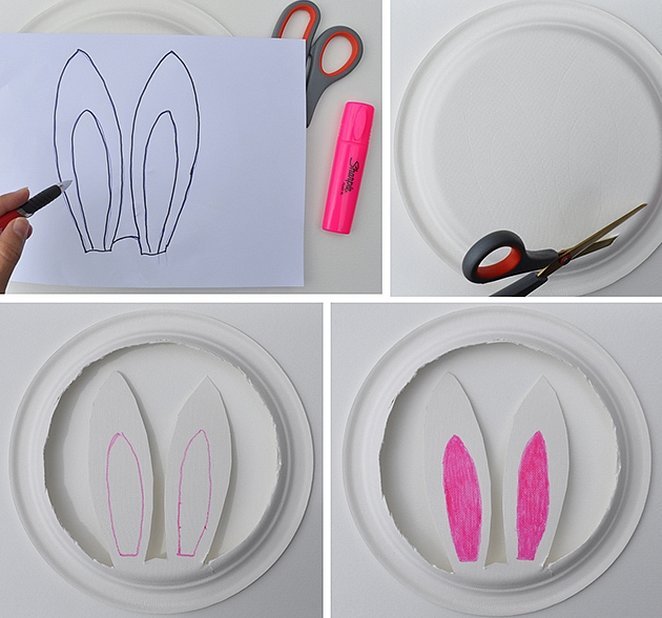
Step-by-step work process:
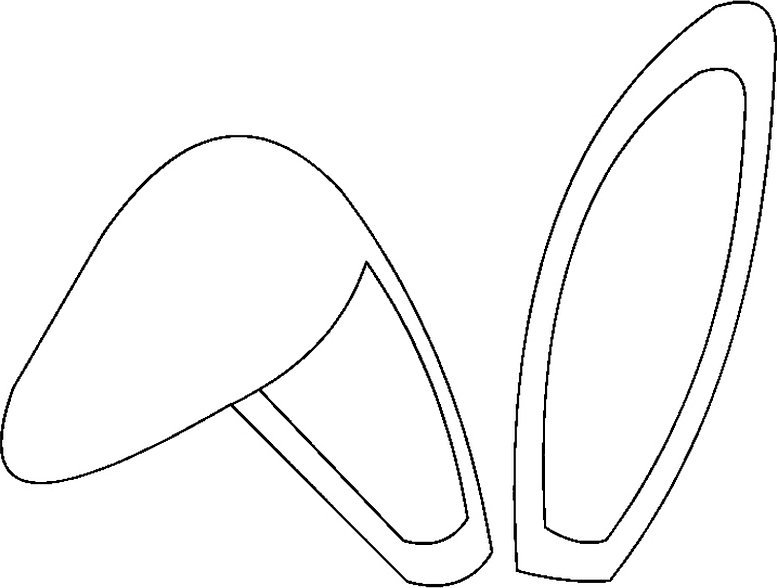
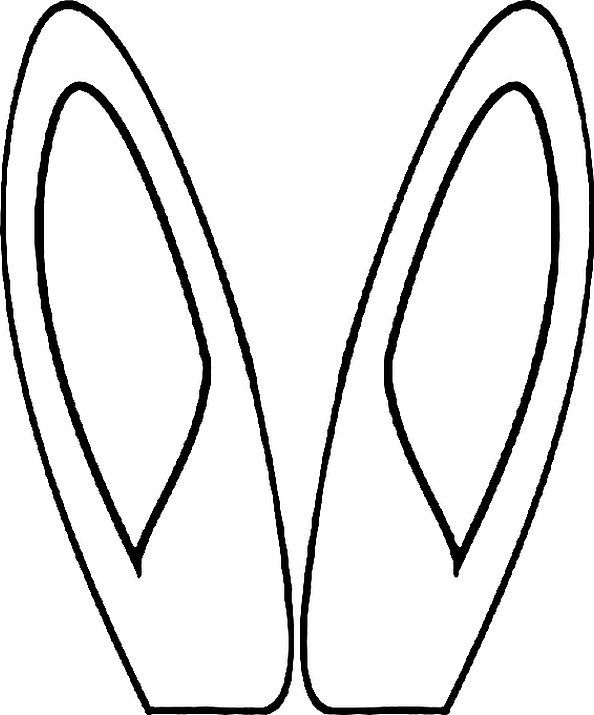
- Print or draw the outlines of the ears you like.
- Place the sheet with the pattern on the bottom of the plate and trace the drawing, pressing hard on the contours so that all the lines are imprinted on the plastic.
- Cut off the excess part of the craft with sharp scissors. You need to cut very carefully so that the plastic does not crack, otherwise you will have to redo the whole craft again.
- Color the inside of the ears pink.
- Gently bend the ears back to an angle of 90 degrees or more.
DIY paper rabbit head mask
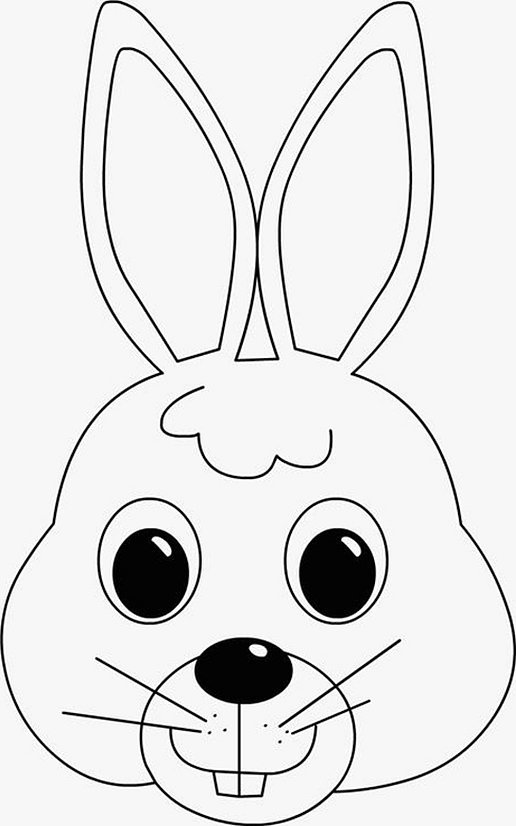
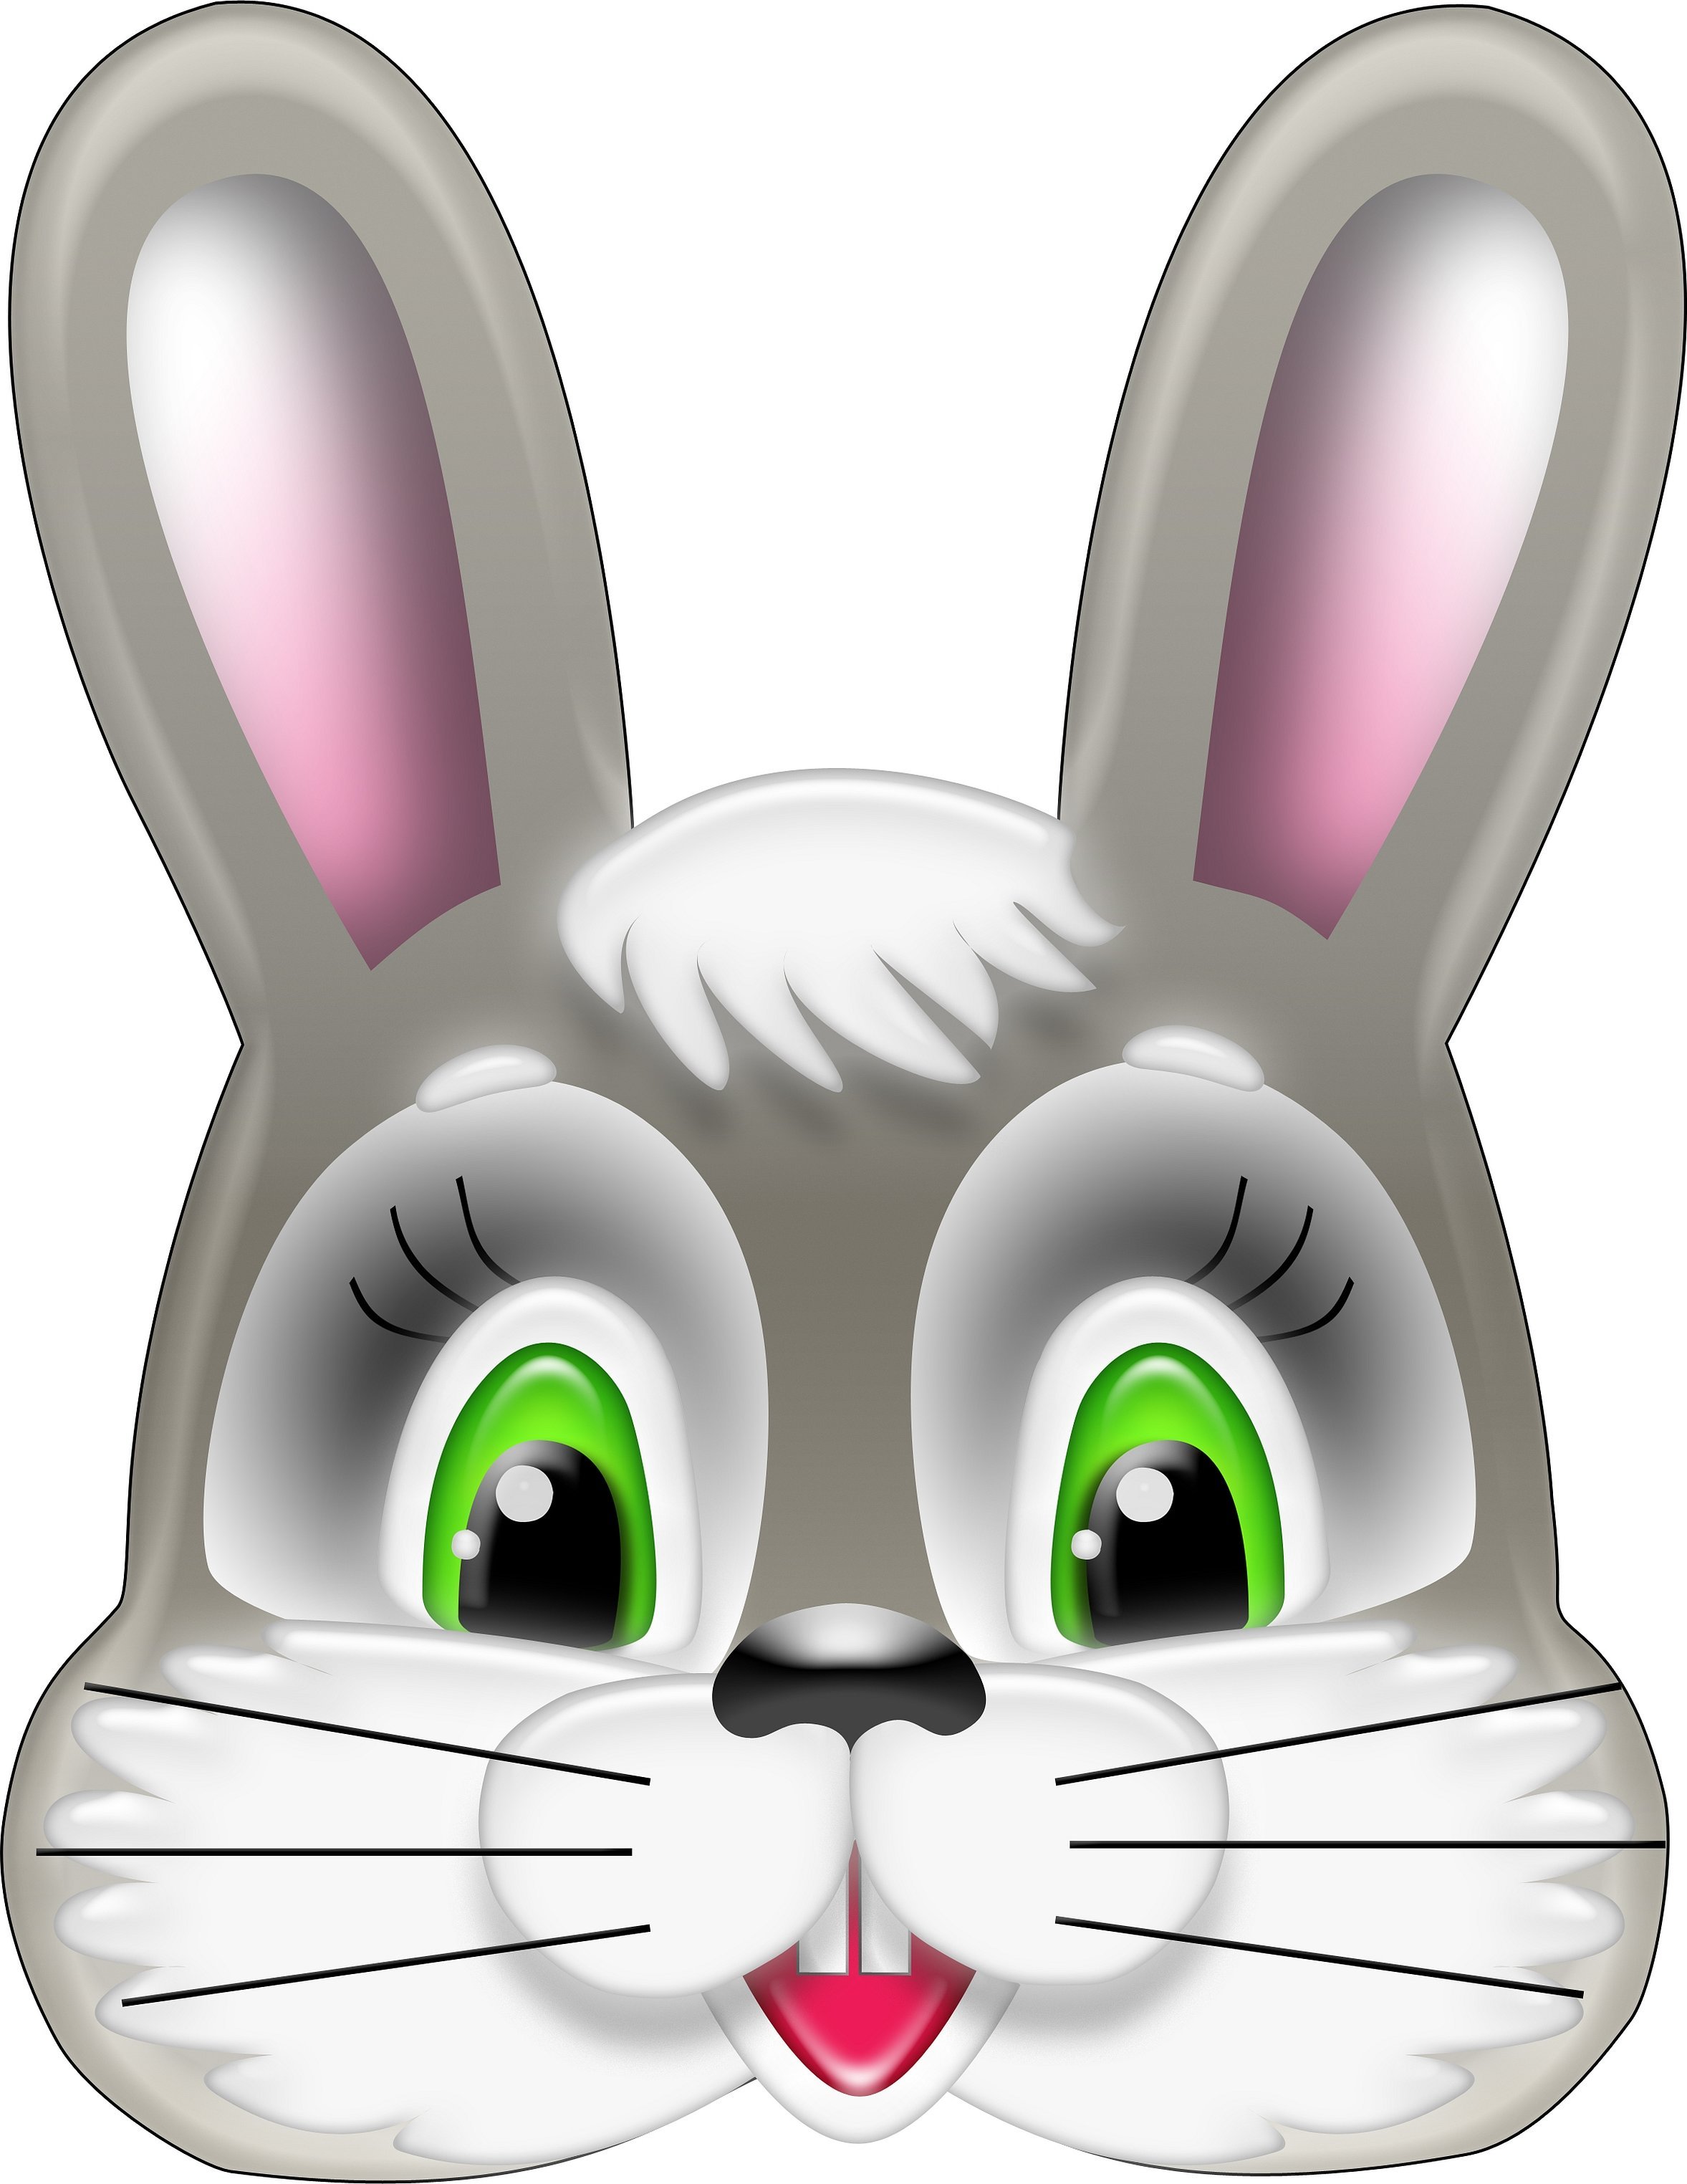
The easiest way to make a bunny mask for busy parents is to print a ready-made template. All you have to do is cut out the design, color it, and attach an elastic band to hold the creation on your head.
Please note! Additionally, you can decorate the craft with an applique made of colored paper or fabric, glue on a voluminous mustache, eyelashes, glasses, or add other decorative elements.
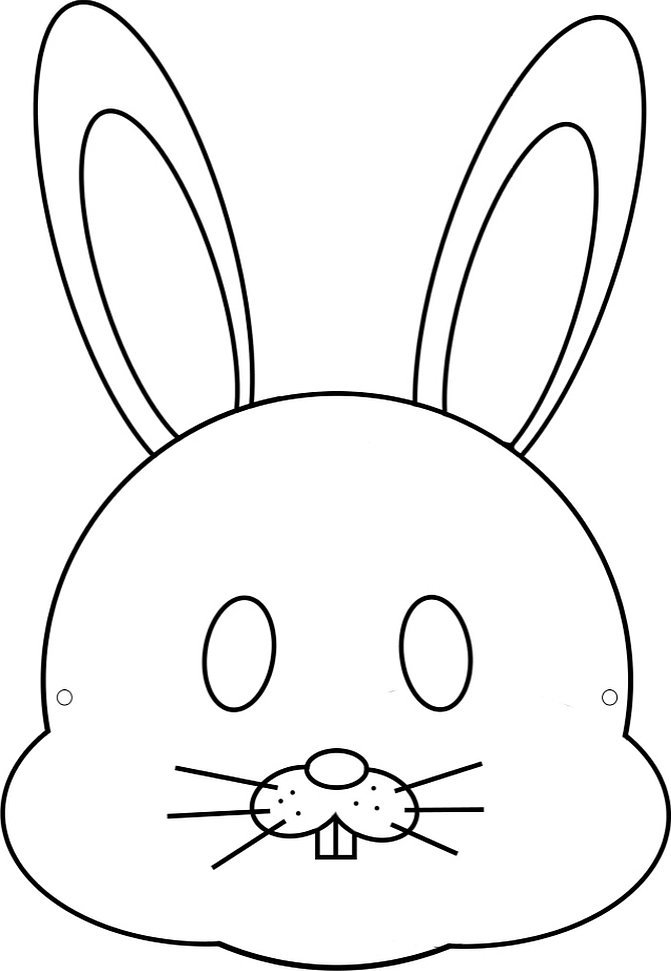
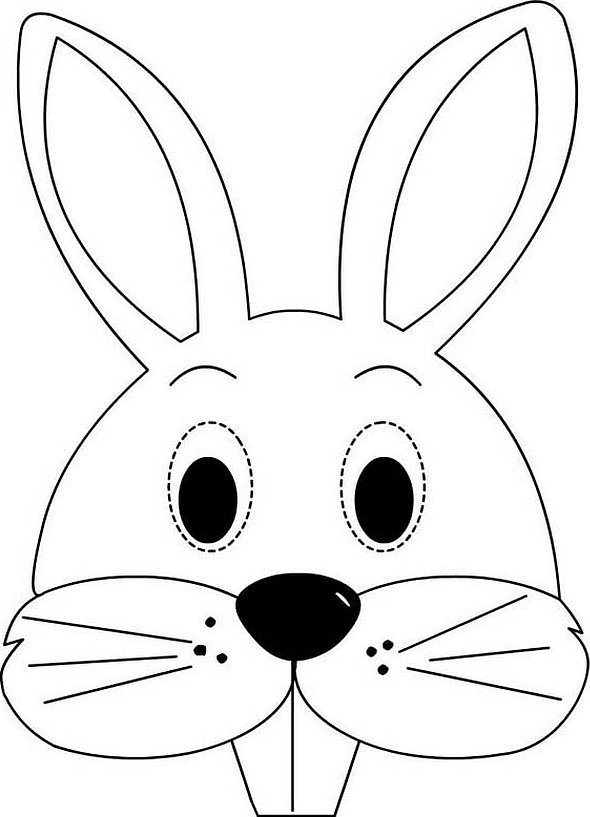

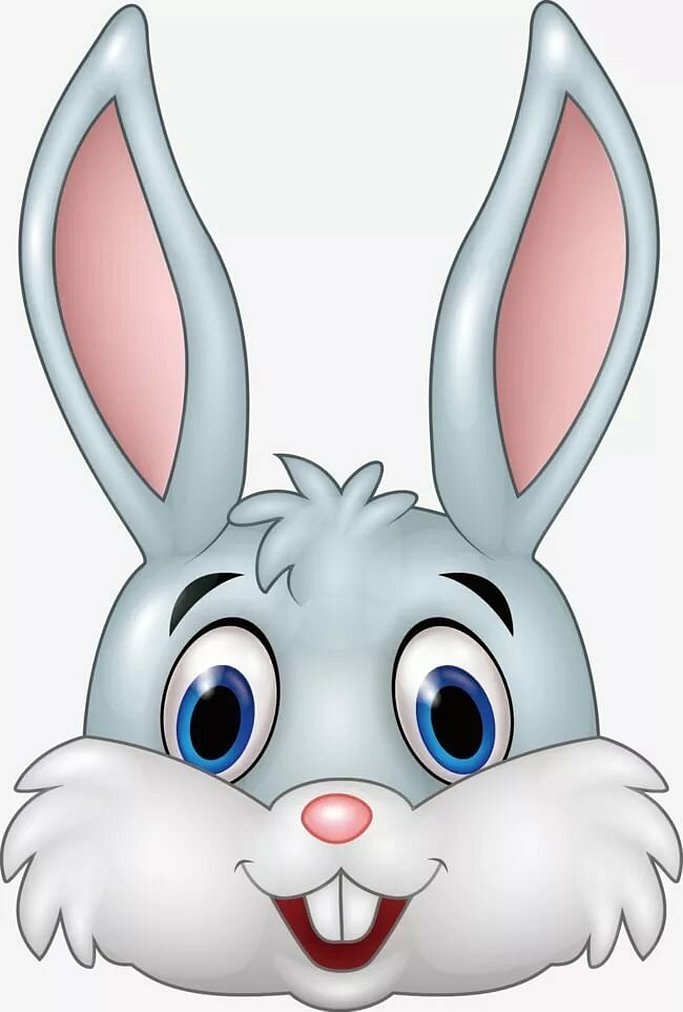
If you don't have the time or desire to color, you can use ready-made colored drawings. This bunny mask is quick to make and will look like a store-bought one.

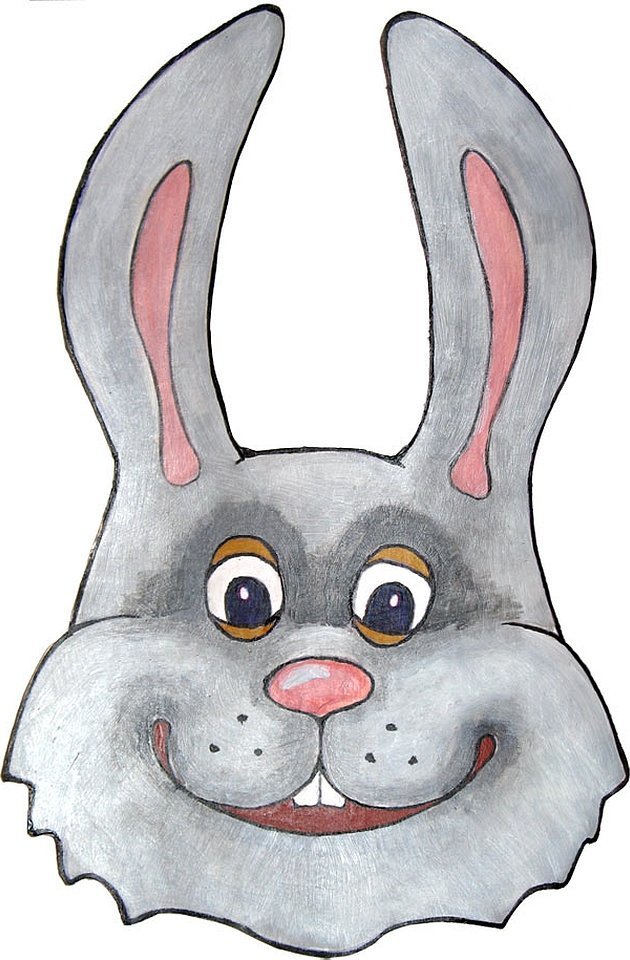
For creative parents and kids who want to create something of their own, rather than use ready-made ideas, there is no limit to their imagination. Such a craft may be inferior in quality or accuracy to ready-made ones, but it is distinguished by its brightness and originality. A rabbit mask made with your own hands will help a child stand out from others, and the process of inventing and implementing an idea will bring many pleasant minutes to both parents and their child.

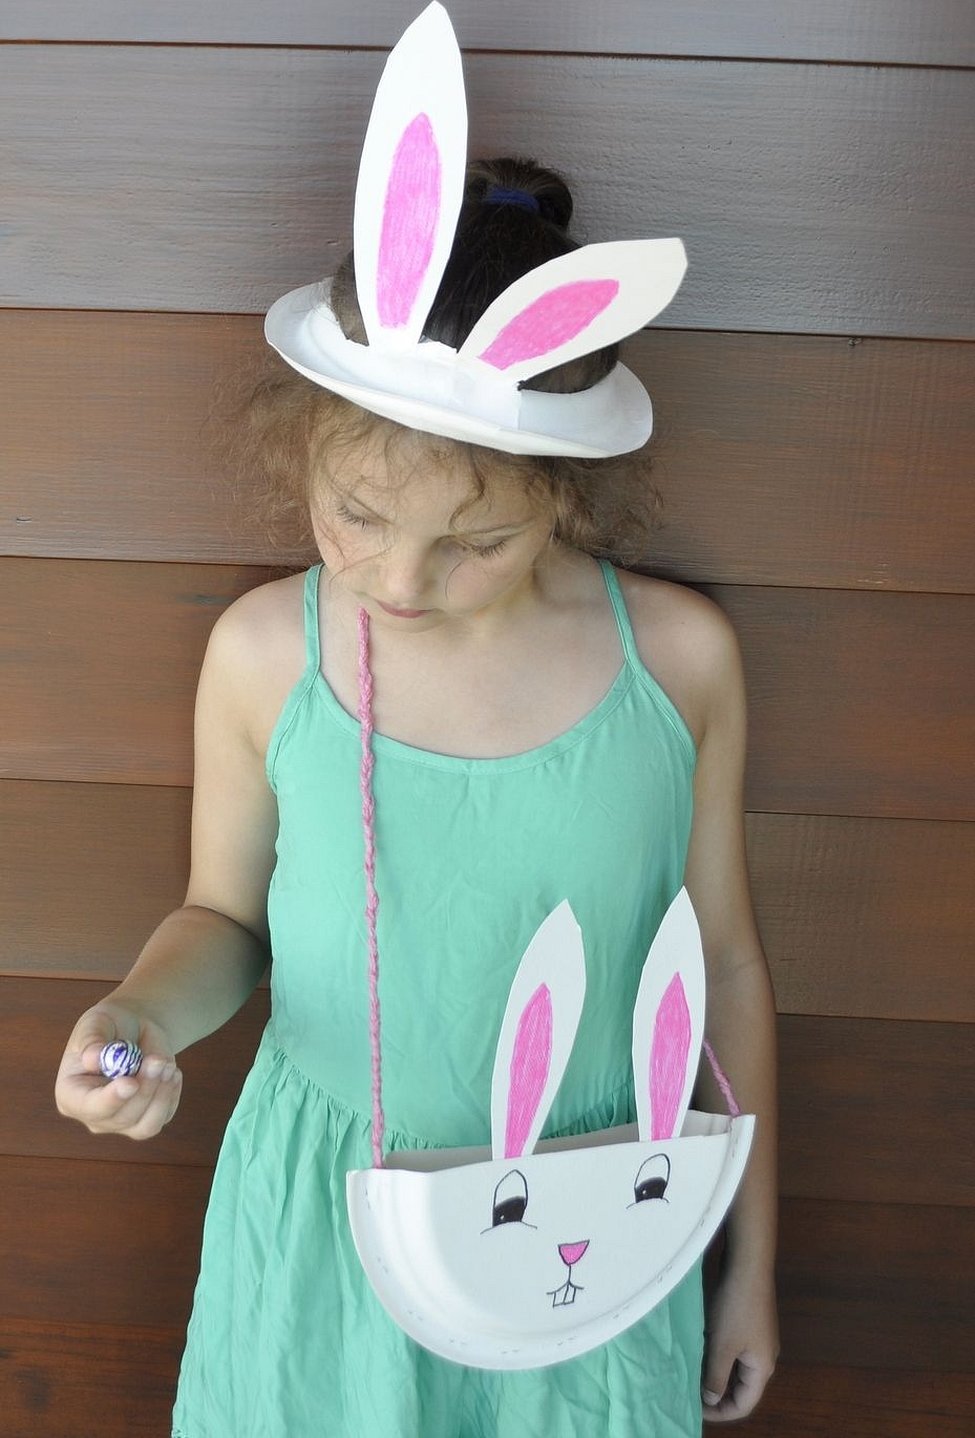
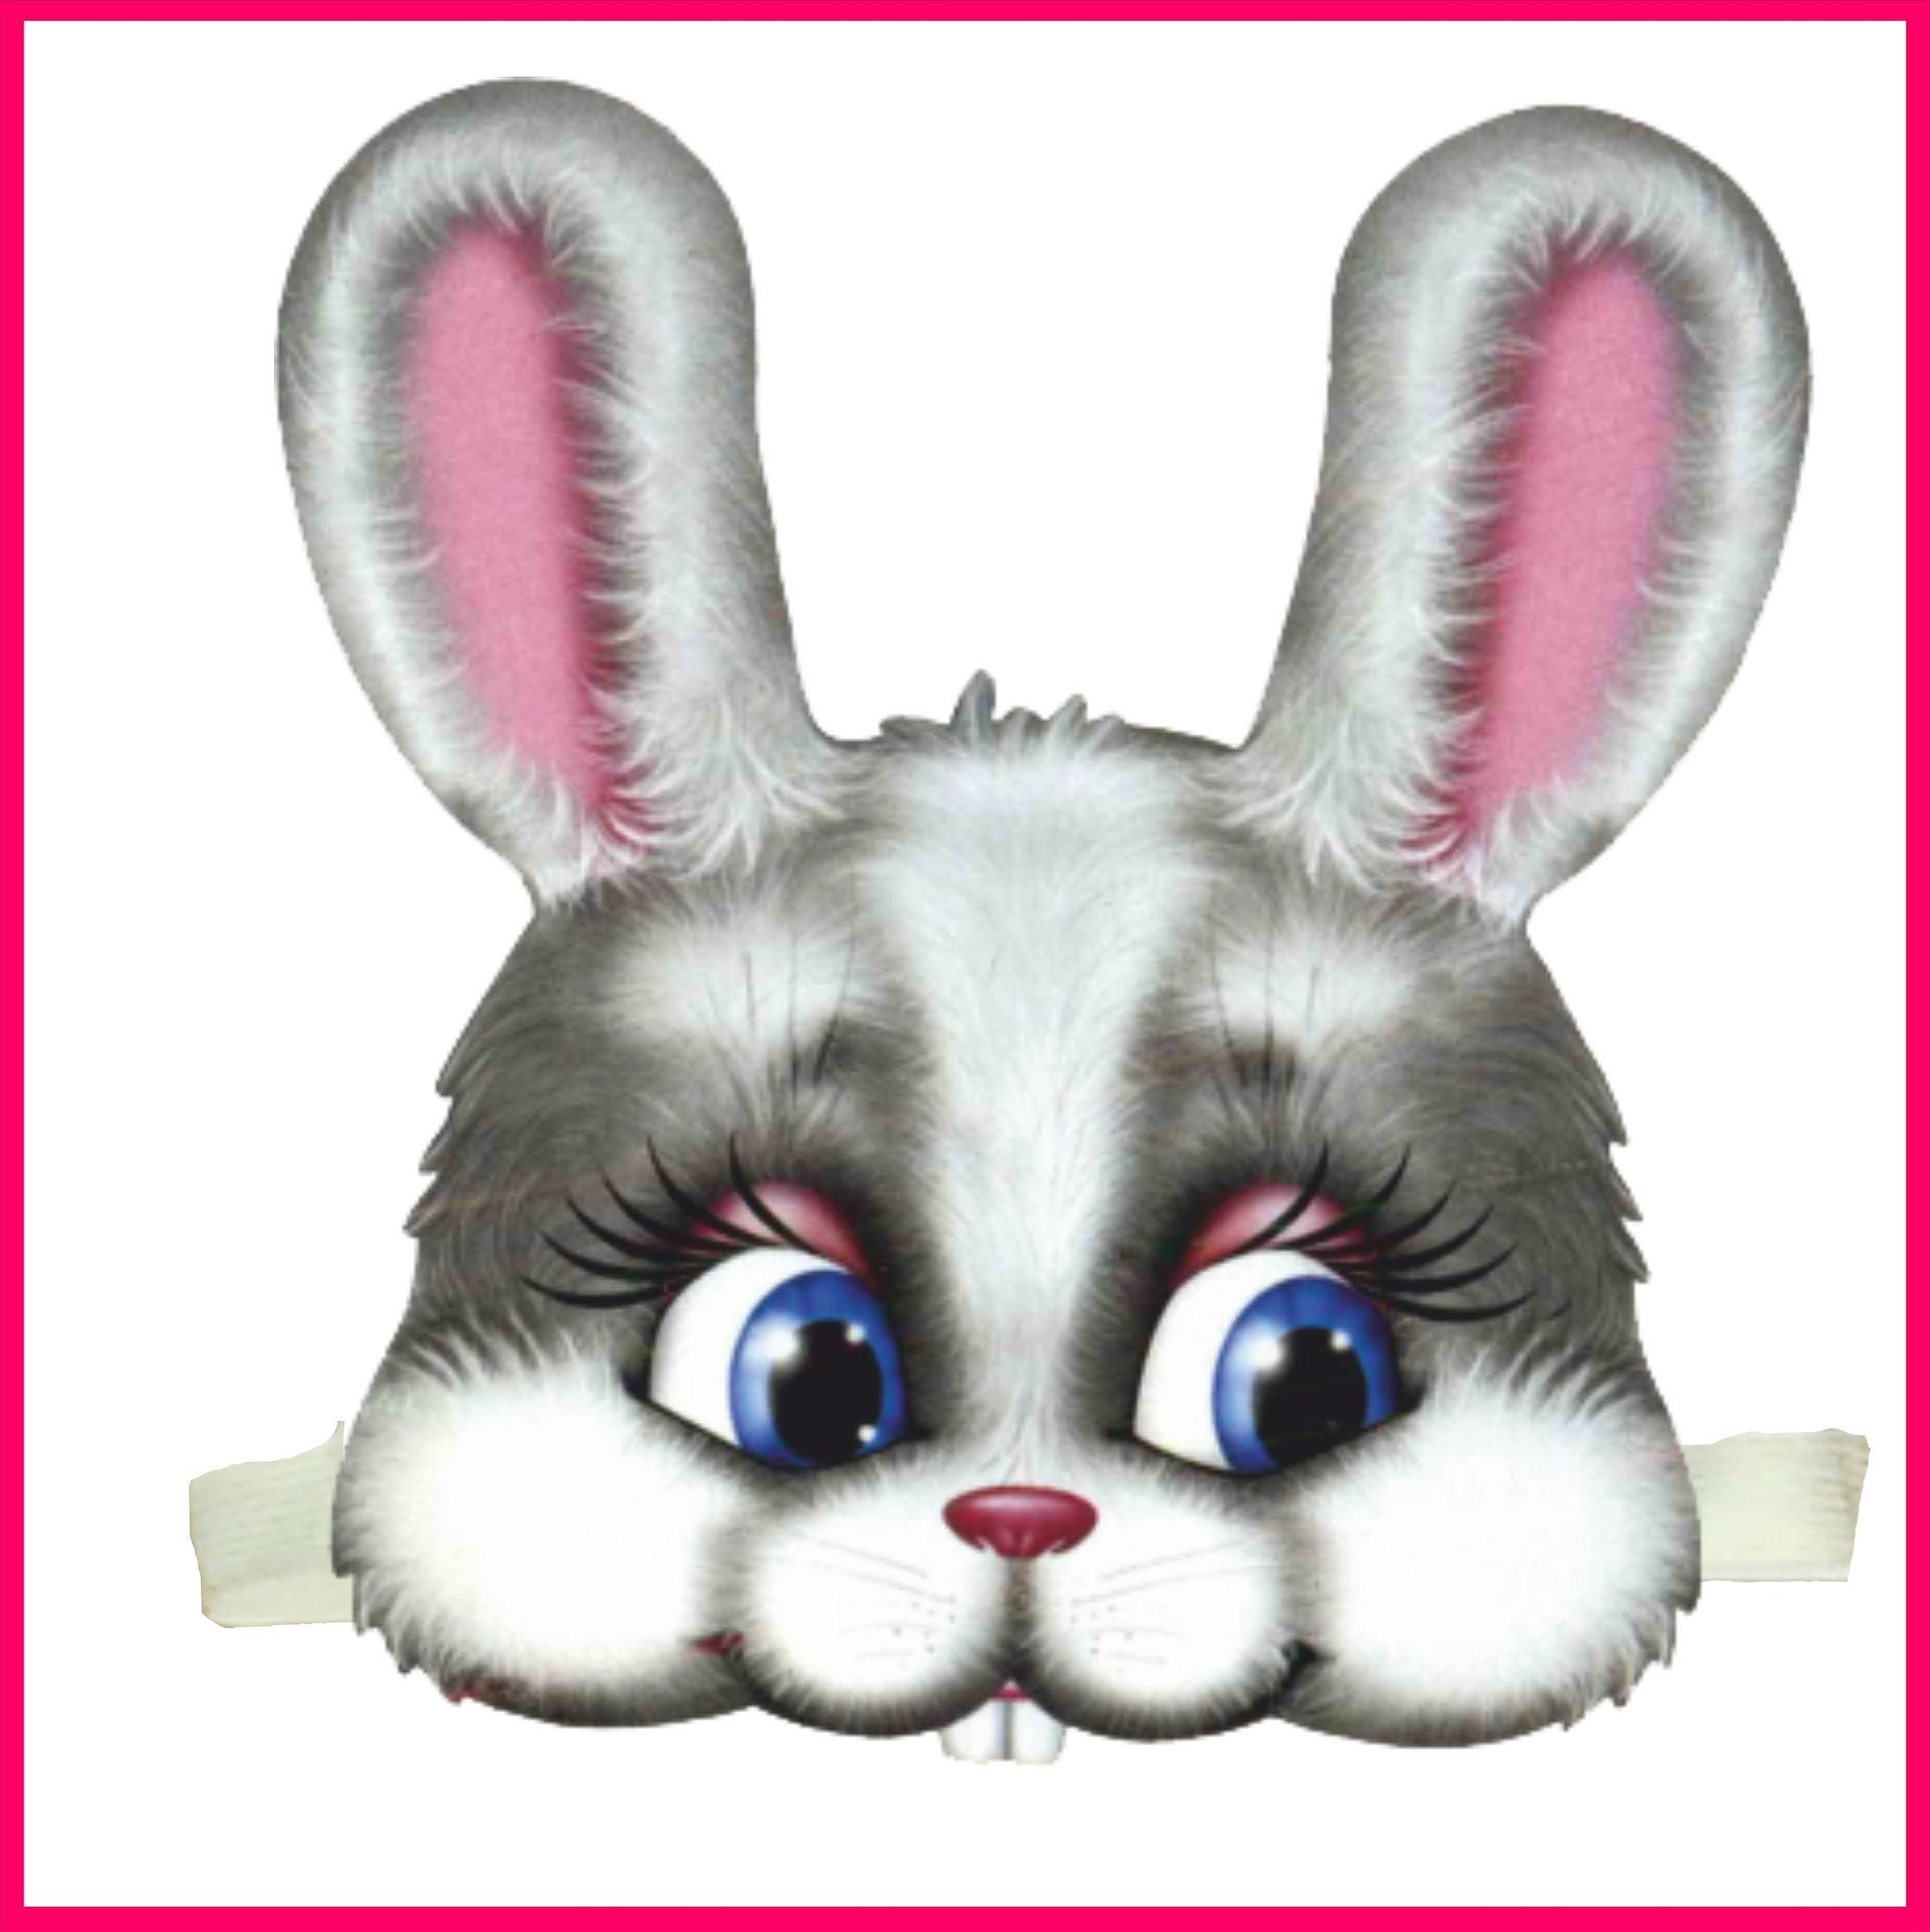
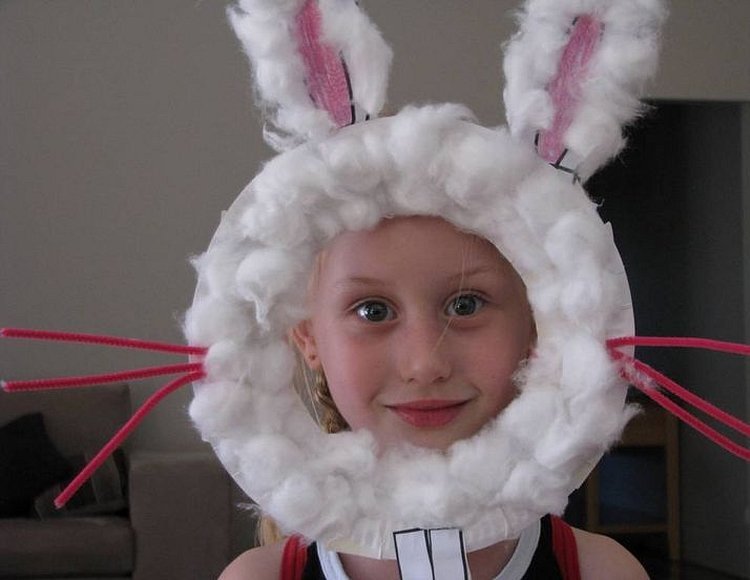
Bunny mask made from a plastic plate for the little ones
Making a funny and fluffy bunny mask from a paper or plastic plate is an easy task even for the youngest artists. As a basis for the craft, you can also use a simple ring cut out of cardboard to the size of the child's face.
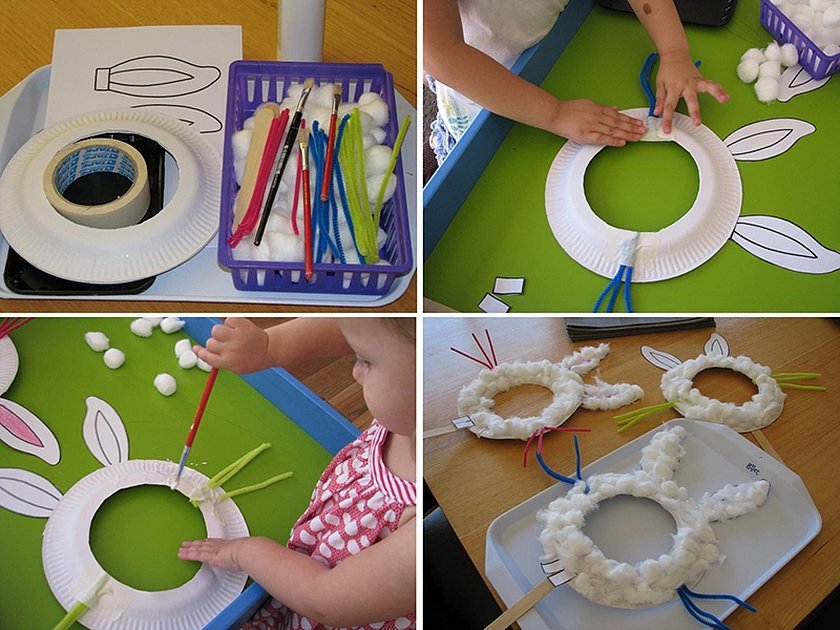
To make this mask yourself, you will need:
- Disposable plate or thick cardboard.
- Mounting tape.
- Print or draw bunny ears.
- Glue.
- Glue brush.
- Cotton wool or cotton swabs.
- Flexible sticks for children's creativity to create mustaches.
- A long stick or elastic band for fixing the accessory on the head.
- Felt-tip pens, markers or paints to decorate the finished work.
Step-by-step plan for creation:
- Cut a circle from the base to fit the size of your face.
- Cut out the details along the outline and paint them.
- Secure them to the base using mounting tape or glue.
- Glue whiskers on the bunny.
- Coat the entire base with glue and evenly apply pieces of cotton wool to it to create an animal fur skin.
- If you want to add front incisors, use two rectangles of white cardboard.
- Attach the finished product to a long stick or tie an elastic band to it, making two holes on the sides.
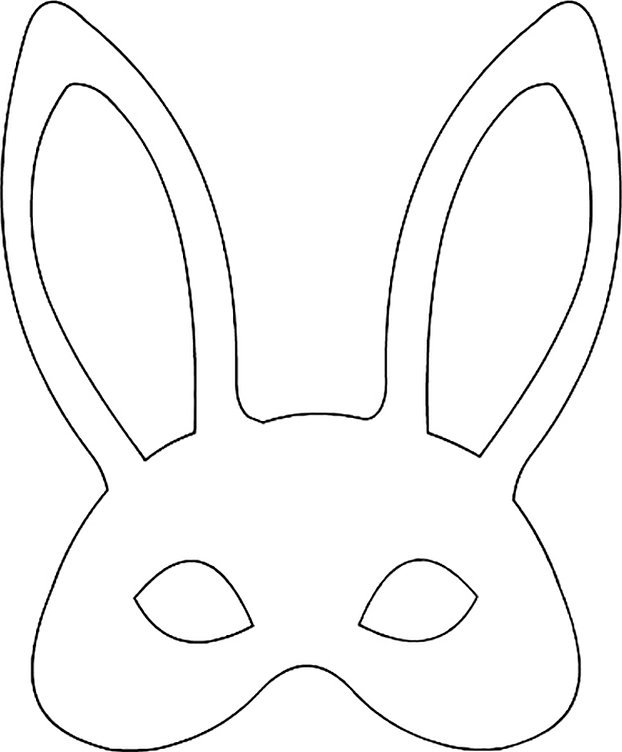
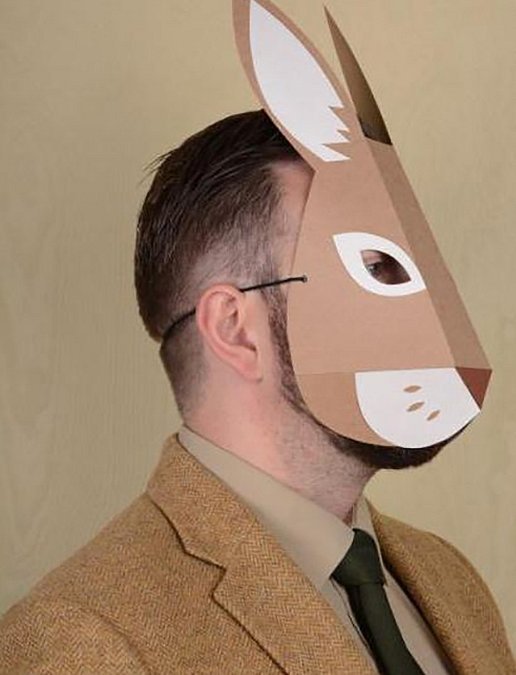
How to Make a Rabbit Mask Out of Cardboard
To create a rabbit you will need:
- Paper template.
- Mounting tape.
- A ruler, sharp scissors and a pencil.
- A sheet of thick cardboard. The sheet format is selected so that the workpiece fits on it completely.
- An elastic band or ribbon to secure the finished product to the head.
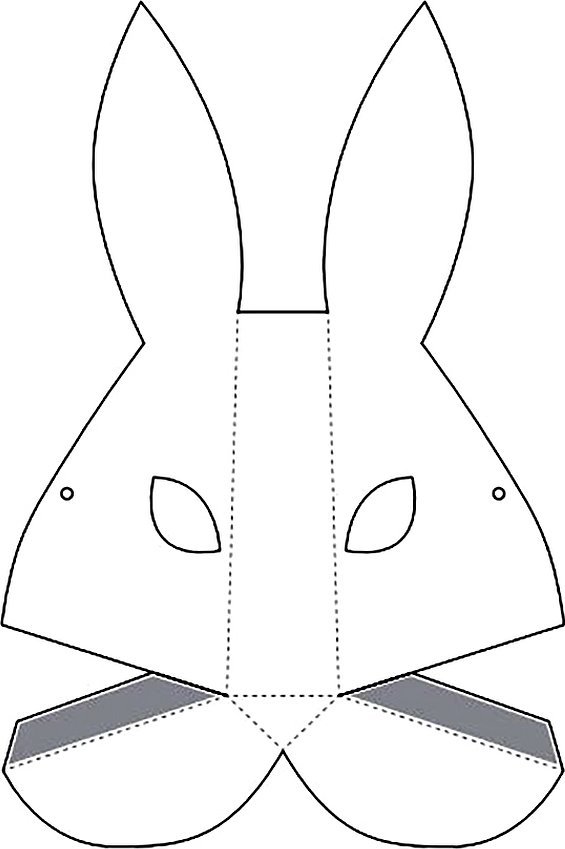
Step by step assembly plan:
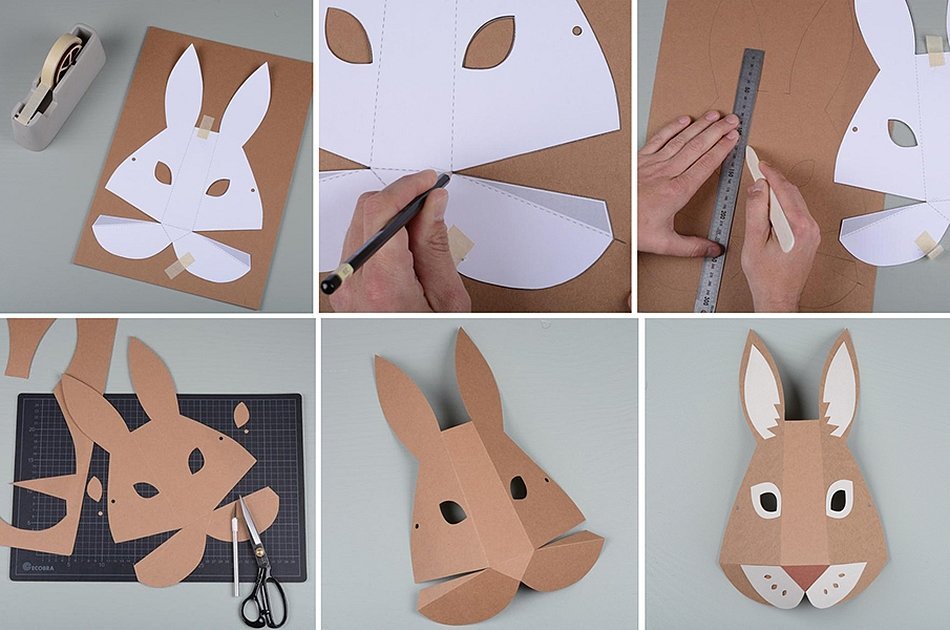
- Print the template of the future rabbit on regular office paper.
- Cut out the blank along the contours and glue it to the cardboard using mounting tape.
- Carefully trace all the contours with a simple pencil, not forgetting about the holes for the eyes and the holes for attaching an elastic band or ribbon.
- Use the blunt side of scissors or a wooden stick to press all the fold lines along the ruler to ensure that the finished craft has even contours.
- Carefully cut out the blank.
- Fold along the lines and glue.
- Decorate to your taste with paper or felt applique, paints or colored markers.
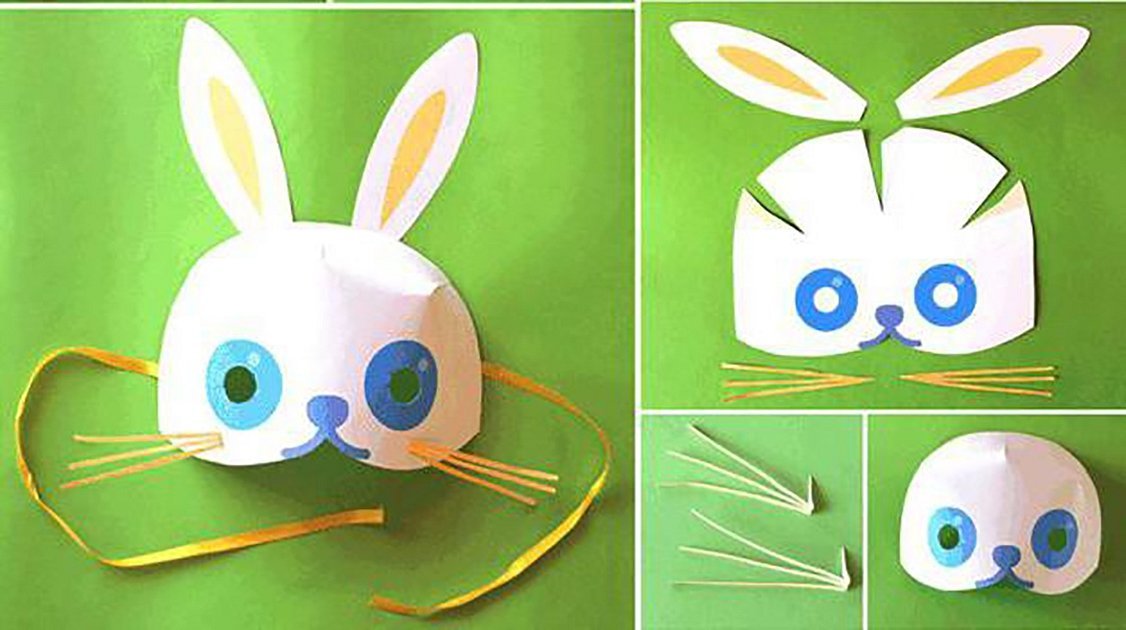
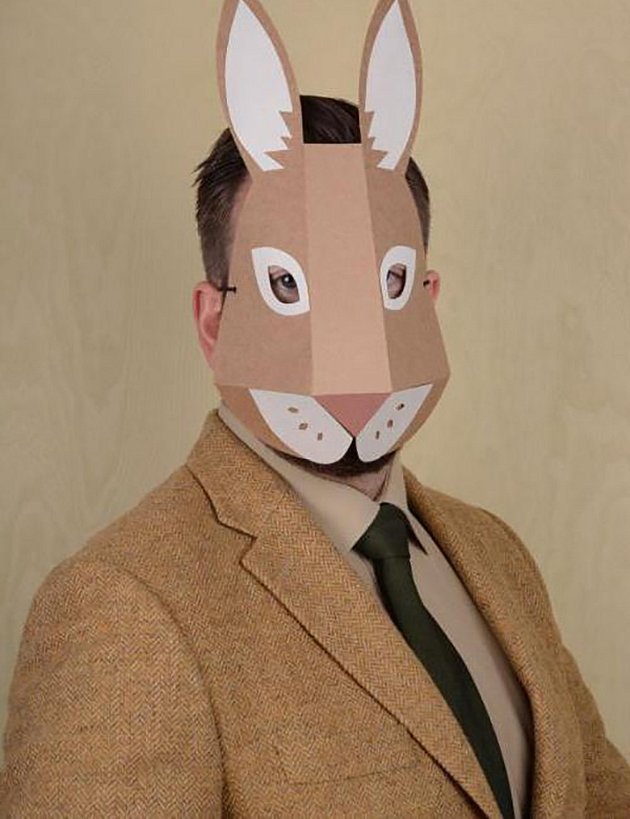
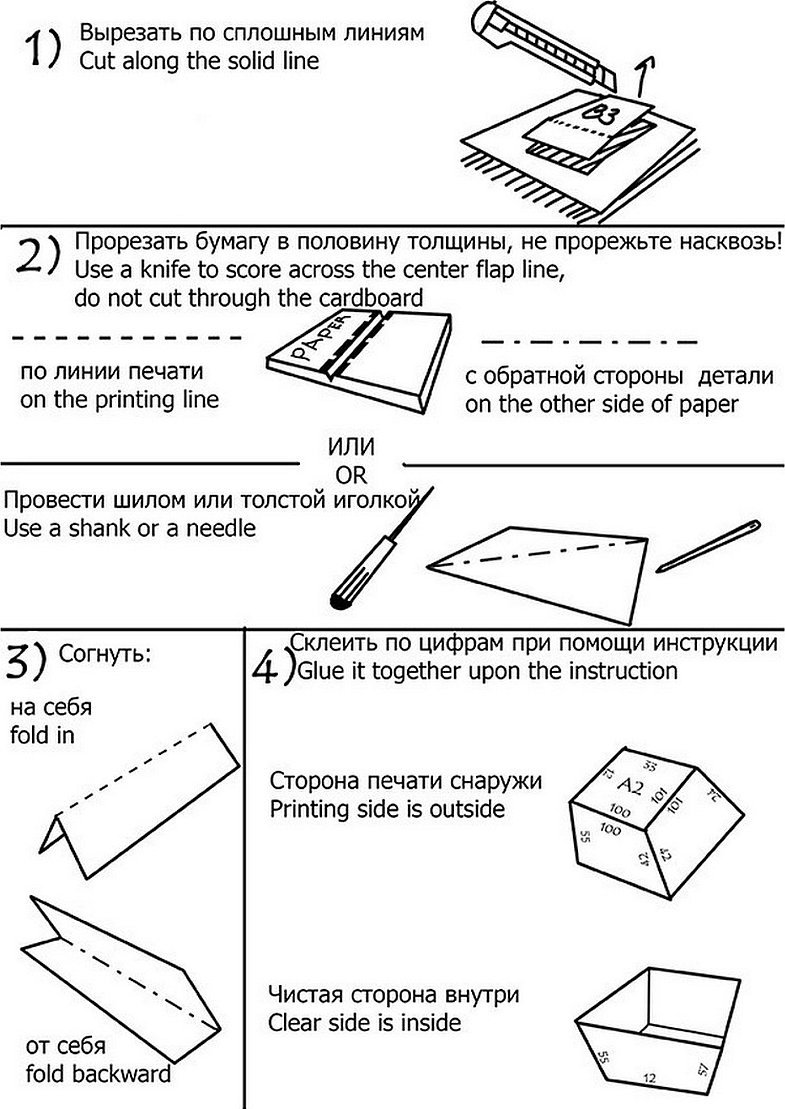
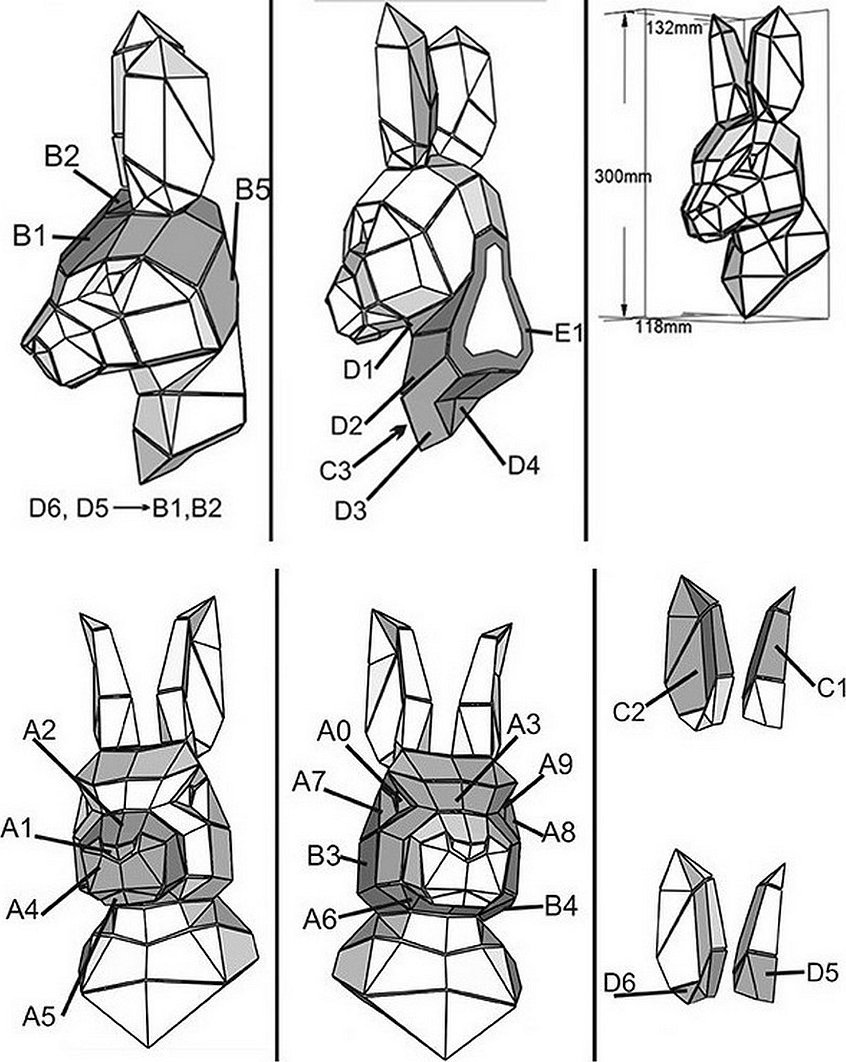
How to make a paper hare head using a template
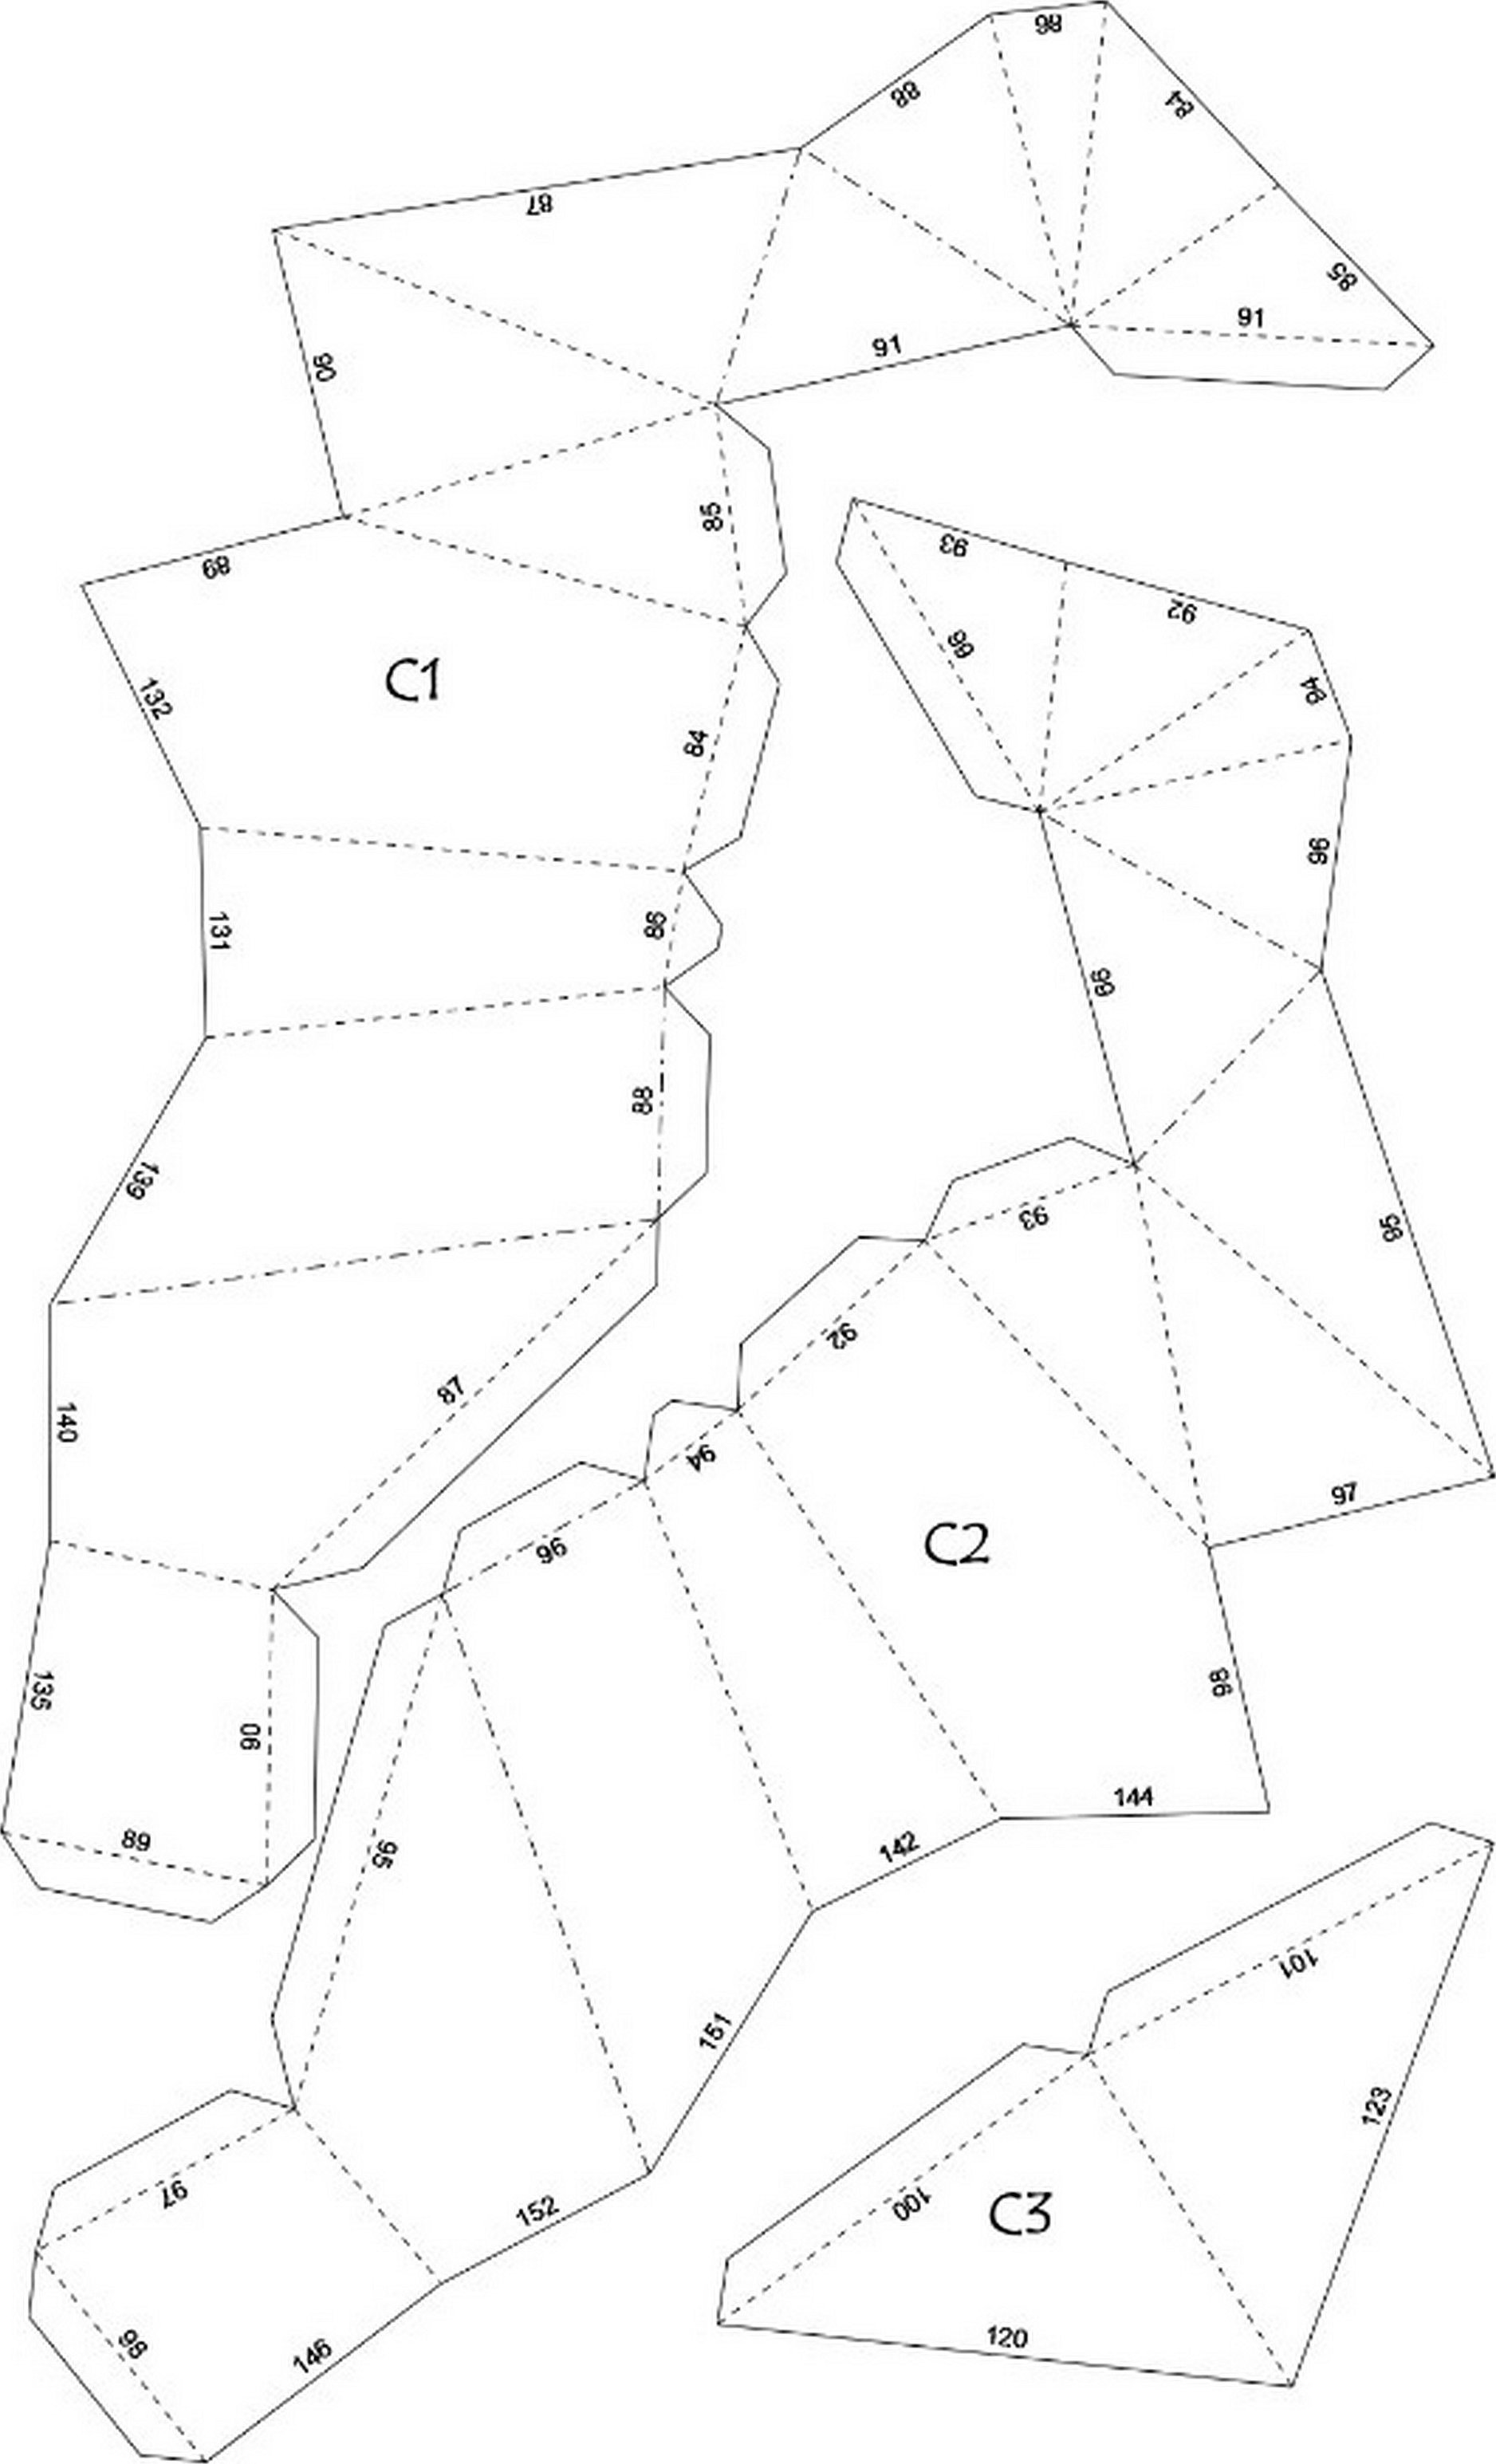
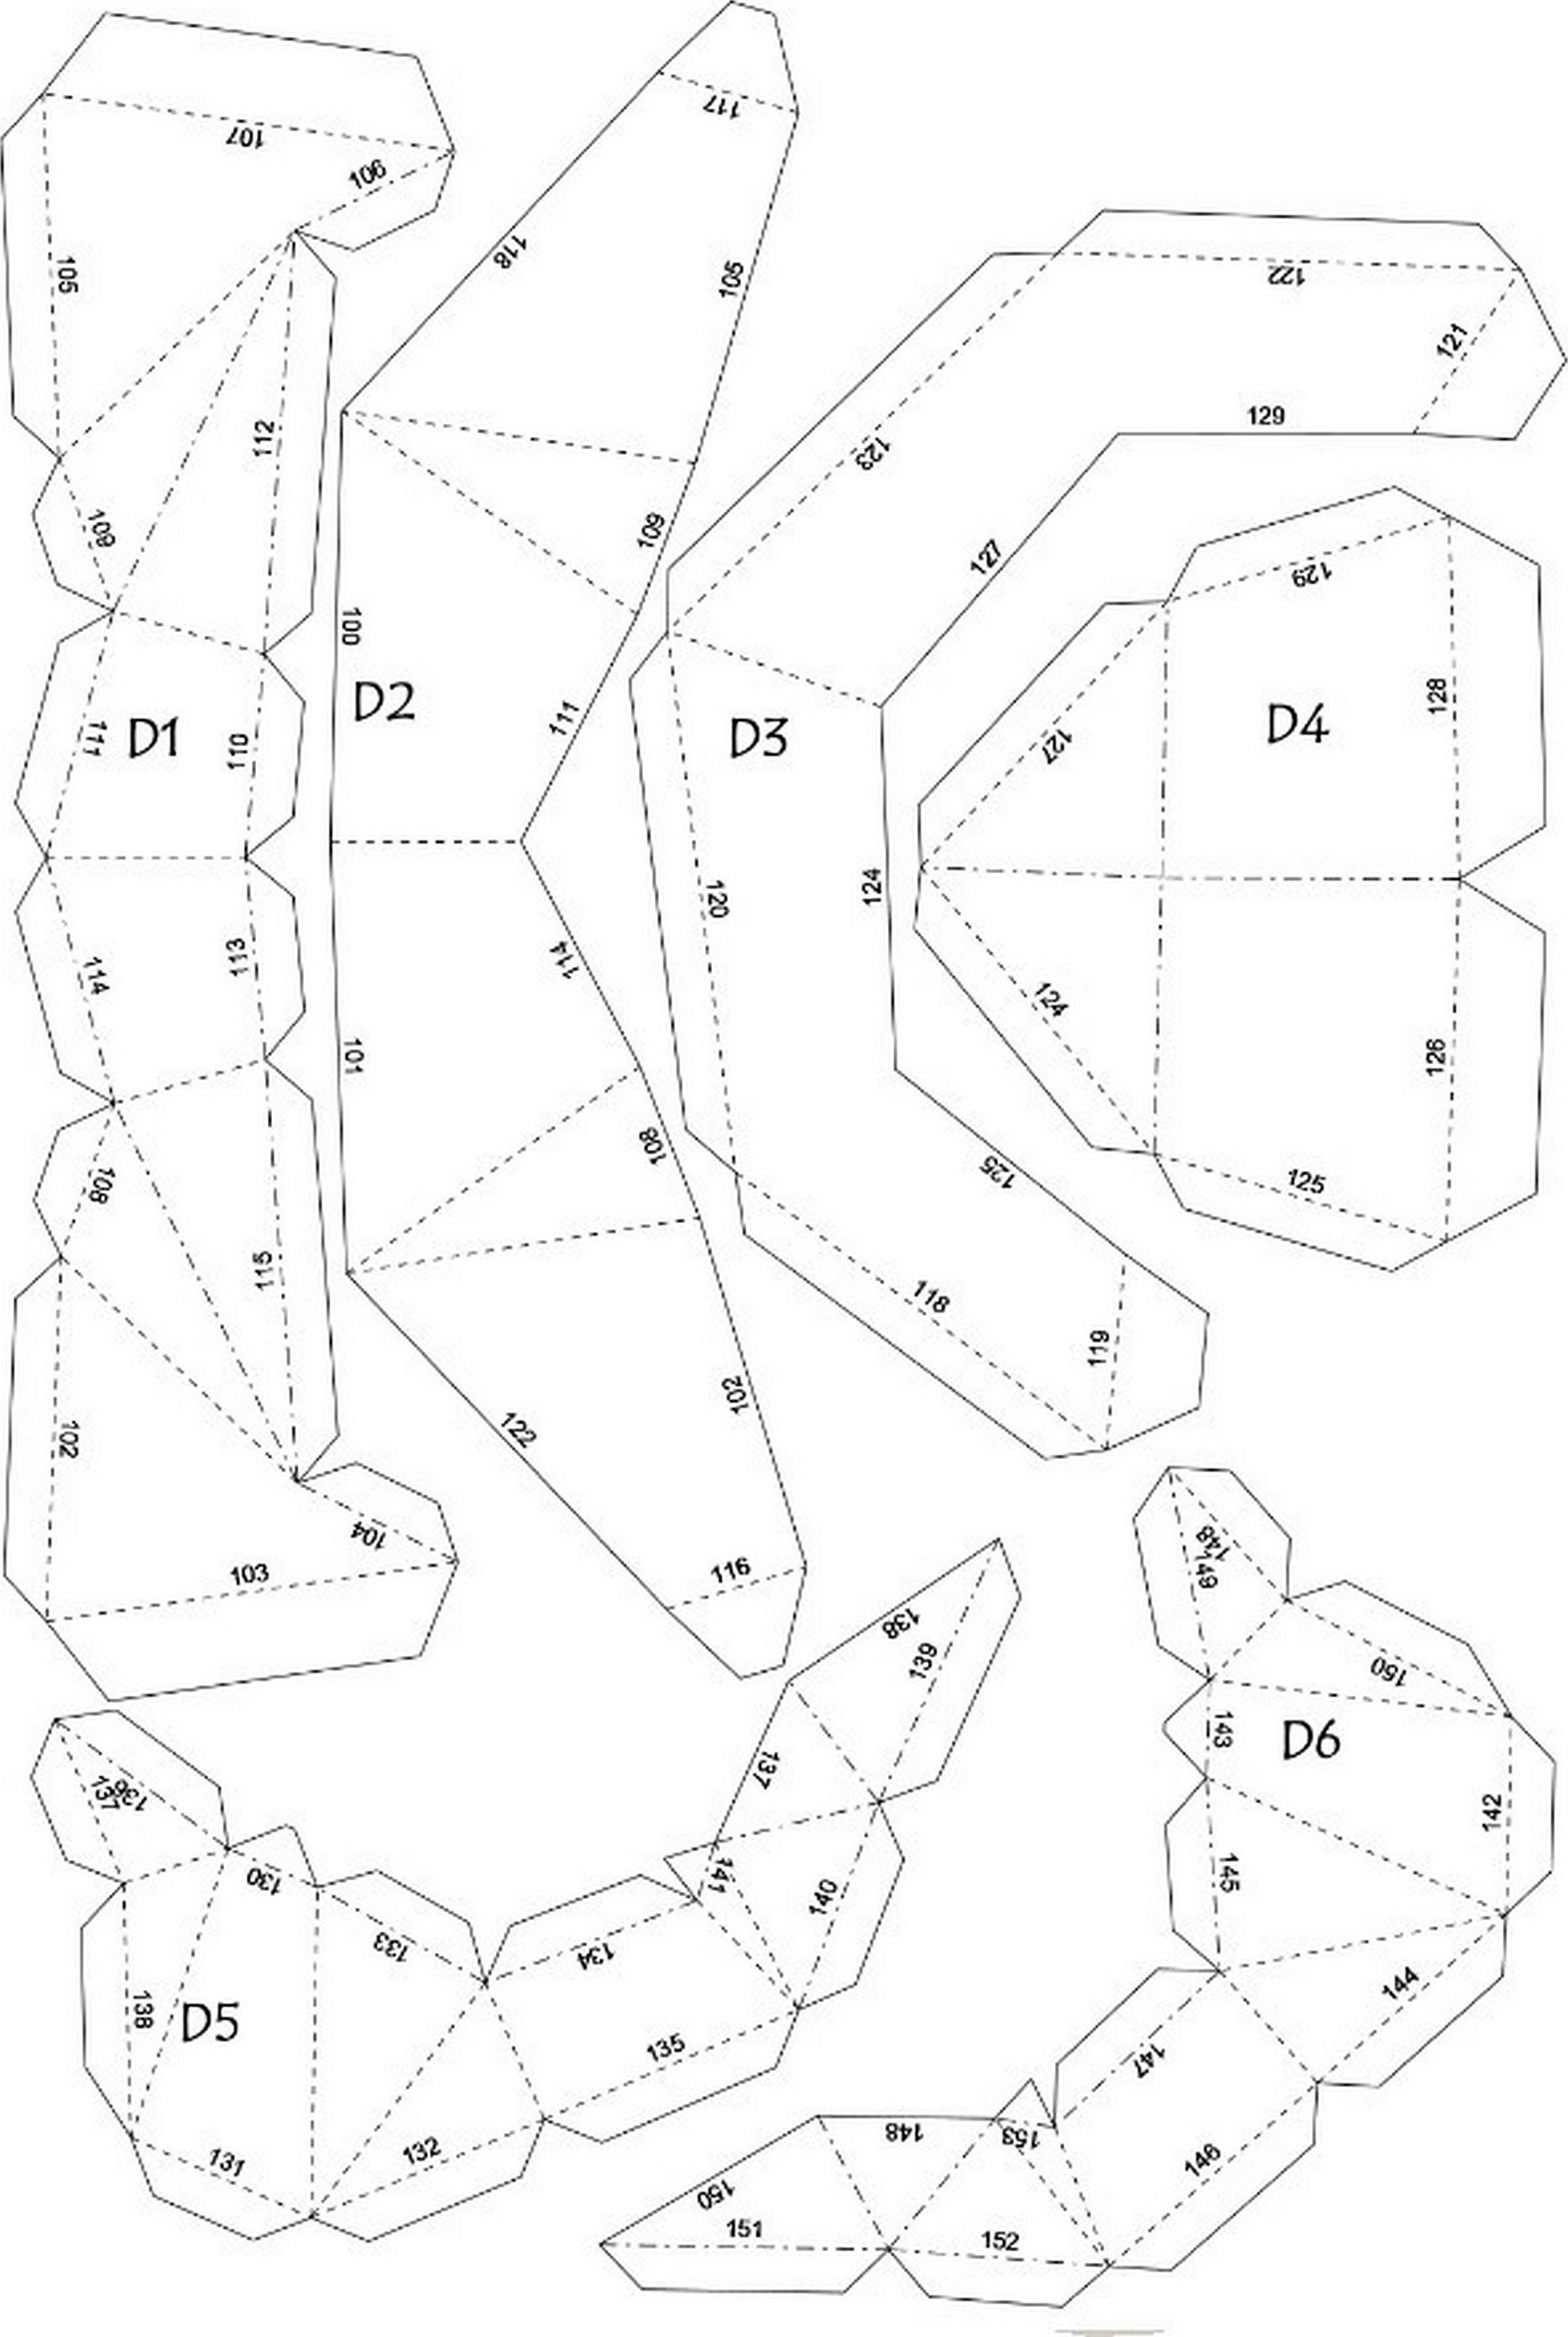
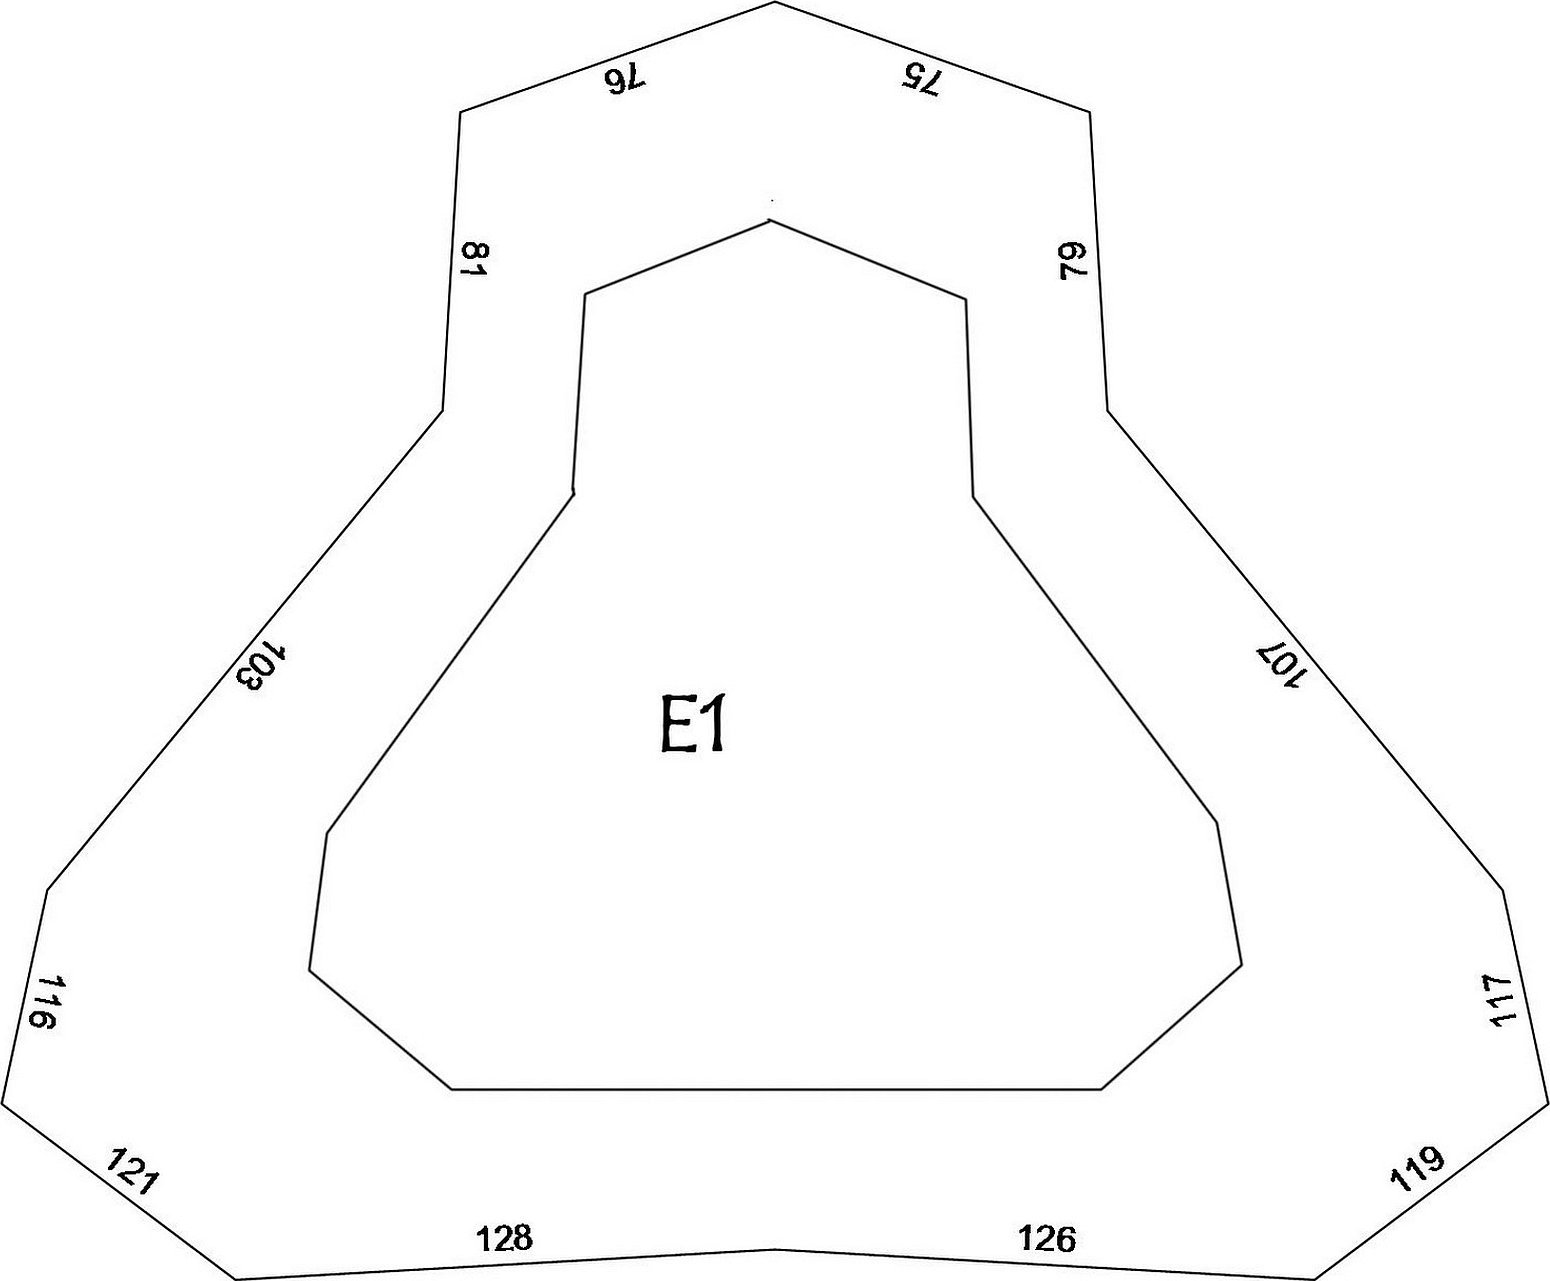
An original solution for the holiday is a voluminous rabbit head, assembled using the new papercraft technique.

To work you will need:
- Thick paper or cardboard.
- Pattern.
- A stationery knife and sharp scissors.
- A ruler, preferably metal.
- Glue.
Additional information! For large papercraft models, the best choice is Moment Crystal glue – it does not “lead” the paper, dries quickly and glues firmly. Apply the glue with a brush or stick very carefully so as not to spoil the craft.
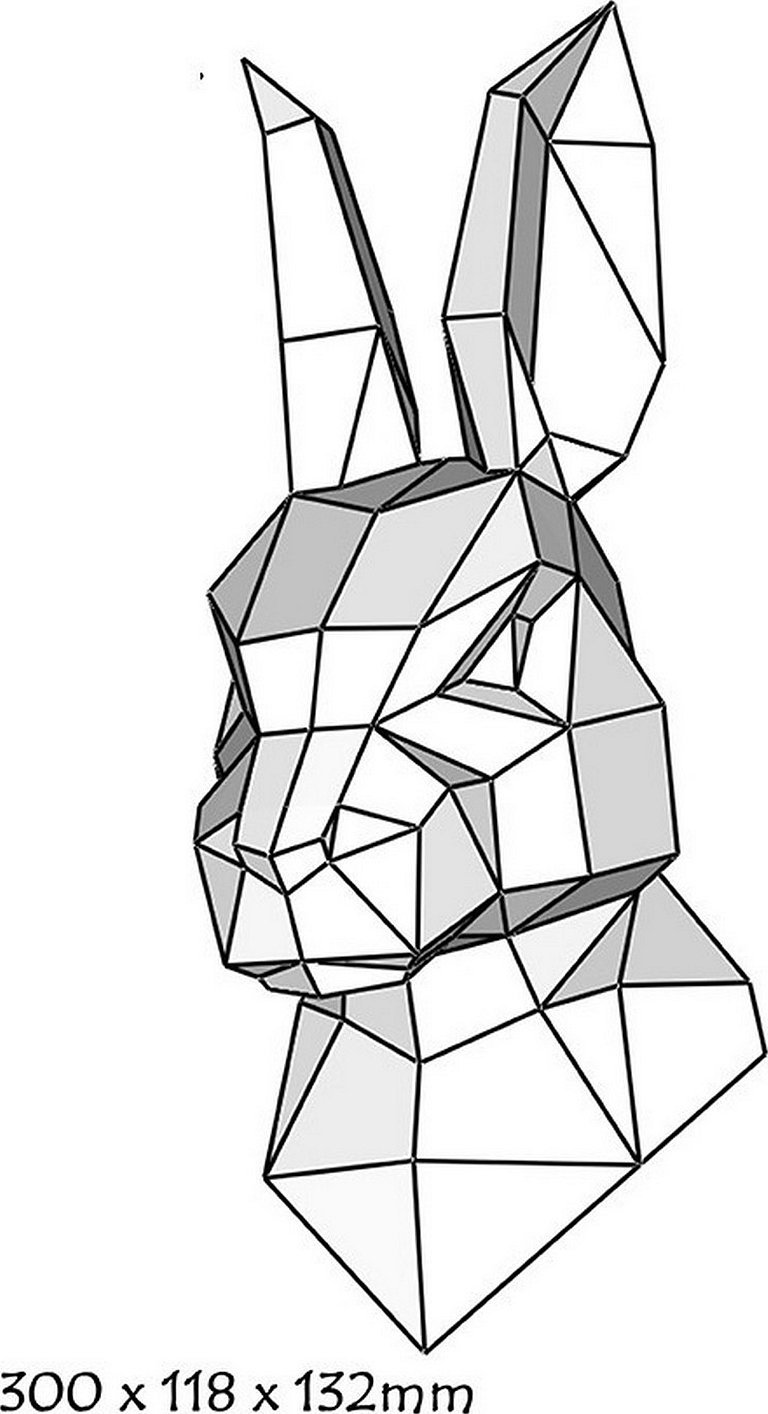
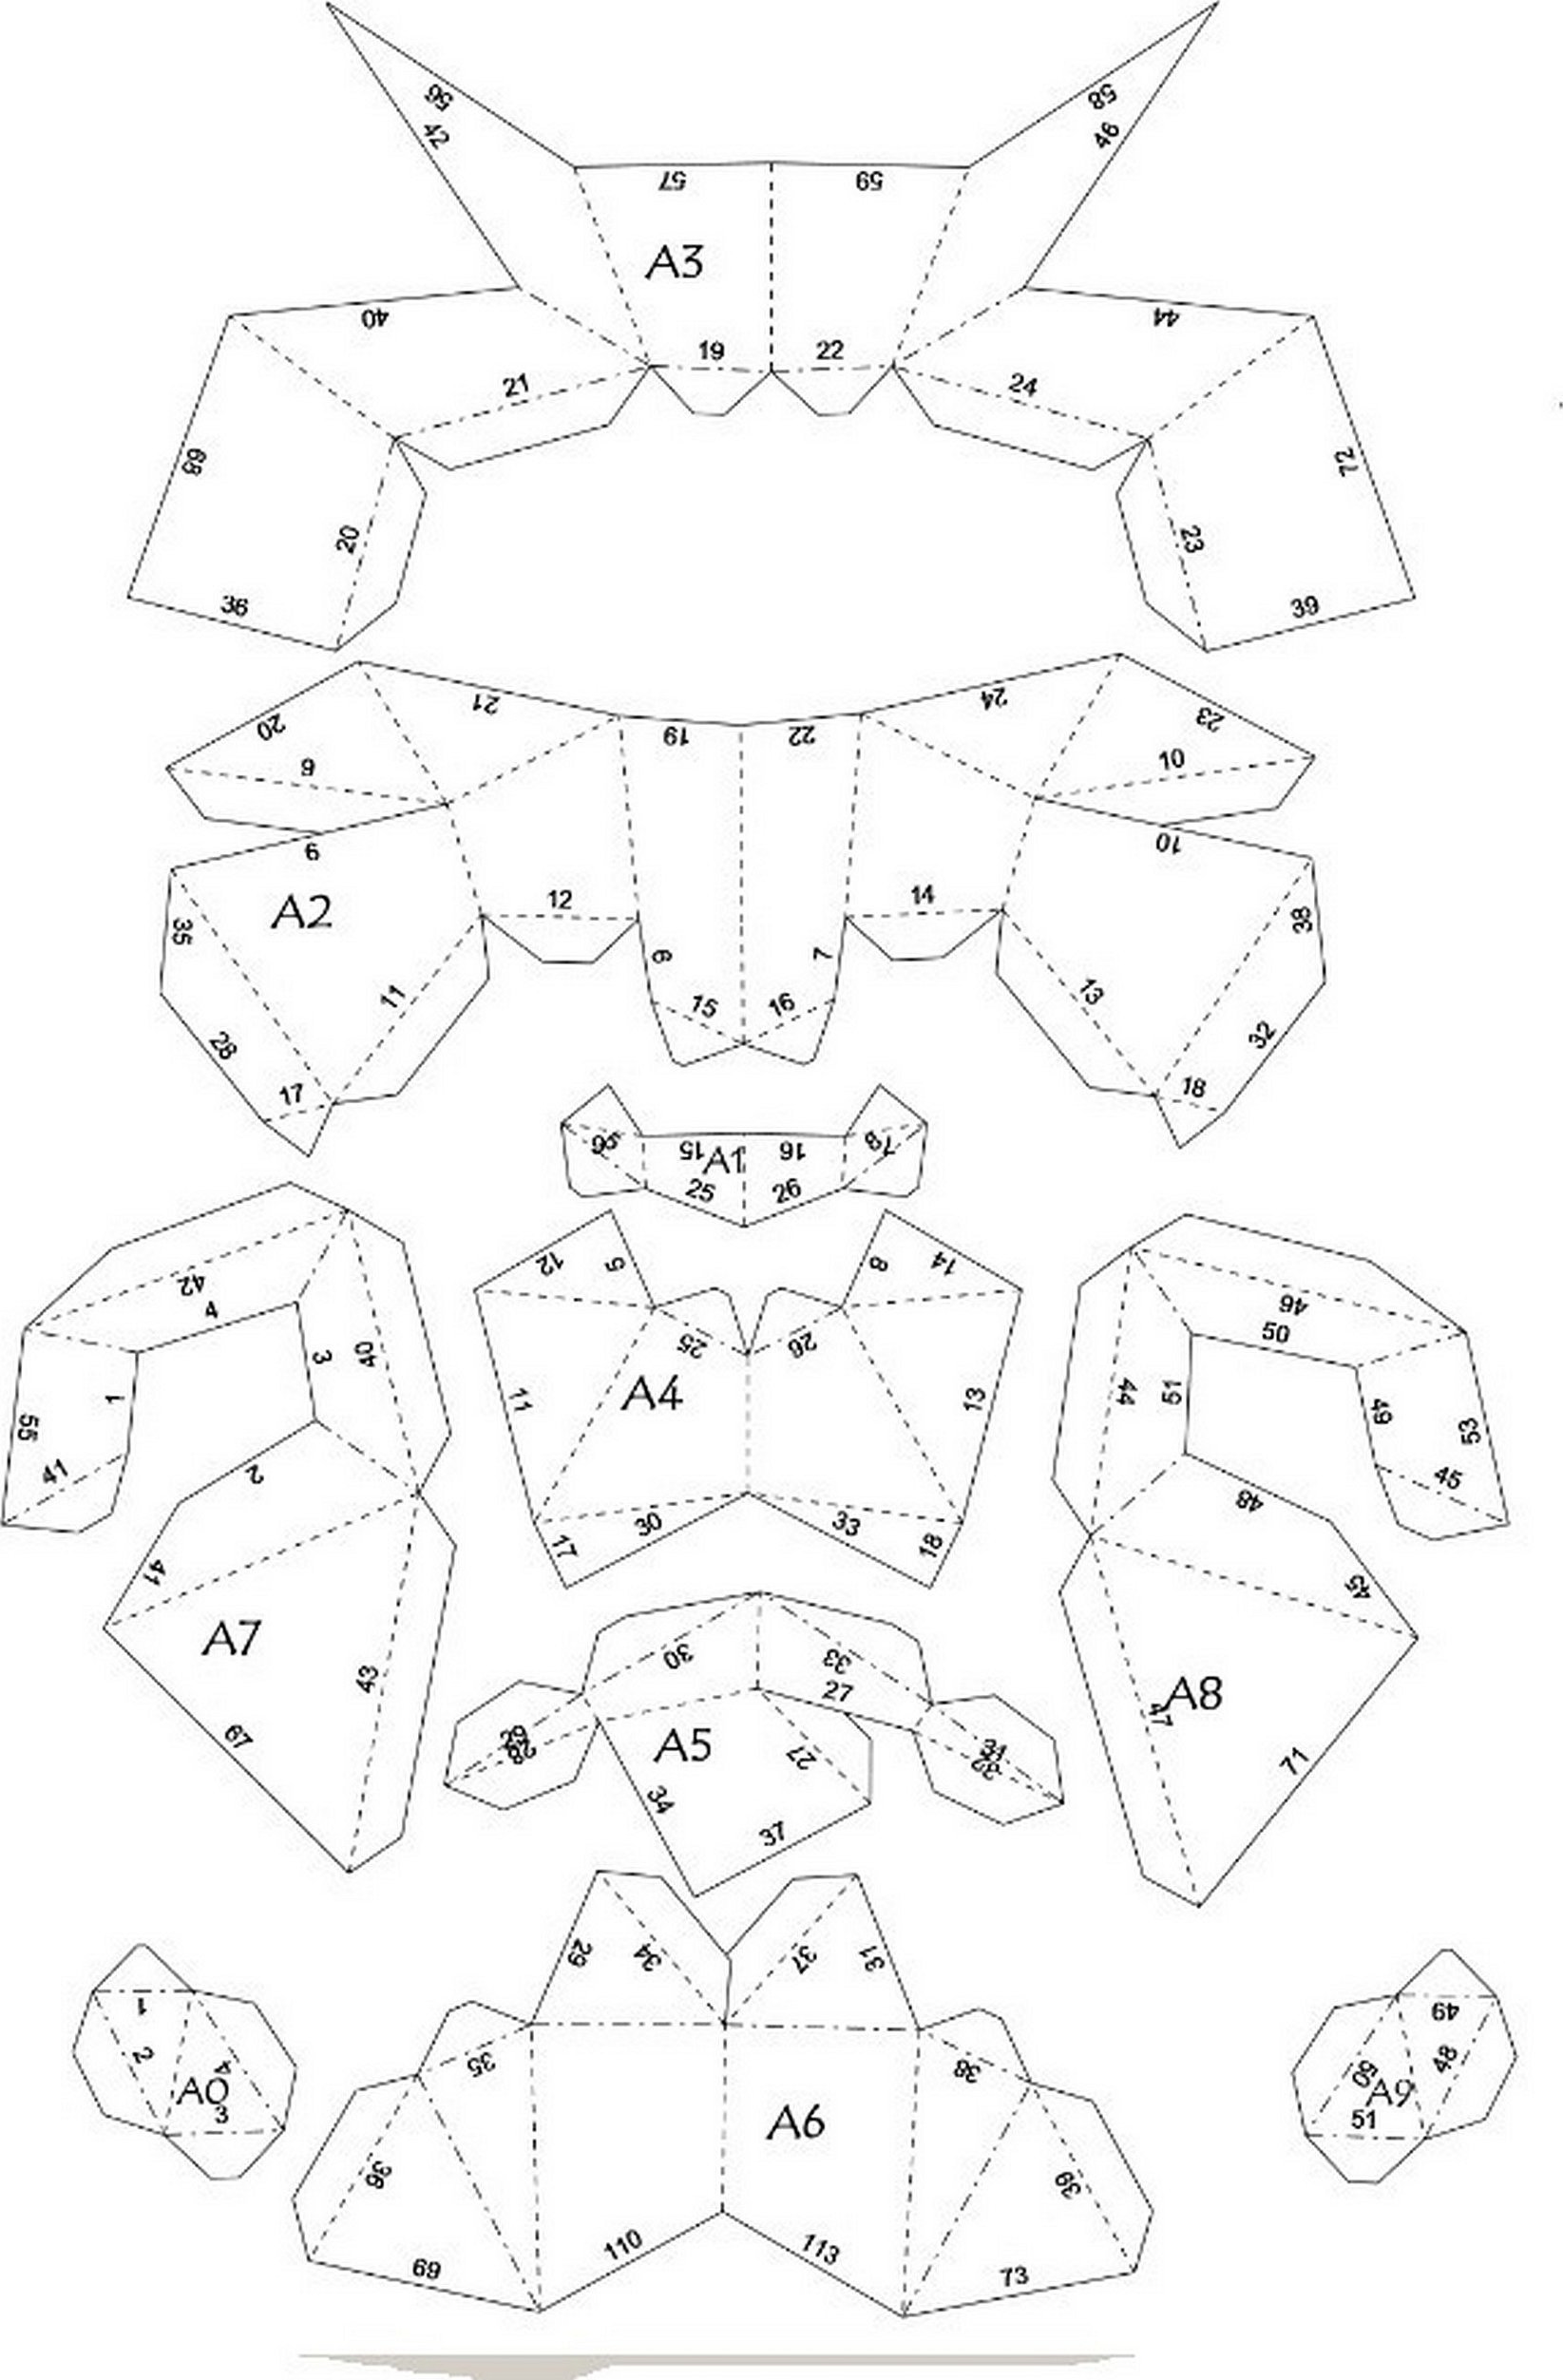
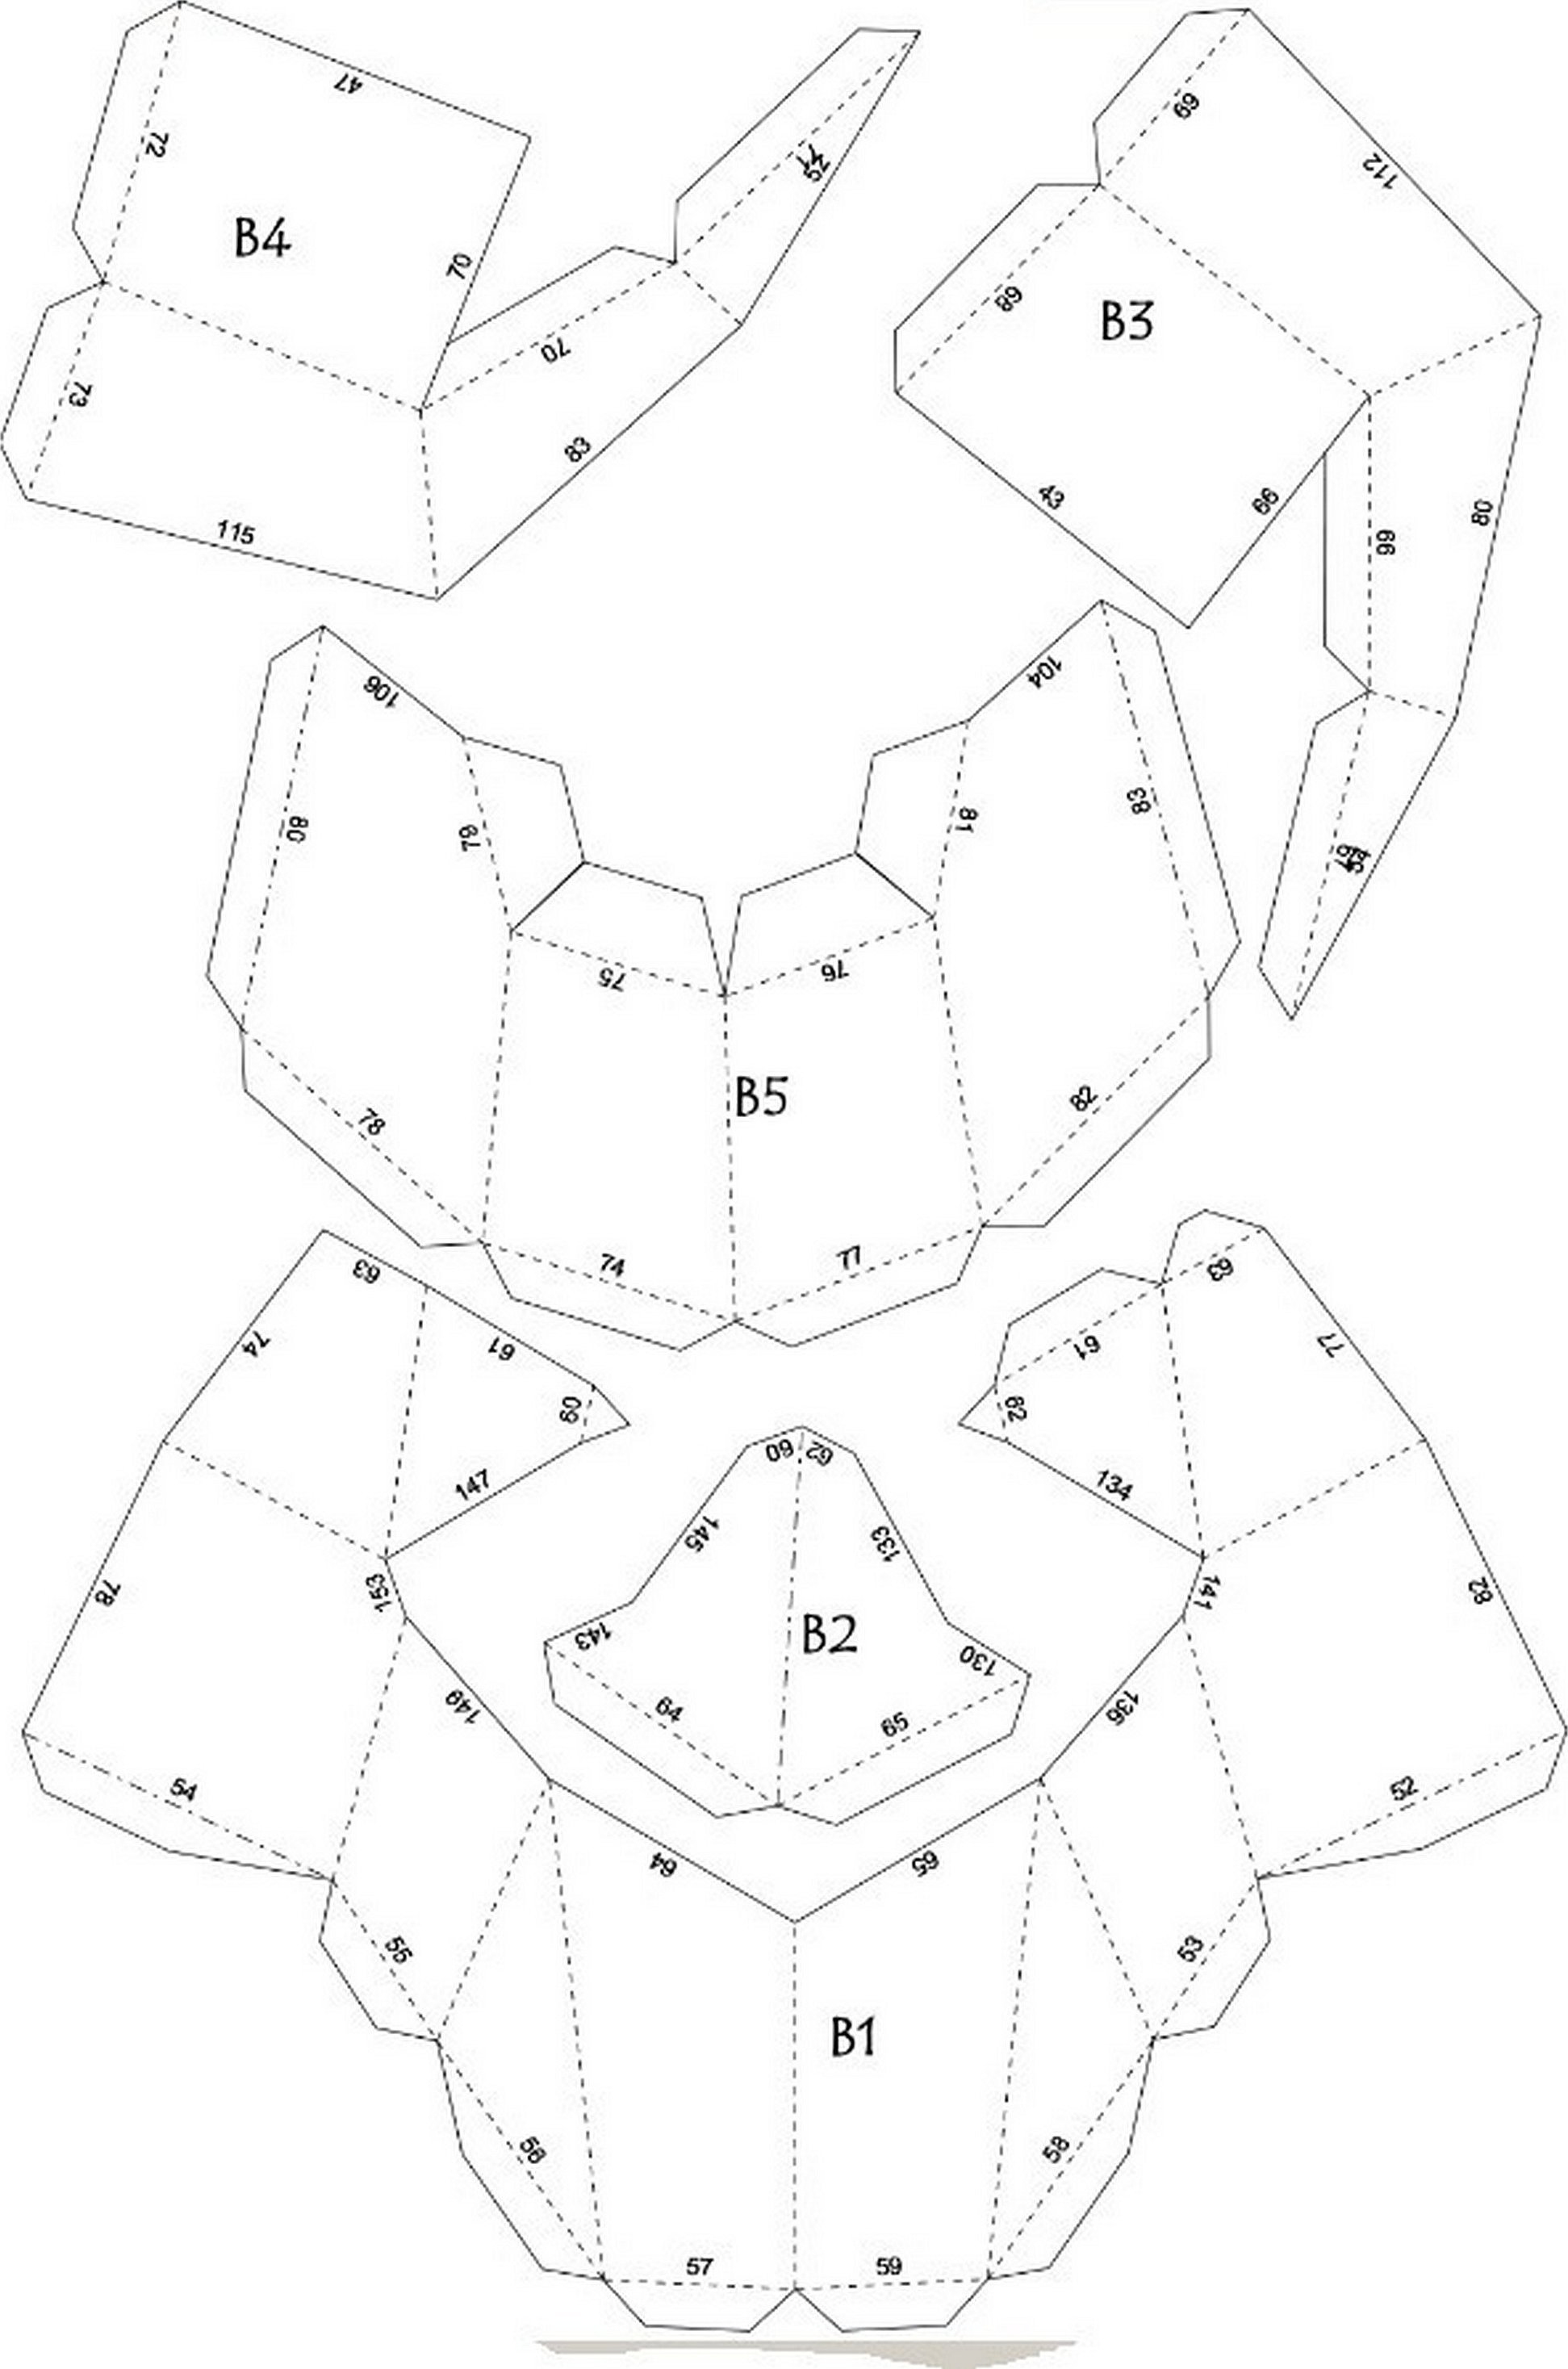
How to assemble papercraft:
- First of all, print out the diagrams. If the printer can't handle thick paper, you can print them on regular office paper, then apply the resulting diagram to the cardboard and press all the contours and fold lines so that they are printed on the cardboard backing.
- Carefully cut out the parts along the contour so that the cutting lines are perfectly straight; it is better to cut them with a stationery knife along a metal ruler.
- Bend the resulting parts along the lines, according to the symbols.
- Glue together, aligning the same numbers on the edges of the parts.
- The finished product can be left as is, but in order to make it durable, it should be additionally strengthened. First, the craft should be covered with epoxy glue, slightly leveling the surfaces with sandpaper, then covered with acrylic primer and painted. To avoid drips, it is better to use paint from a spray can.
Making paper crafts is a fun form of creativity and a great way to relax and unwind after a hard day at work, and preparing festive paper accessories will help both children and adults get into a fun mood in advance.


