People have been embroidering for a long time. This way you can decorate things, make pictures or decorate objects. This article talks about what embroidery stitches exist and how to do them yourself.
- Types of stitches for embroidery
- Forward needle technique
- Back needle technique
- Chain stitch
- Stem technique
- Holbein seam
- Loop or wrap
- Herringbone technique
- Oblique stitch
- "Chubby"
- Algerian interlacing
- Vladimirsky or "Verhoplut"
- Cross stitches for embroidery
- Half cross or painting
- Cross stitch technique
- Tapestry stitch
- "Half-cross on the surface"
- Cross stitch
- Elongated cross
- Hungarian stitch
- Bulgarian cross
- Double cross
Types of stitches for embroidery
There are currently many types of stitches and new ones continue to appear. All techniques can be done both by hand and by machine. Below you can see a detailed description of the most popular types of stitches in embroidery with step-by-step diagrams.
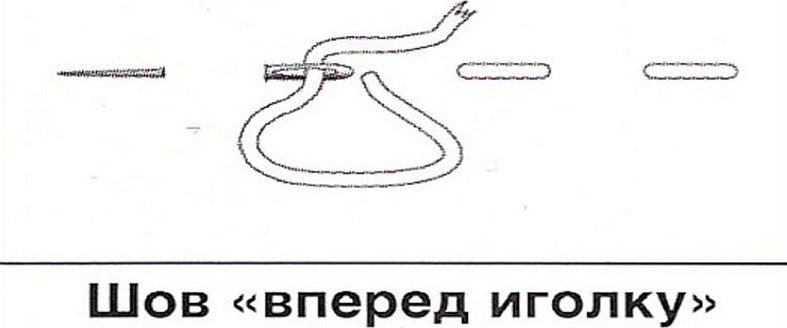
Forward needle technique
This type is quite easy for a beginner to do. When finished, it will be the same on either side of the canvas. It is mainly used to work with image borders.
A stitch is made along the outlined contours of the pattern, "forward needle" is performed from right to left, moving constantly straight, forming new ones. In the process of work, it is necessary to control the gaps between the seams - they must be equal.
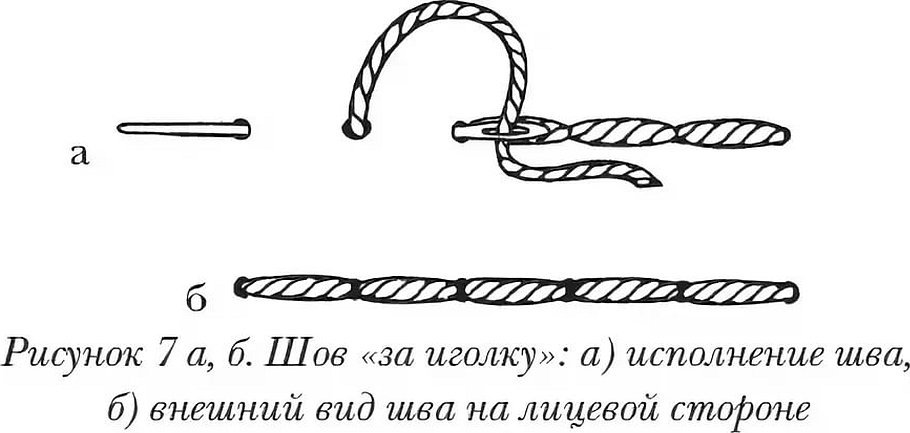
Back needle technique
In this type, the seam is made from right to left. "Back needle" is very similar to machine stitching. From the outside, "back needle" looks quite aesthetically pleasing, all the stitches are close to each other, and on the back side the stitch is more elongated.
Please note! All seams must be the same length.
Chain stitch
It is also called a chain. It is made with a hook with a sharp point or a needle according to a ready-made pattern on thin materials. Silk threads are mainly used for the chain stitch. It is used to make the outline of the pattern or fix it.
To simplify the work, this type is recommended to be done from top to bottom. The needle with the thread is pulled out to the outside, a loop is made and inserted into the same place where the beginning was. During the embroidery process, the loop is not pulled to the end, and the needle is pulled out to the surface of the canvas at a point about 0.5 cm below the initial one.
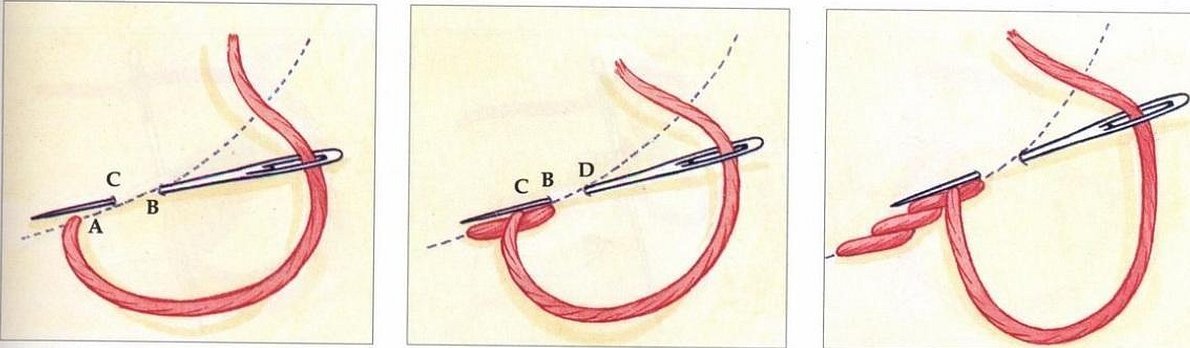
Next, you need to pull the thread so that the loop slowly lies on the base. When a new loop is made, the needle is inserted into the end point and brought out to the front surface. This stitch will initially be difficult to perform, so it is advisable to practice on unnecessary fabric.
Stem technique
This stitch should be used when working with linen or chintz materials. Visually, it looks like a pair of adjacent oblong stitches. This type is used to perform a pattern along the lines and to make stems or leaves. Stitch embroidery is done on tightly secured fabric, pre-washed and dry. It is better not to take long threads, as there is a risk of twisting during work.
This stitch must be done from left to right. The thread is threaded on the inside without a knot. Then the first stitch is done on the right side. Then the needle moves from the inside to the left and comes out on the outside in the center of the first stitch.
This technique is very often used for floral motifs and has long gained popularity in embroidery.
Holbein seam
Named after a German artist, this type will look the same on both sides of the canvas. It is very similar to the forward needle technique. After making a stitch, the needle must be returned back and fill in the gaps on the pattern. Experienced craftswomen turn the canvas over during work and work in the opposite direction to the starting point.
For work, thin cotton fabrics with a small weave are usually chosen. It is necessary to use a thin needle with a blunt point so that it does not cut the structure of the fabric.
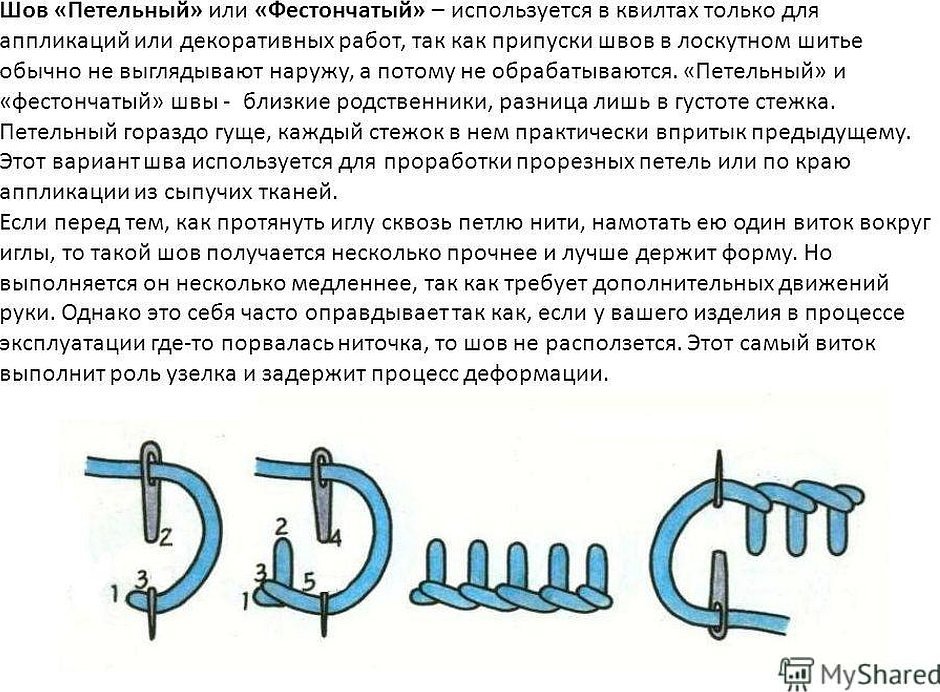
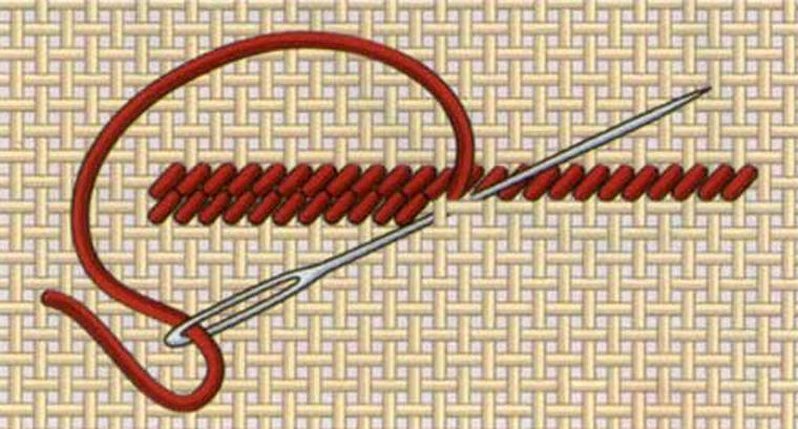
Loop or wrap
It is also called overcasting. This type is quite simple to perform. It is used for clear patterns on the material, as well as for processing various loops and neat overcasting of fabric edges.
In this technique, sewing is always done from left to right. In the process, you need to watch the yarn, it should be in front of the needle, making a loop. You need to pull the needle with the working thread to the front side of the fabric. Lower it down and tighten the loop. Then stitch from the inside so that the thread is located under the tip of the needle. Then you need to pull the needle out and tighten the loop.
The size and direction of the seam can be chosen based on personal preferences. The distance between the stitches is different, which will determine the density of the row.
Herringbone technique
It is used to process a finished design. It looks like an overcast stitch or a full tambour loop.
The "herringbone" is made in just two steps. After installing the thread, the needle enters the inside and is pulled out onto the front base. During work, the thread should be located under the needle. Thus, one side of the stitch is obtained. The next seam is made in the same way, but on the other side and a little lower.
Oblique stitch
Many years ago, the stitch was called a satin roll. It is advisable to use thick floss for it. The space inside the pattern is filled with a slanted satin stitch. The stitch is made by basting the outline stitch "forward needle". Then the entire space is filled with short slanted stitches. They are mainly made from the bottom, from left to right.
"Chubby"
It is also called "polka dot". This stitch is made on a two-layer thread, so it turns out to be quite voluminous. The outline of the pattern is processed with a "forward needle" stitch. The overlay is made along the contour lines, then a double-sided satin stitch is made on it.
Algerian interlacing
It is very similar to the cross stitch technique, but its center is shifted. This is due to the use of embroidery stitches of different lengths.
Vladimirsky or "Verhoplut"
To make the Vladimir stitch, you need the thickest threads so that the pattern is voluminous. It is mainly used for floral motifs. It is necessary to draw contours, for example, a rosebud and fill them with dense stitches from the edge to the middle. The same pattern will be on both sides.
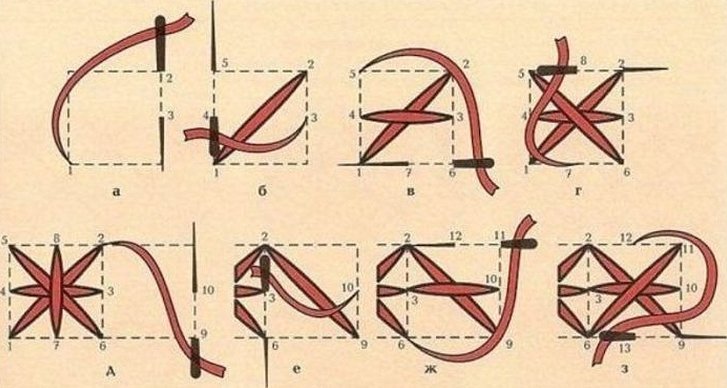
Cross stitches for embroidery
Cross stitching is perfect for those who are just starting to get acquainted with needlework. It is advisable to use canvas with a large cell for work.
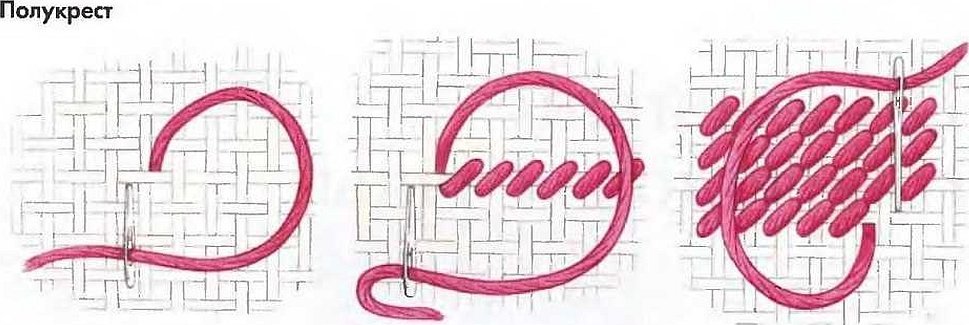
Half cross or painting
It can also be found under the name "painting" - a light double-sided stitch that is done first forward, then back. Simply put, this is the first stroke of a classic cross stitch. It is started from the right side to the left along the design line, making "forward needle" stitches.
Then, on the contrary, move from left to right. In parallel, sewing in the previous row. The finished seams are not overlapped twice. The correct line is formed by correctly piercing the needle into the previous point.
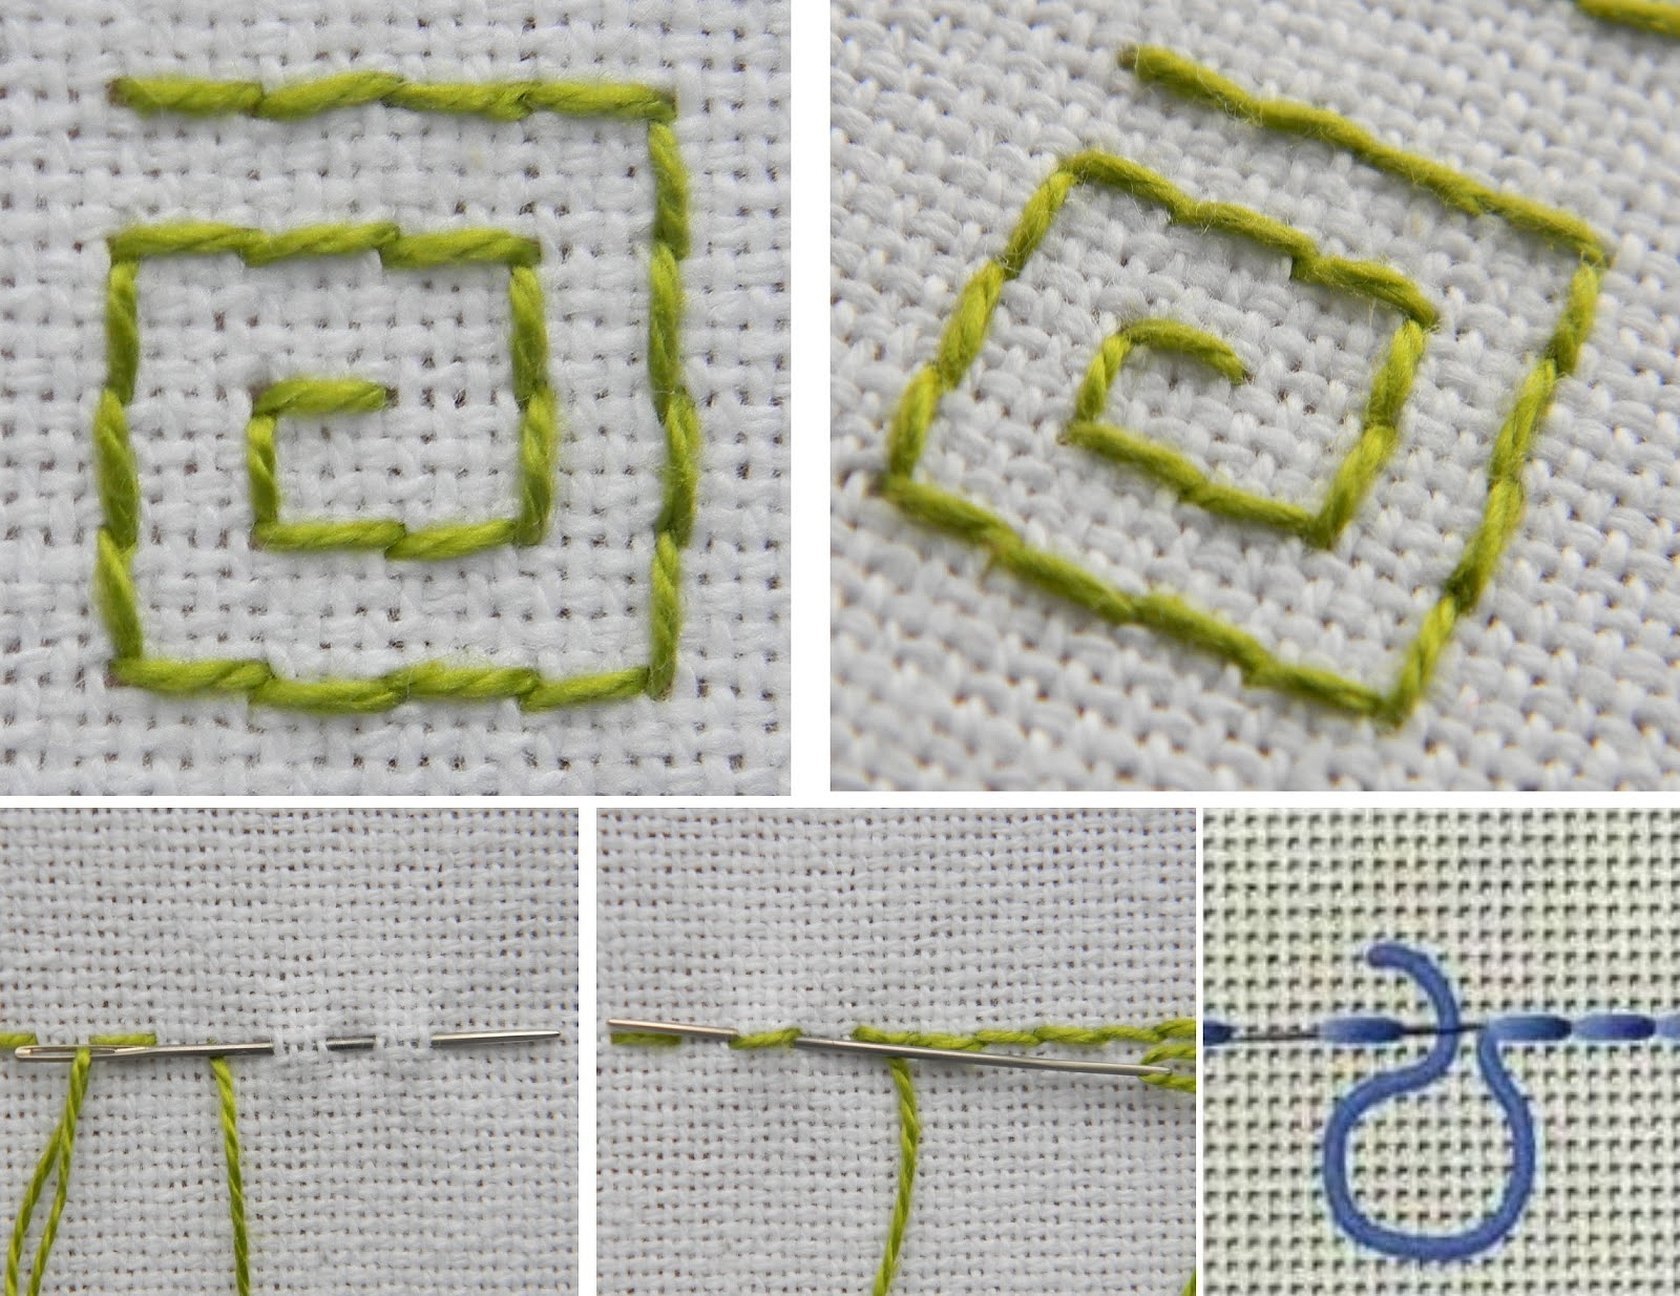
Cross stitch technique
This type of stitches in embroidery is made with two strokes that form a cross, filling one cell of the canvas. In order for the picture to look beautiful, you need to remember the main instruction - in the cross technique, all the upper seams should be located in one direction. It is chosen at will.
Please note! When crosses are made horizontally, all the stitches for embroidery are made first in one direction and then in the other.
Tapestry stitch
When working with an even number of threads, they need to be fixed as in the cross stitch technique. To do this, insert the ends of the thread into the eye of the needle, tying a loop at the end. Then stick the needle into the fabric from the inside, embroider a half-cross and fix the threads through the loop on the back side. Other stitches for embroidery must be done starting from the point where the first puncture was made.
If the embroidery is done with a single thread stitch, a knot must be made on the back of the canvas. On the outside, the tapestry stitches will cover this knot and disguise it. All rows are done strictly from right to left. In order for the stitch to be at the correct angle, the thread must be inserted into the canvas from the lower right corner.
"Half-cross on the surface"
Here the stitches must be made at equal distances from each other, and when embroidering in reverse, fill in the gaps. The half-cross looks like a ribbed fence.
Cross stitch
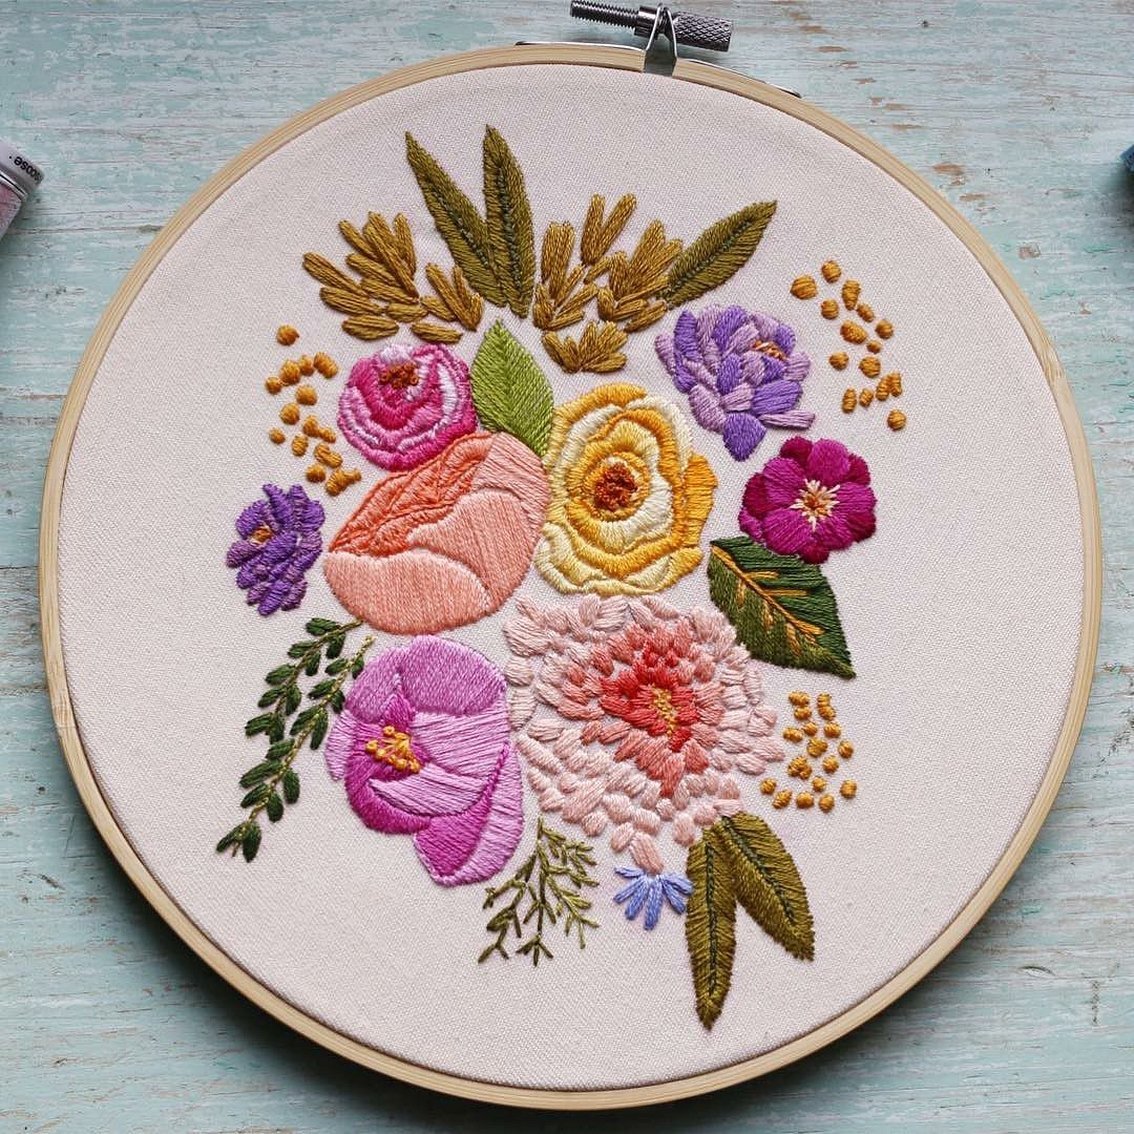
This section includes heavier cross stitches. They are great for decorating decorative pillows or bed linen. Paintings can also be decorated with satin ribbons or beads.
Elongated cross
This type is necessary to saturate the drawing with texture, it also helps to fill large areas on the canvas quite quickly. The technique of work is the same as in a simple cross, only it fills not one cell of the canvas, but several at once in a vertical position.
Hungarian stitch
Hungarian stitches are counted. They are made with absolutely different lengths. It is easy to embroider and is mainly used for large areas of the design. This method looks very aesthetically pleasing if you use threads of contrasting colors.
Bulgarian cross
This stitch consists of two crosses, the bottom one is a classic cross, and the top one is a vertical cross. It looks more like a square and is done on at least four cells in the canvas.
Double cross
It is made from four crossed stitches - two diagonally and two vertically and horizontally.
Each cross is made at once completely. First, a standard cross is made with diagonal stitches. Then, after the second diagonal stroke, the needle is inserted into the center between the two already finished upper holes and a shared stitch is made from top to bottom, and then, according to the same pattern, a transverse stitch from left to right.
In conclusion, it should be noted that you can find a suitable stitch for various jobs. Even more options can be found on handicraft sites. It is advisable for beginners to watch a master class before work and learn what types of stitches for embroidery exist.


