Knitted toys are popular not only with children, but also with adults. Amigurumi will be a great gift. You can use a crochet hook and knitting needles to create them.
Why is the owl toy so popular?
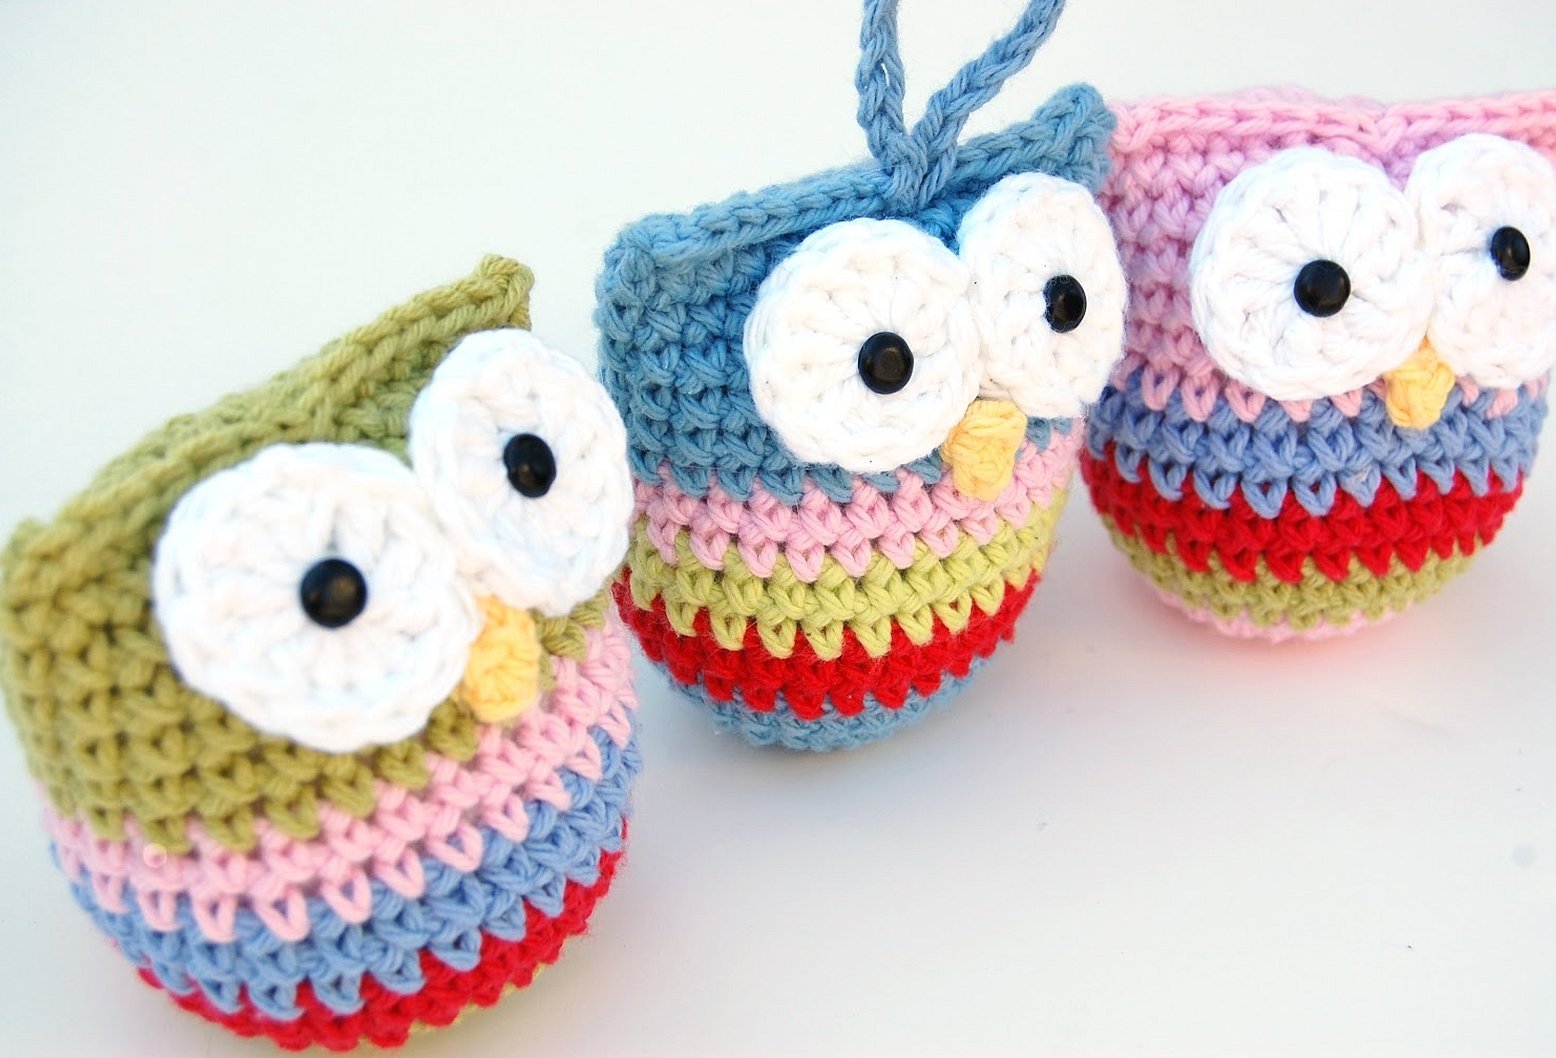
A knitted owl will not only be a wonderful and safe toy for a child, but also an interior decoration. Depending on the chosen pattern, the product can have a practical purpose. For example, it can be a pillow or a potholder.
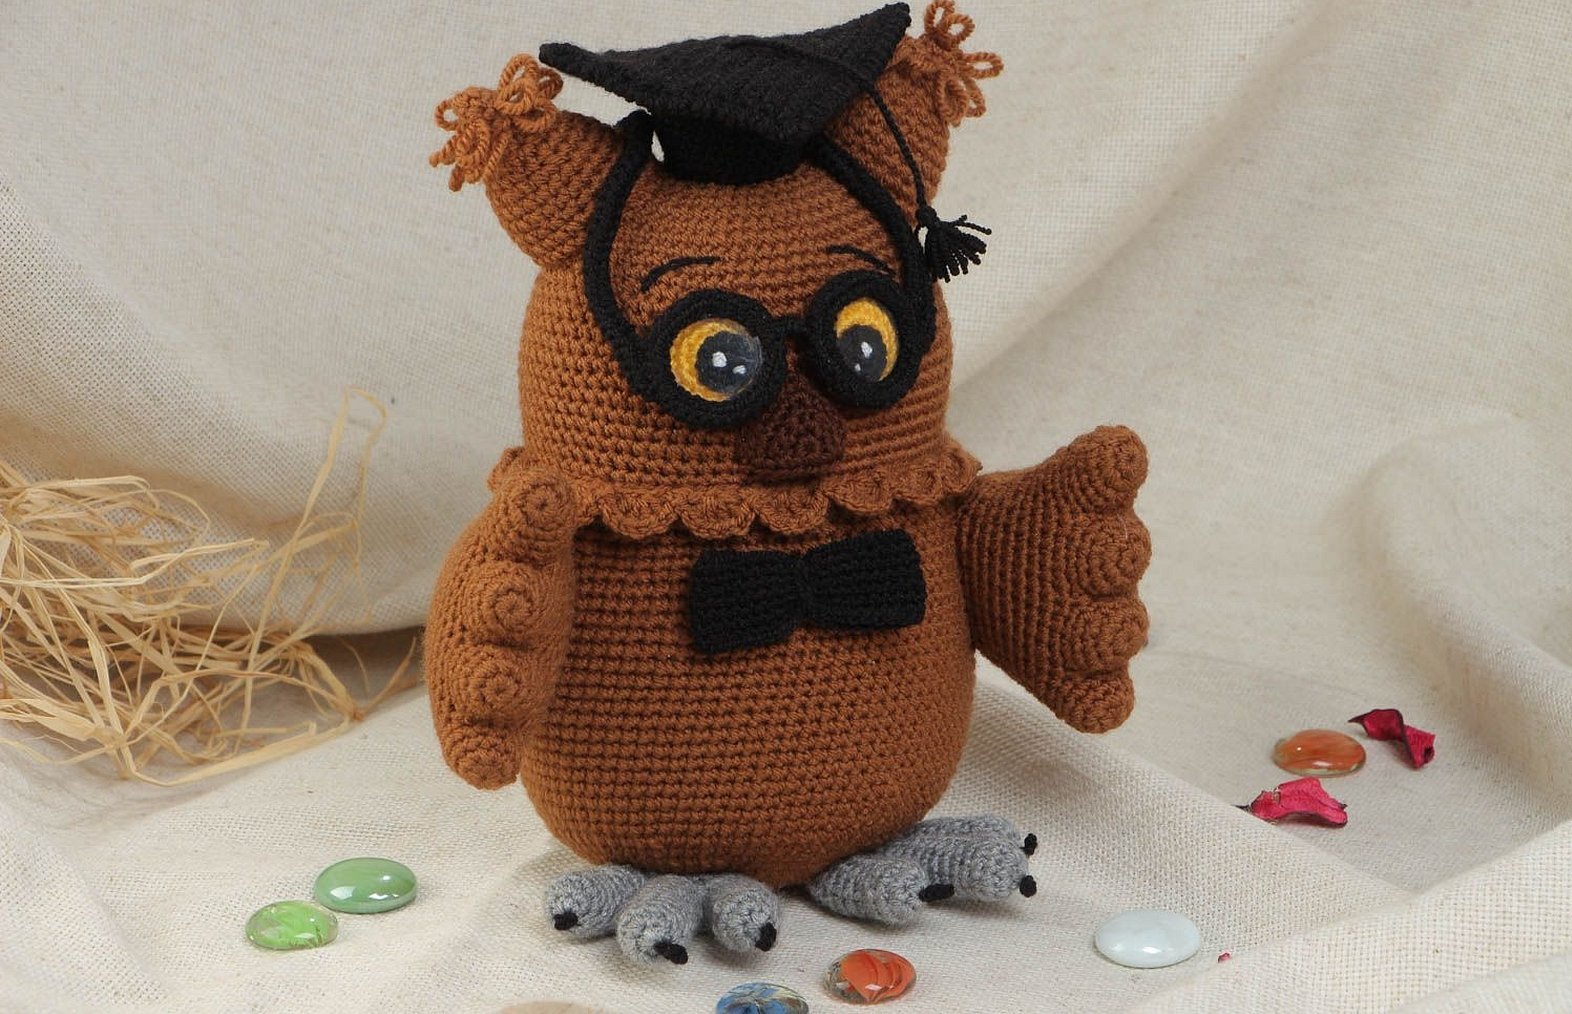
Of all the animals and birds, the owl is the most beloved. This bird is a symbol of wisdom and curiosity. Therefore, it can be given to people who are engaged in scientific or educational activities. A crocheted owl can be made to look like a real bird or a fantasy character.
The most popular cartoon characters are the heroes from Winnie the Pooh and Smeshariki. Children will be happy to receive a unique toy as a gift that no one else will have. Also, over time, it will not lose its relevance, but can become an interior decoration - after all, knitted things make the atmosphere cozy.
Please note! A knitted owl toy can be given to very small children if natural hypoallergenic materials were used to create it.
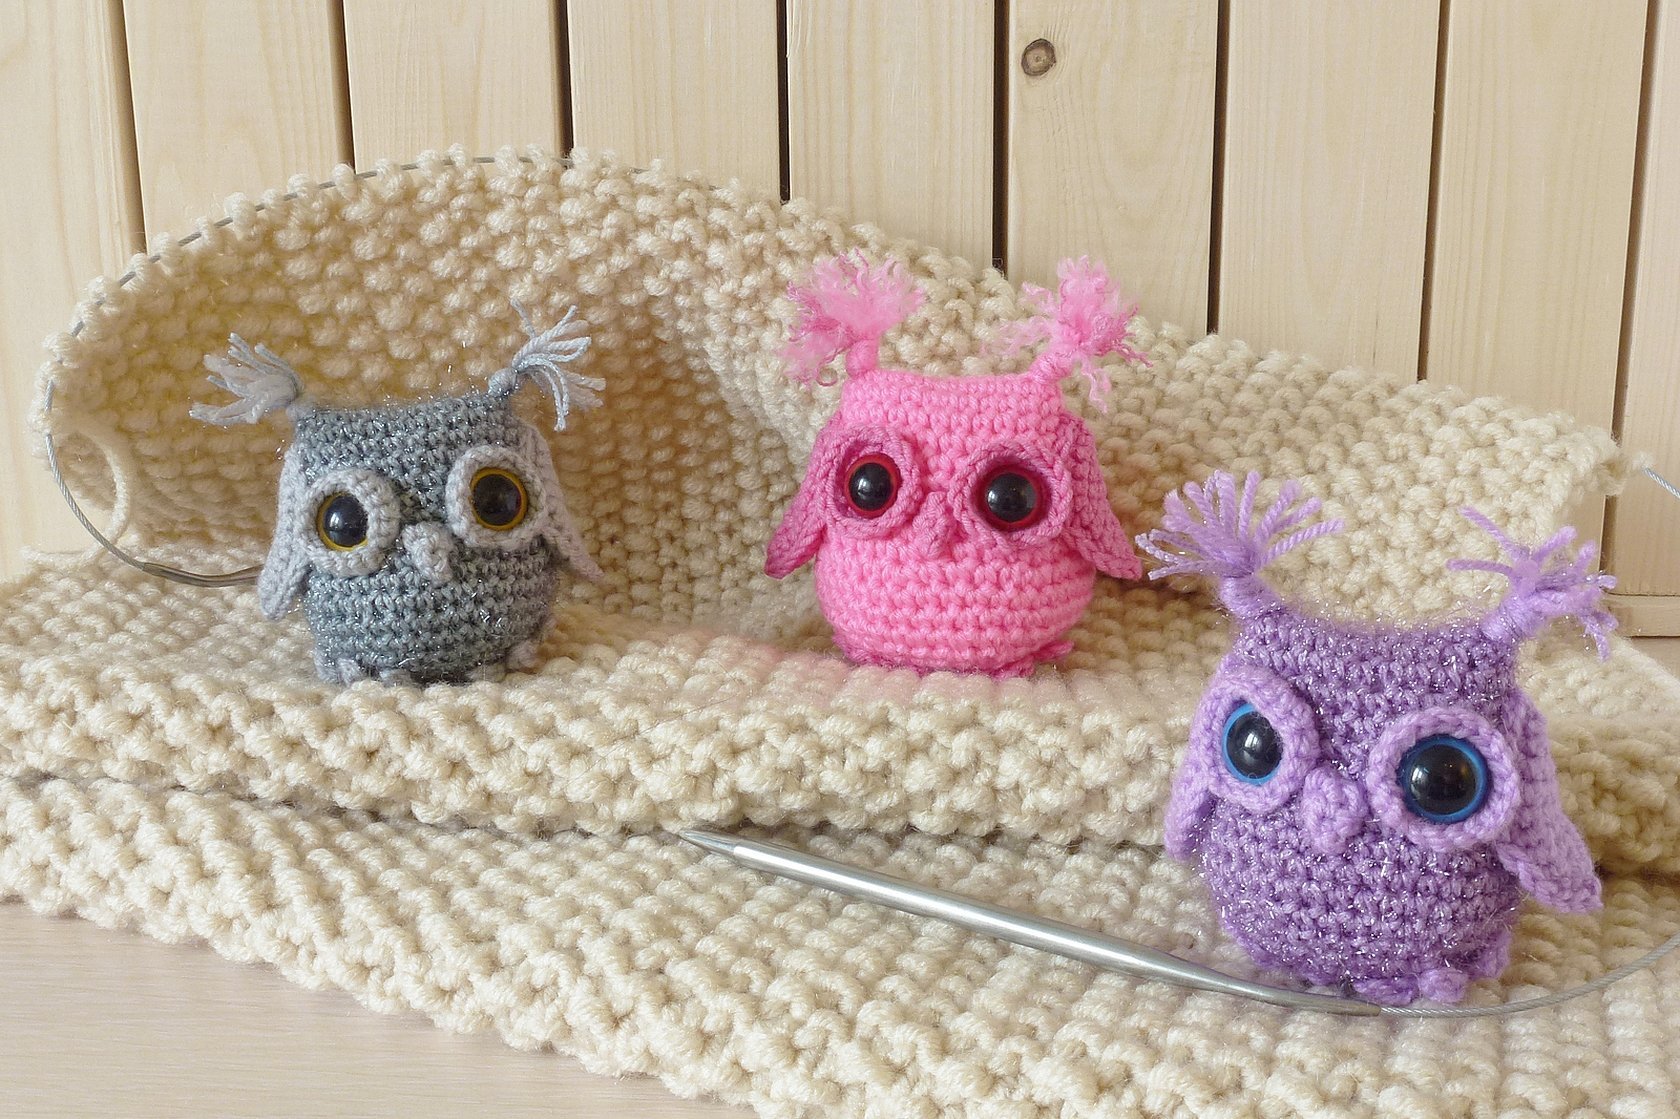
Also, such products are quite durable and difficult to damage. A bright, big-eyed owl with funny tassel ears will delight both children and adults.
How to knit an owl keychain: master class with step-by-step description
A keychain is attached to a bag, keys - it is a small accessory. An owl is one of the most popular images that can be seen not only on backpacks, but also on clothes. You can make such a product using a hook. The keychain should be small in size so that it can be easily attached to things.
To knit an owl keychain you will need the following materials:
- yarn of one or more colors;
- hook;
- light colored felt;
- black beads;
- needle;
- orange thread;
- ribbon or chain.

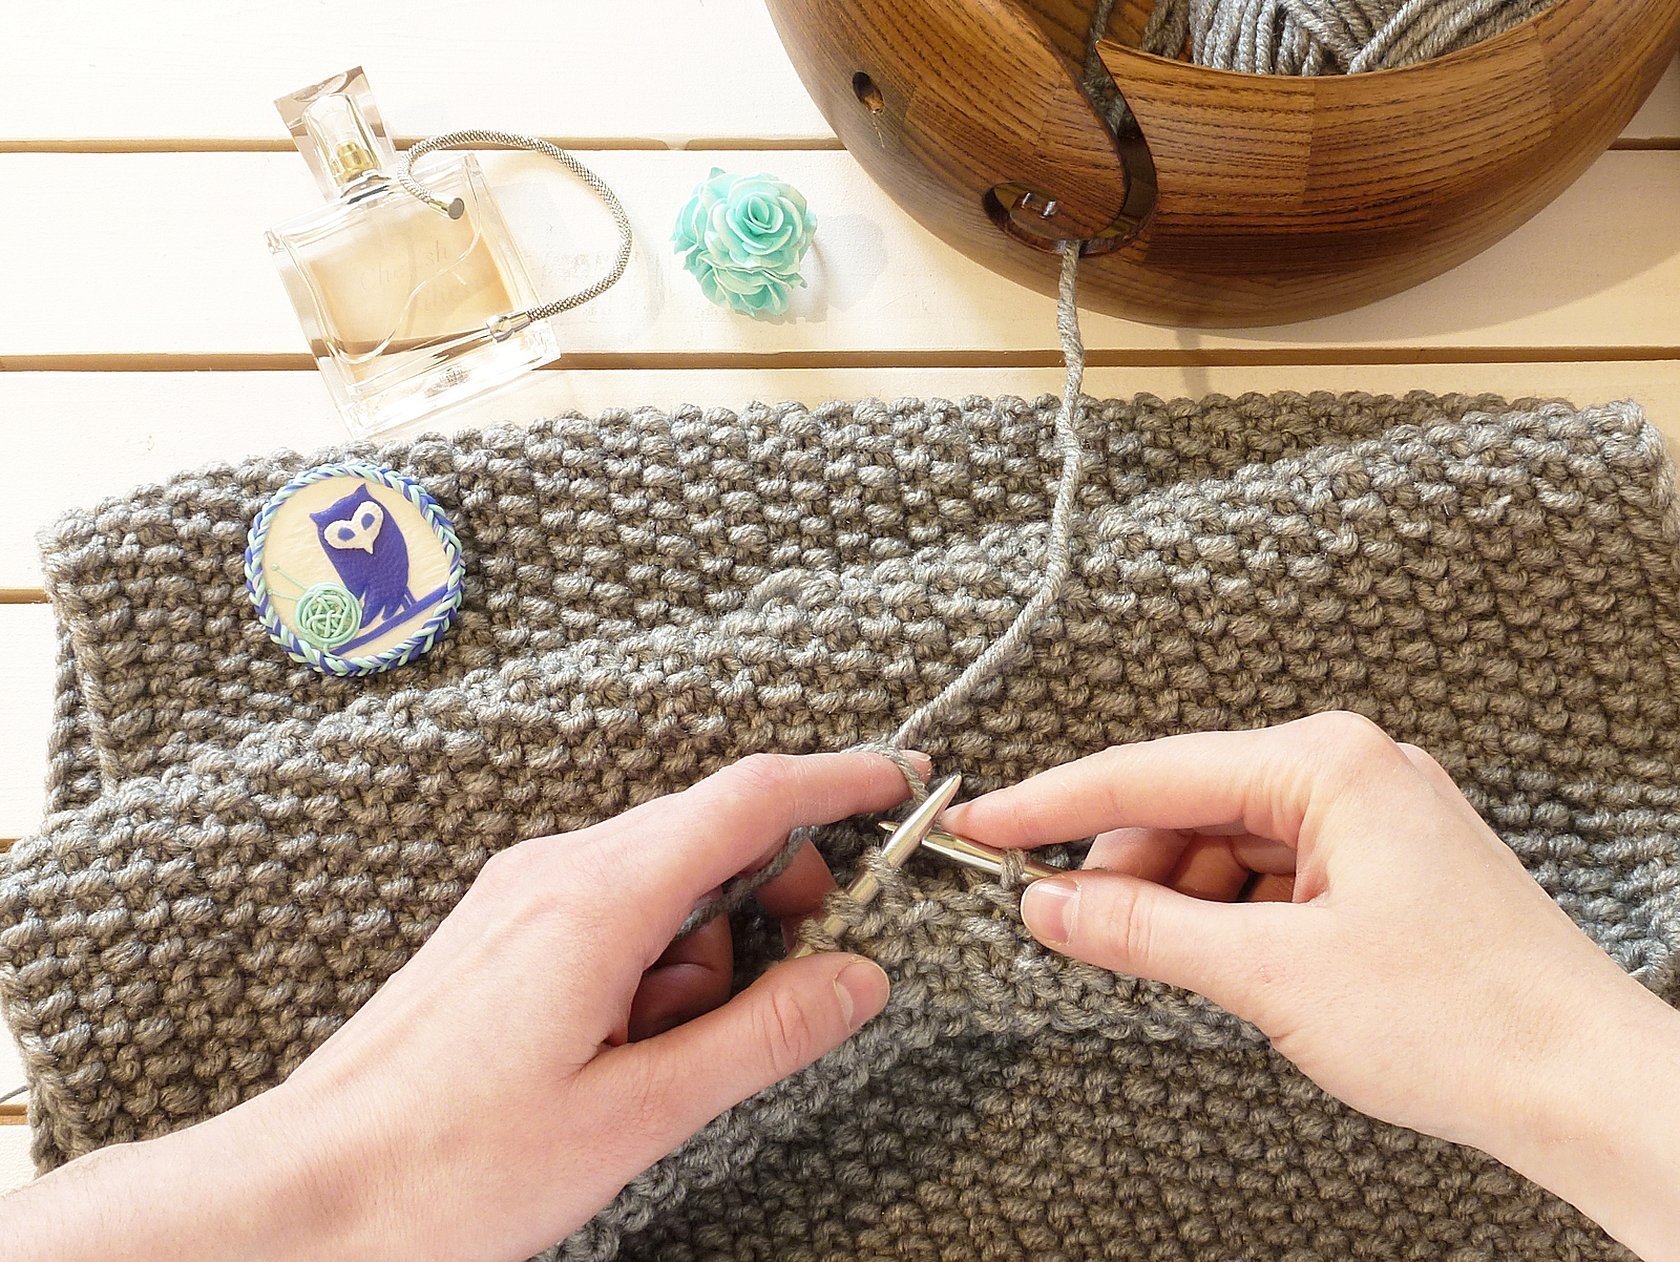
The product can be flat or voluminous - it all depends on the skill level of the needlewoman. The threads should not be too thick, so that it is easier to crochet, and the keychain looks neat. The owl consists of a head, which is also the body of the bird. You need to crochet with a single crochet, making decreases and increases, if necessary.
You should work from the bottom up. The owl keychain knitting pattern is as follows:
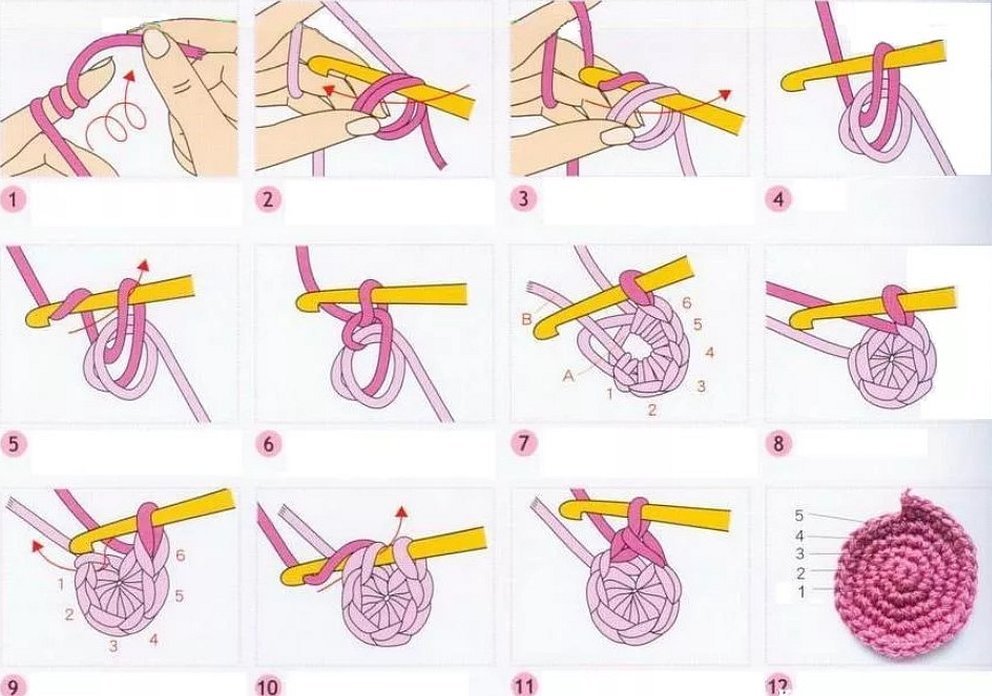
- Row 1 is a chain of single crochet stitches (6 loops) that needs to be joined into an amigurumi ring;
- Row 2 – after knitting single crochet stitches, you should make an increase – 6 loops;
- to create the 3rd row, you also need to knit a single crochet and make an increase of 6 loops;
- for row 4 you need to make 2 single crochets and an increase (6 loops for each single crochet);
- to create the 5th row, the number of single crochets must be increased by 1 and an increase of 6 loops must be made;
- for the 6th row the needlewoman needs to knit 30 single crochet stitches;
- Row 7 – having created 3 single crochets, you should decrease by 6 loops;
- from rows 8 to 10 you need to knit 24 single crochet stitches without increasing or decreasing;
- for row 11 you need to make 2 single crochet stitches, decreasing by 6 loops;
- Row 12 consists of single crochet stitches, which must be decreased by 6 loops.
To make the product voluminous, amigurumi is stuffed with filler. The edges of the keychain are sewn with a connecting seam. After that, you can move on to decorating the owl. Felt is needed to create eyes: neat small circles are cut out of it. Then they are sewn to the knitted figure, after that - beads. The beak is embroidered with orange thread. Then a ribbon or chain is attached, and the keychain is ready.
Important! It is better to sew all decorative elements rather than glue them: this way the product will be durable and the beads will stay in place.
If there is no suitable filler, you can make a flat owl keychain. The knitting technique is almost the same as described above:
- 1 row consists of 2 simple air loops and 2 single crochets;
- for the 2nd row you also need a single crochet and make an increase on each one;
- Row 3 is knitted similarly to row 2;
- Row 4 consists of 8 single crochets.
The knitting technique of the 5th row is more complicated and follows the following pattern: first, make a simple chain stitch, then a single crochet. The next stitch is knitted like this: a single crochet, a double crochet, a single crochet. Next, 1 half double crochet, connecting the double crochet and the half double crochet. Then comes another complex chain stitch, similar to the one described above. At the end, a single crochet.
To make the toy look neat, make a binding along all edges of the product. The eyes for the owl can be made not only from felt, but also with a crochet hook. To do this, knit 2 air loops and 6 single crochets. Felt is suitable for the pupils. The beak is embroidered with orange thread. The fastening is made from a chain or ribbon.
You can complicate the pendant by making it from separate elements: you need to knit two wings, a tail, and then sew them to the body. When making the owl's eyes, you should not forget about the proportions. If the pendant is small, then they should not take up most of the body.
Most often, when creating such toys, the eyes are also knitted, but this method is not suitable for a keychain. The reason is that this detail is small and it is inconvenient to crochet it. Therefore, they are made from felt and beads.

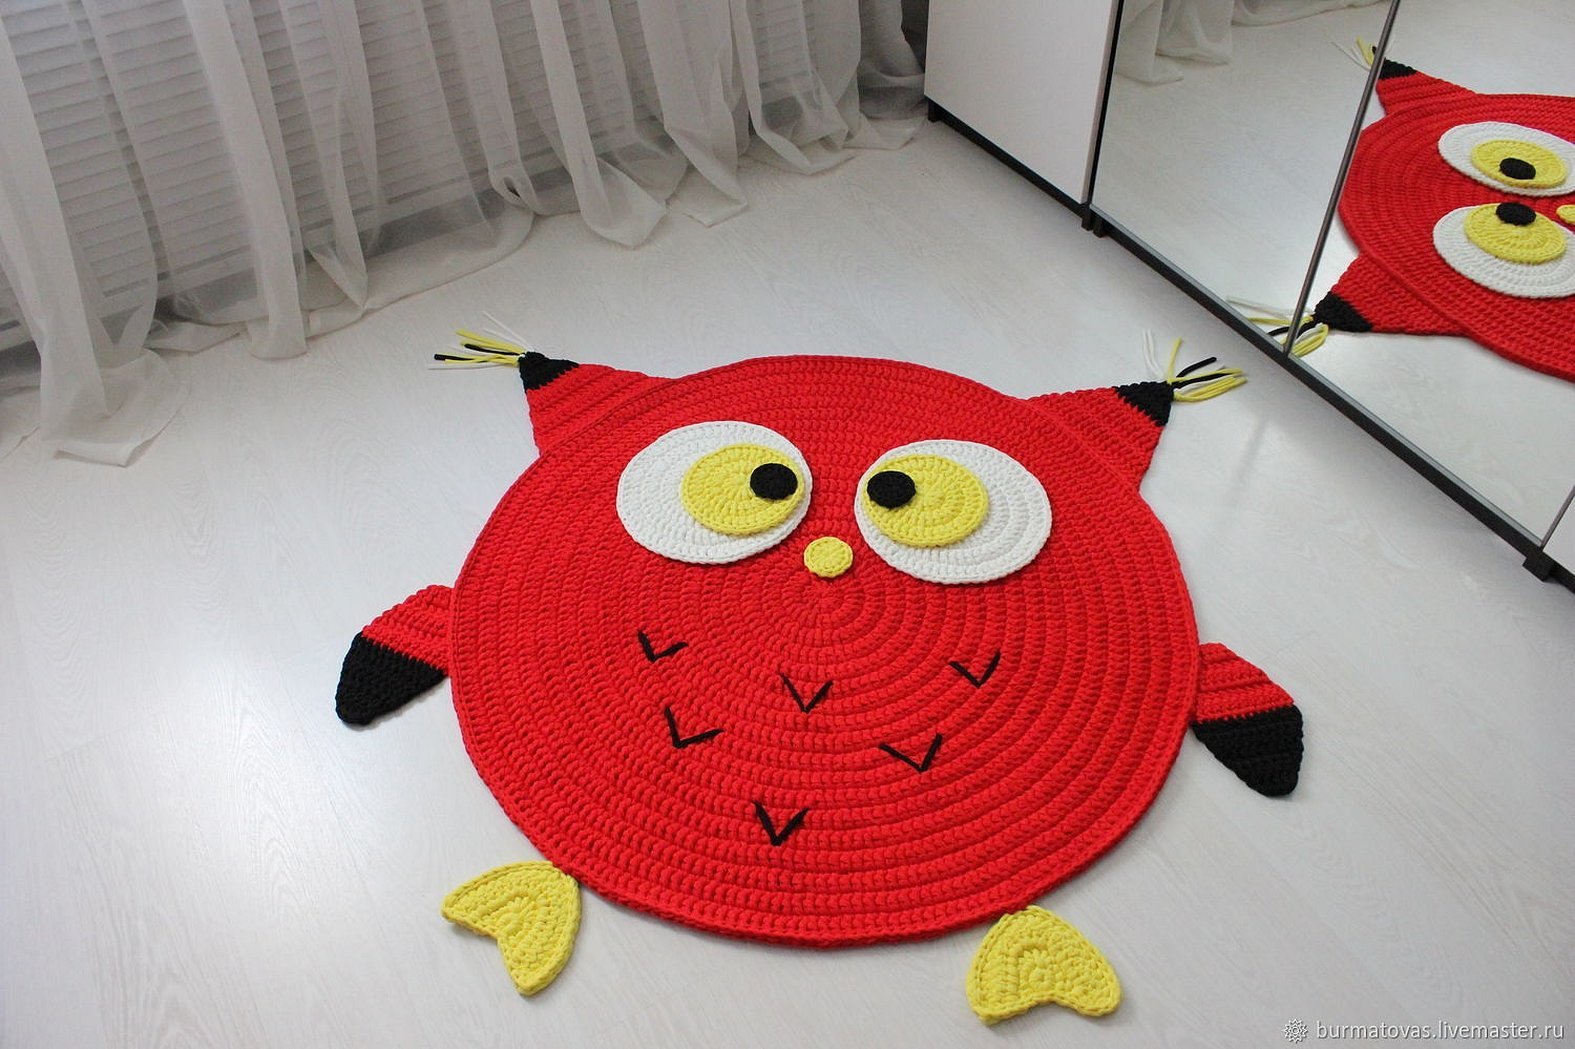
Knitting a pillow with an owl
A crocheted owl adds coziness to your home. It is not as difficult to make as it may seem. To make it, you need to prepare a pattern.
Important! On this diagram, you should indicate which color should be used for which row. Any diagram can be adjusted to the desired size of the product. The easiest option is to make a round pillow.
To make an owl pillow you will need the following materials:
- crochet yarn in different colors;
- hook;
- filler.
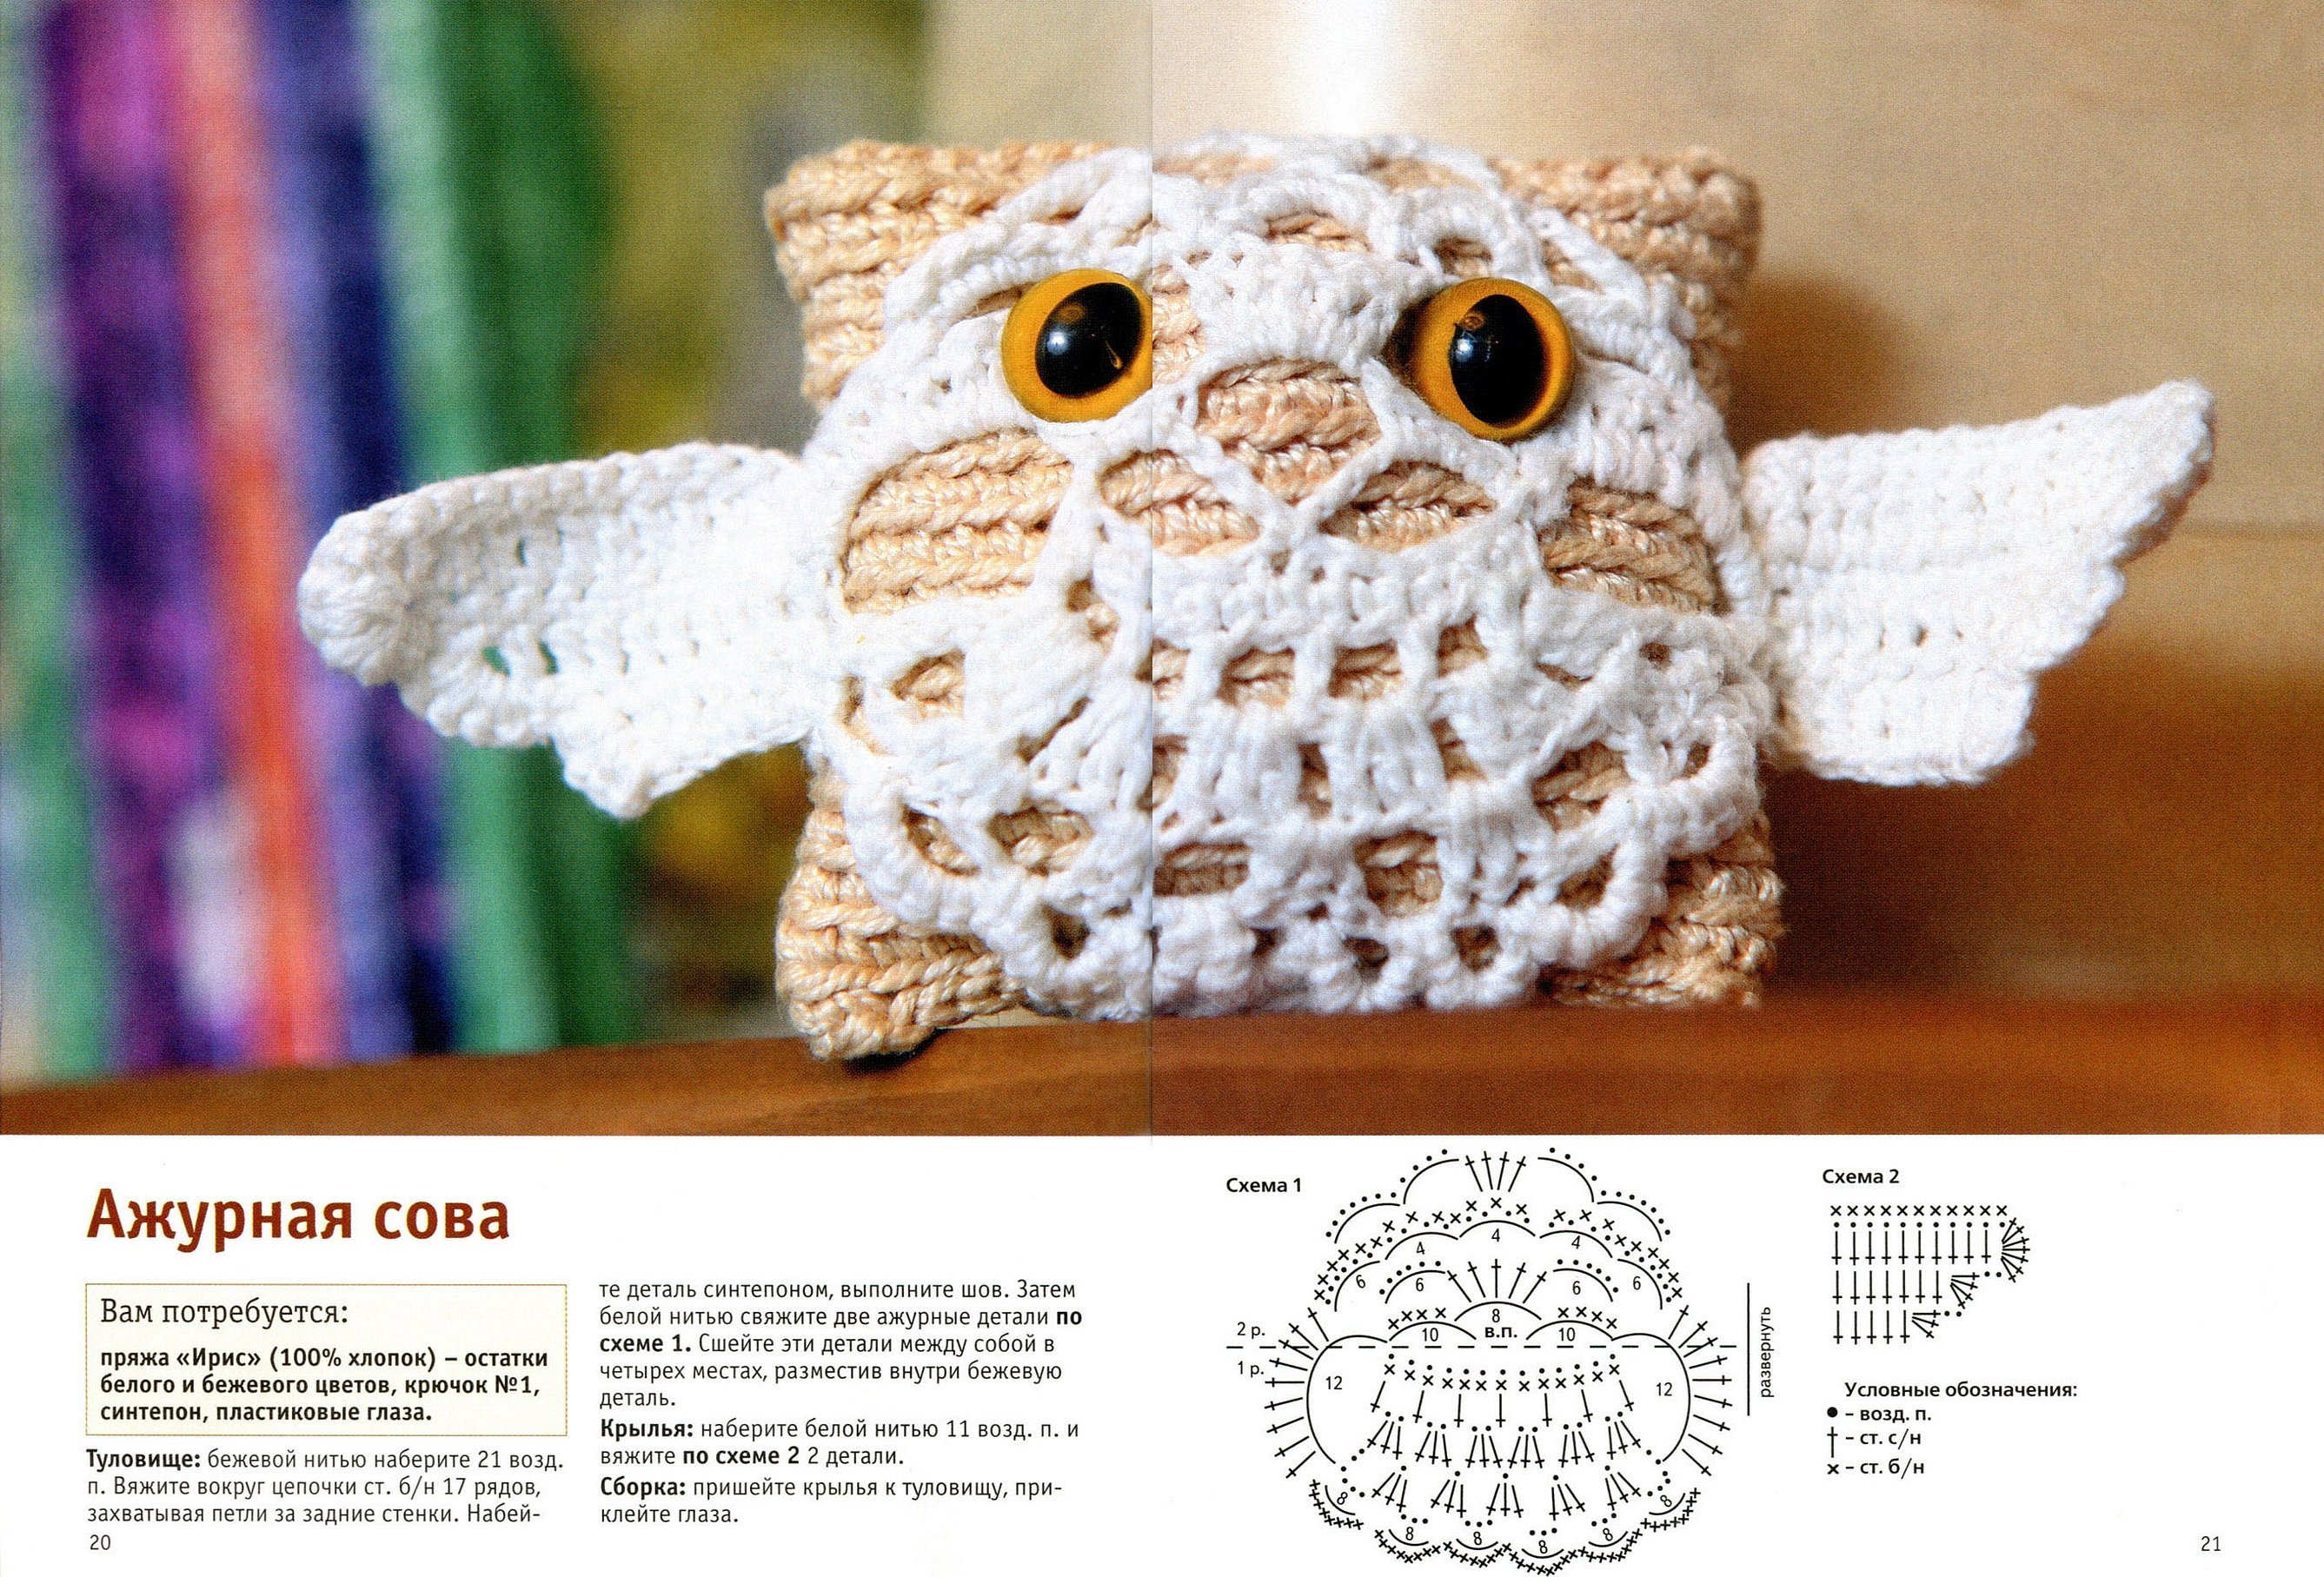
The owl's body consists of two circles, the edges of which are connected and filled with stuffing. You can choose any other shape for the base. You need to knit the ears, wings and beak of the bird separately.
Owl ears can be triangular or semi-oval in shape. The technique for knitting this part is simple - single crochets with gradual decrease. For each ear, you need to make a front and back side, the edges of which are connected with a hook.
The wings for this pillow can be made non-standard, openwork. To create "feathers" you need to knit arches from air loops with double crochets.
The body is also easy to make. It is based on a standard amigurumi ring. Next, you should knit single crochets, adding and decreasing loops. Then you need to connect the circles, leaving one free to stuff the pillow with filler.
The eyes are knitted similarly to the body, only smaller in size. The beak is embroidered with orange thread.
Next, all the parts need to be connected together. You get a beautiful cute owl pillow. The proposed master class is suitable for beginner needlewomen.
Please note! Some craftswomen make tassels on owl ears, which are easy to make by knitting simple chains of air loops.
You can knit an owl that is close in appearance to a real bird. This pillow consists of the following parts:
- torso;
- paws;
- wings – 2 pieces;
- tail;
- eyes.
To create the product you will need colored yarn, but before you start knitting you should prepare a pattern for ease of work.
Body Knitting Guide:
- You need to knit a chain of 15 loops, then a double crochet.
- In a similar way, knit up to row 8. At the end of each row, make an increase of 2-3 loops.
- Row 8 should be knitted according to the following pattern - 5 single crochet stitches, make an increase, then 17 - single crochet stitches and an increase of 3 loops. Then there are 16 columns, loops must be added to the last 4.
- According to the above pattern, you need to knit 9 rows.
- From the 18th row, work like this: 5 sc, then decrease. Next 17 sc, and on the last 5, decrease by 3 loops. Then repeat again, only decreasing by 2 loops.
- In a similar manner, 4 rows should be knitted.
- Row 23 begins with making 4 sc, then decrease. Then there are 16 more sc, then decrease by 3 loops on the last 4 columns. You need to knit the same number of columns, but decrease them by 2 loops.
- According to the above pattern, you need to knit 4 more rows.
But knitting the body is not finished yet. After row 27, you need to change the color of the yarn and you can continue working with the part:
- 2 rows should be knitted according to the last pattern;
- Next, you need to do single crochets with a decrease on the last 3 columns;
- in this way you need to make 9 more rows.
Important! After this, you can stuff the product with filler, leaving the edges of the part unfilled - this will form ears.
The bird's body is ready - all that's left is to fold the edges together and sew them together. You can start making the next element of the pillow.
Making owl eyes is very simple:
- First you need to make an amigurumi circle.
- Next – 6 sc with an increase on each column.
- In a similar way, 30 columns need to be connected.
There is no need to knit the beak separately: it should be embroidered with orange thread. Next, you can start creating a pair of paws - it will consist of two fingers:
- The basis of this detail is an amigurumi ring;
- then you need to make 5 sc with an increase to each column;
- using the same technique you need to knit 3 more rows;
- The second finger needs to be made in a similar way.
Then they need to be connected with a hook. Then you can start knitting the next element of the owl pillow - the wings. The wing will consist of 3 feathers:
- The short feather starts with an amigurumi ring. It requires 6 sc with an increase on each column.
- In a similar way, you should knit 2 rows.
- After this, you can move on to knitting the second feather. The technique for working on it is exactly the same, only you make one more row.
- The third feather is knitted according to the above-described pattern, increasing it by one more row.
Three feathers should be connected with a crochet hook using single crochet stitches. And the last detail of this pillow is the tail:
- start it with an amigurumi ring, knitting sc with an increase on each;
- knit 7 more rows in the same way;
- 3 rows – without adding or decreasing loops;
- then sc with decrease;
- 2 rows – without changing the number of loops.
After all the parts have been knitted, you should sew them to the body. You will get a beautiful crochet owl pillow.
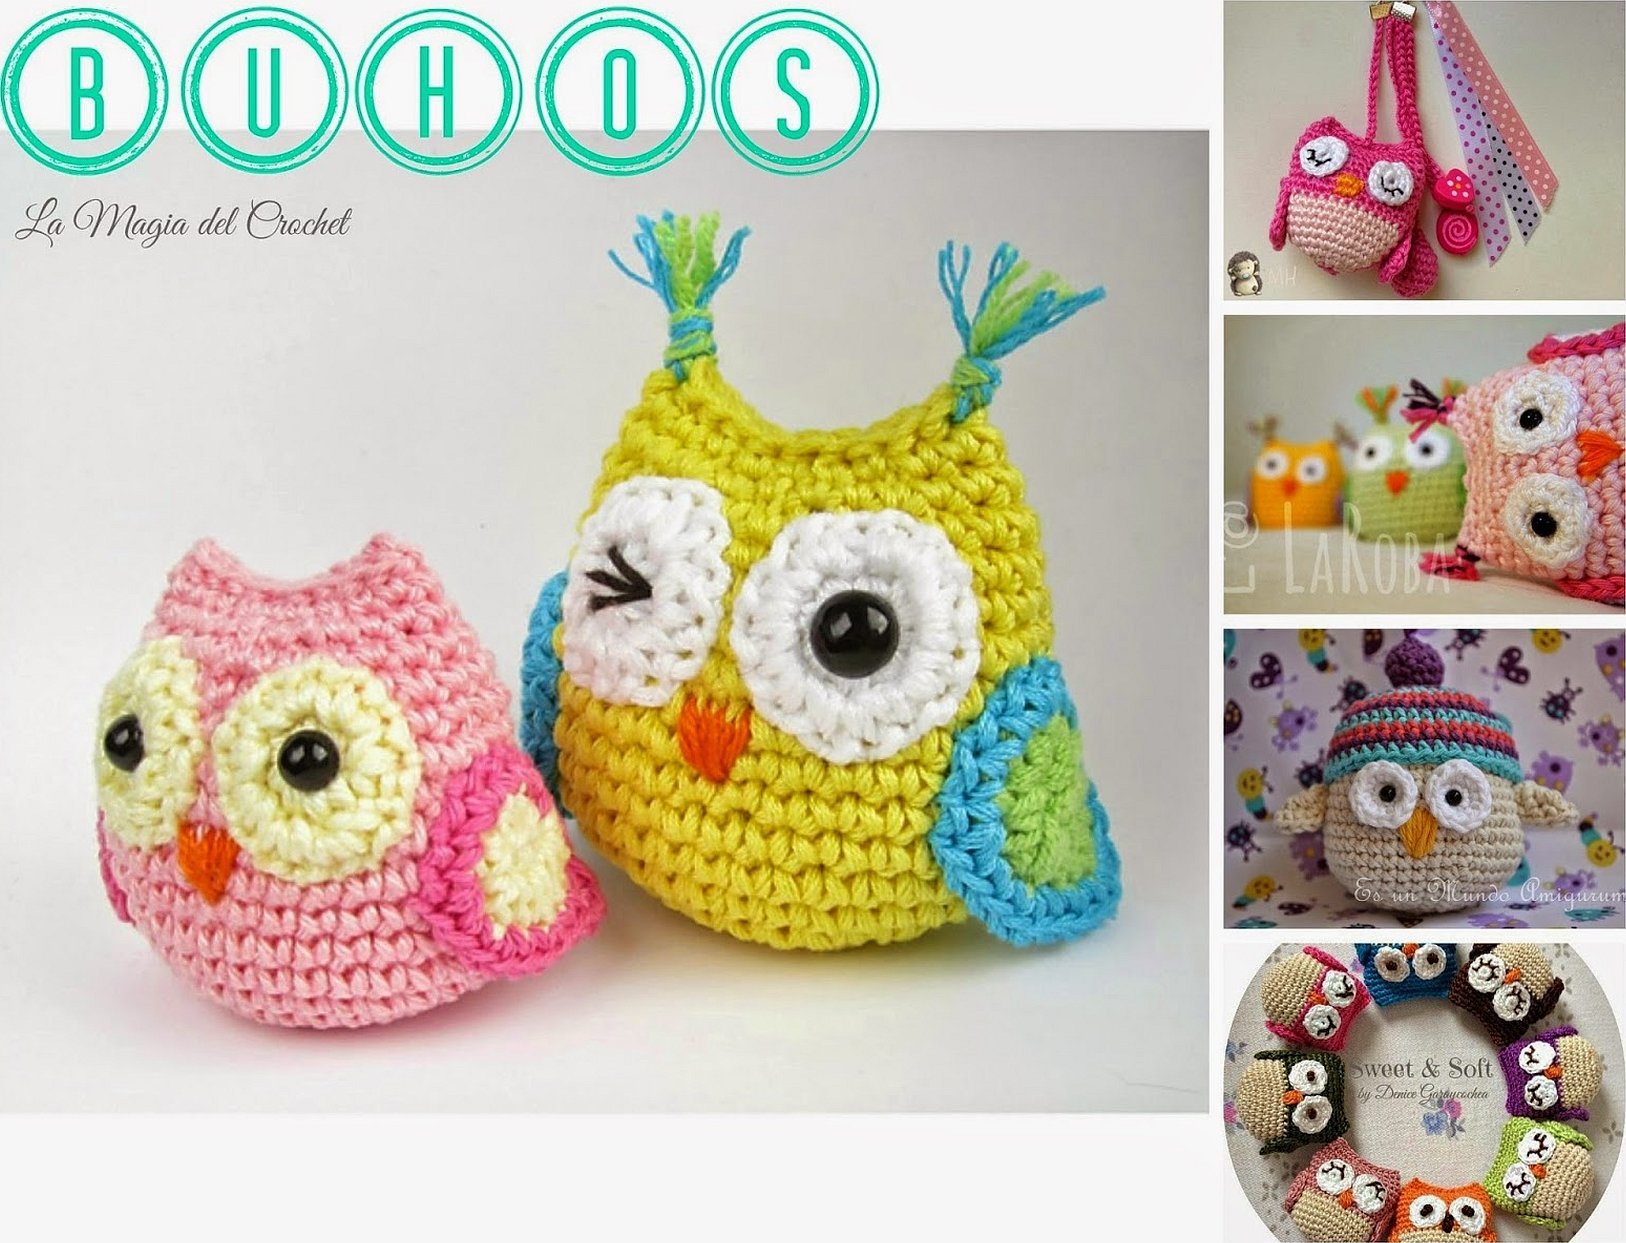
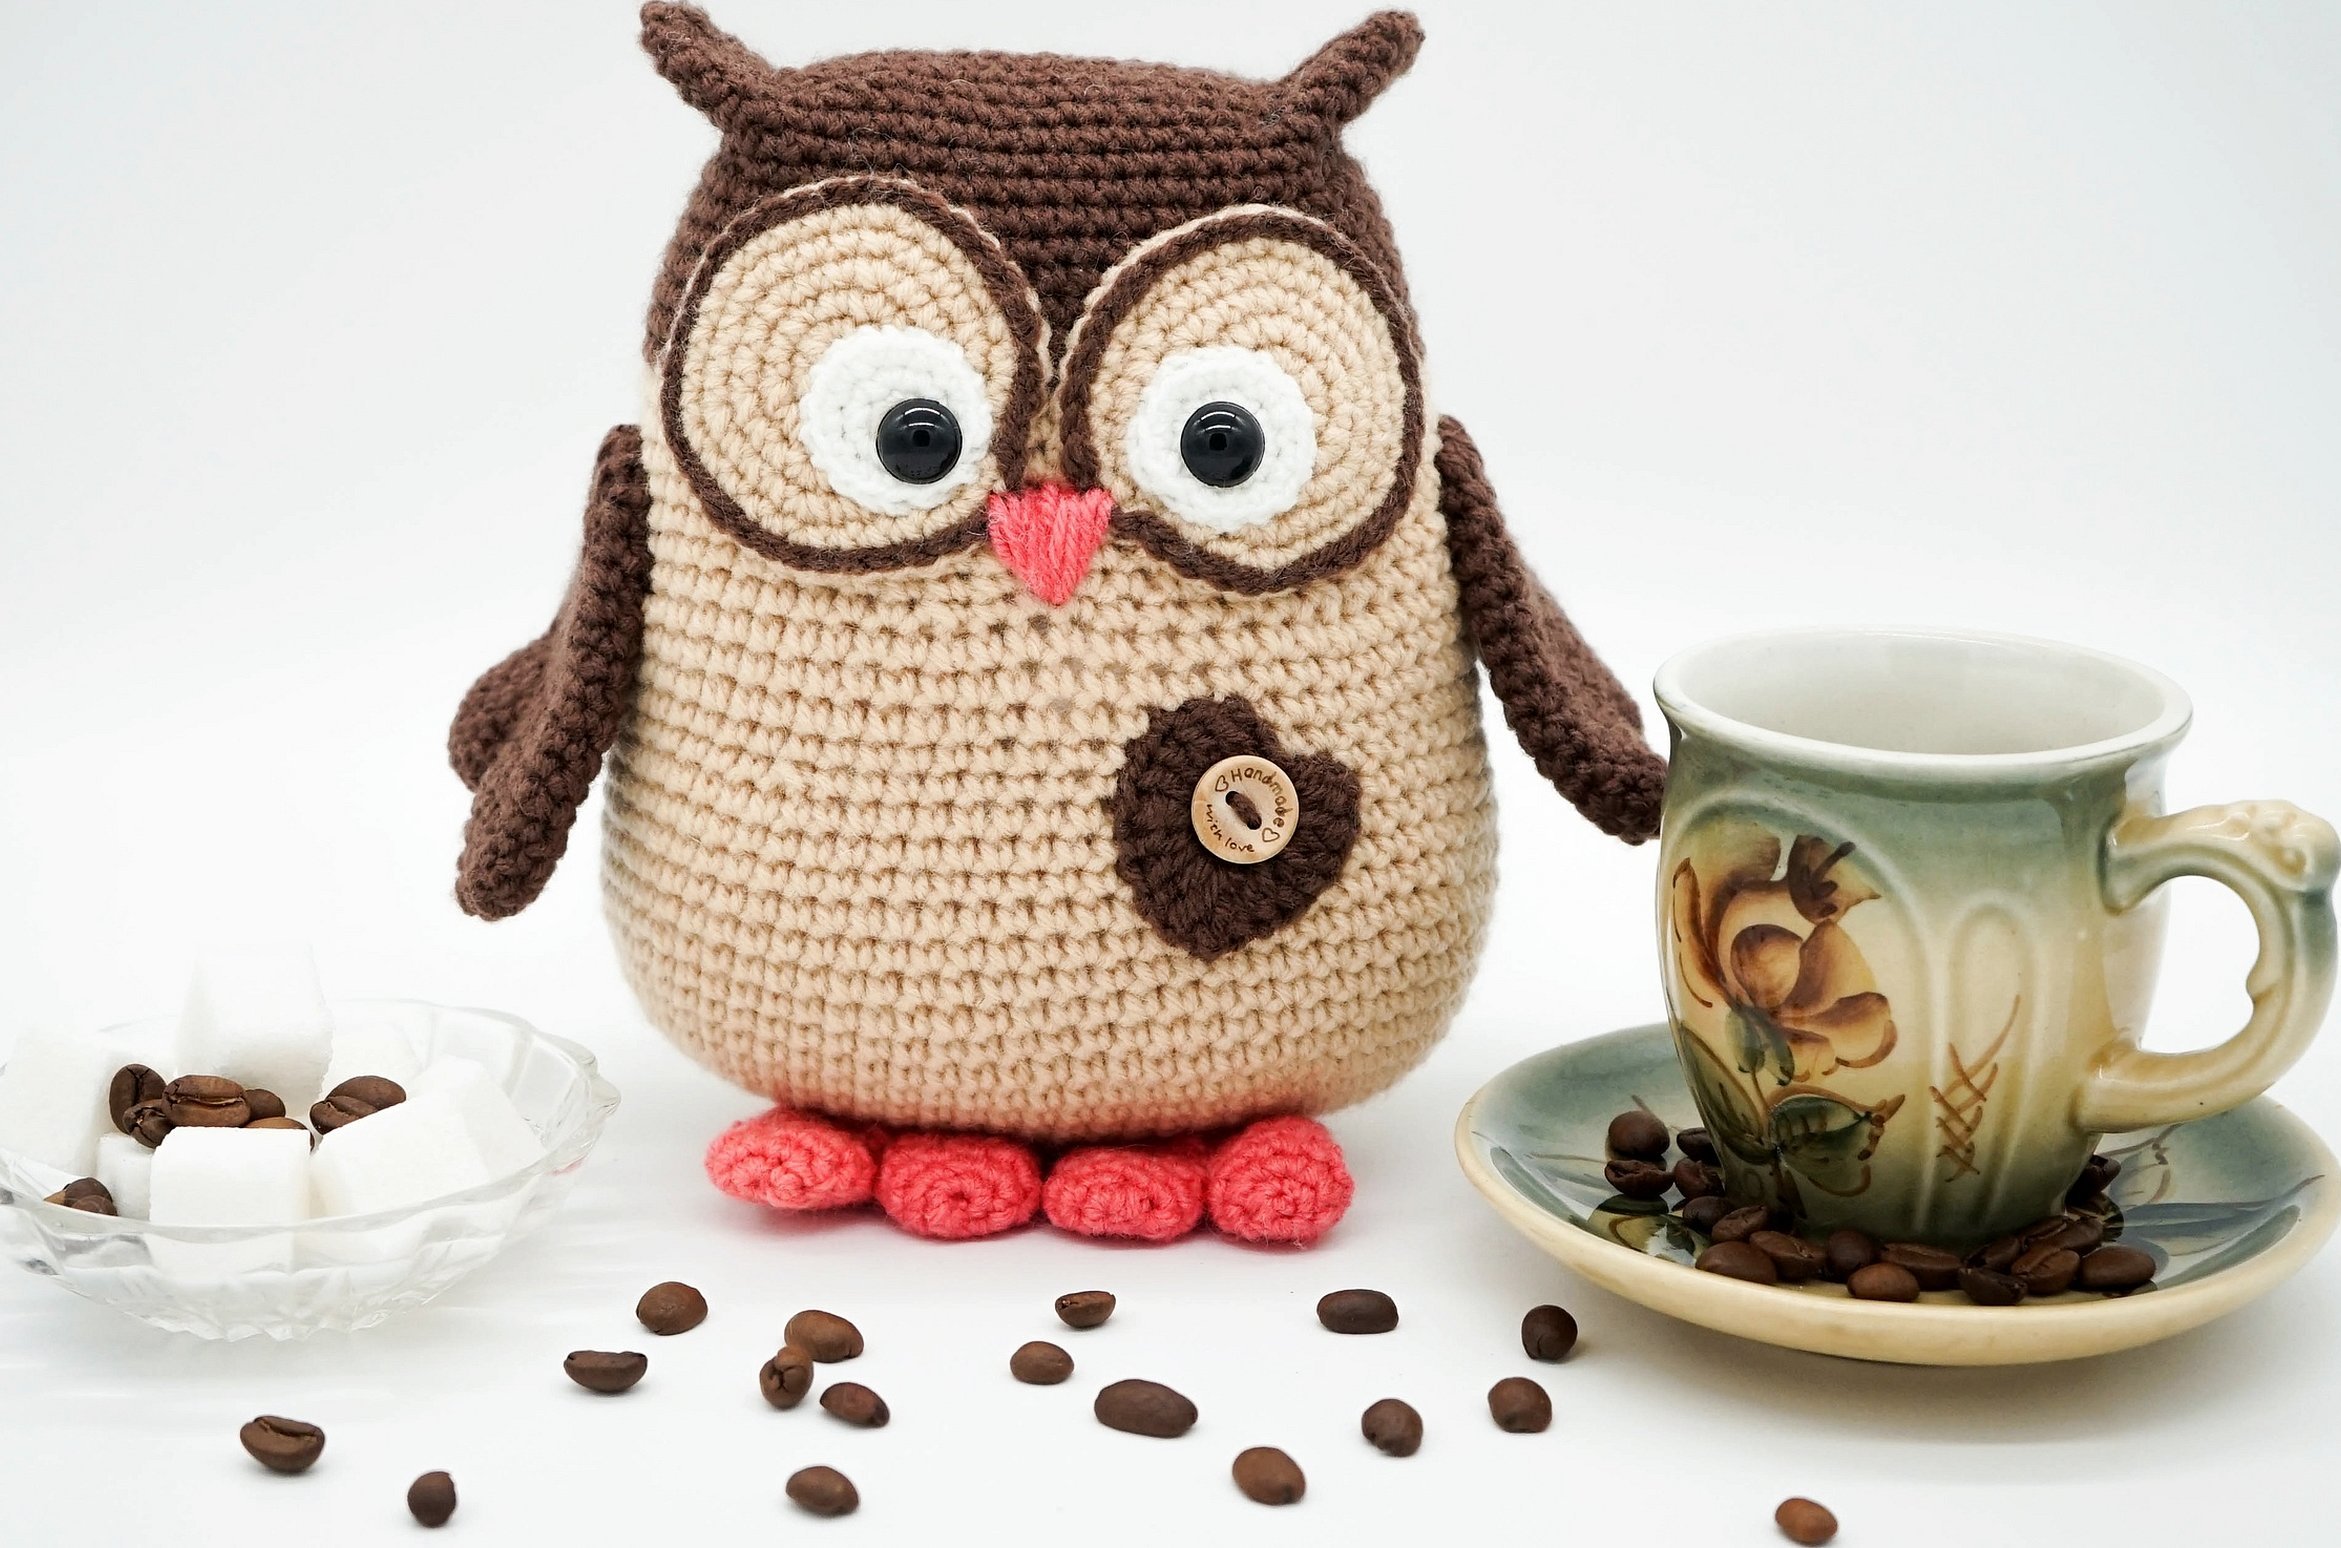
How to knit a owl: description, knitting patterns
The owl will be a great gift for a child or a beautiful interior decoration. The eyes should be crocheted as in the pattern described above. Also, beads or small felt circles are added to them. The head-body is a single piece that should be made using the amigurumi technique:
- First you need to knit a ring;
- Next – 18 rows with sc adding additional loops.
Then the needlewoman needs to choose another color to knit clothes for the bird. The knitting technique remains unchanged until row 35. Then you need to take the original yarn and continue creating the toy. The technique is the same, only instead of adding loops, you need to decrease their number. Having completed 40 sts, you need to stuff the splyushka with filler, and knit 3 more rows, decreasing the number of loops.
To create the wings, use the amigurumi technique. They consist of only one feather. On its half, you need to change the color of the yarn to knit the sleeves. The paws are created according to the MK described above. When all parts of the toy are ready, they are attached to the bird's body.
Knitting an owl from plush yarn: models for beginners
Toys made from plush yarn are especially pleasant to the touch, so it is often used to make gifts for children. However, when working with this material, you need to take into account some of its features:
- It is impossible to knit an amigurumi ring from plush threads. The circle will not be even, the loops will be too stretched, and the thread itself will crumble during knitting.
- Experienced needlewomen advise burning the end of the thread. This is necessary to prevent the yarn from crumbling during the work.
- You don't need to pull the thread to unravel the stitches, otherwise the entire row will unravel.
- For crocheting, it is better to use a simple knitting technique: double crochet and single crochet, because complex openwork patterns will be difficult to make and will not look as beautiful as on other types of yarn.
Plush toys are hypoallergenic, so this material is often chosen for knitting. The peculiarity of the work is that the body is not knitted like amigurumi. You can knit two separate parts, the edges of which are then sewn together, stuffed with filler and the plush toy is ready.
The pattern and description of crocheting an owl from plush yarn are similar to those described above. You can diversify it by knitting clothes for the bird. Or instead of ears with tassels, make them in the form of a hairstyle - two spiral tails. To make the product original, you can sew or glue an applique. Some complement them with sneakers or a hat.
The image of an owl is very popular now. Therefore, it is not surprising that there are many schemes on how to make a cute toy or an original pendant. If the needlewoman has "grass" threads, then a wonderful panel with the image of this bird will be obtained.


