Since ancient times, toys have been not only fun for children, but also an opportunity to spend time doing handicrafts with benefit for themselves and others. Toys can be made from various materials. But what is offered in the article is an exclusive novelty. Cute nylon dolls are a modern and unusual image of a toy.
- Toys from nylon tights: ideas for creativity
- Necessary materials and tools
- Preparation of nylon
- How to make a doll from nylon tights and a plastic bottle
- Secrets of tightening the face and forming the facial expressions of a doll
- Master class on making nylon dolls in pictures
- Buttocks made from nylon tights
- Master class on how to make a popik from nylon
- Tumbler dolls
- Frame dolls made from nylon tights
Toys from nylon tights: ideas for creativity
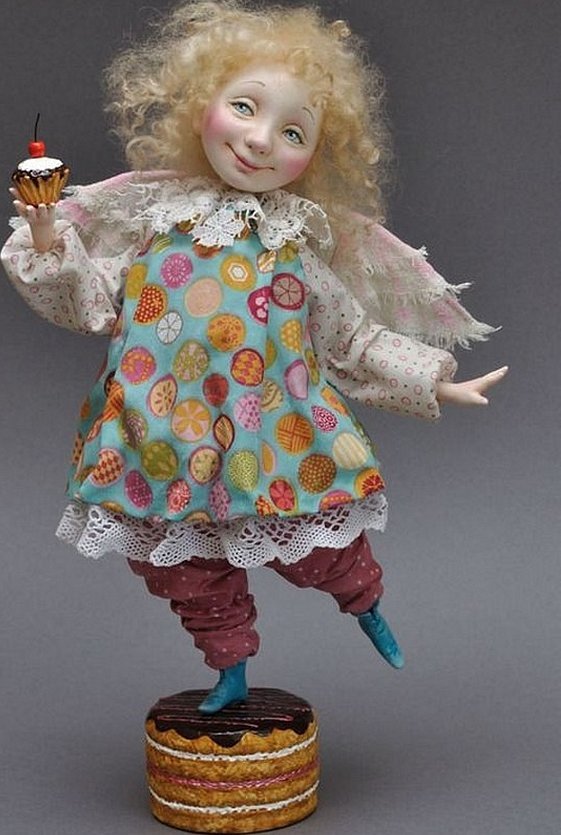
Nylon tights are not only clothes, but also an excellent material for beautiful and unusual crafts. Why nylon? The answer is extremely simple. On its basis, you can easily make all the fine details on the toy, giving it realism. The fabric is very elastic, and this is the main advantage in such crafts, since you can easily deform the workpiece, carefully trim it. There is no need to embroider a lot on the toy, you can simply give it shape with auxiliary details. If you approach the work with special meticulousness and perseverance, you can create a beautiful interior element for your home or a wonderful gift for loved ones and friends.
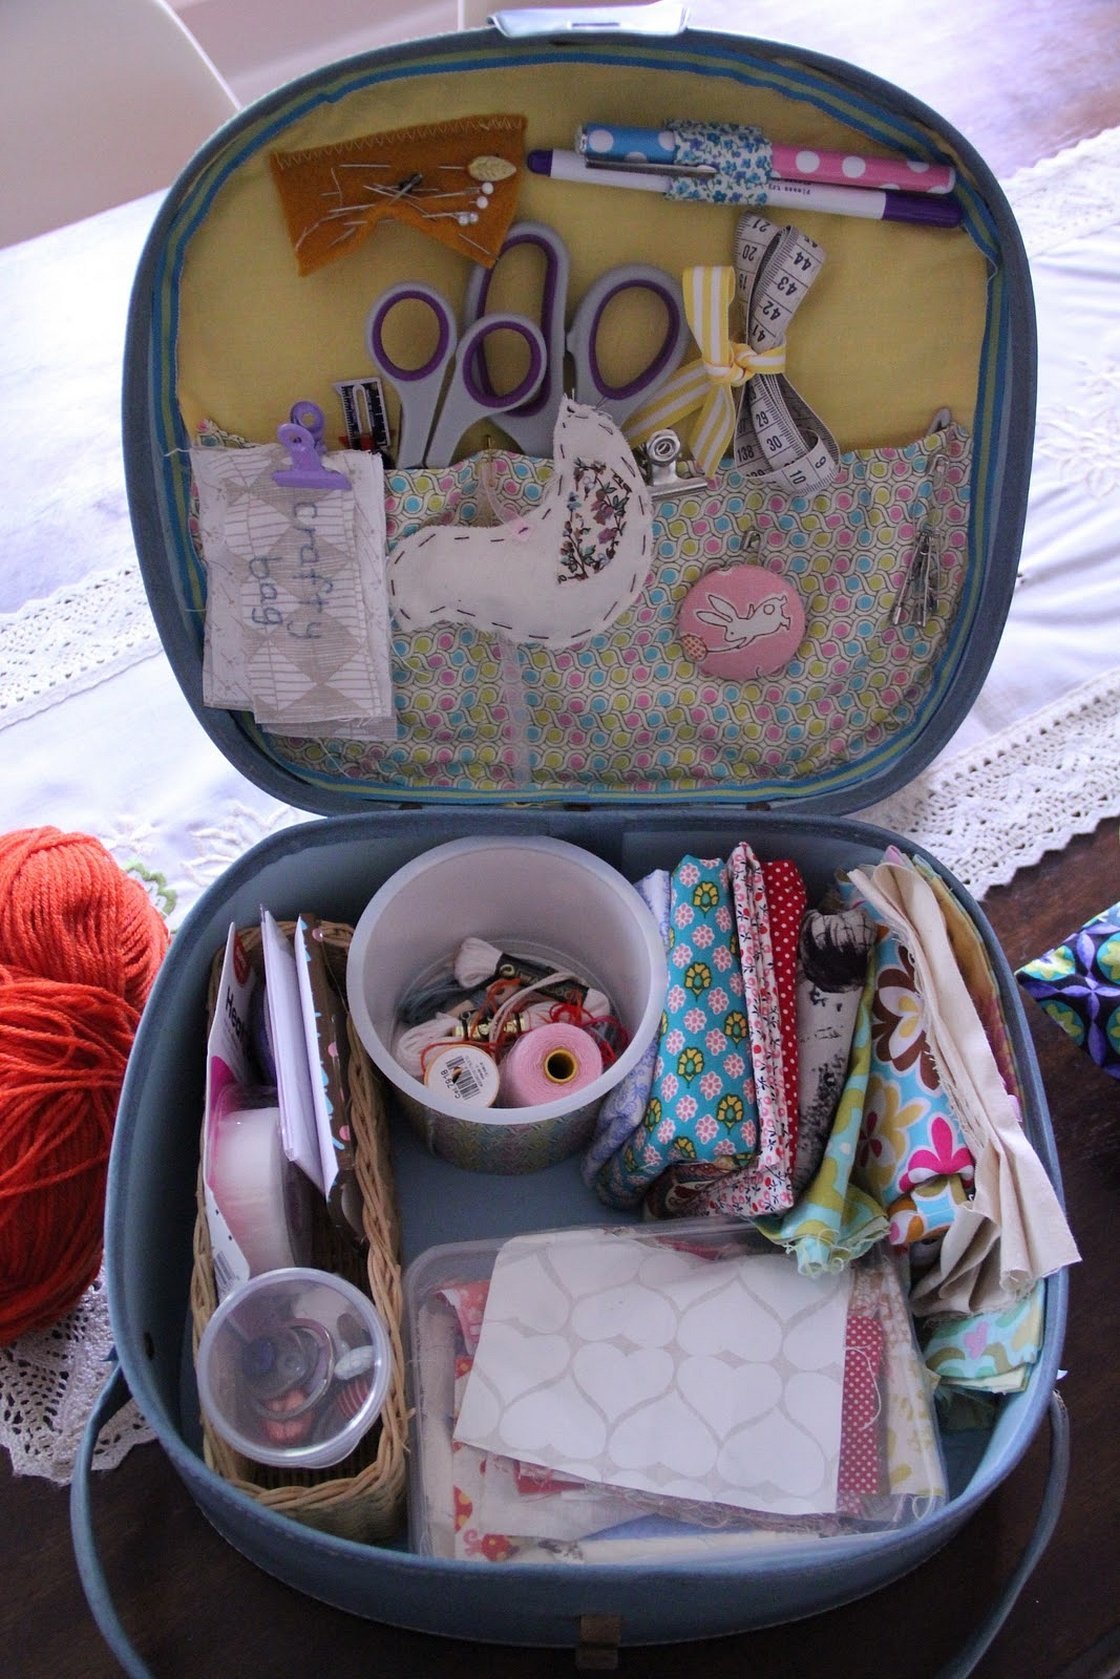
Necessary materials and tools
To create a doll with your own hands from tights you will need:
- plastic bottle (any volume at your discretion);
- strong wire that can be bent by hand (aluminum or copper);
- scissors;
- PVA glue;
- nylon tights (pre-boiled);
- a set of flesh-colored needles and threads;
- colorful scraps of fabric to create clothes for dolls;
- stuffing for dolls (synthetic padding, holofiber, synthetic fluff);
- knitting threads (they are needed to make hair for future dolls);
- acrylic paints;
- small buttons.
Preparation of nylon
Before you start making a doll from nylon and synthetic padding, you need to process the main material - nylon. First, you need to learn how to boil tights. This gives nylon greater elasticity and softness.
Step-by-step description of actions:
- Add 500 mg of bleach to a liter of water. Place the pan with the solution on low heat.
- The tights must be dipped into the solution and boiled, stirring them in boiling water for 15 minutes.
- The color will change over time, so after 15 minutes of cooking they will have a pinkish tint turning to yellow.
- It is necessary to take out the contents, place them in another container and rinse with running water with conditioner (for softness). Let it stand for 15 minutes.
- Gently squeeze out and then dry the tights. The result will be lighter, softer and more elastic tights, ready for further use.
Please note! To ensure the color is evenly distributed, it is advisable to boil only one pair of tights, maximum two. It all depends on the frequency of stirring and the concentration of bleach in the water.
How to make a doll from nylon tights and a plastic bottle
A doll made of nylon tights and a plastic bottle is one of the main ways to make a toy. For beginners, a bottle will help determine the shape of the doll.
DIY pantyhose dolls step by step instructions:
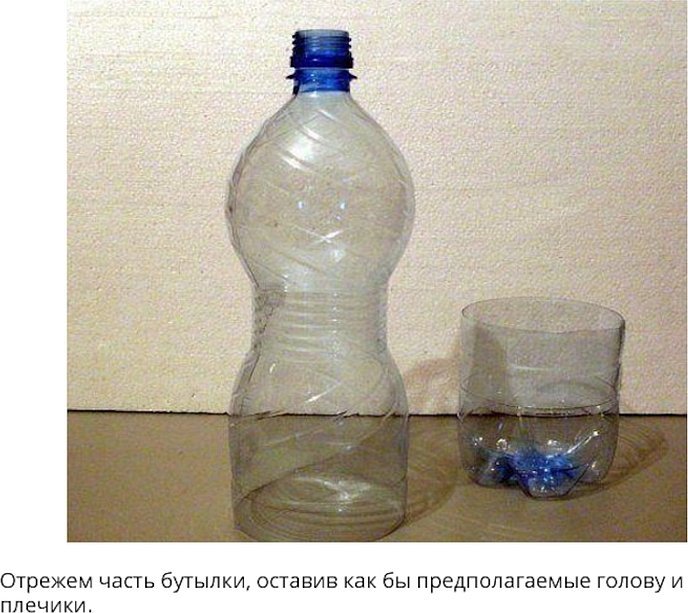
- You should cut the plastic bottle into two parts. One will serve as a model for the head, and the other for the body.
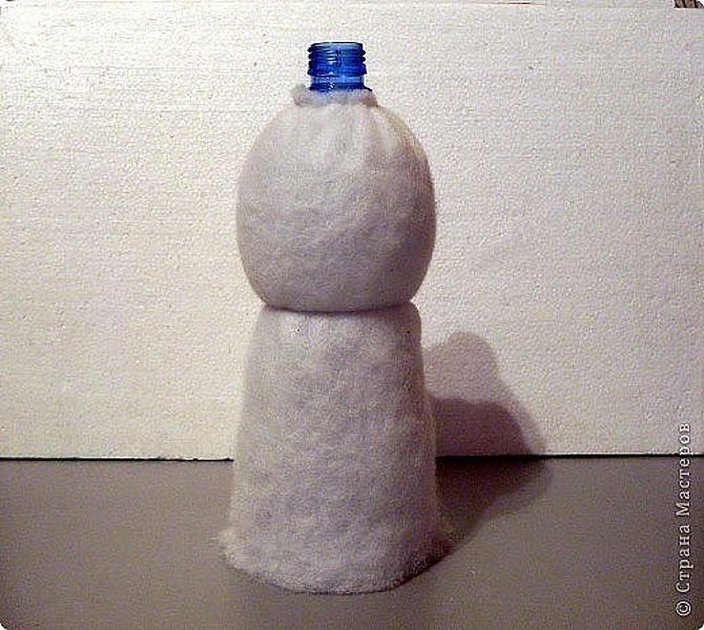
- Wrap most of the bottle with padding polyester. The material should fit snugly around the bottle.
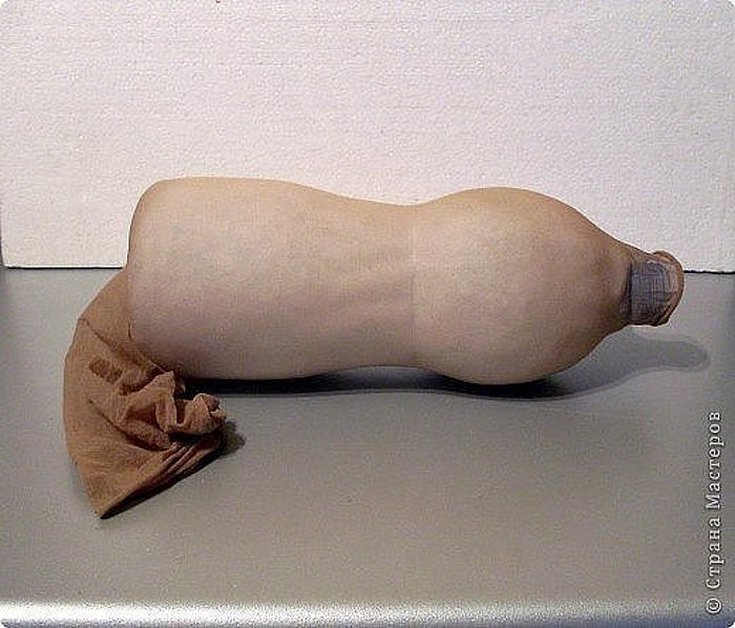
- Pull the tights over the bottle. The tights should be big enough, but you need to pull them on carefully.
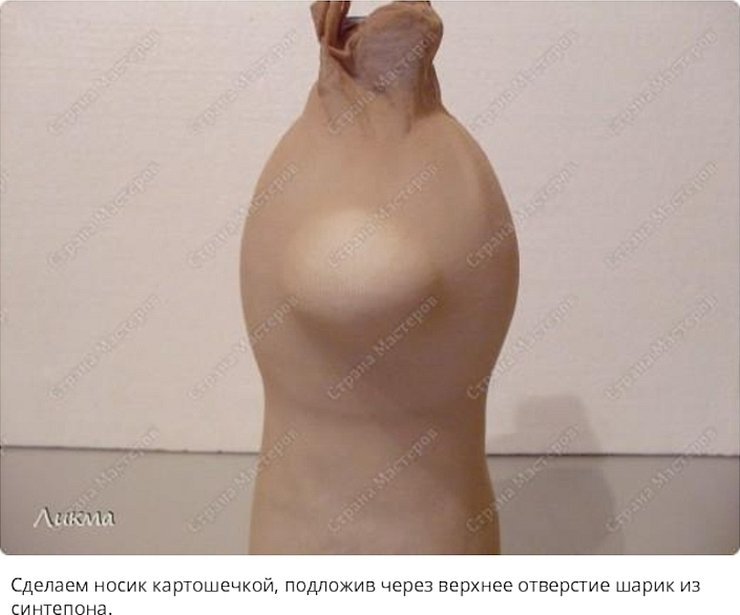
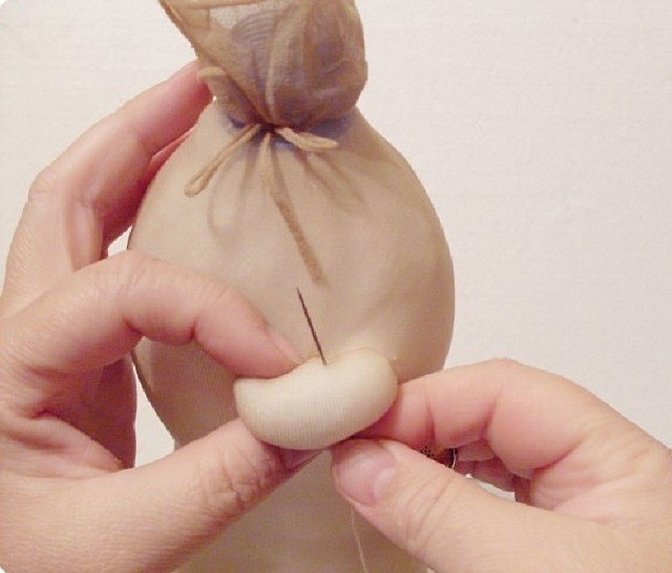
- Roll a relatively small ball and place it under the nylon.
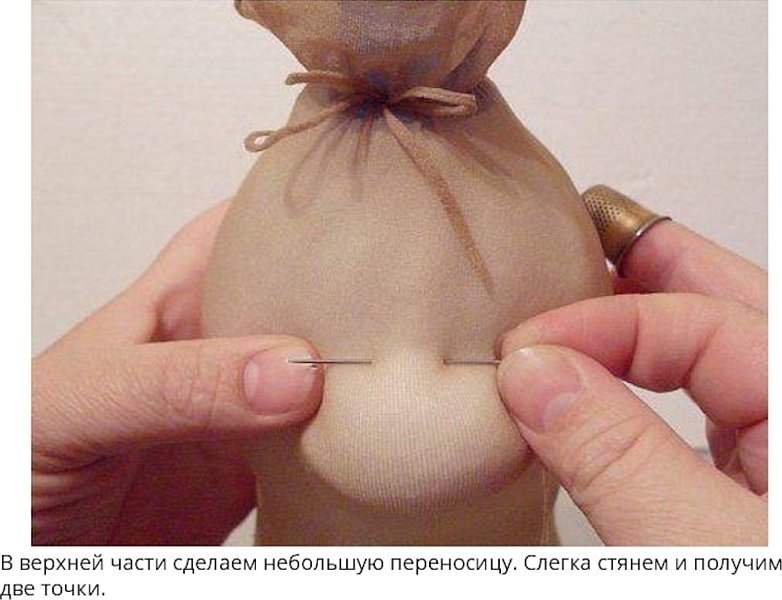
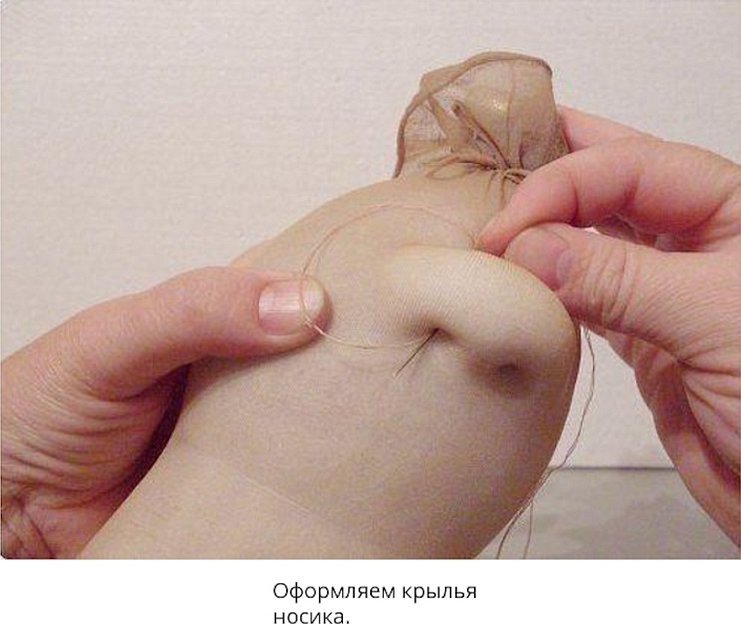
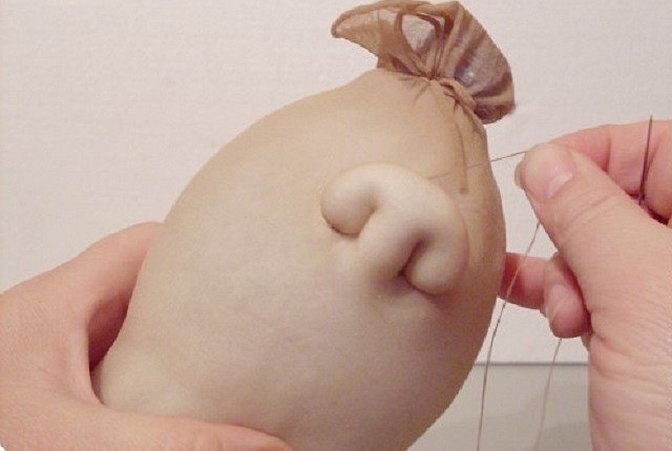
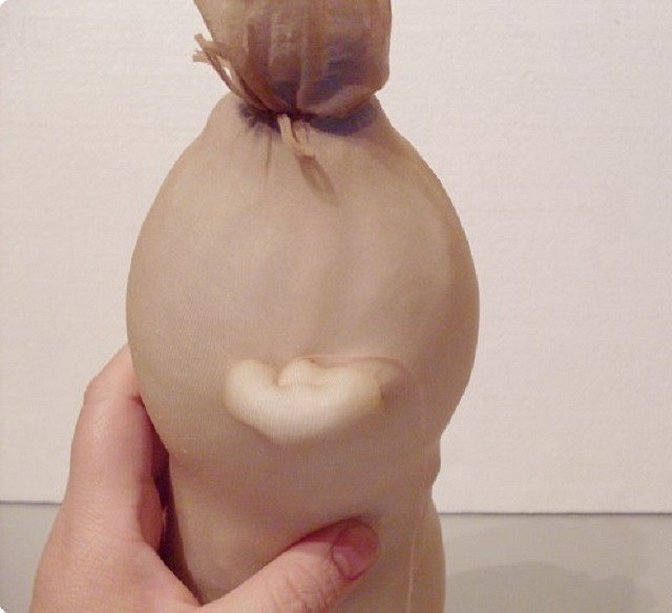
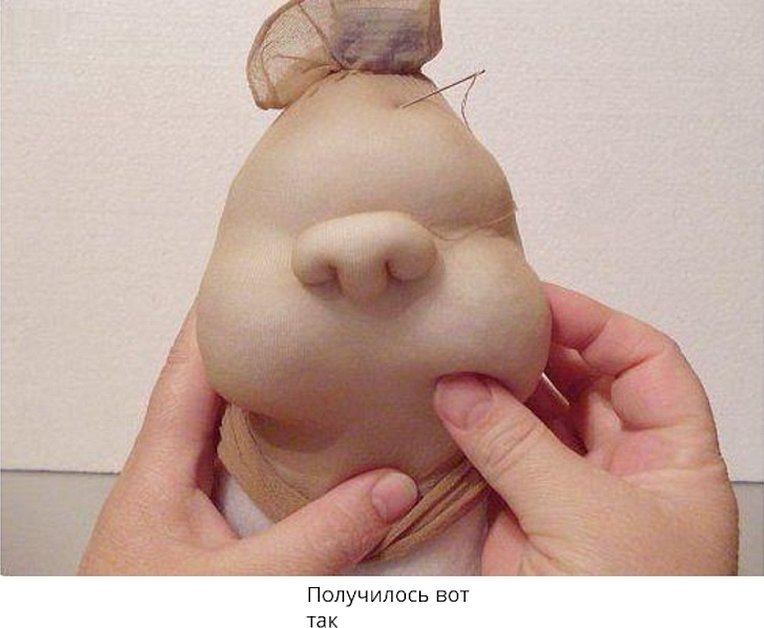
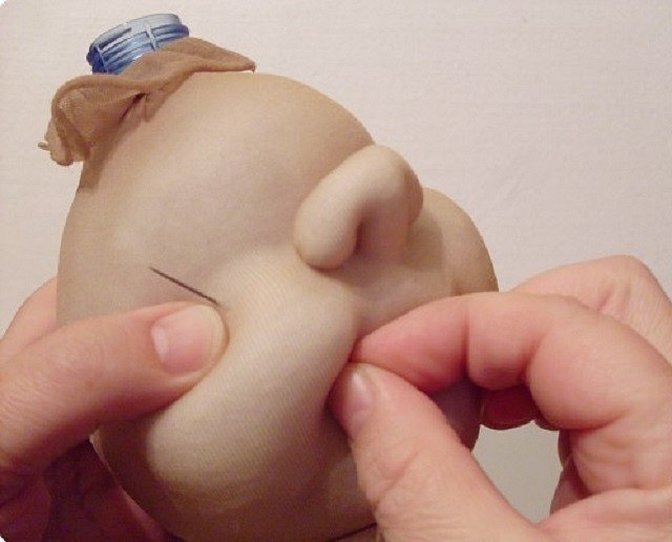
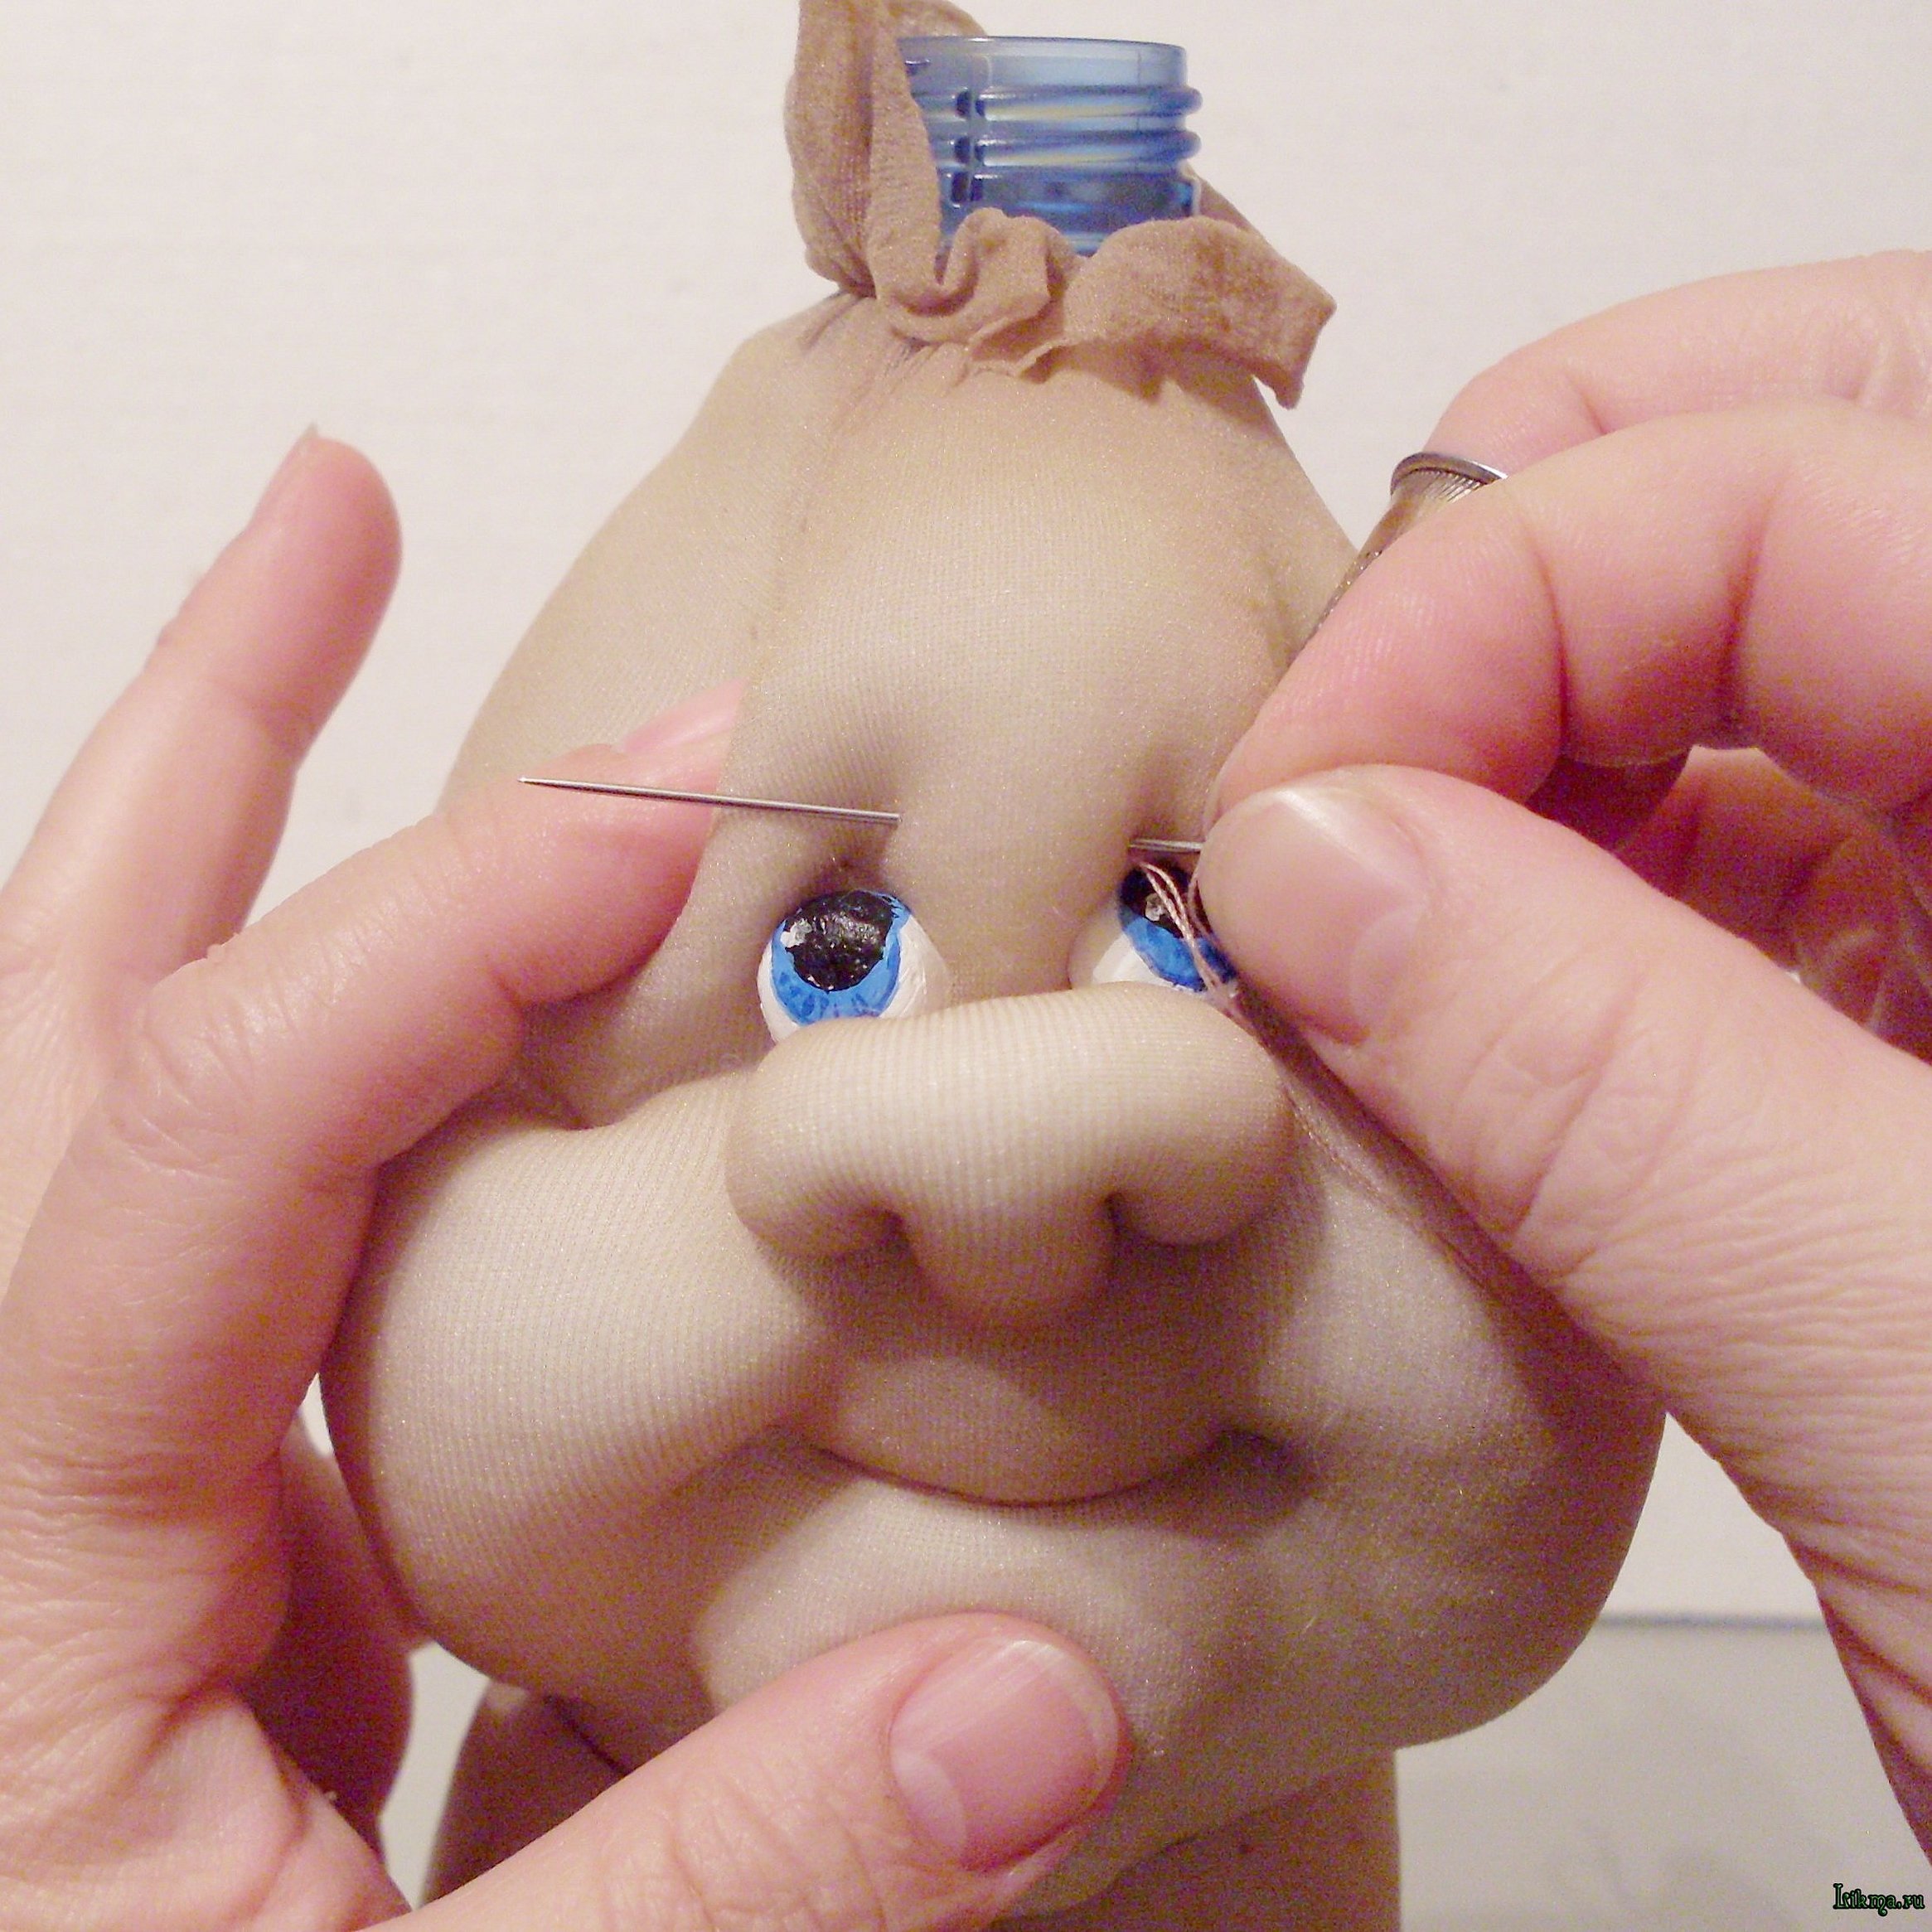
- Tie the part of the tights that will be in the way later. Pierce the upper part of the nose with a needle and, tightening the thread, make the bridge of the nose.
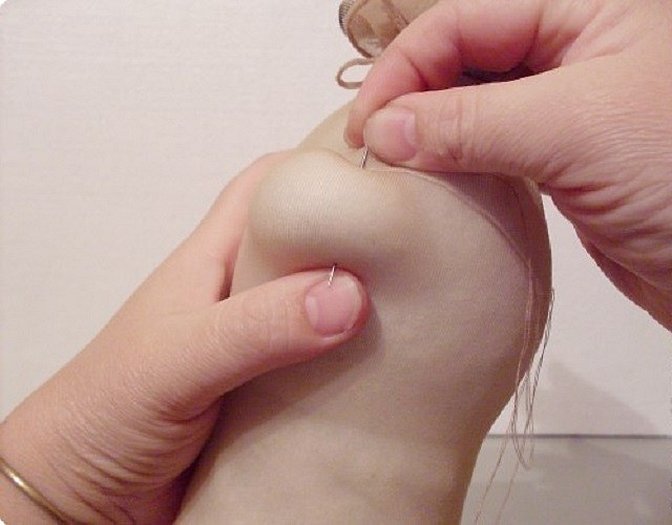
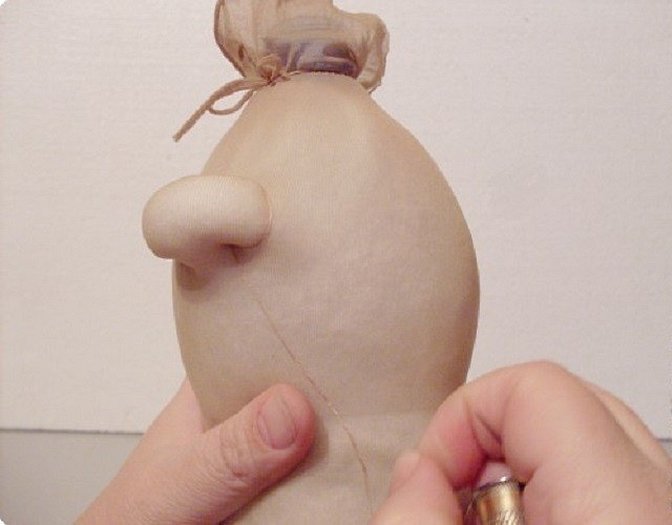
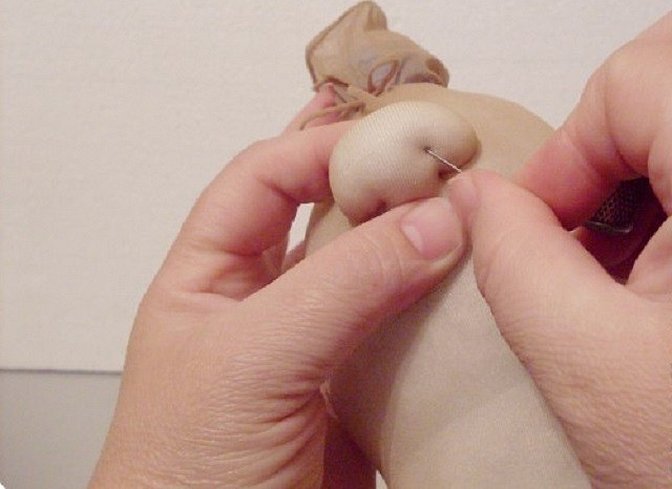
- Pierce one side of the nose from the top to create a nostril.
- Do the same with the second nostril and see if you get the same result as in the picture.
- Make the wings of the nose by inserting the needle through the left and right nostrils.
- To make the shape of the nose more natural, do several of these manipulations.
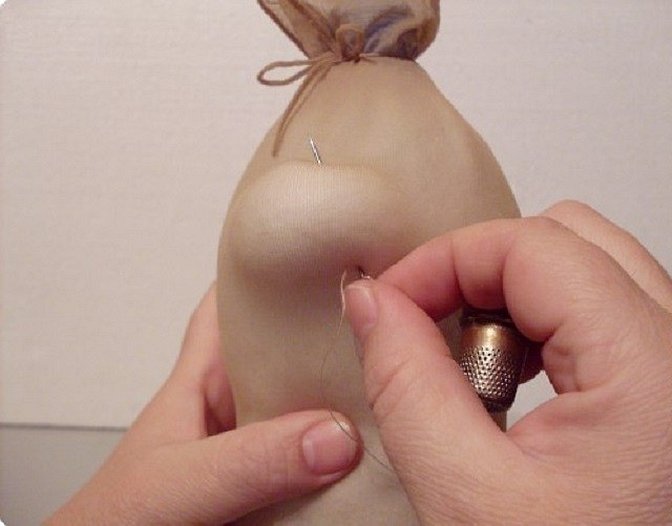
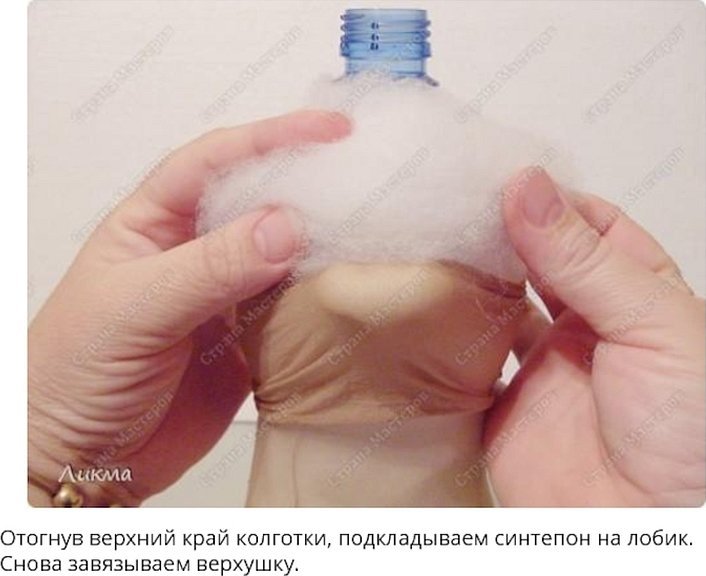
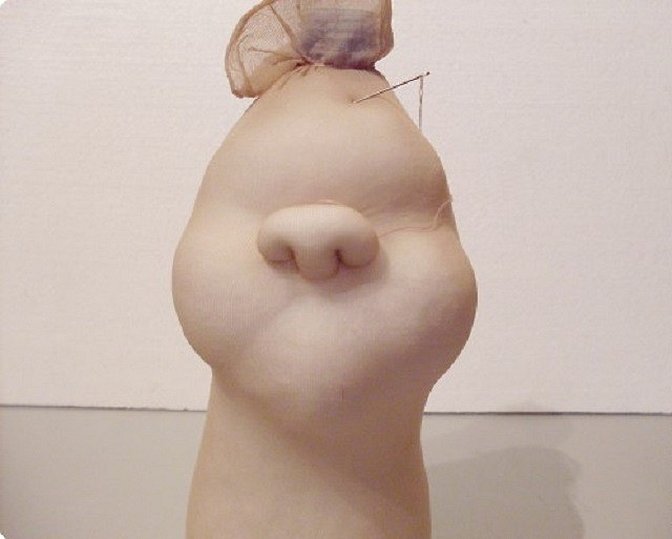
- Pull the top part of the nylon a little and put some padding polyester in the place where the forehead will be located. Then tie the top part of the tights again.
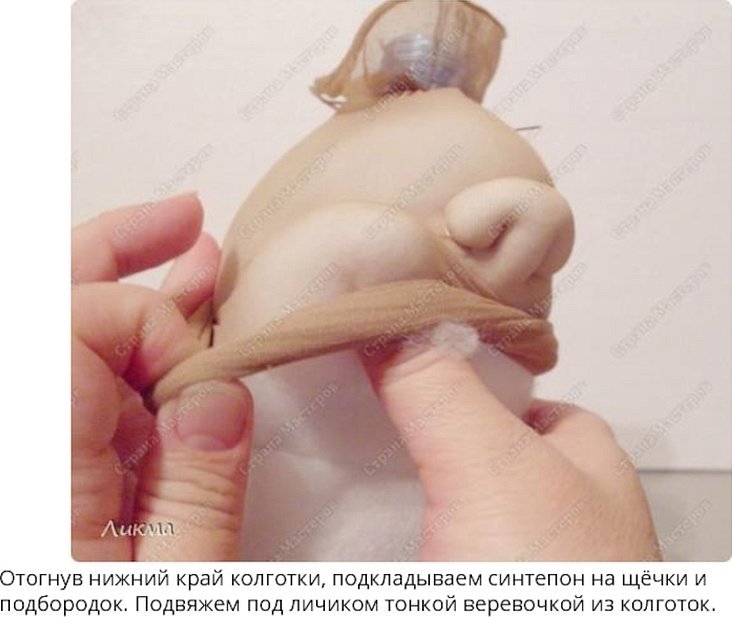
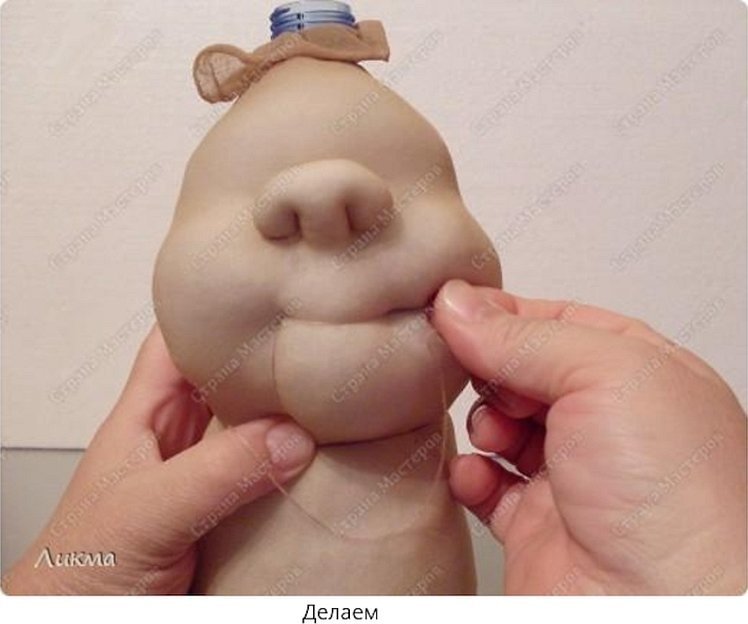
- Pull up the bottom of the tights to carefully push the stuffing into the intended place for the future doll's cheeks.
- Do the same with the toy's chin to create a full-fledged face shape.
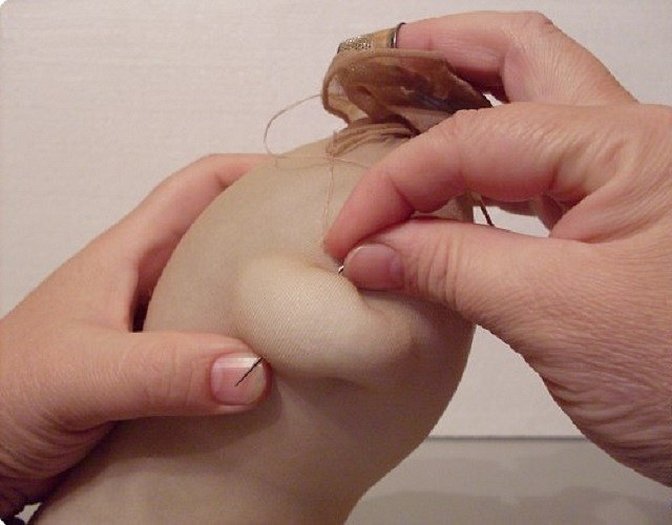
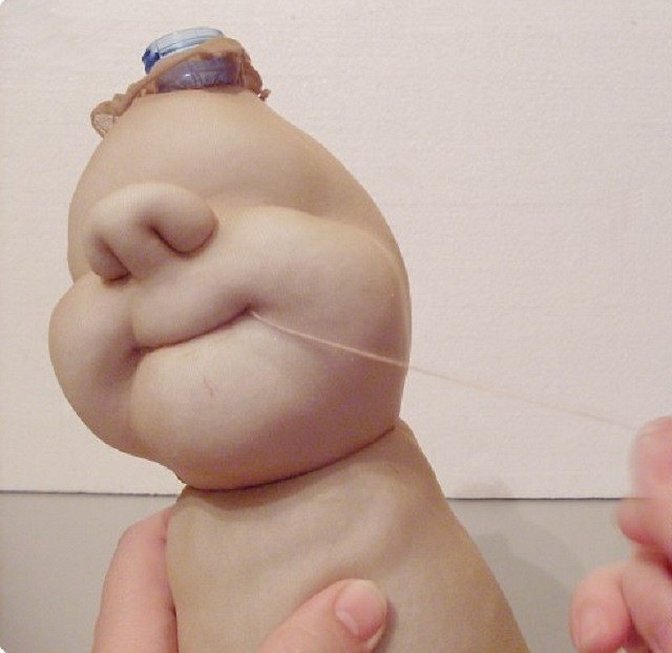
- Pierce the approximate starting point of the mouth in the left corner and draw it to the right corner. The mouth will be expressive.
- Tighten your lips a little to make them look more realistic and beautiful.
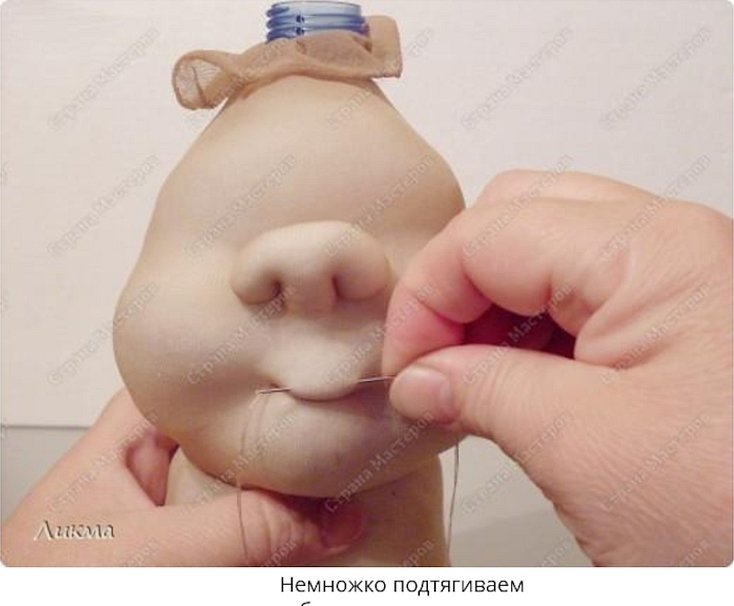
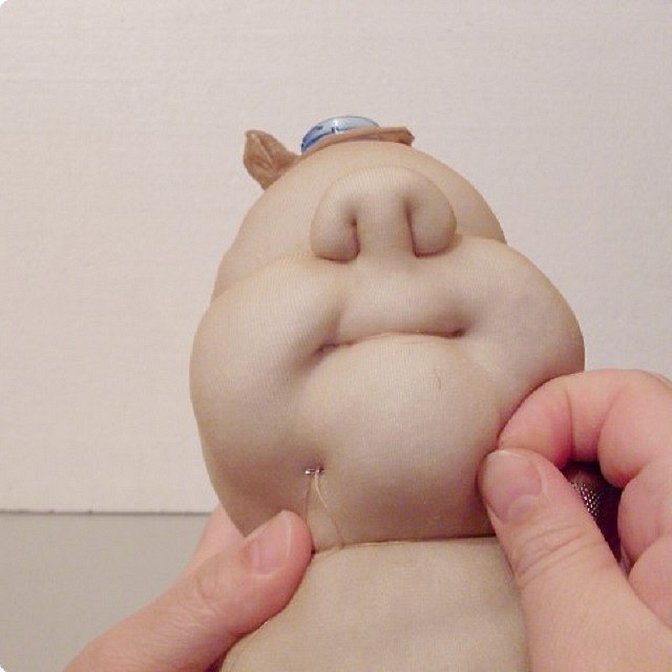
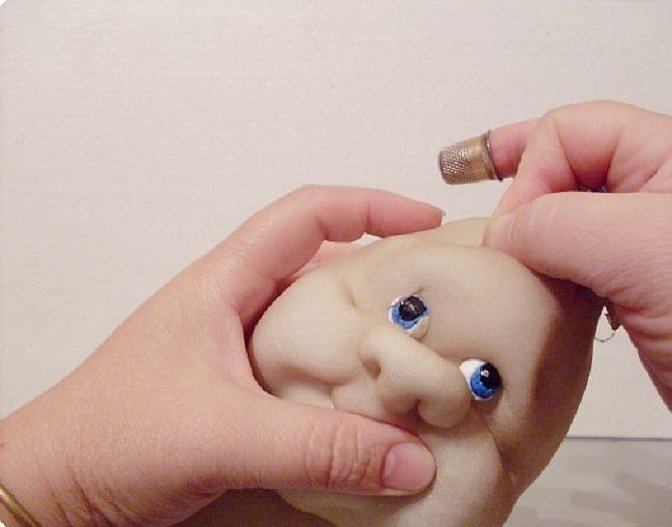
- Make some tightening to emphasize the shape of your cheeks.
- The chin is also an important element of the toy's face; it needs to be highlighted in the same way as the cheeks.
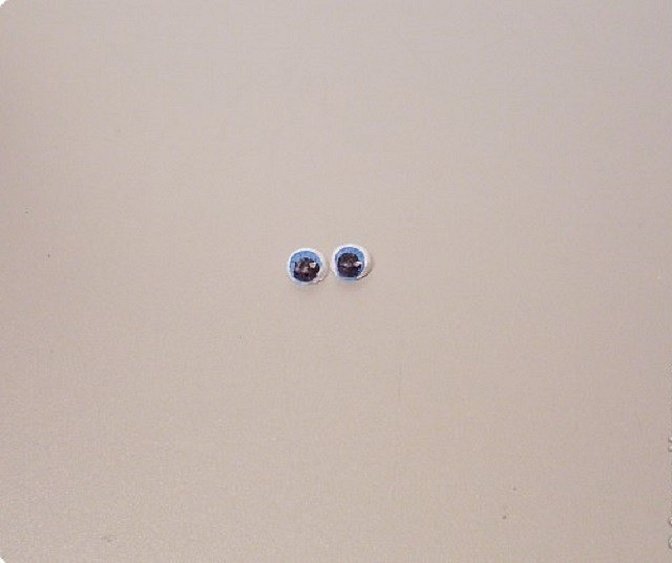
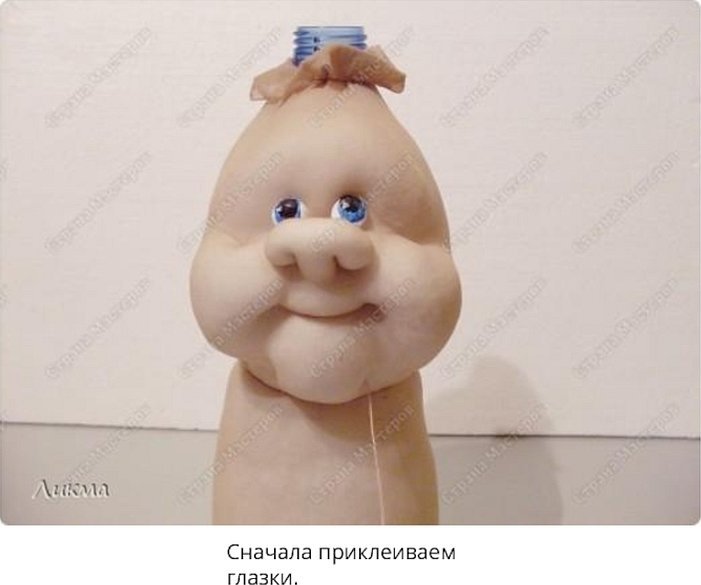
- You can buy doll eyes at a hardware store or take them from an old doll. You can also make them yourself from plaster.
- Use PVA glue to glue the eyes to the face.
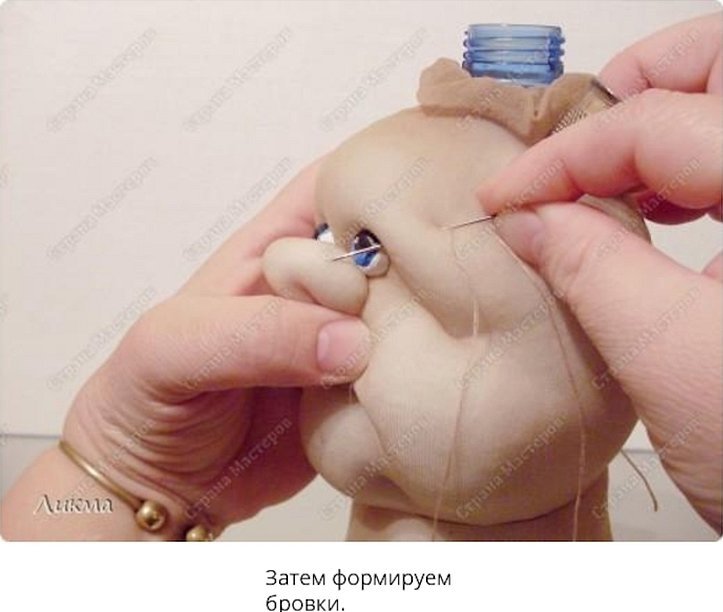
- Now you need to make the eyebrows. To do this, you will have to pick up the needle and thread again.
- The left and right eyebrows should be brought together with a few stitches.
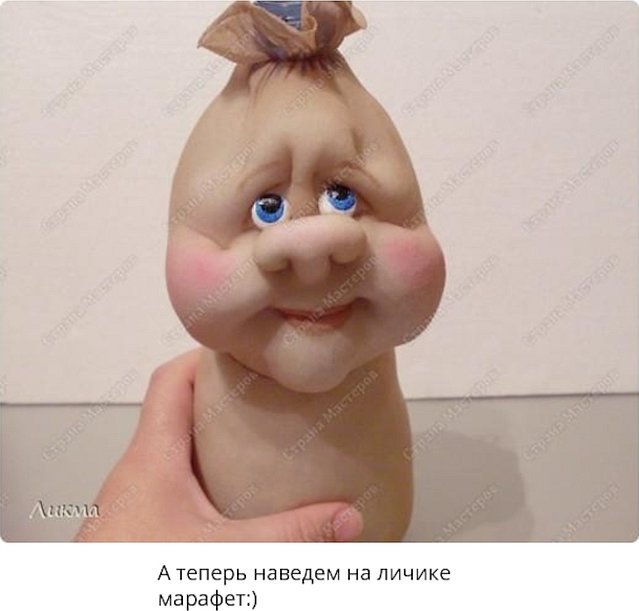
- Now you can paint the doll. To do this more accurately, it is better to use cosmetics.
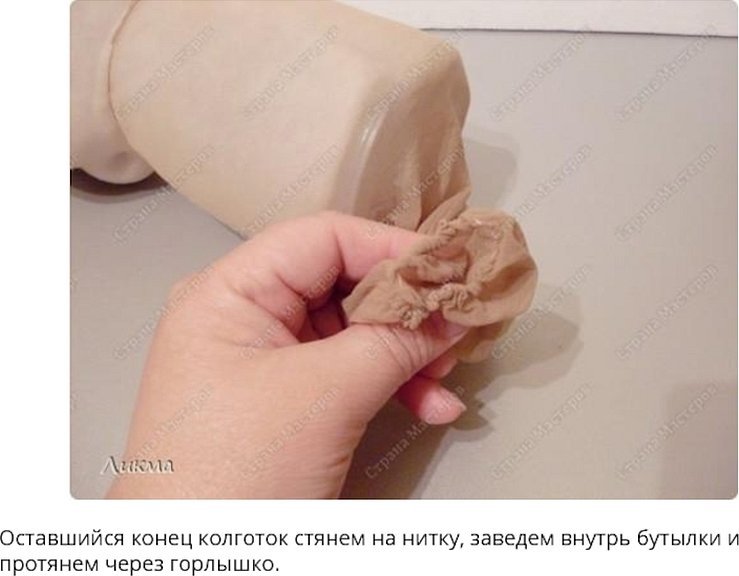
- Pull the remaining end of the nylon tights onto a thread and pass it inside the bottle.
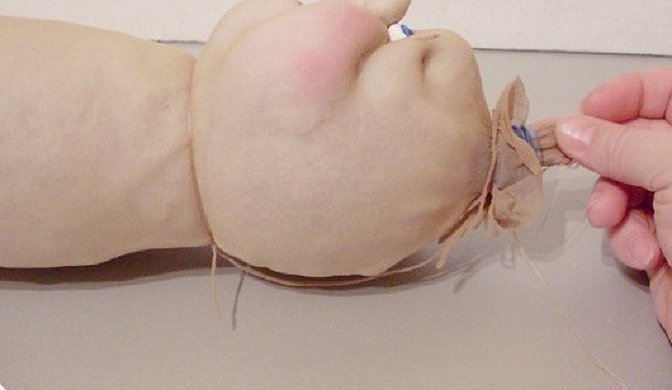
- Pull the top end of the tights from the body through the neck of a plastic bottle.
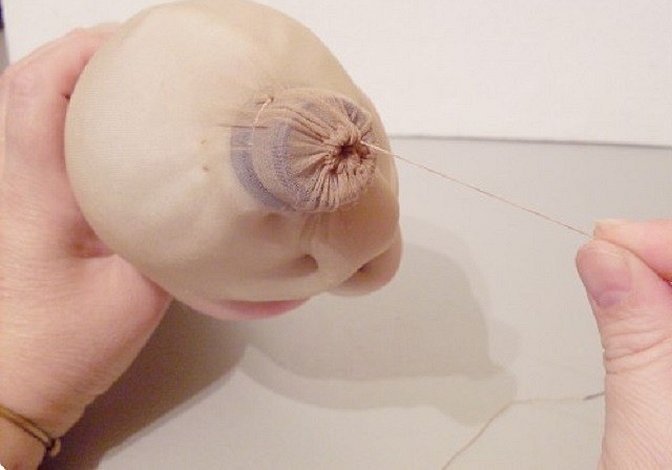
- Tighten both ends of the nylon.
- The rest of the decor is a matter of taste and color. The basis for the hair is knitting threads, and the finished wig can be sewn or attached at your discretion.
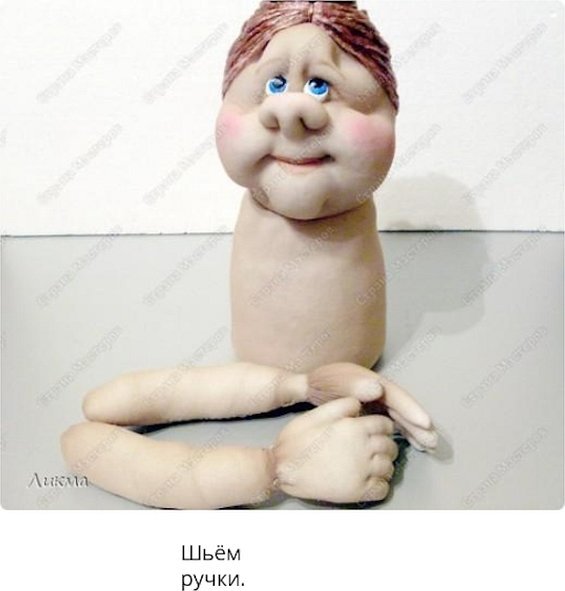
- Make a blank of the hands from wire and wrap it with the available material. Put the tights on the doll's hands in the same way as on the bottle earlier. Sew the hands to the body.
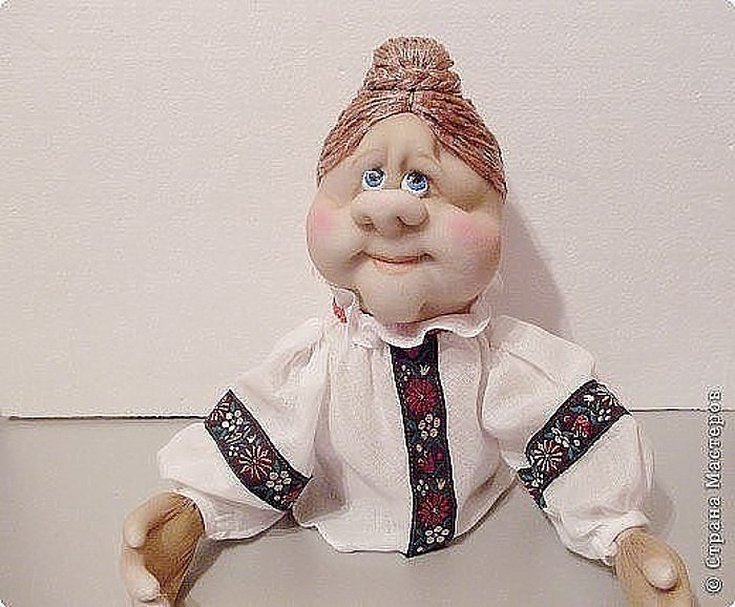
- The doll's clothes depend on the performer's imagination.
- The doll is ready. You can put it anywhere in the house, the main thing is that it always pleases with its appearance.
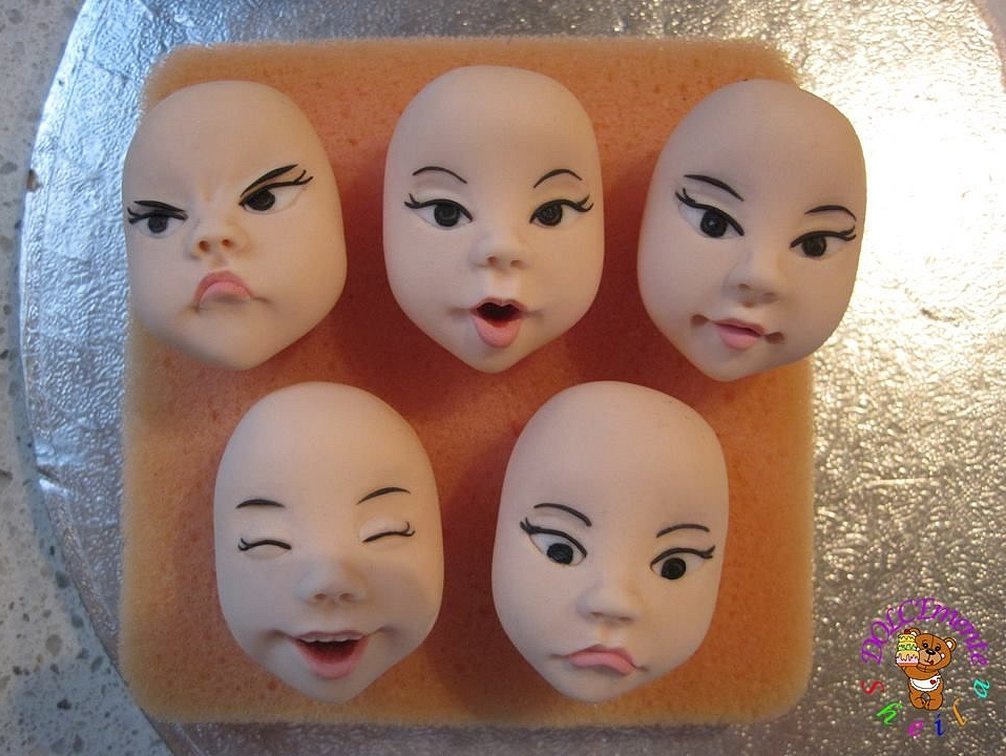
Secrets of tightening the face and forming the facial expressions of a doll
To gain experience, a beginner needlewoman needs to practice a lot. It is always nice to look at a beautiful toy, but it costs time. You can simplify your work by learning small secrets of making the doll more lively and realistic.
Please note! It is recommended to watch Irina Starkova's video and learn all the subtleties of facial expression formation.
Master class on making nylon dolls in pictures
A step-by-step MK in pictures will help you to get acquainted with the technique of making dolls with your own hands from tights in more detail.


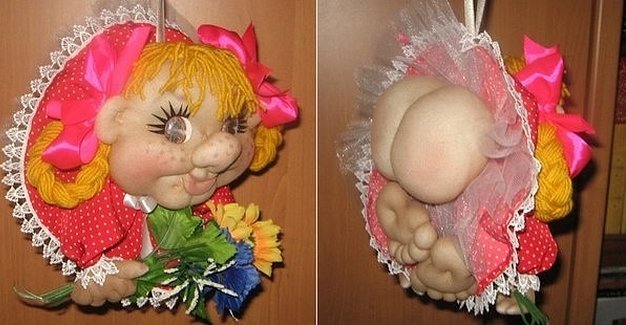
Buttocks made from nylon tights
The name of the doll exactly matches its description. It will decorate the interior and bring a lot of laughter to everyone who sees it.
Master class on how to make a popik from nylon
Making a doll starts with the face:
- Foam rubber or any other material used as a filler should be disassembled into several parts. Determine the size of the head, nose, chin, lips and cheeks.
- Then, starting from the head, insert the raw material into the already prepared nylon tights (stockings are better). Determine the location of the nose. Insert the cheeks on the sides. There should be a lump of foam rubber for the lips under the nose.
- Pull the tights down and wrap the hole with a thread so that the foam rubber does not come out. You should get a blank for the head, like a ball on a thread. The remaining nylon can be cut off so that it does not interfere with the work later.
- To begin tightening your face, you need to take a needle and thread and secure the thread to the resulting “tail”.
- You should start tightening from the nose. To do this, you need to press the lump with your fingers and bring the needle forward.
- Make several ties for the proposed bridge of the nose. When the bridge of the nose is ready, make nostrils for the doll.
- Puncture the place for the wings of the nose and bring the needle out in the cheek area. Then lead the needle up, the shape of the cheeks should be visible right away. Make a small indentation and bring the needle out in the same way, but down and secure the tightening with a knot.
- Do the same with the other cheek, first passing the needle to the other corner of the mouth.
- By the way, about the corners of the mouth. While the cheek tightening is being done, they will already be visible, so there is no need to determine the size of the lips.
- Pull the thread from left to right so that the doll's smile is visible. Remember that the thread should be sufficiently taut.
- Press your hands against your face to secure the tie above your cheeks. Step back a little to thread the needle under the center of the toy's lower lip.
- Again, make a small indentation to go up to the upper lip. Step back a little and go out with the needle to the bridge of the nose.
- Pierce the bridge of the nose and pierce the product from the back, secure all the tightening elements on the face with knots.
- Cut the thread.
- It is important not to forget to glue the eyes in place.
- The final touch is the doll's makeup. The color and shape of the eyebrows, eye shadow, blush on the cheeks and lipstick are at your discretion. The same applies to the wig.
Important! When working with the nostrils, for greater expressiveness, you need to make several ties just above the holes from the nostrils themselves, so that they do not have a rounded shape, but a more elongated one, like a real nose.
The design of the most important part of this toy – the butt:
- To do this, make a ball out of synthetic padding and place it in nylon.
- Just like with the face, just tie the resulting "ball" with a thread. And since this is a part of the body where there is no nose, eyes and mouth, then apart from the round foam rubber you won't have to put anything else.
- Attach a thread with a needle to the "tail". Then simply wrap the thread around the ball in half so that it is divided into two. These will be the buttocks.
- Pierce the base (the same "tail"), press the buttocks to tighten and do the same as in the third step. This way you can give the "soft spot" a shape. The convexity of the butt will depend on the number of tightening actions performed.
The doll also cannot do without other body parts.
Making hands:
- You don’t need to think long about how to make a doll’s palm – just bend a wire model of it.
- Wrap it tightly with foam rubber and place it in nylon.
Legs:
- For the feet, make small blanks from padding polyester: five balls for the toes and the foot itself.
- Accordingly, place your fingers and the foot itself in nylon one after another.
- Secure the thread in the place where the entire structure is tied.
- Bring the thread to the thumb, or rather to its groove, where it grows from.
- Throw the thread back and tighten it at the groove.
- The remaining fingers are embroidered using the same technique as the first one. In this case, you need to make small indentations so that the fingers do not merge into one whole.
- When the last toe is formed, the needle should be pierced to the side, make an indentation towards the big toe and bring the needle out in the center of the foot.
- Pull the thread tightly and secure it at the base with a knot.
Next, you can sew clothes from any materials you like, and sew ready-made arms, legs, and head to the body.
How to make a pop-doll can be seen in the video at the link http://youtu.be/TFQLGULIM7U.
Tumbler dolls
Tumbler dolls are cute and miniature toys made of nylon. Working on them is a great practice for beginners, because you don’t have to bother too much with them. Any thickness of nylon and even socks will do for creating dolls. They are made according to the same principle described in the section “How to make a doll from nylon tights and a plastic bottle”.

Frame dolls made from nylon tights
These stocking dolls may differ only in their sizes. In frame toys, the emphasis is not only on the head, but also on other parts of the body. The word "frame" in the name of the doll speaks for itself.
How to design the face is described in detail in the sections above. Now you should learn how to make the base for the doll - its frame. First, you need to draw a model that will help determine the size of the toy.
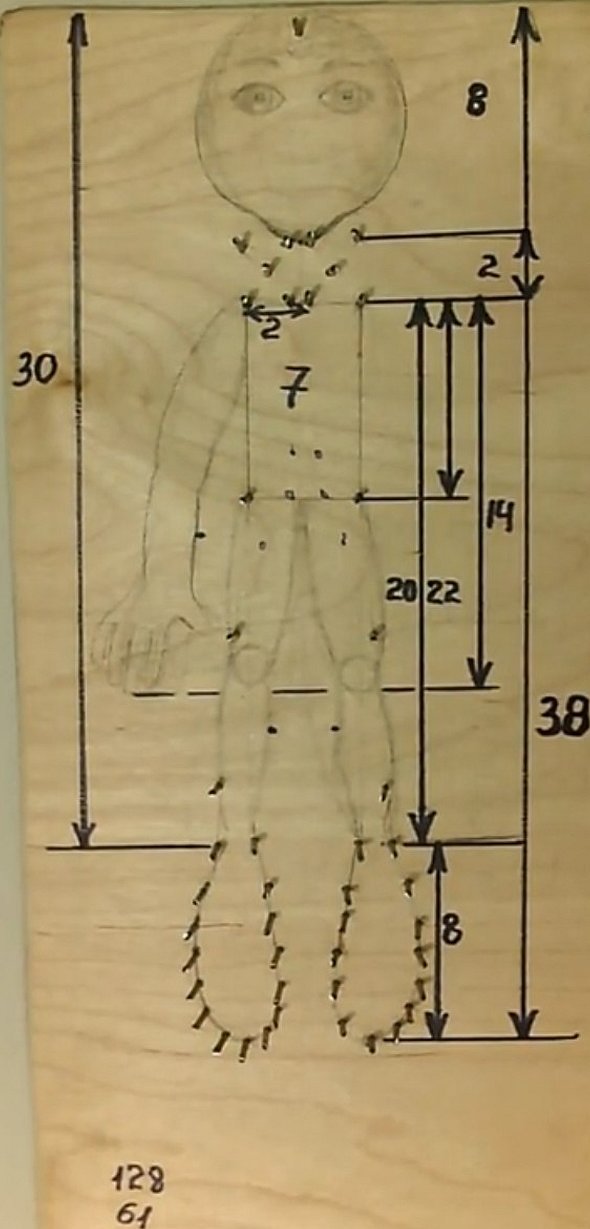
For the frame, the wire must be flexible and dense enough: it should not break from the tension between two nails.
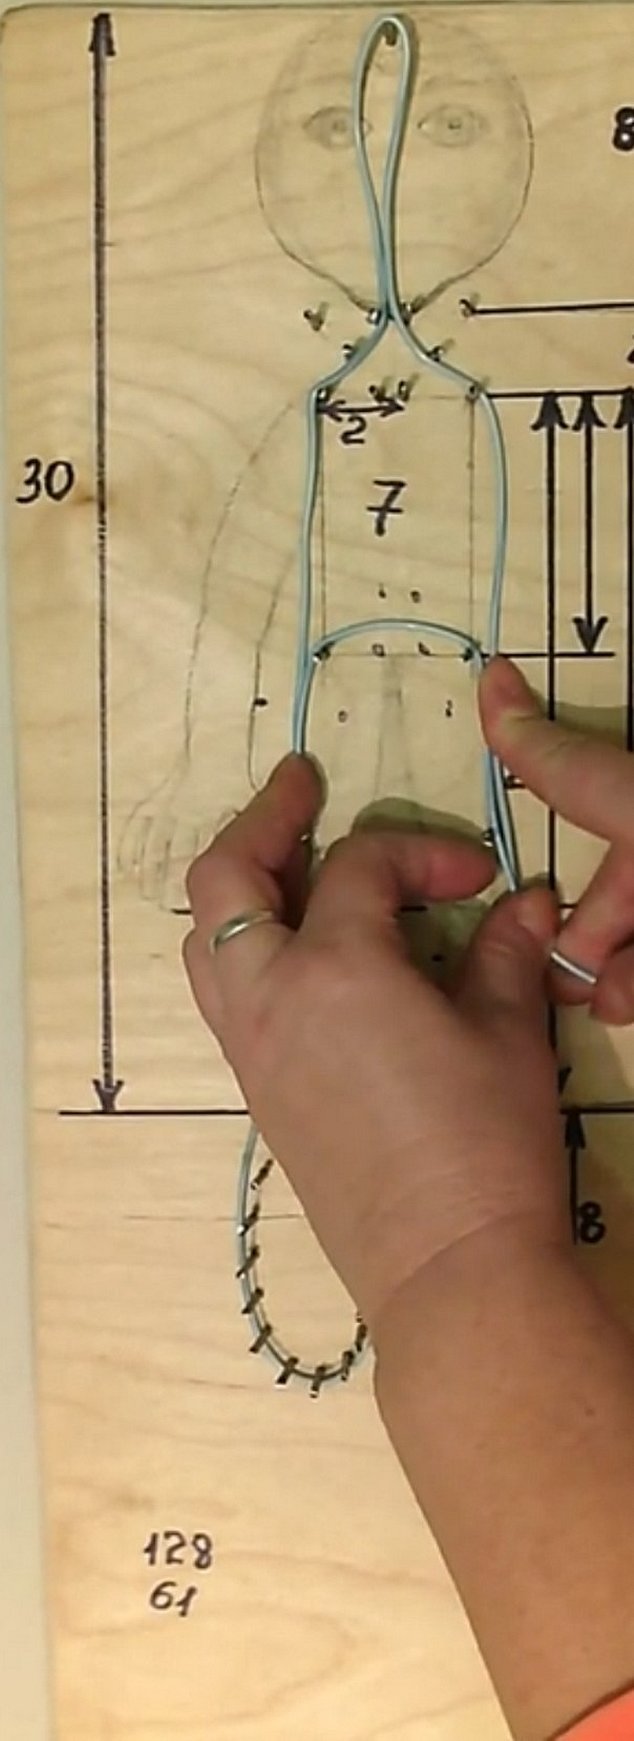
The result is a very stable structure, and you can bend the wire with pliers if you want to make the doll stand or sit in different positions.
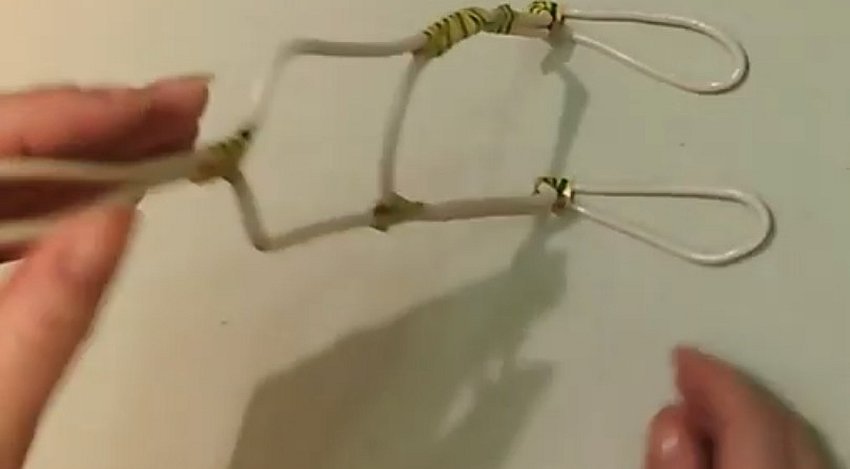
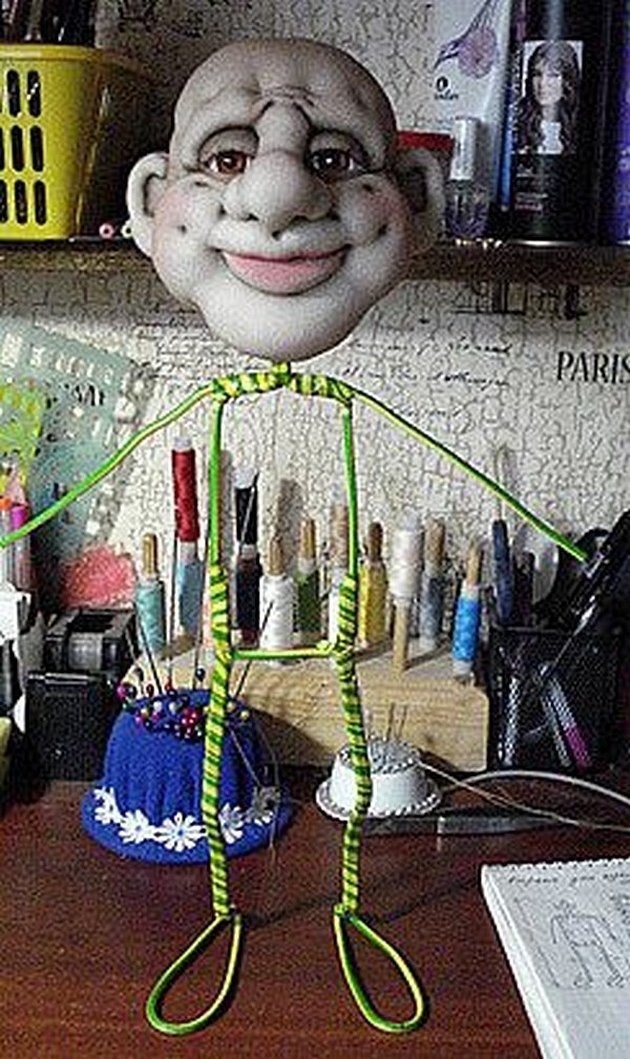
The wire frame should be wrapped with synthetic padding and the tights should be carefully pulled on.

All that remains is to sew the details on the body and the doll's body is ready.
An additional convenience of a frame doll is the ability to change clothes, since they will not be sewn to the head, arms or body.
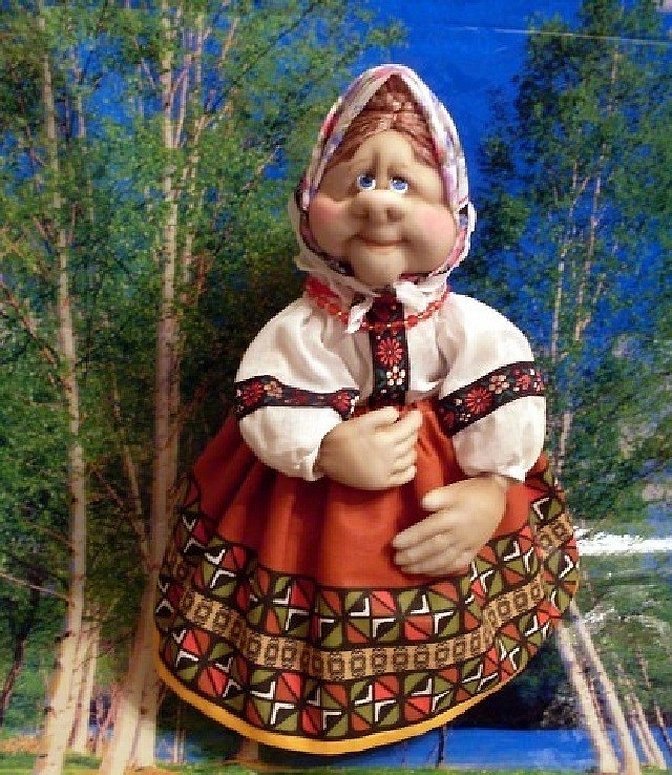
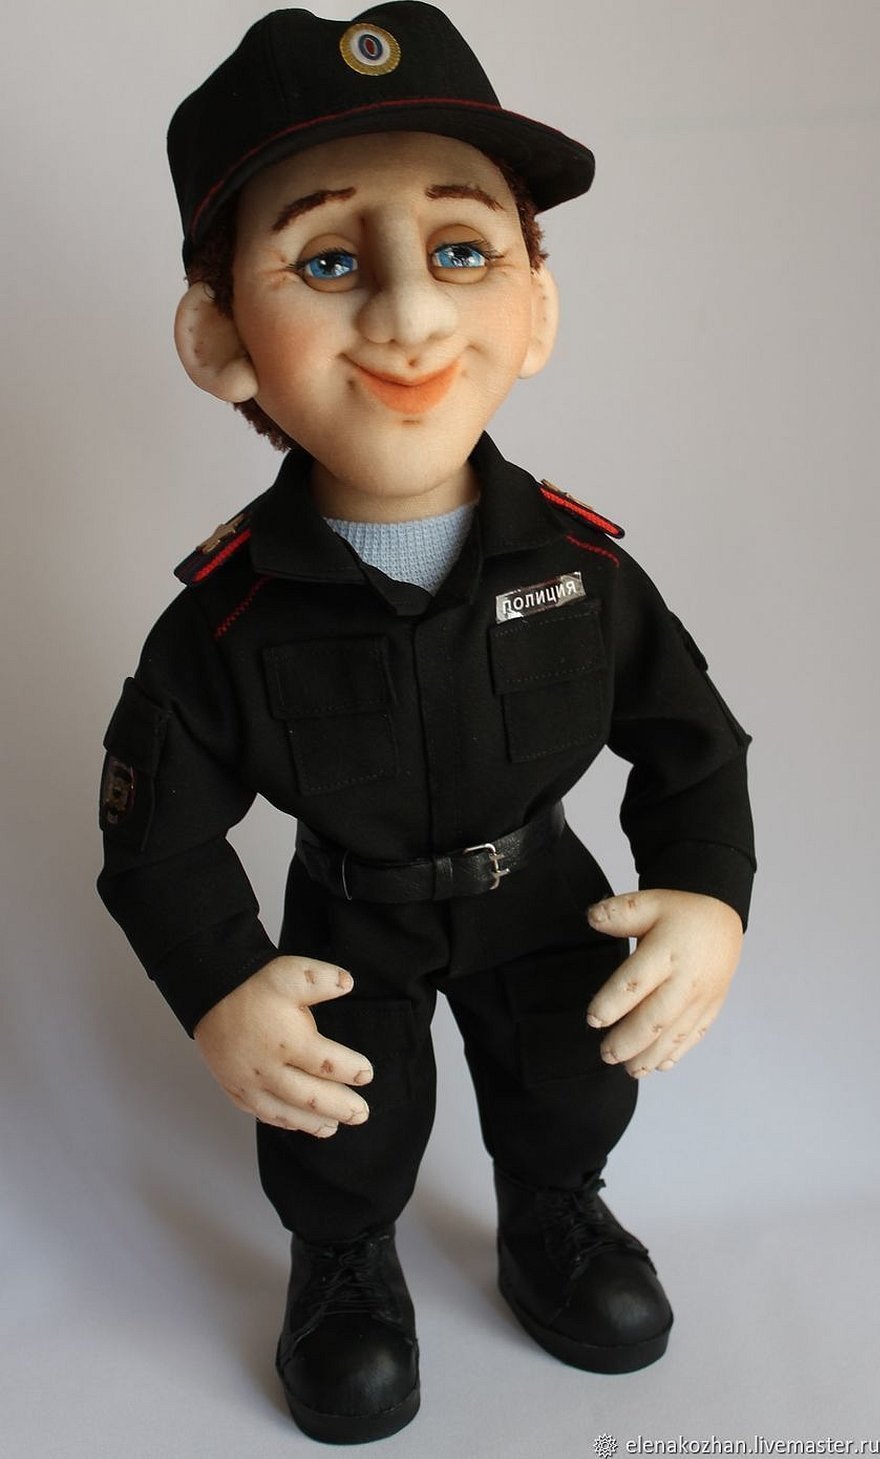
Homemade toys from tights will bring joy and delight from what you have made with your own hands. You can try to make a brownie Kuzya, a doll, a soldier in a similar way and add these wonderful products to your own doll collection.


