Making dolls with your own hands is becoming increasingly popular among people. Many needlewomen make very cute toys, but at the same time adhere to some specific rules. The Snezhka doll is one of the most famous and popular models among soft goods. The toy has its own characteristics that need to be taken into account when creating it. The question of how to make a Snezhka doll with your own hands interests many.
- Where did Snezhka come from?
- Distinctive features of the doll
- What you need to create a toy
- Life-size doll pattern
- How to Make Snezhka Yourself: Step-by-Step Master Class
- Transferring pattern elements to fabric
- Opening
- Sweep away body parts
- Basting of clothing parts
- Sewing
- Stuffing of parts
- Design of appearance: hair, face, clothes, decorative elements
Where did Snezhka come from?
Snezhka is one of the varieties of soft Tilda dolls with a large head. However, they should not be confused, the products have significant differences.
It is believed that the first toy of this kind was made by the craftswoman Tatyana Konne, and now her pattern is used most often when sewing dolls.
The product was first presented in 2007. The craftswoman's works can be found at various fairs, and Snezhka has become very popular, so there are many people who want to buy it or make it themselves.
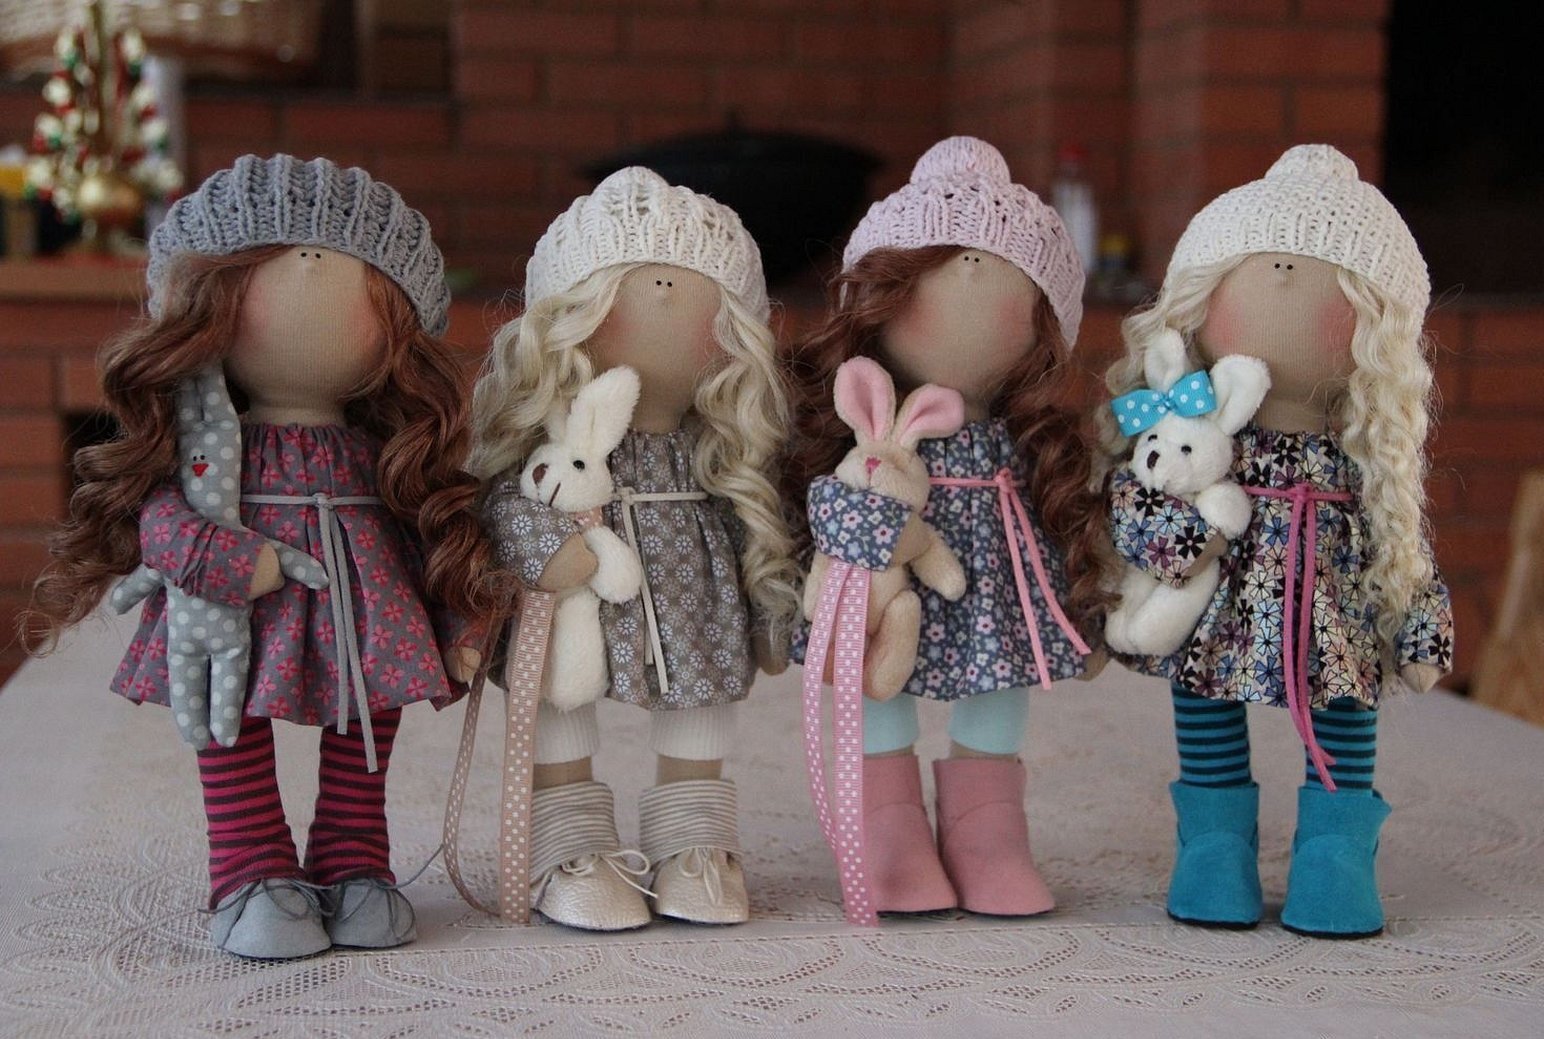
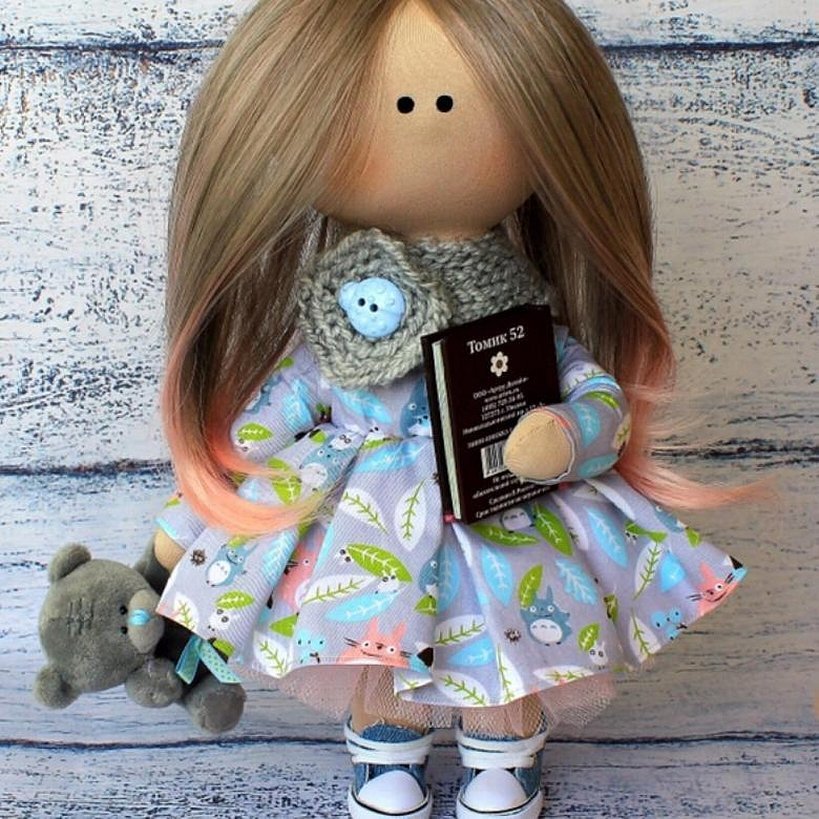
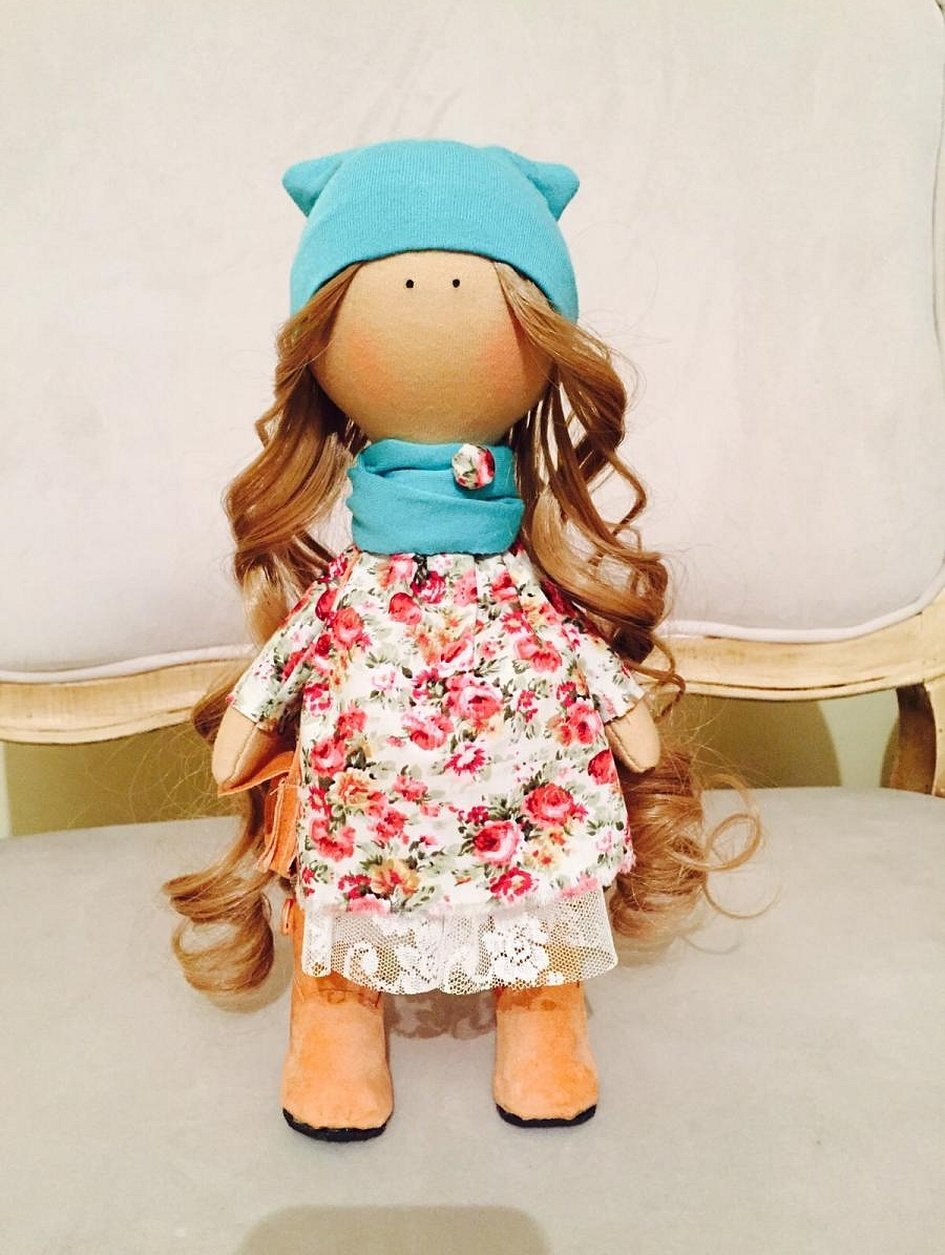
Distinctive features of the doll

Snezhka is a unique doll, some will like her, and others will not like her at all. However, each toy still has a unique personality and character.
These dolls have some features that distinguish them from others:
- Snezhka's eyes are small, like black beads, and have absolutely no eyelashes.
- In the classic version, the nose and mouth are completely absent, and the cheeks must be rosy.
- The silhouette is quite elongated. The body and arms are miniature, and the head and legs, on the contrary, are large, for which the toy is often called a big-head or a fat-legged one.
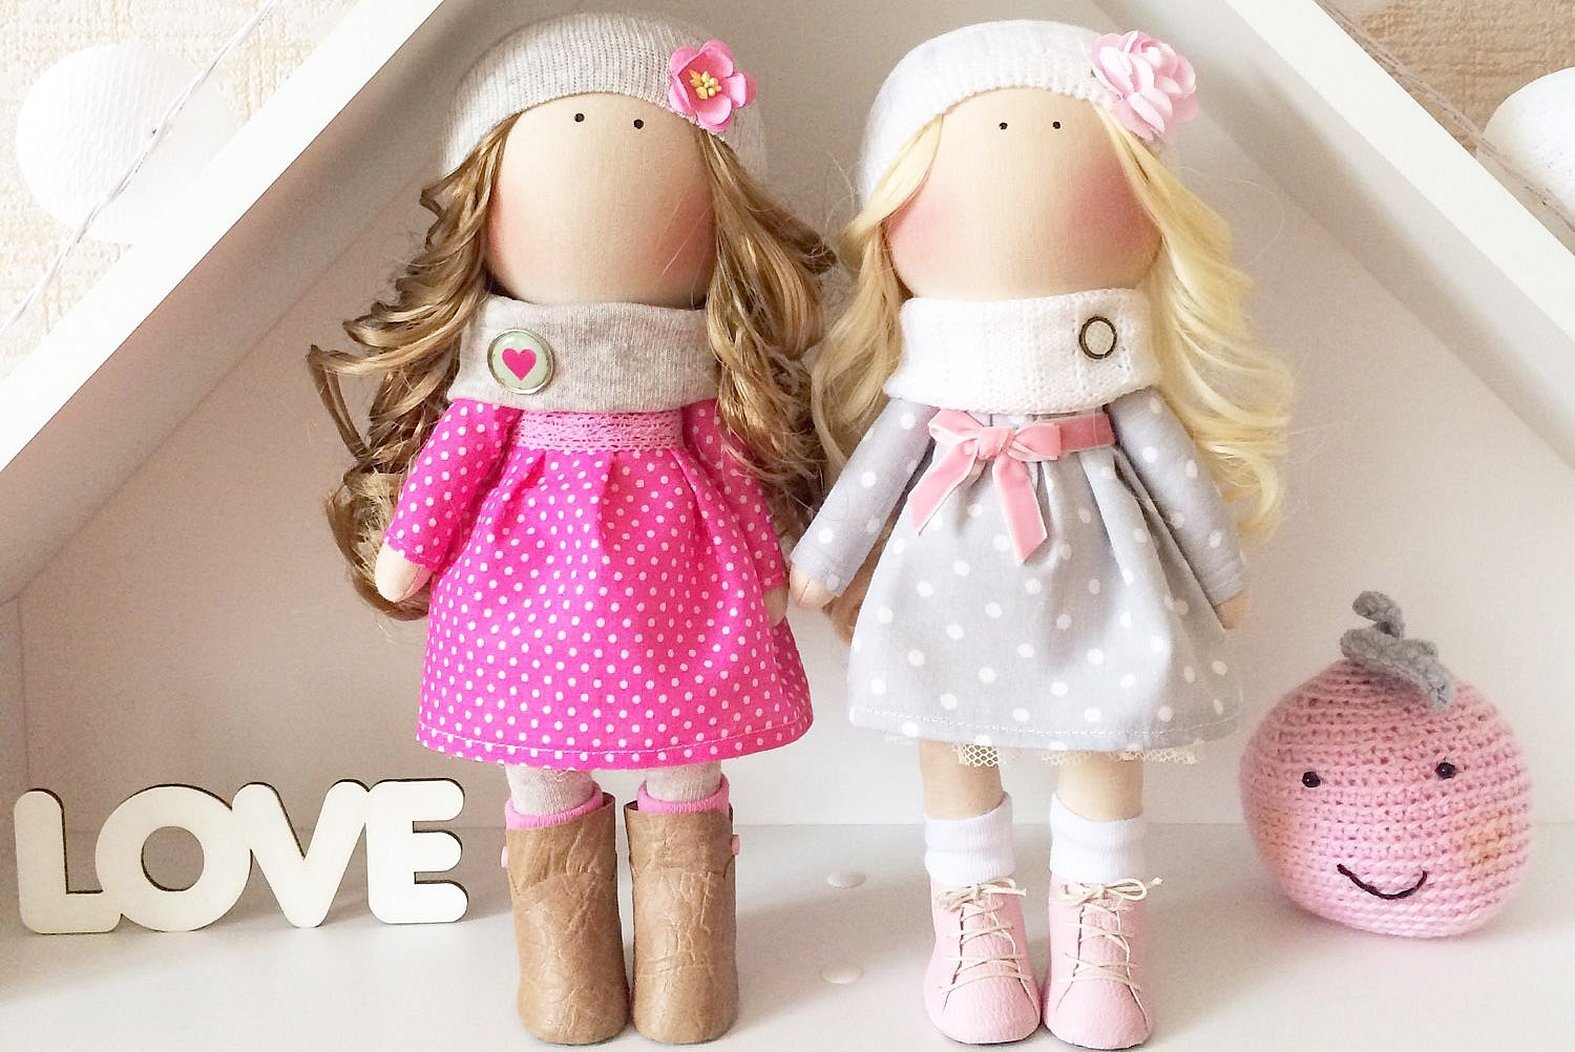
- The clothes are distinguished by calm colors, the absence of rhinestones and glitter. Most often, the dolls are dressed in the Provence, boho or country style.
- Snowballs always wear shoes. These can be wide boots, shoes, moccasins - this is the sign that distinguishes Snowball from all similar dolls. Some craftswomen even add tights, but even without them the doll turns out to be a cutie.
- Another feature of the toy is its weight. It looks quite small and fragile, but in fact it weighs much more than all other Tildas.
The main difference is that such a toy can easily stand upright thanks to its stable legs, while other Tildas can only sit.
Attention! The legs need to be tightly stuffed so that the product sits firmly on them.
What you need to create a toy
It is not difficult to create a toy Snowball. It is important to prepare all the materials and tools so that nothing interferes or distracts from the process. To create a toy you will need:
- Paper - graph paper or tracing paper.
- Scissors.
- Threads of a suitable color.
- Needles.
- Fabric for the body, you need to choose a suitable color - light linen is better.
- Fabric for clothing - you can choose any texture and shades, the main thing is that there are no sparkles or rhinestones.
- Thick white yarn, the doll's hair will be made from it (Snezhka's hair is white). You can also use ready-made wigs or felting wool for this purpose.
- Decorative materials - buttons, ribbons, lace.
- Filler - it is better to take holofiber or synthetic padding.
- Thick white cardboard - needed to create the legs.
A glue gun may be useful in the process, however, if you don’t have one, you can do without this tool.
To make Snezhka you can use not only flax. Any natural materials will do. It can be calico, cotton.
Jersey, felt, and chintz are great for clothing. The choice of color scheme depends on the needlewoman's preferences, but for the body it is best to take a material of a natural color.
Attention! It is better to prepare everything at once so that you don’t have to look for the necessary materials later.
Life-size doll pattern
You can find different patterns and descriptions of the Snezhka doll on the Internet. Below is one of them. It is transferred to A4 paper, after which it is used to create a toy.
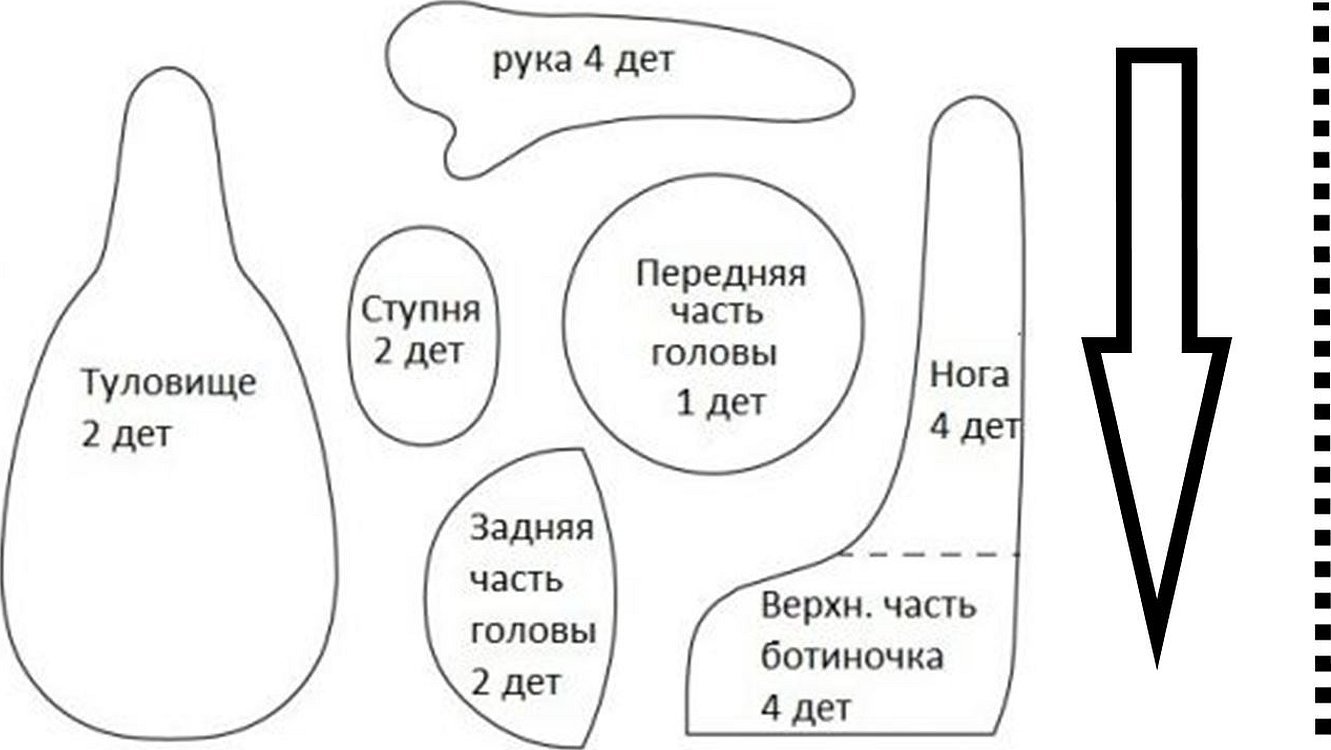
The picture shows how many pieces of each part you will need, but you don't have to make them all out of paper, just fabric. It's best for beginners to use simple patterns, and with experience you can move on to more original ones.
How to Make Snezhka Yourself: Step-by-Step Master Class
Sewing a textile doll Snezhka is not difficult. The main thing is to follow the entire sequence of actions.
Transferring pattern elements to fabric
The pattern of the doll parts must be transferred to paper and printed. After that, the parts are cut out with sharp scissors directly along the contour, no allowances need to be left.
The parts need to be laid out on the fabric. If you need two parts, the fabric can be folded in half at once. The paper pattern needs to be pinned to the fabric and carefully traced with a pencil.
Opening
Cutting out the pieces is quite simple. You need to carefully cut out all the outlined parts, leaving at least half a centimeter for allowances, so that you can then carefully sew them together.
Sweep away body parts
After all the parts are cut out and prepared, they need to be carefully swept with a needle and thread. The process is carried out strictly along the contour of the part.
Basting of clothing parts
Depending on what kind of doll you want to make, you need to immediately select the fabric and decor for the clothes. Patterns are available on the Internet, you can choose any.
The most important thing is that it fits the doll in size. Therefore, it is recommended to first find out the length and width of the doll itself (usually this is indicated in master classes), and then select the necessary clothing options.
The details are also transferred first to paper, then to fabric and carefully cut out. After which they are basted in a similar manner.
Sewing
After all the parts are basted, you can start sewing them together. For this purpose, use a sewing machine or do it carefully by hand.
First, sew the body, arms and legs, leaving small holes through which the stuffing will be carried out. After this, you need to carefully turn them over to the front side. The legs are sewn as follows:
- First you need to sew two pieces of fabric.
- From thick cardboard you need to cut out feet, the size of which exactly matches the size of the shoes.
- The cardboard blank is placed in the center of the fabric base and then glued using a glue gun or simply carefully sewn on.
- The finished sole must be connected to the legs using thread and a needle.
The head is sewn in stages - first the back parts are connected to the front, and then to each other. At the same time, a small hole remains through which the part will need to be stuffed. The workpiece must be turned to the front side.
Stuffing of parts
Once all the pieces are sewn together and turned right side out, you can start stuffing them with filler.
Particular attention should be paid to the legs, the doll should stand well on them, so they need to be stuffed tightly. After that, all the holes need to be sewn up with neat blind stitches.
Design of appearance: hair, face, clothes, decorative elements
You can dress the doll in any clothes you want. The most important thing is that there should be shoes. To make shoes, you need to transfer the patterns to the selected fabric, cut out the details. Sew them directly to the feet, because the shoes are not removed. All seams can be decorated with ribbons or lace.
For reference! If you plan to dress Snowball in pantaloons or trousers, you first need to make them, put them on her legs, and then attach the legs to the body.
After this, it is necessary to make a dress according to the prepared pattern. However, first you also need to put the finished clothes on the doll, and only then attach the head. Clothes and shoes are decorated with various decor, which can be molded on top - lace, bows, ribbons.
Hair can be made from simple white yarn, making spirals from it with a hook. Experienced craftswomen use artificial hair, and the doll turns out charming and very cute. The hairstyle can even be felted from wool. You can braid the toy, make ponytails, using bows and small elastic bands.
The eyes are made from black beads or you can simply draw them on the doll's face. Be sure to add blush to the cheeks, for example, with simple paints.
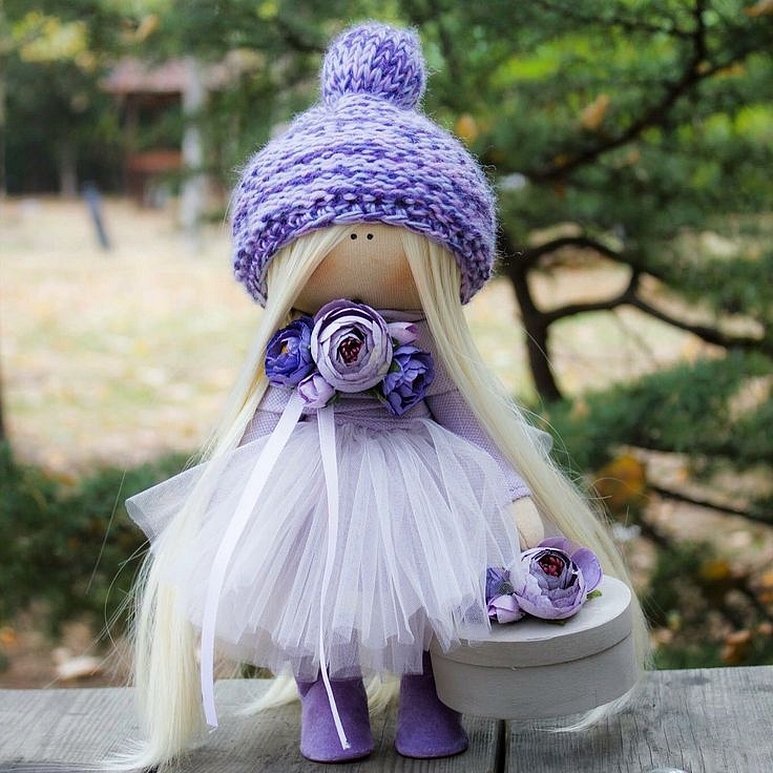
Many craftswomen add various accessories to their snow dolls, such as handbags or hats. This creates a beautiful finished image. Often, dolls are given bouquets of flowers, various mini-toys, and specially knitted clothes - sweaters, hats.
The Snezhka doll is a beautiful and cute little thing that will decorate any interior. It is quite easy to make a Snezhka doll with your own hands. You can find many simple patterns on the Internet, which make it easy to make a cute toy. You can create completely different outfits for the doll, the most important thing is imagination and the desire to create an interesting toy.


