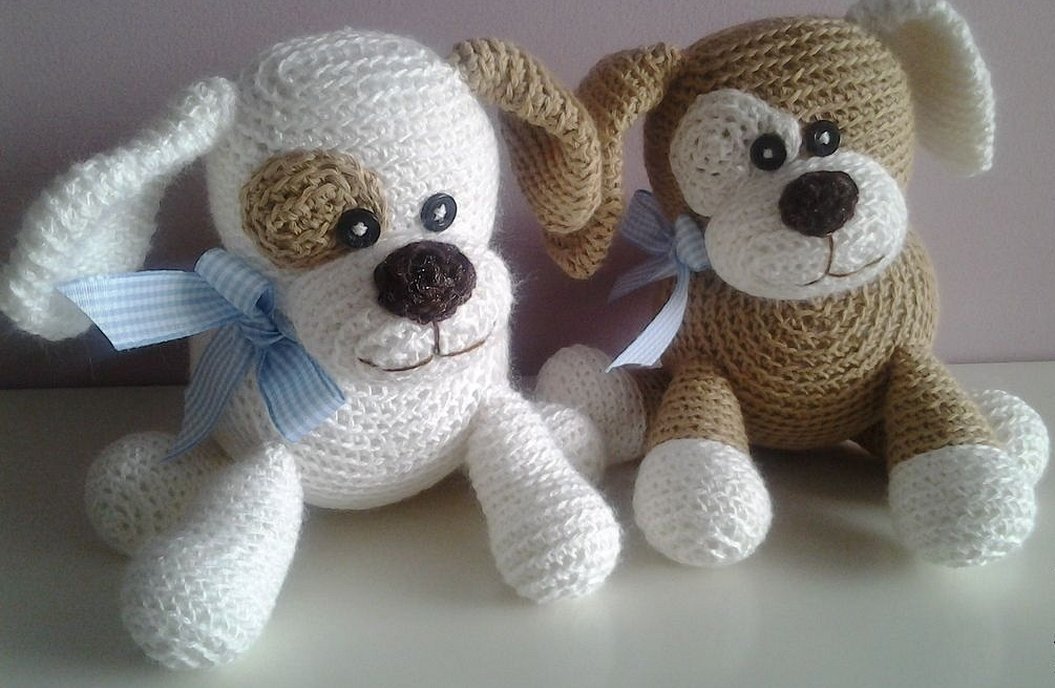
A crocheted dog, especially one made with your own hands, can be a wonderful gift for a loved one, a safe and bright toy for a child, or simply a souvenir that decorates the interior. Hand-made accessories have not gone out of fashion for many years and decorate bags, briefcases of young people and other everyday and festive things.
- Specifics of knitting a toy dog
- Materials and tools
- Yarn
- Hook
- Filler
- Decor
- Why is the amigurumi technique so popular?
- Master classes on knitting dogs
- Crochet Amigurami Dog: Step-by-Step Master Class for Beginners
- Master class on knitting funny dogs
- Knitting patterns with step-by-step descriptions from the Internet
Specifics of knitting a toy dog
When creating your own toy, you can fantasize endlessly, using a variety of knitting techniques and color solutions. Some rely on the breed of the dog and knit exclusively according to a plausible image, some have creative thinking and they choose bright and imaginative versions of their own breeds. For some, creating large plush animals is preferable, and others prefer to crochet each detail for very small specimens.
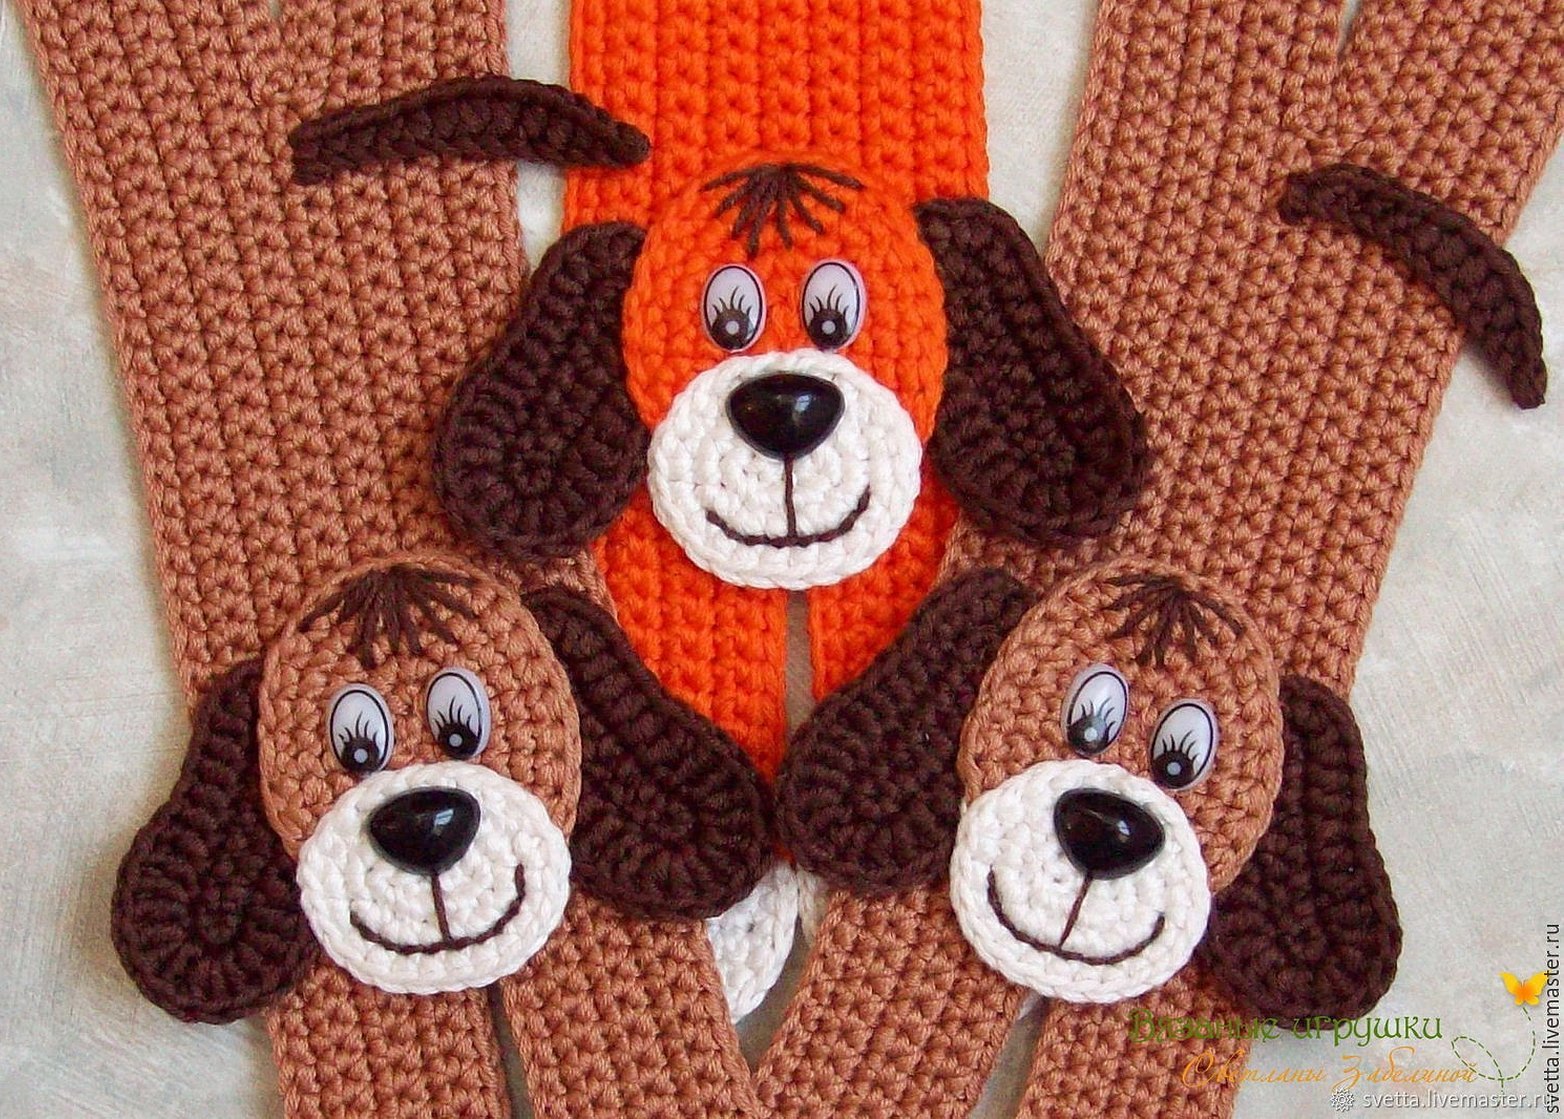
A crochet dog is quite difficult to reproduce and requires dexterity and accuracy, so before you start working, you should practice on simpler objects, such as bookmarks or stands.
Please note! Whatever the original idea, the set of materials for knitting will be absolutely the same.
Materials and tools
To get started, you should purchase the following knitting supplies:
- scissors;
- needles;
- yarn;
- set of hooks;
- stuffing (filler);
- decorative stripes, beads, buttons, etc. to decorate the product.
Yarn
If the toy will belong to a child, it is best to use cotton thread or specialized children's yarn. For a keychain, souvenir, gift to a friend, you can take absolutely any threads (their thickness does not matter): everything depends on the preferences of the master himself.
Hook
Hooks should be selected based on the thickness of the selected thread, i.e. the thickness of the thread = the thickness of the hook. This way the knitting will be neat, without stretches and holes.
Note! If you take a hook one size smaller than the thickness of the selected thread, the knitting will be very dense. This feature will help the dog to keep its shape for a long time and will not allow the filler to crawl out through the cracks.
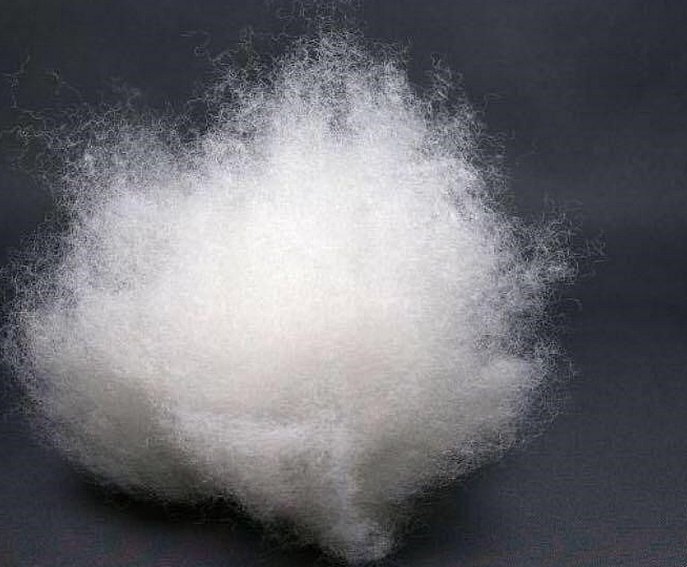
Filler
You should not choose cotton wool as a filler, as it will eventually clump together and make the product look untidy and "chewed". Holofiber or synthetic padding are excellent options. These materials will make the toy soft and pleasant to the touch.
Decor
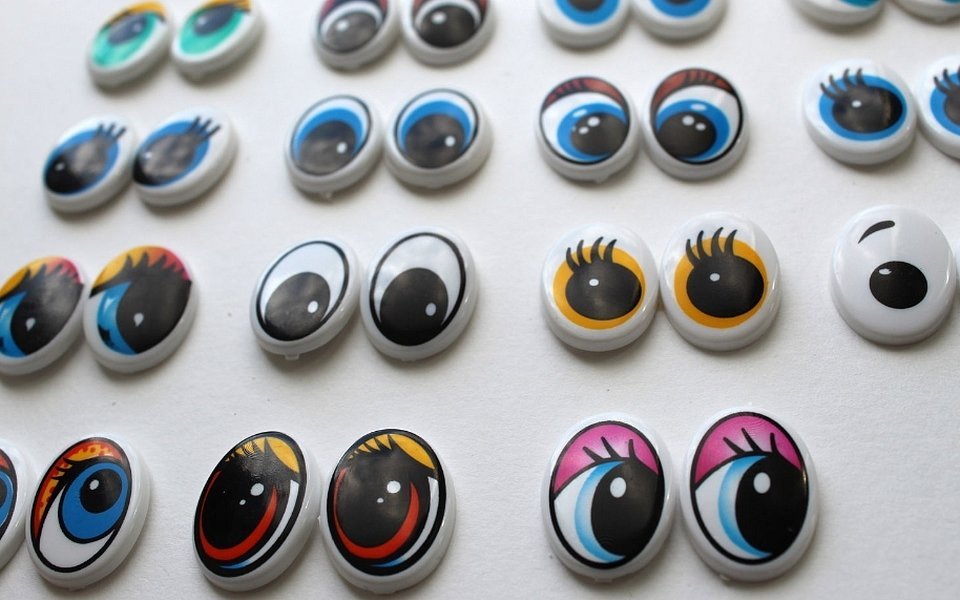
If the dog's decoration involves the use of knitted items, it should be taken into account that they should be made of a thinner material than the dog itself. The eyes can be knitted independently or you can use purchased accessories. Often, ordinary buttons or beads are used.
Why is the amigurumi technique so popular?
The main difference between amigurumi toys and simple knitted ones is their size. The average size of this tiny toy is about 6-8 cm. They gained popularity after the emergence of the fashion for hand-made. Now amigurumi can be found almost everywhere: on bags, instead of a keychain on keys, as an additional accessory on the phone. These little ones also often decorate the interior of the house, creating a cozy and positive energy in the space.
The popularity of the amigurumi toy also gained due to the fact that it is a very simple and quite original gift, made with your own hands. Its airy, marshmallow image will melt anyone's heart. It is always nice to give such a souvenir, as it contains a very kind and positive message from the giver. The appearance of the gift depends solely on the fantasy and imagination of the author. Amigurumi is an exclusively animated creature, with its own character and facial expression. It can be knitted not only with a crochet hook, but also with knitting needles.

The rounded shape of the toy also gives it a positive image.
Please note! Knitted babies are made from oval or round pieces (they are also called “amigurum circles”).
Simple knitted dolls are made in almost exactly the same way, but there is no special emphasis on rounded shapes.
Master classes on knitting dogs
Below are some simple tutorials on how to crochet toys and decorate them.
Crochet Amigurami Dog: Step-by-Step Master Class for Beginners
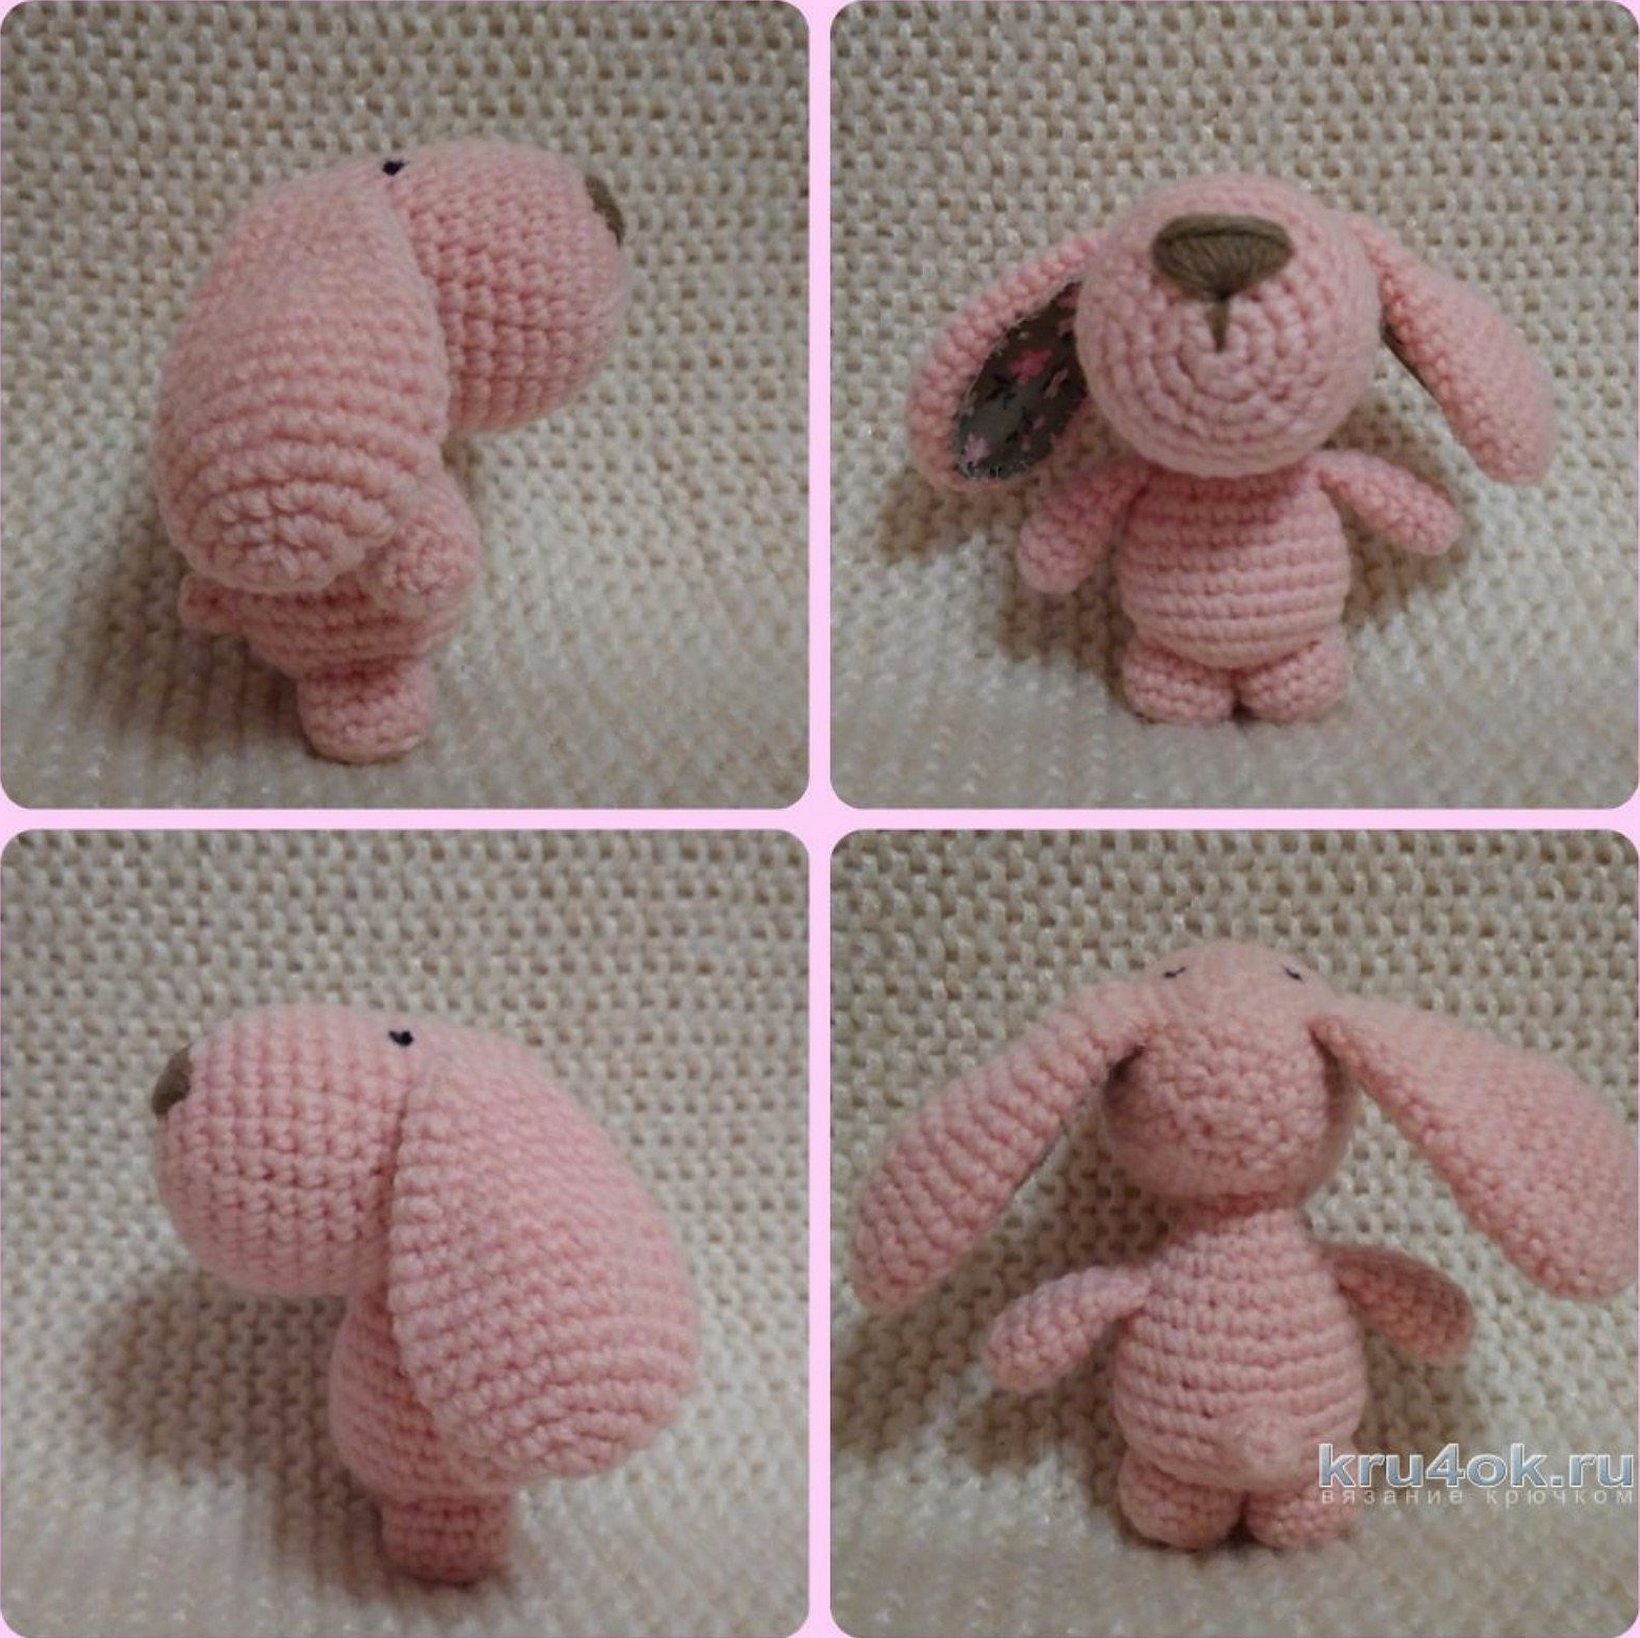
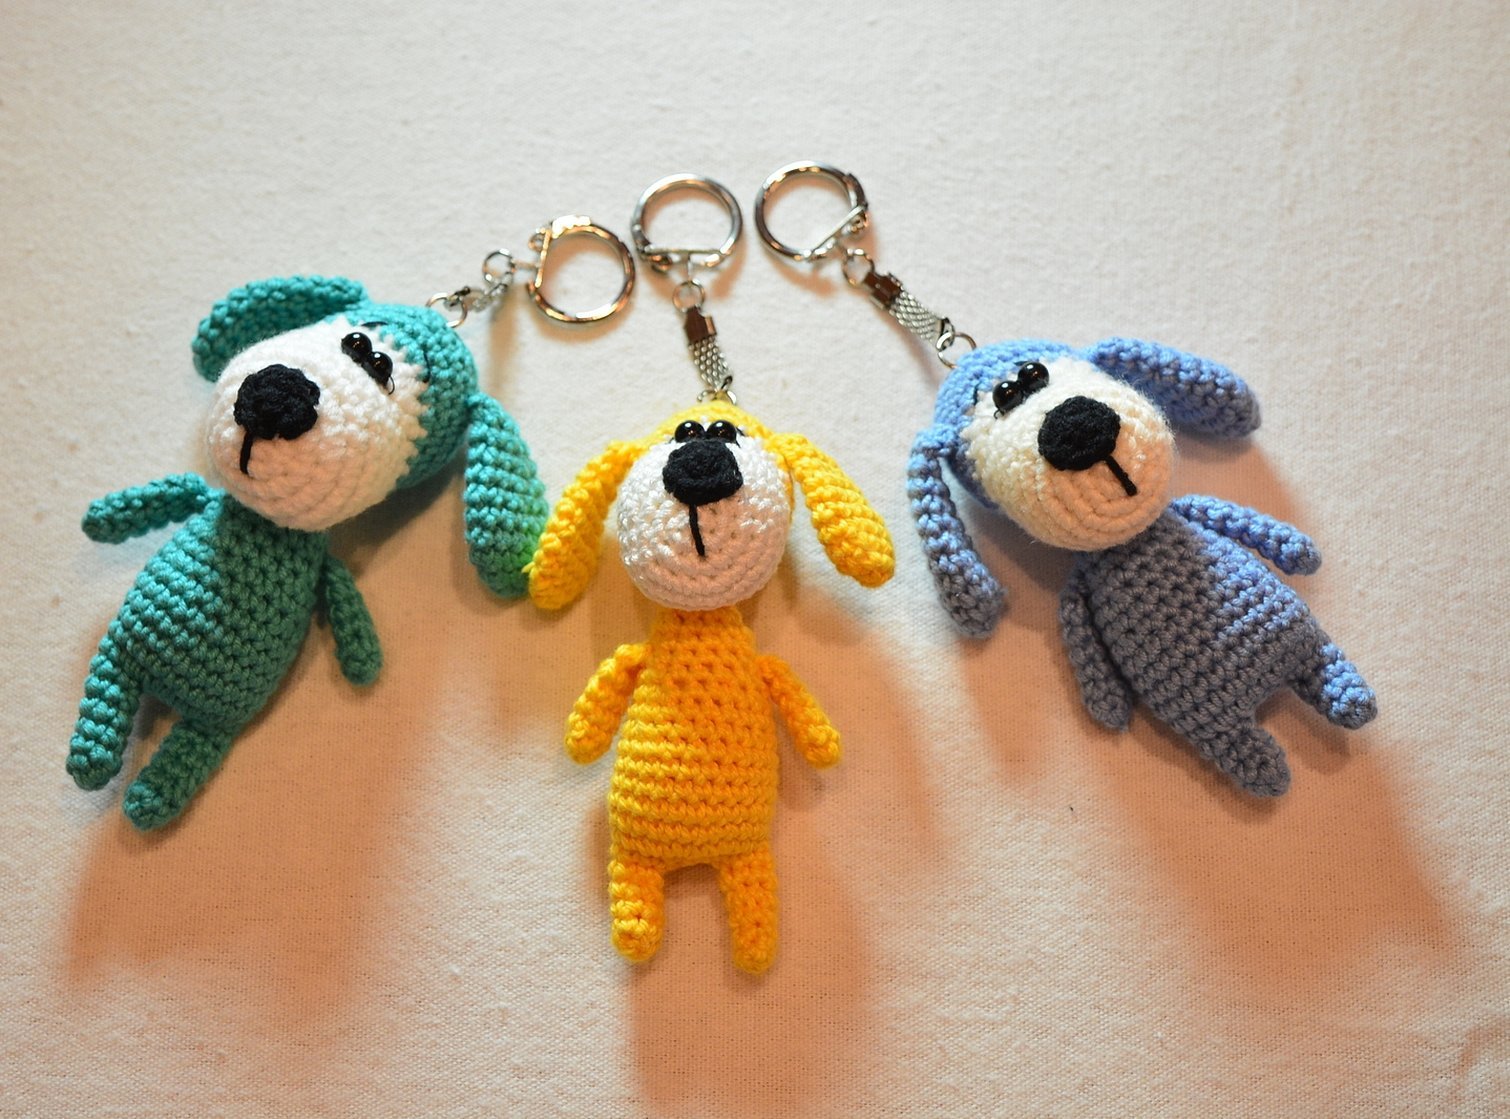
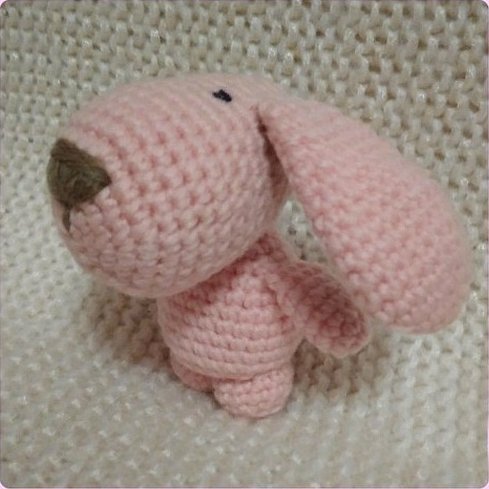
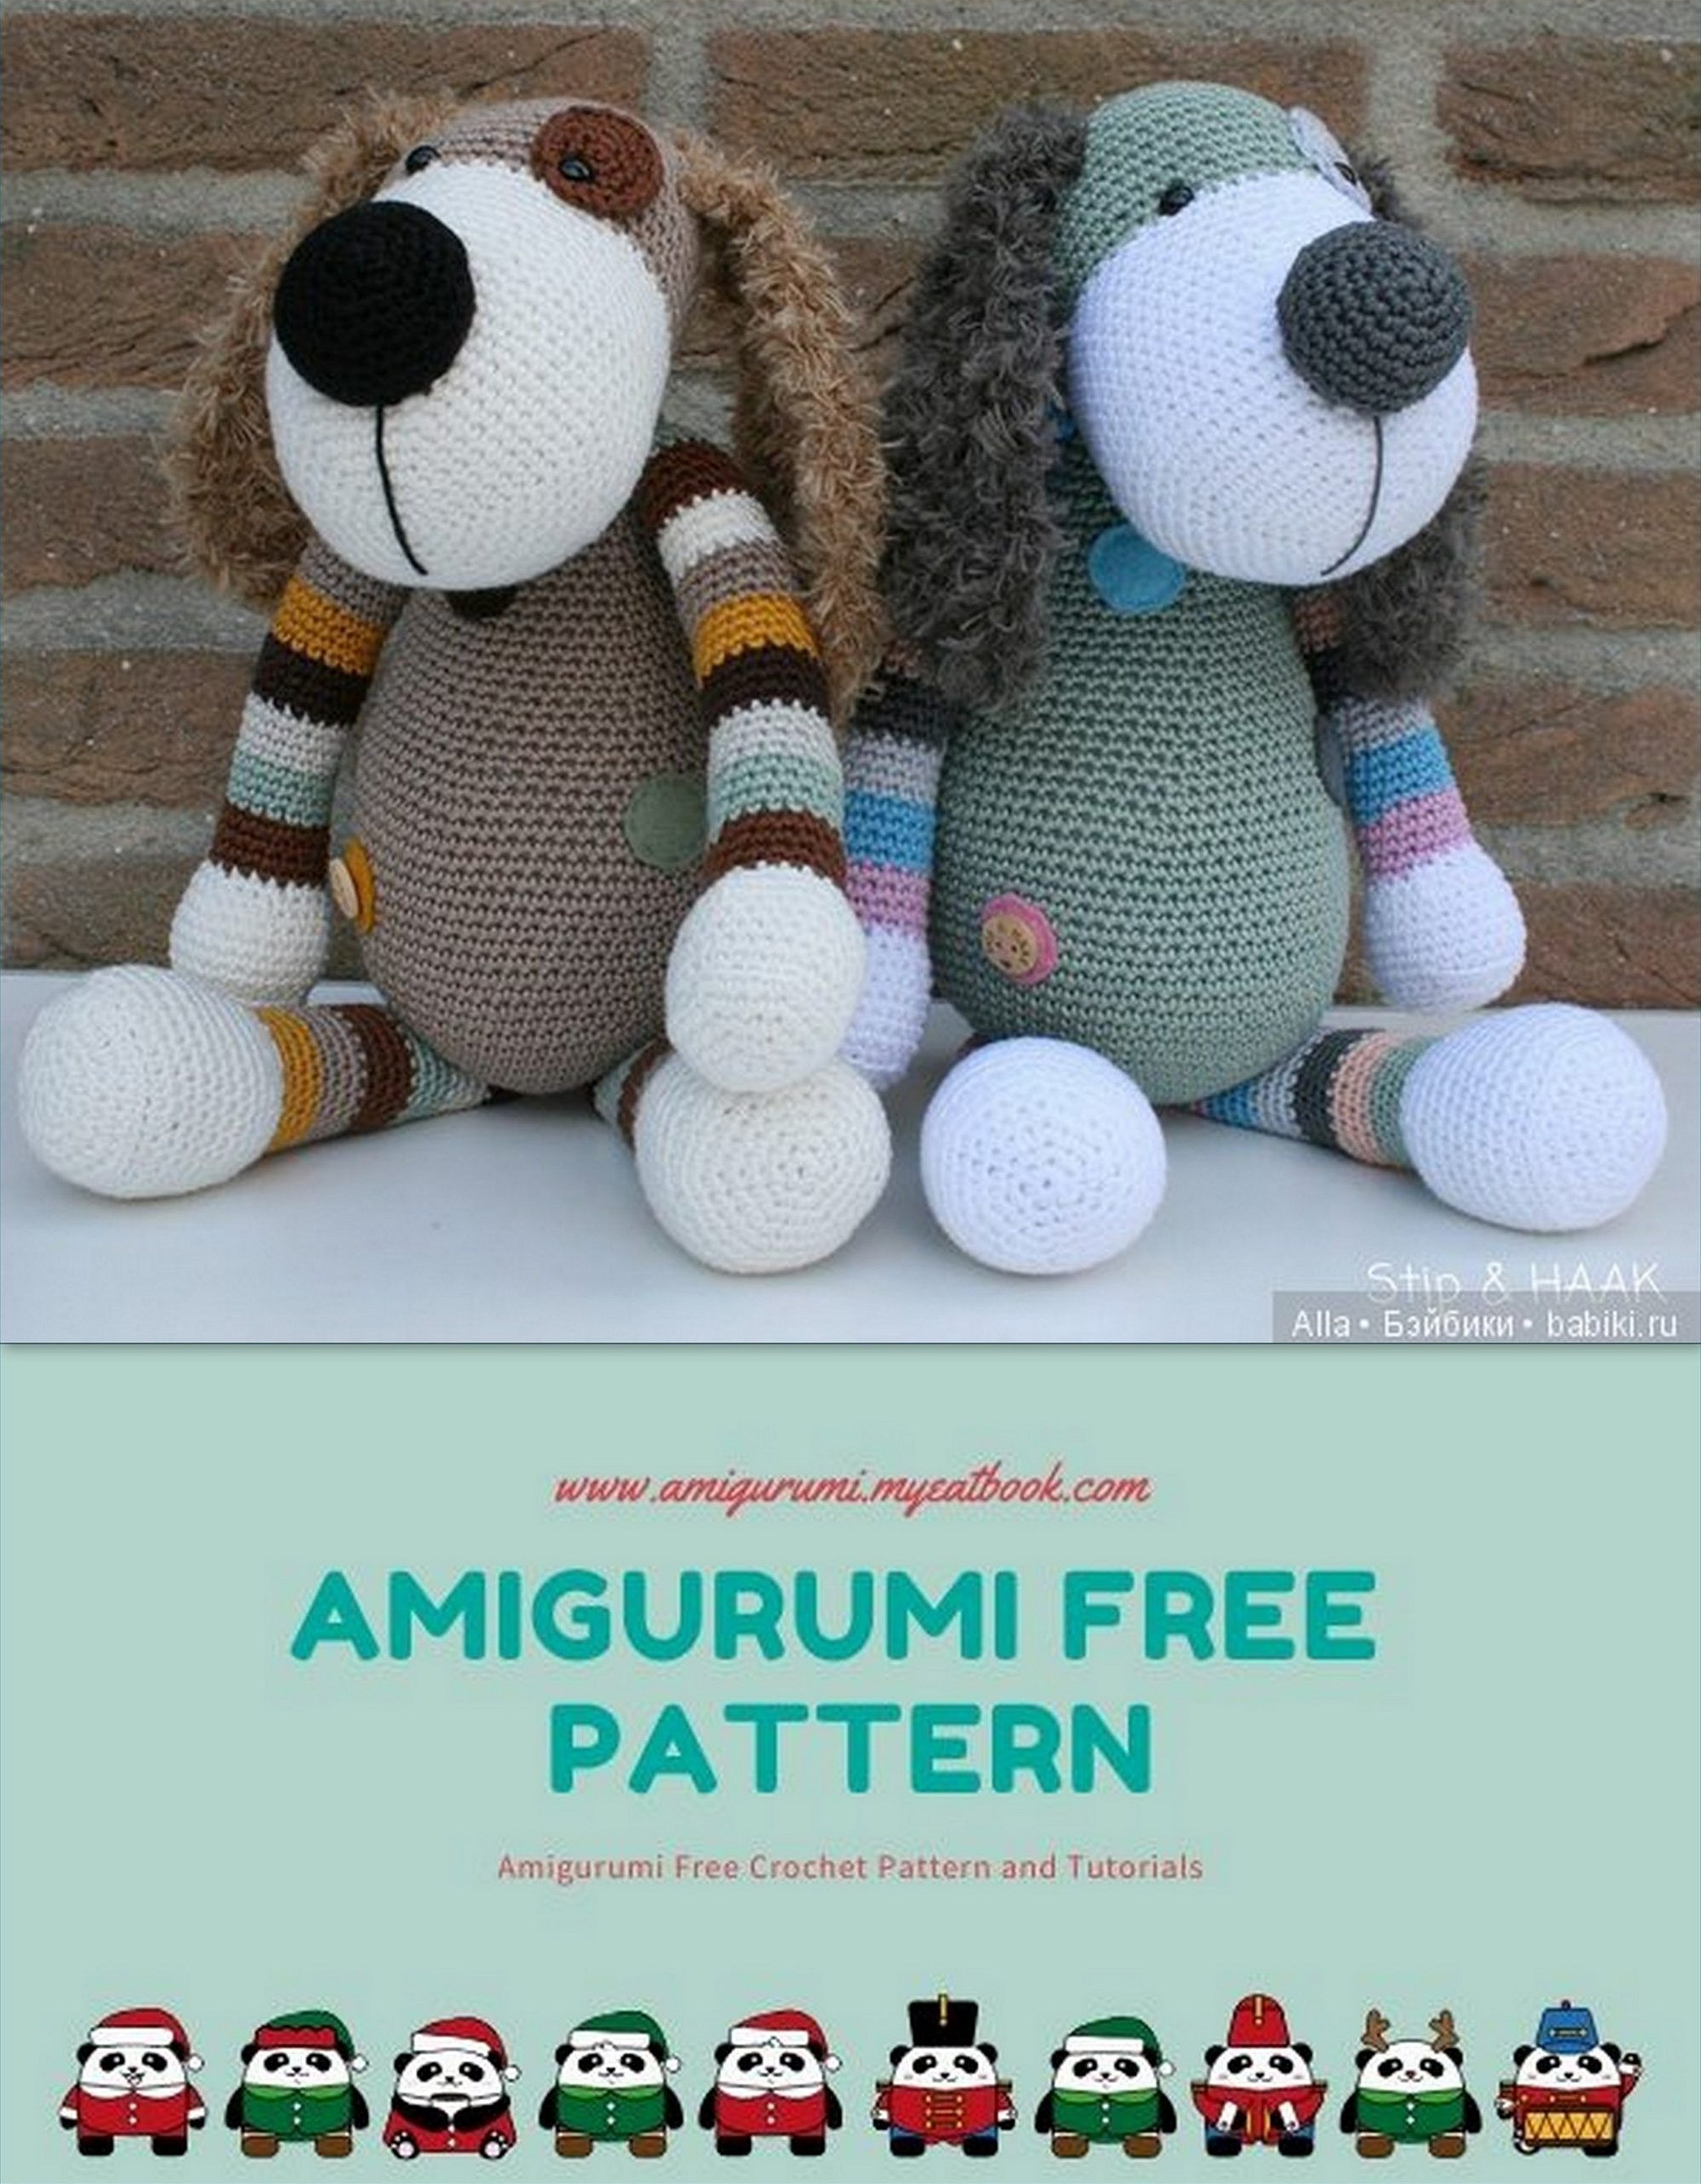
This crochet dog is quite unusual, its head is slightly larger than its body, and its ears are unusually large, which makes the toy very cute and funny. The average height of the toy is 8 cm, so it can be attached as an accessory to a handbag or keychain.
Tools and materials used:
- Blue or pink yarn (for the body) and black for the nose (depending on the author's preference).
- Hooks No. 1 and No. 5.
- Scissors.
- Fabric scraps for ears.
- Beads for eyes (you can also use buttons or embroider them with thread).
- Stuffing (holofiber or synthetic polyester).
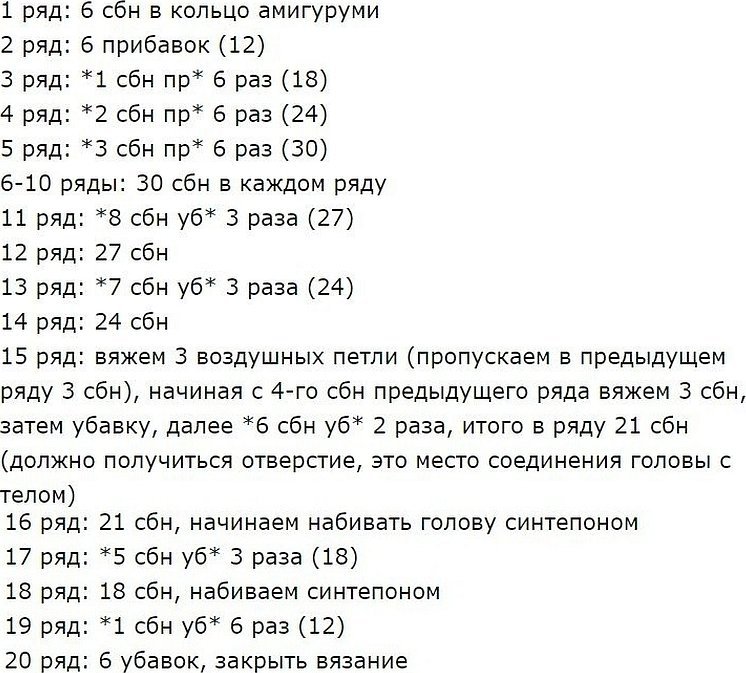
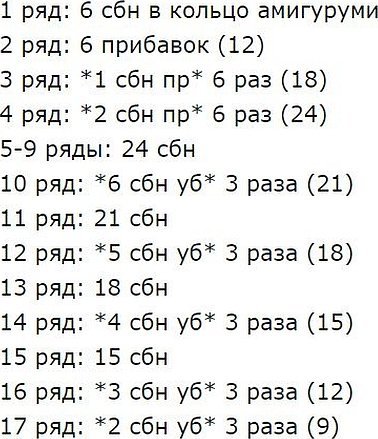
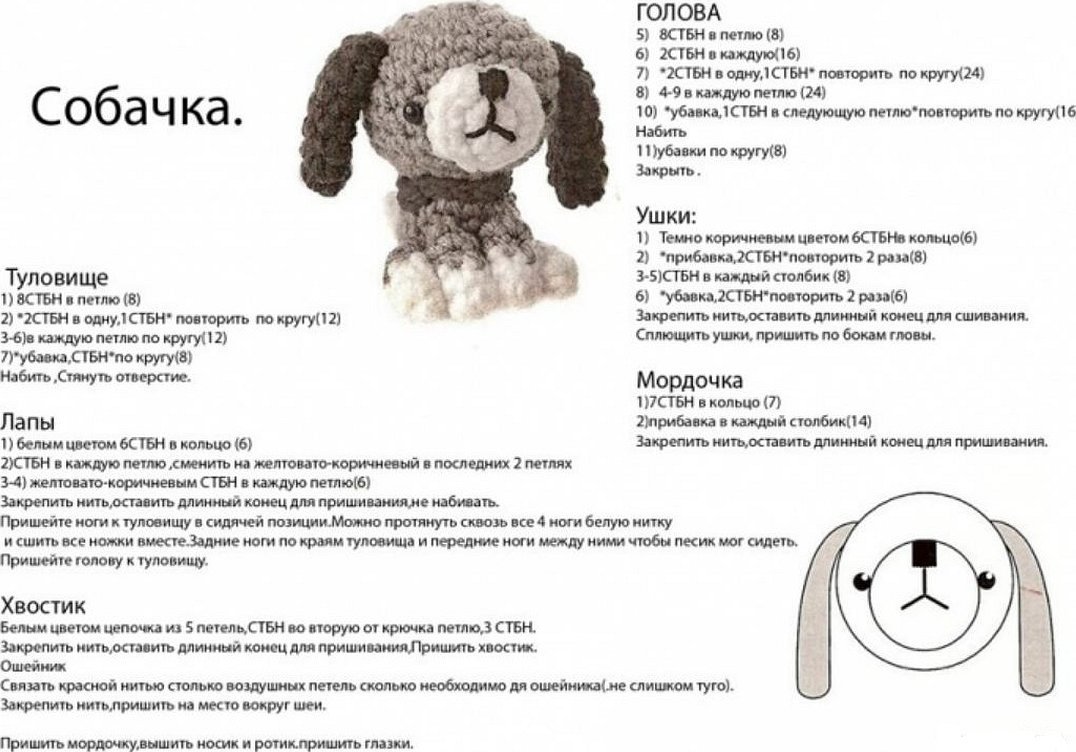
Please note! First, you need to knit the head: of the entire toy, this is the most difficult element (see diagram 1).
Further in the diagrams, the abbreviation sc (sc) refers to single crochet stitches.
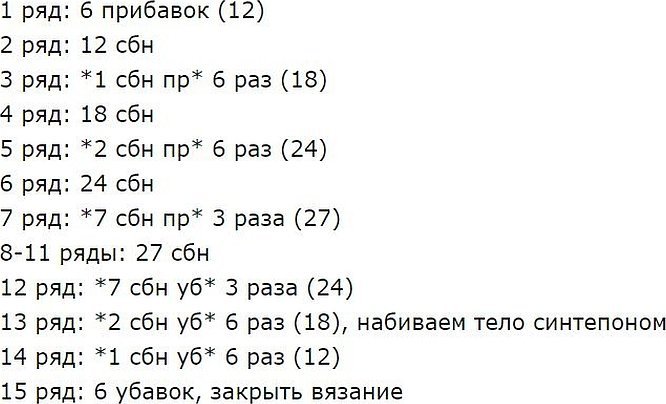
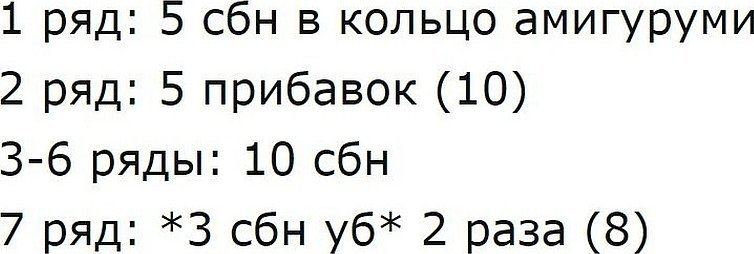
The next stage is knitting the body. To start knitting, you should secure the thread at the hole that was formed at the head (see diagram 2).
Once you have the body and head, you can move on to the next step – knitting the ears (see diagram 3).
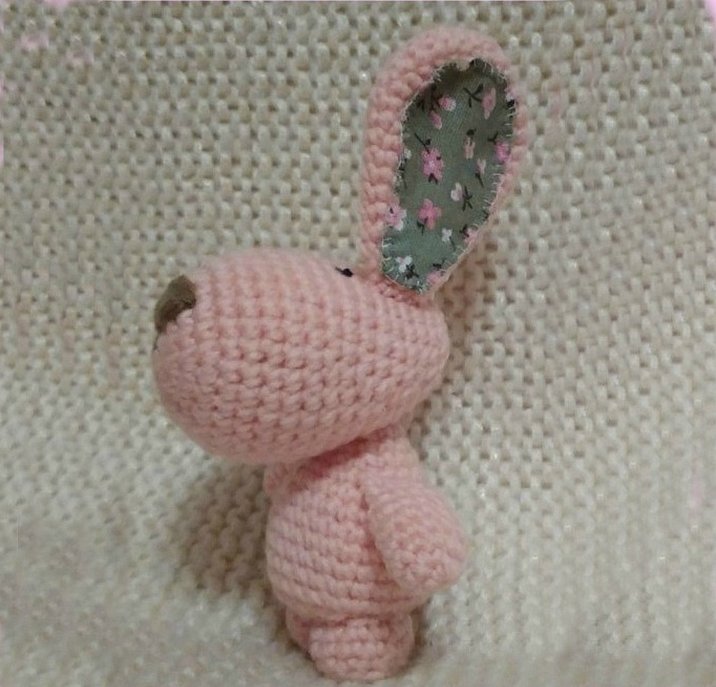
The ear should be folded and sewn along the very edge. After sewing, you need to cut the thread, leaving a small piece so that it is possible to sew the part to the head. The same must be done with the second ear. For decoration, you can sew a velour or rag piece of fabric to the inside of the ear.
Next comes the knitting of the front and back legs (see diagram 4).
You need to knit 2 of them and fill them loosely with padding polyester. After that, fold the edges in half and sew them together. Sew the paw to the body using the remaining end of the thread. Then knit the back paws (see diagram 5).

After the 2 paws are knitted, as with the ears, you should leave long cut threads on them to sew the product to the body.
Attention! The hind legs should be stuffed more densely than the front legs for greater stability.
The final element is the tail (see diagram 6).

Now all the parts of the toy are connected together and the dog is ready. It remains to add some details: to design the muzzle and correct any shortcomings, if any (cut off excess threads, etc.). It is necessary to glue the purchased nose and eyes to him, or embroider them yourself to the master's taste.
Master class on knitting funny dogs
Below is a complete description of all stages of knitting.
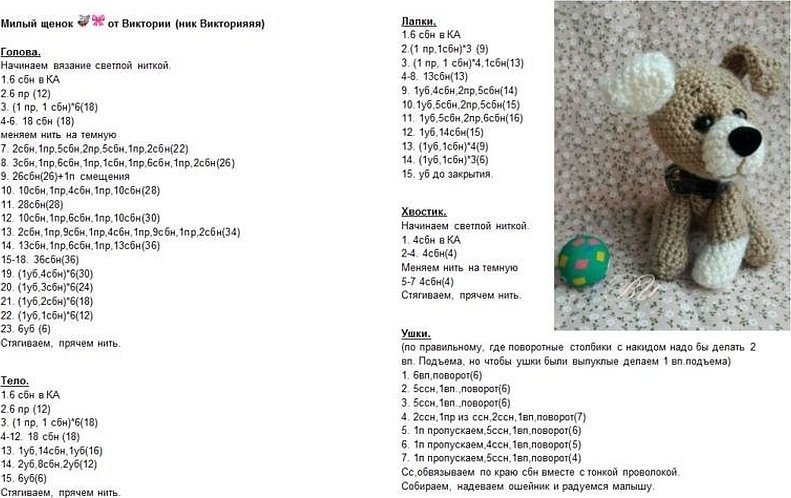
First, you need to knit the dog's body:
- 1-6 air loops into a ring (6).
- 2-2 Sc in each stitch (12).
- 3-1 St. without yarn over, increase (18).
- 4-2 St. without nak., increase (24).
- 5-3 St. without nak., Increase (30).
- 6-4 St. without nak., increase (36).
- 7-5 St. without nak., increase (42).
- 8-6 St. without yarn over, increase (48).
- 9-7 St. without nak., increase (54).
- 10-8 St. without nak., increase (60).
- 11-9 St. without nak., increase (66).
- 12-10 St. without nak, increase (72).
- 13-27 increase (72).
- 28-10 – Single crochet, decrease (66).
- 29 – Art. without nac. (66).
- 30 – 9 Art. no pressure, decrease (60).
- 31 – 60 Art. without pressure.. (60).
- 32 – 8 Art. no pressure, decrease (54).
- 33-35 – 54 Art. without nac. (54).
- 36 – 7 Art. no pressure, decrease (48).
- 37-41 – 48 Art. without nac. (48).
- 42 – 6 Art. no pressure, decrease (42).
- 43-45 – 42 Art. without nac. (42).
- 46 – 5 Art. no pressure, decrease (36).
- 47-49 36 Art. without nac. (36).
- 50 – 4 St. no pressure, decrease (30).
- 51-52 – 30 Art. without nac. (30).
- 53 – 3 Art. no pressure, decrease (24).
- 54-57 – 24 Art. without nac. (24).
Please note! After the knitting is finished, the body should be stuffed very tightly with stuffing.
Next you need to make a spot around the eye:
- 1-6 Air loops into a ring.
- 2-2 Sc in each stitch (12).
- 3 – 1 Column without yarn, increase (18).
The next step is knitting the head:
- 1– 6 Single crochets into ring (6).
- 2–2 Sc in each loop (12).
- 3 – 1 Column without nak, increase (18).
- 4 –2 Column without nak., increase (24).
- 5 – 3 Column without nak, increase (30).
- 6 – 4 Column without nak, increase (36).
- 7 – 5 Column without nak, increase (42).
- 8– 42 Single crochet stitches (42).
- 9 – 6 Column without nak., increase (48).
- 10 – 7 Column without nak., increase (54).
- 11 – 54 Single crochet (54).
- 12 – 8 Column without nak, increase (60).
- 13-17 p. – increase (60).
- 18–18 Column. no pressure, decrease (57).
- 19 – 57 Single crochet (57).
- 20 – 17 Col. no pressure, decrease (54).
- 21– 54 Single crochet (54).
- 22 – 16 Column. no pressure, decrease (51).
- 23 – 51 Single crochet (51).
- 24 – 15 Col. no pressure, decrease (48).
- 25 – 48 Single crochet stitches (48).
- 26 – 6 dc, decrease (42). Next you need to change the color of the thread!
- 27 – 6 dc, increase (48).
- 28 – 48 Columns without yarn (48).
- 29 – 7 St. without nak., increase (54).
- 30-34 rub. – 54 Art. without nac. (54).
- 35 – 7 Art. no pressure, decrease (48).
- 36 – 48 Art. without nac. (48).
- 37 – 6 Art. no pressure, decrease (42).
- 38 – 42 Art. without nac. (42).
- 39 – 5 Art. no pressure, decrease (36).
- 40 – 36 Art. without nac. (36).
- 41 – 4 Art. no pressure, decrease (30).
- 42 – 3 St. without yarn over, decrease (24). Then stuff the piece and continue knitting.
- 43 – 2 Columns without yarn, decrease (18).
- 44 – Single crochet, decrease (12).
- 45 – Decrease until the very end.
Now you need to sew the head to the body and place the previously knitted spot on it by sewing.
Please note! You can embroider the eyes yourself, draw them with a black marker, or buy ready-made ones at a craft store and glue them on with a glue gun.
Next, the nose is knitted:
- 1– 6 Single crochets into ring (6).
- 2-2 Single crochet into each loop (12).
- 3 – 1 Single crochet, increase (18).
- 4 – 2 Single crochets, increase (24).
- 5 – 3 Single crochets, increase (30).
- 6-8 rows – 30 single crochet stitches (30).
- 9 – 3 Single crochets, decrease (24).
The nose is stuffed with padding polyester or other filler. Sewn between the 8th and 16th rows on the head and using black threads make a mouth line.
Next, make the ears (2 pcs.). In each previous row, before the start of the next one, make one air loop (also called a lifting loop).

Algorithm of actions:
- 1 – cast on 5 air loops, in the 2nd loop from the hook knit 4 single crochets.
- 2 – increase, 2 single crochets, increase, turn (6).
- 3 – increase, 4 single crochets, increase, turn (8).
- 4 – increase, 6 single crochets, increase, turn (10).
- 5-9 rows – 10 single crochets (10).
- 10 – decrease, 6 single crochets, decrease (8).
- 11 – 8 single crochets (8).
- 12 – decrease, 4 single crochets, decrease (6).
- 13-14 rows 6 single crochets (6).
- 15 – decrease, 2 single crochets, decrease (4).
- 16-18 rows – 4 single crochets (4).
The ears are sewn to the head around rows 31-32.
Next, knit the front legs (2 pcs):
- 1 – 6 single crochets into the ring (6).
- 2 – 6 increases (12).
- 3 – column without nak., increase (18).
- 4 – 2 columns without nak., increase (24).
- 5 – 3 columns without nak., increase (30).
- 6 – behind the back wall 30 columns without nak (30).
- 7-11 p. – 30 columns without nak (30).
- 12 – 3 columns. no pressure, decrease (24).
- 13 – 2 columns without yarn over, decrease (18). Change the color of the thread and continue working.
- Rows 14–49 – 18 single crochet stitches, changing colors every 4 rows.
- Fold the edges and knit 9 single crochet stitches.
Please note! Sew the front paws between rows 53 and 54 on the body of the toy.
Next, knit the lower legs (2 pcs):
- 1– 6 single crochets into the ring (6).
- 2 – 6 increases (12).
- 3 – single crochet, increase (18).
- 4 – 2 single crochets, increase (24).
- 5 – 3 single crochets, increase (30).
- 6 – 4 single crochets, increase (36).
- 7 - behind the back wall 36 columns without nak (36).
- Rows 8–15 – 36 single crochets (36).
- 16–4 columns. without a crochet, decrease (30).
- 17 – 3 columns. single crochet, decrease (24).
- 18 – 6 single crochets, decrease (21). Change the color of the thread to another.
- Rows 19-42 – 21 single crochets (21), changing colors every 3 rows.
- Fold the paws and knit 10 single crochet stitches.
Then prepare the tail:
- 1 – 6 single crochets into the ring (6).
- 2 – 6 increases (12).
- 3-9 rows – 12 single crochets (12).
- 10 – 3 single crochets, increase (15).
- Rows 11-19 – 15 single crochet stitches (15).
- Fold the tail and knit 7 single crochet stitches.
Sew it between the 12th and 18th rows of the body. To decorate the dog, attach several fabric circles or beads to it.
Knitting patterns with step-by-step descriptions from the Internet
One of the options for a knitted amigurumi dog was described above. Do not forget that you can add your own accessories to the toy. For example, knit a collar or leash, make a small bone or ball. A more detailed approach will make the craft original and interesting. If you make the body of this toy model longer, it will look like a lying one. With the help of experiments, you can achieve more diverse options for its image.
This dog can be made quite large by increasing the number of stitches by 2, 4 or 8 times. You don't have to knit the eyes yourself, even with ready-made beads the muzzle will look very expressive.
This dog is perfect for knitting for beginner needlewomen. A simple set of loops, easy classic knitting, step-by-step analysis of sewing on the diagram - all this will help to achieve the result from the first time.
A crochet dog knitted according to a detailed pattern and description is made quickly and easily. You should not ask yourself the question "how to knit a dog", it is enough to open a detailed lesson or an easy master class, sit down and do it, and as a result, please your loved ones. Also, a toy made with your own hands and presented to a loved one will serve as a symbol of attention and care for a person. You can try to knit a plush friend of large sizes, such a toy will perfectly decorate any interior.


