A crochet doll jacket is knitted quite easily and quickly, even with minimal skills in all sewing attributes. When a daughter has her first dolls in the house, any mother will begin to think that buying miniature things is quite an expensive business. It is much more budgetary and economical to do everything with your own hands. Even a novice seamstress, after watching several master classes, will learn how to crochet a jacket for a doll without difficulty and in a short time. Thanks to the knowledge gained and having improved skills on doll outfits, you can eventually move on to knitting things for the whole family.
- Features of knitting doll clothes
- What you need for work, measurements
- Models of sweaters for dolls
- Patterns for doll blouses
- "Flower" openwork pattern
- Vertical stripes pattern
- Pattern "embossed diamonds"
- Pattern "pearl"
- Master class on knitting a hooded sweater
- Simple blouse for a doll - step by step tutorial
Features of knitting doll clothes
To begin with, you should master the minimum amount of necessary knowledge, namely how to cast on loops, knit external and internal loops. Since things for dolls are small in size, the work on their manufacture is very painstaking: one missed (not knitted) loop on a tiny garment will look like a hole.
Note! Don't throw away the leftover yarn, perhaps this amount will be enough to create one wardrobe item.
Miniature items are knitted in exactly the same way as items of human height. The only difference is thin threads, a small number of cast-on and knitted loops, and, of course, minimal time spent.
What you need for work, measurements
To start working, you need to prepare a skein of threads (any color) and hooks that match the size of the yarn. To knit an openwork product, it is best to have a ready-made printed knitting pattern in front of you, where there is a detailed description of the pattern. This will make the work much easier.
You will also need a tape measure to take the doll's measurements:
- Back size - from neck to waist.
- Sleeve size – from shoulder to wrist.
- Chest - from armpit to armpit.
- Waist circumference.
The finished product can be decorated with beads, buttons, glitter, lace or satin ribbons, etc. – all this is done at the discretion of the master.
Note! You should have small manicure scissors with you in order to carefully cut off the remaining threads on the product. It is quite difficult to do this with large ones.
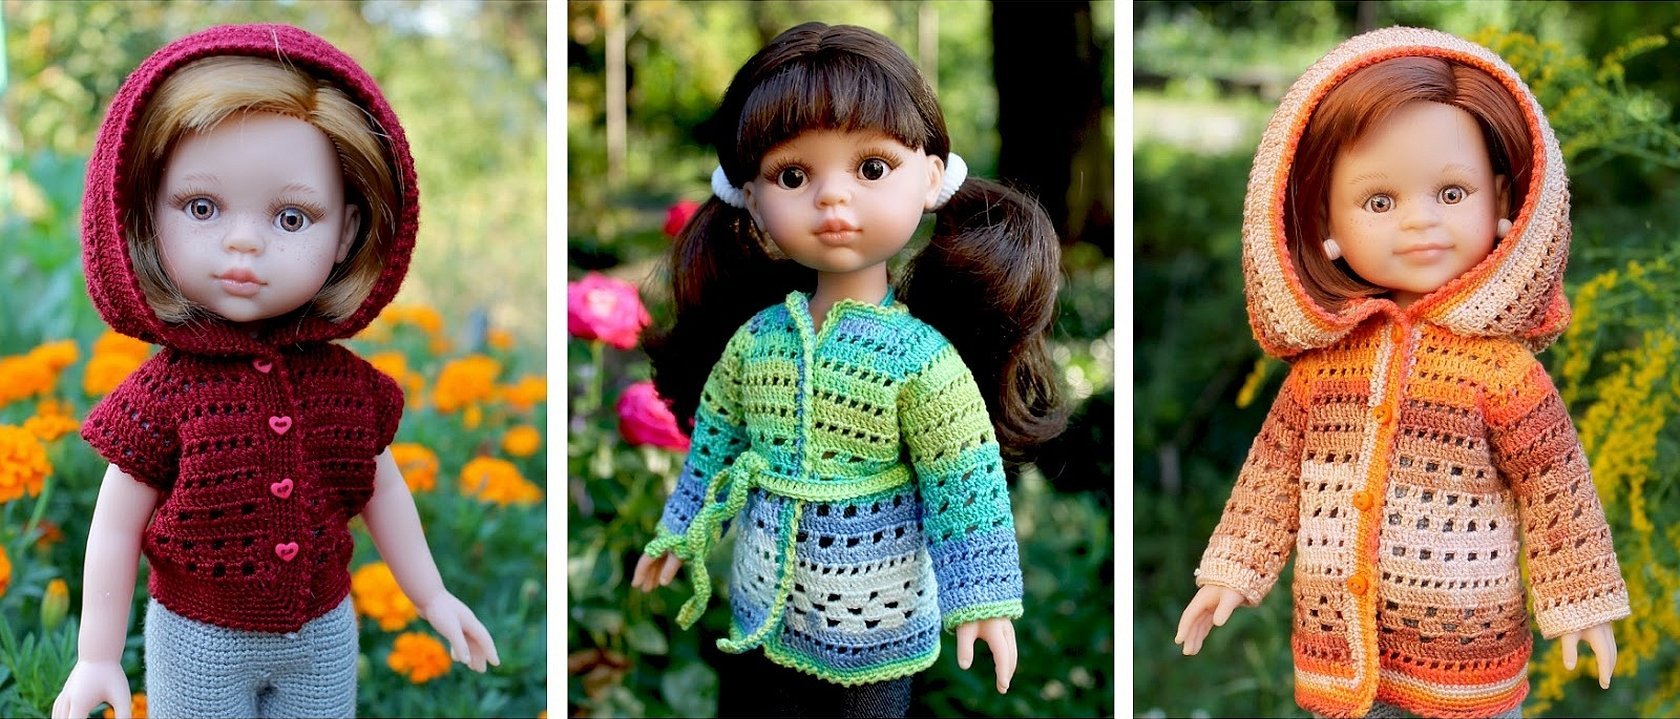
Models of sweaters for dolls
You can sew absolutely any model of sweater for a doll, just like for a person. In order to choose the most suitable option, their main varieties are described below:
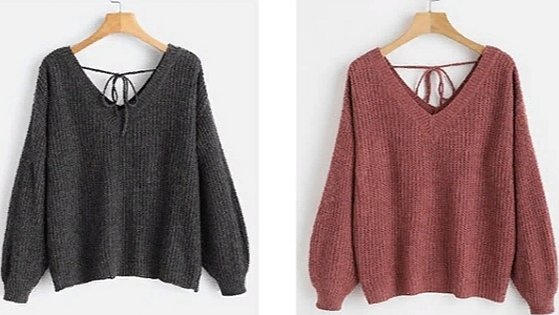
- Pullover. This is a type of loose knitted garment that is put on over the head, without fasteners and has a V-shaped neckline. Most dolls have heads that do not correspond to the body parameters, that is, they may be larger than necessary. This model is perfect for such cases, since you do not have to knit an additional elastic band so that the neckline stretches well.
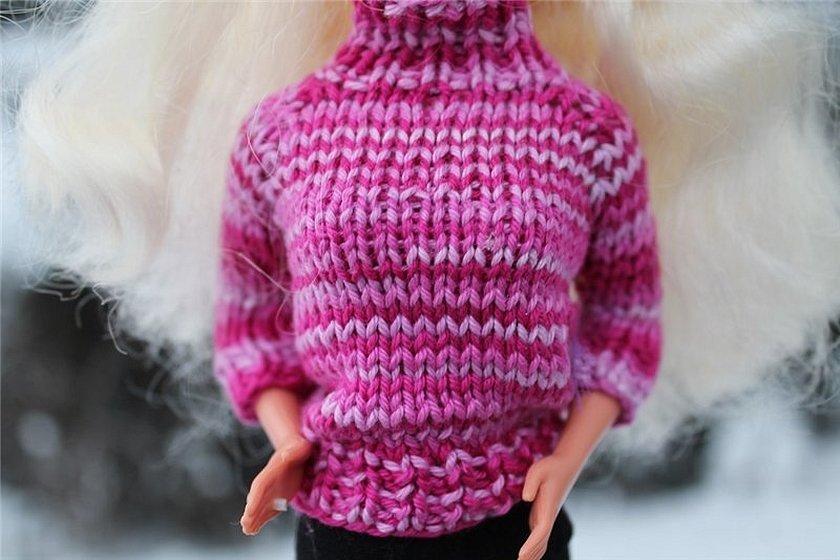
- Sweater. The most popular attribute of knitted garments. It has no fasteners or buttons. It usually has a high neck or a high, loose collar.
- Jumper. This sweater has a round neckline and often a loose fit on the body, i.e. it does not cling to the waist. Various types of attributes are also allowed here, from simple buttons to zippers or other fasteners. Some jumpers can be multi-layered, which gives them an unusual style and appeal.
Patterns for doll blouses
There are a huge number of different patterns, and it is difficult to choose the right one only because it is difficult to decide on just one. Below are the simplest patterns for knitting sweaters for dolls, with which you can begin your journey in needlework. They are suitable for both experienced needlewomen and beginners in this business.
"Flower" openwork pattern
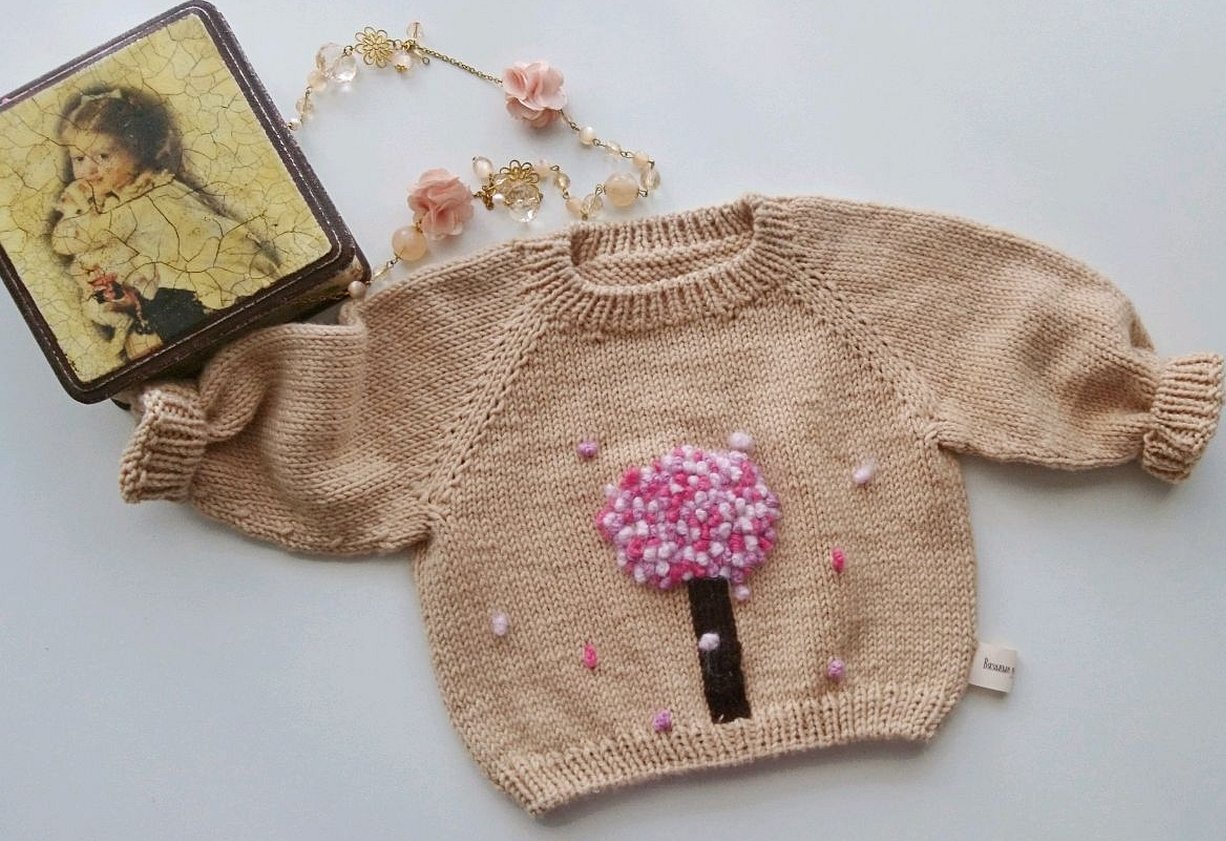
One of the simplest patterns is "Flower". Products with it look airy, delicate and attractive. It is easy and simple to knit. A doll in such clothes will look very stylish and beautiful.
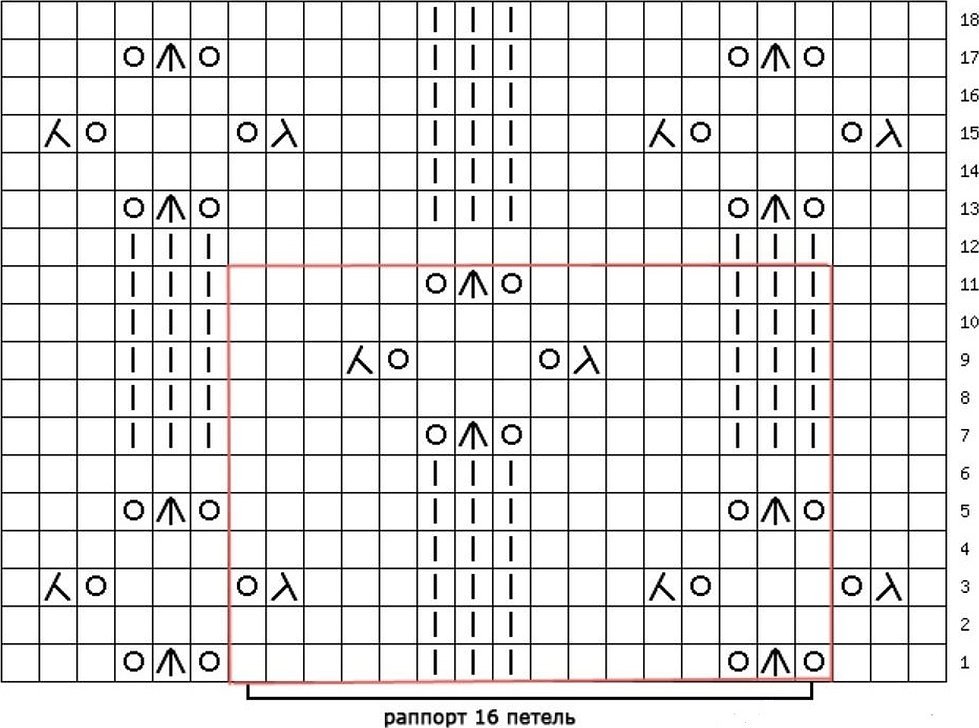
Decoding the diagram:
- O – designation of yarn over;
- I – denotes knit stitches;
- empty cells – purl loops.
First, take two face loops together and knit one face, tilting to the right side (to do this, insert the hook into the 2nd loop, then into the first and knit the loop). Then do the same, but only to the left side (remove the first loop, as when knitting the front side, and knit the front through the second, pulling the removed loop through it).
A small clarification! This diagram shows the front view of the pattern.
Therefore, the first four rows need to be knitted in reverse: instead of front loops - back loops, instead of back loops - front loops.
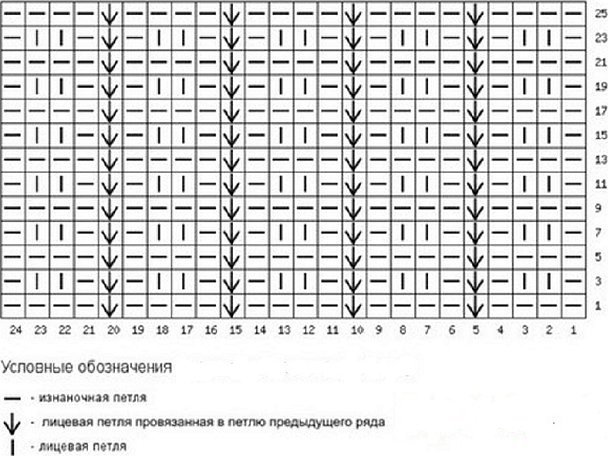
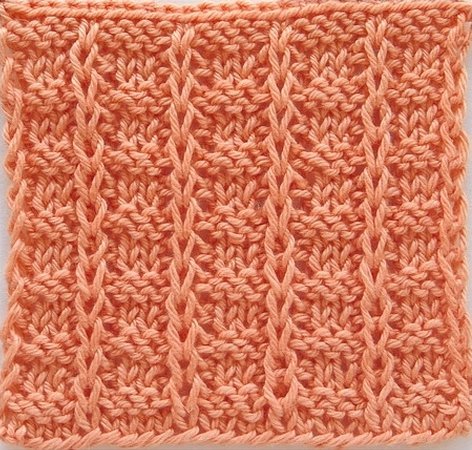
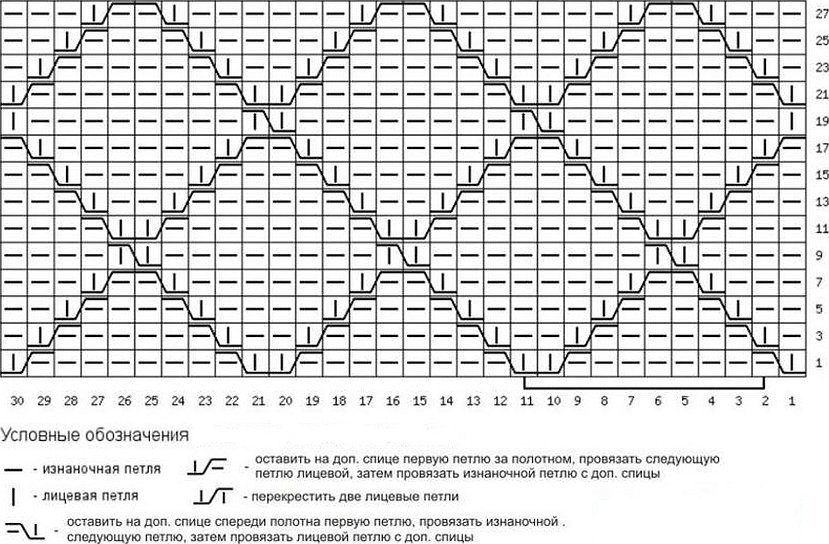
Vertical stripes pattern
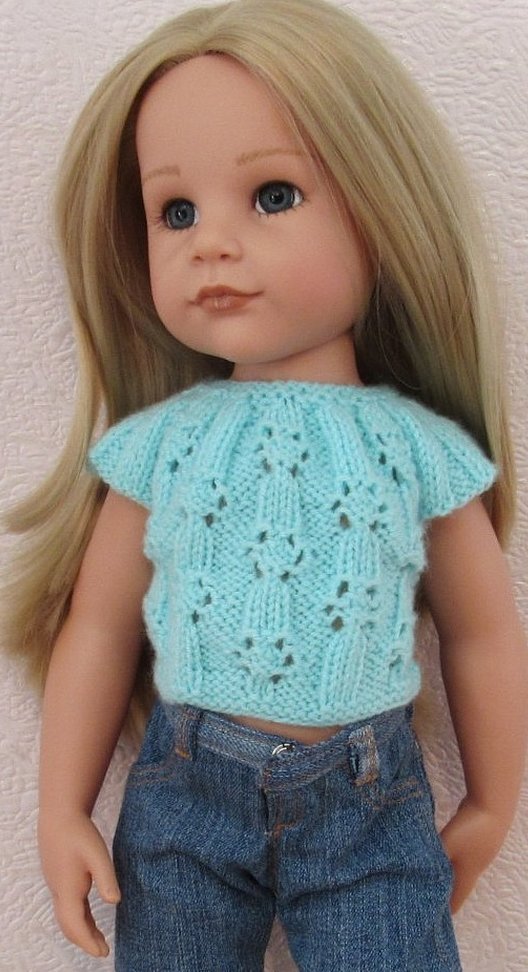
This pattern is knitted using face and back loops. The pronounced vertical column is revealed due to the enlarged face loops. This knitting is perfect for doll clothes, unlike the stockinette stitch - the edges of this knitting do not curl.
This pattern can be made not only with a crochet hook, but also with knitting needles. With its help, you can get excellent stockings and socks, or sweaters with raglan sleeves.
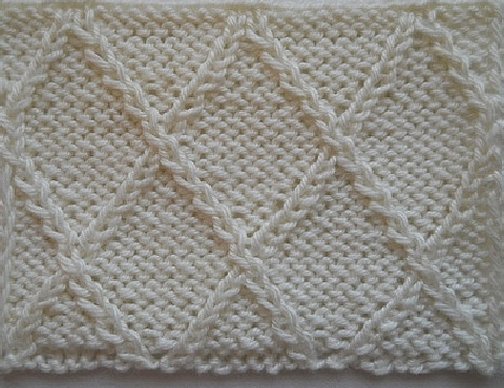
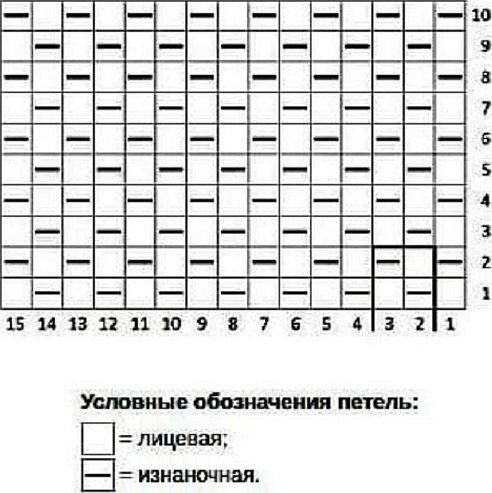
Pattern "embossed diamonds"
This pattern is knitted with a fairly dense knitting using a crochet hook or knitting needles. It is distinguished by a very elastic and thickened finished fabric. It can also be wrapped into a ring using five knitting needles.
This is the result you will get.
Pattern "pearl"
A basic pattern that consists of alternately knitting front and back loops with an offset of one in each subsequent row. The pattern is obtained in the form of a small scattering, like pearls. Therefore, it is also called a rice pattern.
Master class on knitting a hooded sweater
Even a beginner can knit such a blouse, the main thing is to do everything exactly according to the step-by-step instructions.
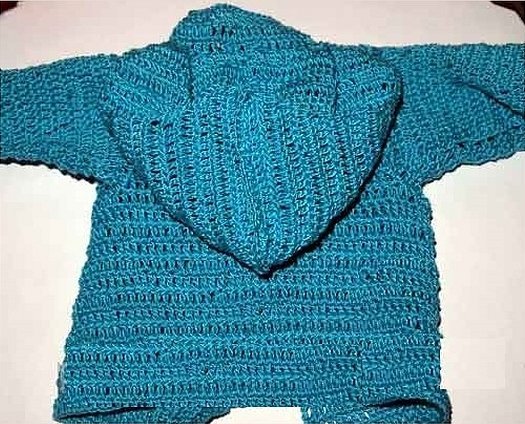
Step by step tutorial:
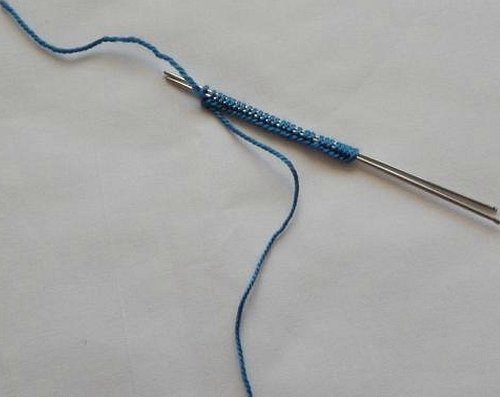
- To begin, you will need to cast on 90 stitches (using acrylic thread and hook No. 3) and make three rows of “pearl” pattern.
- After completing two loops, you should make a yarn over by knitting the next two loops together using a front ch.
- Next comes one row without change.
- Afterwards, making intervals of 3 cm, you need to knit a few more loops for buttons between the rows of the “pearl” pattern.
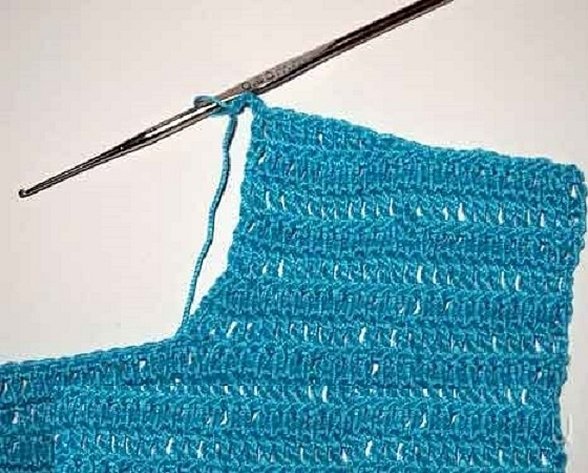
- A blouse is knitted 7-8 cm long and an armhole is made at this point. To do this, knit 25 loops, close 4.
- Now you need to knit another 40 loops, then close 4.
- The remaining loops must be knitted to the end.
- Based on what has already been done, you need to knit the back approximately 14 cm long.
9. Then, after each subsequent row, add 2 loops 2 times to create an armhole on the left and right sides.
10. Now you need to close 15 loops in the middle and finish knitting the right and left sides separately.
11. In order for the neckline to be round, when knitting the remaining rows, you need to gradually close each of them one loop at a time;

12. The shelves should be made symmetrically. For the left one, you need to knit the armhole on the right side exactly the same as on the back. As soon as its height reaches 13 cm, you need to start decreasing from the left side, consistently skipping a row of 5 loops, 2 loops, 1 and 1 more loop - this will create a beautiful neckline.
13. When the blouse reaches 16 cm, you can start closing the remaining loops.
14. The right shelf is knitted similarly to the left one.
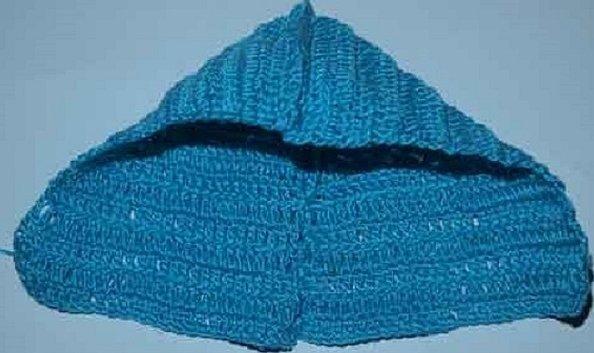
The sleeves and hood are knitted separately. To make the work easier, you can knit them with knitting needles. To do this, you need to cast on stitches and knit the required number of rows (based on the size of the doll) in a circle with a "pearl" pattern of the desired length, and then secure them on top of the finished product.
This blouse can be made not only for Barbie, dolls, or Monster High dolls, but also for plush toys.
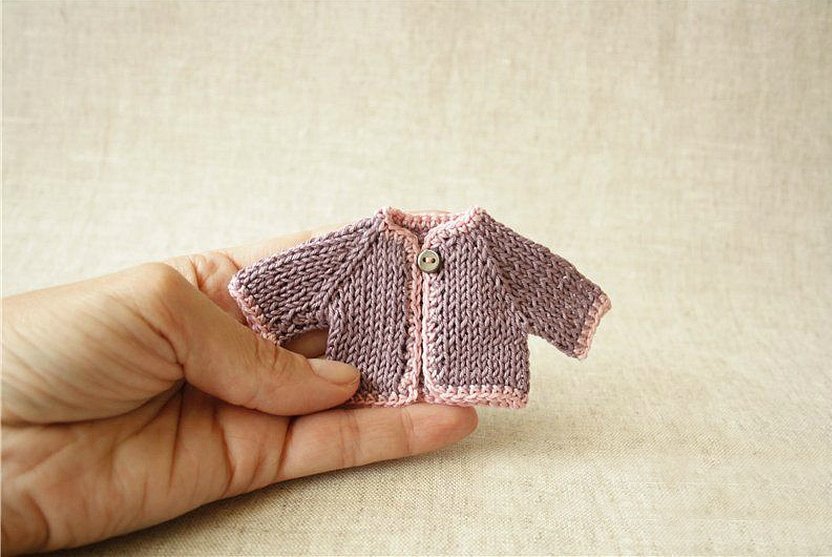
Simple blouse for a doll - step by step tutorial
A similar blouse will suit both Teddy and any doll, the main thing is to decide on the size of the product and the number of loops to be cast on.
For knitting you will need knitting needles or hooks, yarn, a needle, thread, small scissors, buttons or fasteners.
To knit a blouse size 30-34 cm, you need to cast on 28 stitches.
Now you should make an elastic band (you will need to alternate the front and back loops). The width of the elastic band can be chosen any, at the author's discretion, this lesson provides three rows. After the elastic band, 4 rows of stocking stitch are knitted.

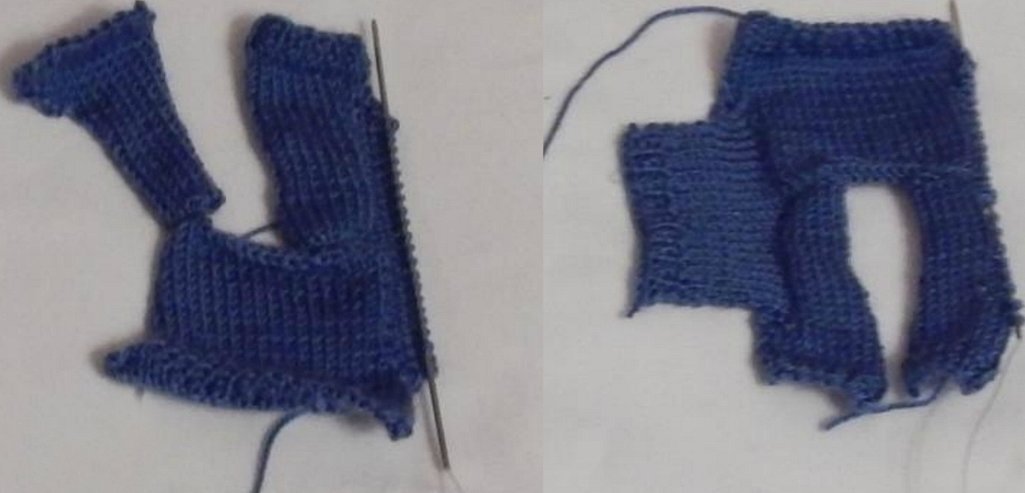
After the elastic and 4 additional rows of stocking stitch have been knitted, you can begin to make the armhole, that is, in each subsequent row you should close two loops (decrease). Further knitting depends on what length of the sweater is required in a particular case.
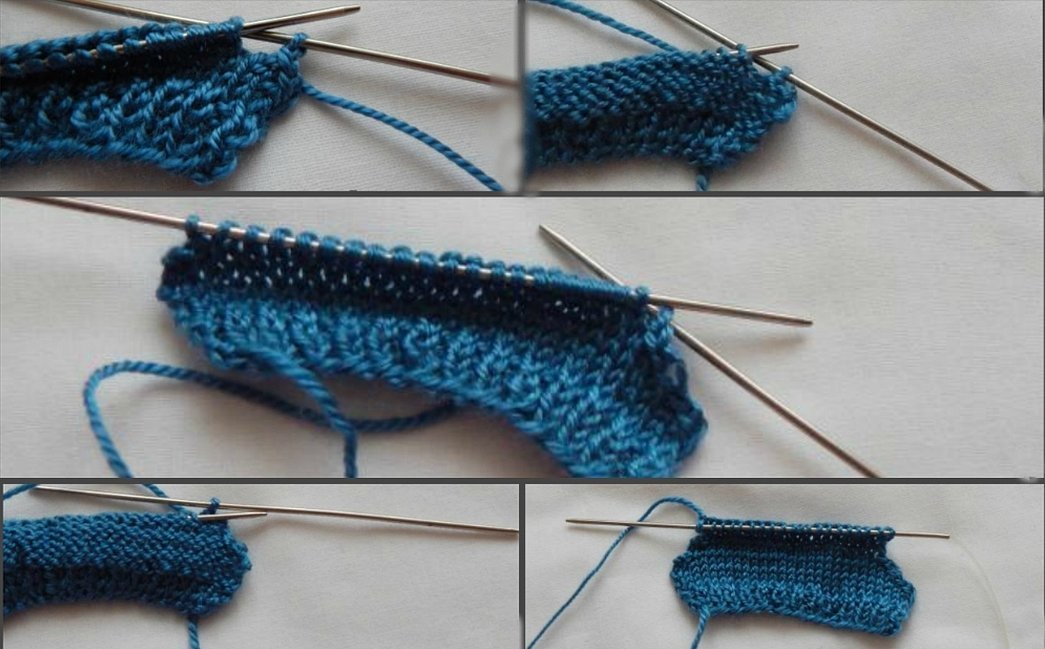
At this stage, the work on making the back of the doll's sweater is completed.
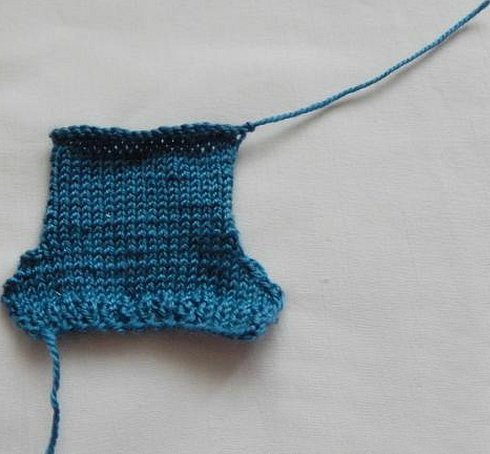
To knit the fronts, you need to cast on 15 stitches and crochet or knit a section similar to the knitted back.
Now you can sew the back and front parts of the sweater.
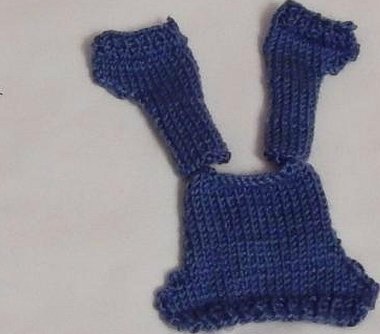
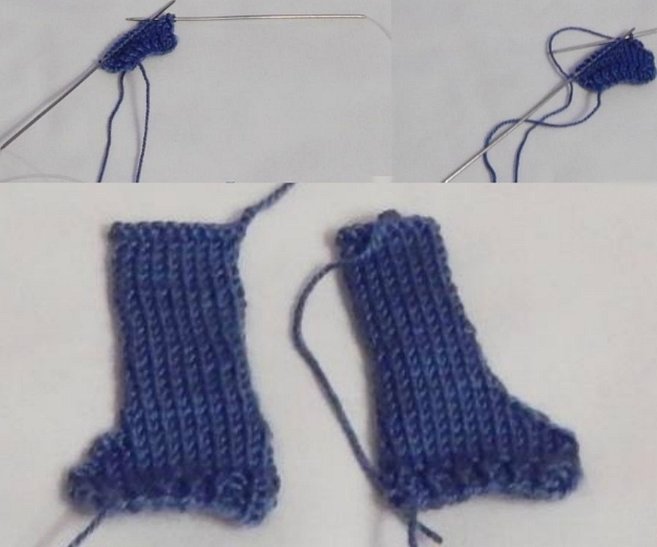
The sleeves should be knitted from the front side of the sweater. To do this, cast on 24 loops and knit two rows. In the 3rd and 4th rows, decrease two loops in each. The sleeves are made with stocking stitch and finished with four rows of rib knitting, as on the back. The second sleeve is made in the same way as the first.
Now you need to combine all the resulting parts together, then turn the thing inside out. Now you can attach a button to it to decorate the sweater, or simply decorate it with some ruffles or fringe.

If you are inspired to create something with your own hands, then do not forget about dolls, which, having stood on the shelf for a long time, are waiting for attention and care from the owner. By knitting a new outfit, you can breathe a second life into the toy. More experienced craftswomen can easily combine different patterns in one product and create beautiful clothes for their dolls.


