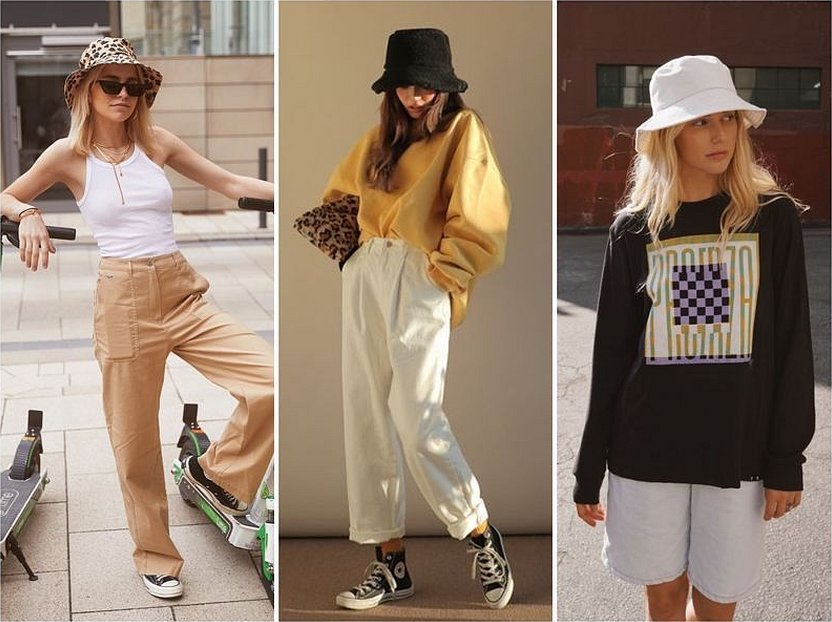
On the eve of summer, needlewomen have a question about how to sew a Panama hat for the whole family, what tools and materials to use. The process of creating a summer headdress is not difficult. It is important to be able to work with small details and stitch evenly on a sewing machine. It is more difficult to decide on a model from a variety of options. The final chord will be decorating the finished product.
Measures
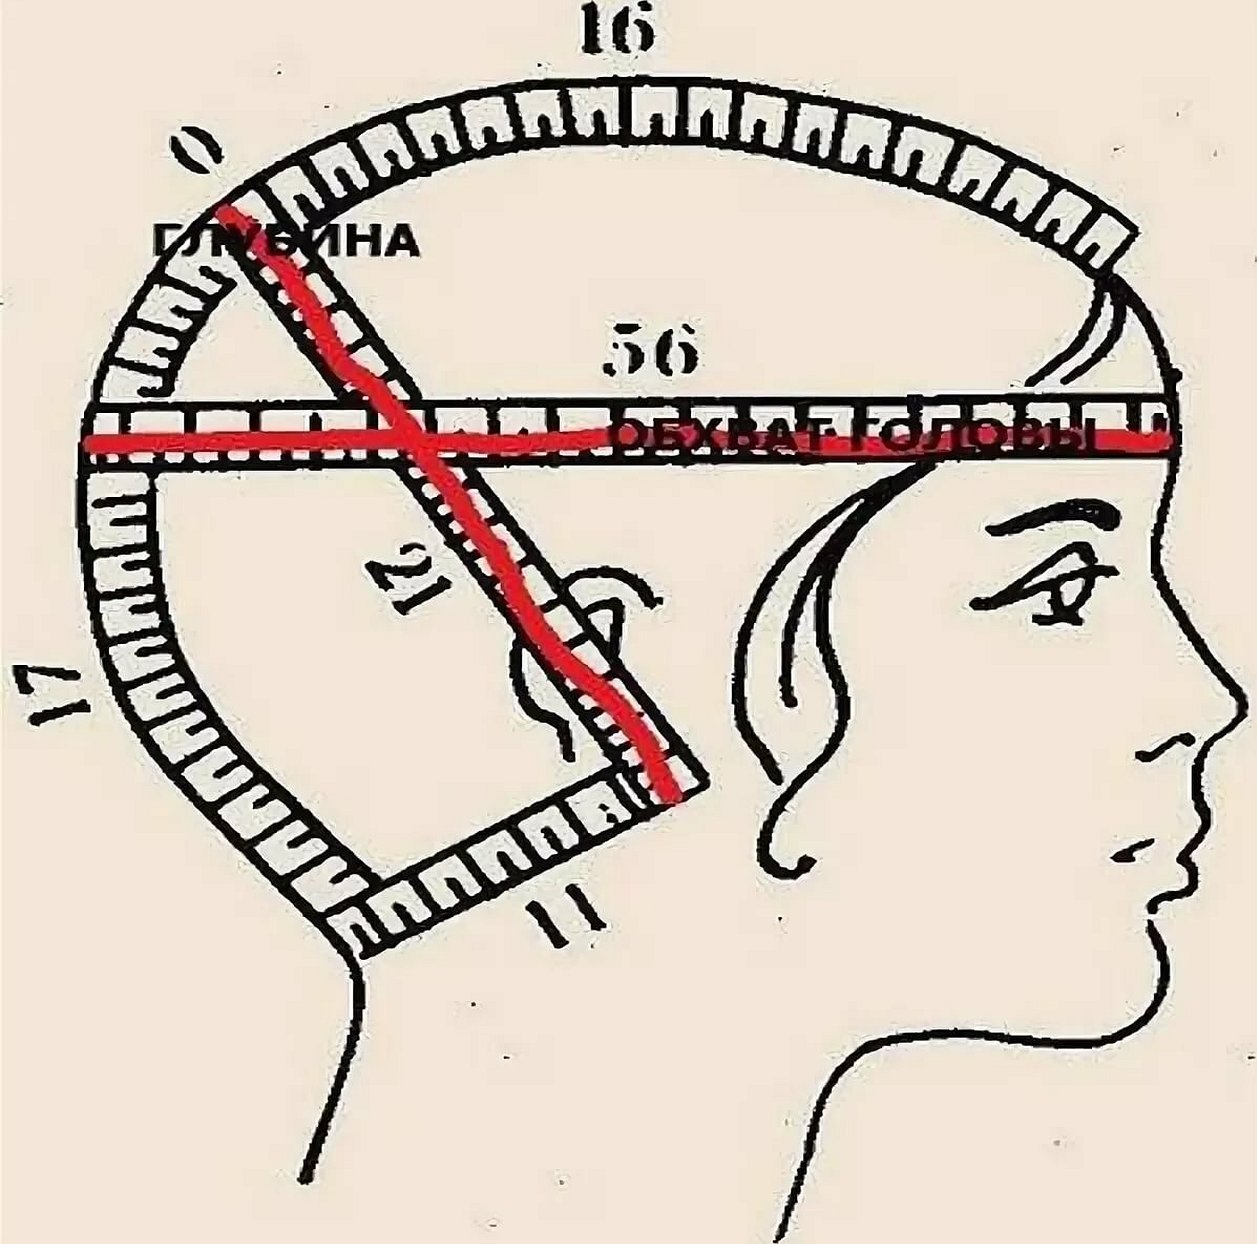
You won't be able to sew a panama hat for a woman, a man or a child with your own hands if you don't take the right measurements. The whole process takes about 5-7 minutes, but it requires attention and precision. All data should be written down immediately so as not to forget the numbers.
The correct and at the same time standard scheme for taking measurements for sewing a summer headdress:
To sew this type of criminal attire, you only need to know 2 parameters:
- Head circumference. You need to measure the maximum circumference of your head - the measurement is taken along the forehead above the eyebrows and along the most convex part of the back of the head. In this case, you need to pull the measuring tape tightly.
- Cap depth. The distance from the beginning of the earlobe to the middle of the crown. These measurements determine the size according to standard norms.
Pattern, cutting of the product
First, you should choose the fabric for work. It is worth considering that the headdress will be used mainly in the sun and in hot weather. Therefore, it is recommended to take only natural lightweight fabrics.
Next, measurements are taken, and only then the model is selected. It is worth considering at the time of selecting a sketch, for whom the item will be made. The most difficult and responsible stage will be the preparation of the pattern.
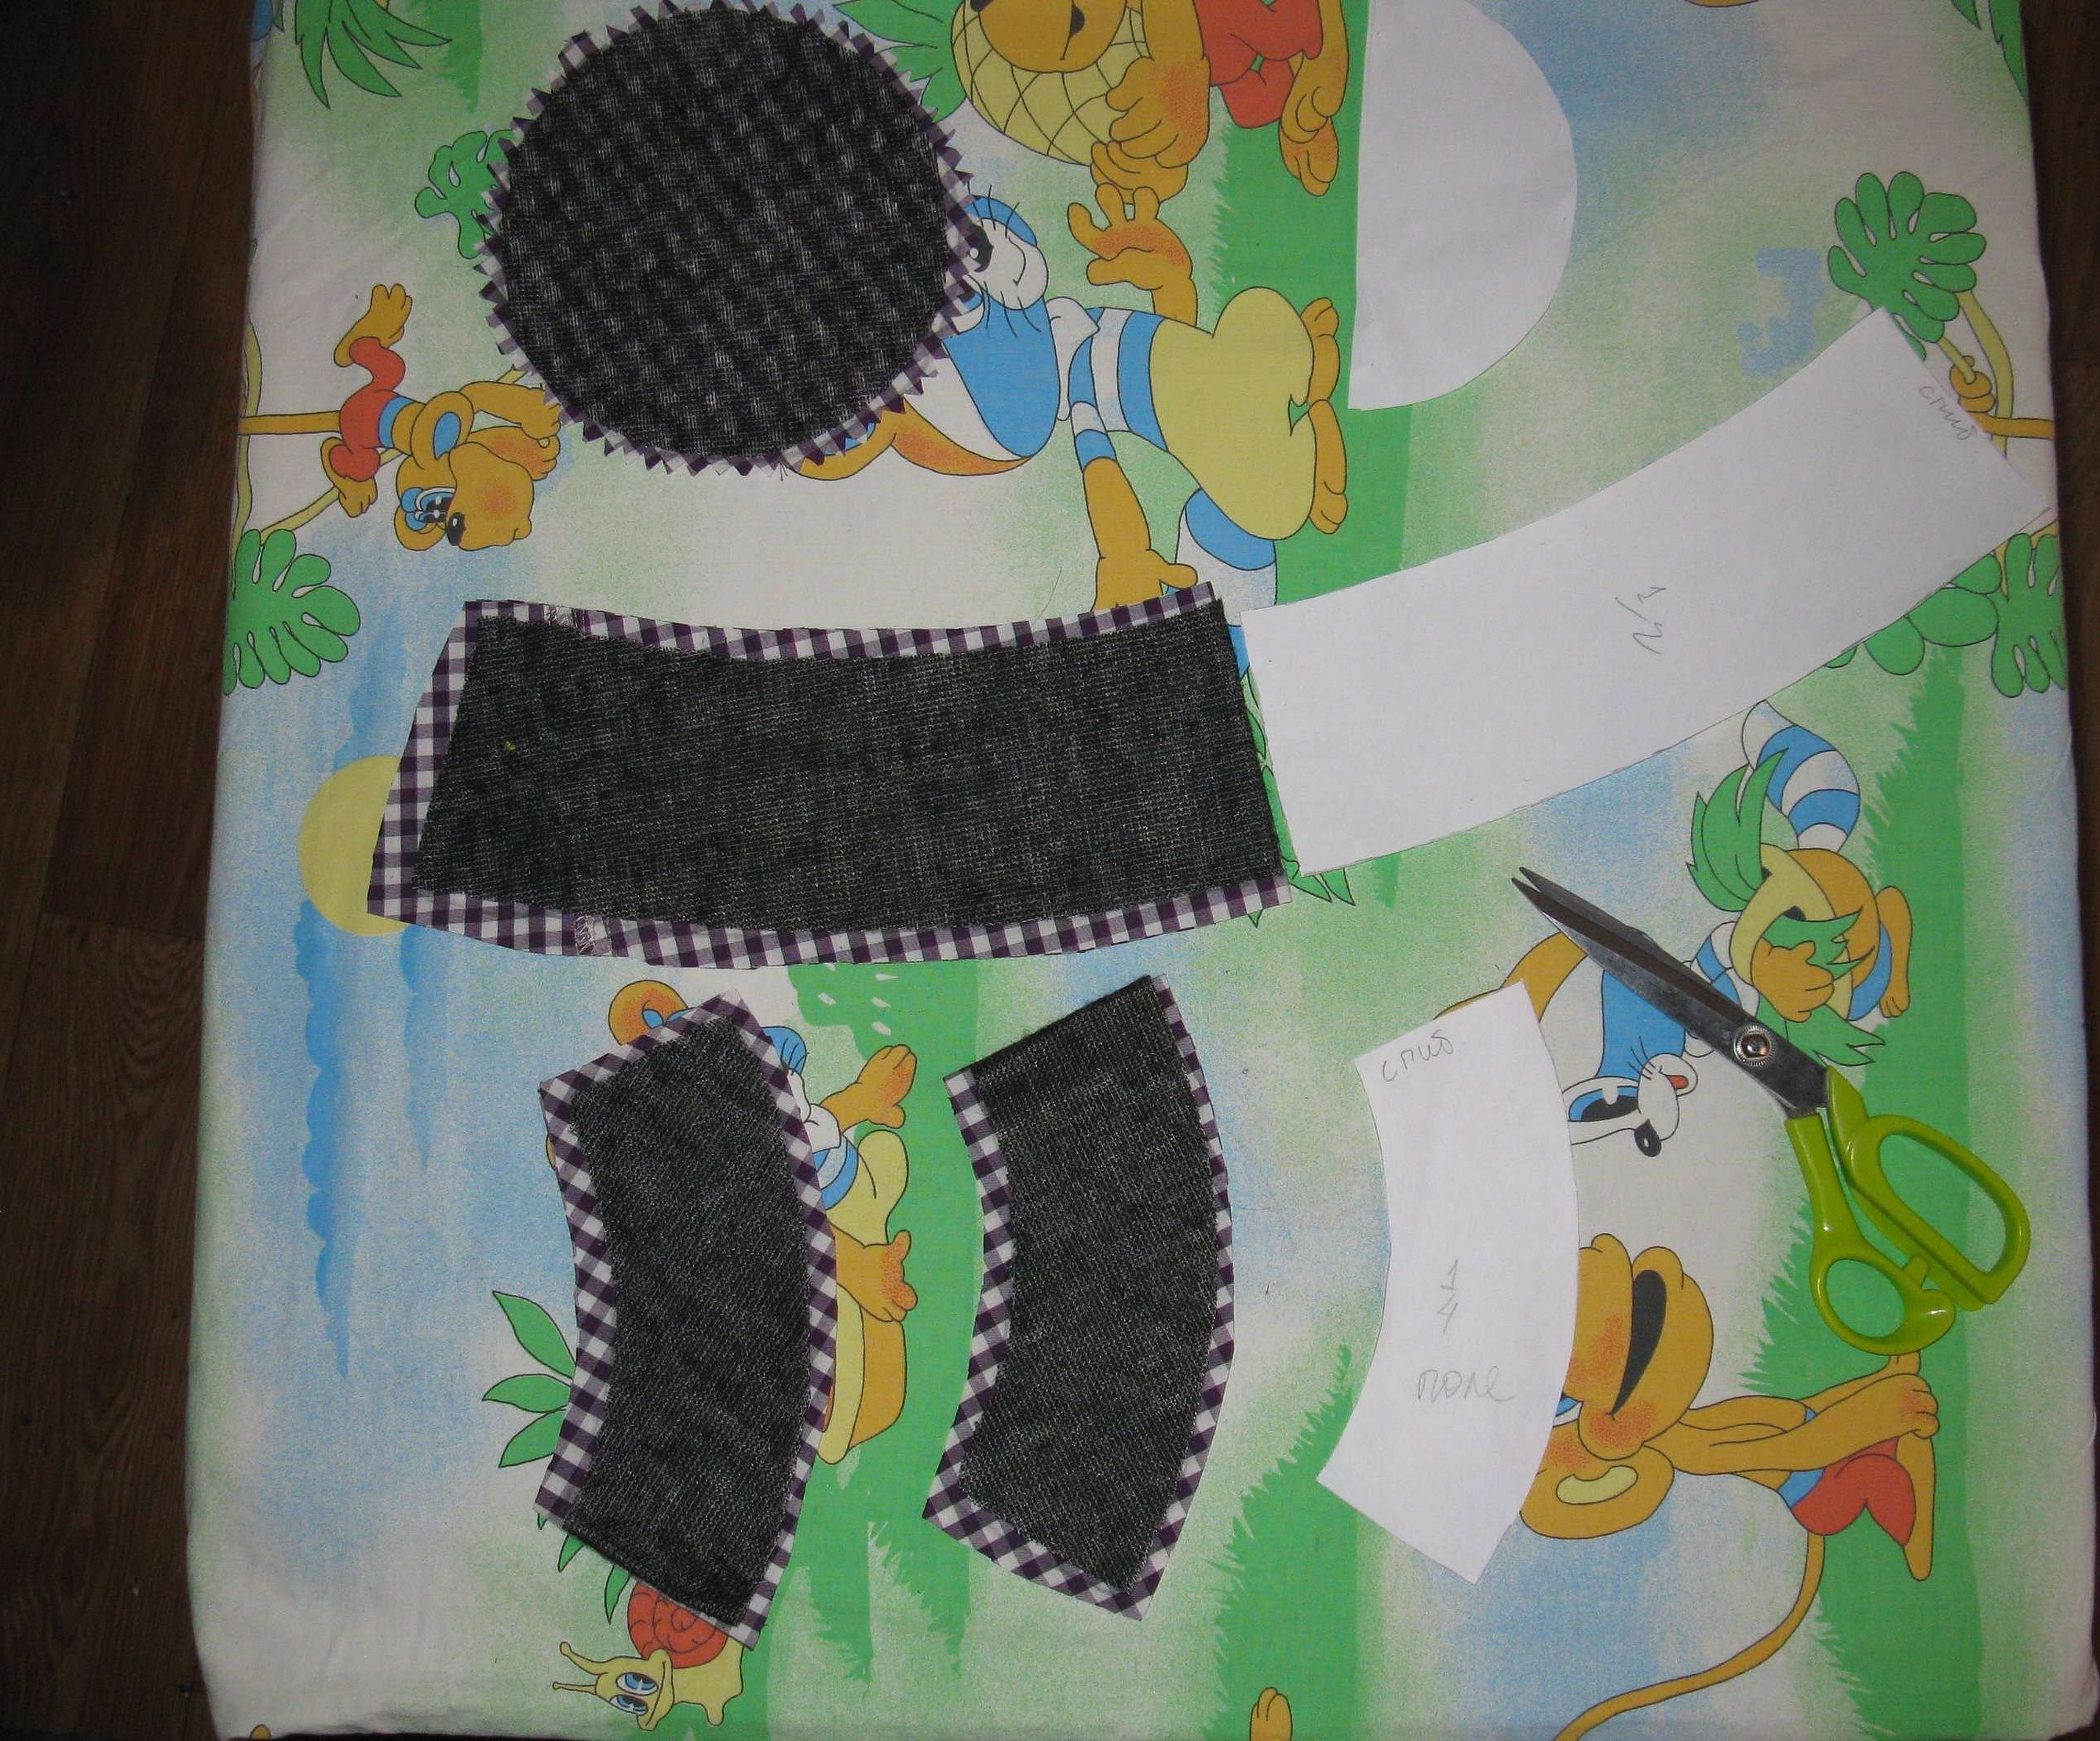
When the pattern of the Panama hat is ready, you can start cutting the fabric. You need to take into account the direction of the main thread of the fabric. If the parts do not match in this regard, the product may become deformed. During wear, the item will definitely be washed, so it is recommended to check the material for shrinkage.
Women's
The variety of women's panamas is so diverse that it is quite difficult to immediately decide on a choice. But an alternative to simple types of headwear of this concept can be unique panamas. This type of product is more reminiscent of a hat with small brims.
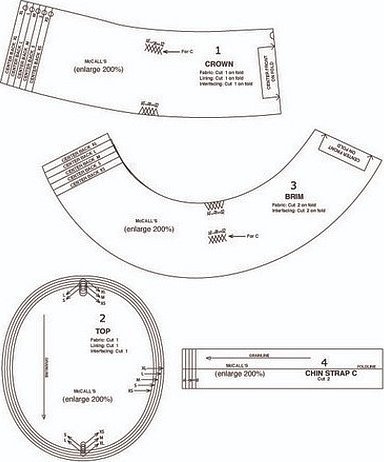
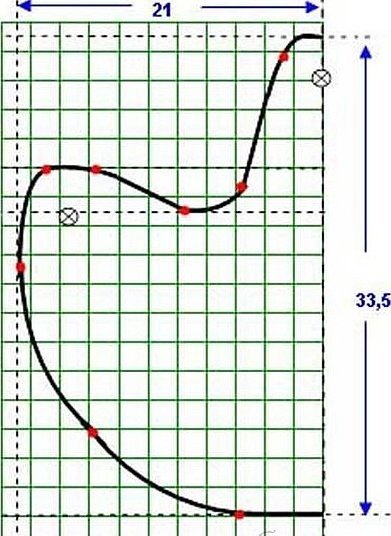
The pattern for a full-size women's Panama hat is prepared as follows:
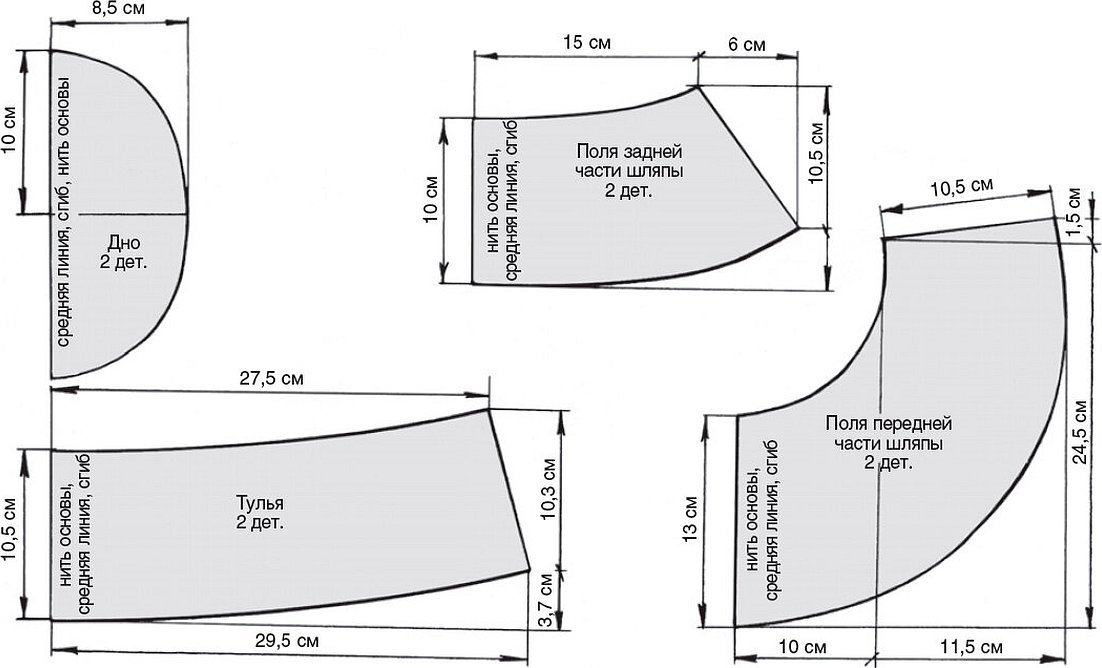
- When preparing the pattern, it is worth considering the individual dimensions of the head and adding 1 cm on each side of the piece. This is an allowance for seams.
- First, you need to stitch the side edges of the brim. Iron the seams and topstitch them, placing the lines at a distance of 3–5 mm from the seams.
- Place the outer and inner brim with the right sides together and stitch. Work is done from the outer side of the cuts.
- Cut off excess fabric from the seams and trim them to 5–7 mm. Turn the piece right side out, straighten the trimmed edge, and iron all seams.
- Continue forming a decorative stitch along the edge along the outer side of the brim. Place decorative stitches parallel to each other along the brim at a distance of 1 cm.
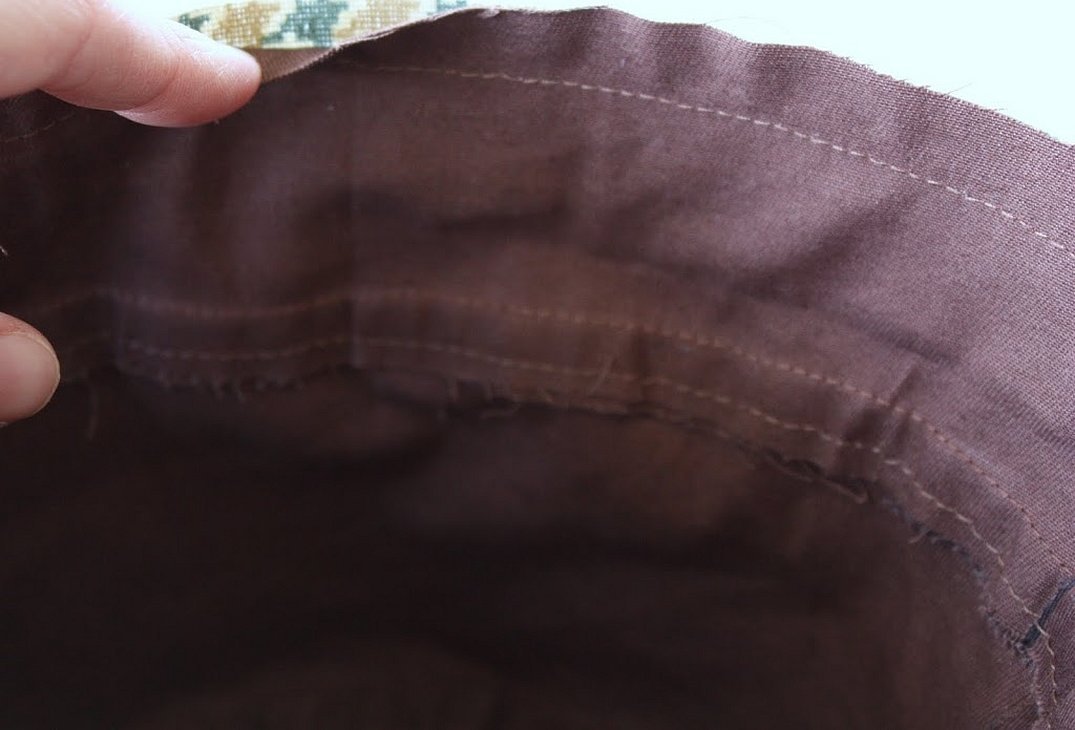
- Sew the back edge of the crown. Then untangle the seam. Sew the back edge on the lining, leaving an open opening of 5-7 cm for turning the hat inside out.
- Sew the bottom to the crown, the bottom lining to the crown lining. It is recommended to iron the seams.
- The prepared parts are folded with the right sides inward, and the margins are inserted between them.
- The sections are aligned and all layers are connected with a through machine stitch. You can use another type of stitch, but the one originally suggested is still preferable.
- The hat is turned inside out through the open hole in the crown lining. The seam allowances of the opening in the crown lining are folded inwards and the folds are stitched by hand with blind stitches.
- The seam for attaching the brim is sewn at a distance of 3–5 mm from the seam.
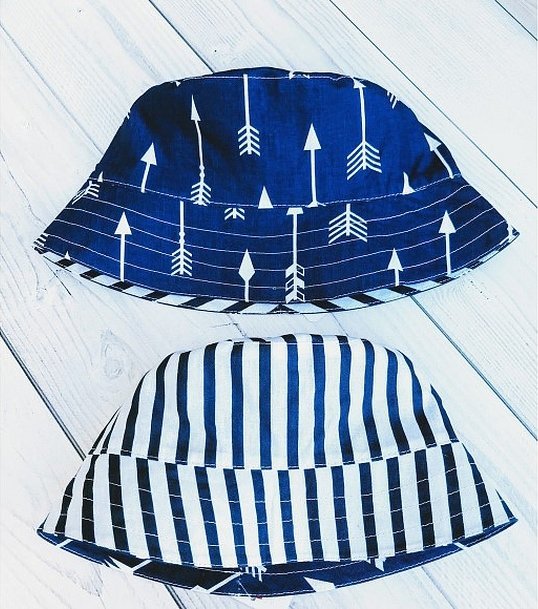
The result is a Panama hat like this:

Important! Denim is a universal type of material from which you can sew summer hats for men, children, and women.
For production, you can take cotton, linen, denim. Decorate with any decorative elements along the brim line. For the summer version, a marine style may be relevant.
Male
In hot weather, a Panama hat is a must-have item not only for children and women, but also for men. The Afghan hat is considered a very common, functional and comfortable model. To make this type of headwear, you can use thick cotton or linen. If the textile is still deformed, you should think about what you can make a hard lining from. Usually, interlining or cardboard is used for this.
The pattern for a men's Afghan panama hat looks like this:
- First, you need to create a sketch, and then a more detailed model, which is formed in accordance with the parameters of the head.
- Initially, the brim of the Panama hat is stitched. The line should run parallel to the edge, in several rows. The more rows of line are created, the denser and stiffer the brim or individual parts will be.
- The lining of the Panama hat is cut on the bias (the front parts are cut along the grain line), but using the same patterns.
- The next step is assembly. Since the top of the Panama consists of side parts (crown) and bottom, the side parts are first sewn together, and then the bottom is sewn to the side parts.
- Sew the brim, finishing the edges.
- All actions are repeated with the lining, which is sewn to the main part.
Please note! For precise alignment of the crown with the brim, 4 marks are applied to the crown and brim. When sewing, you need to try to match these points.
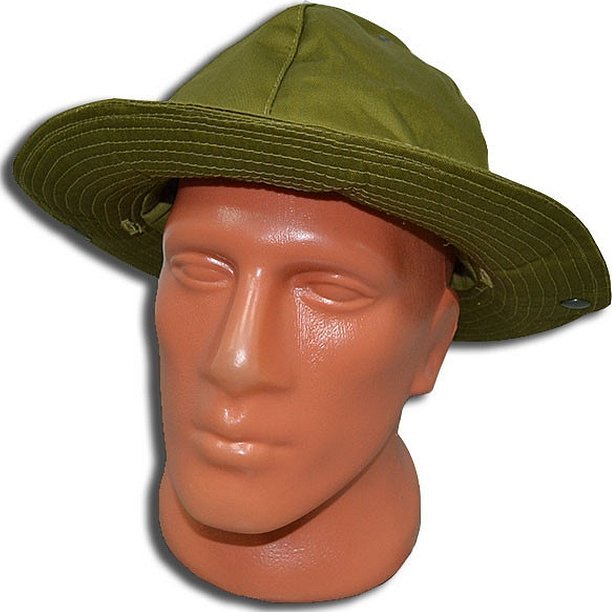
The resulting headdress is considered universal - it will suit half of the summer wardrobe. The main thing is to initially choose a universal color of the material. Khaki and dark blue are usually used.
Children's
There are many different models of children's panamas, which differ in their design and sewing principle. Their diversity lies in the difference between products for boys and girls. But there are the simplest options that are relevant for babies and toddlers. At the same time, the pattern of a children's panama will not be difficult.
To make any option, you need to prepare ½ m of suitable fabric, ½ m of decorative tape, 50 cm of twill tape for the inner seam finishing, interlining strip, sewing threads. It is worth taking care of a set of tools: a sewing machine, safety pins, paper, pencil and measuring tape.
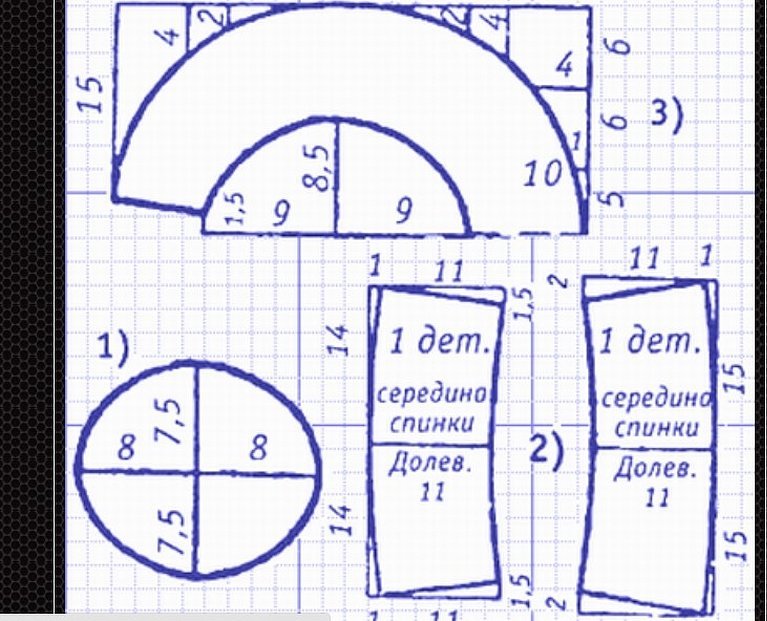
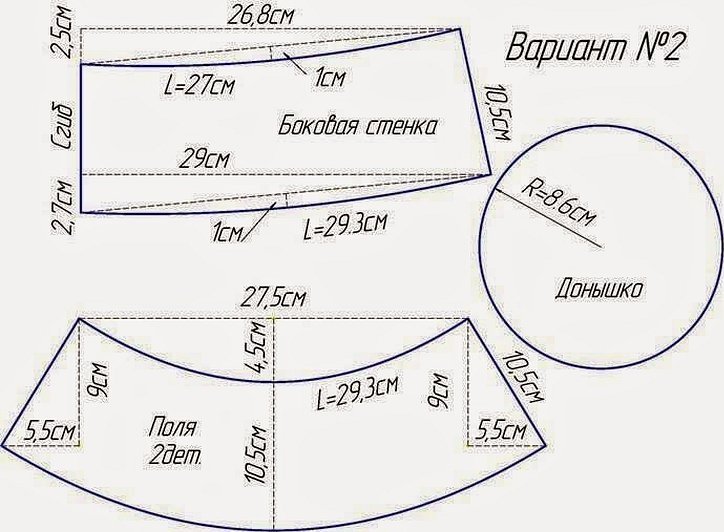
The pattern for a boy's panama hat is prepared on a piece of cloth folded in half. The set of patterns consists of:
- 2 field details;
- 1 crown;
- 1 piping;
- 1 top piece.
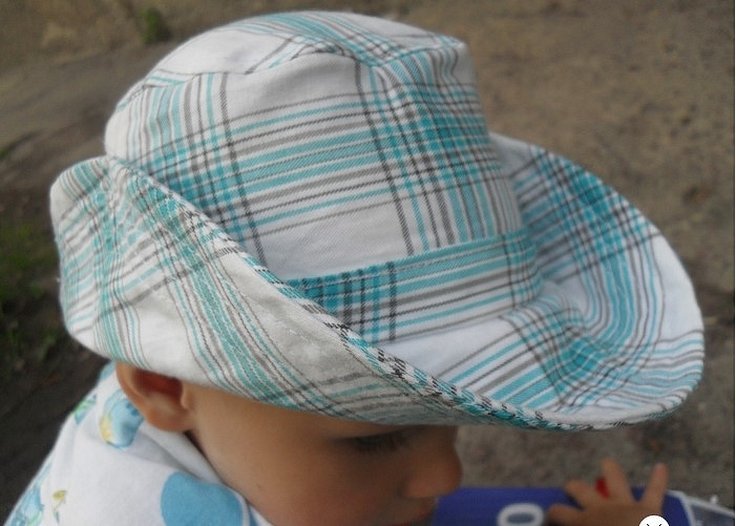
The principle of making a cowboy panama hat for a boy:
- First, you need to glue the fields with non-woven tapes. Between 2 field parts, a non-woven tape is placed, which is steamed with an iron.
- You need to sew the brim together to make a circle. The line is laid in 3 rows at a distance of 1 cm from each other. Fold the brim with the right sides together and sew around the circumference on a sewing machine. It is better to cut off the excess allowances.
- Sew the crown to form a circle. Overcast the edge. Turn it over and make a finishing stitch.
- Connect the crown with the brim. Fold the parts so that the seam is on the outside. It is recommended to combine the parts in the center at the front. This is necessary so that the hat is even. Trim the allowances.
- Sew the top. Attach the top to the crown so that the seam is inside. Additionally, it is worth aligning the centers. Sew the parts. Neaten the cut and bend it upward. Make a finishing line.
- Sew on the piping. First pin the piping and then sew it on, leaving small tails to sew the piping together later.
- Process all seams and edges, covering them with piping.
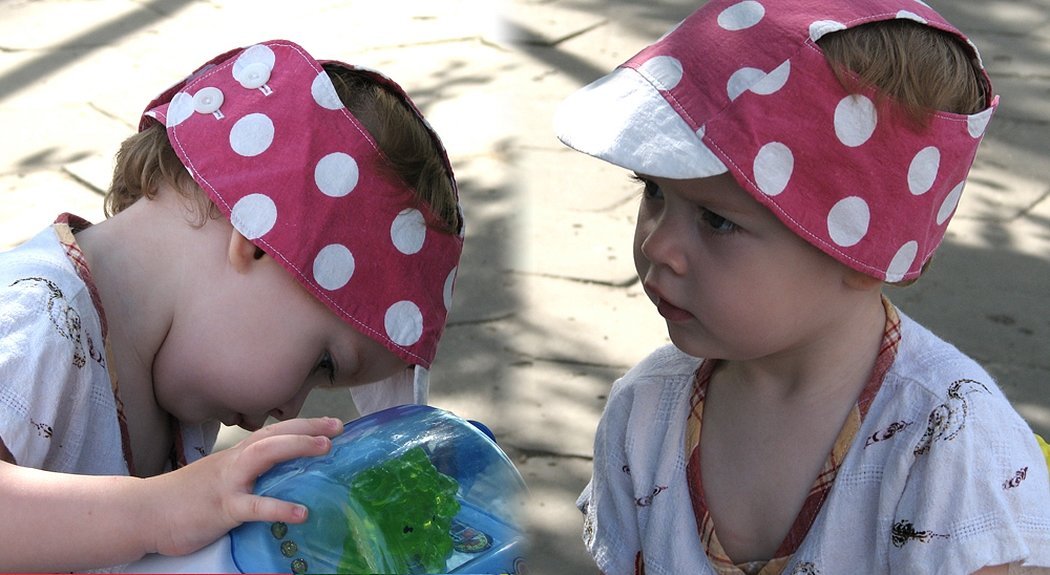
The finished cowboy hat will look like this:
What will the pattern of a panama hat for a girl look like and the principle of making the item:
- Prepare a pattern according to the measurements taken.
- Cut out paper blanks and apply them to the fabric. Attach the parts with safety pins. Cut out the patterns.
- Use an overlock to process the edges of the fabric cuts. Use safety pins to connect all the parts.
- Sew the connecting seams on a sewing machine.
The summer product can be decorated with a large flower made of fabric or ribbons. The result will be the following panama:
For very small children, a string is sewn to the bottom of the brim, which will allow the product to be fixed around the neck if there is wind.
Additional information! A very popular type of children's sun hat for one-year-old children, regardless of gender, is the folding sun hat.
The Panama folding bed is made as follows:
- Prepare 2 panama pieces from fabric according to the pattern.
- On the top layer, make an applique. Glue a piece of fabric of a contrasting color with interlining, then cut out a figure from it.
- Baste the dome of the figure to the top layer of the panama. Stitch the applique along the contour with a dense zigzag stitch.
- Place the panama hat pieces with the wrong sides together. Sweep both layers along the edge.
- Sew the edges of the panama hat with bias binding. Sew a button to one of the outer straps, and sew loops on the others.
The "folding" hat is ready for use. This type of summer hat is mainly used by girls, as the tails can be pulled out through the side holes, showing off the beautiful elastic bands. You can also create a model for a boy. It is enough to think of an interesting decorative treatment of the holes.
In terms of making children's versions, you can show all your imagination. Interesting appliques are formed on the basis of the products, and various decorative elements are sewn on. There are also completely non-standard solutions - you can sew a small soft toy on the front.
Panama hat sewing algorithm
When the pattern of the panama hat is selected and fully prepared, it is worth starting to sew the headpiece. To understand how to sew a panama hat, it is worth using a step-by-step and fairly detailed algorithm.
The following tools and materials are usually used for the work:
- 1/2 m base fabric;
- 1/2 m fabric for the inside;
- 1/2 m lining fabric;
- sharp scissors;
- paper, chalk and pencil for pattern;
- threads to match the fabric;
- awl;
- sewing supplies;
- sewing machine.
Universal master class on sewing any model of Panama hat:
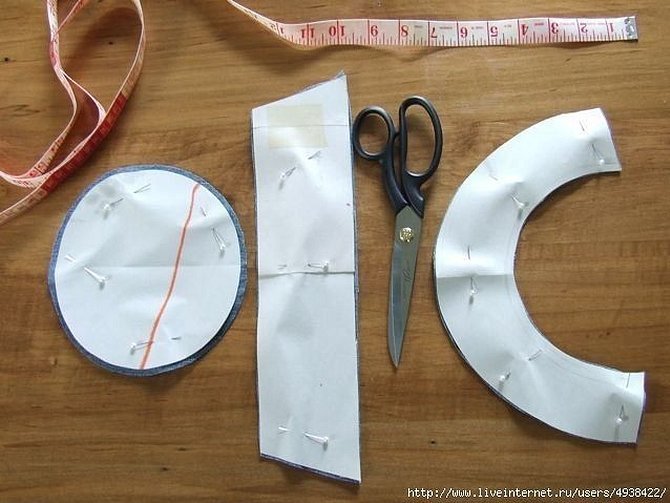
- Cut out the product parts from paper after the pattern has been prepared.
- Place paper pieces onto main, lining and stiff fabric.
- Trace around with tailor's chalk and carefully cut out all the parts along the outline.
- You need to take 2 side pieces from the main fabric and stitch them along the sides. Leave a small gap on the sides. Glue the lining fabric in the middle. Cut the bottom and top edges of the sides. Repeat with the other side pieces.
- Sew the top and sides. Take the central circle for the top of the panama hat and attach it to the side pieces from the wrong side. Glue the lining fabric onto the circle. Carefully stitch along the upper edges of the top and side pieces.
- Take the brim pieces from the main fabric. Place them with the short sides together and sew on the sewing machine. Glue the lining fabric in the middle of the wrong side. Cut the top and bottom edges of the brim. Attach to the wrong side of the hat and the side brim pieces, sew along the bottom edge on the sewing machine. Turn to the front side.
- After the 2 pieces of the hat are sewn together, you need to put them together with the right sides together, sew along each edge and leave a small opening. Turn the hat inside out through the opening. Iron it and sew a double seam along the bottom edge of the hat.
The final stage will be the finishing, which is done at the discretion of the needlewoman. Usually ribbons, laces, appliques, basic fittings are used - here the needlewoman's imagination, unlike the sewing algorithm, should have no limits.
In hot weather, you should definitely wear a hat to avoid sunstroke. A universal option is a Panama hat. There are many options that can be used to sew men's, women's and children's products. If you make the item yourself, you can create a truly unique design. It is important to choose the right fabric that will ideally suit this type of design. Both the child and the husband will be happy with such a gift.


