There are several types of seams in sewing, depending on their purpose. They are made in one or two lines. Beginner seamstresses are advised to consider the basic stitches, they should be even and neat.
- Hand stitches and lines: types and patterns
- Backstitch
- Hand stitch "behind the needle" (marking)
- Running stitch
- Open-cut edging stitch
- Reinforced connecting seam
- Blind hem stitch
- Edging seam with tape
- Hand furrier stitch
- Stitching and marking seams
- Interlining seam
- Cross stitch
- "Running" seam
- Hem
- Double or French seam
- Tick stitch
- Lap seam
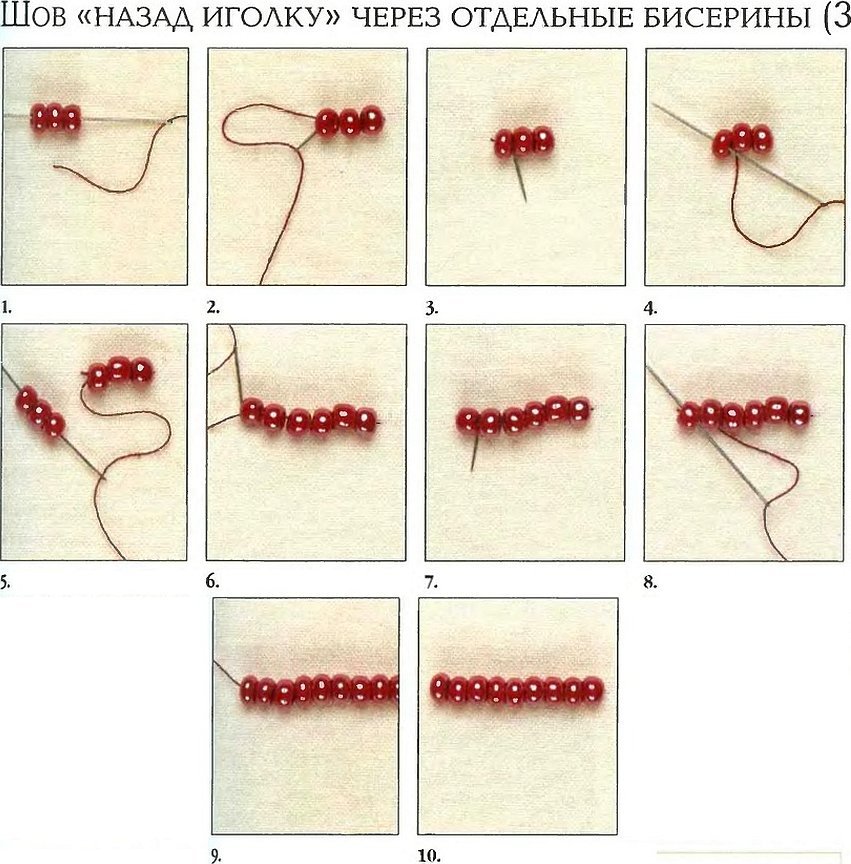
- Hand stitches for working with beads
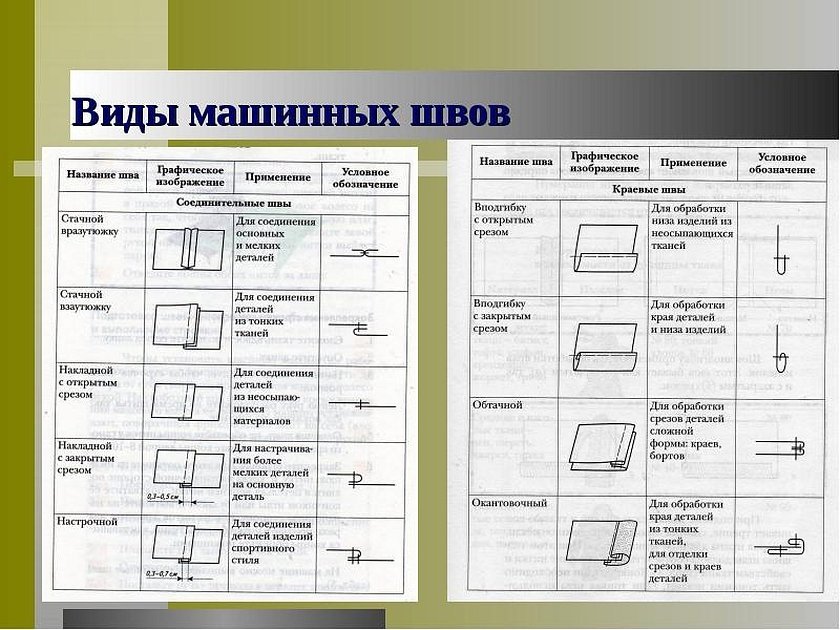
- What types of seams are there in machine sewing?
Hand stitches and lines: types and patterns
There are different types of stitches for hand sewing with a needle. They can be decorative and ordinary - this is a general classification. The first group includes types that are used only for decorating clothes. The second perform a practical function.
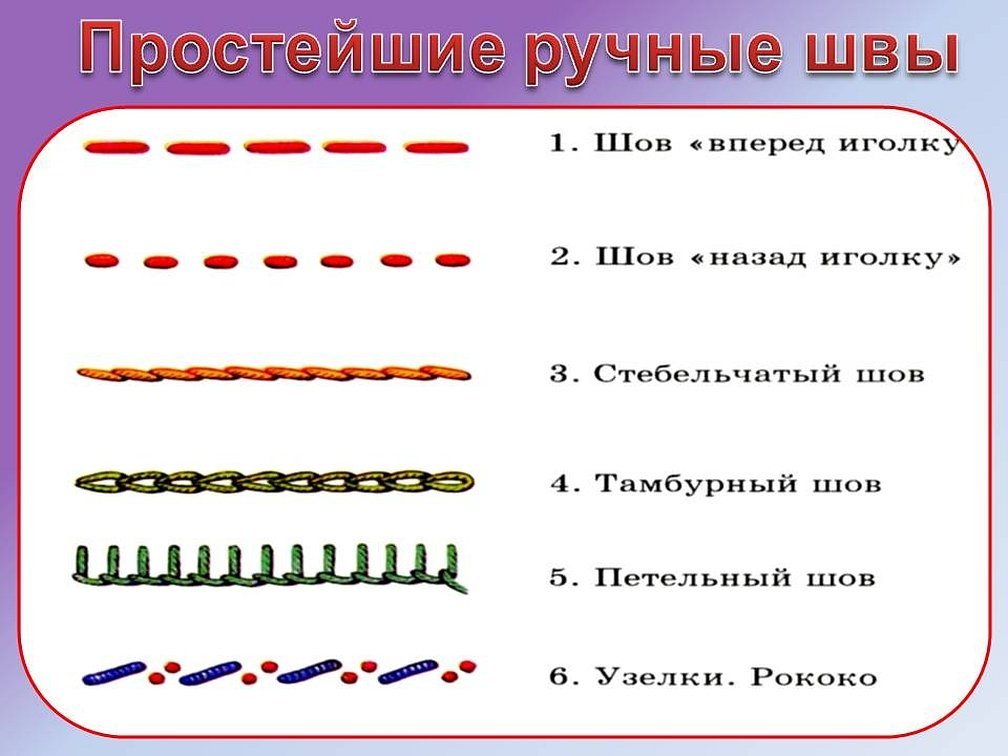
Main varieties:
- "back needle";
- marking stitch;
- forward the needle;
- open-cut edging;
- connecting seam;
- hidden hem;
- edging with braid;
- hand furrier stitch;
- stitching and marking;
- lining seam;
- "crosses";
- running seam;
- hemming;
- double or French seam;
- "check mark";
- lapped.
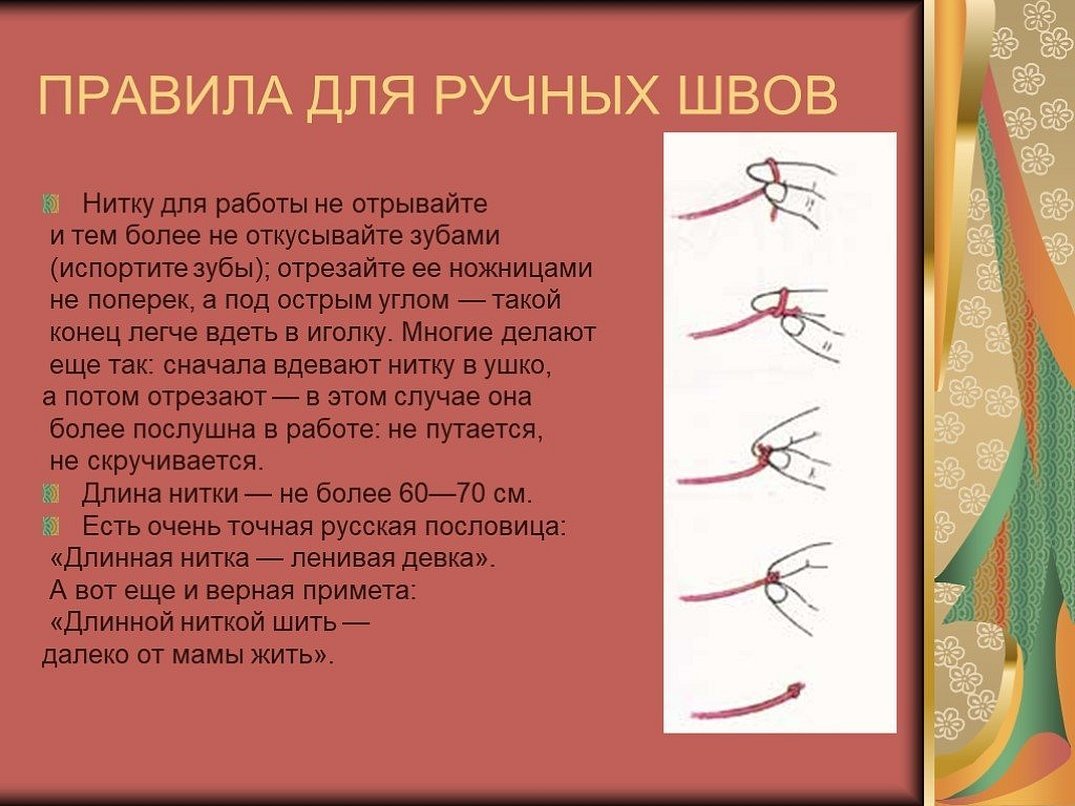
Important! It is recommended to take a thread that is long from the wrist to the elbow.
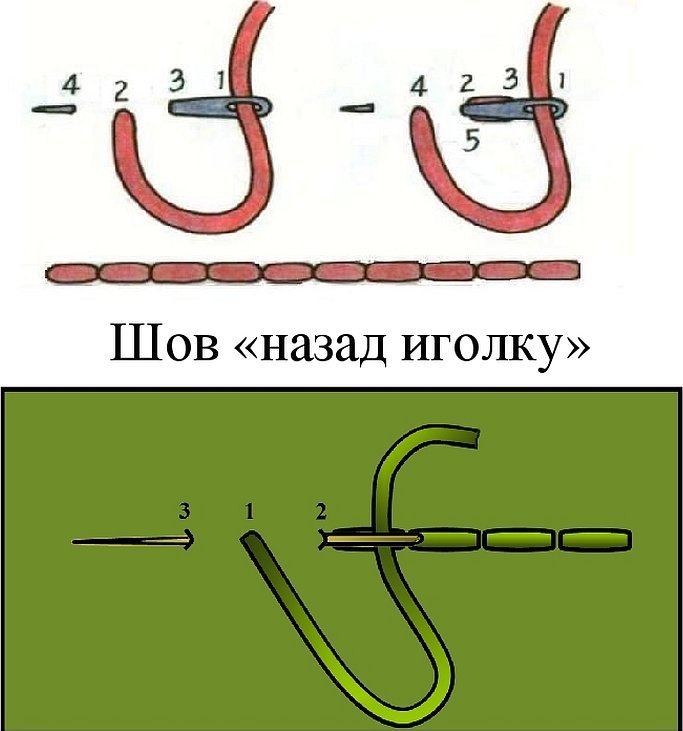
Backstitch
At the very beginning of sewing training, it is recommended to use a stitch, the line of which will be strong and simple. "Back needle" is a basic stitch, it is used for fastening, in difficult places on fabric products. How to do:
- Bring the needle up.
- Make a stitch back. About 2 millimeters.
- Bring the needle up. Step back a few millimeters along the seam.
- Insert the needle into the end of the stitch and bring it out to the stitch in front.
When stitching, leave 3 mm from the edge of the fabric.
Important! There is also a variety with gaps.
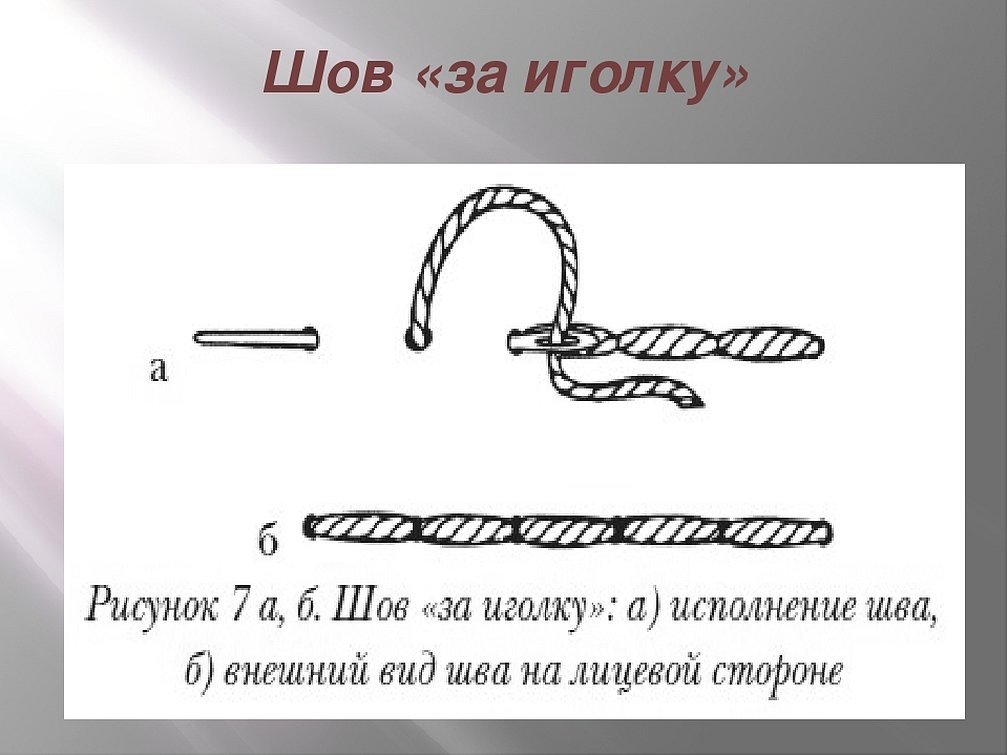
Hand stitch "behind the needle" (marking)
Linen can be sewn and even embroidered using stitches "behind the needle". They are similar to machine stitches, look neat, and are easy to perform.
How to do a machine stitch by hand:
- Bring the needle out to the front of the fabric.
- Bring it out a few millimeters to the right. Pull the thread through.
- Bring the needle to the front side at the starting point, it will be to the left.
- Bring to the wrong side at the end point of the stitch. Bring to the right side to the left.
There is also a variant with interrupted stitches, but when bringing the needle to the wrong side, the stitch is made wider than on the front side.
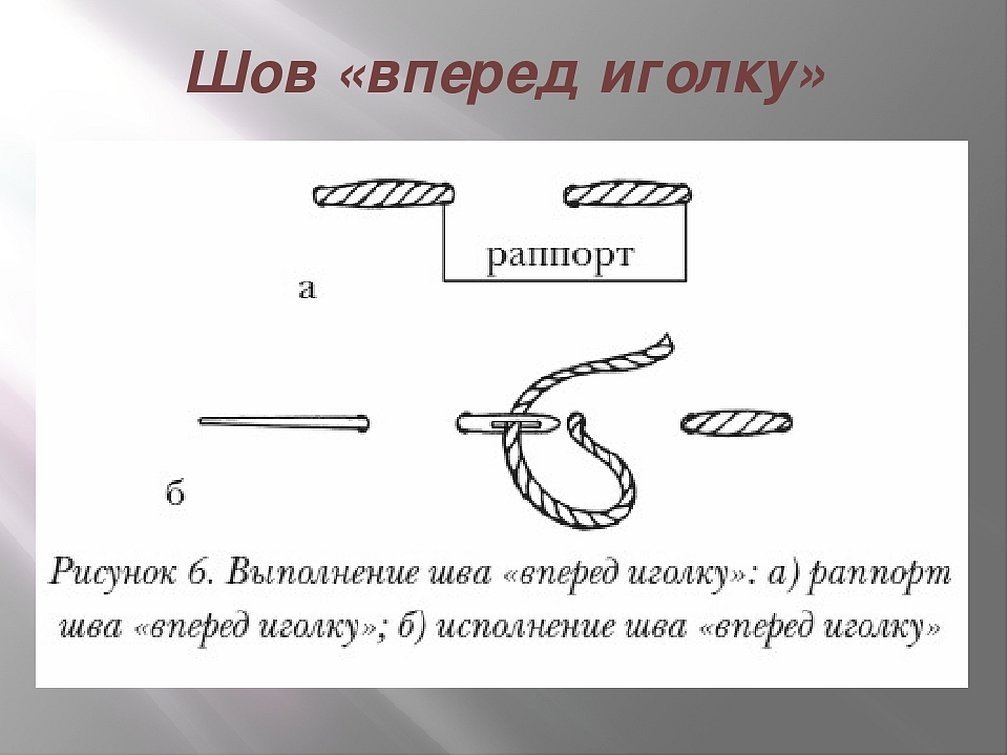
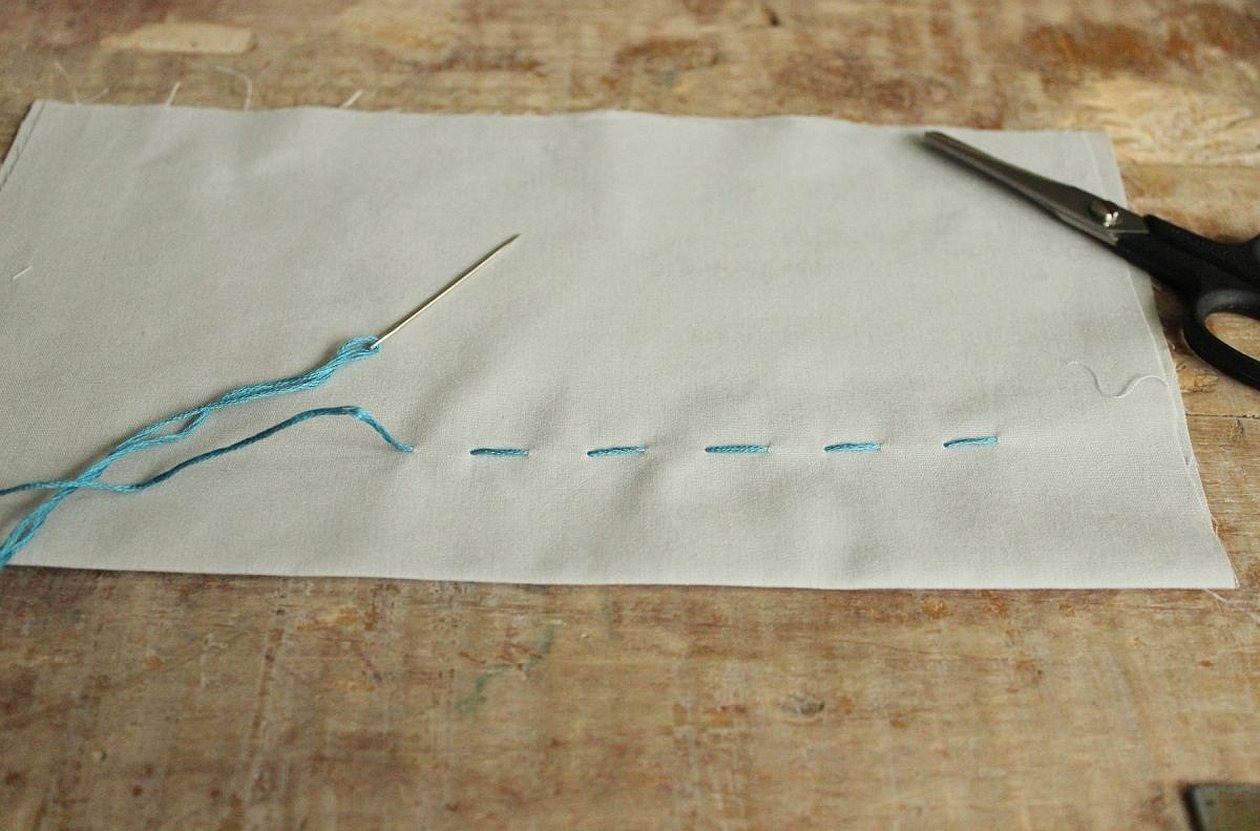
Running stitch
A simple toy can be sewn using the running stitch. It consists of skips and seams, and is used for lightweight items.
How to make a hand stitch:
- Secure the thread to the edge of the material.
- Make a stitch of 5 millimeters.
- Bring the needle to the wrong side.
- Skip the same number of millimeters.
- Bring the needle to the front.
- Make the next stitch.
It is recommended to observe the stitch size when doing the stitching. But the length may vary slightly, this type is often used for tracing the pattern.
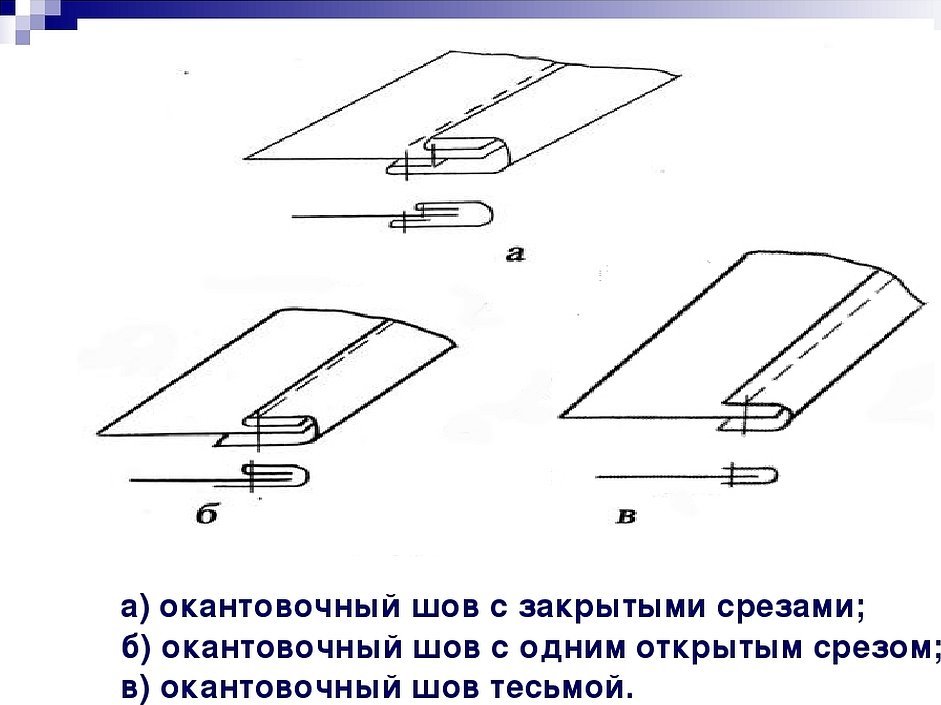
Open-cut edging stitch
There is a version with an open and closed cut, it is used with different fabrics. They look identical from the front side, but can be distinguished from the back.
Sequence of execution:
- Combine the binding and the edge of the material. Sew 5 mm from the edges.
- Turn back the piping. Iron it.
- Fold it inside out, wrap the cut. Baste to the base.
- Sew a line along the front facing.
A sewing machine is the most convenient for this method of sewing. This option is notable for the fact that it can be used to process even dense fabrics.
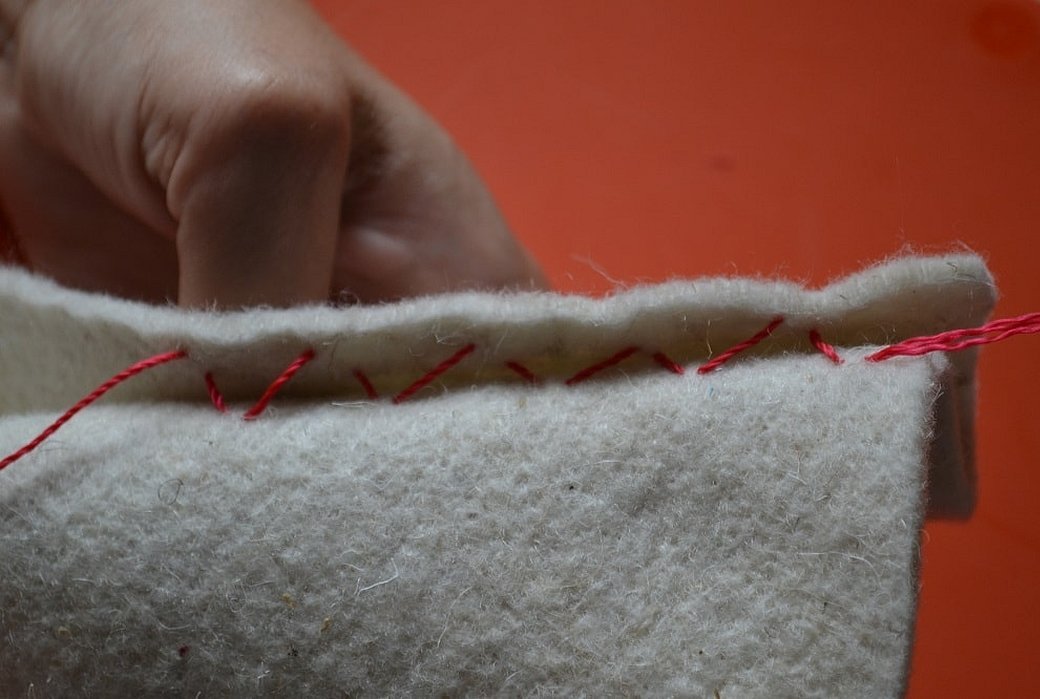
Reinforced connecting seam
This is an option for joining dense fabrics, such as felt. If you have a suitable needle, you can process a "suit", denim, even coat materials.
How to perform:
- Make several stitches that go through all the layers.
- Make the following steps after 2 layers (if the previous ones were after 3). Step back 15 millimeters.
- Leave the thread loose, do not tighten.
It is recommended to use with strong threads and a needle. The fabric is folded in three layers.
Blind hem stitch
Seams for self-sewn by hand can be hidden. They are visible on the back side, but are absent from the front side of the fabric. This option is used to process the bottom of the product.
How to perform:
- Turn the fabric over.
- Pierce with a needle.
- Capture a small area above the fold. The thread is not visible on the front side.
It is important to make each step with a small needle, there should be 4 of them per 10 mm. The length is kept at 4-5 millimeters, the width - up to 3 millimeters.
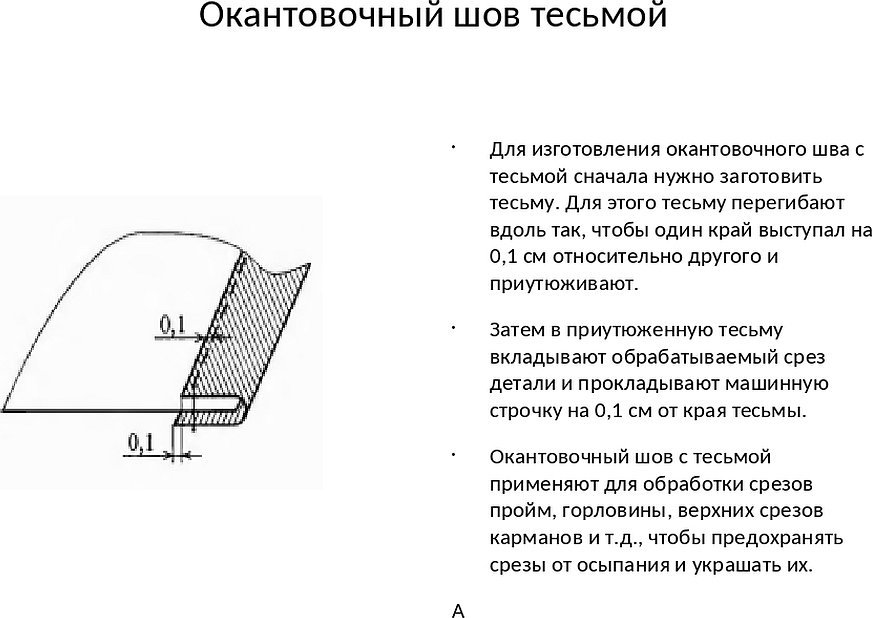
Edging seam with tape
The name of the seam itself speaks for the technique of its execution. It is made in the same way as a simple edging option with an open and closed cut, the tape is needed to strengthen the edge.
How to proceed:
- Make a ribbon, fold it so that one edge protrudes 1 millimeter beyond the other. Iron it.
- Place the tape into the cut.
- Sew a line 1 mm from the edge.
This option is appropriate when processing neck and pocket cuts. It helps to protect them from fraying and makes the product more aesthetically pleasing.
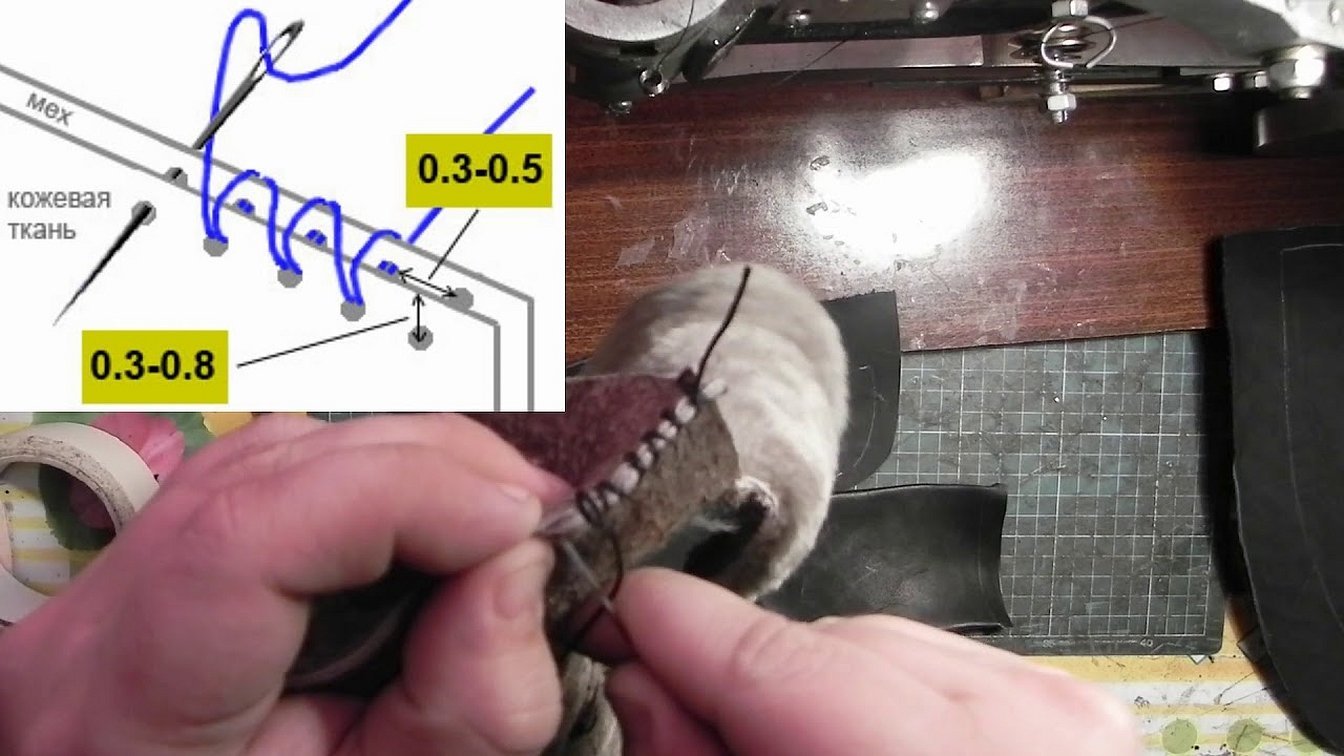
Hand furrier stitch
Leather is sewn with a regular straight-stitch machine, but fur products are processed with a furrier's machine or manually with a seam designed for this purpose.
How to hand sew two fabrics together using a furrier stitch:
- The stitch is made from right to left.
- The needle is threaded through one hole twice.
- Make stitches from right to left. Take a small step.
- Each subsequent stitch is made in the same place without indents.
Important! This method of sewing fur skins allows you to make the stitching even and strong. A household machine will not be able to sew a natural product qualitatively.
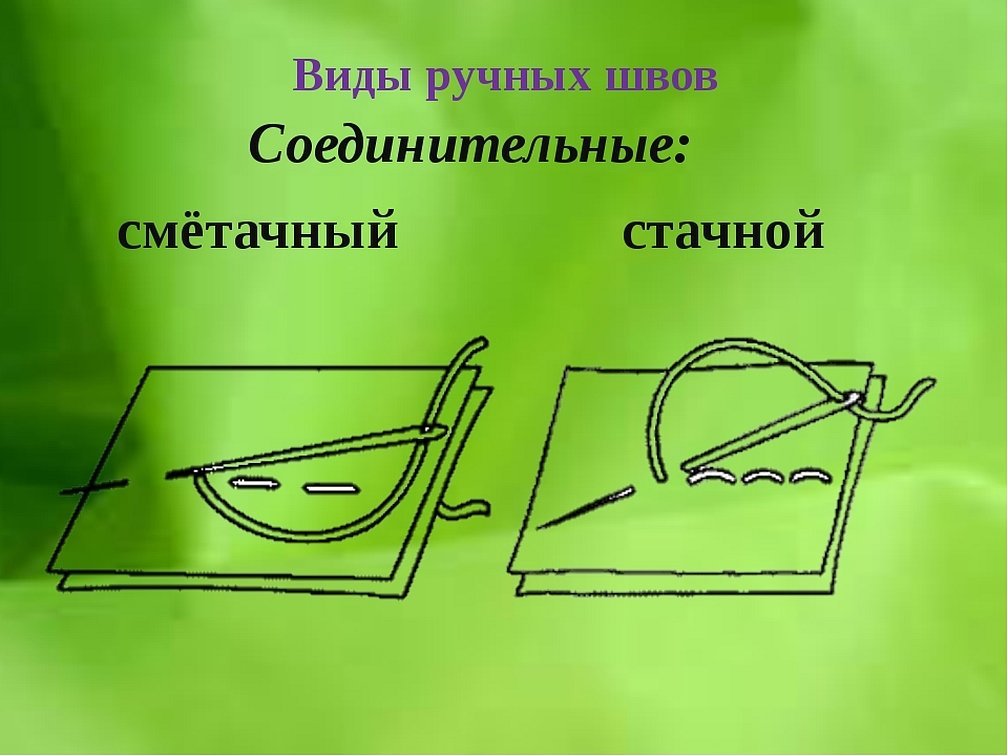
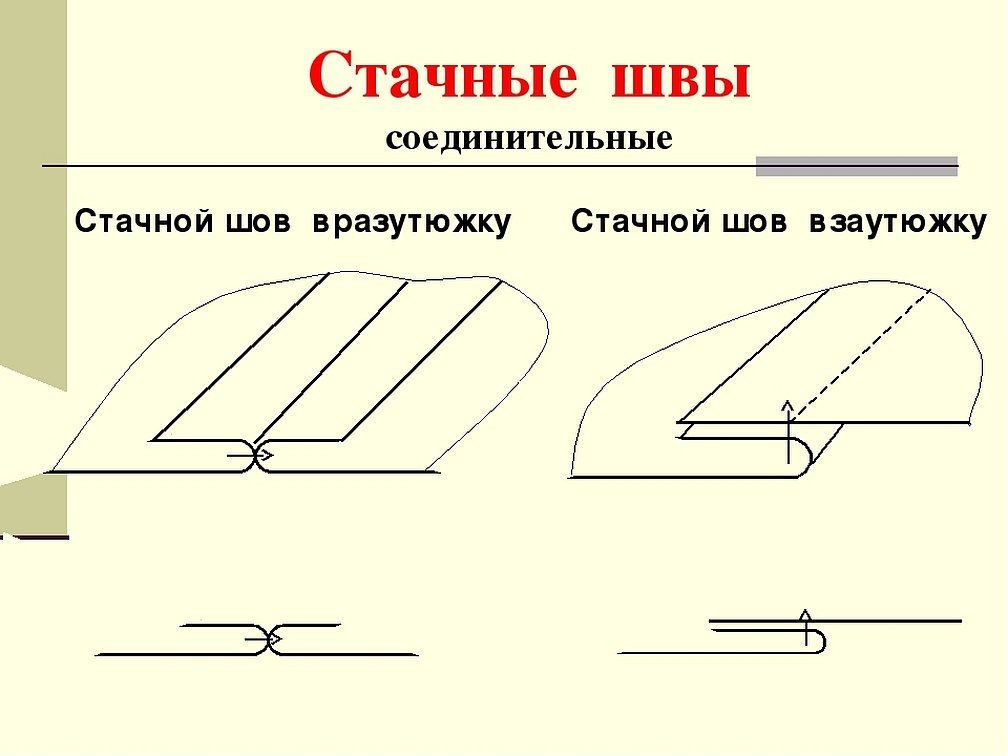
Stitching and marking seams
This option is suitable for joining fabric on a sleeve or a shelf if the old machine stitch has come apart. It is recommended to make small steps of 4 millimeters. Do not leave large gaps, 5 steps are made per 10 centimeters. The marking seam is done similarly, but a gap is left between each step.
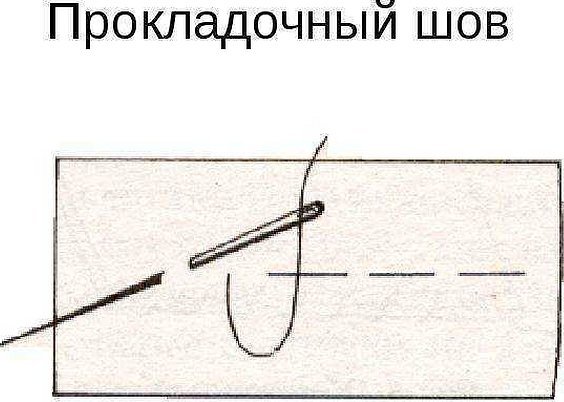
Interlining seam
For a lining stitch, it is enough to master the basic technique. The needle is inserted from right to left, and the thread tension is kept even. Between the stitches, a distance of 3 millimeters is made, equal to the stitches themselves.
This option is suitable for marking on fabric, as well as gathers.
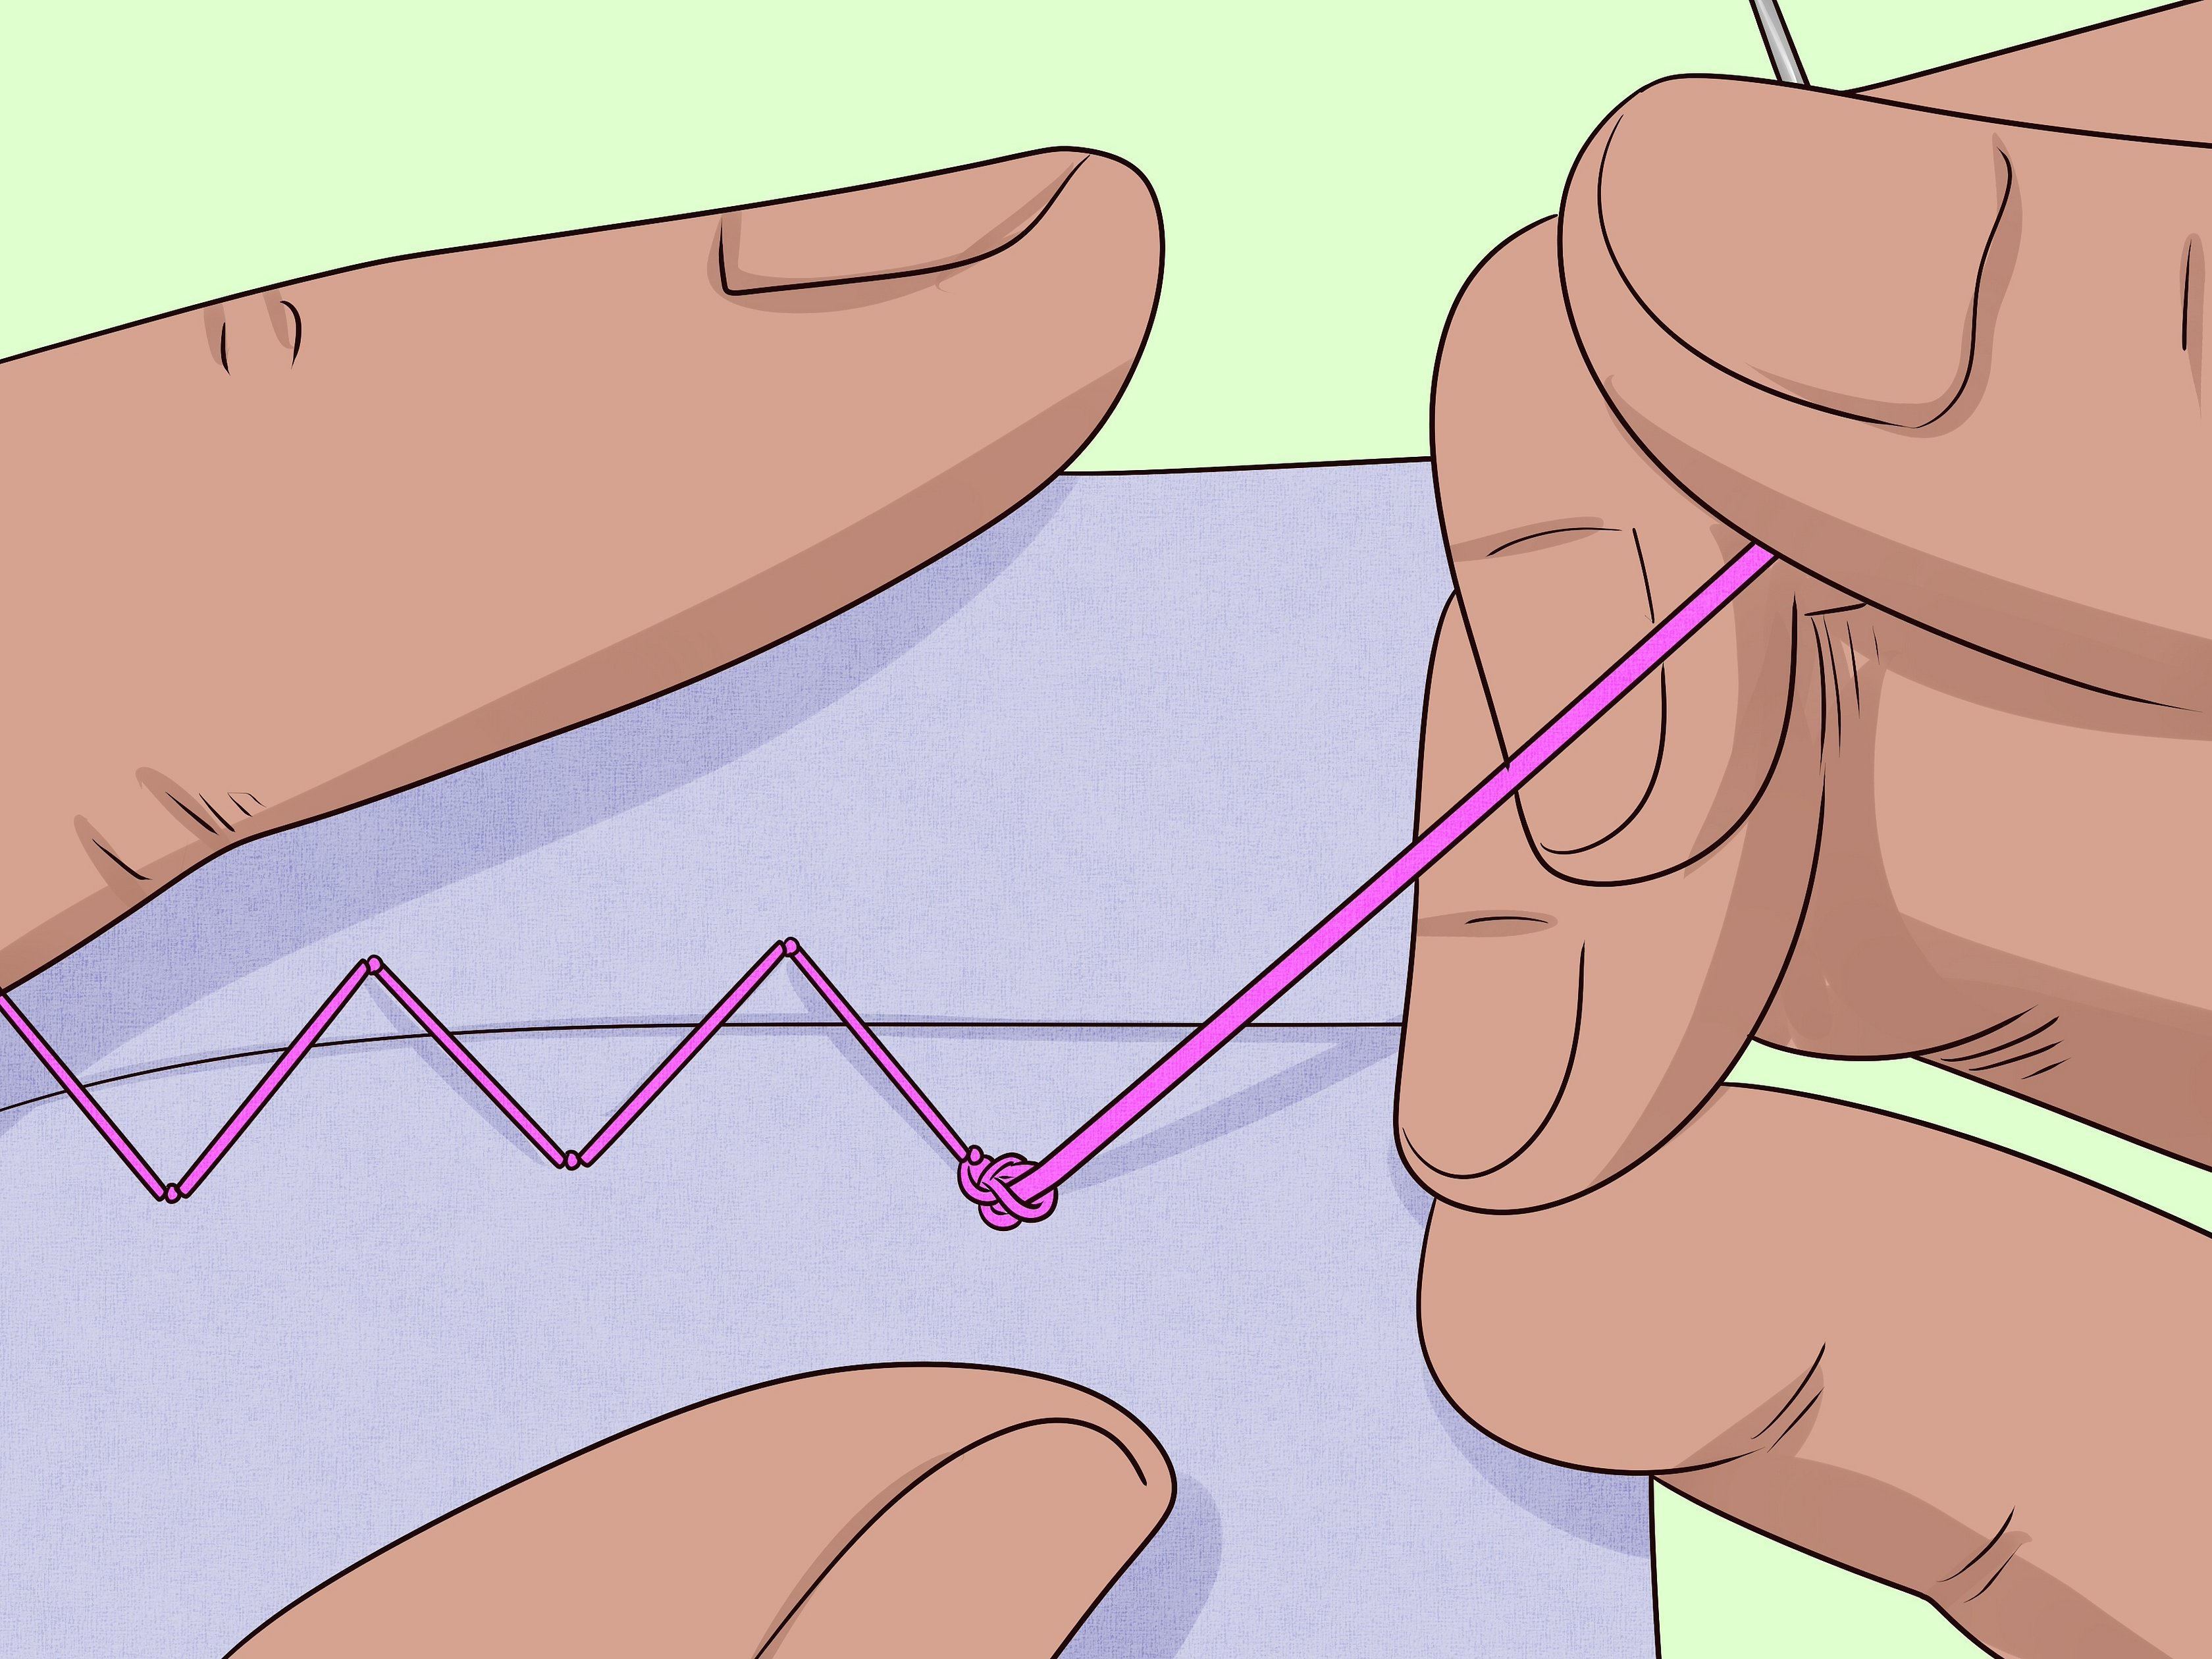
Cross stitch
The main option for temporary fastening of fabric. It is used at the stage of preparation for sewing on a machine, as well as for rough versions.
How to do:
- Make stitches from top to bottom and from right to left. Keep track of the space between horizontal stitches.
- Move back up, insert the needle into the bottom point. Bring it out at the top puncture of the bottom stitch.

"Running" seam
The types of stitches for hand sewing with threads include "running". It is used as an alternative to stitching for decorating fabric.
How to perform:
- Make a back stitch.
- Capture a few millimeters.
- Step back 10 millimeters.
- Remove the needle.
- Grab the top layer of material.
- Repeat the steps.
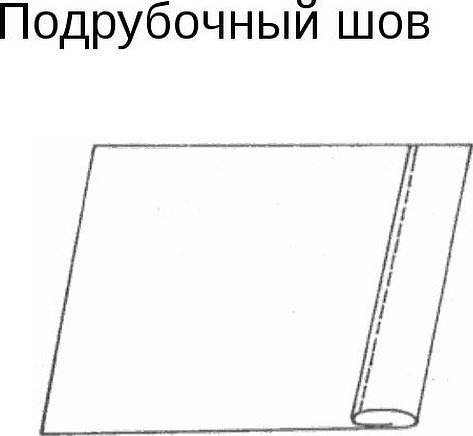
Hem
This option is used for hemming bed linen, as well as the bottom of light children's and adult clothing.
How it is done:
- Fold the edge by 5 millimeters.
- Bend again by 5 millimeters.
- Sew with a regular stitch 1 mm from the fold.
The result should be an even line of equal steps with small gaps.
Double or French seam
Suitable for processing loose fabrics, as well as where additional reinforcement is needed. These are pillowcases, cuffs, pockets, etc. This type of stitch has several names: double, French, reverse.
How to perform:
- Place the two pieces with the wrong sides facing each other. Match the edges and stitch with a straight stitch. Leave a 4 mm gap from the edge.
- Trim the seam allowance close to the stitching line.
- Fold the pieces to the wrong side.
- Iron the fold.
- Sew another line 6 millimeters from the edge.

Tick stitch
This method of hand sewing is used for hemming zippers. How to do it step by step:
- Make a stitch back from right to left.
- Pull the needle out to the left 5 mm from the thread.
- Continue making the same stitches back with the needle.
It is recommended to make the connection in steps of up to 5 mm, although a length of 10 mm is allowed.
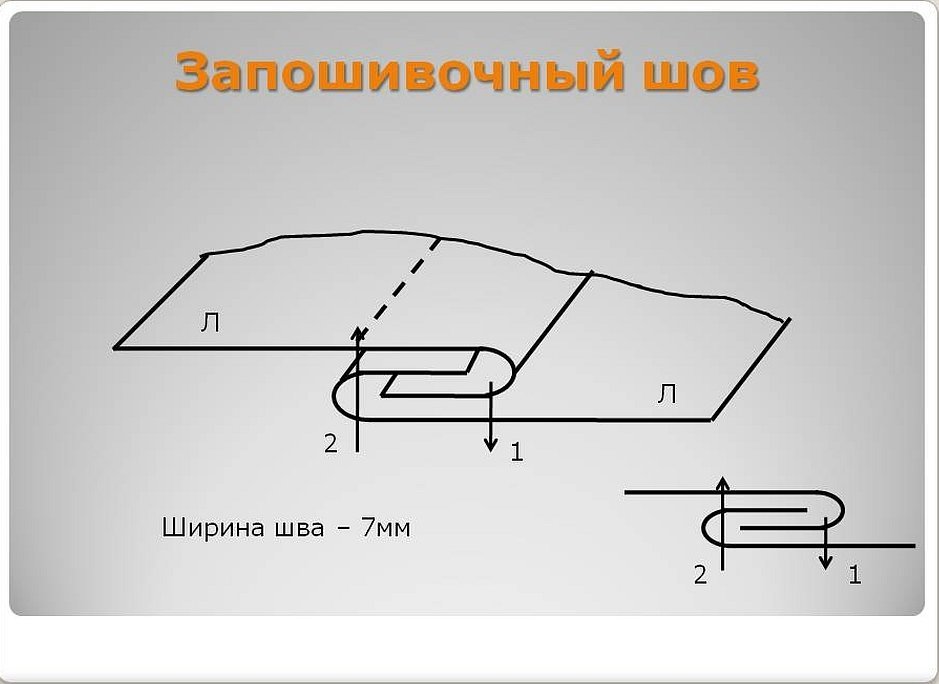
Lap seam
You can hem your clothes unnoticeably and neatly using a lap stitch. On one side of the garment you will see 2 lines, and on the other side - one. This option is notable because the line is strong, and frequent washing of the garment is not a problem.
How to sew:
- The distance between the lines is kept from 3 to 10 mm. The second line is made 1 mm from the fold.
- Connect the fabrics with the right sides together. The bottom side should stick out.
- Fold the bottom seam allowance.
- Sew a line.
- The free part goes around the cut.
- Sew another line on the wrong side.
Important! The denser the fabric, the wider the seam allowances.
Hand stitches for working with beads
Types of beadwork differ in the way beads are attached and arranged. The most common option is the monastery stitch.
How to perform the monastic:
- Fasten the thread on the wrong side. Determine the square.
- Insert the needle from below into the lower left part, pull it out into the upper right corner.
- Pull the thread with the bead, repeat the stitches.
- The beads will be secured with the same tilt to the side.
- The last and first bead are reinforced twice.
Important! The thread must always be kept taut.
When working with beads, needlewomen also use stem, arched, circular, “attached”, forward needle, and line stitches.
What types of seams are there in machine sewing?
There are also different types of stitches for machines. There are several groups:
- stagnant;
- set-up;
- overhead;
- double;
- lapped;
- incremental;
- marginal;
- folds.
The machine performs all types of stitches better, faster and more reliably than a person. The advantage is that the loop or overlock stitch repeats the overlock stitch.
Even when working on a sewing machine, it is important to know the basic types of stitches and lines, their pattern, and purpose. You can manually sew fabric where the machine cannot reach. Fur products are sewn exclusively by hand, provided that the machine is a household one.


