The Teddy bear is a toy that began its history at the beginning of the twentieth century. During this time, dozens of varieties were created. Therefore, it is impossible to single out a single standard according to which this toy should be made. Nevertheless, the classic Teddy bear exists and has its own characteristics. You can buy it or make it yourself for your child. If you follow certain manufacturing rules, you can say that this is “that very” Teddy bear.
Peculiarities
The Teddy doll has the following features:
- The paws and head are attached to special hinges. This allows them to be turned to any desired angle.
- In Teddy bears, it is common to use stuffing with sawdust. In this case, the head is tightly stuffed. In this case, the shape it will take depends on the execution of this operation.
- To make it heavier, they use a special material - granulate. It is added to the tips of the paws and the lower part of the body.
One of the most famous manufacturers is Steiff.
The pattern provides that the body, head, upper and lower paws are made separately and attached using special fasteners. Such dolls can be used for performances in a puppet theater.
Materials
There are special requirements for the materials from which the doll is made. Here are some of them:
- The fabric should be thick enough to prevent dense filling from leaking through.
- In order for the doll to have beautiful fur, it is necessary to use fleecy material for production. For this purpose, natural fur, alpaca, mohair and other similar materials can be used.
- Sawdust for use in stuffing can be purchased at a specialized store. If you take ordinary ones, they must be sifted, removing large pieces. Larch sawdust is well suited for the work.
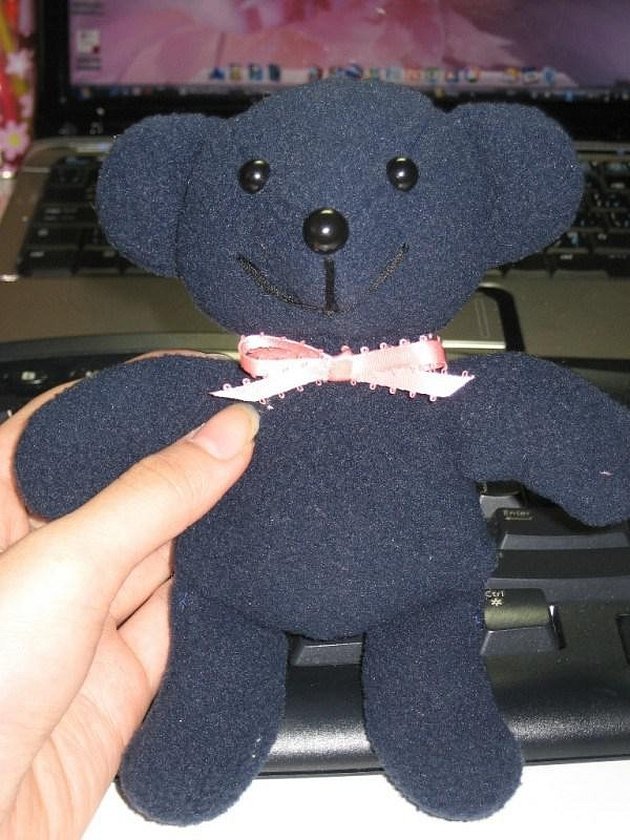
Important! When making a Teddy bear, the craftsman designs small details according to his own taste. Sometimes this doll is called Tilda.
Pattern options
Over the long history of Teddy bears, various types of these dolls have been created. However, the most popular options are the following.
Classical
It consists of six parts. The following proportions are observed:
- the length of the doll is 4 times longer than the head;
- lower paws - 1.4 times, upper paws - 1.6 times;
- the head is half the size of the body;
These 33 cm long Teddy bear models were popular before 1970. They had a pointed muzzle and slightly bent upper paws at the wrists.
Simplified
This pattern for a Teddy bear is the author's work of the master Natalia Shepel. In this case, the classic sample was simplified. Now even novice needlewomen can make such a model. Here are some differences:
- The paws consist not of three, but of two parts - front and back.
- The design does not include darts.
- Missing wedges.
- There is no need to tighten.
In this case, the height of the bear is 19 cm. You can make a jumpsuit or other clothes for the doll.
Since in this case the model is smaller than usual, it allows using not only sawdust but also felting wool for stuffing. For decorating the details, you can use pulling out individual wool threads.
Vintage
In this case, we are talking about dolls that were very popular in the thirties of the twentieth century. They were made in factories or by hand. Their appearance has its own characteristics: a less pointed nose and a flatter muzzle of a bear cub.
Vintage Teddy dolls look plumper than modern models. The pattern provides for sewing the bear using a companion material. The feet and the inside of the ears are made of it. Felt can be used for this purpose.
In order to emphasize the retro-style atmosphere, it is recommended to use a material with thick and short wool. Its color should be brown. A dress or jacket can be made for dolls.
Some people prefer to make these dolls in white tones. This gives them a beautiful and more delicate look.
How to make a cutting
In order to choose how to sew a bear with your own hands, you need to choose the right style. The history of the Teddy bear doll is more than 100 years old. It was first remembered in 1902. Since then, many types of patterns have been prepared.
It needs to be found online and downloaded. Then the bear pattern is transferred to paper. After that, you can cut out the fabric according to the available drawings.
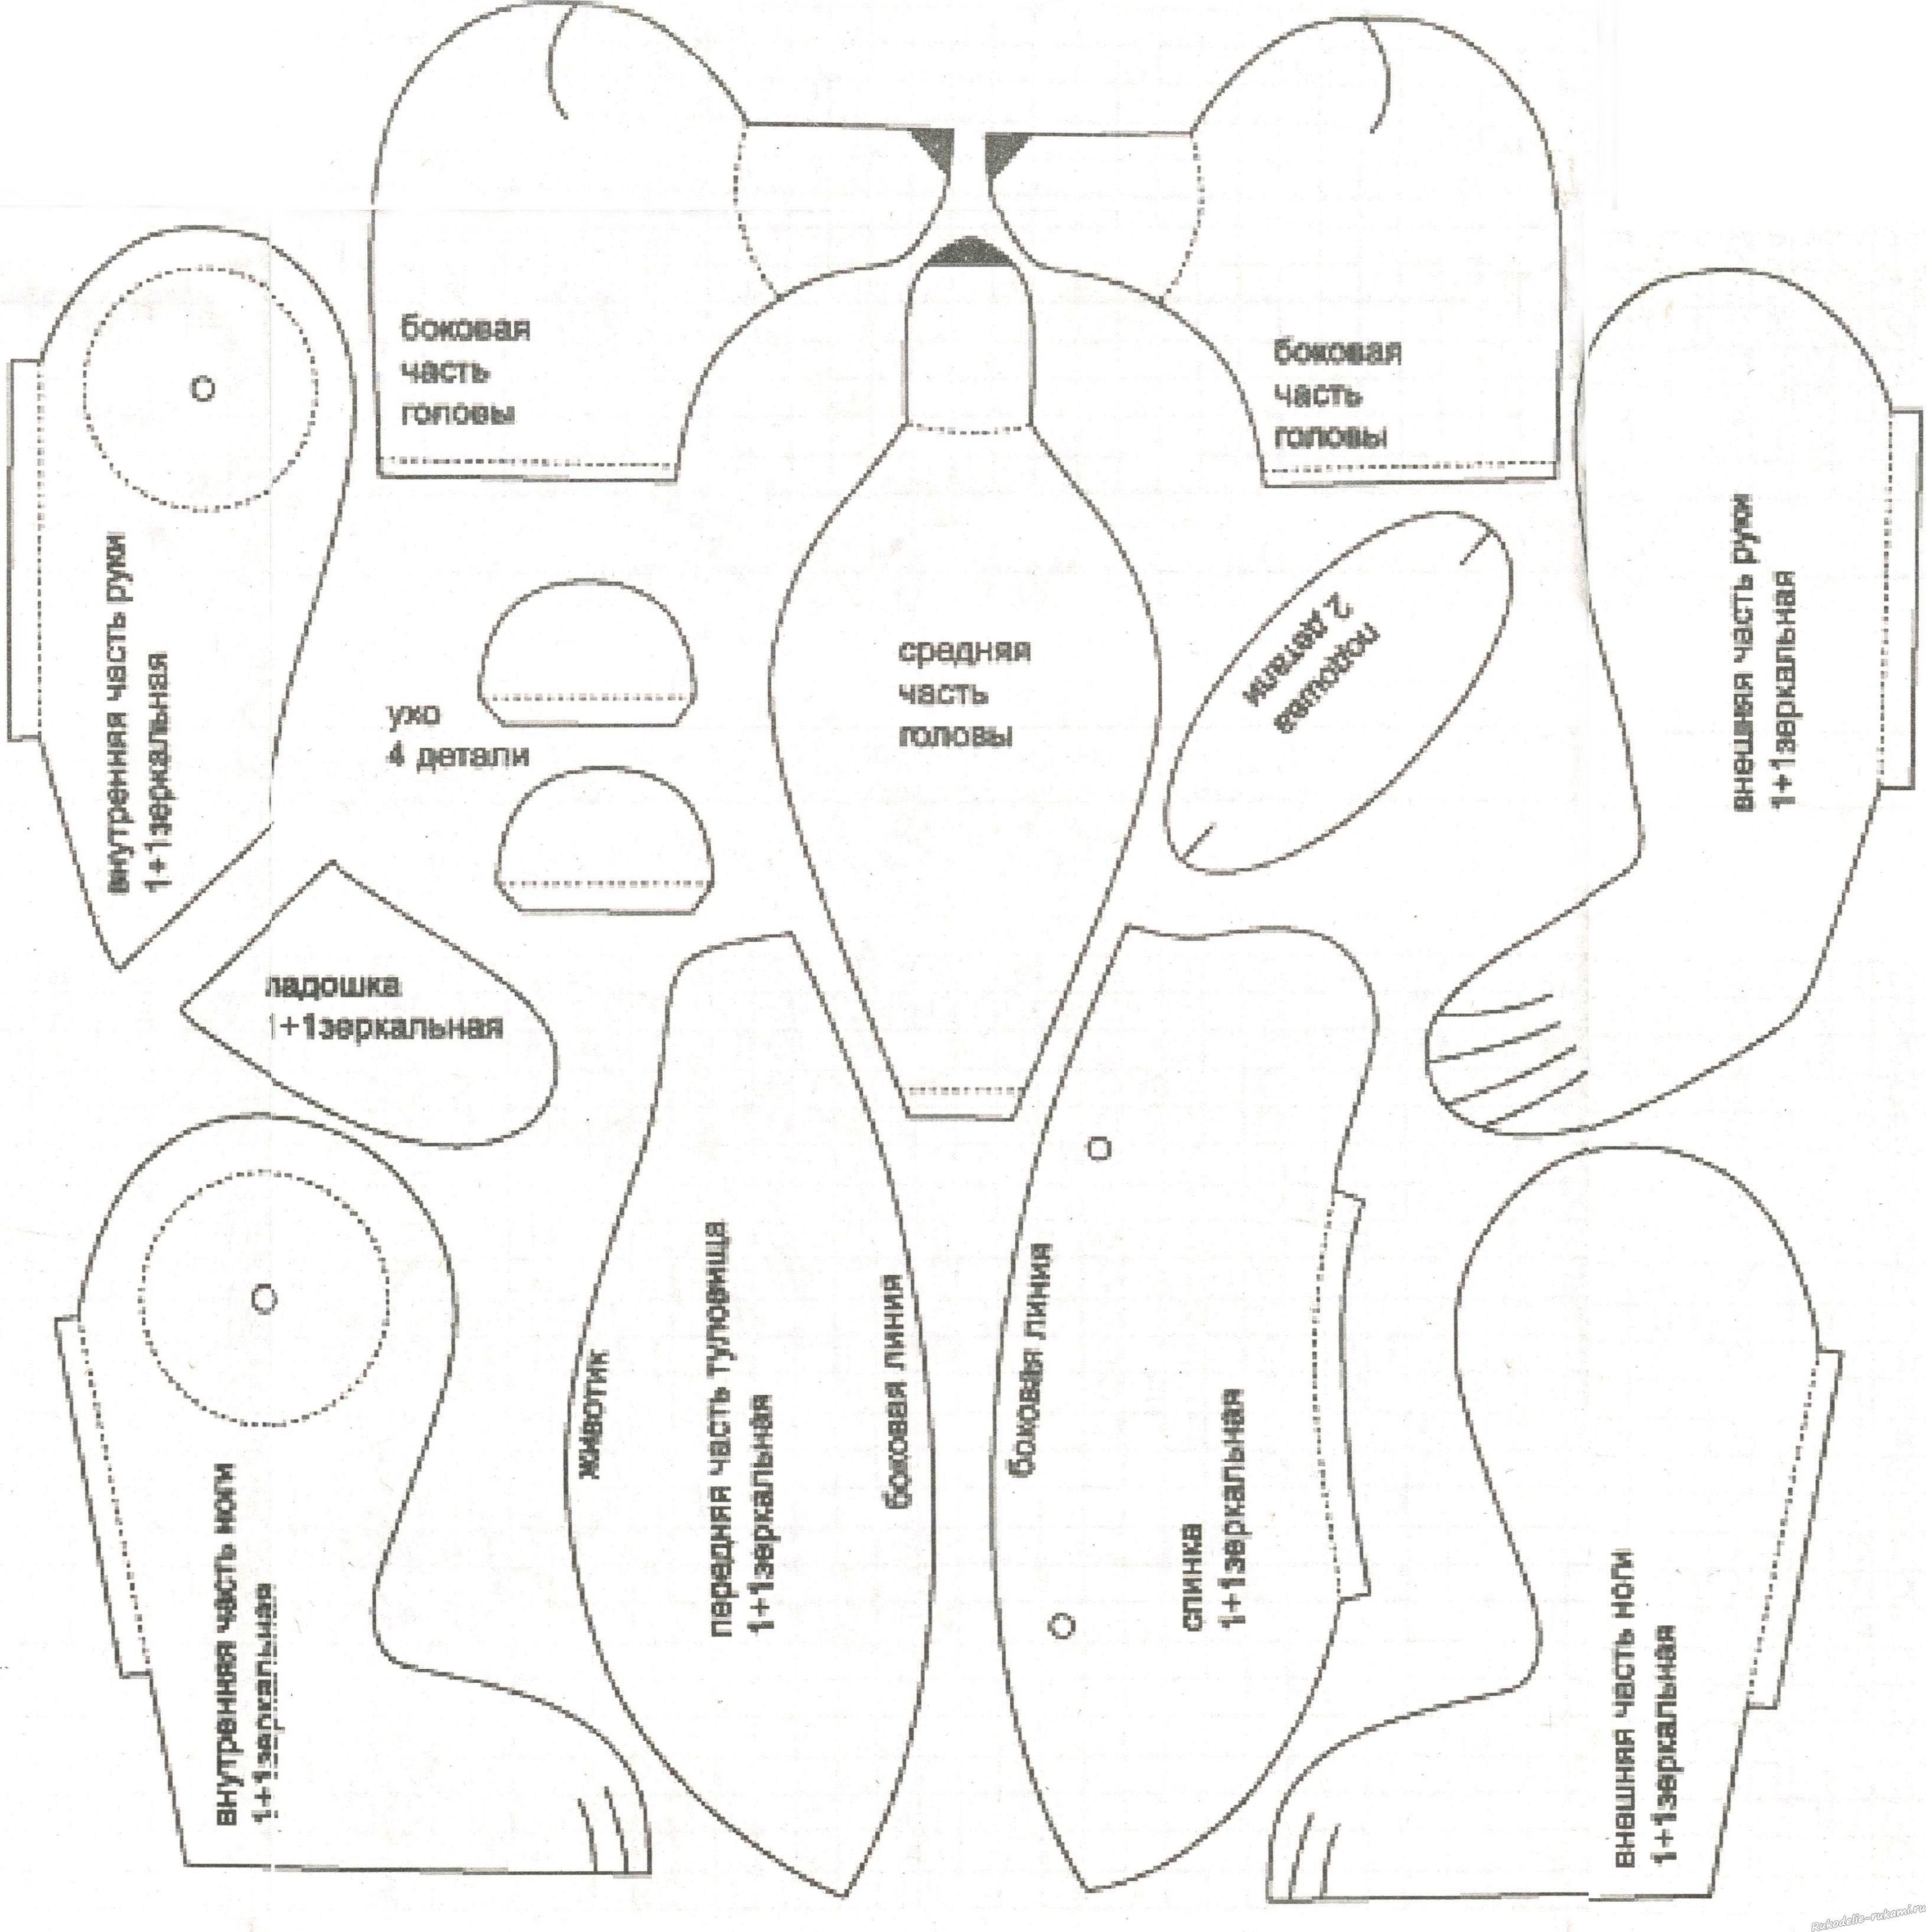
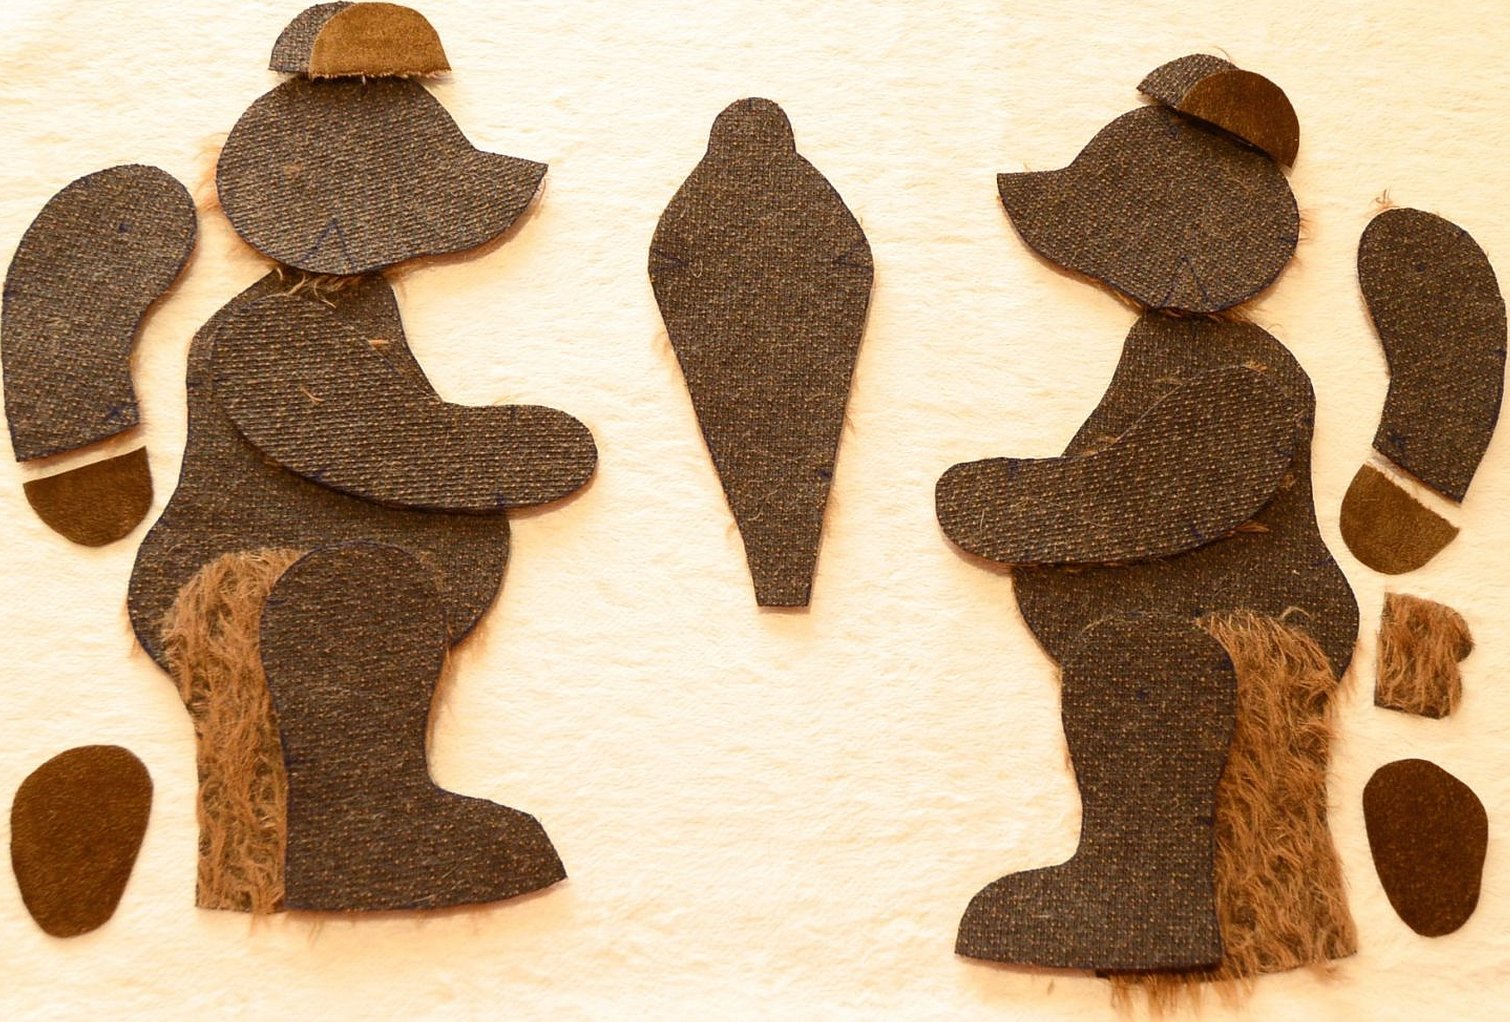
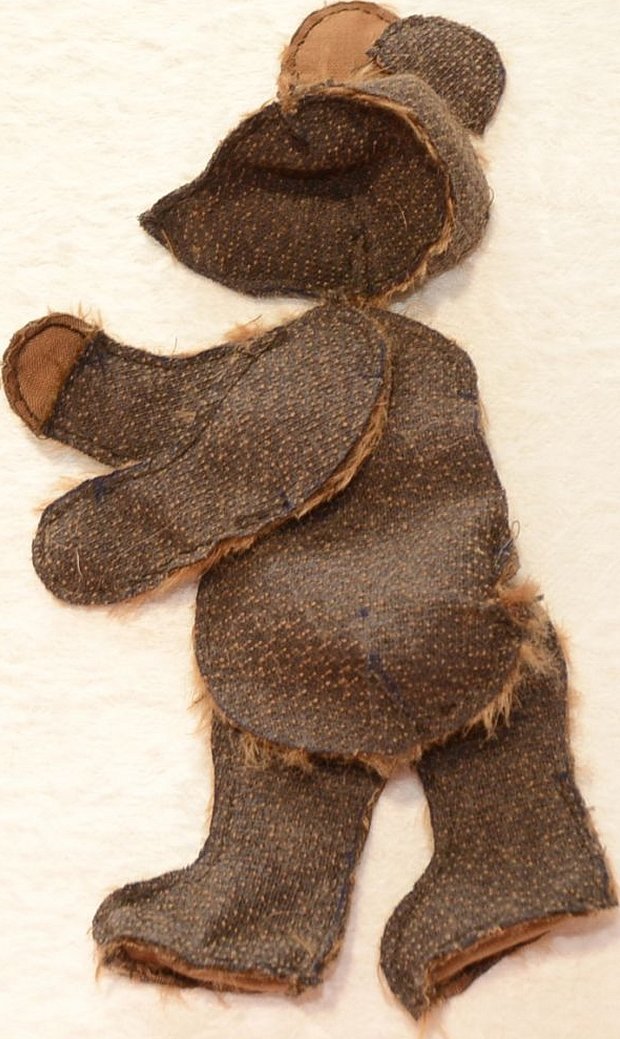
The figure consists of the following parts:
- 1 top and 2 side head pieces;
- ears;
- tail;
- torso;
- upper legs made of three parts - outer, inner and paws;
- lower legs made of three parts.
If necessary, you can make the pattern yourself.
Before sewing a bear, you need to check the following:
- Matching paired parts in shape and size.
- The borders of the parts that need to be sewn together must be equal in size. This can be checked by running a thread along them and comparing its length.
You need to check that you have all the necessary parts according to the Teddy Bear pattern.
Adviсe
To work, you need to prepare materials and tools. To sew Teddy you will need:
- For sewing, you need to prepare mohair. If you are working on a bear for the first time, it is better to choose a thin mohair this time.
- To attach the upper and lower paws, you will need 4 T-shaped cotter pins measuring 2x20 mm. For the head, you will need another one, measuring 2x25 mm.
- The fastenings will be made on the basis of plywood disks. For the upper paws you will need 4 pieces with a diameter of 25 mm. For the lower ones, the same number of 30 mm. For the head, a diameter of 25 mm (sewn into the head) and 20 mm (into the neck).
- You will also need 12 metal washers (12 mm) for fastening.
- You will need to sew in black eyes (2 pcs.). The master chooses them.
- You need to prepare strong threads for tightening the eyes and other parts of the doll. You will need regular sewing threads, as well as those that will be used to shape the nose.
- The bear will need some filler. In most cases, it is customary to use synthetic fluff or sawdust.
- A small amount of weighting agent is required. Quartz sand is used for this purpose.
- You can make clothes for Teddy.
- You will need two types of needles: a sewing needle to do the main part of the work and a long doll needle to tighten it.
- Using an awl, you can make holes and straighten the pile.
- You will need a stick for stuffing.
- Pin wrench.
- After the doll is made, it will be necessary to do tinting. For this you will need a brush and oil paints.
During the process you may need plucking pins and pliers.
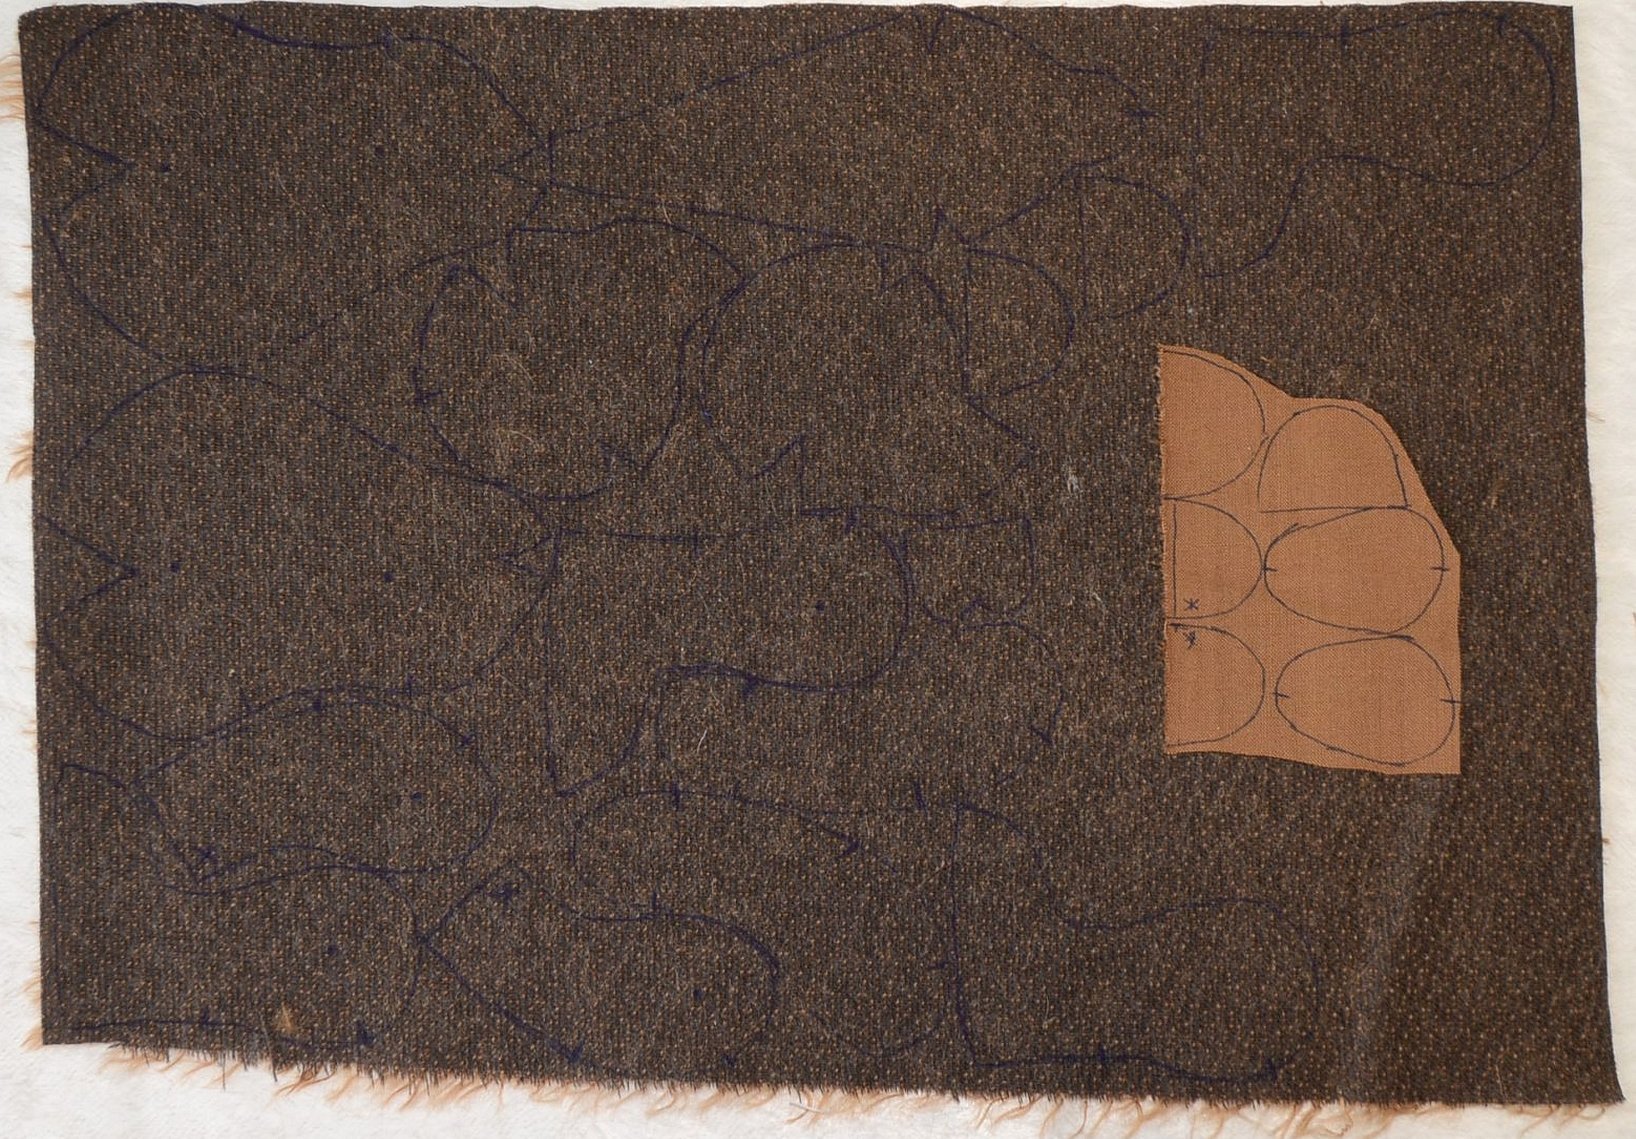
There are a large number of patterns for soft toys - bears. You need to choose the most suitable one and cut out the details from paper.
Then the drawing needs to be transferred to the fabric. In this case, you need to pay attention to the fact that the direction of the pile is correct.
Important! It is recommended to additionally leave 5-7 mm wide edges for tolerance.
When sewing, the plush parts are placed with the fur inside. After their production is finished, these parts of the doll must be turned inside out.
Sewing the head
The head is made from two side pieces and a wedge that belongs to the top of the head. Before sewing them together, you need to pluck the fur in the place where the Teddy bear's nose will be.
Before joining the side parts according to the Teddy pattern, they need to be folded together so that the fur is inside. The first seam should be made from the nose to the bottom of the muzzle.
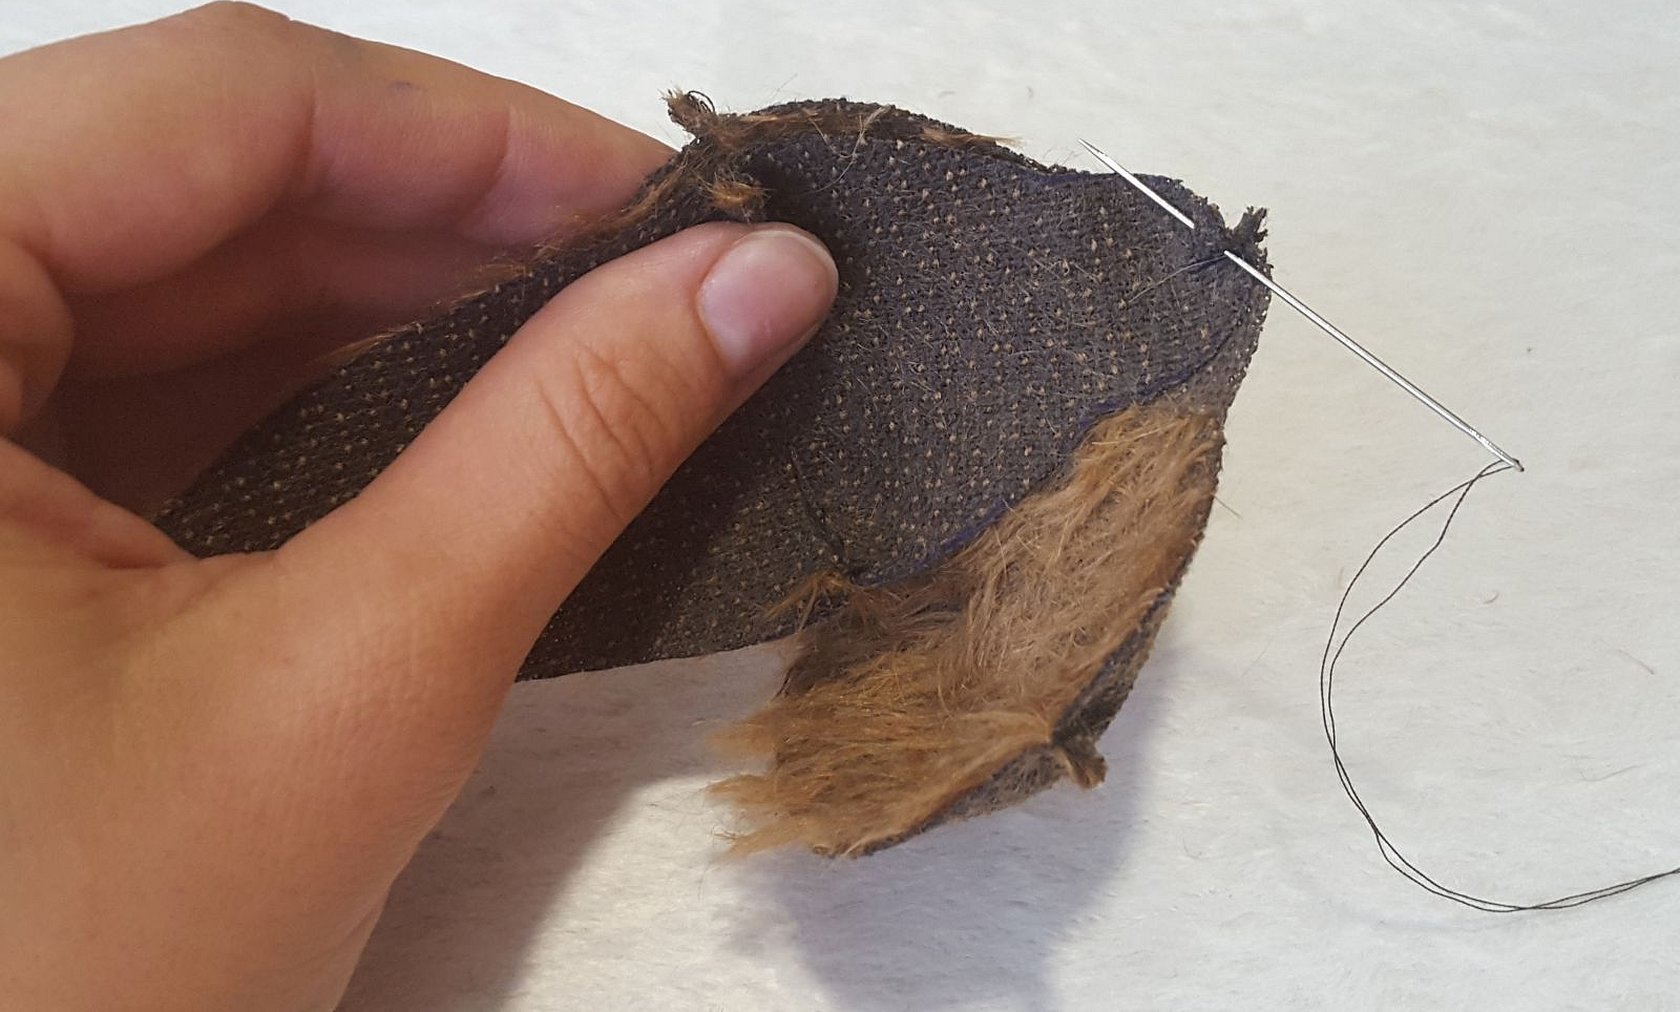
Now you need to sew the top part. At the same time, you need to make sure that the notch located above the bear's nose is visible. Darts are made on it and on the side parts beforehand. You need to sew them to each other so that they match.
Now the head is ready.

Upper paws
Each upper paw, according to the bear cub pattern, consists of three parts:
- outer part;
- paw;
- inner part without paw.
Important! To sew them, first they are folded with the fur inside. Then the paws are sewn on. After that, the parts are connected, leaving an opening through which they can be turned inside out.
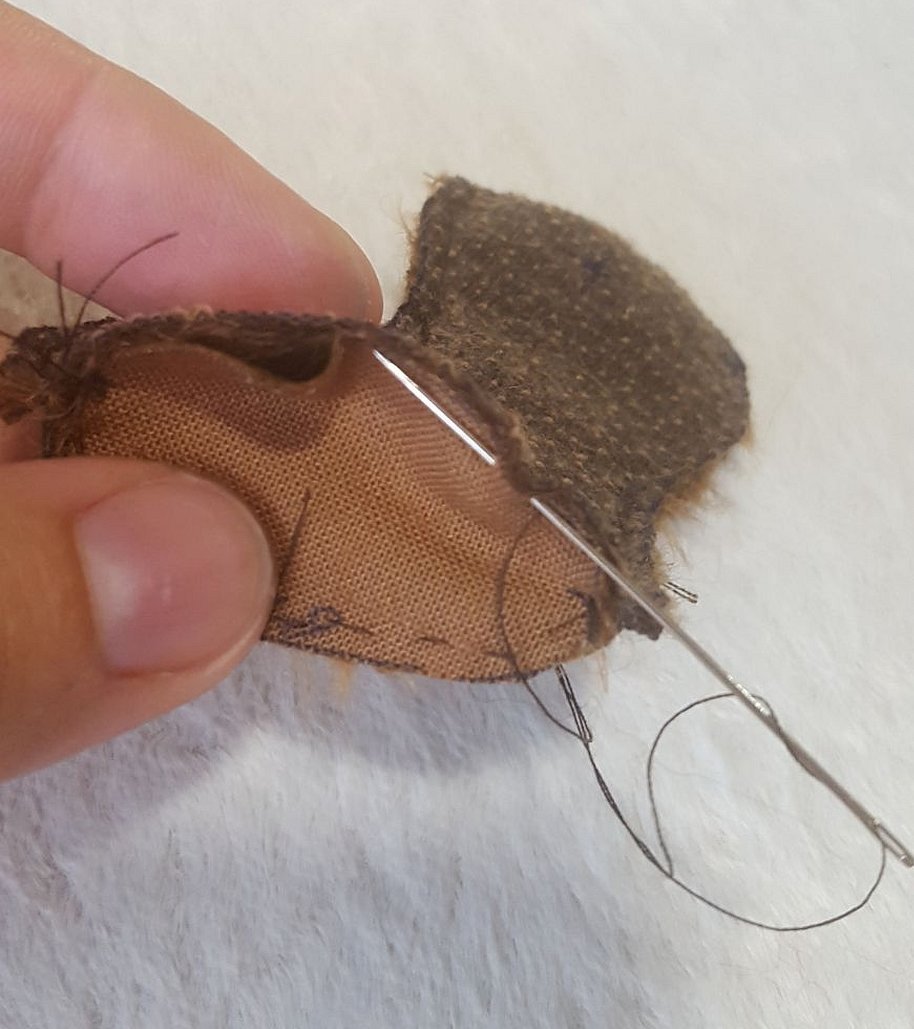
Lower paws
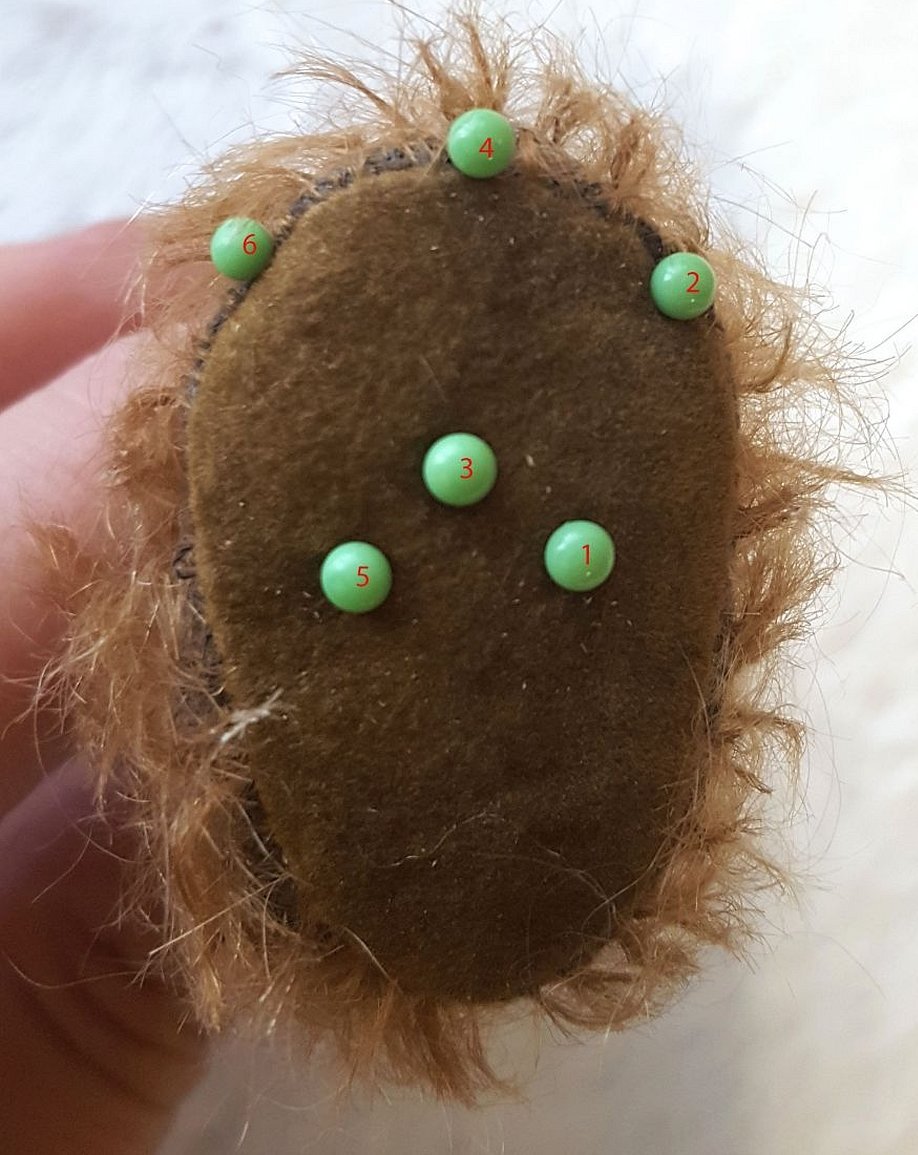
Each of them consists of three parts: two sides and a bottom part. Before work, you need to fold them with the fur inside.
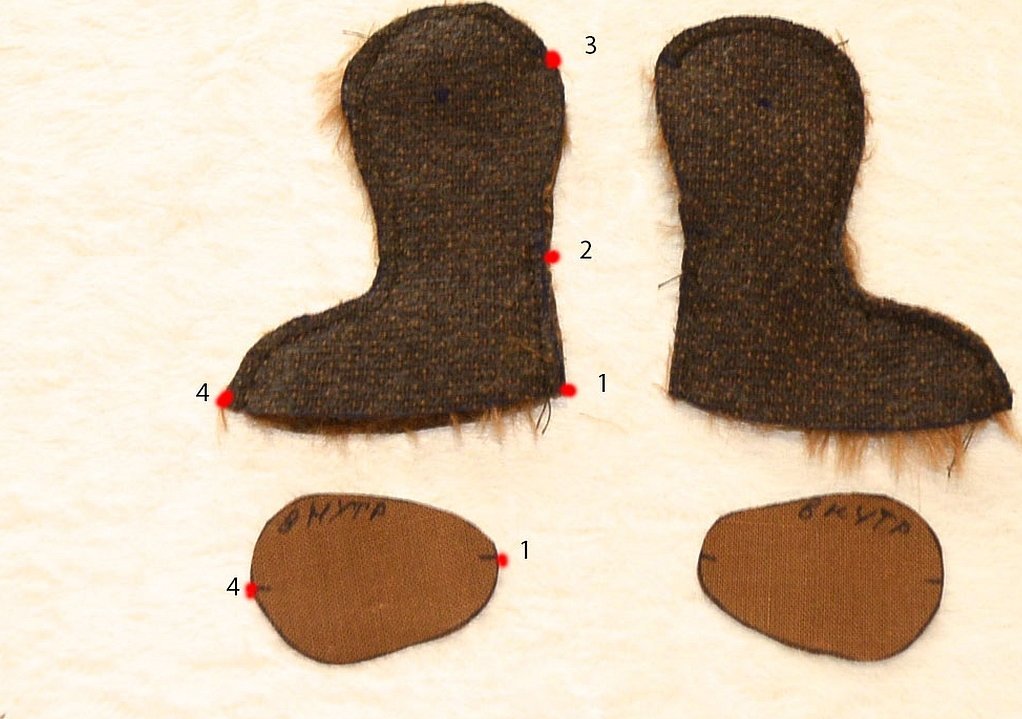
They start sewing at the back of the heel. In the picture, this corresponds to the space between points 1 and 2. Then the front and top parts are sewn between points 3 and 4. Then the bottom part is attached to the paw. Before firmly sewing, it is recommended to bait the fabric.
Head design
To sew a bear with your own hands, you need to decorate its head.
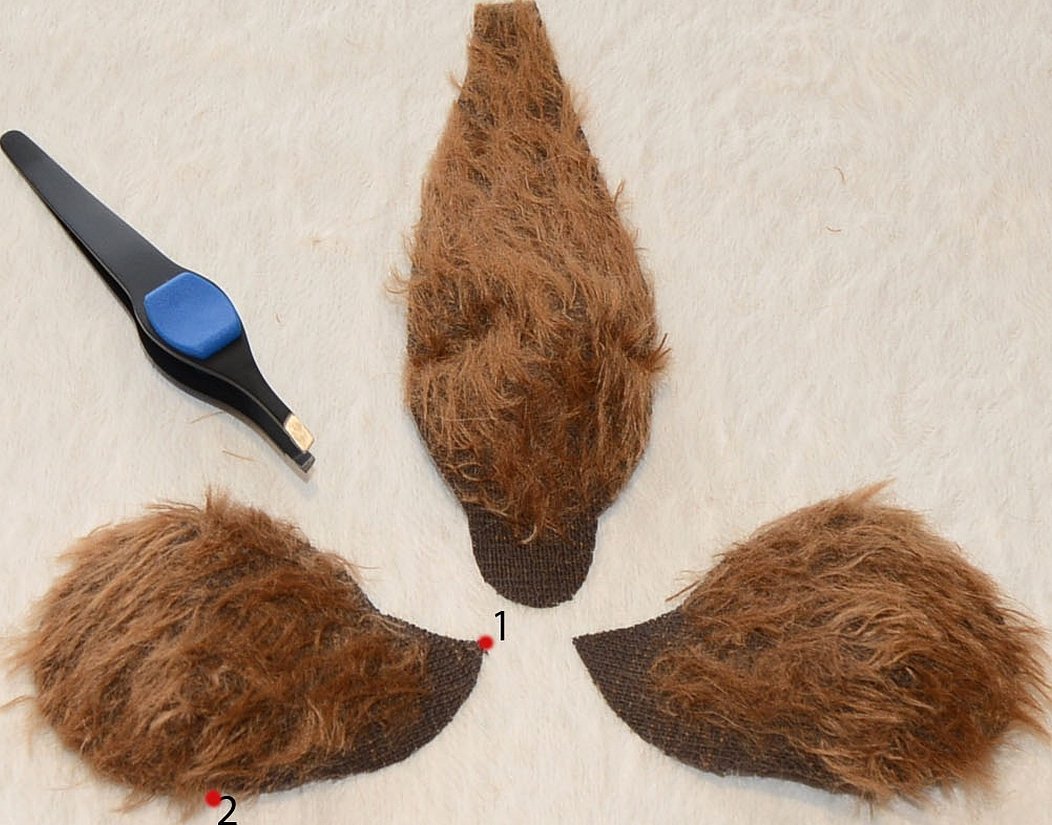
For the head, you need to make ears, leaving an opening for turning them inside out. After that, you need to leave a long thread with which you will need to sew them to the head.
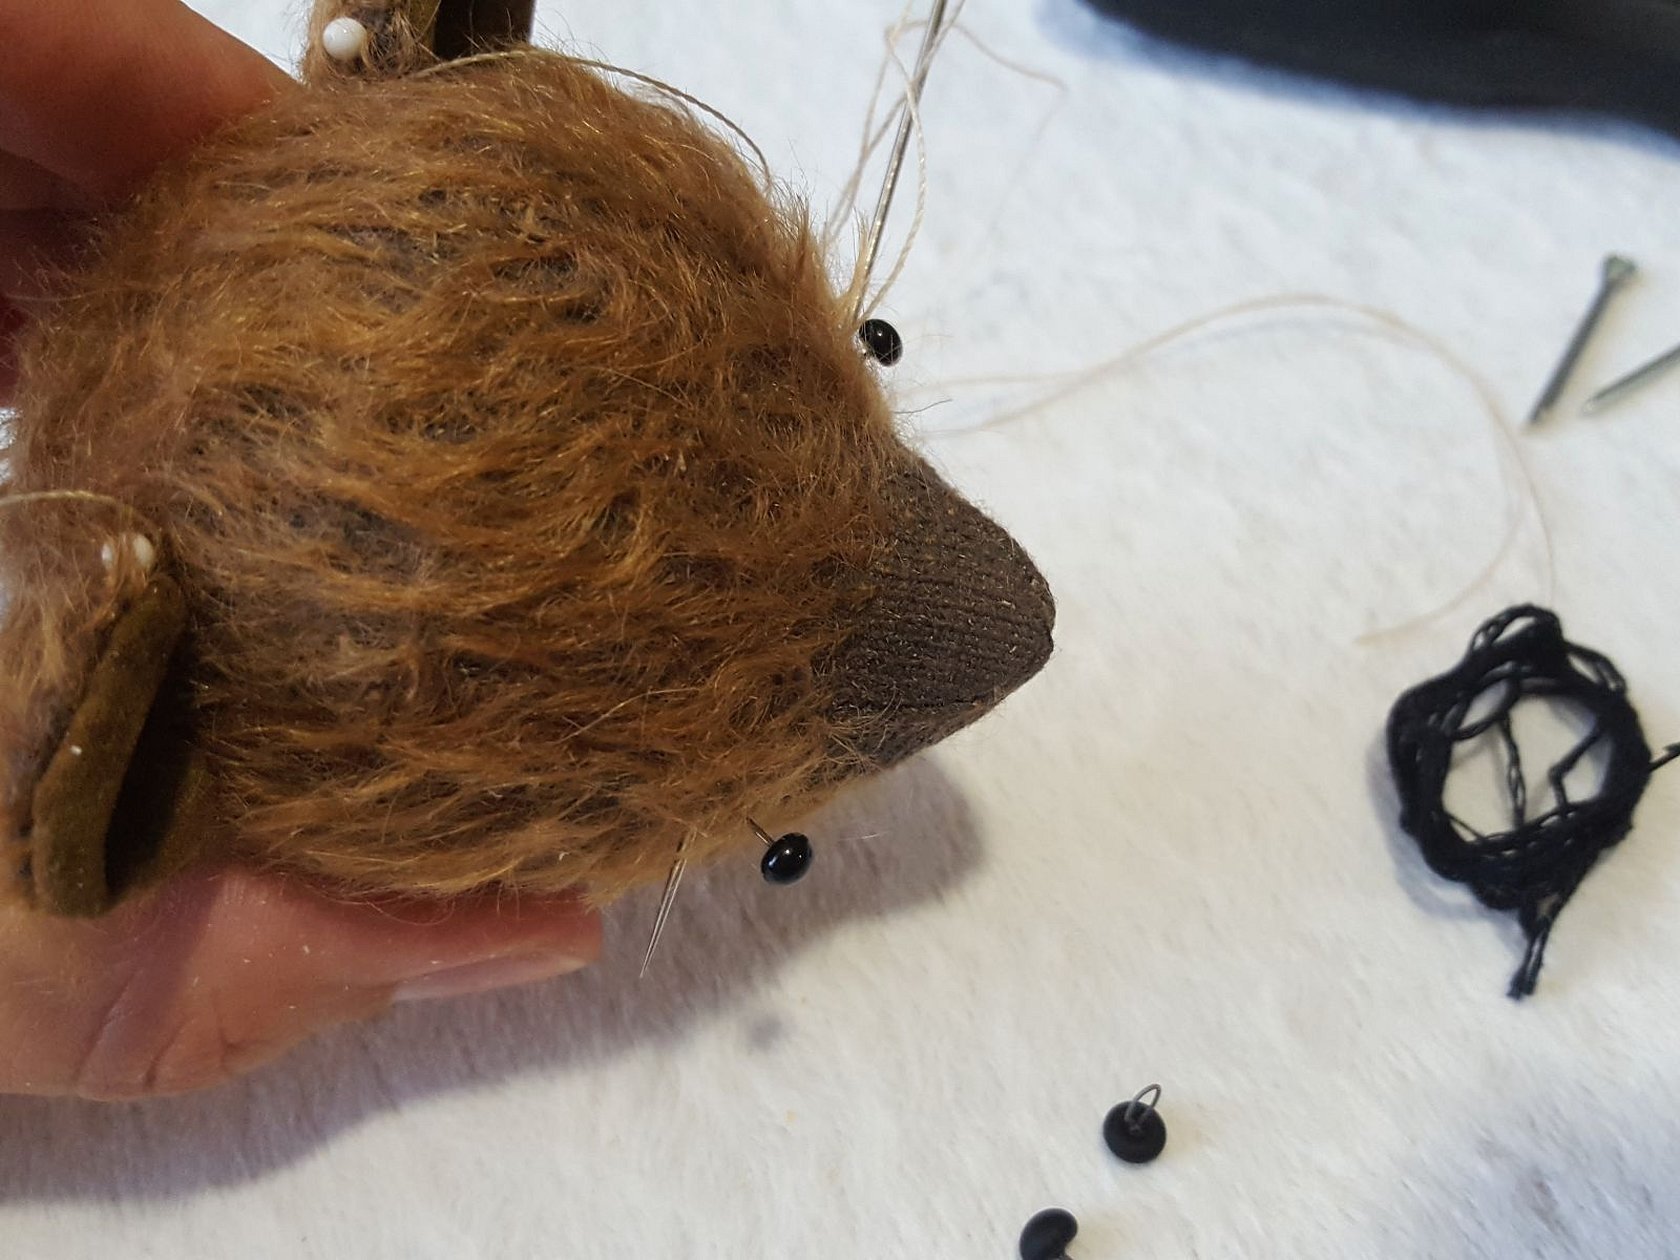
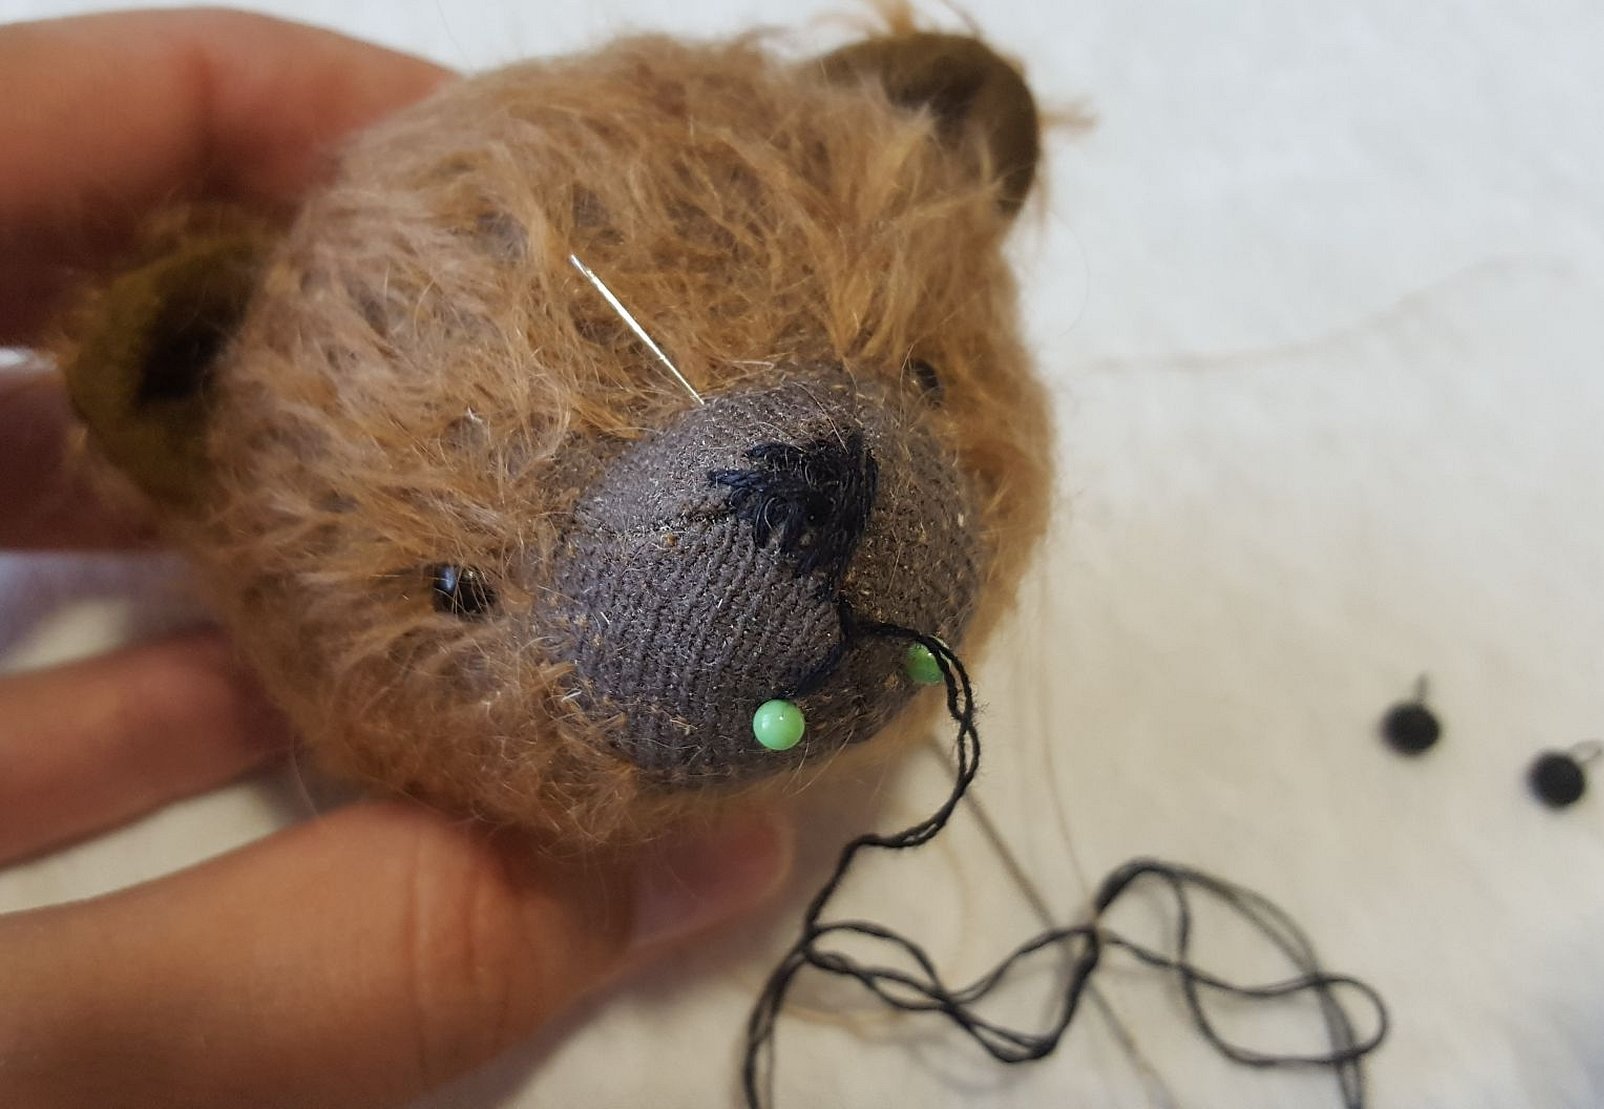
Then the doll maker sews on buttons or beads for the eyes.
Tightening
This part of the work is necessary to give expressiveness to the finished Teddy bear doll. The tightening is done in several stages.
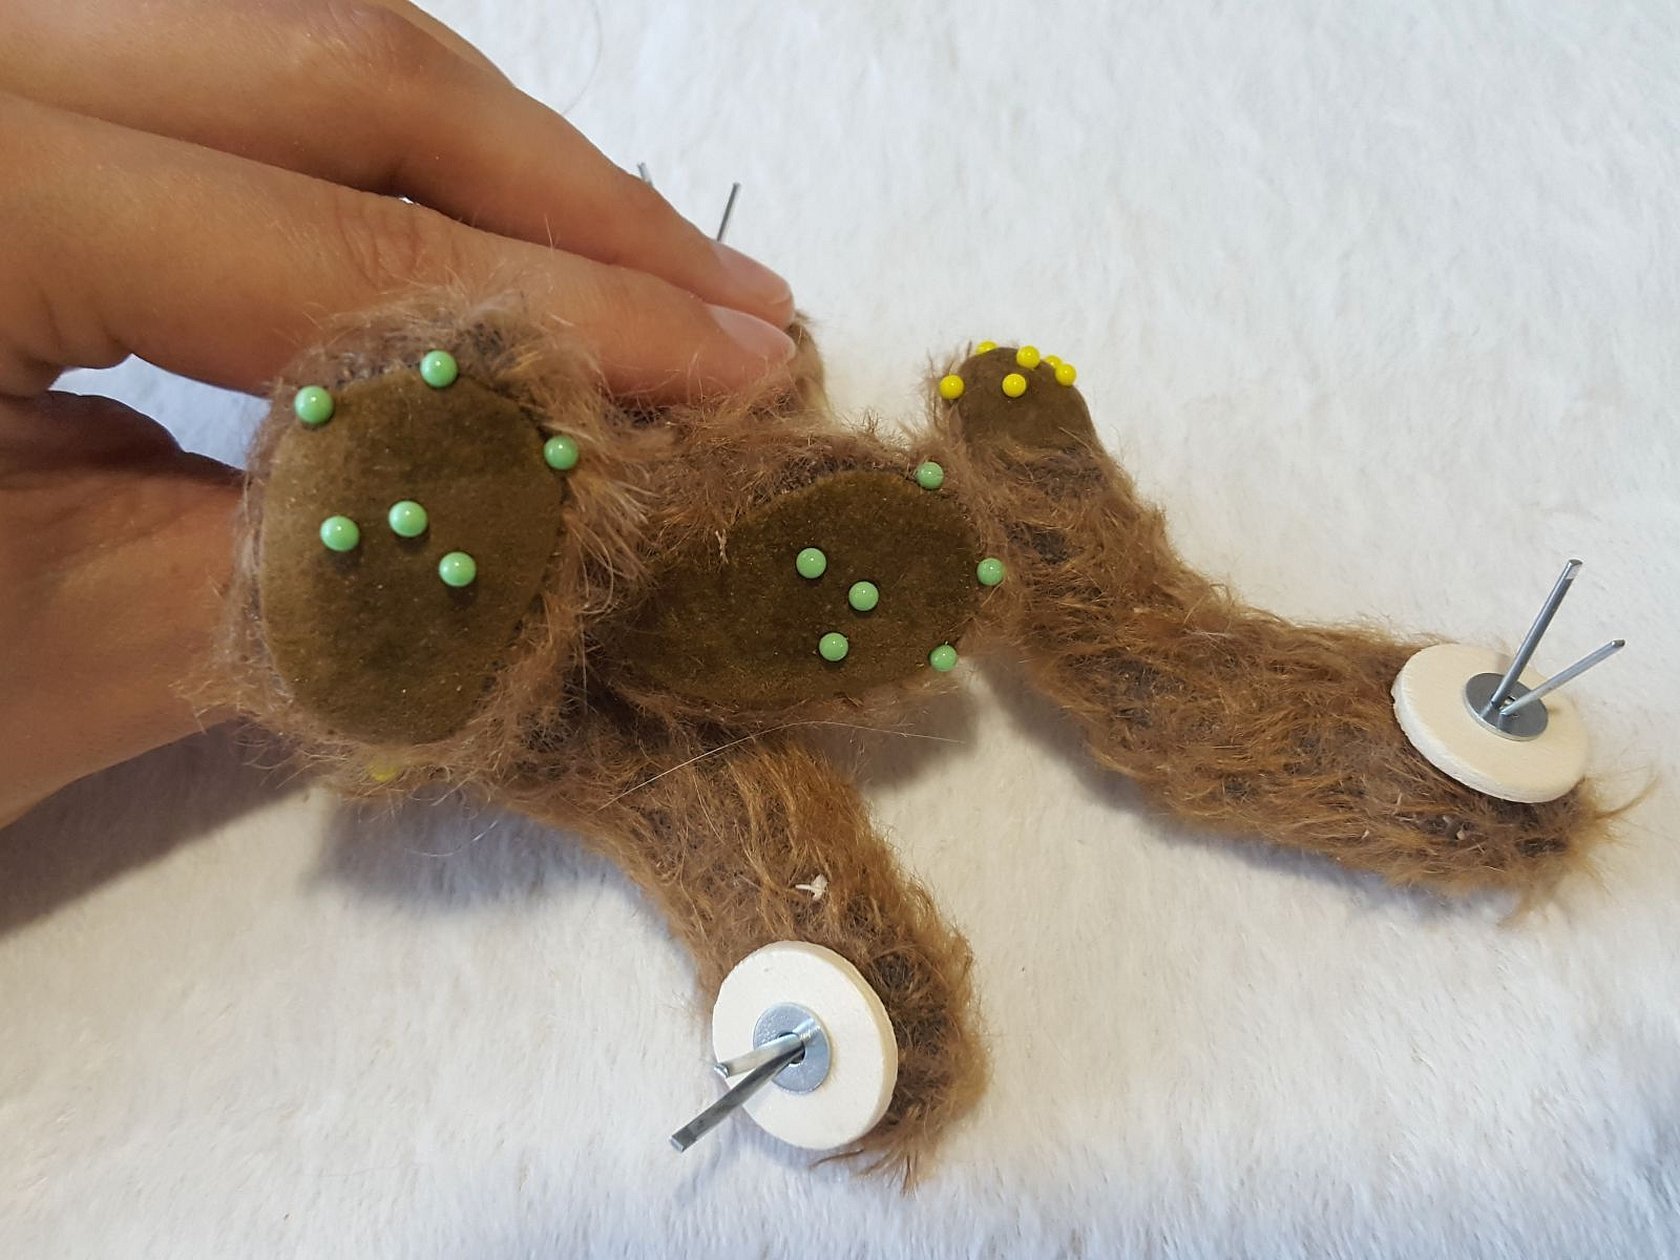
The paws should be tightly stuffed. The places where the stitching will be done should be marked with pins in advance. Six pins will be needed on the lower paws. Three of them will be located in a triangle in the center and three where the bear's claws should be - one in front and two on the sides on different sides.
The first stitch is made from the inside of the paw (for a standing bear this will be from top to bottom). The thread should come out at one of the inner pins (1). The stitch is made so that the needle goes back next to one of the outer pins (4).
The needle then pierces the paw down at point 2 and returns through 5 and through 3 to 6.
After this, the needle is returned up through point 5, the thread is tightened and tied to the initial tip of the paw.
This procedure must be repeated for each of the paws.
It is necessary to tighten the muzzle of the bear. In this case, it is recommended to mark it with pins. Then embroider the mouth and nose.
Fastening of moving parts
The body, paws and head are connected using disks, washers and T-shaped cotter pins. First, holes are pierced with an awl in the right places on the paws. A washer and a disk are placed on the cotter pin from the inside. The cotter pin passes through them and comes out. The same operation is carried out with the bear's head.
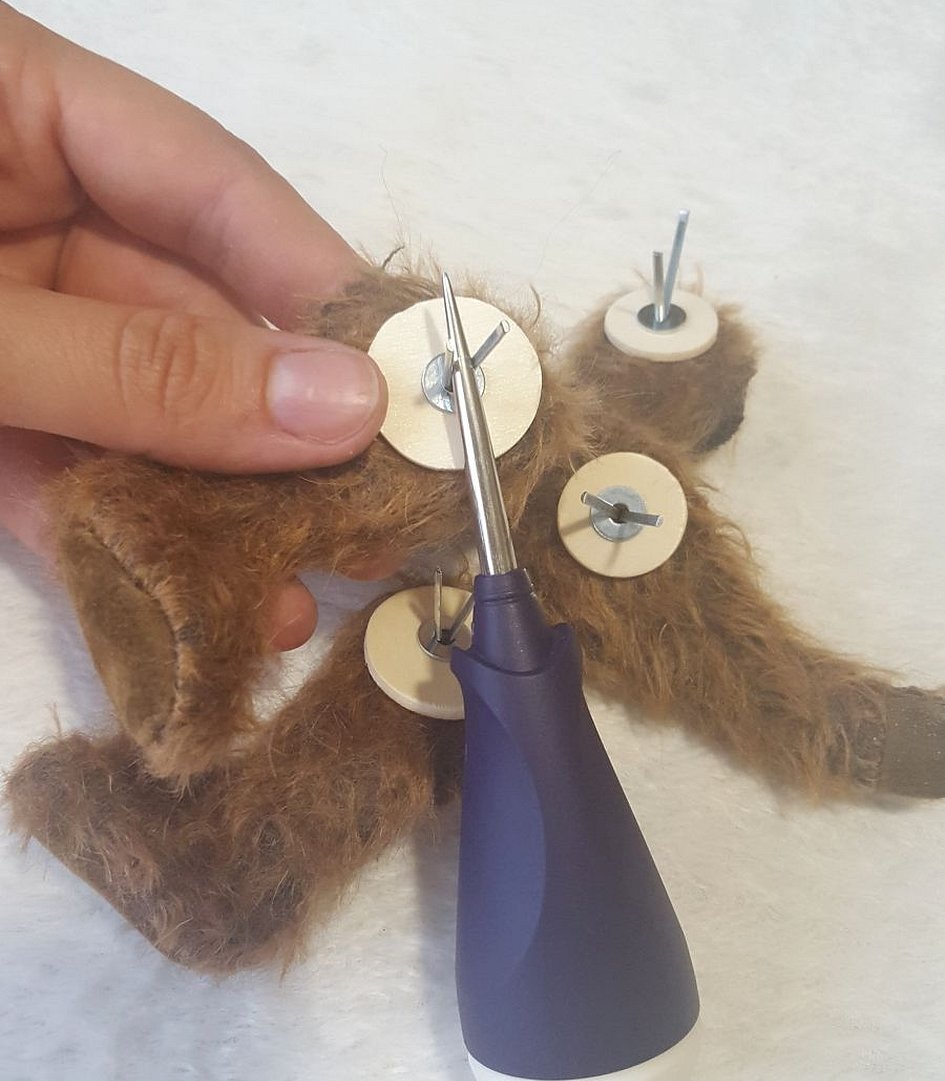
Next, make holes in the body in the right places with an awl. Push cotter pins through, put plywood disks inside, then metal washers. After that, the cotter pins are bent to fix the connection.
After the fastening is installed, the body is stuffed and the required amount of weighting material is poured into it.
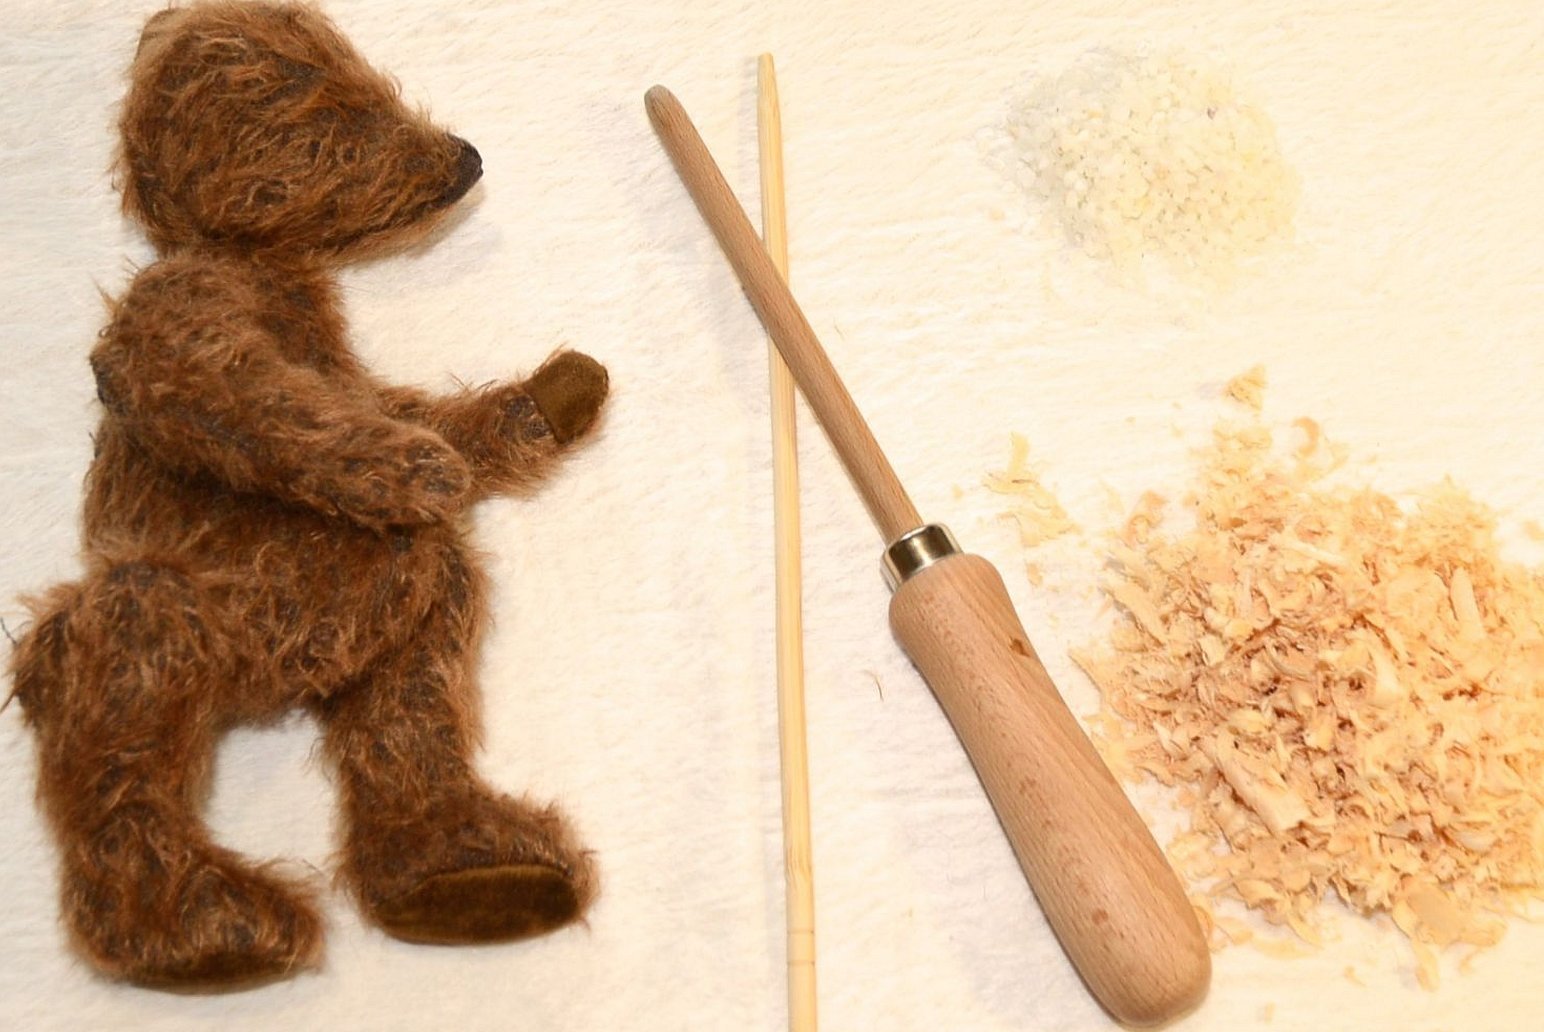
What to stuff a toy with
When packing, sawdust is used in most cases. It is poured inside and compacted with a wooden stick.
Sawdust can be used dry or wet. In the first case, they will not absorb dust and small debris. However, after the stuffing is done, the sawdust will not change its shape and density.
When using wet material, the procedure of filling with sawdust will be more comfortable. At the same time, dust will not be formed. However, as the sawdust dries, its volume may change.
In addition to the stuffing material, it will be necessary to add a weighting agent. It is placed in the tips of the paws and in the lower part of the body. The stuffing is done separately in the body, each paw and the head. Sawdust allows you to give them the desired shape.
In this case, you need to make sure that the tips of the paws are stuffed especially tightly. This is due to the fact that later it will be necessary to tighten and form the fingers. The body will be stuffed last after the connecting disks are inserted. You can additionally sew a dress or a jacket for the toy.
Making a Teddy bear is not easy. However, it is possible to make this doll for your child if you work carefully and accurately, in accordance with the requirements of the manufacturing technology.


