Making different things with your own hands, from outerwear to the smallest accessories, has become quite popular. In this way, people can emphasize their uniqueness and style. This article talks about how to sew a bag with your own hands and what you need for this.
- Bags that you can sew with your own hands
- Choice of fabric
- Fur and suede
- Step-by-step sewing
- Model of a bag made of cotton fabric
- Made of knitwear and felt with felt
- Embroidered shoulder bag
- From burlap
- For shoes
- Belt bag
- Shopping bag
- For laptop
- Sports bag
- Sewing a leather bag
- Tools for sewing leather bags
- How much leather will be needed?
Bags that you can sew with your own hands
You can sew different bags with your own hands, for example, for sports or walks, bags for changing shoes or for storing a cosmetic bag. Below are some sewing tutorials described in detail.
Choice of fabric
Very often, cotton, chintz or drape are used to sew bags. Sometimes you can sew a bag from old home jeans. The fabric can have different density and structure, it all depends on the area of use of the product in the future. If desired, you can decorate with embroidery or make them using the patchwork technique. Below are patterns for bags made of fabric and felt.
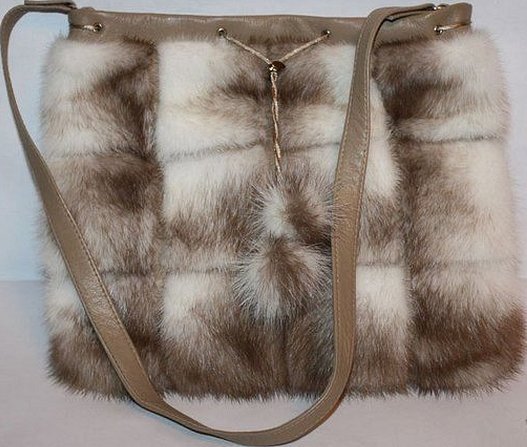
Fur and suede
Products made from these materials are mainly worn in winter and autumn. Fur can be sewn onto a ready-made bag (made from suede, drape), or be the main fabric from which the entire outer side of the product is sewn.
Please note! You can sew a keychain for the product from a piece of fur and attach it to a chain.
Step-by-step sewing
Below are master classes on the most basic models of products. Some patterns are suitable for beginners.
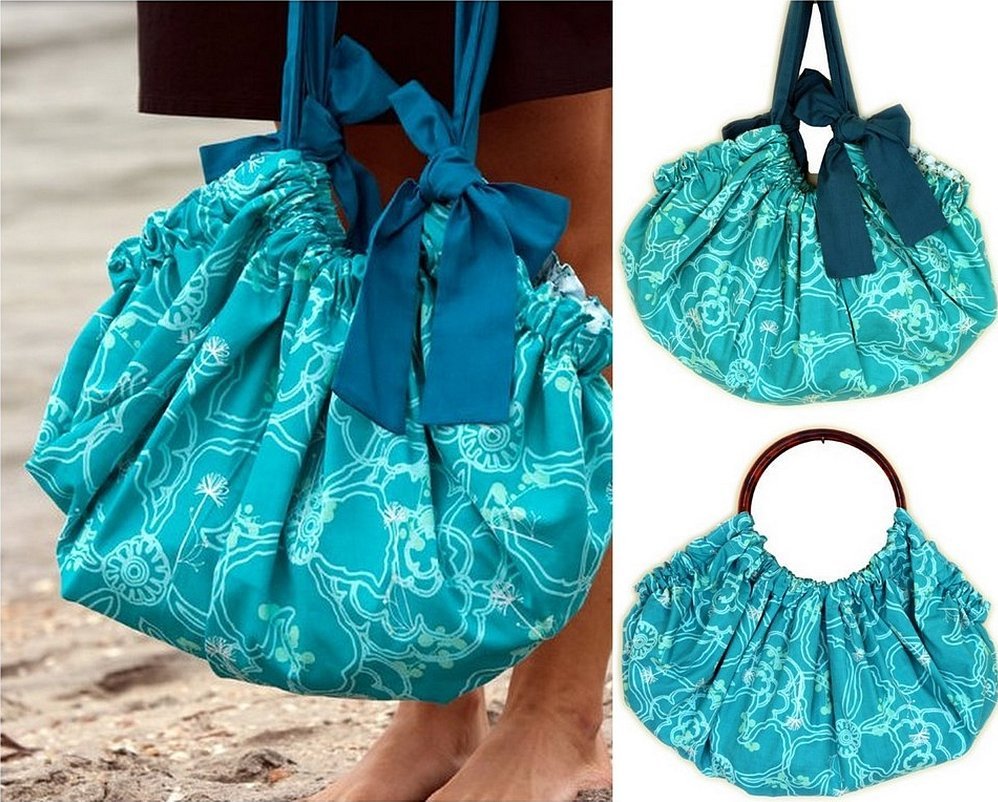
Model of a bag made of cotton fabric
This thing will take no more than an hour, but it will look beautiful and is also made of natural material. Therefore, it is suitable for people with allergies.
Materials for work:
- cotton fabric;
- soap or chalk for marking;
- needles, threads and pins;
- pattern marker;
- sewing machine;
- iron;
- textile roller;
- pattern;
- measuring tape.
First, take a piece of fabric and fold it in half with the outer sides inward, make a 1 cm indentation and stitch the side edges. Before work, you can overlock the cotton so that it does not fray.
Cut a strip of cotton to the required dimensions. The length contains the distance between the side lines of the product, taking into account seam allowances. The color of the strip can be either the same color as the fabric or a contrasting color. Stitch the edges of the cut on a sewing machine.
Now you need to make the handles. To do this, you need to cut two pieces of cotton measuring 50x8 cm. These are approximate dimensions, everything depends on personal preferences.
Fold the handle material in half with the outer side inward and sew the edges by hand. Leave a small opening for turning the piece inside out.
Next, using a marker, thread the sewn edge onto it to form folds of cotton. Holding them, pull the marker through them.
Take an almost finished item, make an 8 cm indent from both edges and sew on the handles using a sewing machine.
Finally, you can decorate your work with beads or fabric scraps.
DIY bags patterns and templates for work can be found on various handicraft forums.
Made of knitwear and felt with felt
What is needed for work:
- felt fabric;
- product fastener;
- ready-made strong handles;
- buttons or snaps as desired;
- half rings 2 pcs.;
- a ready-made strap or thin chain;
- sublimation thermal printing for decoration, 1-2 pcs.
The first thing you need to do is immediately transfer the sticker to the felt fabric. This is done with an iron. Such stickers withstand the bag and machine washing quite well.
Start assembling the product from the outside. To do this, you need to make two large parts, for the pocket and the clasp.
The first step is to sew in the fastener. It is quite practical to connect it to the felt pieces using a basting stitch. Sew the zipper to one of the large elements, carefully placing it in the center.
Place the pocket piece with the slit on top and baste with stitches. Next, stitch the entire piece on the machine. Take the second "part" of the pocket - the piece without the slit - and match it with the first. Sew the pocket on all sides.
Now both sides of the product need to be sewn together on a sewing machine, and the bottom needs to be sewn on. Close the darts and the product is ready.
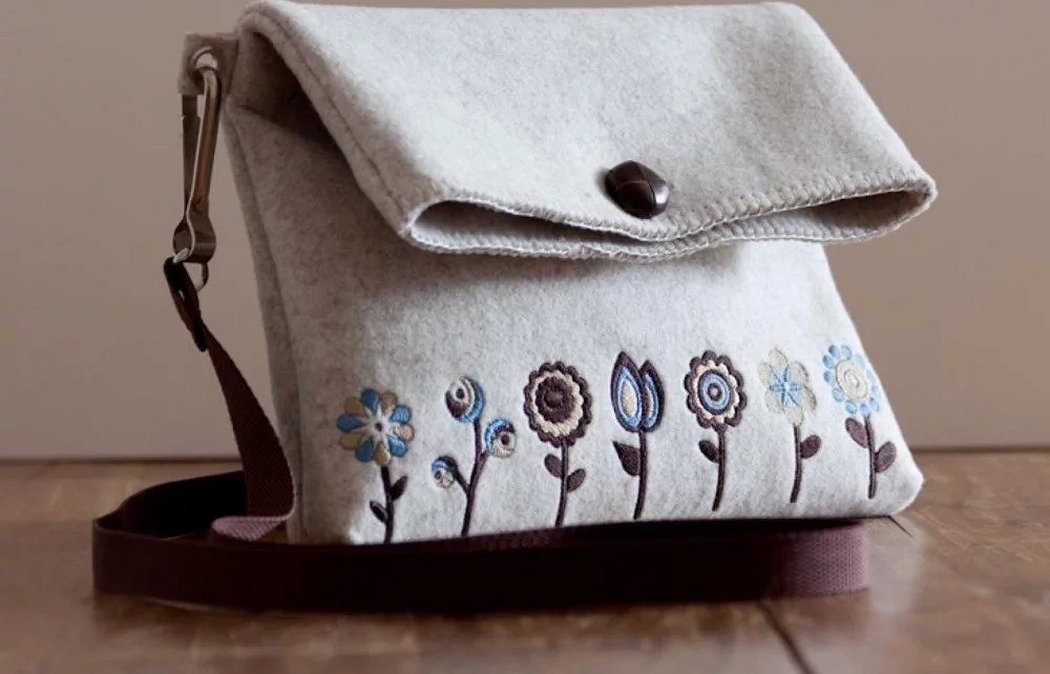
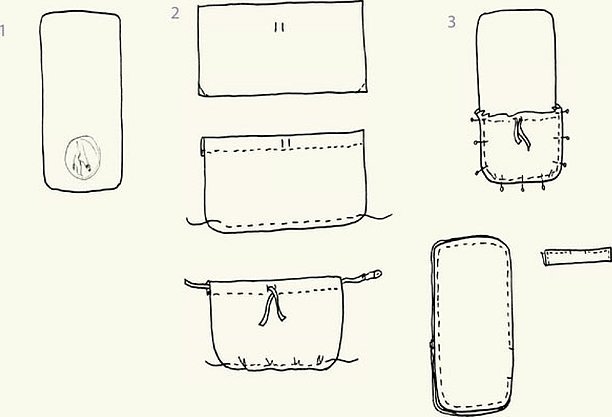
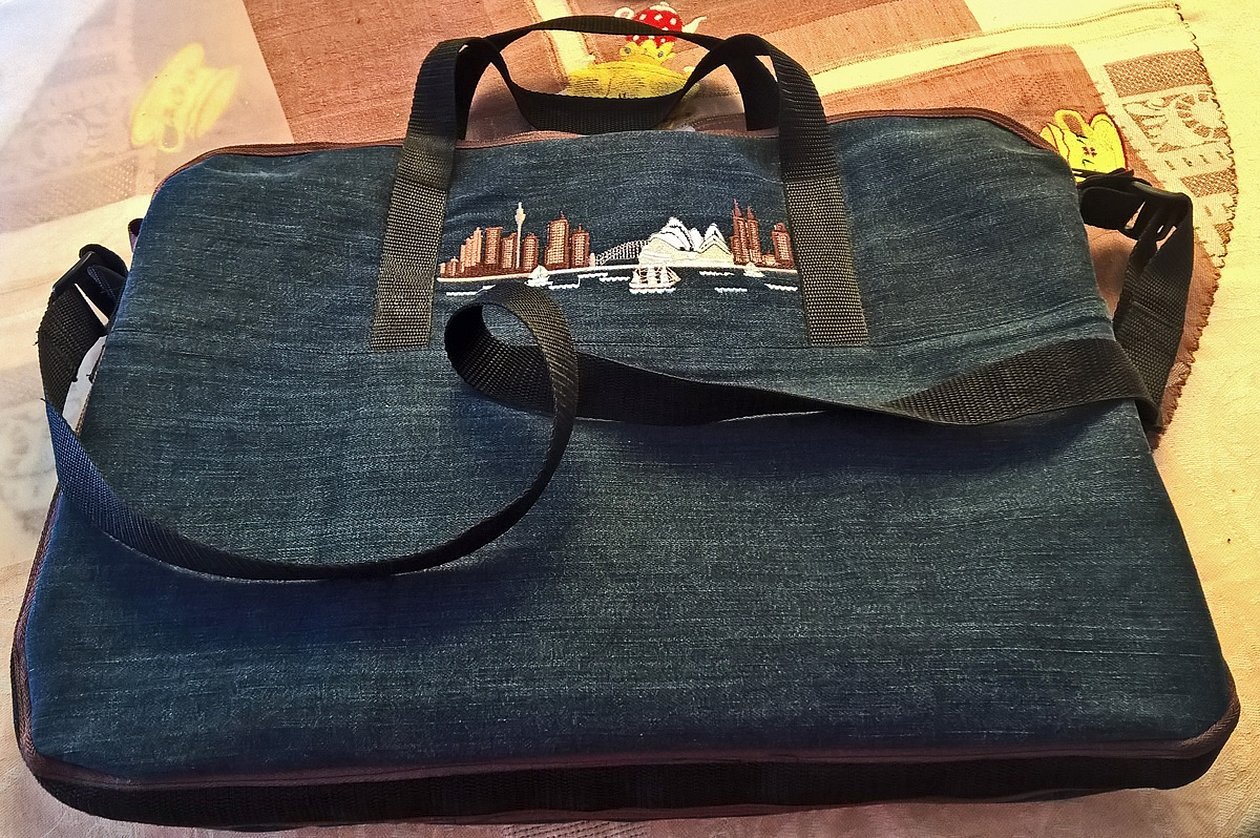
Embroidered shoulder bag
An embroidered shoulder bag is quite easy to make. You don't need to have much experience in tailoring or be a craftswoman.
It is necessary to follow the instructions and correctly calculate the amount of fabric. Figure 7 shows a diagram of such a product.
From burlap
A burlap bag can be sewn in a round shape, this is the simplest option. For this style, you do not need to make a bottom. The process consists of sewing two identical parts and then sewing on handles, zippers and decorations.
This model will not be very big, you can store cosmetics, a charger or food in it.
For shoes
Tools for work:
- raincoat fabric;
- standard clasp;
- 4 rings with 5mm legs;
- tie string;
- adhesive material;
- needles, textile roller and pins;
- a device for driving eyelets inside (hammer, pliers, etc.).
Make two pieces of fabric and two pieces of adhesive material. This will create loops into which you need to insert the lace. Connect the elements using an iron or a steamer.
Iron the allowances on the main parts, secure the zipper with safety pins and sew it in. Sew the bottom layer to the part where the zipper is already ready.
Next, you need to sew the main part to the zipper. Both parts (front and back) are folded face to face and fixed with needles, capturing the elements of the belt loops.
Mark the places on the product for inserting eyelets (rings). Reinforce these points on the inside with a piece of felt or felt. Make holes and insert rings into them, not hammering them too hard.
Iron the top edge of the shoe bag to the wrong side, making a 5 cm fold, and fold it again by 1 cm and stitch. Make knots at the ends of the lace.
Belt bag
Step by step work:
- make a paper pattern for the belt bag and attach each cut-out element to the back of the material. Transfer the pattern to the fabric, making allowances of 2 cm;
- cut out the details for the waist model;
- check that the elements of the product are correctly aligned with each other;
- Next, you need to sew the parts of the product and at the end add a 16 cm zipper.
This product can be worn on the belt and used to store money or documents.
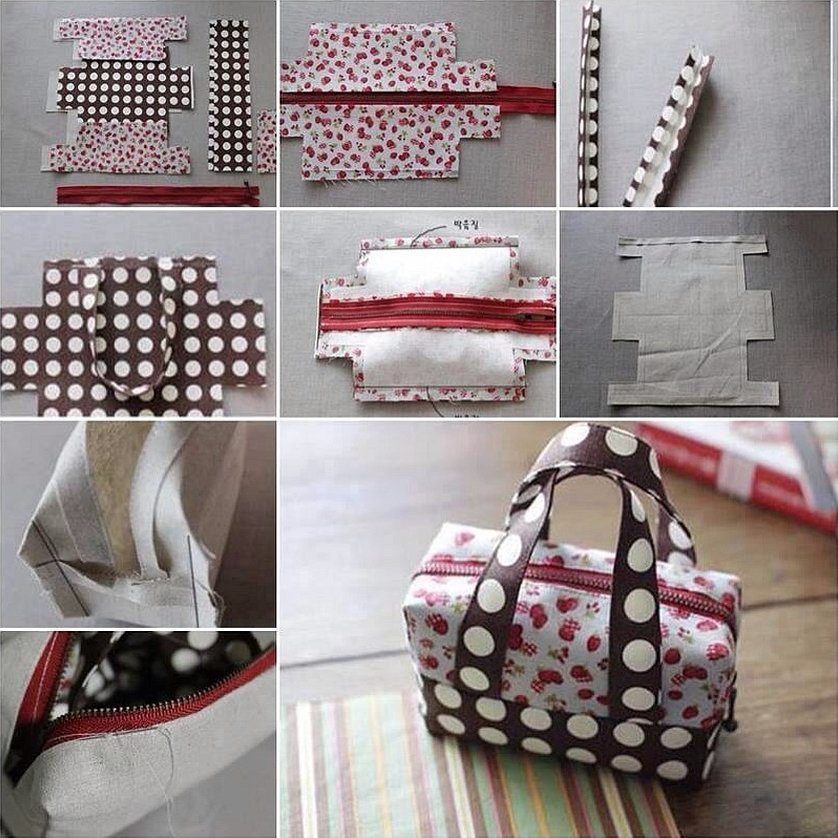
Shopping bag
Step-by-step sewing of a shopping bag:
- cut out the pattern pieces and assemble the base of the garment, 2 pieces of the front side and 2 side pieces. A rectangle is formed, united into a ring. Do the same with the lining piece. To increase durability, you can make finishing stitches along the seams;
- fold the base with the right side inward, match the bottom and sew with a machine. Iron the seam, fold the corners on the sides and make volume, lay a line from one side to the other at an angle of 40 degrees perpendicular to the ironed seam. Cut off pieces of excess material. Connect the lining material with the main one and sew with a machine;
- Now you need to turn the product inside out, process the edges and sew on the handles. At the end, you can add embroidery or a pattern to the product.
Finally, you can decorate the product with various pieces of fabric or beads that you have lying around the house.
Below in the article you can learn how to sew a simple bag for storing a laptop.
For laptop
Making the bag:
- First, you need to place the laptop on the canvas, mark the dimensions and cut out two pieces of fabric;
- The length of the handles is selected at will, from 3 cm;
- Next, you need to stitch the internal elements and attach the product to the laptop;
- Sometimes a pocket is sewn on to store the charger inside;
- Sew the outer part of the product and the sides;
- Sew in the zipper and sew on the handles.
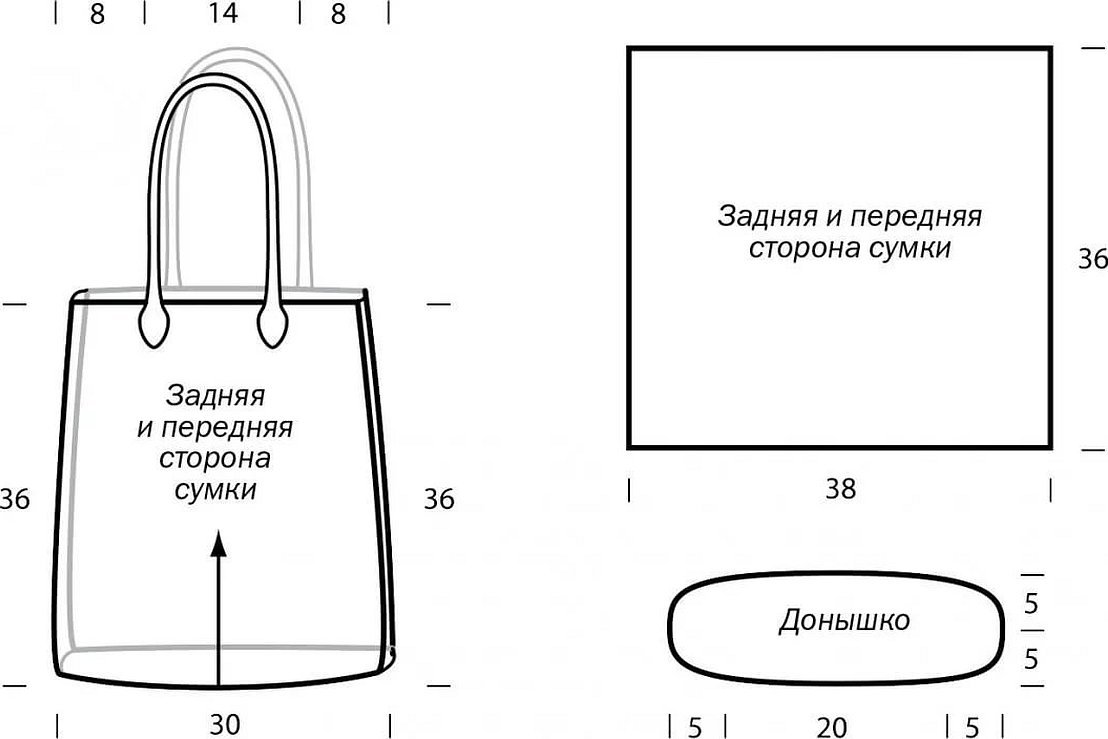
Sports bag
A sports bag can be used not only for visiting the gym, but also, for example, for a store/market. It has a lot of space, and it is also comfortable to wear. Basically, such models are sewn from thicker fabrics with lining so that they hold their shape. Figure 12 shows a pattern for such a product.

Sewing a leather bag
It will be very difficult for a beginner to make things from leather. It is necessary to have experience in working with leather.
Because it can be easily damaged. For such products, special machine needles are required, otherwise it will not be able to pierce the material.
Tools for sewing leather bags
Basic tools for proper leather cutting:
- rulers of different lengths;
- square;
- leather cutter;
- a knife with a sharp blade;
- small scissors for cutting hard to reach places;
- triangle with circles;
- sharp marking tool (awl);
- disappearing marker;
- cutting stand.
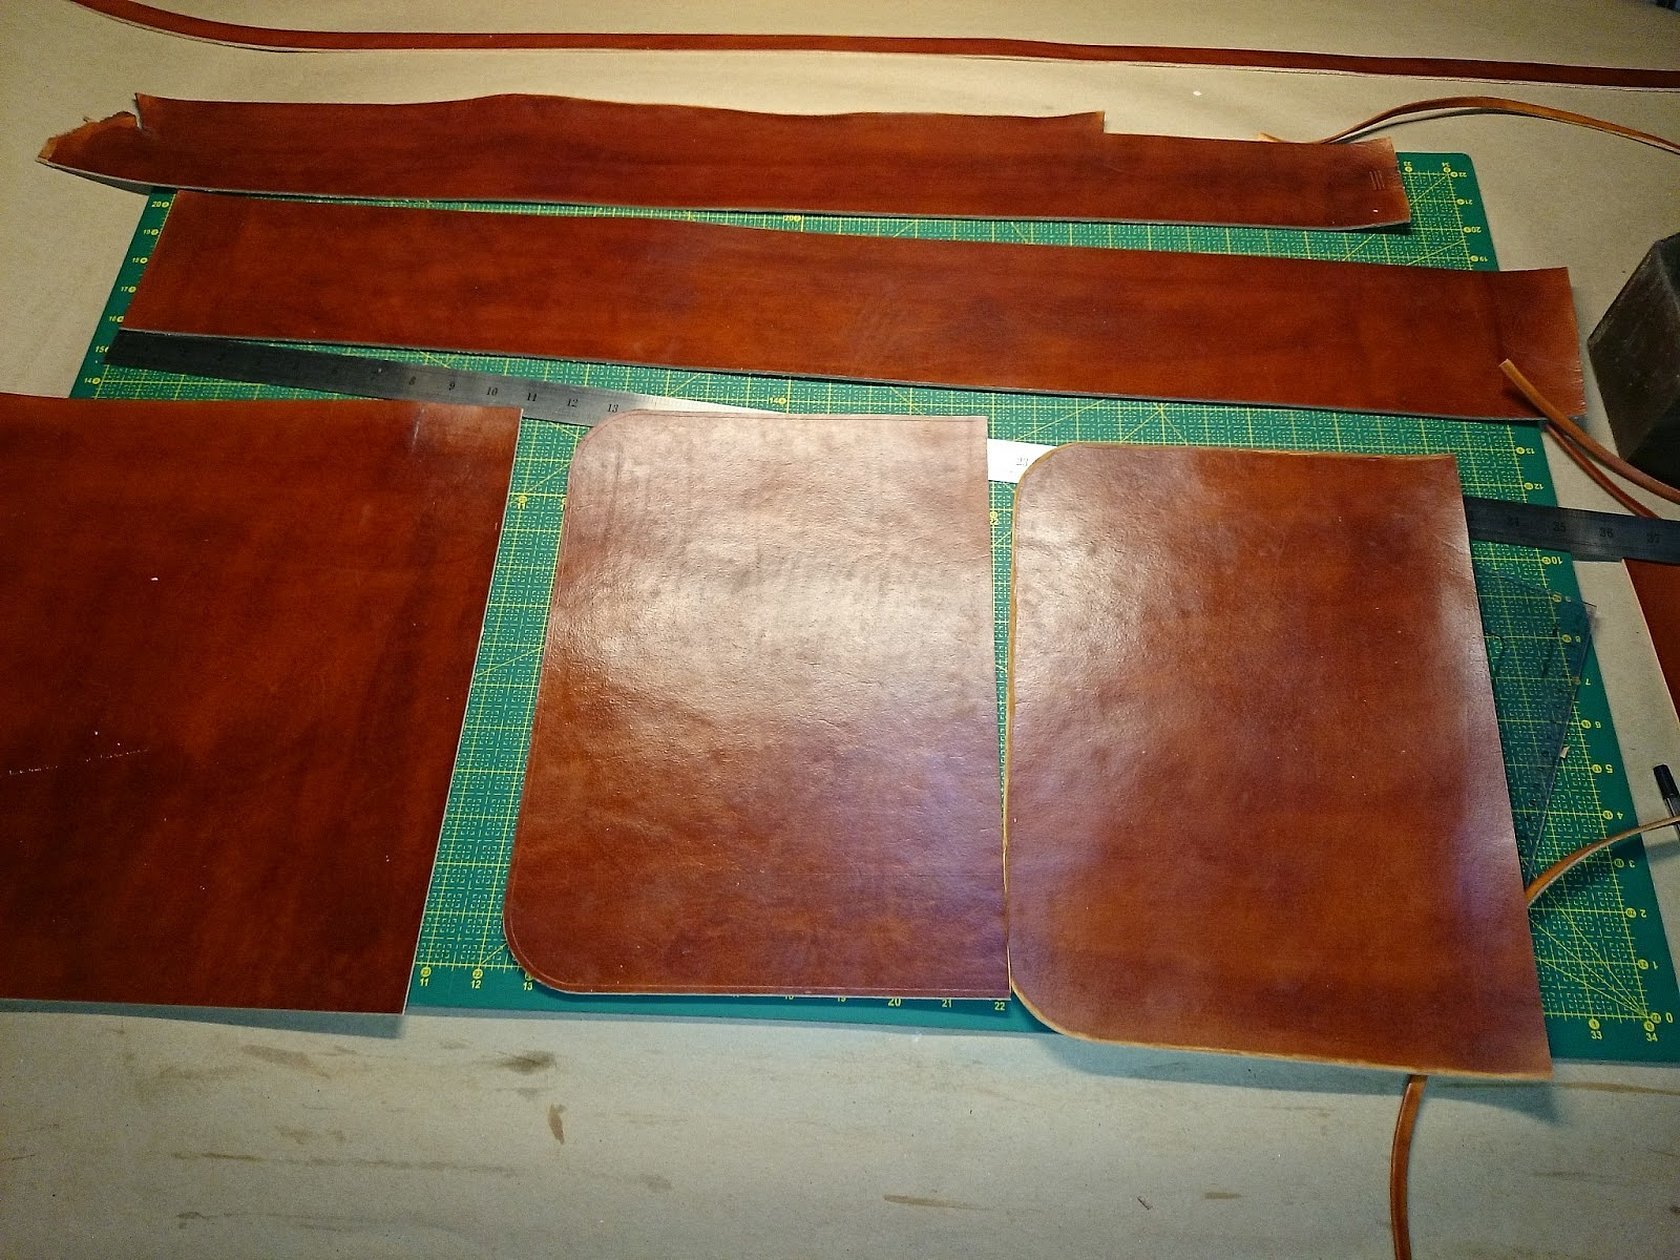
How much leather will be needed?
The average size of the material for a small bag will be about 1.2 meters. Depending on the style, the presence of decorations, pockets and other elements, and most importantly the size of the product, this figure will change. Before working with leather, beginners are advised to try sewing a model from knitwear to assess their strengths and skills.
In conclusion, it should be noted that sewing a bag with your own hands is quite simple. There are many patterns from simple to complex, so everyone can find something for themselves. When making such things, it is important to correctly calculate the fabric so that there are no defects.


