Skirt styles are varied. And, among all this diversity, a special place is given to the yoke skirt pattern. The yoke skirt pattern is simple in its execution, even an inexperienced seamstress can build the patterns of the product. Having such a skirt in the wardrobe of a fashionista is a real find. Perhaps, not a single thing will be able to visually increase the curve of the hips, while reducing the size of the belly. It is for this reason that the popularity of the product has remained unchanged for decades, and the situation is unlikely to change in the near future.
What is this?
Most women's skirts have a yoke. Moreover, some girls wearing such items do not even know about the presence of this element on their clothes; such an outfit will hide all the flaws of the figure in just a minute.
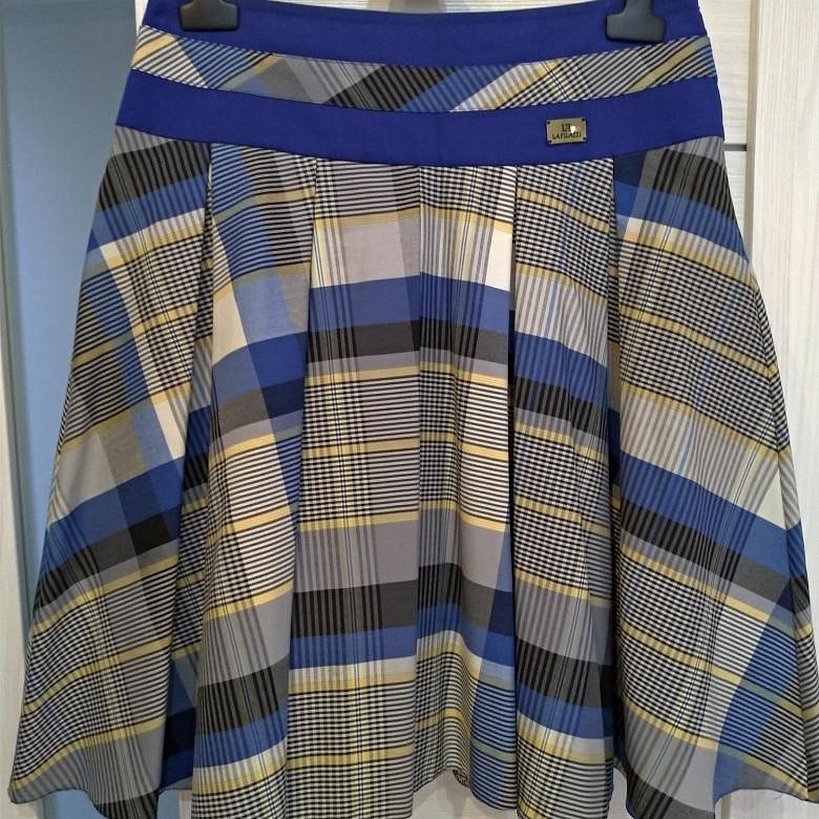
A yoke is a cut-out detail that functions as a clothing element. It is nothing more than a belt of a unique cut, sewn to the main fabric of a skirt. The yoke is present not only in skirts, but also in dresses and trousers. The manufacturer must indicate the full length of the product, including the yoke, on the label.
Basic pattern
The basis is the classic version of a straight-cut skirt.
To make the patterns of the product, you will need to measure the waist and hips, the length of the hem. The DP is taken according to the woman's preferences and is based on the features of the body structure.
ImportantAfter measuring, the waist and hips are divided in half.
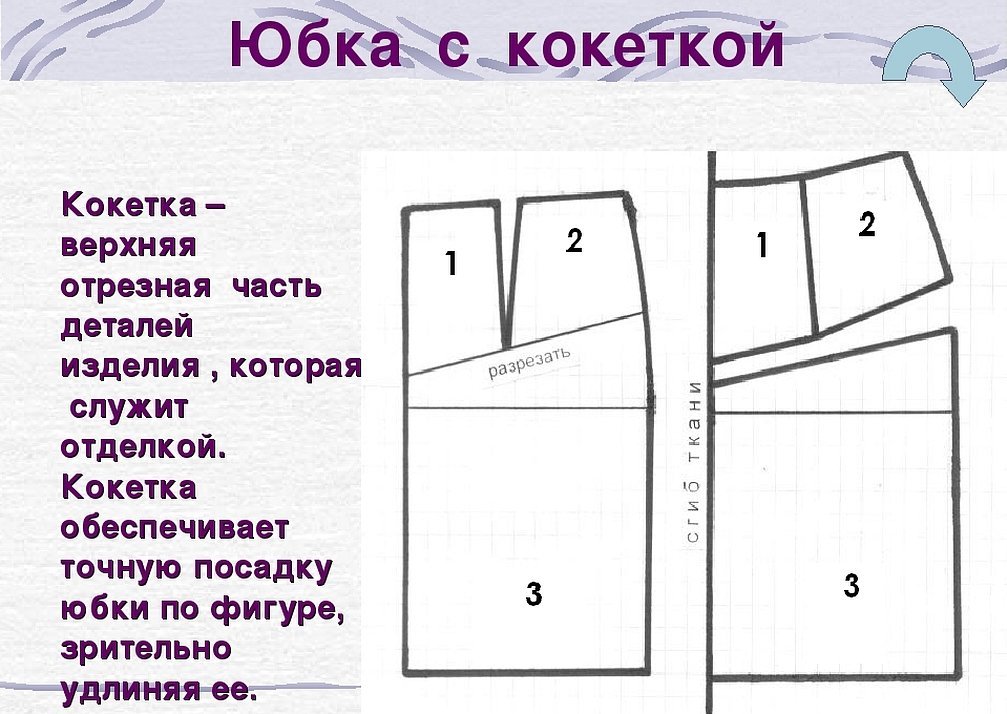
Pattern of the wide part of the skirt
- The parameters of the yoke height are marked on the patterns of a classic straight-cut skirt. The required parameters are set aside on t. 1, 2, 3, 4, 5, 6.
- The height of the yoke is marked.
- Connect the formed dots.
- The lower part of the product is trimmed along the formed line. The darts are closed, their edges are aligned.
Sun
This type of style is popular among little fashionistas (the girl wears this item for her first matinee in kindergarten), and this item is no less popular among graduates. The undeniable advantage of the skirt is that the item fits perfectly on an ideal figure, and is suitable for plump women.
Necessary measurements:
- DI;
- OB, if the skirt is sewn with an elastic band
- OT, if there is a belt or a trimmed facing.
Taking measurements should be taken seriously. 90% of success in sewing a product is the accuracy of the measurements taken.
Important. The waist is not always thin, especially if the woman is overweight or has non-standard figure proportions.
Measurements are taken in the lower hypochondrium area.
Algorithm:

- Before taking measurements, the figure is tied with a belt at the waist;
- The OT value is taken from the installation belt;
- CI is measured from the waist to the desired mark.
Attention! If the product is to be worn with high platform shoes, measurements are taken in similar shoes. This point will be important for the floor-length or mini-length versions of the product.
Patterns are constructed by performing arithmetic manipulations:
- SWEAT;
- Calculation of the cutting radius using the formula: (POT/4) + 2. Where POT is the measurement corresponding to POT.
A sun skirt when turned is a circle with a cutout in the center. In order to simplify the work and save paper on patterns, make 1/4 of the pattern.
A right angle is constructed with the hand. On each side of the angle, the distance obtained using the formula described above is measured.
The lines are connected by an arc. This is done as follows:
- Several straight lines are drawn from the vertex. The distances obtained by the formula described above are marked. An arc is drawn through the obtained points.
- Use a compass, placing the leg at the top of the angle, connecting the resulting points.
The resulting line is 1/4 OT. The measurement size is checked. The waist is measured again with a centimeter, the value is increased by 4 times. The resulting number is identically equal to OT + 2 cm. If there is a discrepancy, control calculations are performed, the correctness of the pattern construction is rechecked.
The distance corresponding to the DI is set off from the points and connected by an arc. The procedure is similar to that for modeling the cut at the top.
Half Sun
This type of skirt requires one pattern for the front and back panels.
This version of the product is suitable for women and will look great on a girl.
Attention! Skirts with a conical shape have a coefficient of curvature of the upper waistline circumference. The main thing is to decide on the type of product. For a half-sun skirt, the value is 0.64.
Measurements.
- OT - narrow part of the body.
- OB - measures the protruding parts of the hips, buttocks, and includes the stomach;
- DI - from the waist down to the hem.
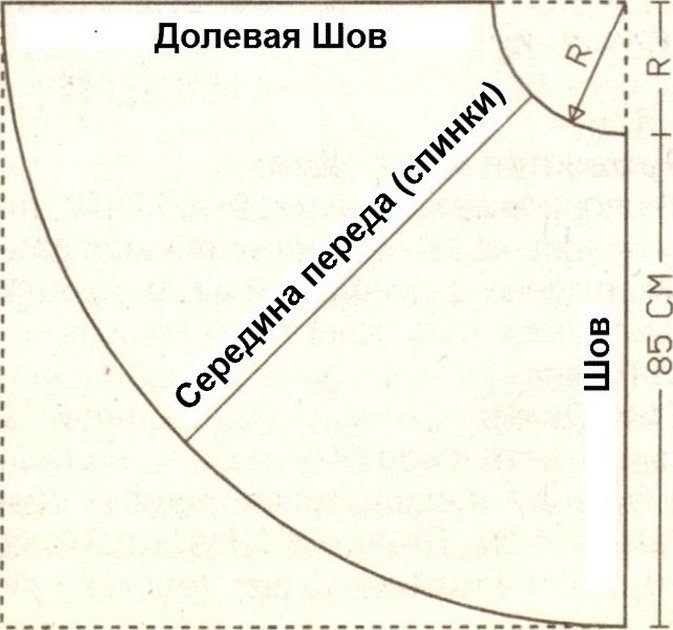
Step-by-step instructions:
- The radius of the inner circle is calculated: 0.64 is multiplied by the POT value;
- OT is divisible by 3, 14.
Construction of the pattern:
- Construction of a 90 degree angle with the vertex at point O, located at the top left;
- An angle of 45 degrees is set aside;
- Points T and T1 are marked, corresponding to R1. R1 is the radius of the waist circumference:
- The length of the circumference on the sides is determined - H and H1;
- An additional circle R2 is drawn. This value can be obtained by: summing R1 and TH;
- The product is shortened in the center by 3 cm after the product has shrunk;
- It is cut out.
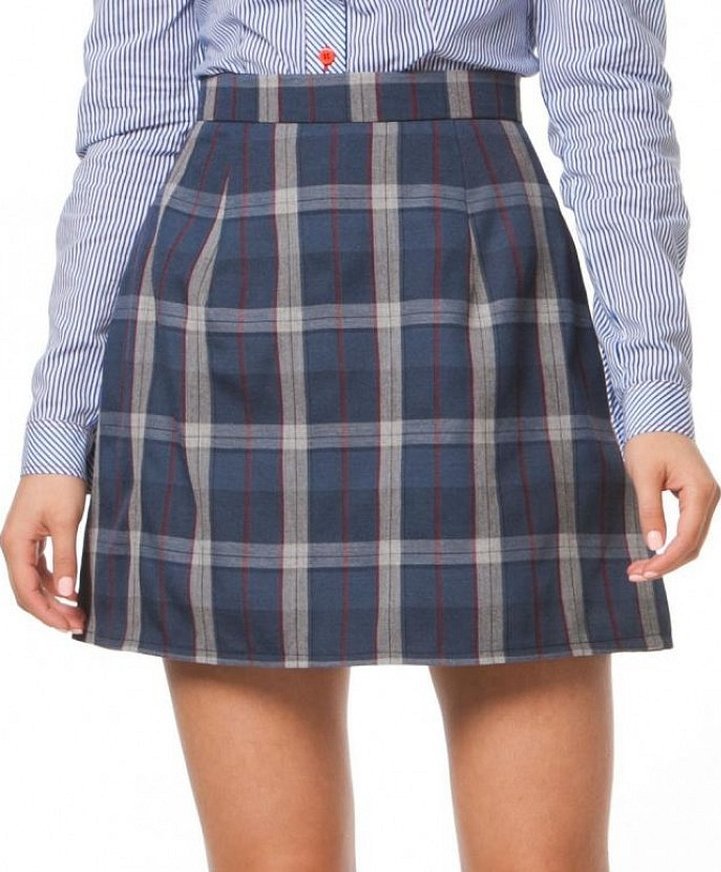
Trapezoid
The model fits at the waist and is flared at the bottom.
Necessary measurements:
- POB;
- SWEAT;
- DI.
Determined with allowances for ease of fit. At the waist - up to cm, at the hips - up to 2 cm.
Important. The meaning of these numbers depends on the desired freedom of fit, the style and texture of the material.
For work, a ready-made pattern of the base of the skirt is used.
The basis of construction is a pattern of a skirt with two seams, step-by-step algorithm:
1. A right angle is drawn with the vertex T. The long segment on the right is the waist, DI is measured from T;
2. The hip line is marked. Measured from T down 20 cm, marked T.B. A horizontal segment is drawn from it;
3. Find point B1. Its value is POT with allowances for fit. Draw a vertical line, get points T1 and H1.
4. The location of the side seam is fixed. The width of the product is divided in half, the value is reduced by cm.
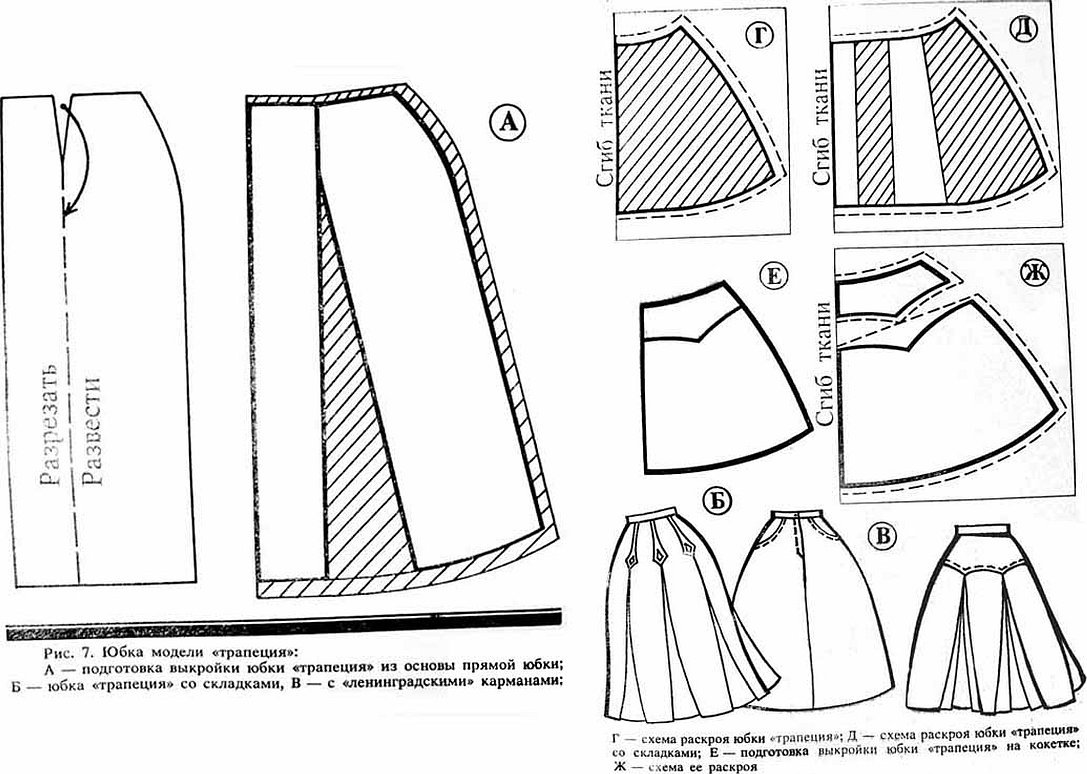
- The obtained value is set aside from point B to the right. Designate B2, and a vertical line is drawn through it until it intersects with the waist and bottom.
- The total solution of the recesses is determined. It corresponds to the difference between the POB and POT with allowances;
- The position of the back dart is calculated by multiplying the length values of segment BB2 by 0.4. The solution of the back fold is determined by multiplying the obtained value by 0.35.
- The position of the front notch is the multiplication of the length of the segment B1B2 by 0.4. The solution of the back notch is the multiplication of the obtained value by 0.15.
- The remaining amount is distributed along the side seams.
The number of darts depends on the model's build.
ImportantFirst, you need to make calculations using formulas, and then make a model, adjust the position of the darts after direct fitting.
Bell
They take measurements. They decide on the length of the bell-shaped dress. You can make a long skirt, or you can make a product of the desired length.
- A midline is constructed with the vertex O. A line is drawn from it.
- The waist line is drawn. An arc with a radius of OA - 1/2 *OT-4 cm is drawn.
- The bottom line is constructed according to the drawing.
- The middle line is constructed according to the drawing.
ImportantTo construct the pattern, use large pieces of paper.
Design of the side seam. Connect point O with point O1. This creates an intersection with the bottom line. Form a side dart, leaving 0.5 cm along the waist line to the right. Draw smooth lines that converge at the side seam.
Making a cutout along the bottom, middle lines, and top. Cut the pattern along the side seam and along the dart line.

How to make a belt
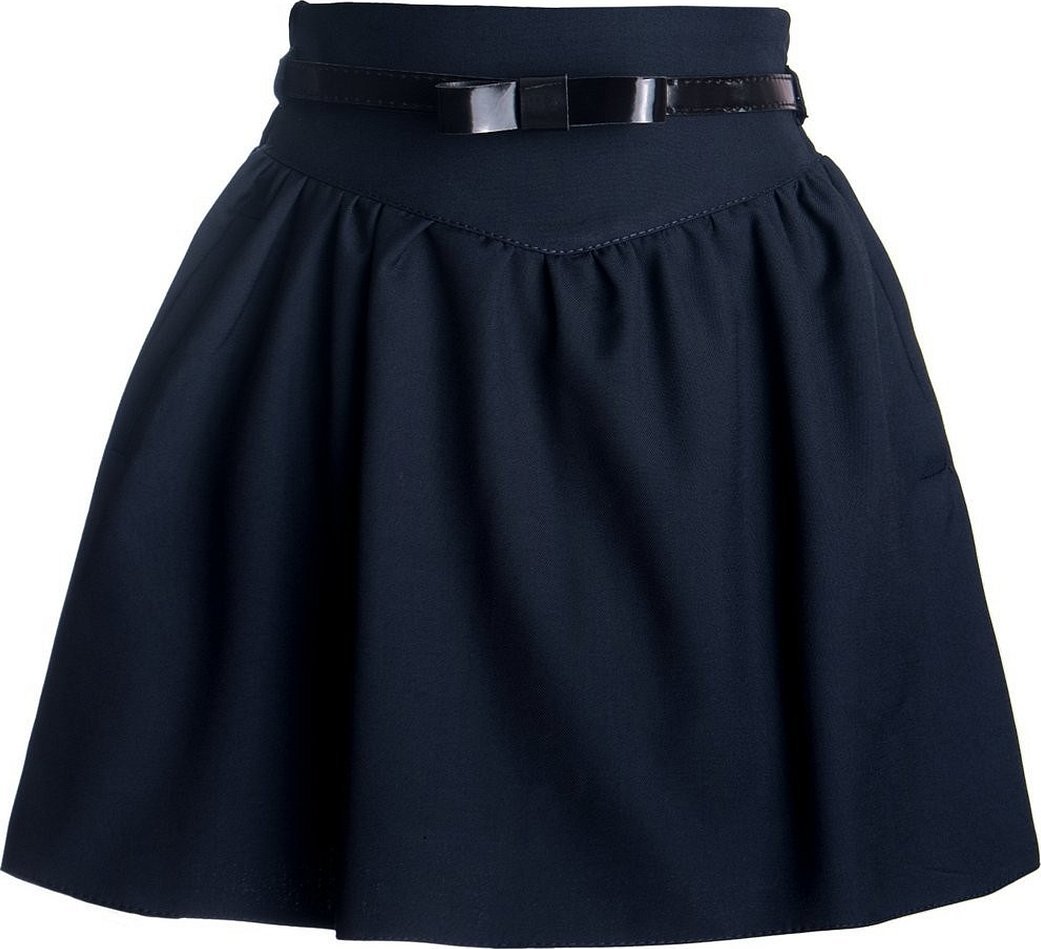
A yoke belt is a detail of a garment with a belt (skirt, trousers, etc.), which performs several functions on clothing: a belt and a yoke.
Location: Below the waist.
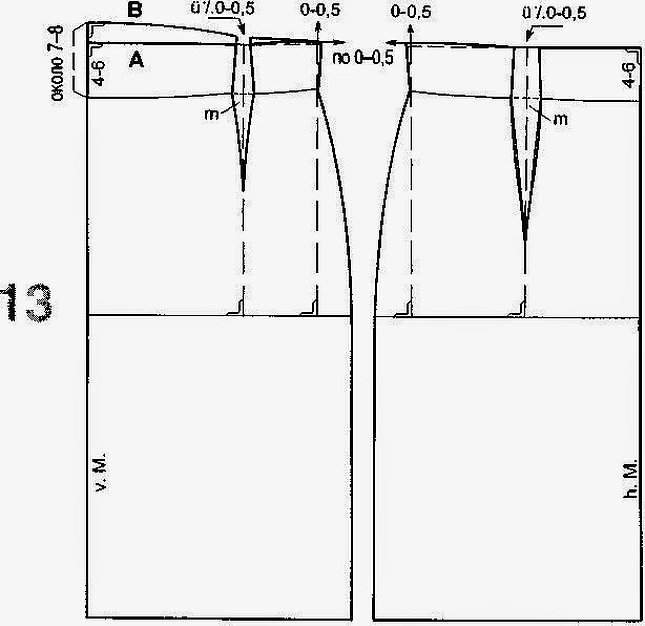
Most often found on straight cut garments.
- From the top edge of the back and front panel pattern, you need to set aside several 50 mm segments. 50 mm is the width of the yoke.
- The segments are laid out at the top from the pattern base lines on the back and front fabric.
On curves - at an angle of 90 degrees to the lines.
Attention! The greater the quantitative ratio of the set aside segments, the more accurate the lower edge of the yoke. It is not necessary to set aside the yoke on paper - the lower edge of the belt is marked.
- The lower boundary is connected by segments at points.
- A curve that follows the shape of the top edge of the parts.
- The top edge of the front and back panels is cut off.
- The separate parts of the belt are glued end-to-end.
- The belt details are corrected - a smooth shape of the detail is drawn.
The details of the yoke belt are outlined on a sheet of paper.
What clothes to wear with
Each of the several belt parts obtained consists of 2 identical ones.
Connection options:
- Seam;
- Butt fastening;
- Fastening with buttons, snaps, hooks.
Please note! For a yoke that fastens with a button, an allowance of 3 cm is allocated (according to the style). The allowance for the fastener is made on the waist - the yoke at the line of the middle of the front part and the back panel.
The construction of the yoke on trousers is similar.
The yoke is made on a dress if the dress is cut at the waist.
Most often, yoke models are decorated with beads of various calibers. Beads are not sewn on, but knitted into the fabric of the part. It should be remembered that any sewing requires perseverance and patience.


