Diamond embroidery has long enjoyed great success. It attracts not only children from 7 years old, but also adults. There are thousands of beautiful patterns that can be brought to life. And ready-made kits are available in every handicraft store. This article talks about what diamond embroidery of icons is and what rules you need to know when doing it.
Diamond embroidery icon patterns
Diamond embroidery is very similar to creating a mosaic of small elements, and not the process of embroidery with thread. The work is quite complex and tedious, perseverance and caution are necessary. Diamond embroidery kits of icons can be bought either on the Internet (which will be cheaper) or in special hobby stores. When buying online, the advantage is that you can open the box and only then pay for the order, this is not allowed in stores.
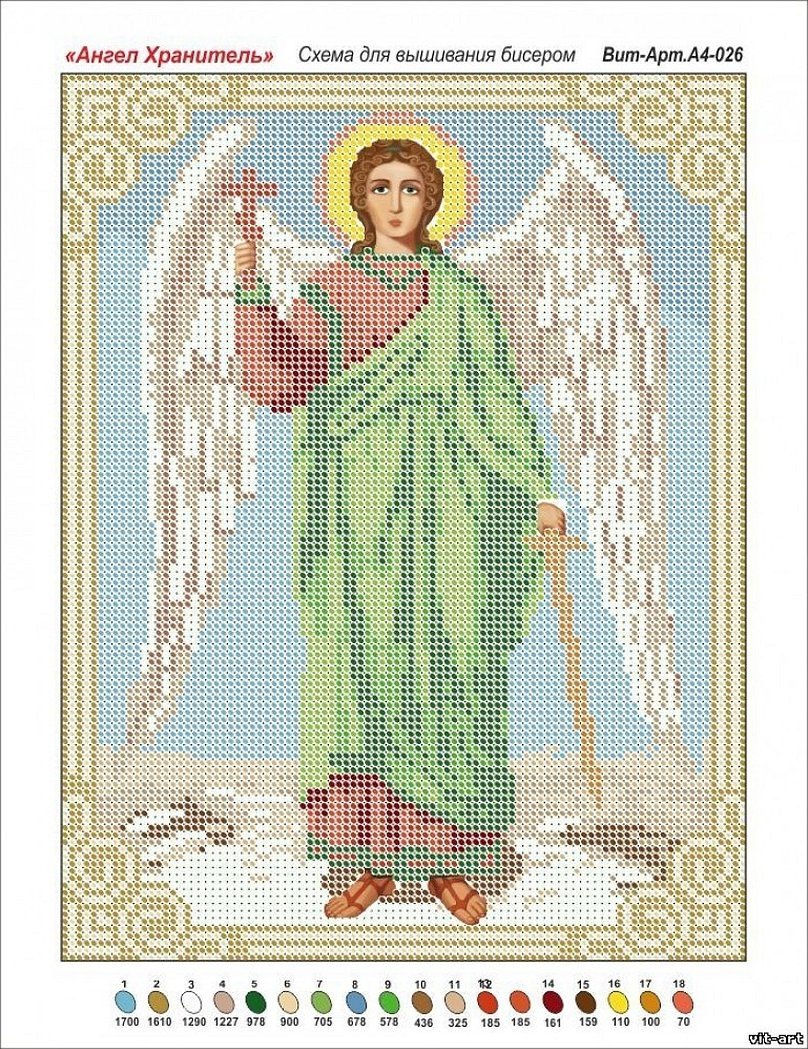
Angel
The Guardian Angel icon is considered to be a mediator between man and God. The main purpose of the Angel is to protect man and his family from adversity and troubles. It is believed that when a person prays, it is the Angel who conveys his prayers to the Almighty. In Figure 1 you can see the embroidery pattern.
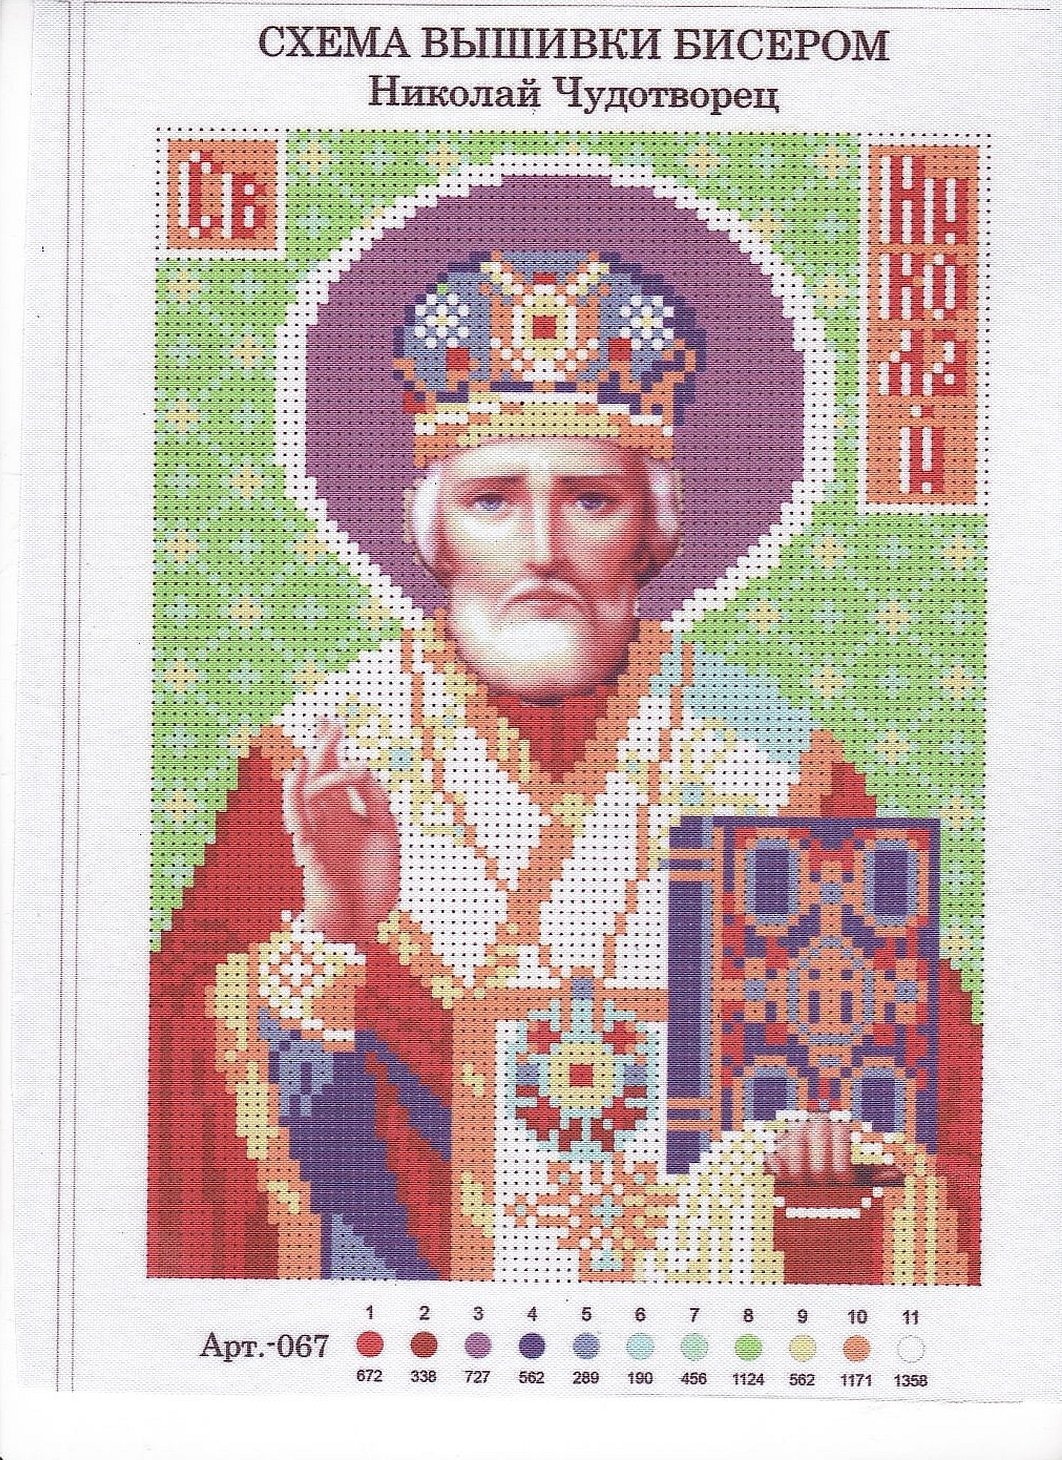
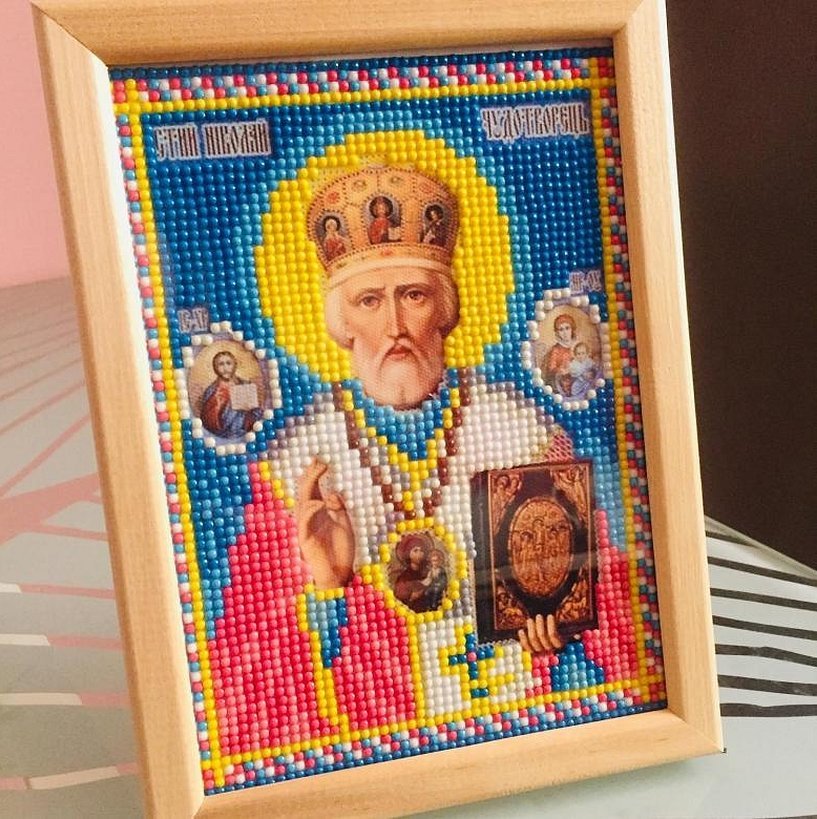
Nicholas the Wonderworker
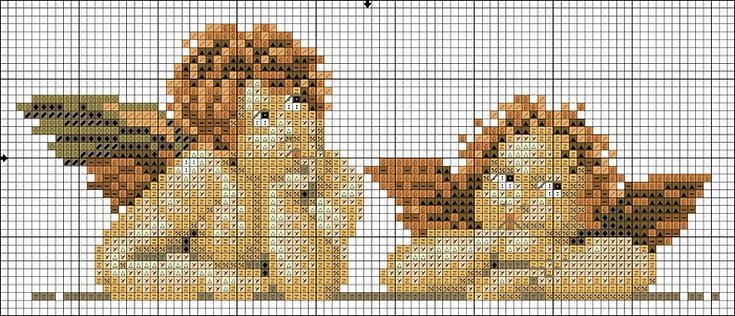
The icon of St. Nicholas the Wonderworker protects the peace of sailors, travelers and others. Often, car owners can see his portrait in the car. This icon is dominated by gold and orange colors. It can be placed in a car if it is small. Figure 2 shows a diamond embroidery pattern for the icon of St. Nicholas the Wonderworker.
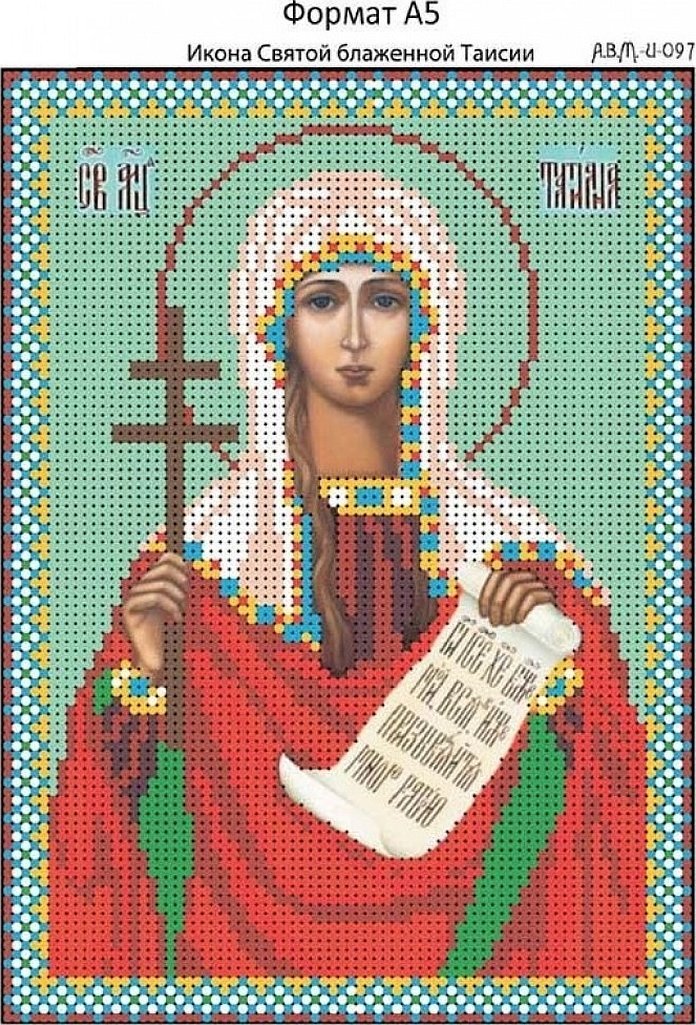
Named icons
As they say, personalized icons protect the owner and his entire family. But such items should be made by a person for himself, and not received as a gift from someone. Usually they are placed in the bedroom to protect not only sleep, but also peace and health of a person.
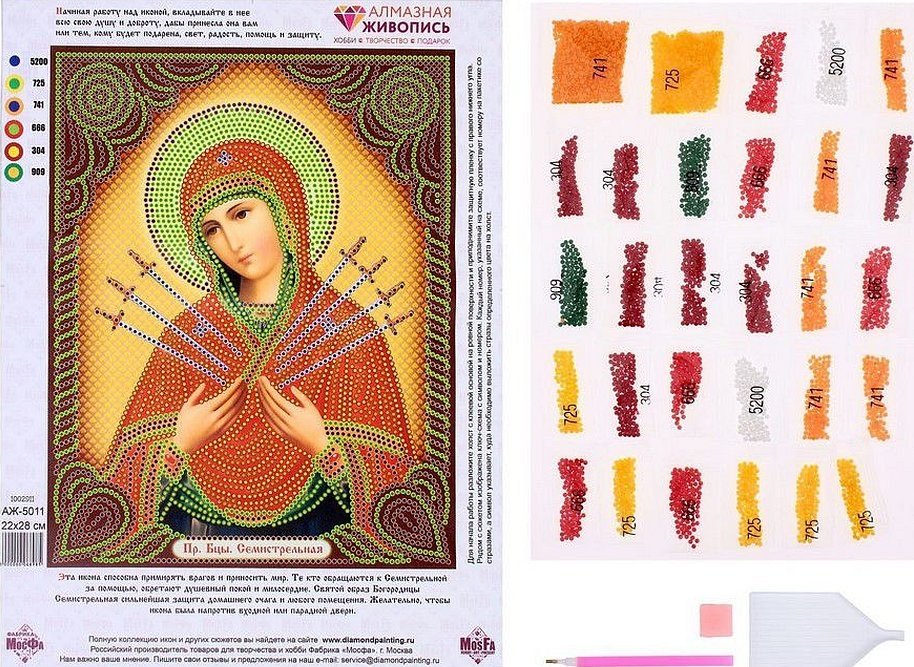
The Diamant icons are made mainly of red and gold colors. But there are also sets with the Saint's green or white vestments.
Methods of laying out diamond mosaic icons
Many people advise to consecrate the icon after finishing the work, otherwise it will just be a drawing that does not help in any way.
Before starting work, it is necessary to place all components of the kit on a flat surface - you can use a table or a tablet made of hard cardboard suitable for the canvas.
For diamonds, it is better to take plastic or glass plates and place each color in them. This will make it easier to embroider the icon sequentially. Many craftswomen take ordinary cardboard containers from kefir or milk to place crystals, cut off the top and use them as plates for diamonds. As a last resort, you can take a plastic palette.
In the store you can find a special case with compartments for each color of beads.
This is convenient because it reduces the chance of accidentally touching the plate and dropping all the diamonds. It is not recommended to carry out work in the dark, as this can greatly worsen vision, and fatigue will be higher.
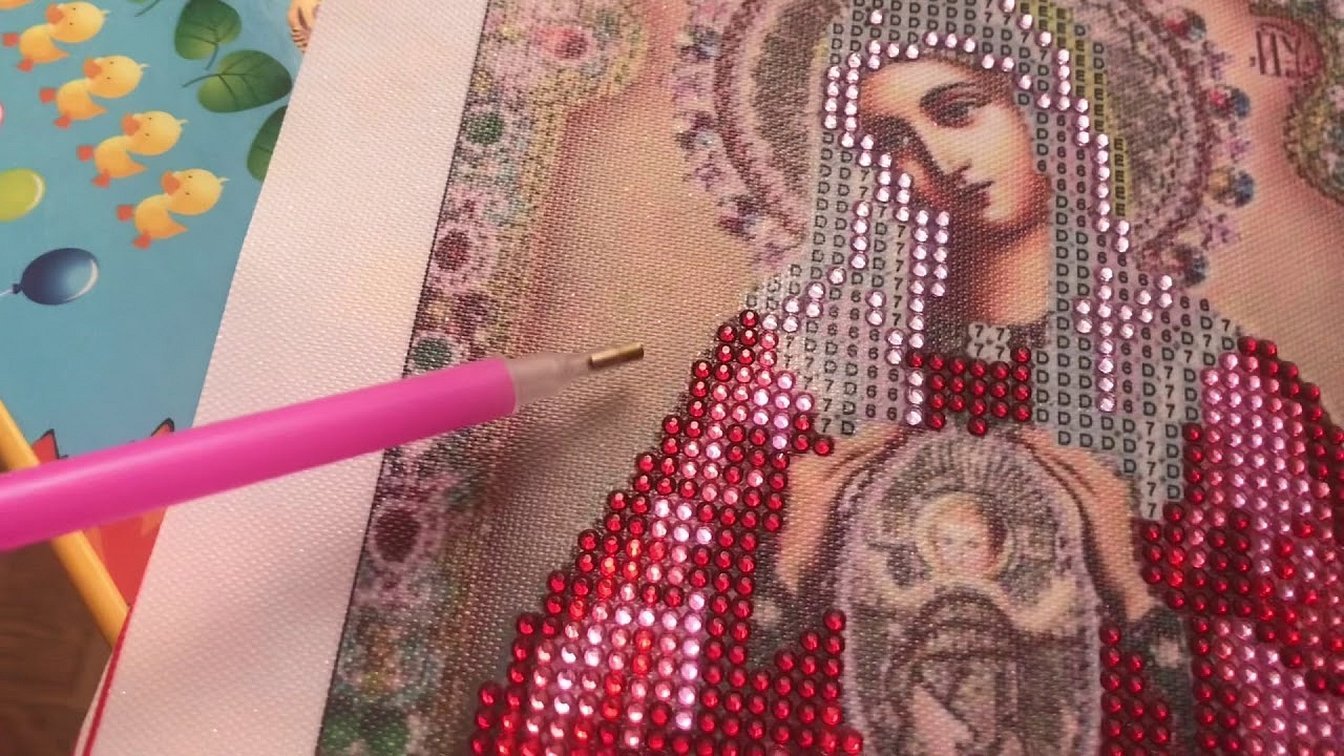
It is not advisable to remove the oilcloth from the entire canvas at once, otherwise it will lose its stickiness. There can be two ways of laying it, using tweezers or a special stylus. The second option is much more convenient and faster.
How to attach hot melt rhinestones
Before gluing hot-melt rhinestones, you need to put paper under the canvas so as not to stick it to the table.
Next you need to do the work with an iron:
- set the mode to "silk";
- cover the rhinestone craft with a sheet of paper or cotton;
- iron slowly.
From time to time, you need to press hard on the iron, then the glue will better connect to the canvas. Large rhinestones sometimes need to be heated longer.
Attention! But you can’t press too hard with all your weight, otherwise the glue will flow from all sides.
After work, you need to leave the canvas for at least an hour until it dries completely.
Glue for diamond embroidery
Ready-made diamond embroidery kits are always supplemented with a stylus or tweezers for laying out beads. A stylus is a special plastic stick with a sharp end that is dipped in silicone gel and attaches stones to the craft.
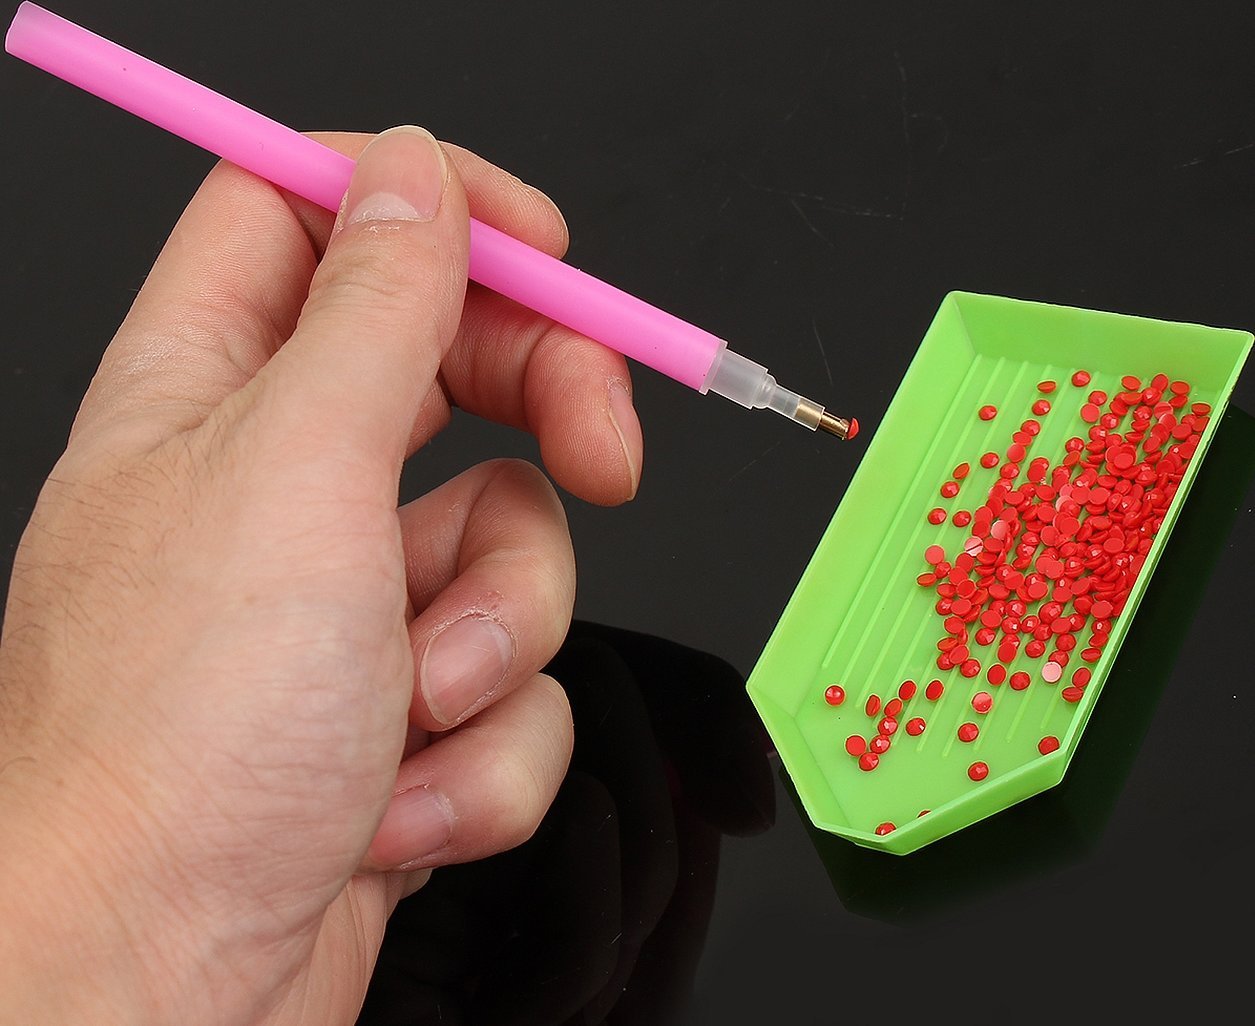
The hand should be in a perpendicular position during the work. The silicone itself will be liquid, and after finishing the work it is wiped off with a cotton swab. If the bead is glued by mistake, it can be removed with a knife or a nail file.
Silicone glue is best for diamond embroidery and can be found in kits or separately in craft stores.
What is included in ready-made kits
The kit basically includes a mesh pattern similar to the one sold for cross stitch, but with an existing top layer that needs to be peeled off before the process begins. Craftsmen do not recommend removing it all at once.
In some versions, a frame with glass is used as a canvas for the painting, under which a symbolic representation of the picture is located. The diamonds are attached to it thanks to the sticky side on the bottom line. After finishing the work, the pattern is removed, and the craft is placed in the frame.
Another option is to solder the diamonds using a special soldering iron with nozzles that fit the size of the diamonds. But silicone-based glue is mainly used to create icons.
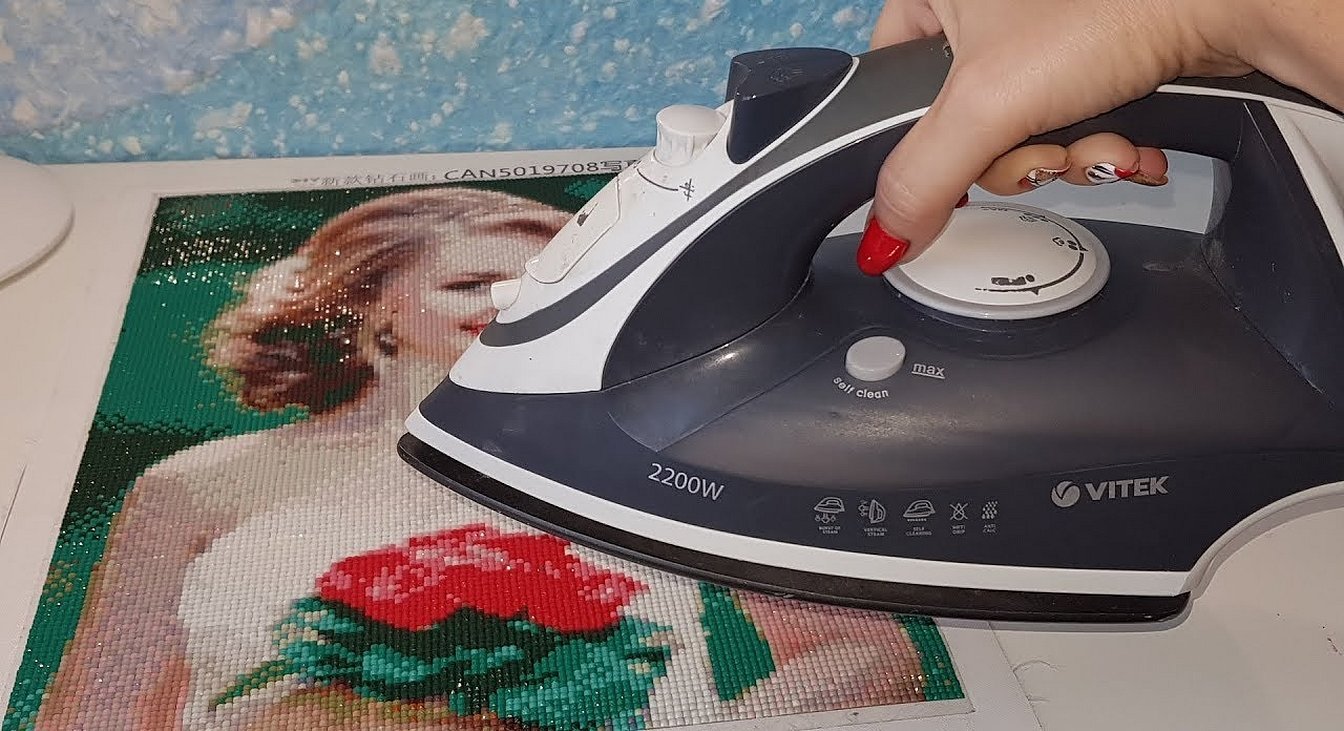
How to Iron Diamond Painting
Basic rules and tips for ironing diamond embroidery:
- the ironing process should be done through the fabric. In this case, you need to iron from the back side so as not to melt the stones. This can be done through cotton fabric. Since only synthetic materials are used in embroidery kits, it is not reasonable to iron them directly, because if you do not use a lining, yellow spots will remain on the product;
- ironing should be done quickly. If you hold the iron on the fabric for too long, the glue may start to melt (at a temperature of 100-120 degrees). Therefore, the iron should be warm, and the process itself should be fast and dexterous;
- it is necessary to use parchment. It is recommended to replace the film that covers the surface of the canvas with ordinary parchment during ironing. Because it is unknown how the film will behave under the influence of the iron. But the paper should not be ordinary, but the one used for baking, it will withstand any iron temperature up to 300 degrees;
- test the corner of the canvas. Before you start ironing, you need to test the corner of the canvas. It should cool down well. If there are no stains on it, and the glue remains in place, then you can safely start ironing. If something appears, then it is better to avoid this process;
- steamer is prohibited. It is strictly forbidden to use it, as steam can wet the fabric. After that, not only the glue will flow, but the stones can also fall off their places. Steam also greatly damages synthetic fabric, in which case it is better to refrain from ironing at all.
Attention! Many craftswomen also recommend never washing the finished fabric.
Even at low machine speeds, the mosaic can come off, and the glue can simply wash off the canvas. It is allowed to sometimes wipe the craft with a microfiber cloth, but not very wet. Therefore, to prevent dust from collecting, it is better to place the icon or any other painting in a stretcher and under glass, in extreme cases, the canvas can be covered with transparent varnish.
In conclusion, it should be noted that making an icon from diamonds looks quite beautiful. This craft will not only please the eye, but also be useful. But it is necessary to consecrate it. Kits can be purchased at any creative store for an inexpensive amount. Prices start from 350 rubles. Drawings with different animals (kittens, dogs, birds) are in great demand. Such an activity will be interesting not only for adults, but also for their children.


