Knitted lace is coming back into fashion. Since such products are very expensive, you can make them yourself. This article tells about what Irish lace is and describes the easiest works.
Irish lace - what is it
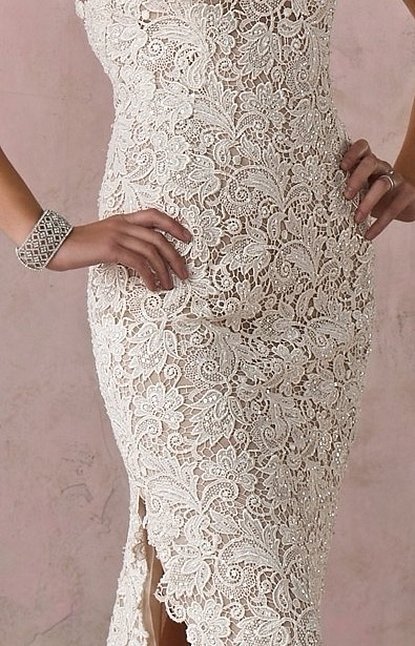
Irish lace is a special technology of work, during which separate parts (ornament, plants) are embroidered, after which they are folded into a common product. This type of knitting came to Russia from the city of Cork. Sailors, in their free time, were engaged in knitting ropes, and then assembled them into a large picture. The products turned out amazing, they were impossible to describe in words, but they require a lot of time.
Irish lace models based on examples of works by master Miroslava Gorokhovich
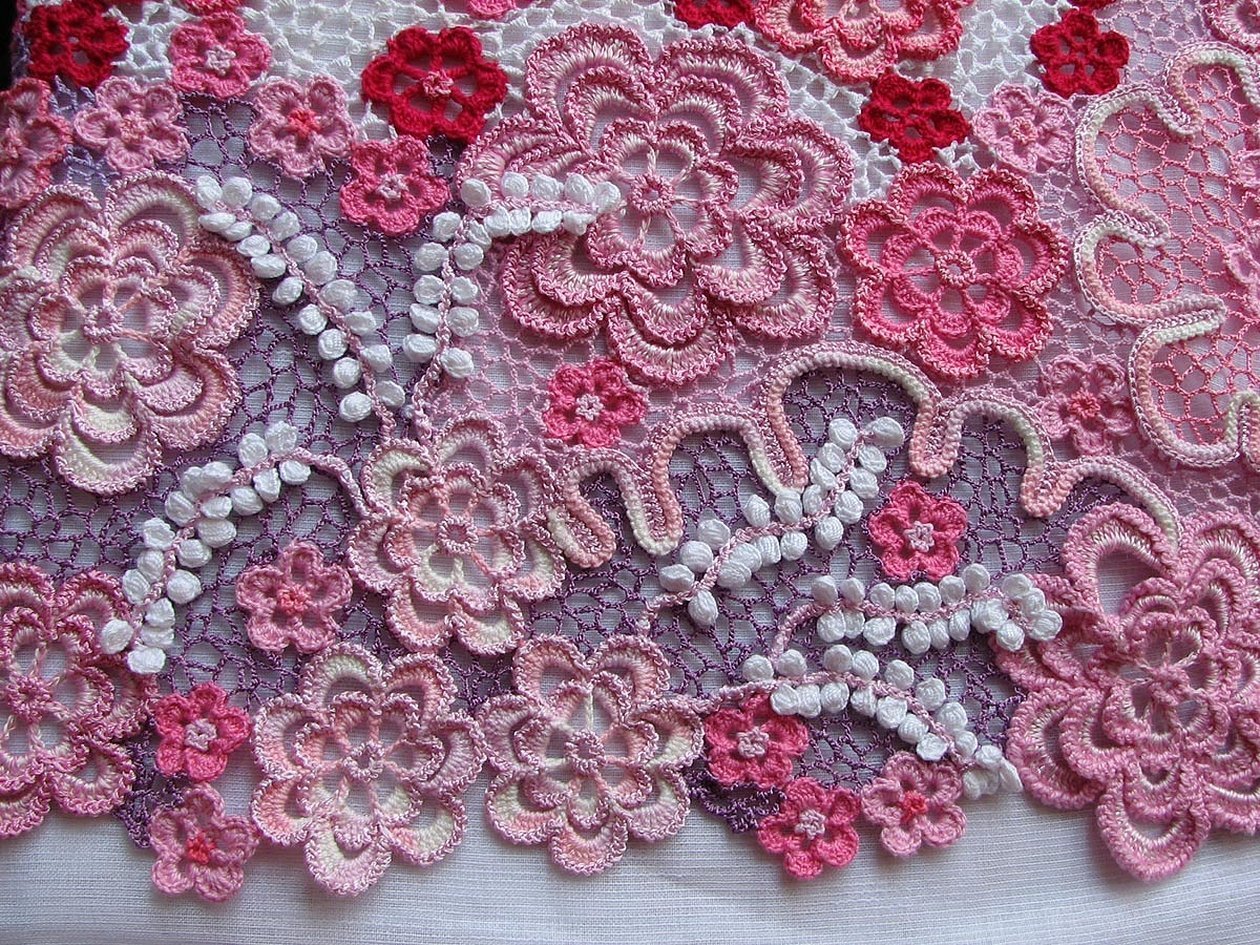
Miroslava Gorohovich is one of the most popular masters in the Irish lace technique. Most of her works are in handicraft magazines. Irish lace by Miroslava Gorohovich, models and patterns are presented on her website. She also knits items to order, at very reasonable prices. Below is a photo of one of her works. Miroslava Gorohovich makes Irish lace with fairly bright yarns, which makes the items look summery.
How to make curls
To make curls, you need to follow the work scheme:
- First you need to knit a caterpillar cord of the required size;
- Round off the curl by making two single crochets and sew five ribbon ears to the base;
- Rows are made with one yarn over of lush columns. The row ends with one connecting loop and two columns without a yarn over;
- The finished rows need to be tied with a working loop;
- Next, make single crochet stitches. The row ends with two loops and two single crochet stitches;
- Next, you need to knit a working row with double winding.
The process of making the curl is complete.
Please note! If you need to make a product, put all the knitted parts for it in a container. You can knit colored threads inside the curl.
After finishing knitting the curls, they need to be washed and dried well. Then the clean curl needs to be placed on the base of the product and attached with pins or needles.
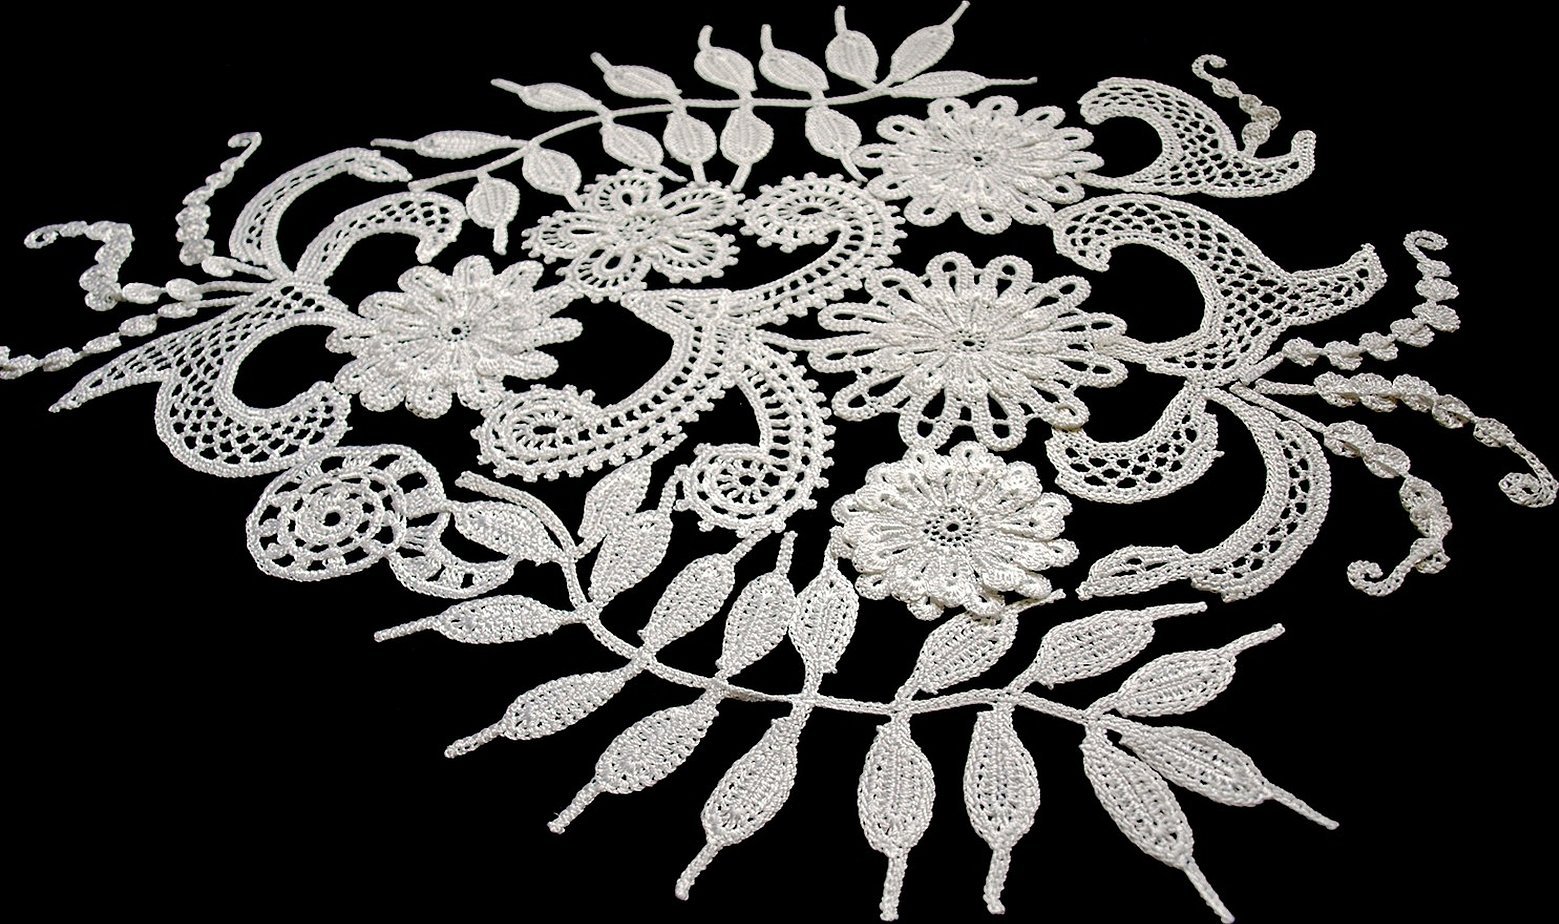
How to sew leaves
Experienced craftsmen believe that this knitting technique will be the most original and popular. The work is quite difficult, so it is considered more of an art than a hobby. Small, openwork leaves, shiny and large motifs, collected in original drawings, of different textures and colors help to create simply amazing in its beauty openwork fabric, which will suit everyone's taste.

What details can be made using this technique:
- Classic leaflet;
- Oval leaf;
- Canadian;
- Leaflet with a window;
- Great Quatrefoil;
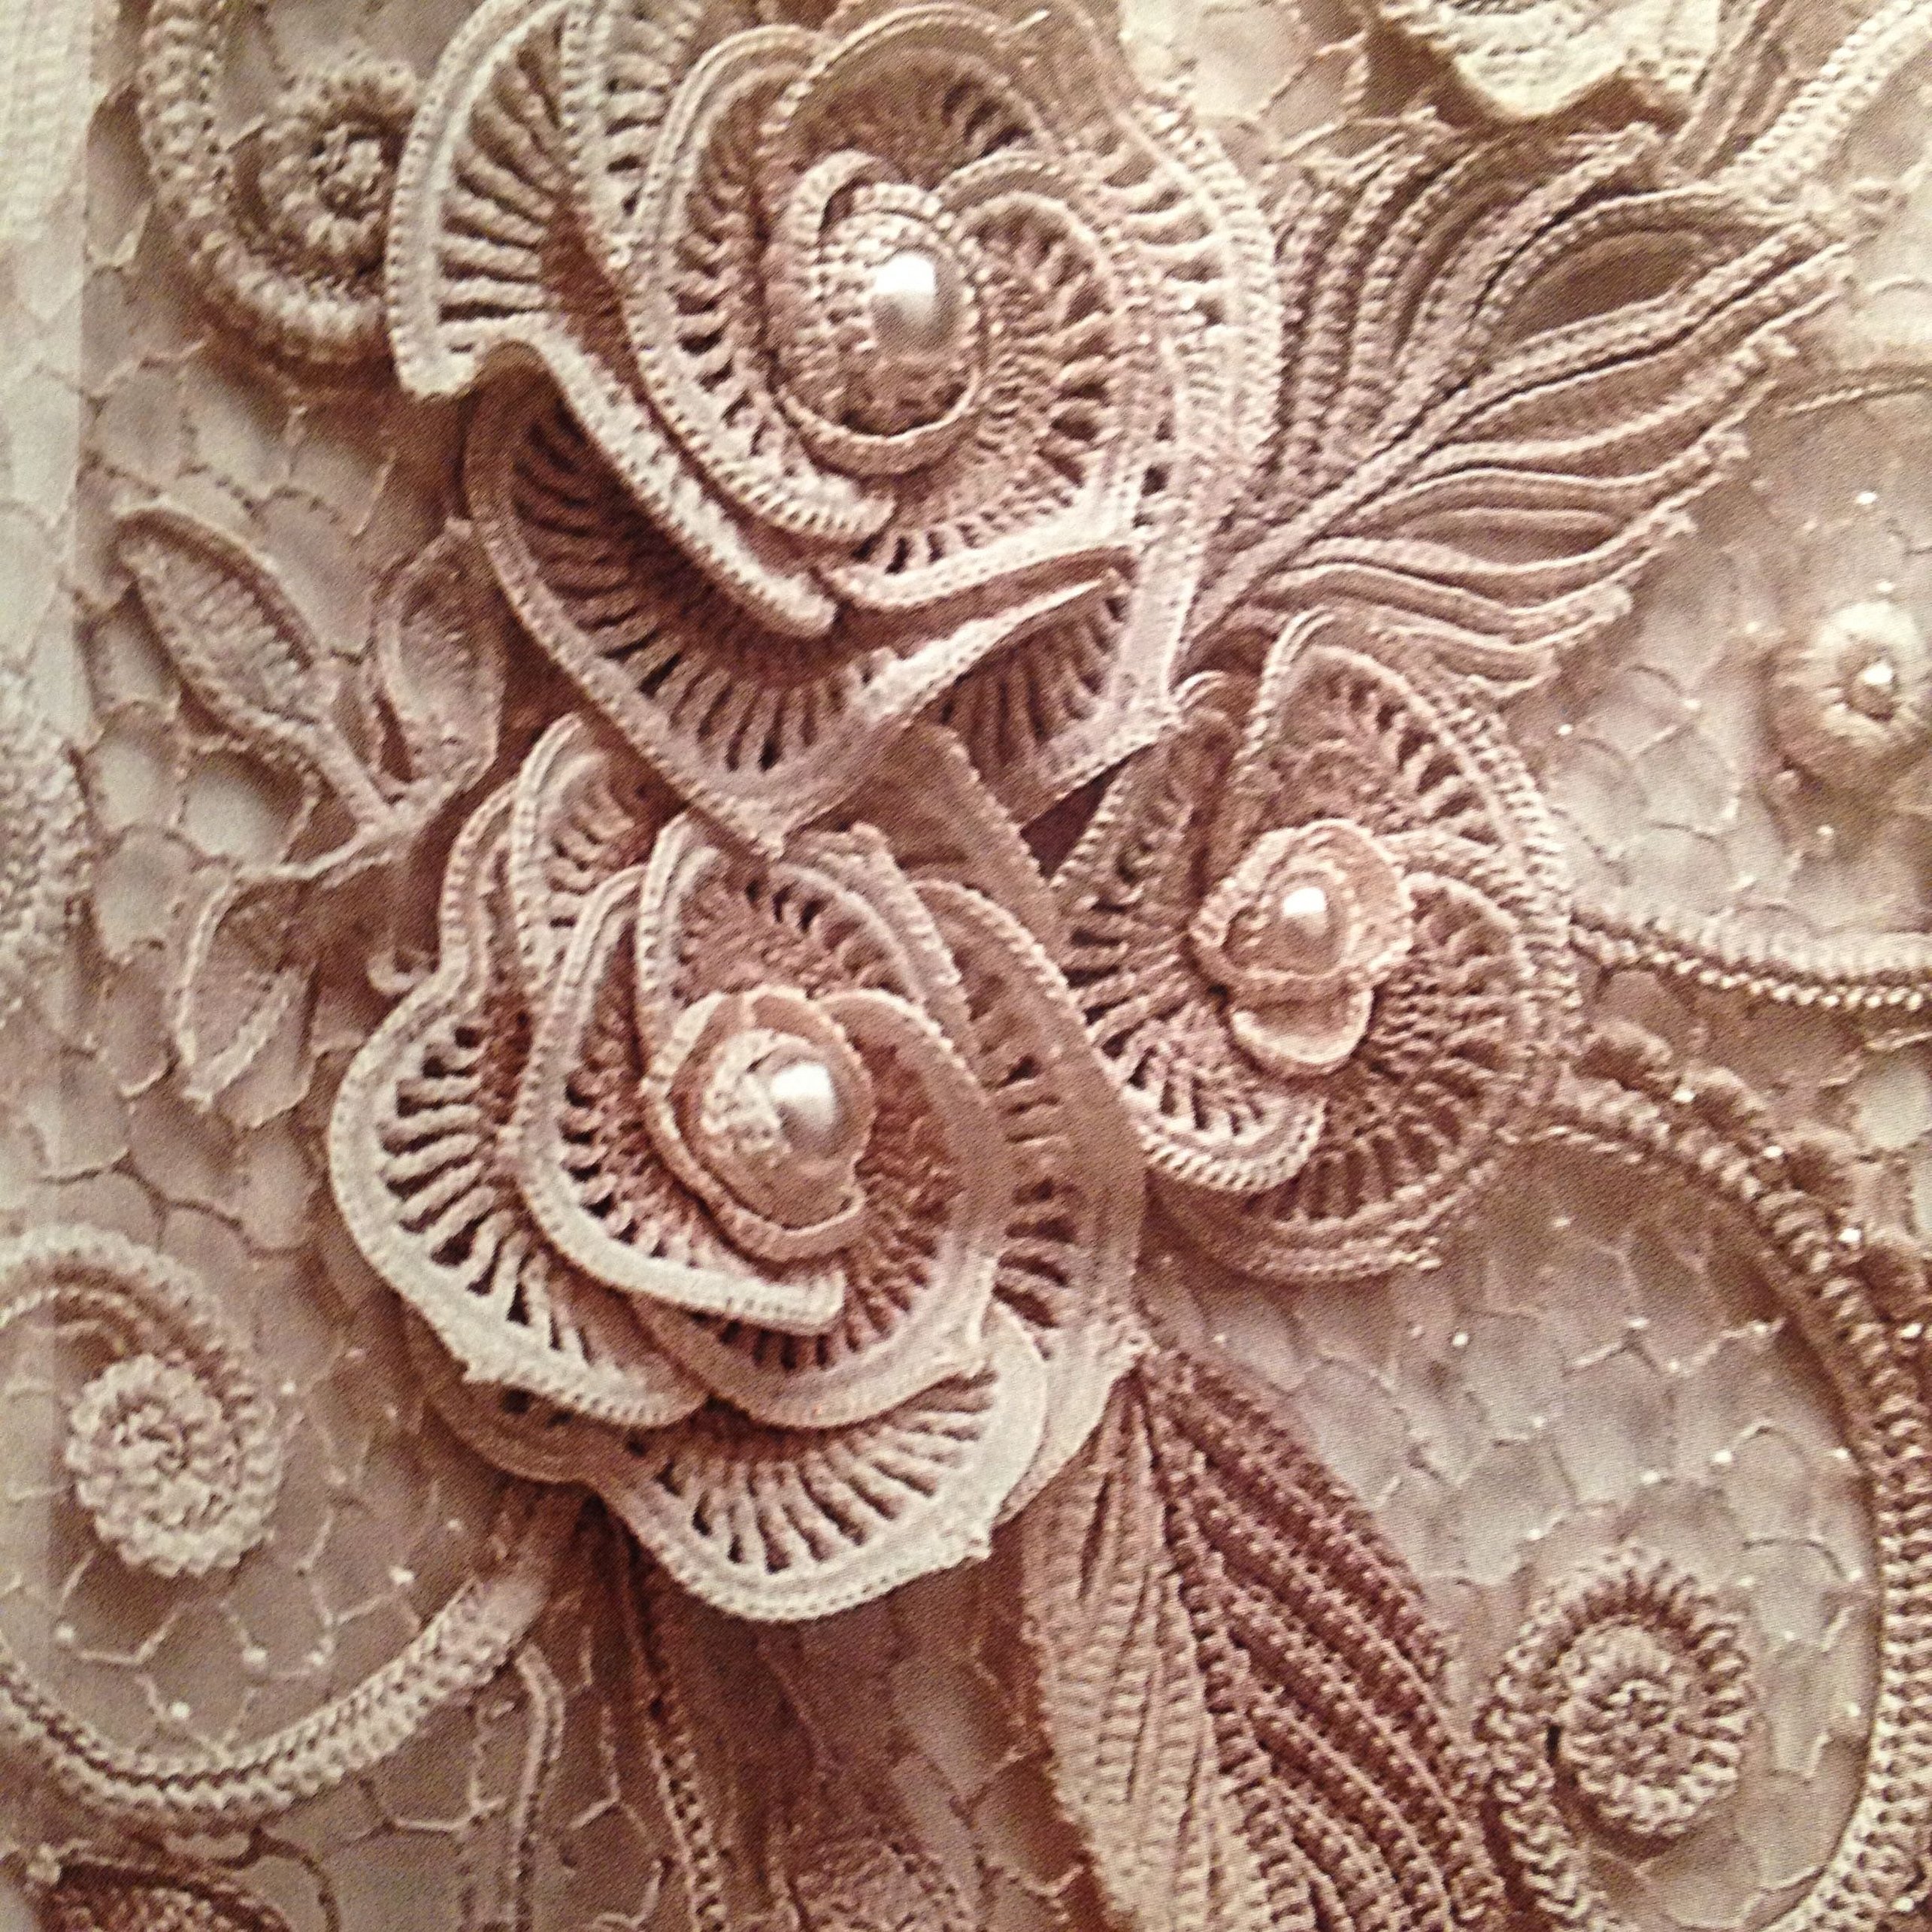
- Rose with petals;
- A branch of grapes.
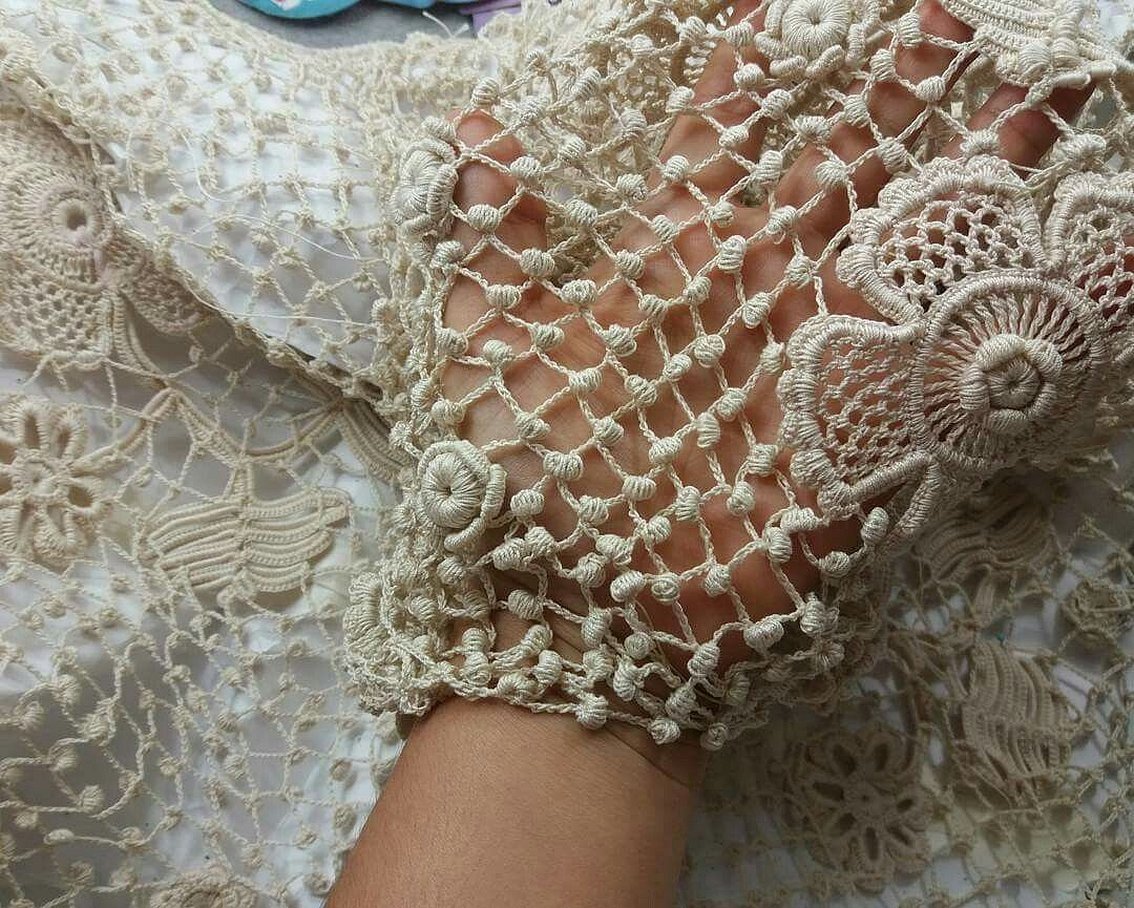
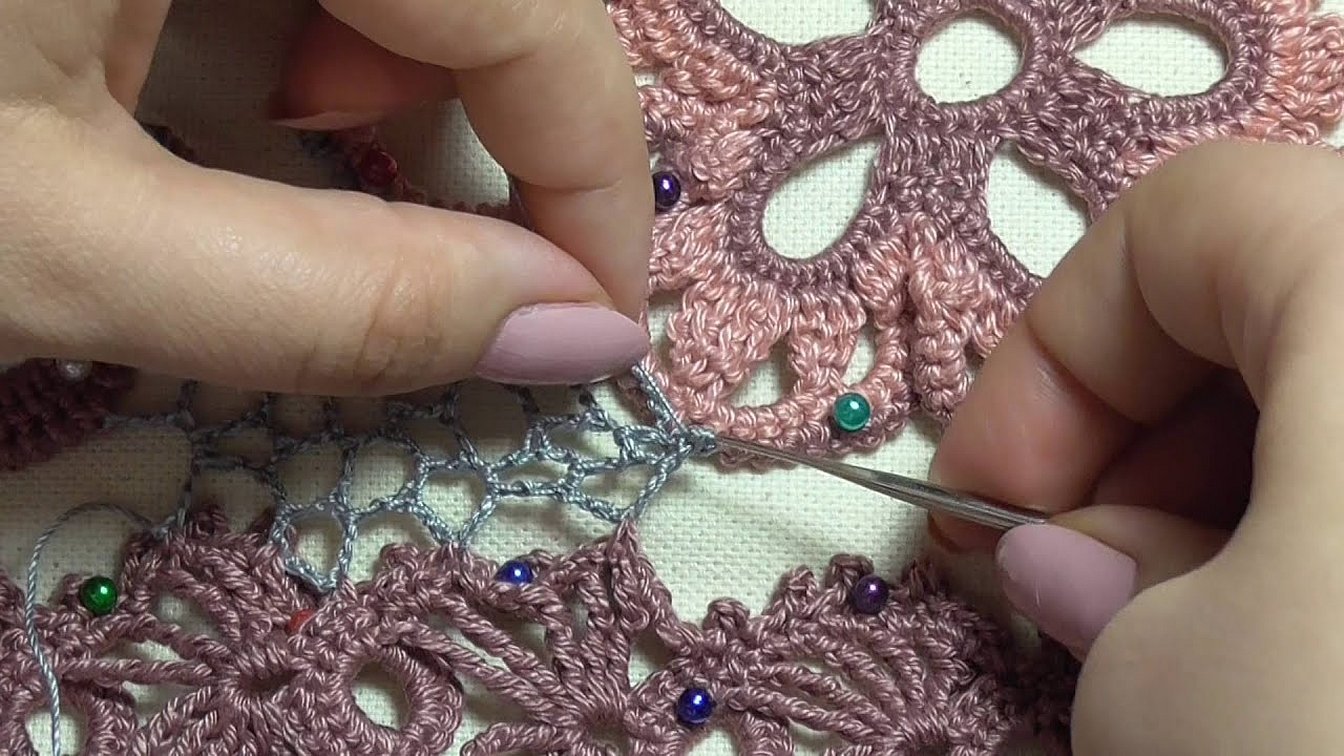
Here we will use a sequential knitting technology. First, we need to make individual elements (patterns), then they are placed on a template or pattern, and joined together using a lattice.
There are many methods of joining lace parts. The most common is to connect patterns using a grid. It is done quite easily - ready patterns are laid out on the sketch, and the distance between them is connected with a grid.
It happens that in the process of binding elements of different sizes, “gaps” of different types may arise that cannot be filled with regular grids; in this case, an irregular grid will be used.
Also, the parts can be assembled in the opposite direction. Initially, an openwork mesh base is made, and then motifs are attached to it. For example, tulle or tulle can be used as a base.
Please note! The parts of the product can be assembled sequentially, tying them together during the knitting process. This method is mainly used for small products; for a large piece of fabric, this method will be very difficult.
Net
Initially, you need to connect the places of the pattern borders by sweeping, then you need to fill the gaps between the grid. It is obtained through alternating arches from rows of air loops and columns with a different number of yarns.
For beginner needlewomen, it is advisable to connect already sewn patterns, between which there will be a mesh, on a rigid base (synthetic padding, cardboard, etc.). This is necessary so that the fabric does not move or bulge.
The motifs must be positioned with the inner side facing up when working.
When everything is prepared, you can start working:
- Insert the hook upwards into the fabric, catch the working thread and pull it towards you.
- Hook the smaller end of the thread and pull it through the finished loop. To secure the thread to the base, pull the long end of the thread and make a knot. The tail of the thread should be hidden in the product.
- Now you need to dial four air loops, after that make a column with 2 yarns. Do it until the end of the product.
Collars
First, you need to cast on eight loops and sew them into a circle. In a new row, tie the circle with fifteen single crochets. Then make eight air loops and a double crochet, tie them alternately with fifteen single crochets. There is no need to cut the thread here.
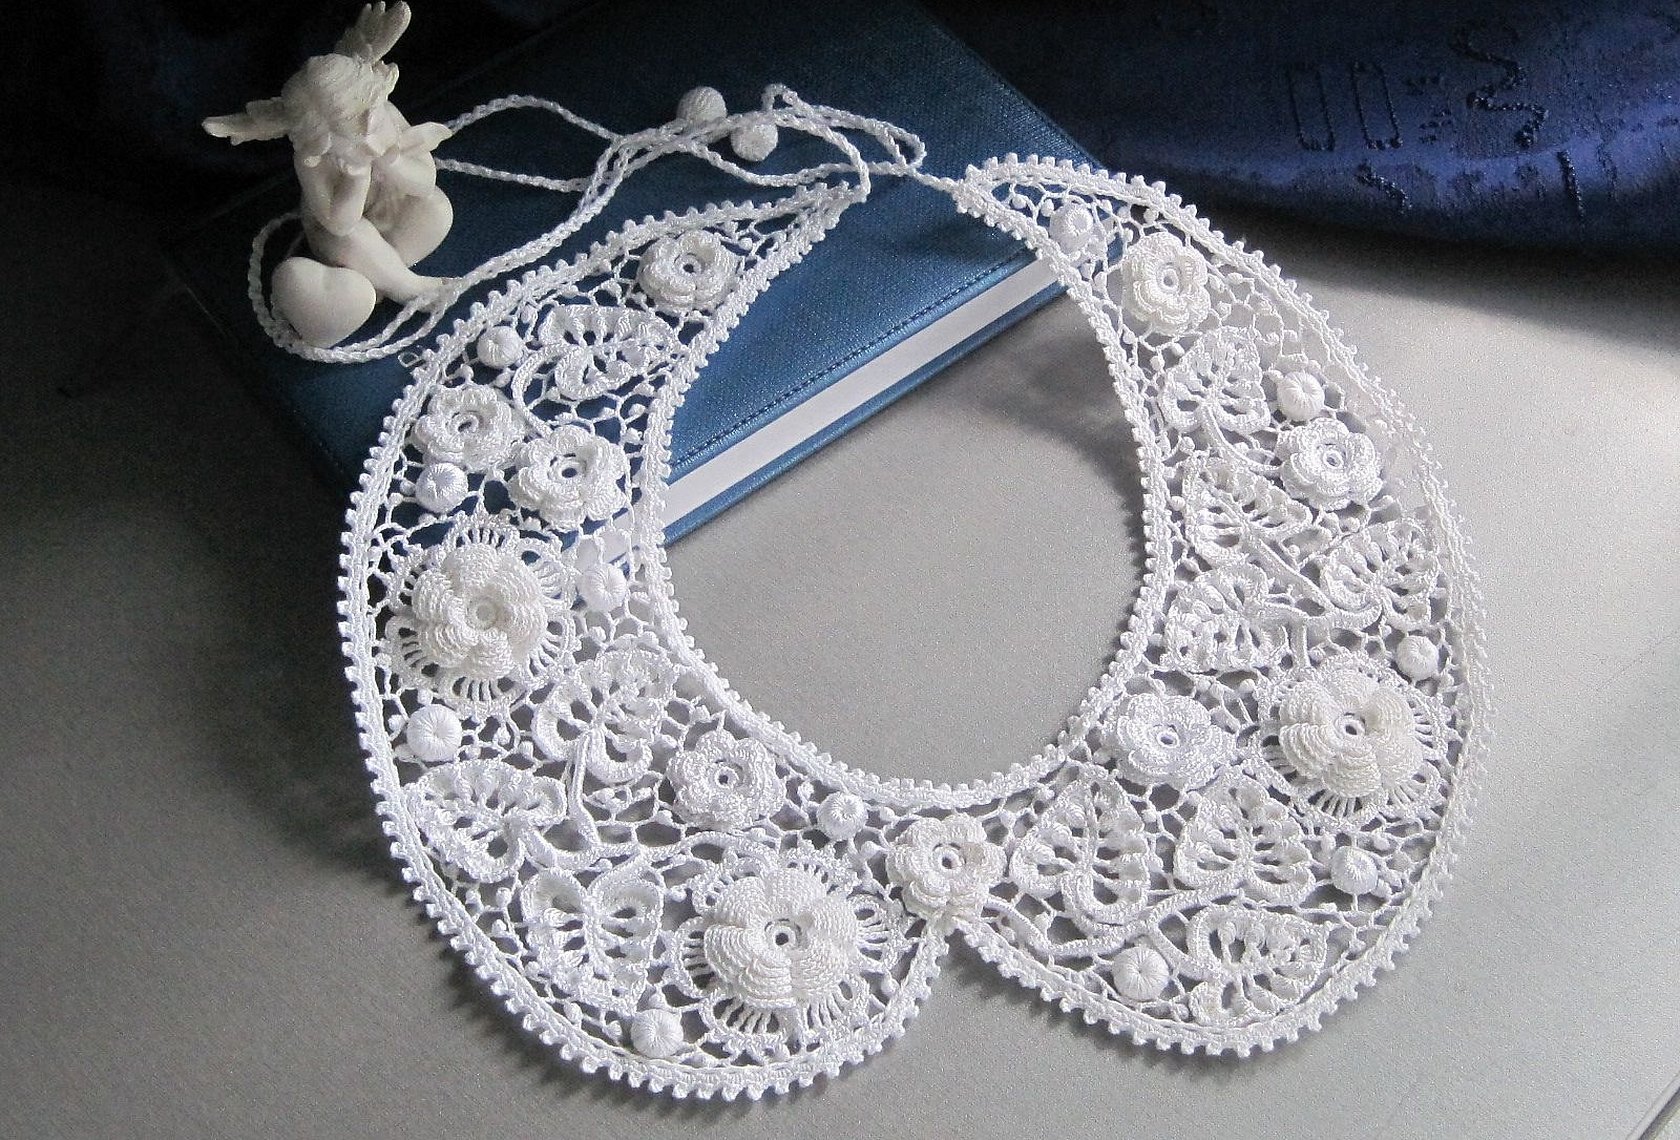
Next, you need to make a caterpillar tape, for this you need:
- Make two chain stitches without pulling the first one, and insert the needle into the first stitch;
- Take the thread and make a loop. Two loops are formed on the tool;
- Knit two loops together, single crochet;
- Turn the work to the left, but do not change the direction of the thread. It should hang behind the work;
- Insert the hook under the product and make a loop. Two loops have formed on the hook, which need to be knitted together;
- Turn the piece over again, make loops and sew them together;
- Fasten and cut the thread.
Next, we will work with thin yarn. Fix the thread with a seam, make a grid, changing loop arches with single crochets.
Now you need to constantly monitor that the product does not warp. Having made air loops, push a single crochet through the loop arch. Make two loops and fix with a single crochet on the cord, hooking two threads.
Please note! Continue working until the collar is finished. After finishing, wash well and iron with a hot iron without steam.
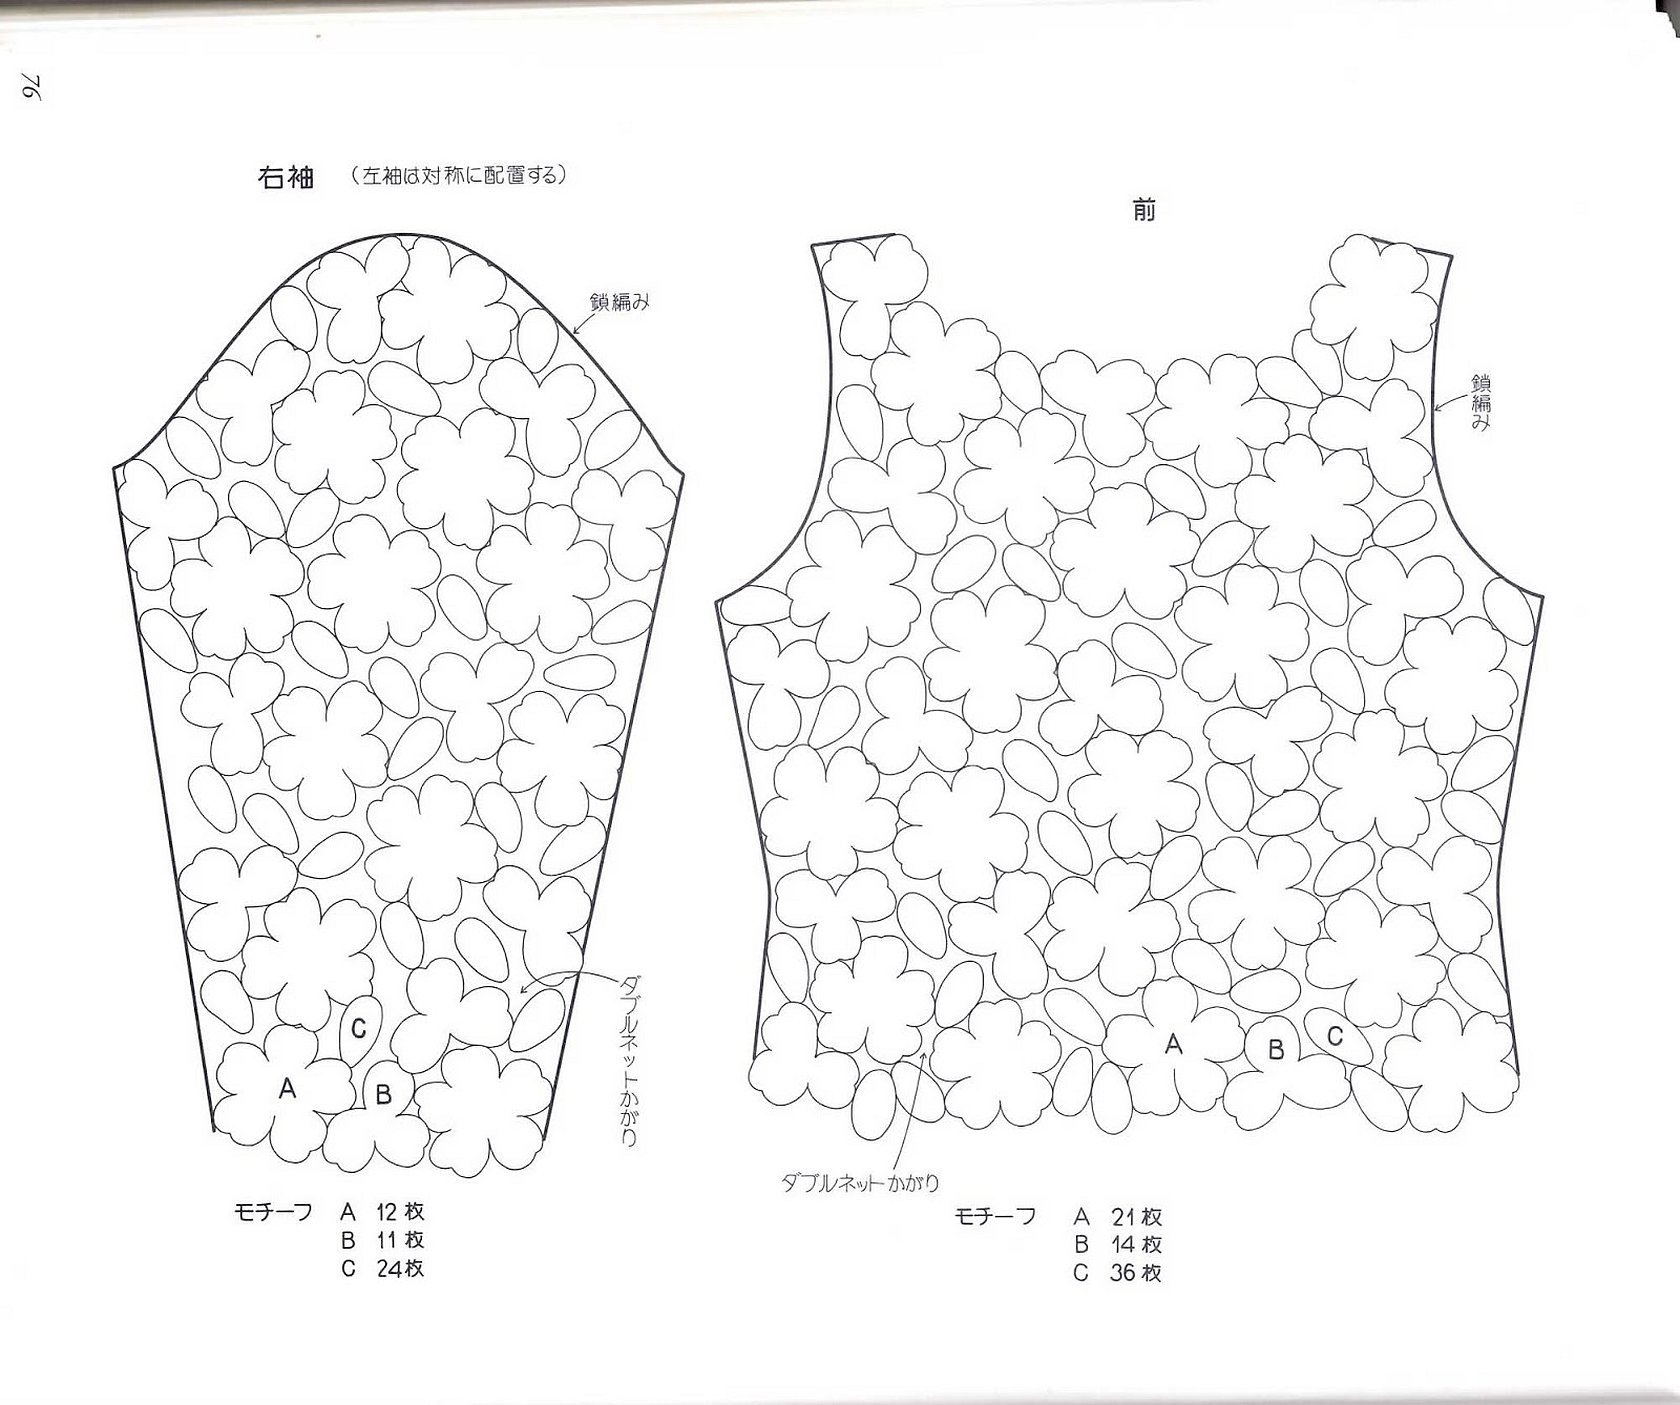
Sweatshirts
The sweater is made from light brown threads and hook No. 3, the connection is made using a mesh.
First, you need to find a sketch of all the parts of the sweater. Then choose the color of the product. According to the proposed templates, make the desired pattern, sew on the ribbon fragments to the required length. Place the finished parts and ribbon on the sketch with the inside facing up, fix them.
Using dark brown threads, make the elements of the sweater. Then you need to connect the parts into a motif, filling the space with a net. Here you need to use hook No. 2. Remove the part from the sketch and wash it well. The product is ready.
Volumetric flowers
Technique of execution:
- Make eight loops and sew them into a circle;
- Knit a column with two yarns to the end of the row;
- Next, connecting loops are made. Having completed the row, the thread must be cut;
- Make one air loop, two connecting loops, seven air loops with a yarn over, continue working until the end of the row;
- Make a border for the flower;
- Cast on eight connecting stitches, six with a yarn over, six without a yarn over. Finish the flower and cut off the excess thread.
Napkins
Step-by-step instructions for making a Tunisian rose napkin:
- Here, the outer rows will use bourdon knitting, while the inner ones are done using the classic technique.
- The row begins with single crochet stitches, then a half double crochet is knitted, a double crochet stitch to the end of the row, a double crochet stitch and a single crochet stitch;
- The beginning of knitting will be at the branch of the flower;
- The last six columns in the composition will be performed on a bourdon.
Using the same technique, you can make a daisy-shaped napkin or a square one.
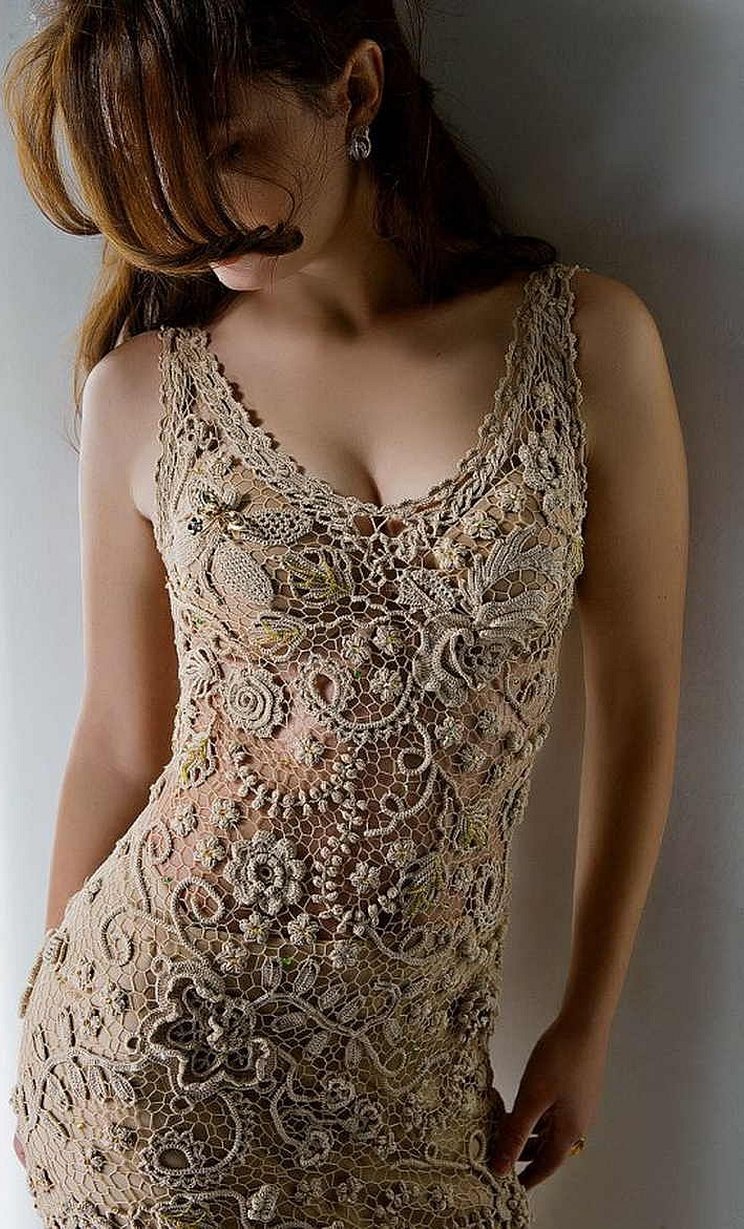
Irish lace by Anastasia Khmel
This master knits quite rare and exclusive things to order. From kitchen potholders to amazing evening dresses. She has her own special style. Each work is filled with tenderness and lightness. Anastasia runs her channel with great success, gives lessons and selflessly helps subscribers and students. She is very popular among needlewomen and knitting enthusiasts.
Making products using Irish lace technique is quite labor-intensive work. It takes a lot of time and effort to knit a dress or a blouse. Beginners are recommended to watch master classes by Anastasia Khmel, where all stages of work are clearly described and shown.


