There is hardly a single craftswoman who has not heard anything about this famous doll and would not like to make it. But the lack of information about the new sewing technique can become an obstacle to creativity. This article describes in detail how to approach the implementation of the idea of sewing an unusual doll, and provides a step-by-step master class "Tilda", which even beginners can handle.
History of origin
The unusual doll, named Tilda, was invented by a girl from Norway, Toni Finnanger. The creator of the original toy worked as an illustrator and was fond of handicrafts. Her grandmother instilled in her a love of creativity and patchwork.
Having worked off another contract signed with a publishing house for illustrations for books, Toni began making toys in a rustic style. She came up with the name for her doll based on the first letter of her own name. The figurine of a woman dressed in colorful boho dresses became popular all over the world.
Toni has published two beautiful books about making Tilda dolls with her own hands and has organized a business selling her products. Hundreds of thousands of toys made according to her own designs are sold worldwide every year.
For reference! The artist who invented the doll does not object to the creative endeavors of numerous imitators.
Specifics of Tilda dolls
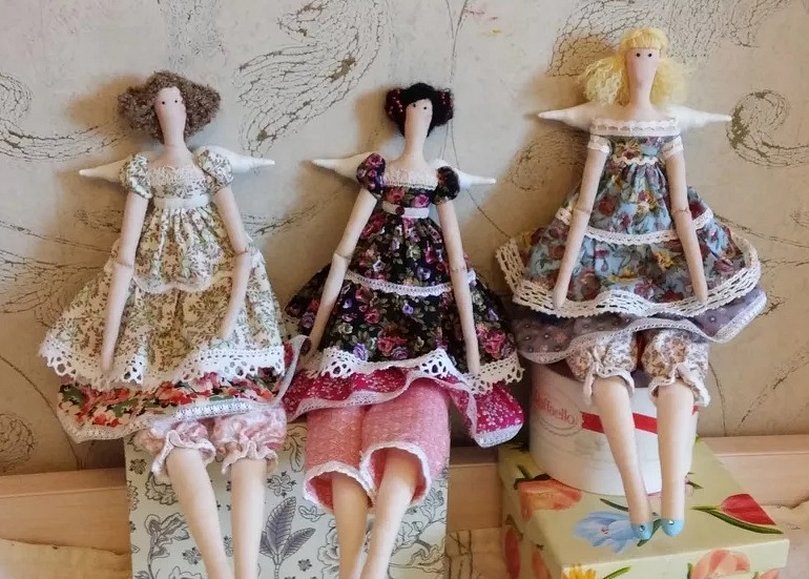
Toys made in the Tilda style have a number of distinctive features, thanks to which they cannot be confused with any others. These textile dolls are characterized by the following features:
- The figurine itself, clothing and all accessories for it are made from natural high-quality fabrics based on cotton and linen fibers.
- The color palette of materials is pleasing to the eye. Most often, these are delicate pastel tones and pure natural shades.
- Some incompleteness of details, expressed in the lack of drawing of facial features.
- Quite peculiar proportions. Tilda's body is usually quite dense, thick at the waist, and the limbs are narrower and longer, although there are exception models.
- A large number of small details and accessories, thought out and executed very carefully.
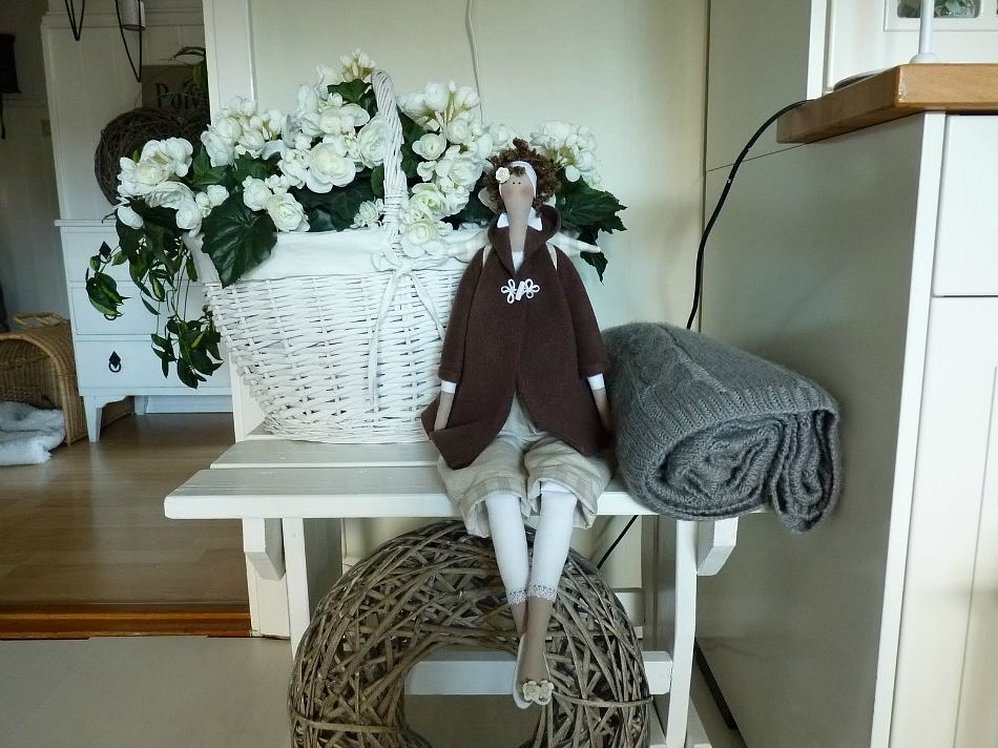
The creator gave her doll an independent and cheerful character. The details that complement Tilda's image combine the incompatible: a wedding dress and a basket, lace stockings and rubber boots. At the same time, they are all made perfectly, without the slightest carelessness.
Varieties
Tilda-Matilda can be created not only by hand or by machine. Craftswomen based on the idea of Tonya Finnenger have developed many patterns and schemes for crochet with knitting needles. In the public domain you can find many MK "Tilda", with a detailed description of sewing and knitting such versions of the toy:
- mother with a boy or girl;
- grandma and grandpa
- bather;
- teacher with glasses;
- cook.
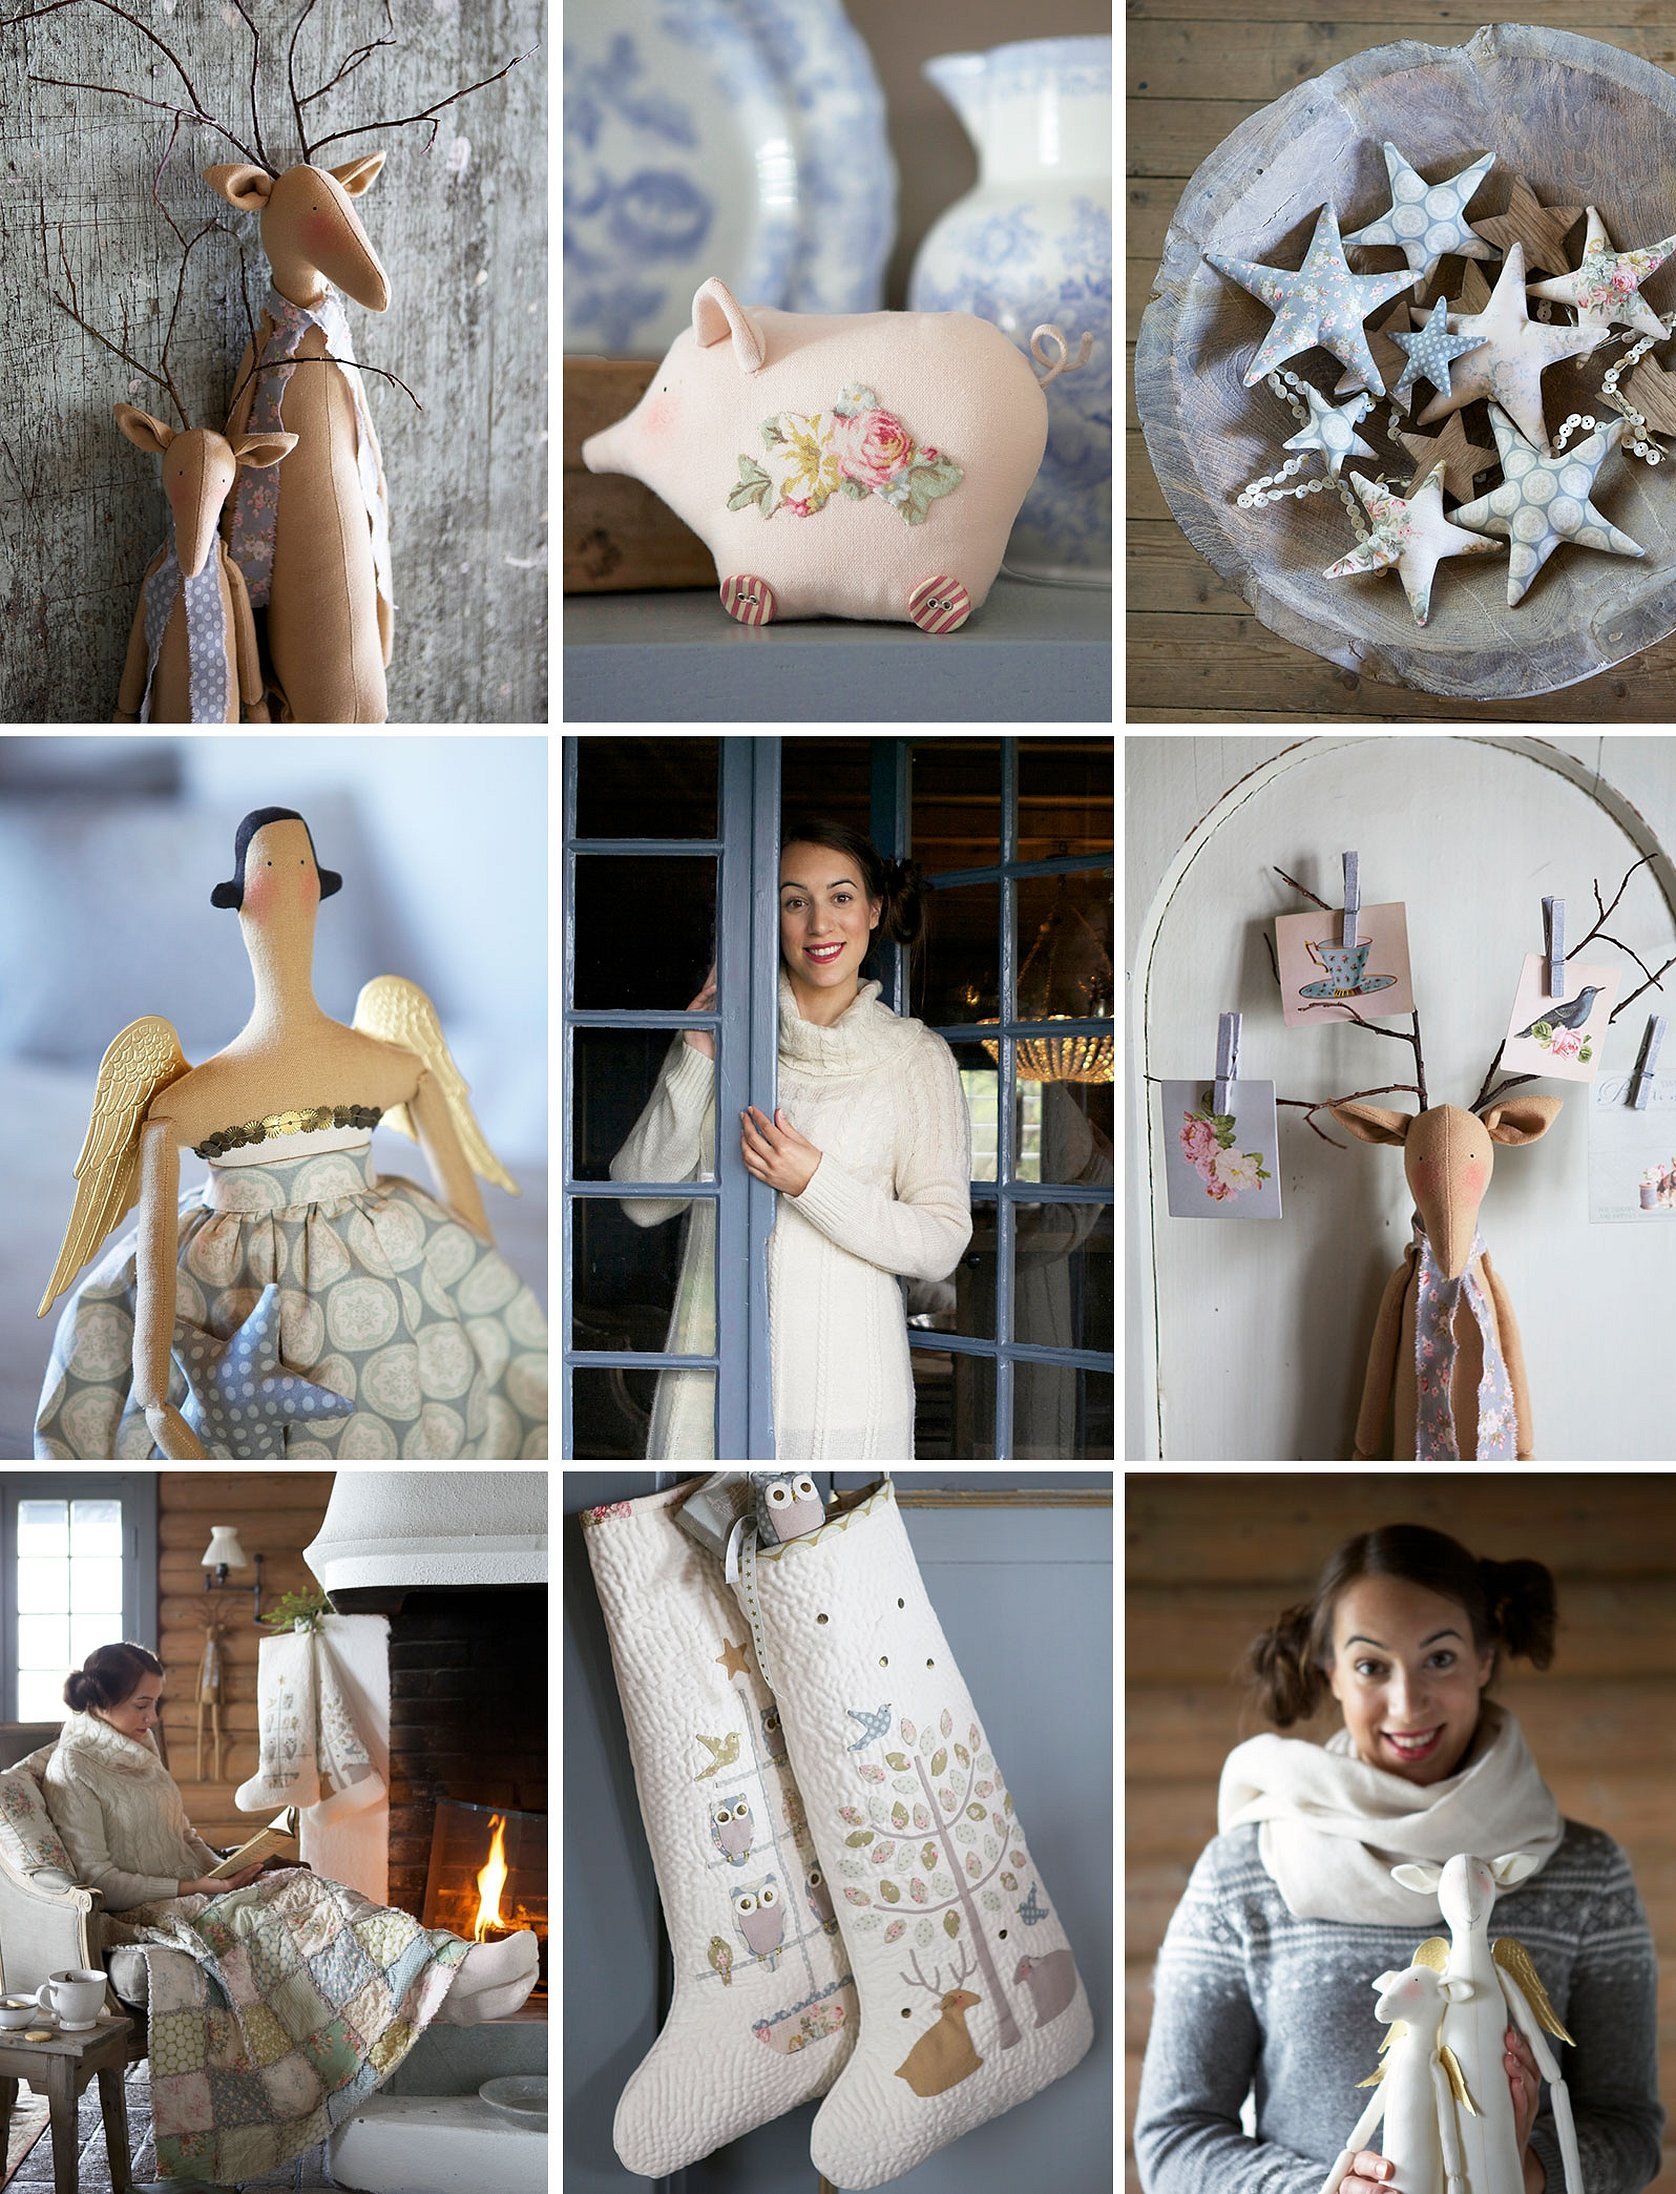
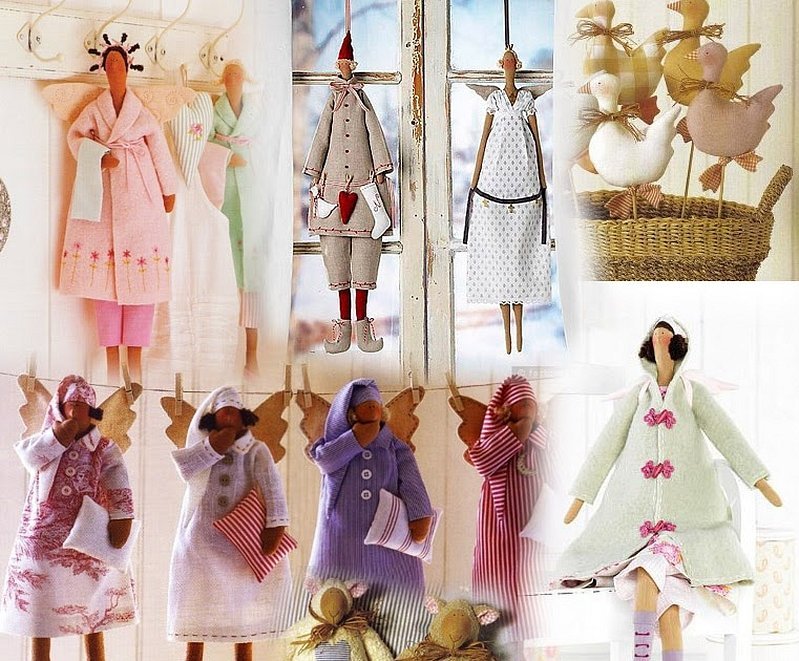
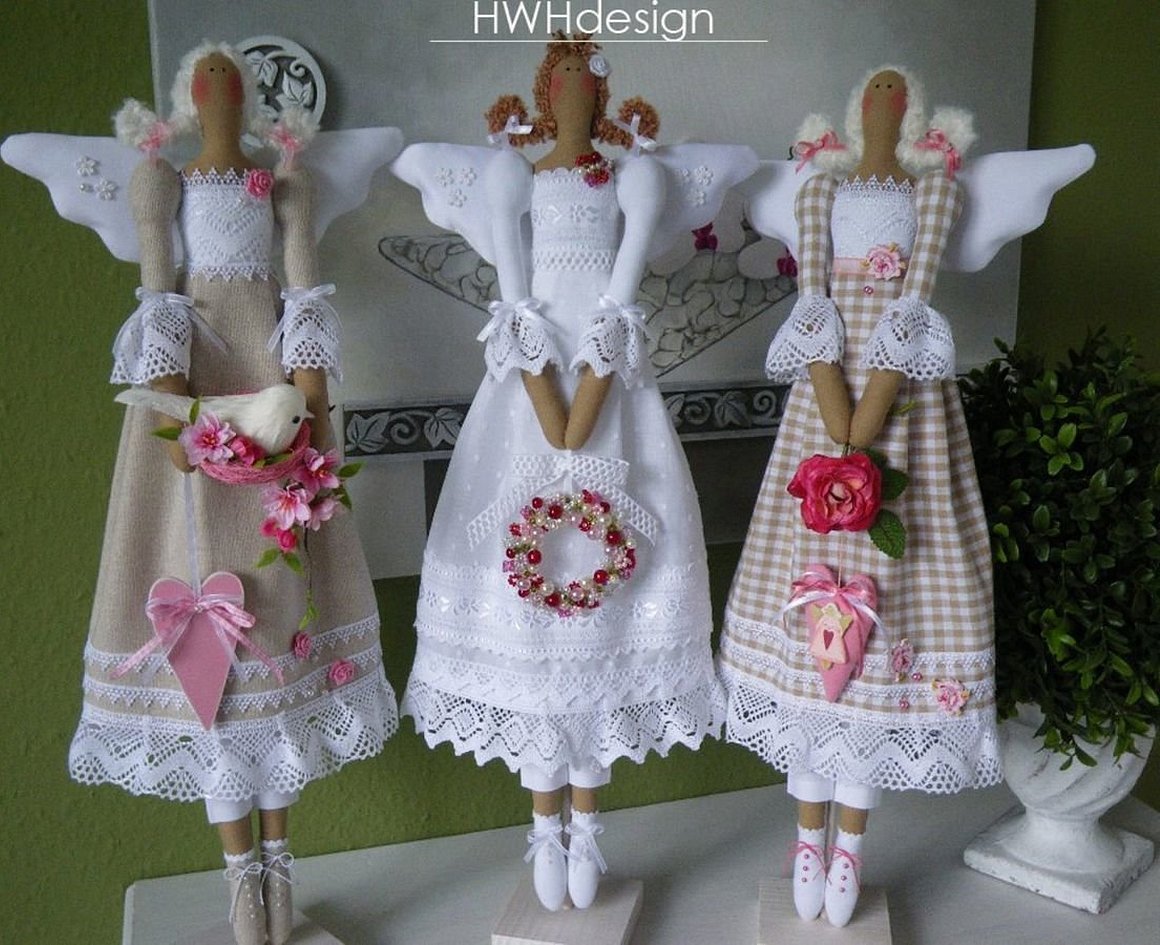
There are such unusual interior dolls as a snowman or an angel.
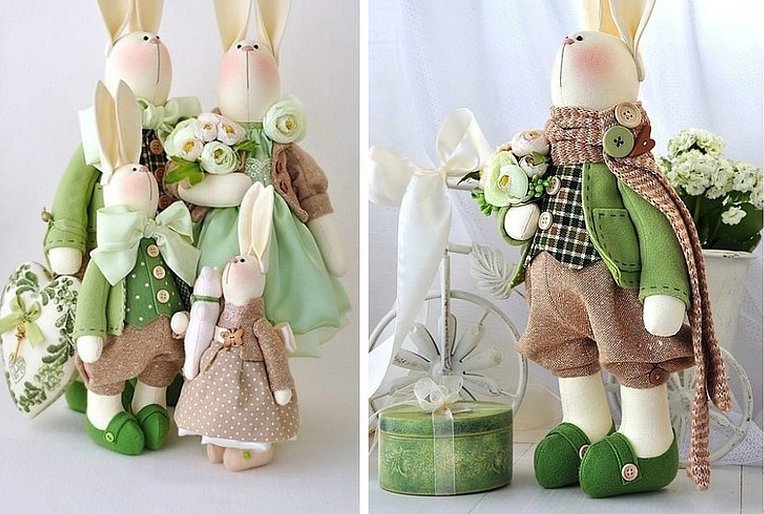
For reference! In addition to the traditional female figurine, a Tilda-style toy can be made in the form of a hare, cat, rat or mouse, snail, bear or any other animal.
How to choose the right fabric
When sewing a Tilda toy, it is important to choose the right materials. The body is made of fabrics with a dense and smooth structure. It is better to give preference to textiles that are as close as possible in shade to the color of human skin. If you are sewing a figurine of a mouse or a bunny, then here too you should choose a fabric color that is close to natural.
The most commonly used fabrics are:
- various types of cotton and linen fabrics;
- knitwear;
- gabardine;
- fleece.
Clothes can be sewn from absolutely any materials you like. Beginners may not need to buy specially cut expensive fabrics to make a doll, but sew an outfit from scraps that are at hand.
The only thing that can ruin the harmony of the outfit is a large pattern. Although for a large Tilda this may not be a problem.

What else do you need for work?
Since the distinctive feature of the tilde is the presence of various small details and accessories, all kinds of sewing accessories will be required to create them. This opens up space for imagination. In the work you can use:
- lace;
- ribbons;
- beads and seed beads;
- wire;
- cords;
- buttons.
To create voluminous hair, you can buy ready-made artificial strands or make them yourself from felting wool or regular knitting threads.
Life-size doll pattern
The classic height of the famous toy, according to the author's idea, is approximately 40-50 cm, but there have been no clear rules on this for a long time. The Tilda doll can be very small, slightly larger than a palm, or large, the size of a child.
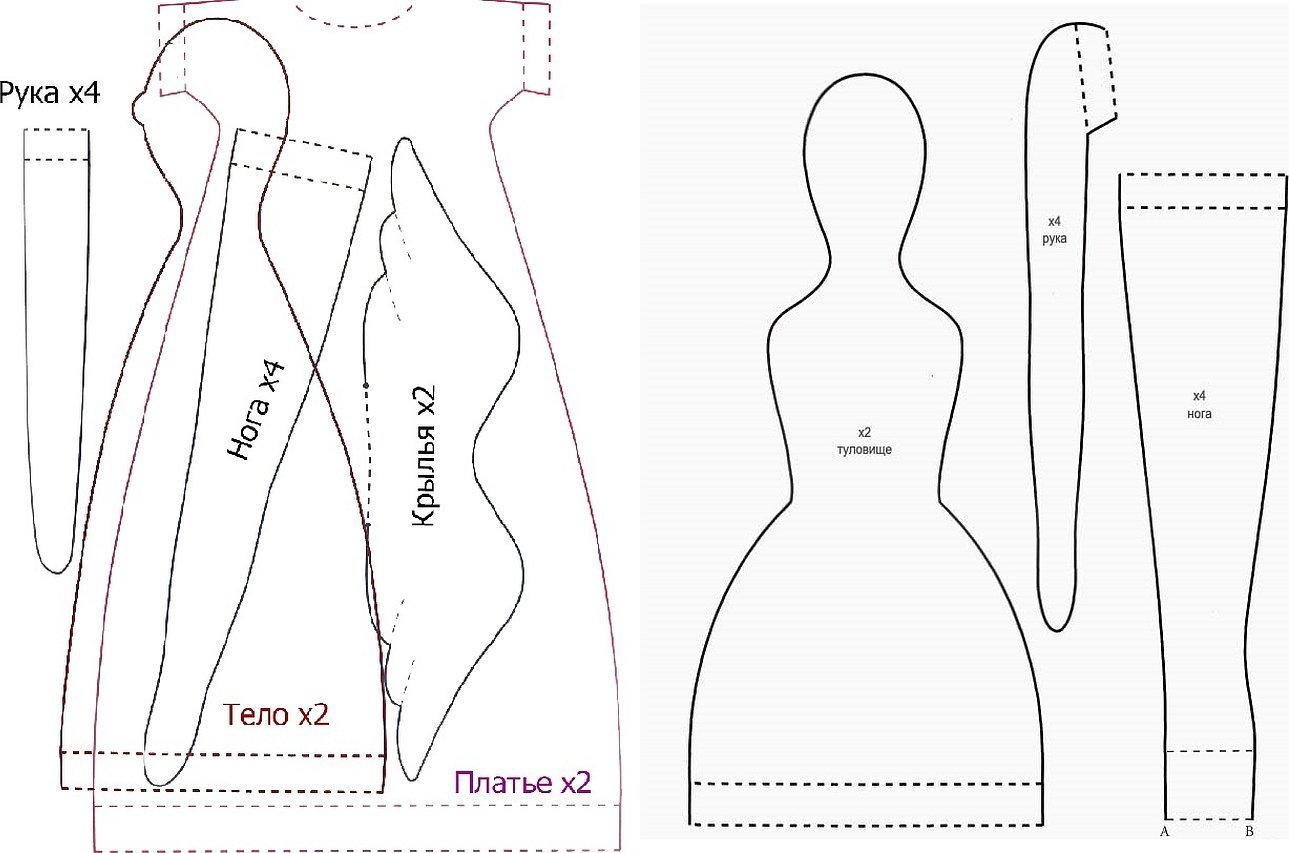
To make a life-size female figure in this technique, it is enough to place all the pattern parts - the body with the head, arm and leg - on an A4 sheet. If the drawing is too small, it is simply stretched to the edges of the page and printed out in this form.
Tilda: Master Class for Beginners
The step-by-step process is not as complicated as it may seem. But you should be careful when performing each step:
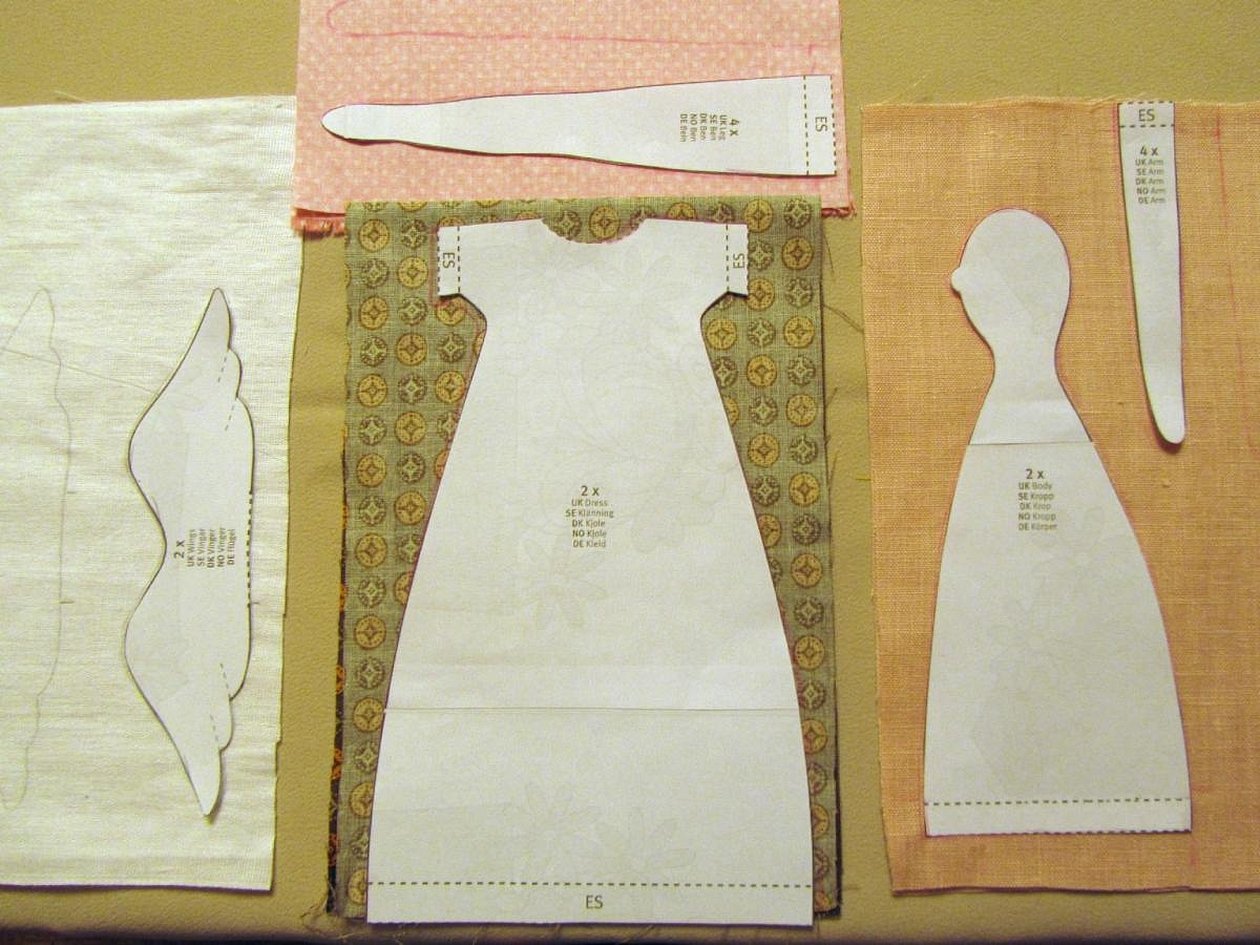
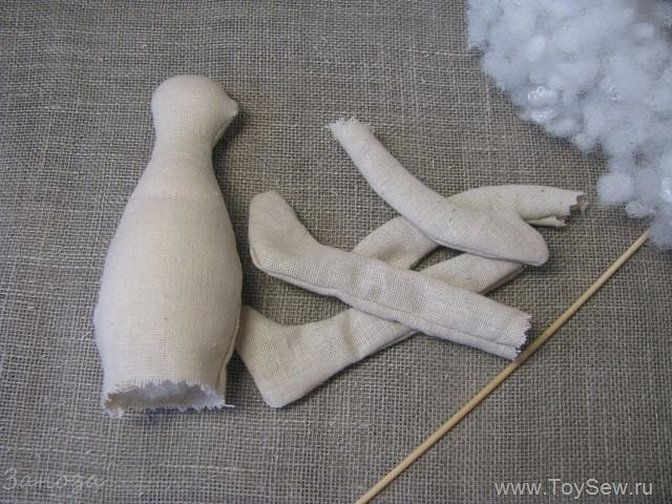
- Cut out the body parts.
It is important to place all the pattern pieces on the fabric in one direction, then the doll's limbs will be the same and will not stretch.
- Sewing together the parts.
All pattern elements are paired. They need to be folded together with the right side inward and sewn, leaving small openings for stuffing unclosed. Leave the body blank unsewn along the bottom edge.
- Incisions.
Before turning finished pieces inside out, be sure to cut off any excess fabric left over from seam allowances at the folds as close to the stitching as possible.
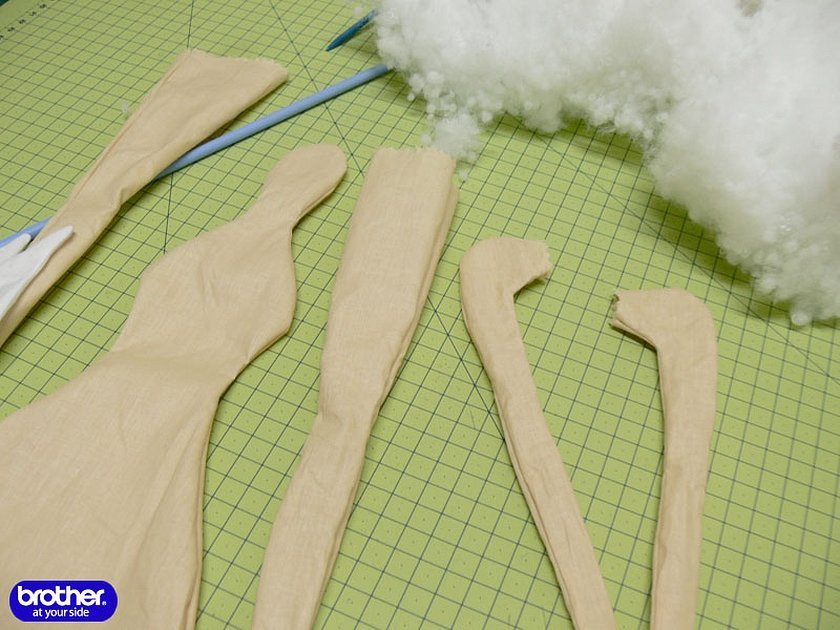
Turn the body and limbs inside out carefully so as not to pierce the fabric, using a pencil or other convenient object in narrow places.
- Stuffing.
Fill all the parts with synthetic fluff or any other filler with a loose structure. In this case, the legs are filled only to the knee level, a horizontal line is sewn, forming a fold, and only then the filling of the blank is completed.
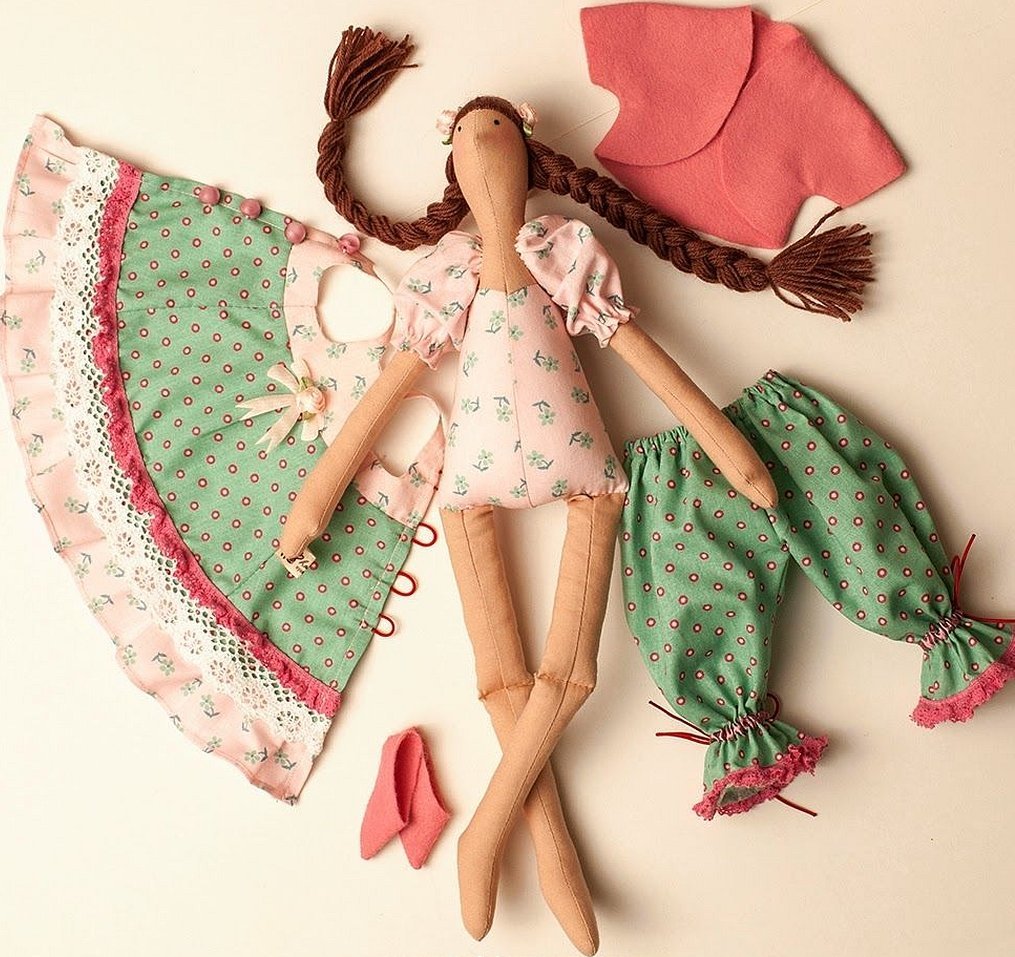
- Sweeping away the torso and limbs.
Fold the bottom edge of the body inward and baste, sewing in the doll's legs at the same time. The side seams should match, and the legs should be the same length. Baste the arms with a blind stitch.
- Sewing an outfit.
All parts of the dress or suit are cut out, placed on the fabric in one direction, and sewn together as with regular clothing. The exception is models in which part of the outfit is initially connected to the body like a swimsuit or slip. In this case, all that remains is to make the missing parts - sleeves, skirt or pants, etc. - and connect them to the Tilda with hidden seams.
- Creating a hairstyle.
Tilda's hair can be styled in a variety of ways: make a loose ponytail, braid it into one or two plaits, or curl it and leave it loose.
In any case, the hair should be attached to the head by sewing it along the central parting, and then let your imagination run wild. The stitches can be hidden with a hat, wreath, scarf or headdress.
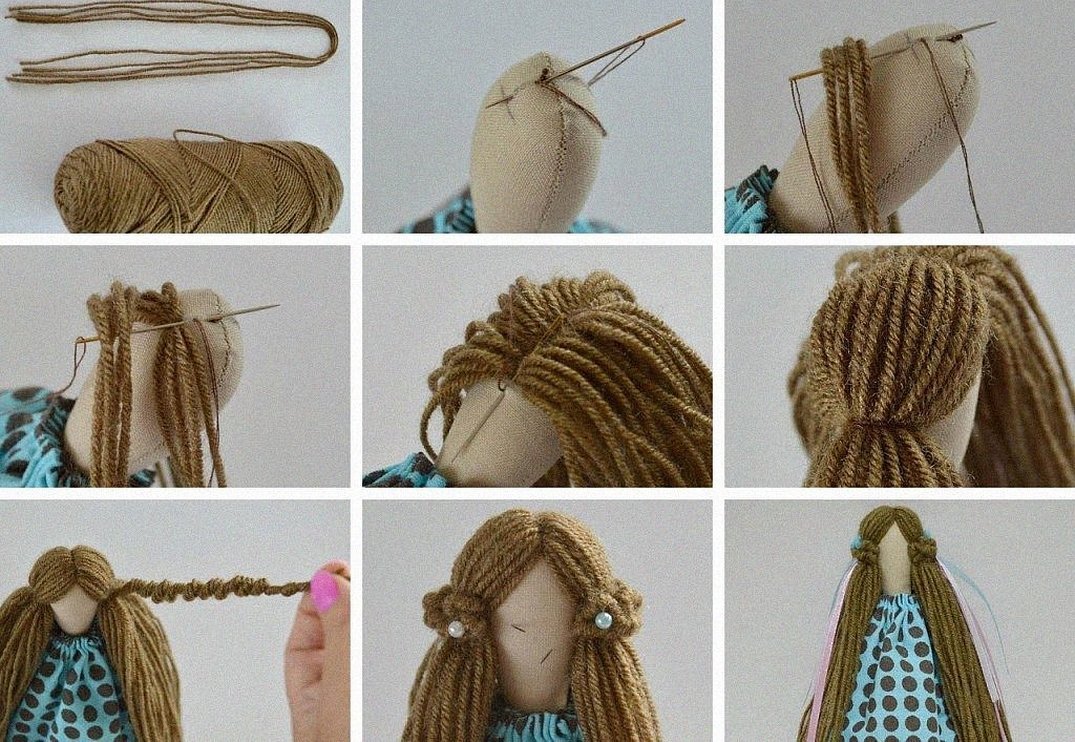
- Giving expression to the face.
Usually this step comes down to sewing on bead eyes. You can also lightly paint Tilda's cheeks with acrylic paints diluted in water or regular blush.
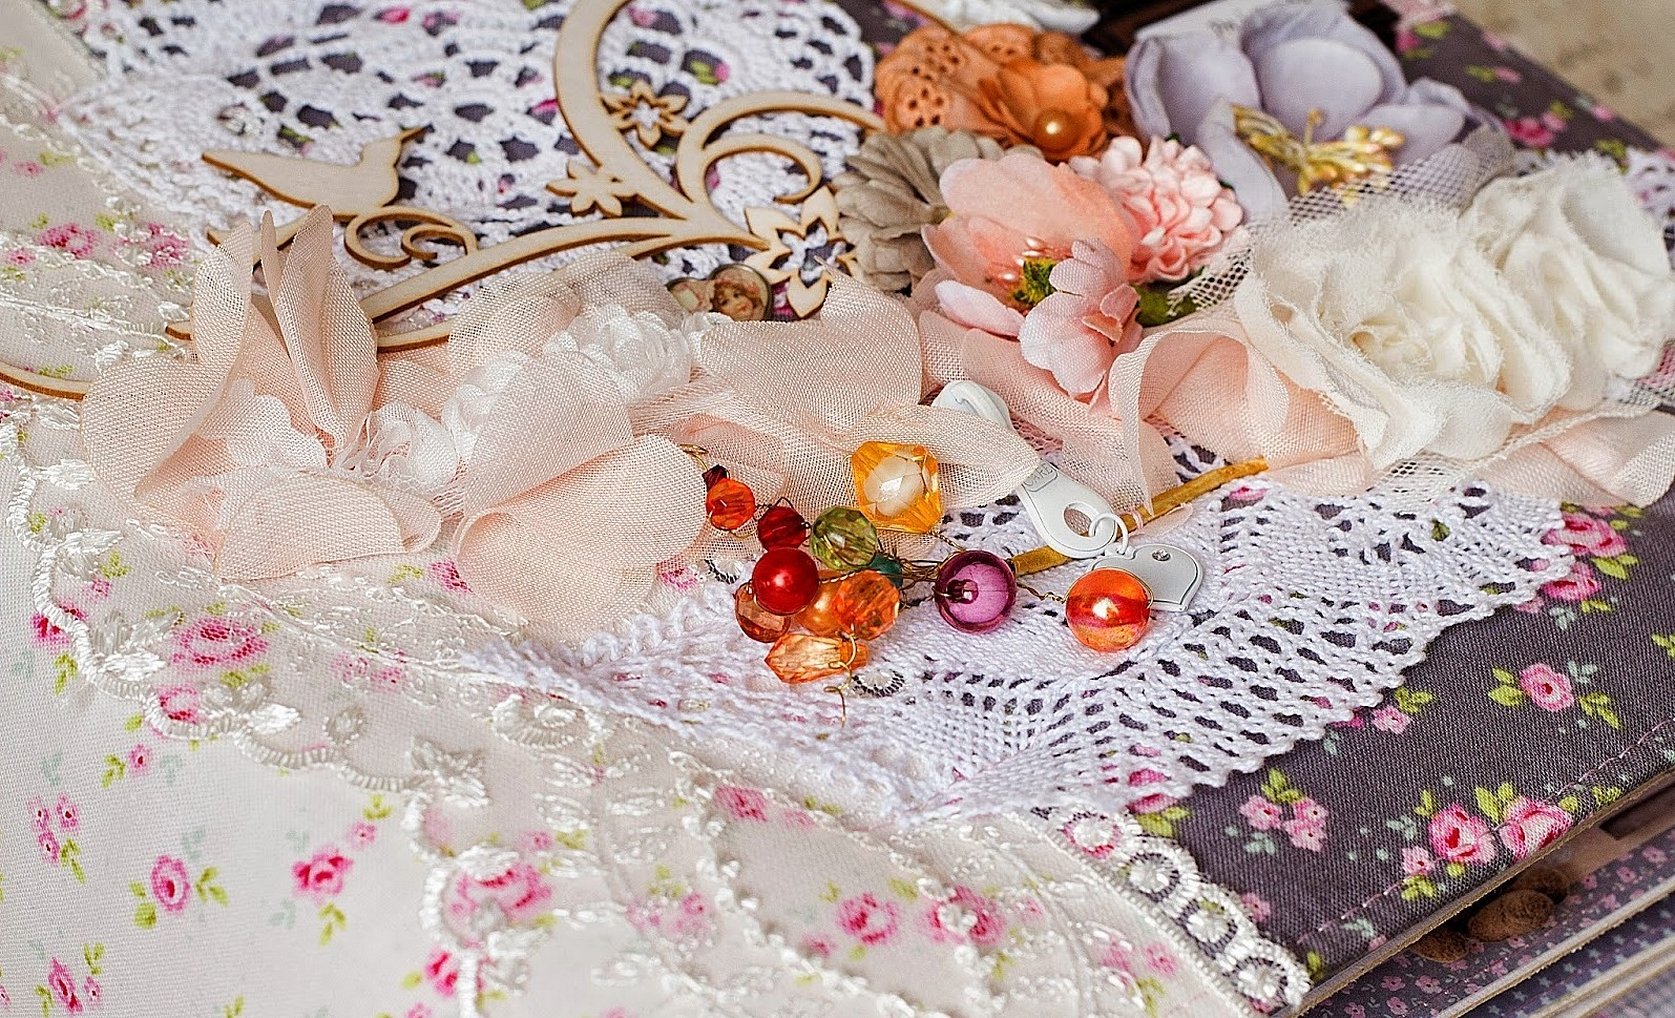
- Additional details.
Decorate the doll with ribbons, lace, buttons and beads. If you are sewing an angelic figurine, then at one of the last stages you need to make wings and sew them to Tilda's back. If desired, attach a loop here, by which you can hang the toy so that it floats in the air.
- Making accessories.
Here, depending on the idea, you should twist glasses from wire, weave a beaded bouquet, sew a miniature handbag.
When connecting all parts of the doll and her outfit, it is recommended to pin them first and only then sew them together. This will allow you to see possible errors in time and correct them.
The finished Tilda will be a great addition to almost any interior and a wonderful gift for all occasions. Using the recommendations and advice from the article, you can sew not one, but several figures in this unusual technique.


