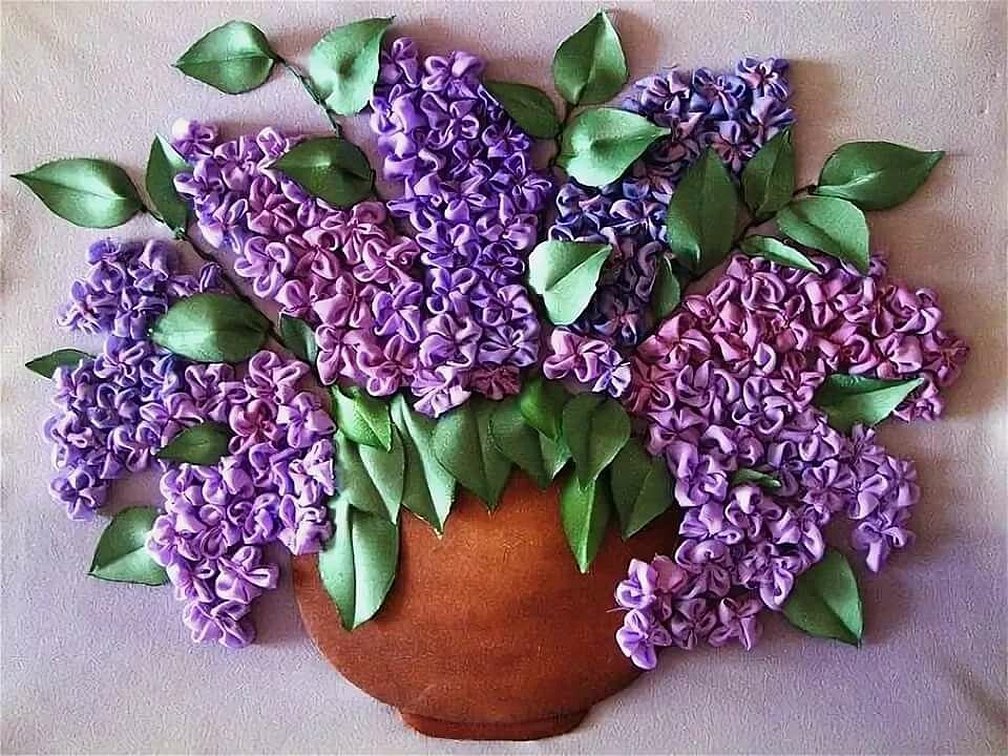
To create a unique picture embroidered with your own hands, it is worth paying attention to fashionable techniques and trends of this type of needlework. Ribbon embroidery is gaining particular popularity. Plots made in this technique with the use of plant motifs look very beautiful. A simple, but at the same time effective option will be the embroidery with ribbons "Lilac". The texture and original technique of embroidering buds of a lilac branch will give the product a special lyricism.
Materials and tools
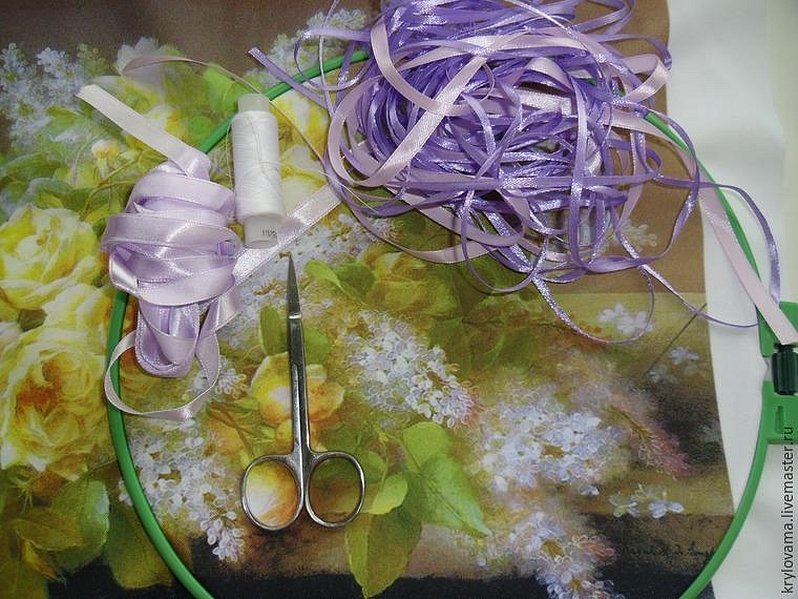
To make beautiful ribbon embroidery, you need to prepare the appropriate tools and materials.
Please note! It is better to buy a ready-made kit, in which the ribbons are already selected by color and special embroidery tools are collected.
List of everything needed for work:
- green and purple ribbons (you can also use lilac);
- base fabric for forming embroidery;
- blunt-tipped needles;
- hoop for fixing fabric;
- satin for the base, the same color as the ribbon for forming flowers;
- candle and matches (processing of cuts on tapes);
- scissors;
- floss threads in the color of the ribbons;
- a pencil or textile marker to create a sketch on the canvas.
In the process of choosing each component, it is necessary to pay attention to the quality. This is especially true for the base canvas and ribbons. To do this, you need to decide on a sketch of the painting to be made.
Step by step instructions
There are many options for forming lilac buds, as well as attaching them to the base fabric. The simplest option is considered to be forming lilac buds separately and then sewing the finished parts to the fabric.
Detailed step-by-step instructions for ribbon embroidery "Lilac" for beginners and experienced needlewomen:
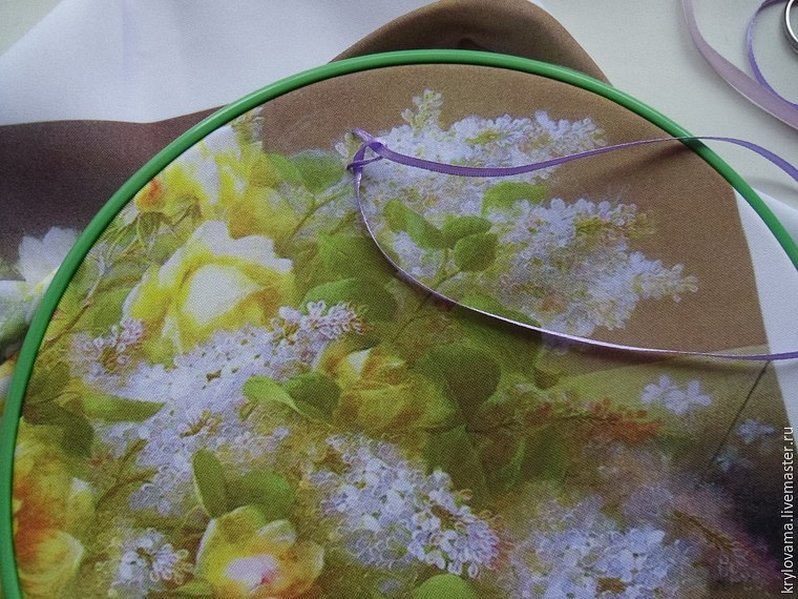
- Secure the satin fabric in the hoop. Do not stretch the fabric too much, so as not to deform the fabric and flowers.
- On the satin, draw the outline of the lilac brush with a pencil, along which the embroidery of the flowers will be formed. It is enough to draw light outlines so that later the marks do not show through the tape.
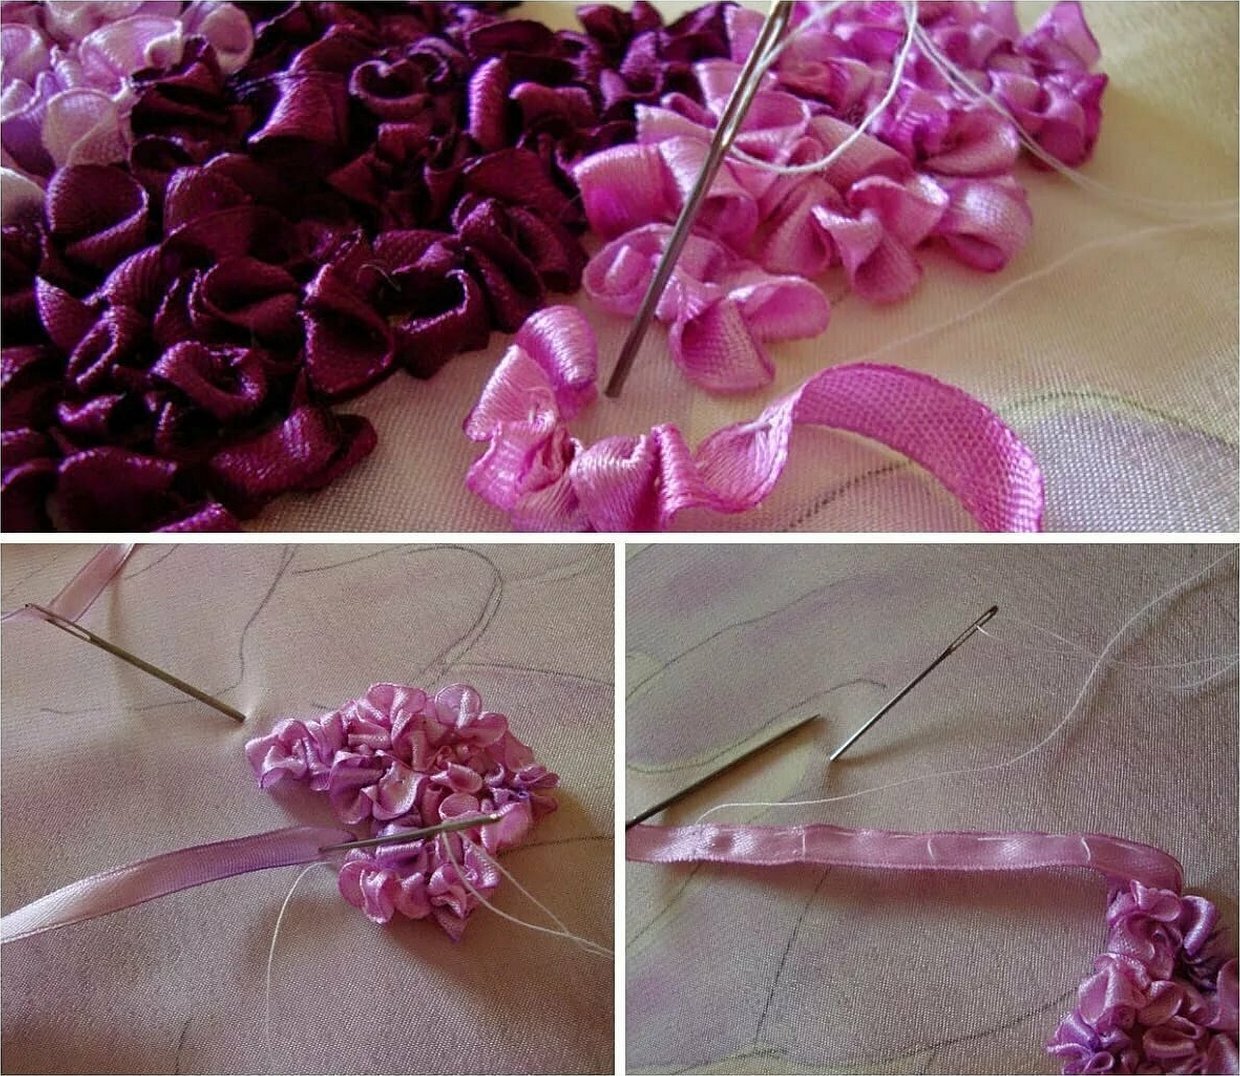
- Cut the purple ribbon into 8-10 cm strips. The size of the bud will depend on the length of the elements.
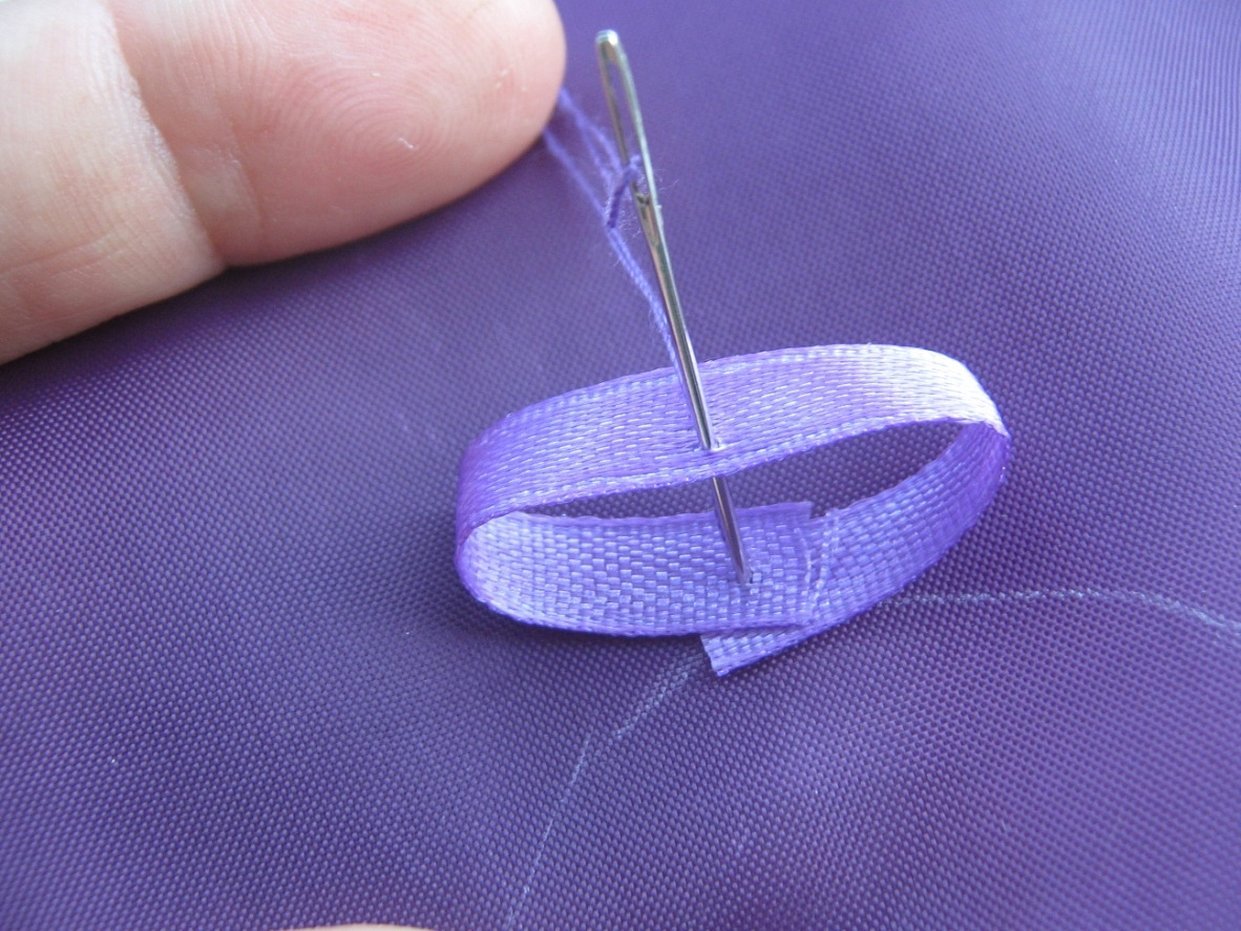
- The strip needs to be formed into a ring, the ends of which will be fixed by overlapping. Attach the resulting element to the satin and secure it in the middle with a needle and thread so that a bow is formed.
- Bring the needle out of any loop of the bow through its middle. The stitches should be as neat as possible so as not to spoil the appearance of the bud and not to deform the petals.
- Use a needle to grab the bow loop, piercing the piece through the middle of the ribbon. The stitch should be small so that it is not visible. Pull the thread a little and pass the needle through the center of the bow again, bringing it to the wrong side of the fabric.
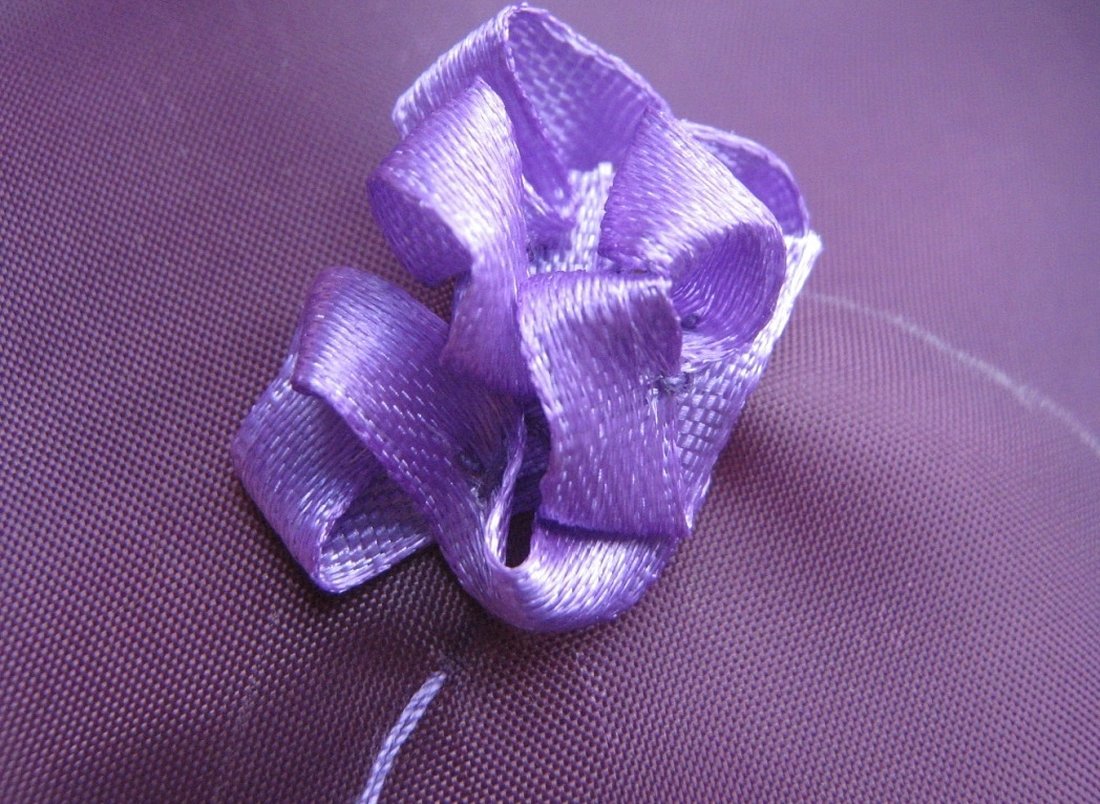
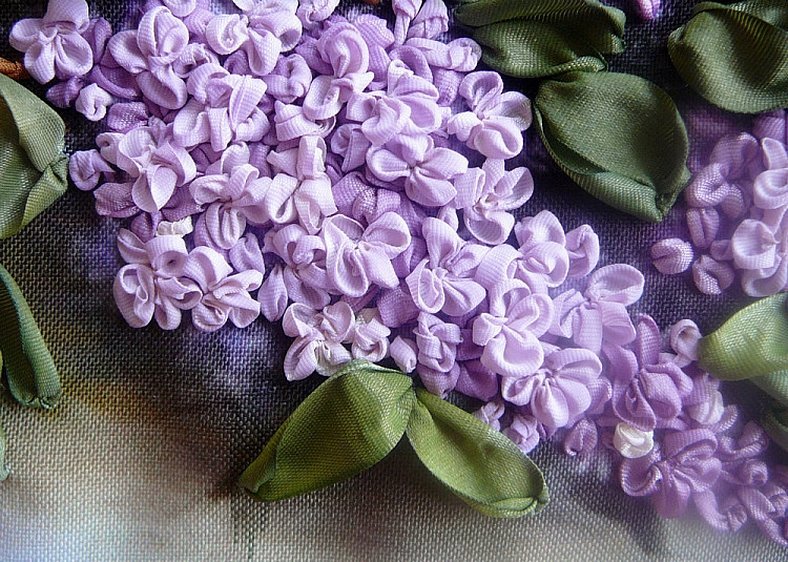
- Bring the tool out again through the central area of the future bud to the front side. Repeat the process of forming the petal with the other part of the bow. The first bud is ready.
Once all the buds are ready, you can begin to form a full-fledged cluster of blooming lilacs. It is important to take into account the peculiarity of the placement of flowers within one sketch.
Important! To make the finished bunch look natural, during the embroidery process it is worth placing the flowers in a checkerboard pattern relative to each other.
Instructions for forming a brush of flowers:
- At a distance of 2-3 cm from the first bud, bring out a needle and thread. There should be no empty space between the flowering elements.
- In the same way, sew all the previously made buds to the canvas. The number of parts is determined individually. Much depends on the size of the brush, the size of the buds and the technique of execution.
- After filling all the space on the fabric allocated for the bunch, you need to take the satin out of the hoop and cut out the blank. In order not to spoil the embroidery, it is worth retreating 2 cm from the edge of the ribbons.
After making several flowering brushes, you can begin assembling the picture. Much depends on how the branches themselves will be arranged. Often, a basket or vase is embroidered on the main fabric beforehand. But you can do without auxiliary compositional elements.

Next, the finished lilac bunches are sewn to the canvas of the painting. In this case, it is recommended to tuck the edges inward, so that the tassels become voluminous, and the process of fastening is simpler.
The main thing is to make all the stitches small and carefully lay the ribbon itself. You can cut out leaves from a green wide ribbon. It is recommended to singe the edges of each detail over a candle flame. This technique will slightly deform the fabric, giving it natural shapes, and will not allow the threads to fray at the cuts.
The most gorgeous paintings: schemes
The embroidery "Lilac" can be formed in other ways. Among many needlewomen, the popular technique for forming buds on the canvas is considered to be the "French knot". There are quite a few patterns for this type of embroidery.
In addition to choosing the appropriate option for embroidering the buds themselves, it is worth deciding on the scheme for forming the composition. They mainly differ in the complexity of the pattern and the schematic arrangement.
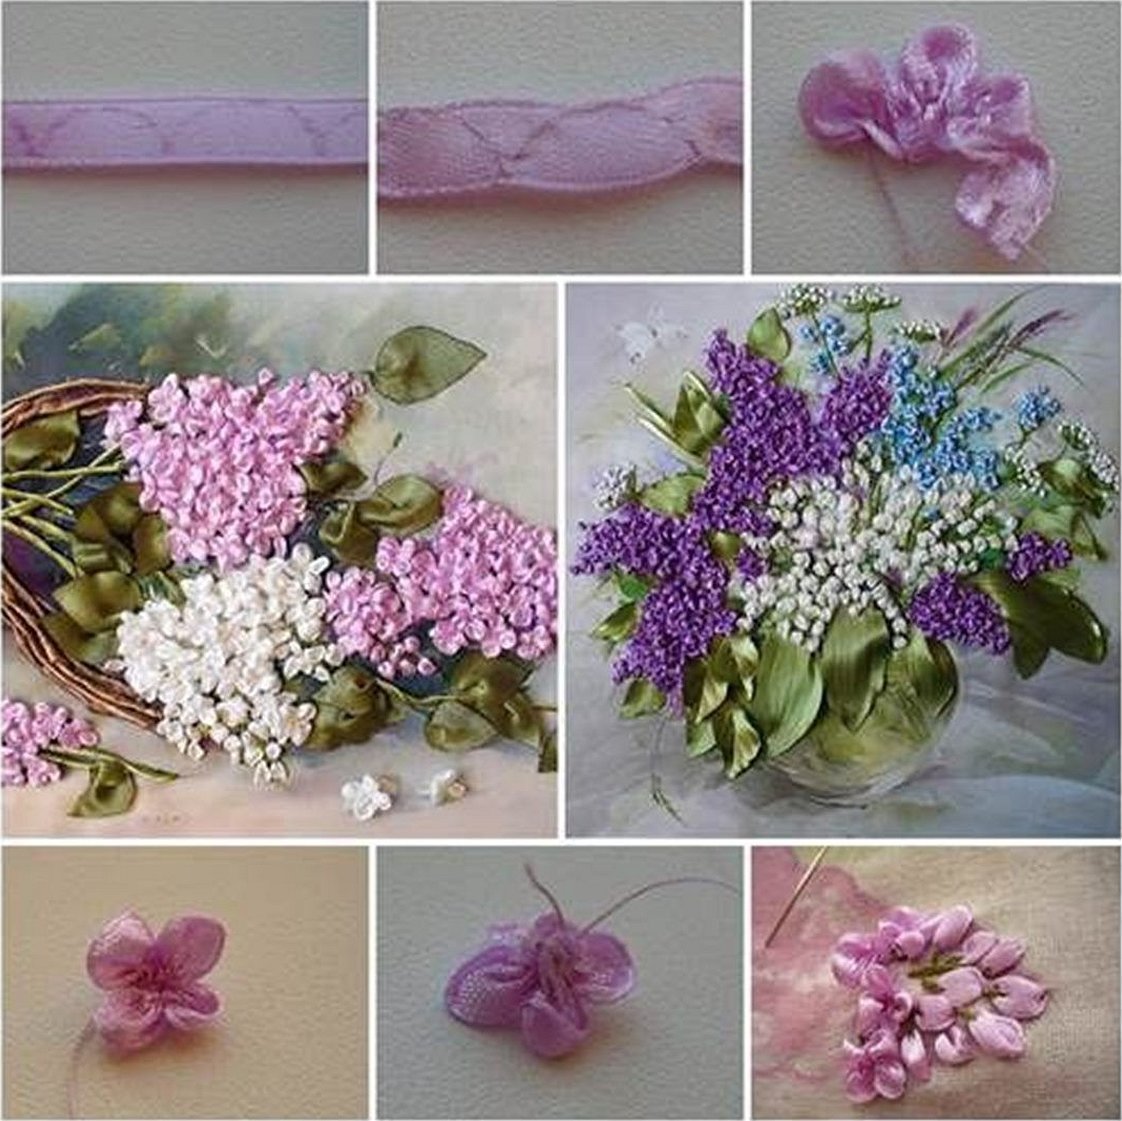
The overall composition may include a basket, a vase, rain, an unusual background and much more. In most cases, you can use your imagination and create a unique pattern for embroidering blooming lilacs from ribbons.
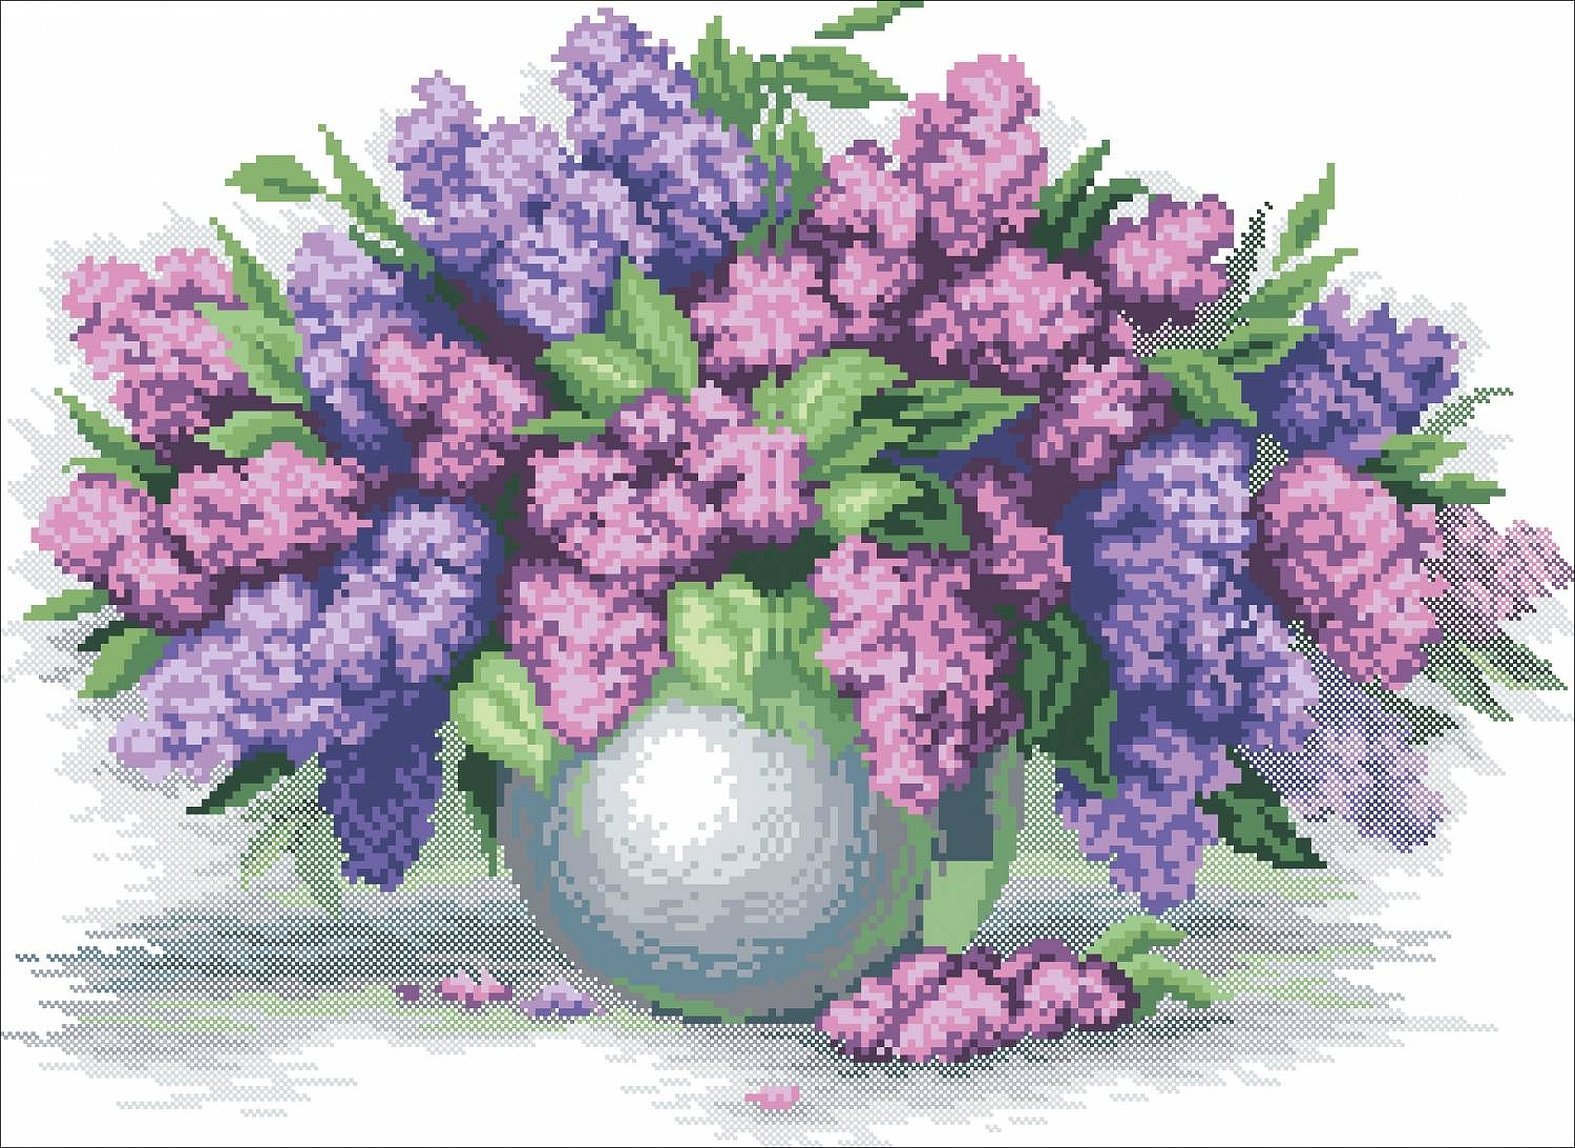
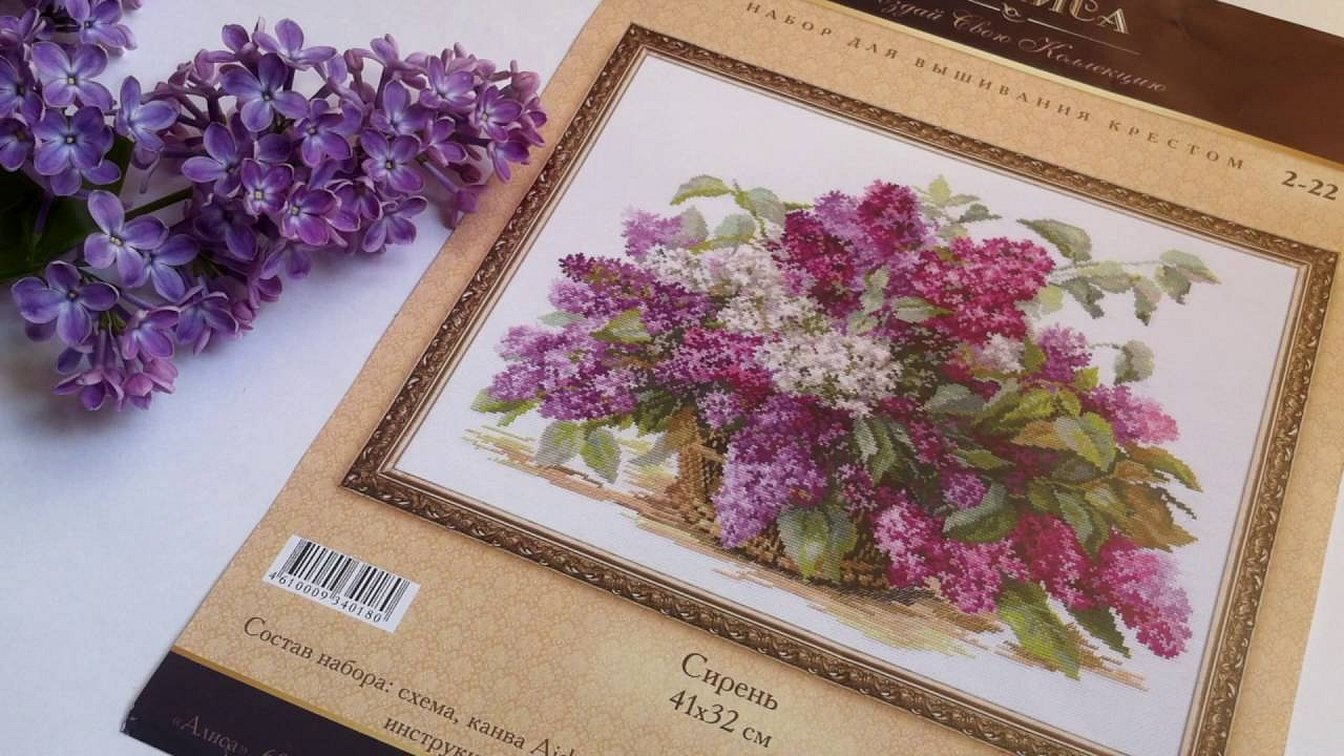
Cross stitch
Cross stitch "Lilac" looks no less impressive if you choose a suitable pattern. In this case, it is advisable to choose ready-made kits, in which, in accordance with the artistic idea, the colors of the threads are selected, there is a pattern for the formation of each element, and the processed canvas is already prepared.
You can also use free patterns for cross-stitching lilacs, which are presented in specialized literature or on the Internet.
In terms of choosing ready-made kits, you can give preference to different manufacturers. You just need to decide on the size of the picture and the complexity of the pattern. An excellent option can be lilac embroidery "Alice".
Cross stitch lilac embroidery can have different interpretations in terms of composition, but such work will look original and beautiful. Using this embroidery technique, you can decorate decorative pillows, tablecloths, napkins.
Secrets of needlewomen
Experienced embroiderers know a lot of secrets that concern working with ribbons. Each nuance can become an advantage, not a disadvantage. In order not to spoil the embroidery and make it more neat, it is worth following some recommendations:
- If this type of embroidery is being done for the first time, then you do not need to choose complex designs with large motifs.
- The cut areas of the tape should be scorched over a candle flame to prevent the piece from unraveling.
- To work with ribbons, you need to choose needles of medium thickness with a wide eye and a blunt tip.
- When there is no possibility to draw a sketch yourself, it is better to use templates. They can be transferred to fabric in different ways.
- You can transfer the design from the template to the fabric using carbon paper. This should be done carefully so as not to leave smudged marks on the fabric.
- It is advisable to embroider a large-sized picture immediately on a frame or by fixing it in a hoop. This will help evaluate each stage of the work, and the fabric will not be overstretched.
- First, the background of the painting is formed, and only then the central composition is embroidered.
- The ideal base fabric for ribbon embroidery is gabardine. It is easy to care for and dense.
If you take into account some small secrets in your work, then embroidery will bring you pleasure, and the result will please you with its appearance.
To embroider beautiful lilac brushes from ribbons, you can use various techniques for forming buds and petals themselves. Additional elements in the form of a base for branches (vase, basket) will help make the composition complete. A complete picture will be obtained thanks to the background and frame. In addition to ribbon embroidery, you can do cross stitching. For this, it is advisable to purchase a special, ready-made set, which contains all the necessary tools and materials.


