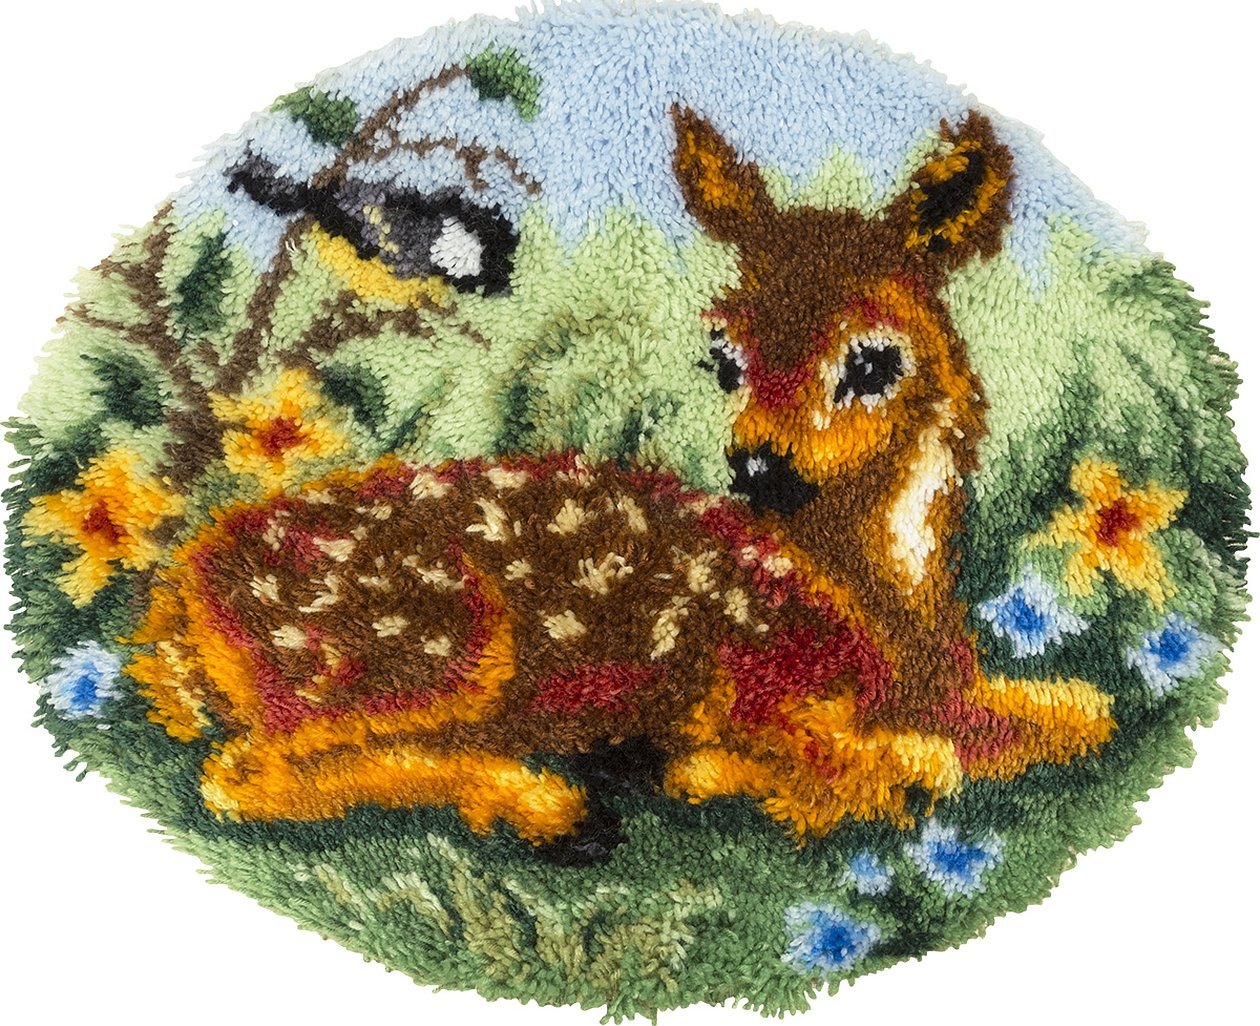
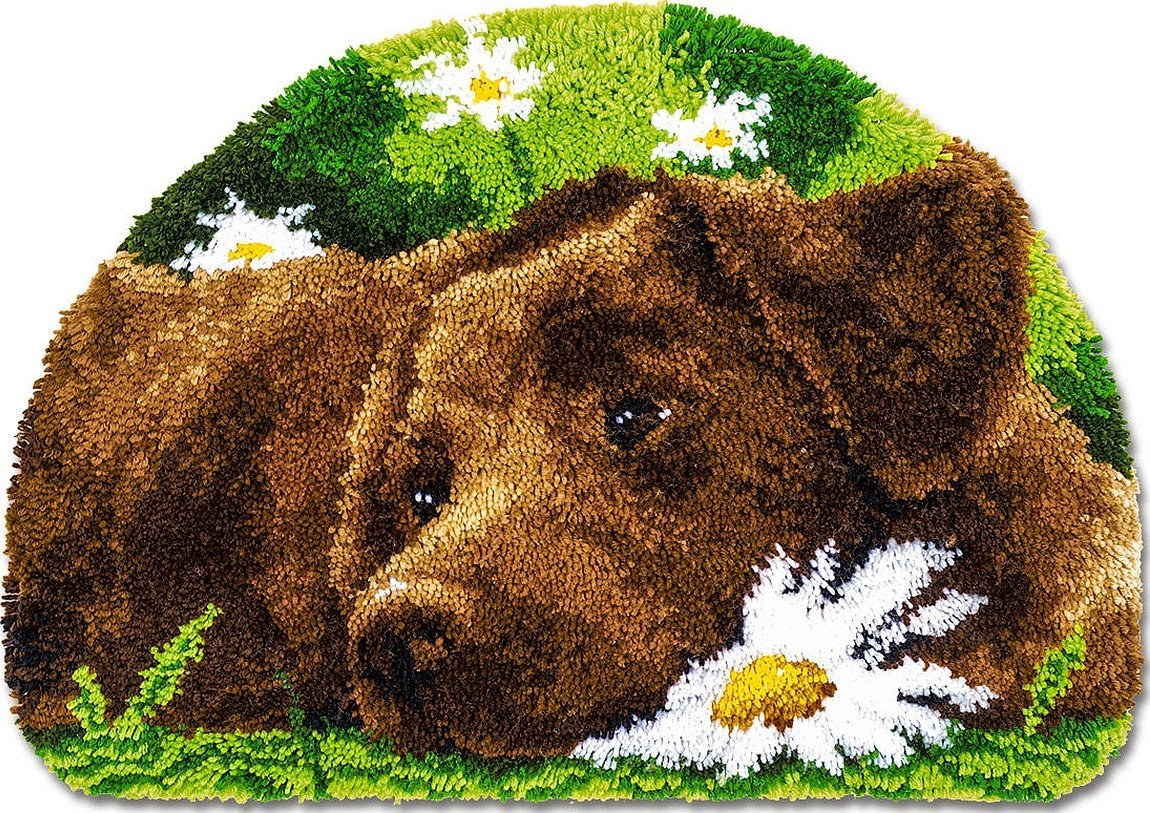
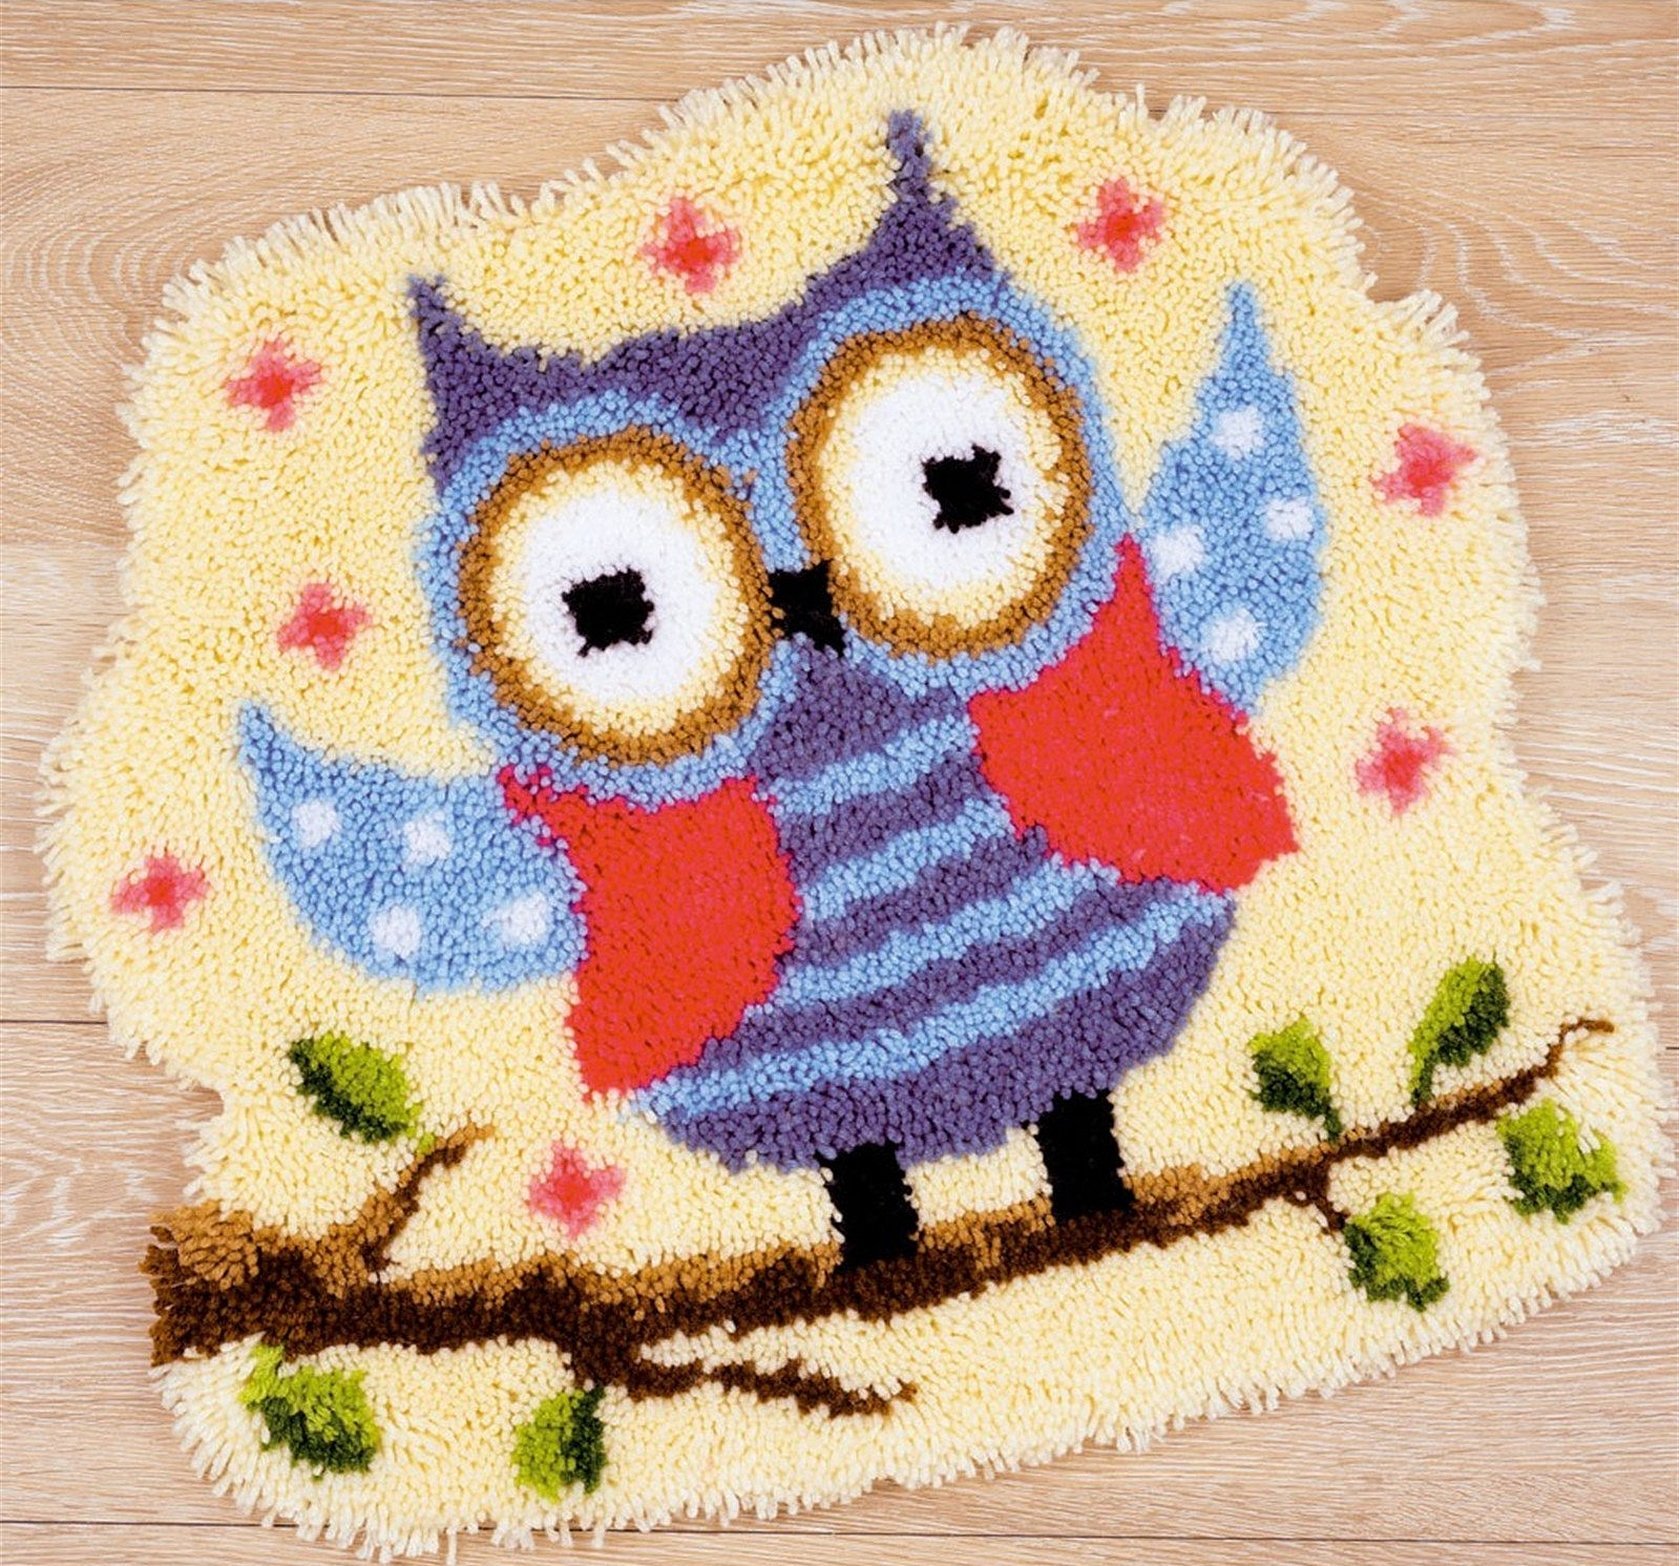
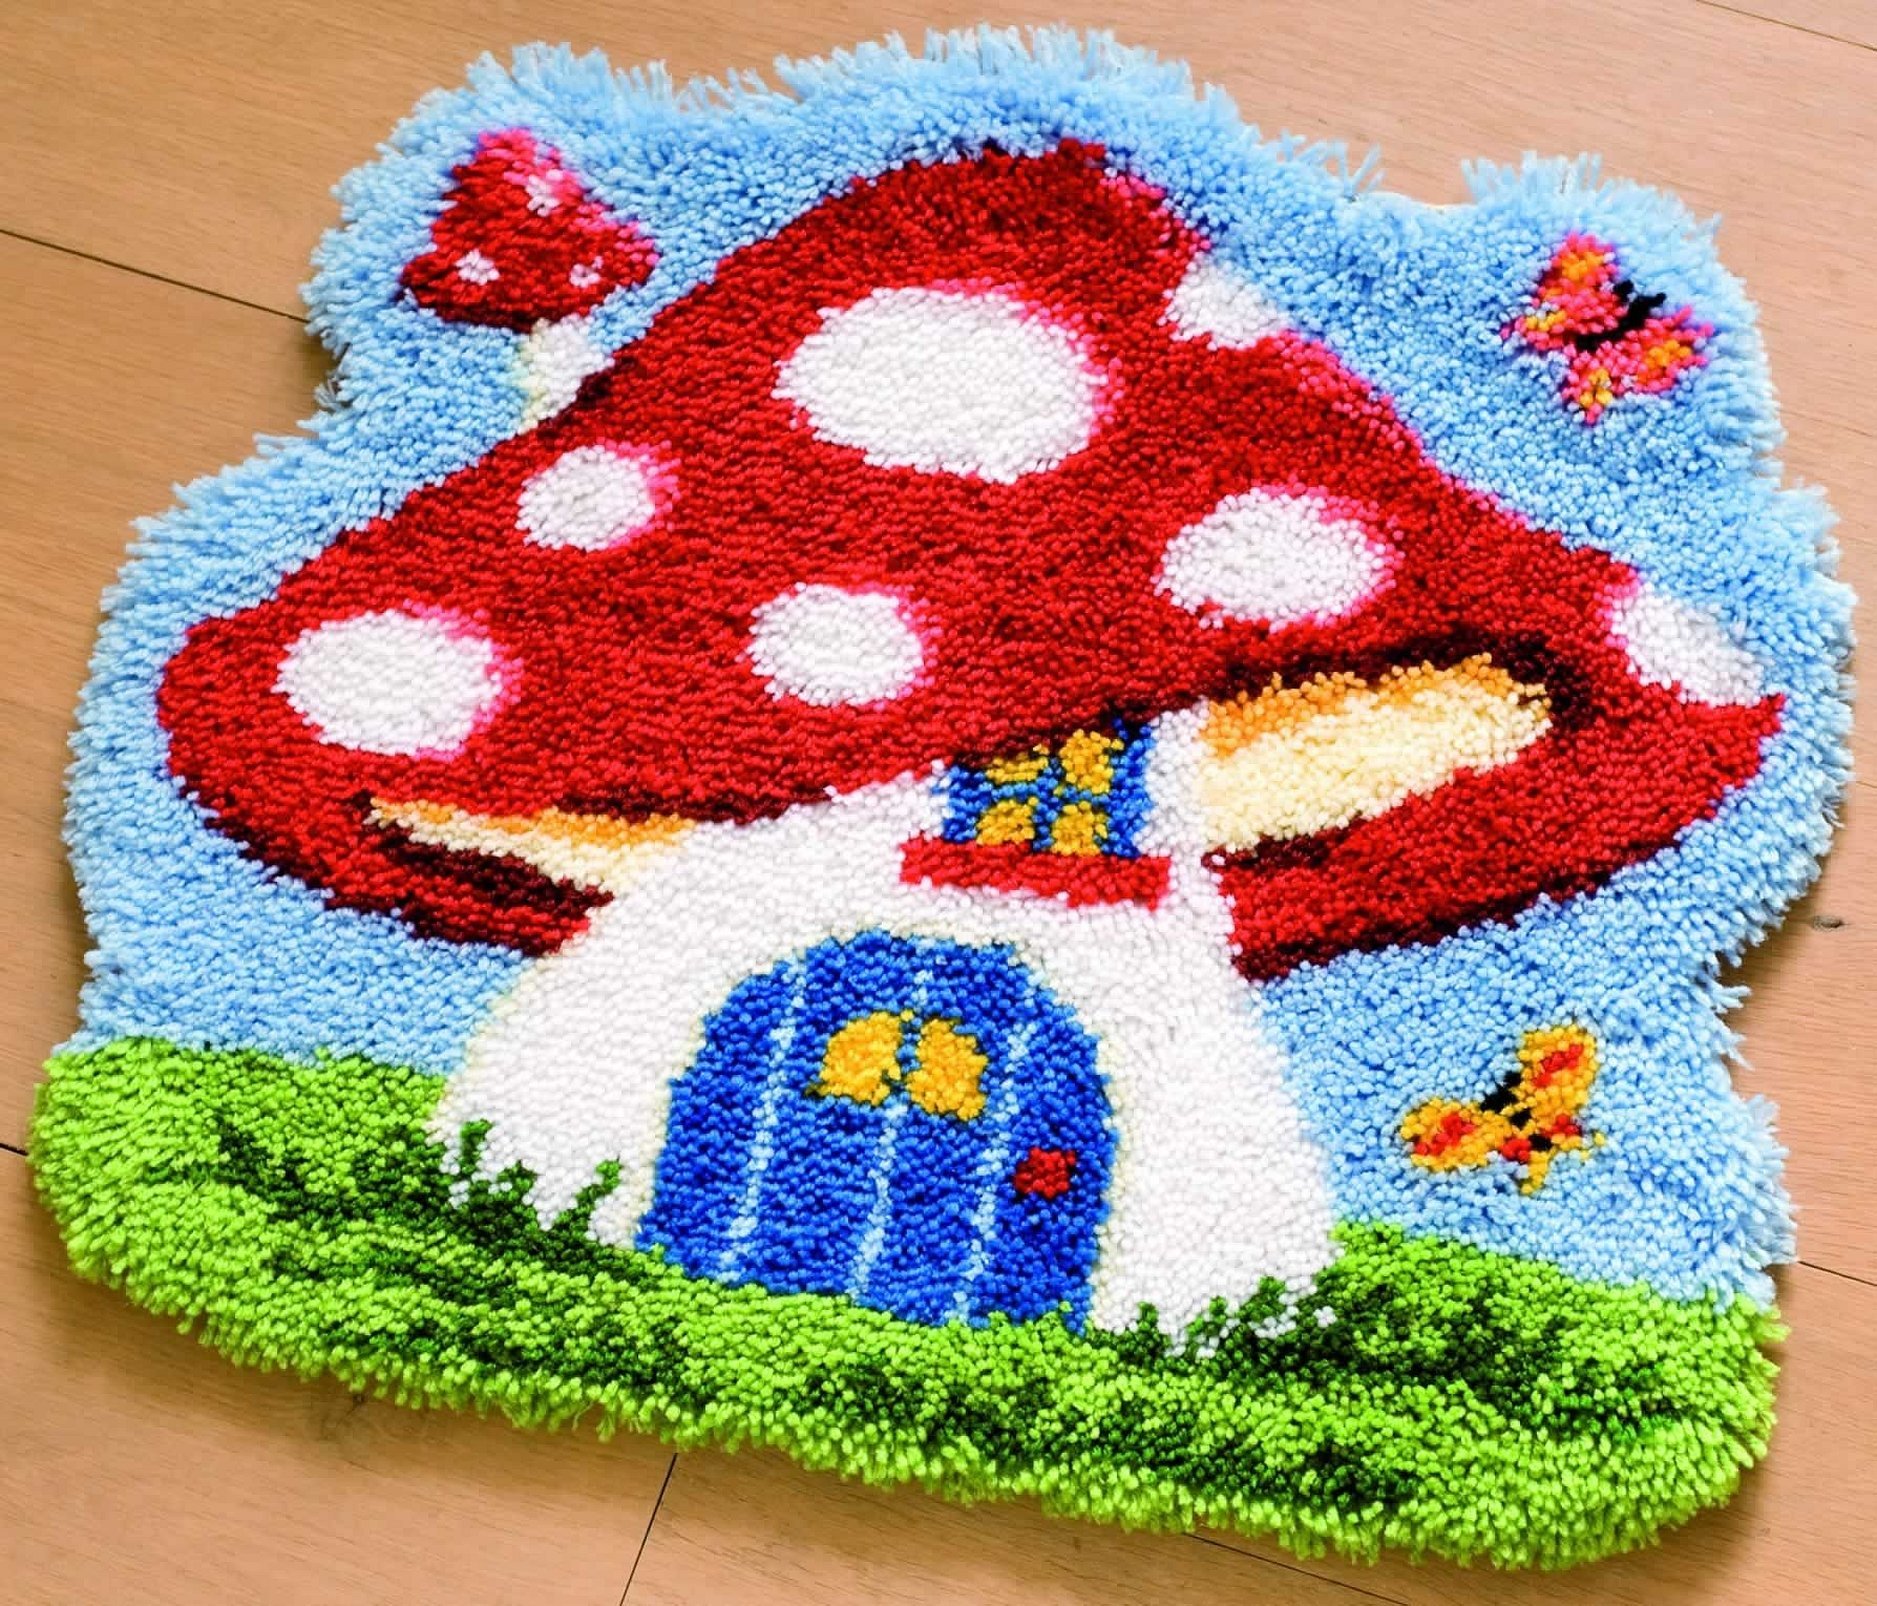
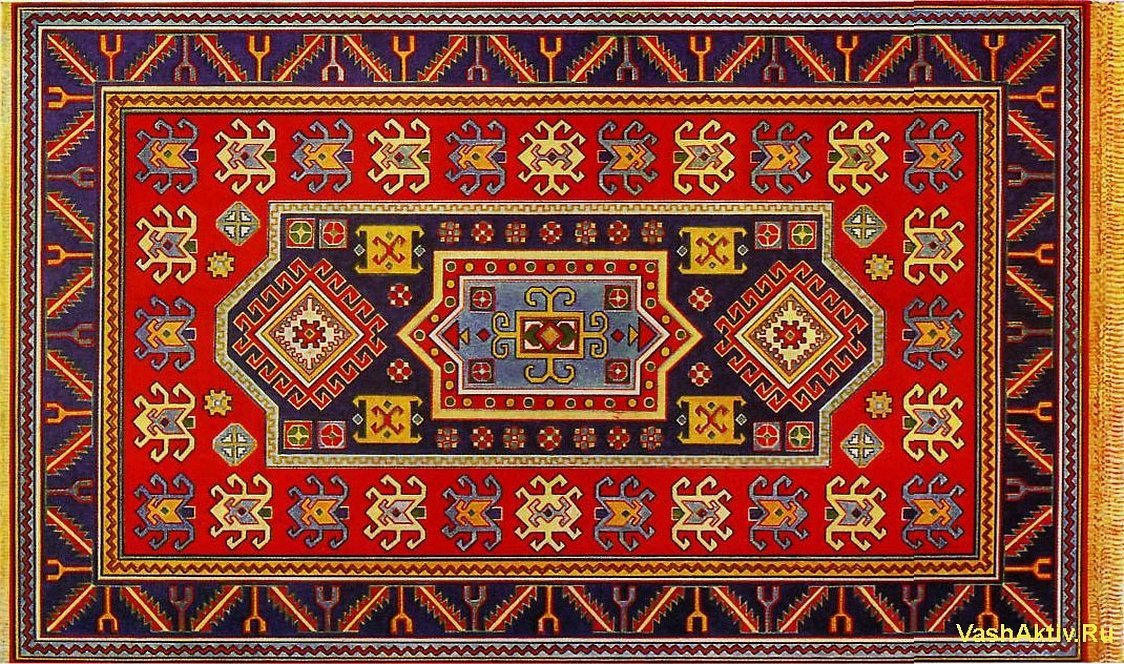
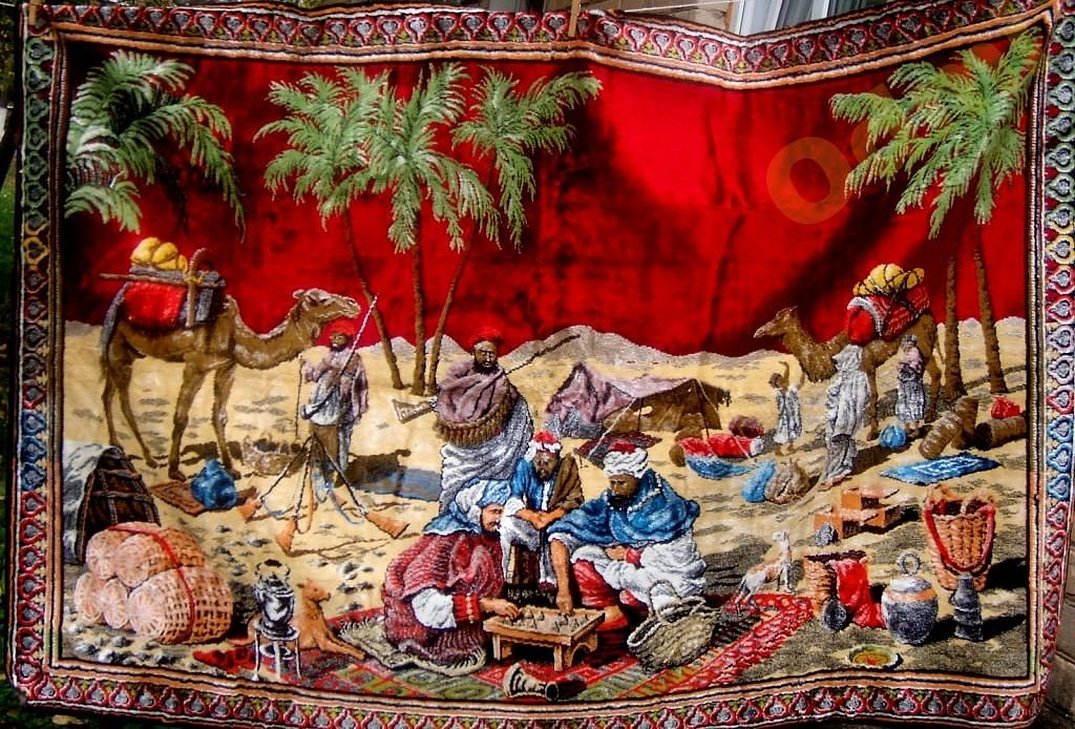
Many people, having heard the term "carpet embroidery", think that this is a method of making a carpet. However, such embroidery is used not only for carpets, but also for various rugs, paintings and even cushions for the sofa. Carpet embroidery can make excellent soft dolls.
Having decided to do carpet embroidery, you first need to buy everything you need. This will require many tools, from a needle to PVA glue.
What kind of needle is needed for work?
Carpet embroidery will take more than one day, and if you choose the wrong needle, the work will progress even longer. This embroidery technique has been known for a long time. And when it first appeared, people used homemade needles. But progress does not stand still, and now they produce special needles for carpet embroidery. A special needle allows you to work with a solid thread. By creating voluminous soft loops, a pattern is obtained on the outside. The work is done with thin and thick threads, so two needles are required for the work. The main condition for needles is their sharp edge. They must not make holes in the fabric, but pierce it well. They can be purchased in special stores. The principle is that a thread passes through a needle with an eye, and thanks to the locking mechanism, stitches of the same size are obtained.
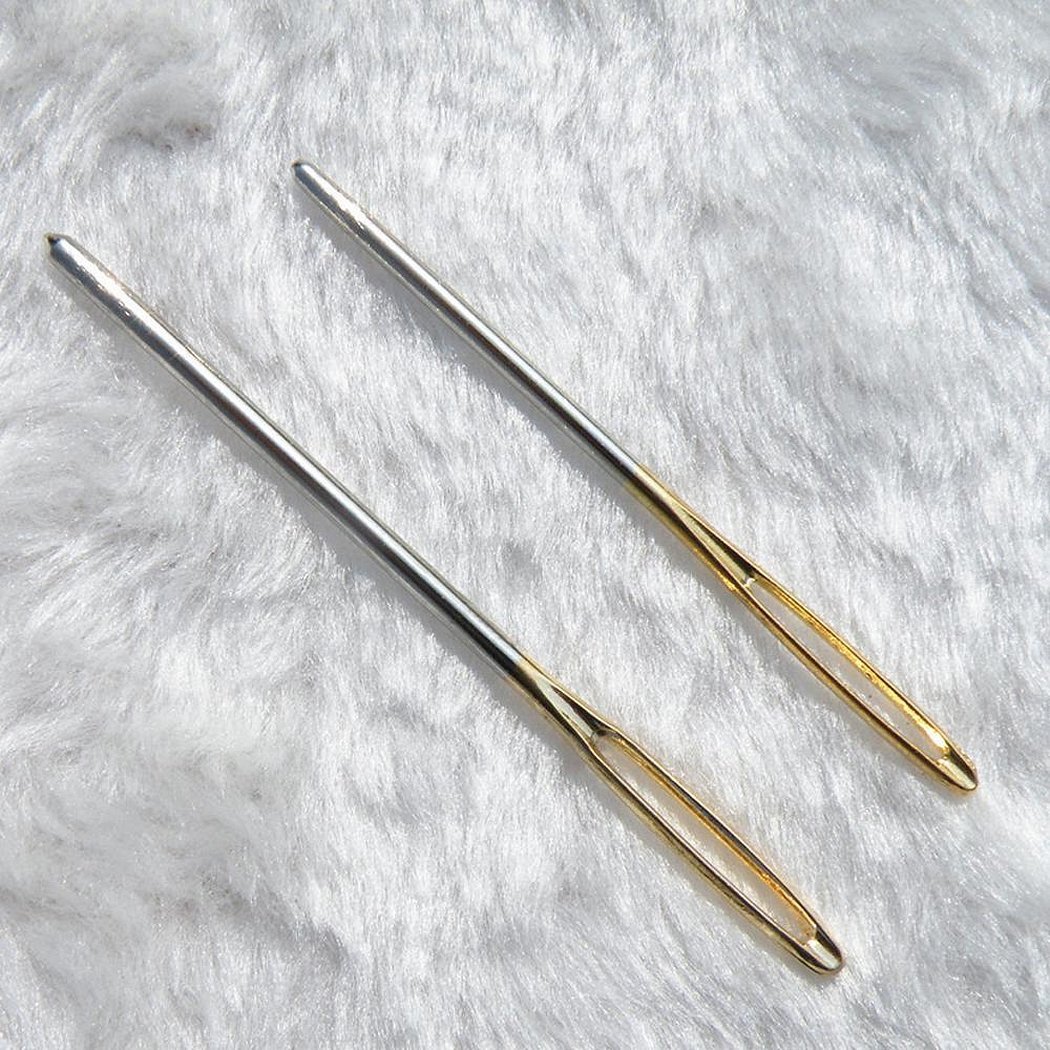
In addition to the needle, a hook is a must-have tool for embroidery. These two tools should be included in the carpet embroiderer's kit.
Selection of threads
You need to choose thick and voluminous threads that consist of wool, or that include wool. In addition, you need to make sure that the thread is twisted. Acrylic threads can be used as a substitute for wool. A carpet embroidered with such threads will be much lighter in weight.
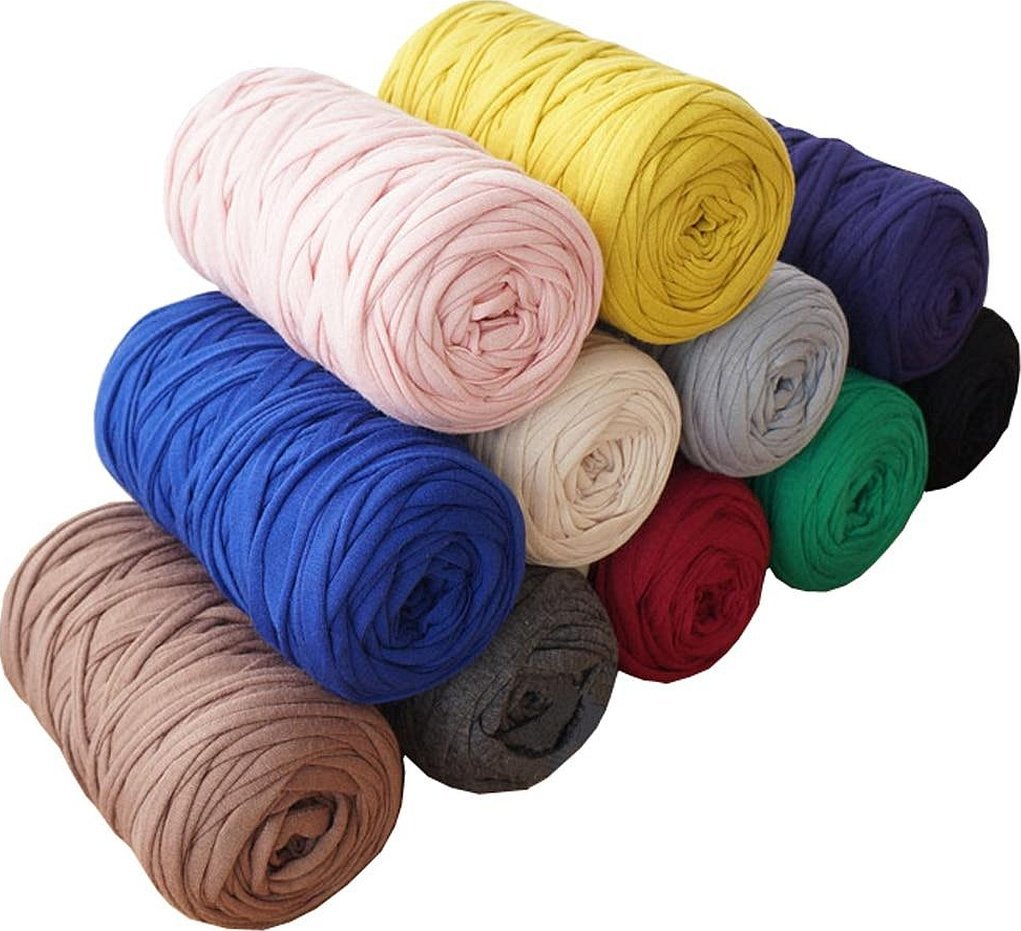
When choosing material for work, it should be remembered that carpets made of wool will have a more expensive and noble appearance. Acrylic threads are presented in a more diverse color category, and their price is much cheaper. In addition, the carpet embroidery technique for beginners is suitable like no other, because any, even the most tangled threads, can be adapted to a special needle. You can also use wool from which mittens or a sweater were previously knitted.
Attention! For convenience, you can use a special threader. With its help, you can easily thread the needle without spending much time on it. If you cannot buy such a tool, you can use a regular thin needle.
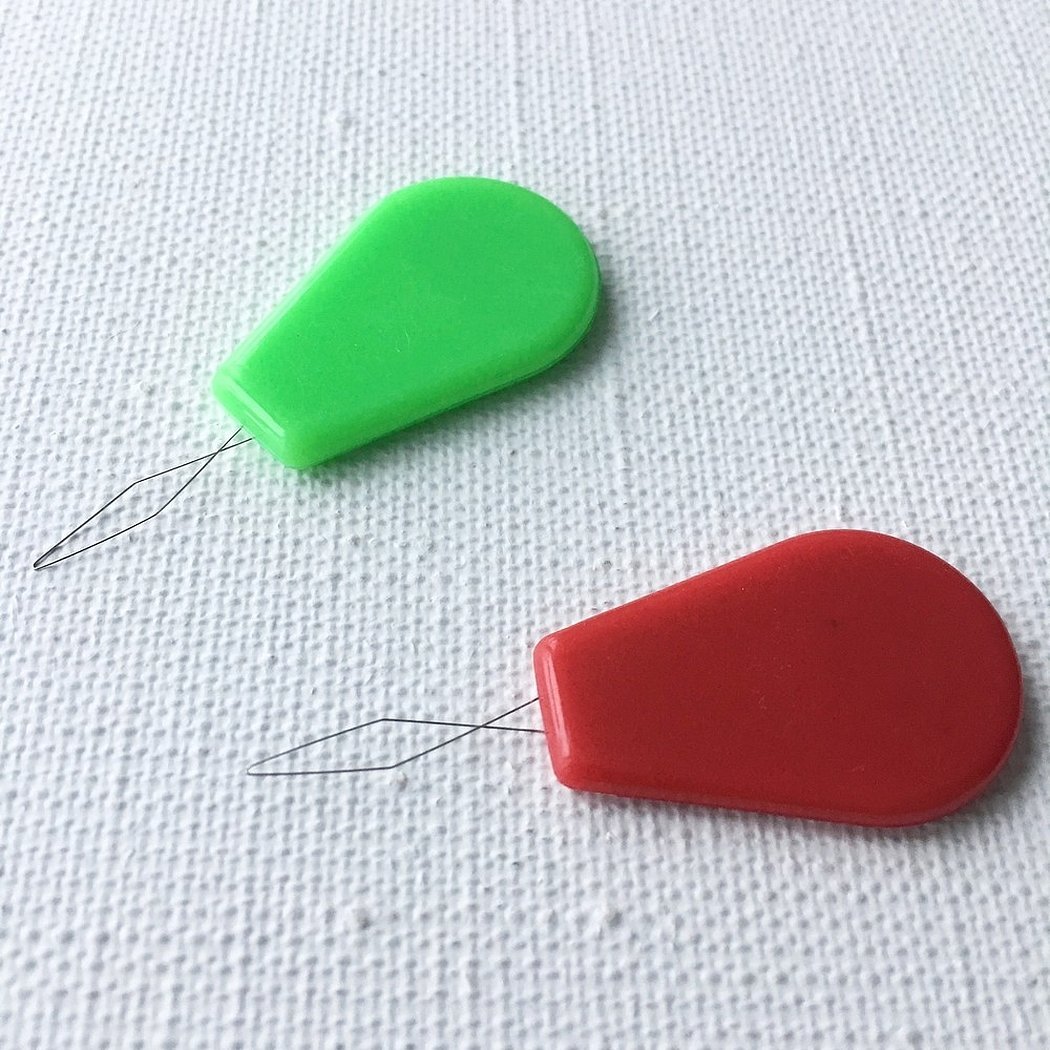
The mechanism of the needle threader works like this:
- The thread is placed into the bend of the wire and inserted into the wooden handle.
- It is passed through the needle and brought out to the tip of the needle, into a special hole.
- The needle is inserted into a mechanical insert, with the help of which the length of the needle is adjusted.
- The screw is tightened. In relation to the needle cut, the screw should be on the side.
Carpet technology: main types
The first thing you need to start embroidering a carpet is to make a sketch. You can take a ready-made drawing, or you can draw it yourself. The main rule is a clear outline of the contour and a clear image itself. To avoid holes and torn edges, the drawing must be applied to the back side.
Carpet embroidery technique is divided into two main methods:
- the design is created from loops (loop embroidery);
- A knot is tied from short threads (knot embroidery).
Embroidery in loop technique
The loop method of embroidery is done on the back side of the fabric. To make a loop, the needle must make a precise movement from the back to the front side. To make the embroidery denser, you need to make loops as often as possible and, conversely, to make the density less, it is better to make loops less often.
Knot embroidery
The knot method is not done with a needle, like the loop method, but with a hook. You can try a regular hook, but it is better to use a special one, designed specifically for this type of embroidery.

All fragments of the design must be embroidered separately, moving towards the center of the image from its outline. First, fill the edges, and then the main part.
The pattern for tying a knot is quite simple:
- The thread needs to be folded in half and put on the hook.
- When threading the hook through the canvas, hold the ends of the threads and grab them with the hook. After the hook snaps, pull it out to the front side. At the same time, tighten the resulting knot tightly.
Main seams
The basic rule of the carpet stitch is that the threads must be pulled tightly and evenly. The most common and simple stitch is a cross stitch. It serves as the basis for the carpet stitch. You need to start with the first half of the cross, moving from left to right, evenly laying stitches. The second half of the cross is also done with crosses, only the direction changes: from right to left. They should cover the stitches of the first half.
The second type of seam is extended. The working thread should pass through two horizontal and one vertical thread of the canvas. All rows should follow this order: in the direction of the seam, the working thread is laid from right to left. It is covered with the first row from left to right, and back in the same order.
The half-cross stitch is made with a thin thread. The canvas should be thicker than the thread. The working thread is passed in a straight direction from right to left, without stitches. A half-cross is made over it from left to right.
When embroidering with a straight tapestry stitch, you should not forget about the oblique tapestry stitch. There are two methods of embroidering with a straight tapestry stitch.
Carpet embroidery is not limited to these stitches, there are many different stitches, but basically all the masters use only these.
Operating procedure
When starting work, the first thing you need to do is stretch the selected fabric onto the hoop. In the process, you need to follow some recommendations:
- the position of the needle should be perpendicular to the fabric;
- To avoid tangling the knots, it is necessary that the thread coming out of the holder is located behind the hand.
- You need to lift and thread the needle very carefully until the tip of the needle is visible;
- the distance between the previous and current stitch should be at least 1 mm;
- after 7-8 stitches, if the thread gets in the way, it needs to be cut off;
Important! You can tell from the pattern whether everything is done correctly. If the stitches are visible on the back side and the pattern is on the front side, then the work is done correctly.
When choosing a complex textured pattern, you first need to make a frame. Then, taking the right yarn, fill the pattern's surface. You can fill it using a linear or circular method. Or you can combine these two methods.
Needle embroidery for beginners is not difficult to perform, but in order to avoid mistakes, you must follow the following rules:
- the stitches should be placed at the same distance from each other, not too close and not too far;
- to ensure that the borders are clearly visible, stitches must be applied to the inside of the pattern;
- To turn the direction of the needle, you don't need to remove it from the fabric. It's the fabric itself that turns, not the needle;
- make sure that no knots appear on the thread, so that you don’t have to unravel the work you’ve done;
- constantly pay attention to the front side of the drawing to see if the drawing is applied evenly. For beginners, the first rows may turn out uneven, but there is nothing to worry about.
Having finished embroidering the canvas, you need to do the finishing work. The canvas needs to be washed, diluting shampoo in warm water, then let it dry, having previously laid it out on a flat surface. If as a result of drying, the product is wrinkled, it can be ironed a little.
Knot embroidery
The design must be applied to a special fabric - stramin. Stramin is a dense fabric with large cells.
First, draw squares on the fabric consisting of 10 cells. Prepare the yarn by cutting it into pieces of a certain length. To make the pile longer, you need to take long threads.
The design and embroidery must be applied on the reverse side. The work is done in several stages:
- Fold the piece of yarn in half. Pull the resulting loop through the mesh using a hook;
- The ends of the thread are held with a finger, then hooked and pulled through the net;
- The knots should be pulled tightly so that they are securely held on the mesh;
- Fill the entire drawing in a similar manner;
- When the design is finished, turn the fabric over to the front side and trim off any uneven areas.
Beginners may think that carpet embroidery is very difficult, but it is not. There are basic stitches that are very easy to make: half cross, cross, long tapestry oblique, tapestry oblique and elongated cross.
To make it easier for a beginner, you can start with a simple drawing. You can buy it in a store or download it from the Internet. There are forums for craftswomen who often post their work there.
For beginners there are special ready-made kits. The main task for a beginner will be to choose a good canvas.
But it is worth remembering that the first works may not always turn out ideal, but over time, experience will come, and the works will become much better.
Master class on creating pictures in carpet embroidery
Carpet embroidery is not limited to carpets and pillows, it can be used to embroider a beautiful picture or panel. The embroidery pattern is the same as when embroidering a carpet. The only difference is that a picture requires more color shades of threads.
To start embroidering a picture, you will need a frame and a hoop. First, the fabric needs to be washed. Then the canvas should be inserted into the frames so that it does not sag. The threads for embroidery are always numbered. In order not to get confused when embroidering a picture, you can also mark on the fabric where and what color will be done.
The drawing must be transferred to the fabric using copying. First, embroider the outline of the image. Black threads are usually used for this. You can start filling in the elements in any order. To avoid gaps in the picture, the stitches must be placed as close to each other as possible.
Just like when embroidering a carpet, at the end you need to secure all the seams. Then you need to cut all the threads from the back side. Using office glue, coat the seams from the back side.
Then the painting needs to be wrapped in a plastic bag and left overnight, placing it on a flat surface.
The next day, the product must be ironed and coated with interlining.
When you run out of thread or need to change the color
If you need to replace the thread, or if it runs out, you must do the following:
- Make a few finishing stitches and then remove the thread. The stitches you make need to be held tightly with your fingers so that they do not unravel;
- Trim excess thread as close to the fabric as possible;
- Coat the remaining tip with textile glue.
You can do the same if you need to move from one section of embroidery to another.
It can be said that carpet embroidery is being reborn because this technique has been used for a very long time. At that time, there were not even special needles and embroidery kits. Therefore, craftsmen managed to make needles from old tin cans themselves. It is worth noting that the quality of such needles was much better than the quality of today's needles.
Previously, people tried to make as many things as possible on their own, because, for example, carpets were very expensive, and if you really wanted to, you could make them yourself. They pulled out threads from old things, washed them and stretched them, thus saving money, and also on embroidery threads.
Nowadays, it is not necessary to run around different stores to find all the necessary materials for embroidery. Specialized stores began to sell embroidery kits. They usually include fabric, acrylic threads already cut to the required size, a machine (needle) for embroidery, and a hook.


