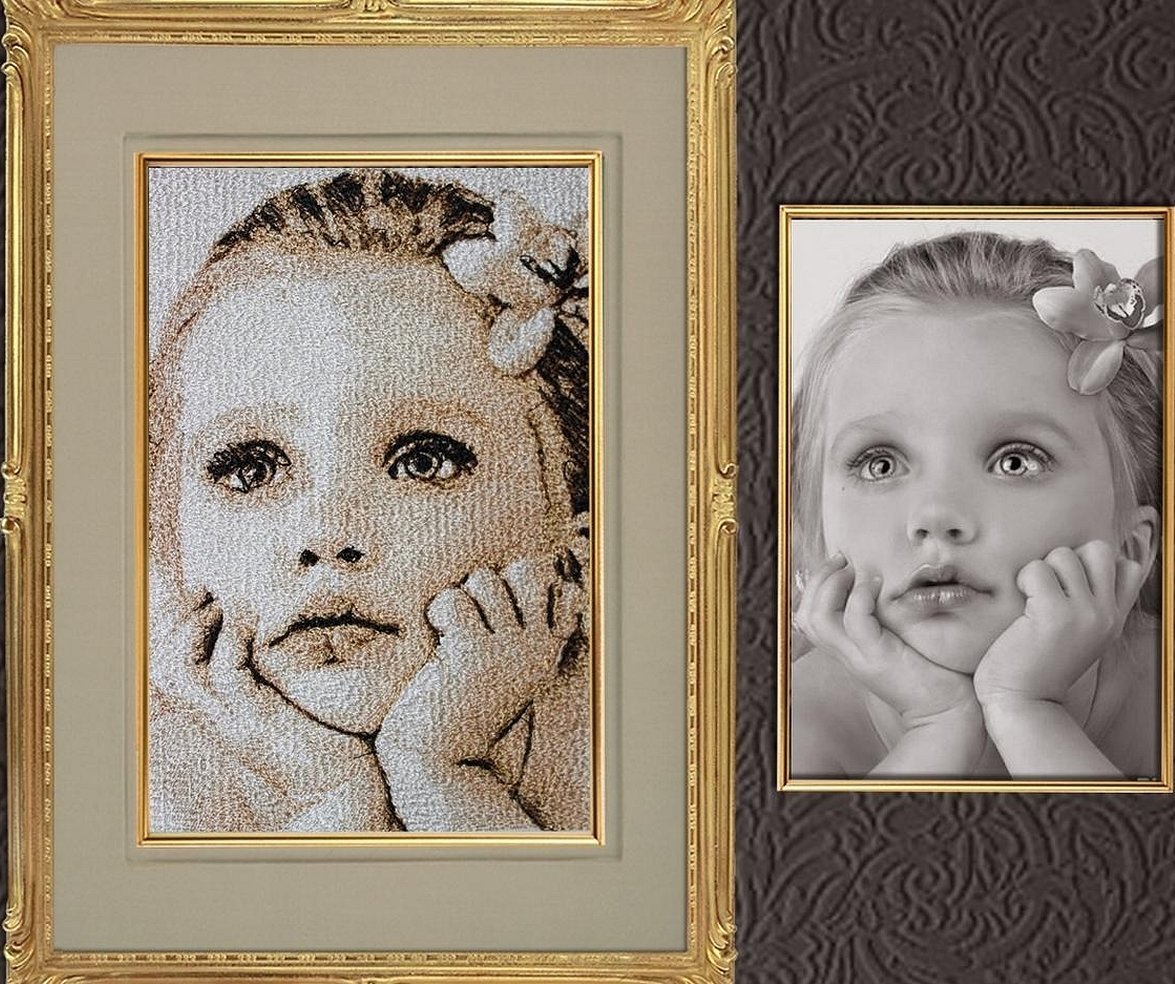
A self-embroidered portrait is not just a photo, but a work of art that will be imprinted in the memory of friends and family for life. To create a cross-stitch pattern, you need to choose the right photo, learn how to use an embroidery program and promptly correct any errors that arise during work.
- Programs for viewing and creating embroidery
- How to make a cross stitch pattern in Pattern Maker
- Select photo
- Photo processing
- Composing blends
- Removing single crosses
- Extracting the schema
- Other options for creating a diagram from a picture
- Conversion table for floss threads
- The most common mistakes when developing a pattern from a photo for cross stitch
Programs for viewing and creating embroidery
You can cross-stitch your favorite photo or picture yourself using special programs.

Modern charts are easy to view and do not raise questions about how to create a cross stitch pattern. Popular and easy to use are:
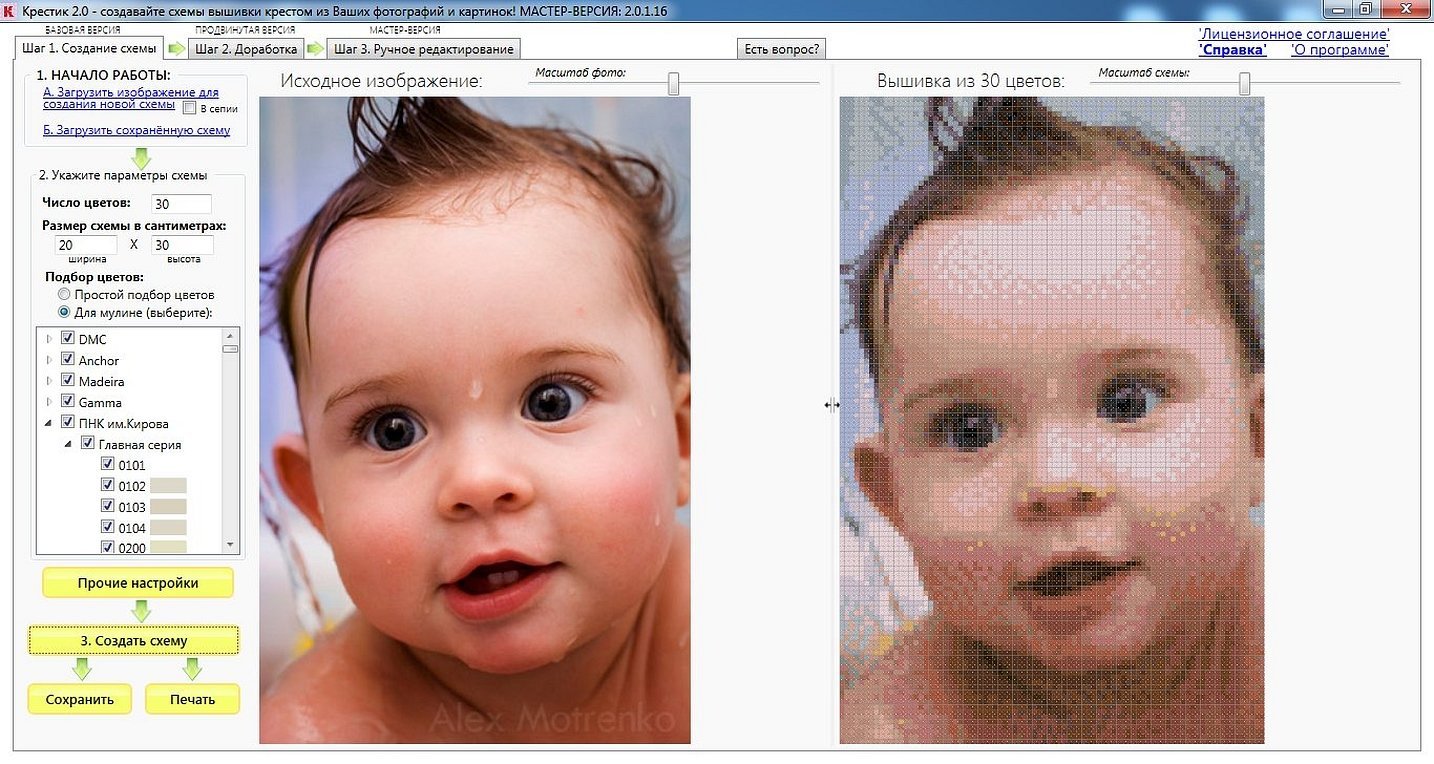
- "Cross 2.0" is an automatic program for creating embroidery from photos and picturesque drawings online, removes unnecessary stitches, selects threads, and refines patterns. All that remains for the craftswoman is to come to the store and select the required amount of floss.
- Pattern Maker for Cross stitch is the best of the available Russified options, the set of tools allows you to process and refine sketches at any stage, the “viewer” program will help you to get acquainted with the picture in advance and print it in real sizes.
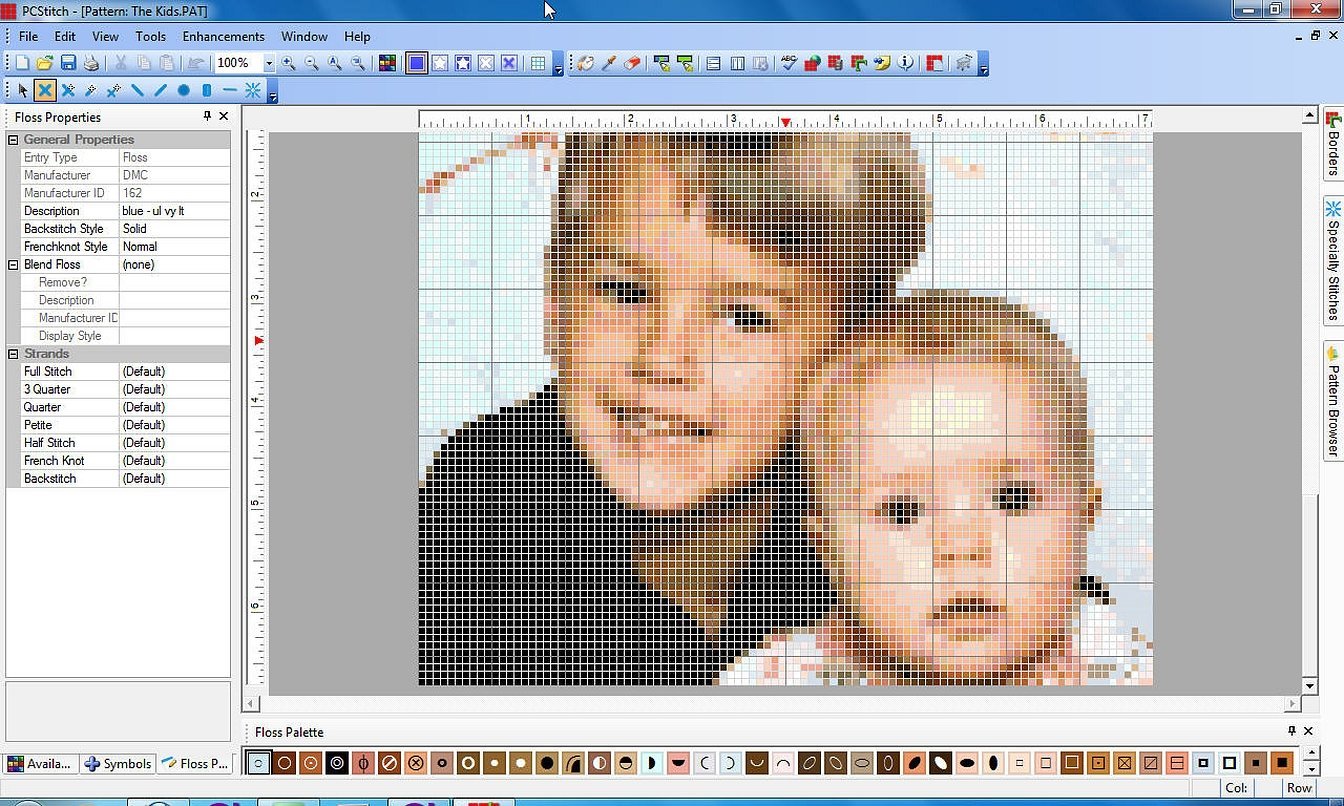
- PCStitch7 is a Russified version with a convenient and simple interface, designed for the development and embroidery of small and large paintings, despite the large toolkit, it has a small drawback - an imperfect color conversion algorithm.
- PCStitch7 is the best CP in terms of color shade conversion, saturation and brightness are guaranteed for craftswomen, it is intended for professionals, a difficult interface, inconvenient printing and high cost are the main disadvantages.
Please note! It is important to understand the specifics of working with each of the proposed options, including downloading the CP and thoroughly studying the tools in practice.
How to make a cross stitch pattern in Pattern Maker
The program has a wide functionality, allows you to create graphics, independently or with photos, implement your ideas by embroidering drawings and patterns on canvas. After registering and downloading the Russified version, it remains to follow the step-by-step recommendations offered in the interface.
Select photo
The best photo is one taken indoors in cloudy or sunny weather, without glare or shadows. The selected photo is imported into the laptop so that it can be easily found later. Saving the image is done by hovering the mouse over the files in the following sequence: file -> open -> next -> make the image a background for the outline -> uncheck the "conversion" button -> next.
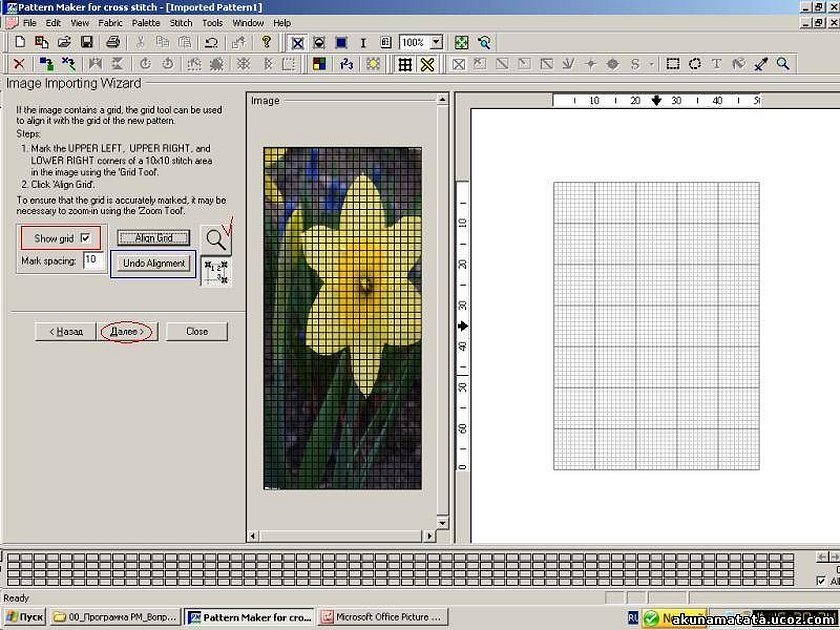
Photo processing
If everything is done correctly, the pattern will appear in the computer window. It remains to determine its parameters (standard - 200 cells, DMC, 90 colors). When doing the work yourself, you should think about a spare couple of centimeters in the parameters for framing the picture in a frame. The more crosses in the product, the better the image will be. The quantitative selection depends on the type of canvas. When determining the parameters "by eye", it is important to find the golden mean.

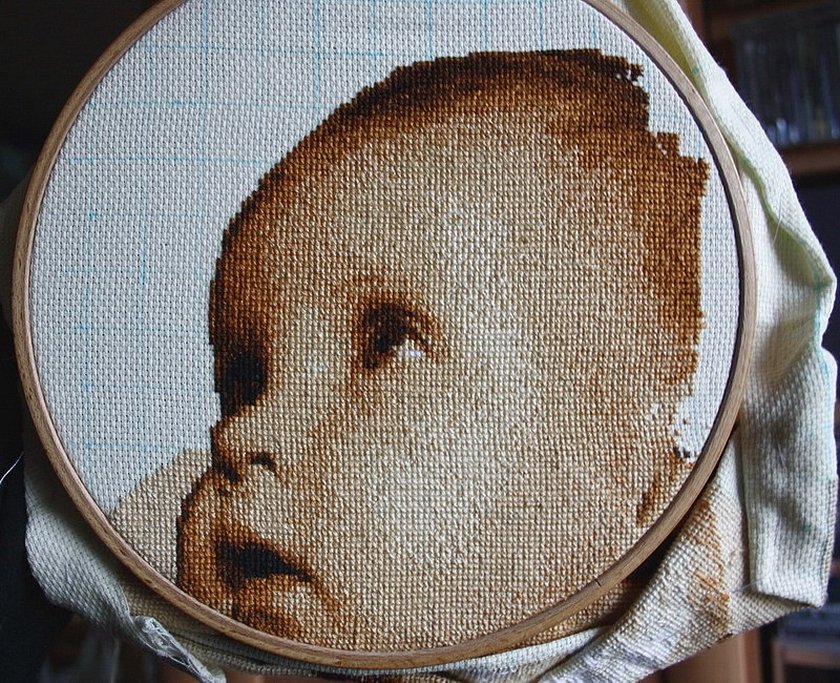
Important! The main reference point in a portrait is the face and eyes, which should be clearly outlined and clear. Removing such facial defects is a must.
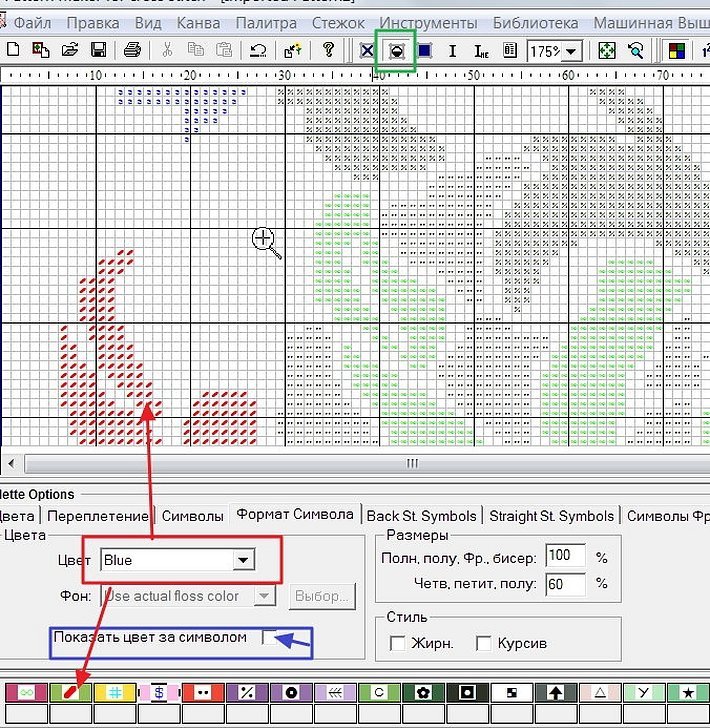
Composing blends
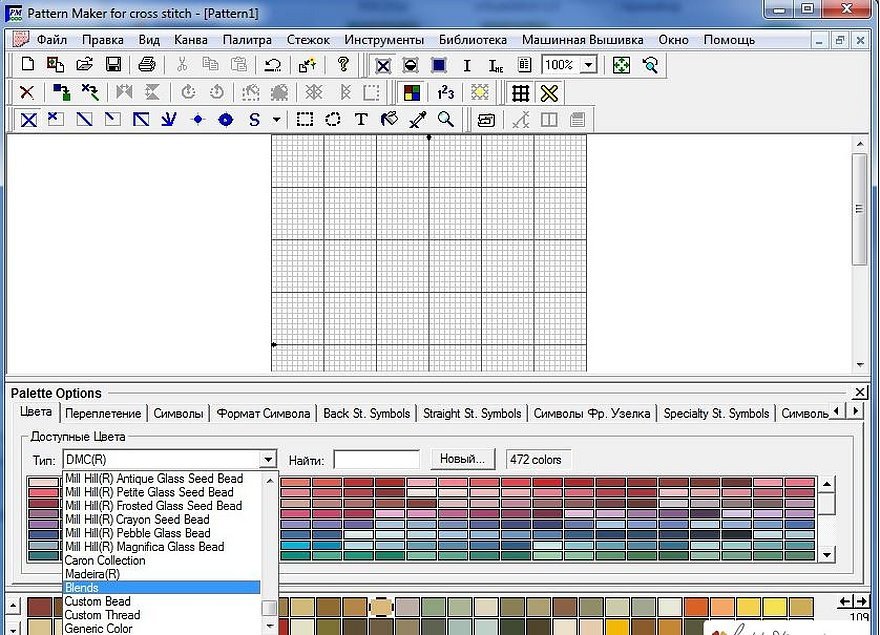
The appearance of a drawing on the screen over the cells indicates that the work is being done in the right direction. Before creating blends, you need to understand the color palette, which will appear in the lower sector of the program. To do this, open the Colors tab, enter the desired thread size and double-click to save. The stitch set for the same colors will be uniform. To define it, you also need to check the box on the tab and save.
Blends are created by pressing the Blends button in the Colors tab, taking into account the thread. For example, one can be DMC, the second - Ancho. The tape palette is saved by pressing the "ok" button.
Removing single crosses
At the final stage, a drawing with single empty crosses may appear before the user's eyes. You can get rid of it by replacing it with another color. To do this, you need to place the cursor on a single cross and, without releasing the left mouse button, select the desired shade.
Extracting the schema
The photo is taken, the palette is ideal, all that remains is to extract the saved file with the specified dimensions saved to the parameters of an A4 sheet (approximately 100 × 70 cells) and print it.
Other options for creating a diagram from a picture
Perhaps it is easier for the craftswoman to work with symbolic patterns using the following cheat sheet: click the tab "view" -> symbol -> file -> export to graphic file. The CP will automatically take care of other options for creating a pattern from a picture. If it is inconvenient to use Pattern Maker for Cross stitch, it is worth trying other CPs, which are easy to find on Internet resources.
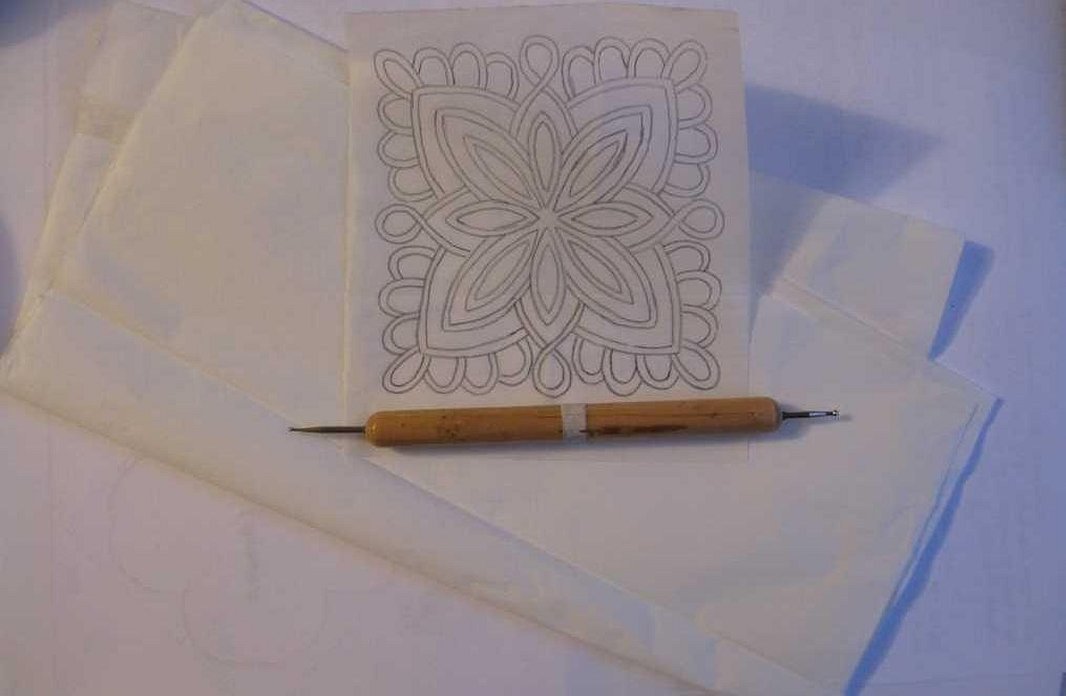
In the absence of experience working with computer equipment, girls prefer to act with time-tested methods, for which a pencil, a picture, an eraser, a floss color card and graph paper are enough. In comparison with modern possibilities, this method is not considered the simplest, since it requires imagination and the ability to embody a drawing on paper.
The created drawing should be transferred to graph paper or tracing paper, and then to a sheet of paper in a box. Then you should turn on your imagination and color the drawing cell by cell with pencils. You can use an eraser to adjust the color shades. After receiving the desired palette, the template is ready for embroidery. All that remains is to buy the working material and start fulfilling the set goal.
Important! The canvas parameters should ideally match the needle size. It is very reckless to sew on a 22-gauge canvas with a #16 needle: a thick one will leave large holes, a thin one will make the work inconvenient. Recommended parameters: a 16-gauge needle for a 26-gauge canvas.
This method is ideal for beginning students whose main desire is to embroider by hand and master the basics of the craft.
Conversion table for floss threads
The Crestik floss conversion table converts color palettes from one shade to another, with a total of 5 palettes available (DMC, Gamma, Anchor, Madeira, PNK im. Kirov). It is easy to use.

- In the field indicating the floss palette, you must select the desired option, otherwise the pattern will be completed by default in DMC.
- To enter a list of colors, you should open the desired tab and confirm your decision by pressing enter on the keyboard.
- A field with all the entered color numbers will appear in the table and will be displayed in the right corner.
- To select a palette, you need to check the boxes for the corresponding colors, or, conversely, uncheck them.
- If the required shade is not available, a corresponding message will appear on the screen.
- An incorrectly entered color can be deleted by double-clicking the mouse.
The use of the table is advisable when embroidering with floss threads. If the result is not satisfactory, you can use the search function for a similar color. After checking the tab, the program will automatically find an identical color shade and offer it to the user. In such situations, previously set colors will also be reviewed.
Please note! The program is not able to recreate the photo 100%.
This work is assigned to the craftswoman. Therefore, before completing the development of the scheme, you should once again make sure that the chosen color shades are correct. If the result is not satisfactory, the palette adjustment is carried out independently.
The most common mistakes when developing a pattern from a photo for cross stitch
The reason for the occurrence of errors is the lack of attention and perseverance. Frequently encountered mistakes made by experienced needlewomen, especially beginners, are:
- lack of the effect of a toothy Hollywood smile;
- dull eye color;
- highlights in the area of the lips, cheeks and nose;
- black spots in unwanted places;
- unnaturalness of complexion.
You can correct the errors using PhotoShop, Lightroom, PhotoStudio editors. The processed photo is saved under a new name and run through the program used to develop the scheme. The picture obtained in the photo editor will look comical, in reality - beautiful.
Important! It should be understood that Pattern Maker does not understand the difference between the color shades of the face and does everything automatically. Therefore, this moment falls entirely on the shoulders of the needlewoman.
When cross stitching, the most common mistakes are:
- incorrect thread fastening;
- error with floss tension;
- sequence of directions of crosses;
- raw edges of the base;
- incorrect needle parameters;
- insufficient number of color shades;
- runs instead of a diagram.
For your information! The above-mentioned shortcomings are periodically committed by all embroidery lovers. If they become frequent, it is worth taking a break from work and doing it later.
If the needlewoman has skills in working with Photoshop or other computer programs, it is possible to make a pattern for cross-stitching within a few hours. In other situations, it is worth wishing good luck, since training and studying how to work with the editor and CP can take several days. Perseverance and patience will help to cope with any problems that arise on the way to achieving the goal.


