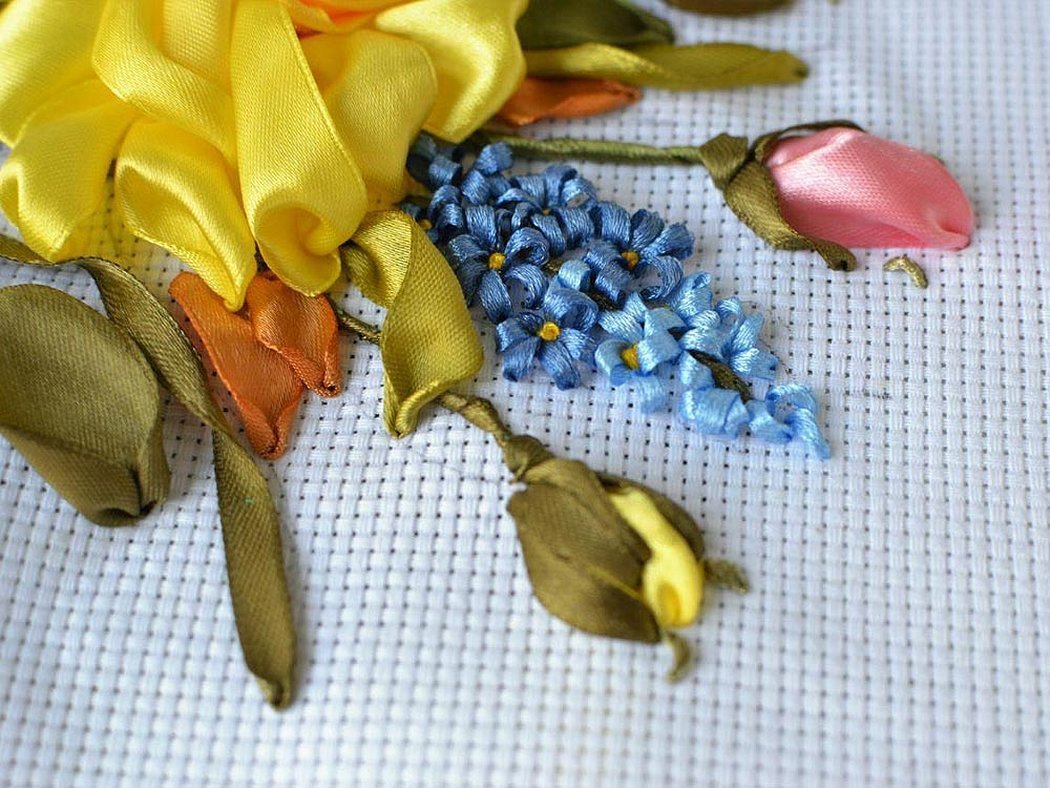
Ribbon embroidery allows you to create a three-dimensional image. With this technique, you can create beautiful pictures with bouquets of various flowers. Knowledge of the basics of embroidery technology and imagination will help you create a bright, unforgettable gift.
- Embroidery technology
- Devices for work
- Selection of needles
- Selecting fabric for the base
- Methods of making stitches
- Patterns for embroidery of flowers with ribbons
- Wild flowers and herbs
- Bouquet of phloxes
- How to embroider lilac from satin ribbons
- Small flowers
- How to Embroider Pansies with Ribbons
- Forget-me-not buds (French knot)
- Beautiful peony with ribbons
- Embroidered tulips in a basket
- How to insert the tape into the needle
- A sprig of rose made of satin ribbon
- Lilies of the valley with satin ribbon
- Fuchsia flowers
- Ribbon embroidery of daisies
- Japanese cherry blossoms in bloom
Embroidery technology
Ribbon embroidery "bouquet" consists of a large number of flowers, which are made using the same technology. Therefore, sometimes to create one picture it is enough to know the basics of ribbon embroidery.
Each flower consists of a separate section of satin. Work begins with small details. Gradually move on to larger ones. Ribbons are fixed on the back side. In this way, the entire picture is done. Different stitches are used for different flowers.
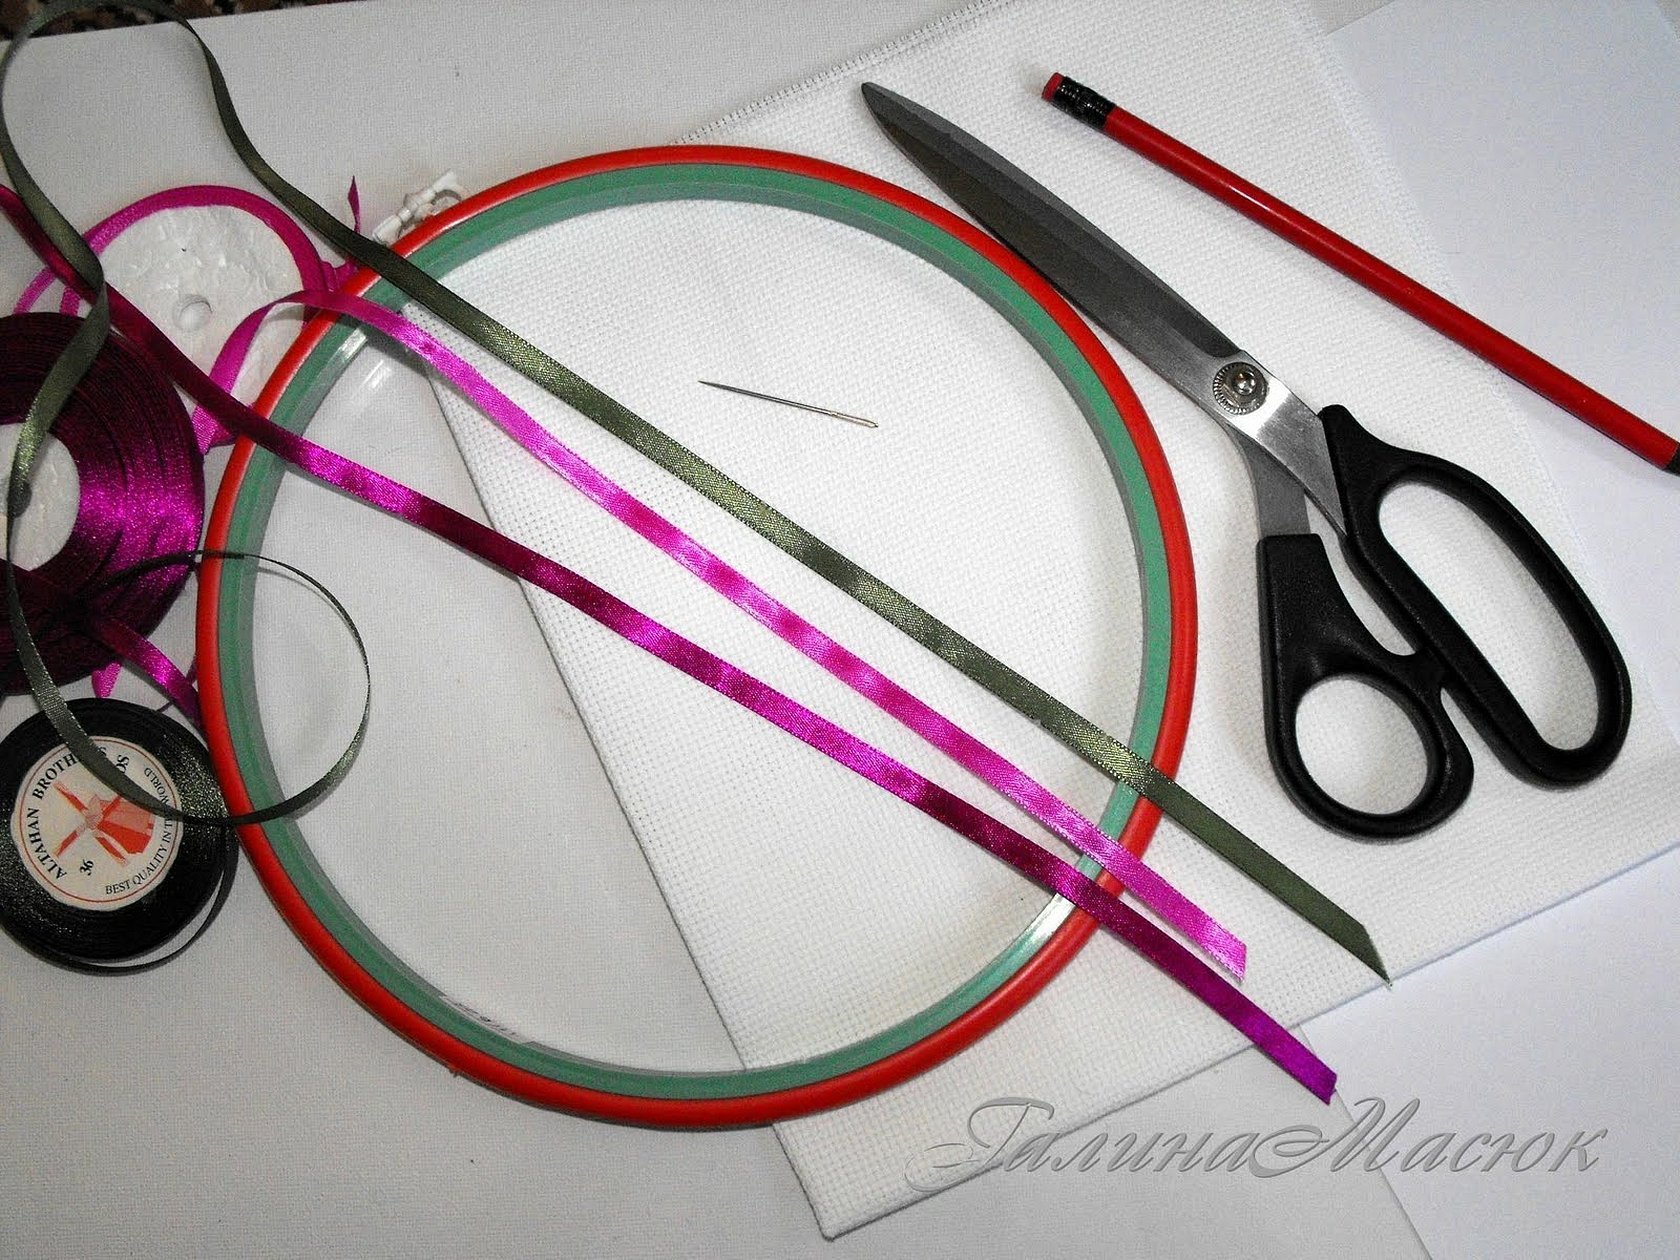
Devices for work
Pictures embroidered with ribbons do not require many devices. The needlewoman will need:
- hoop;
- floss threads;
- textile;
- needles;
- lighter for singeing ribbons;
- pencil;
- scissors;
- ribbons.
Auxiliary devices are rarely required. Sometimes a copy sheet is needed to transfer the pattern to the canvas. The ribbons and base must also be of high quality.
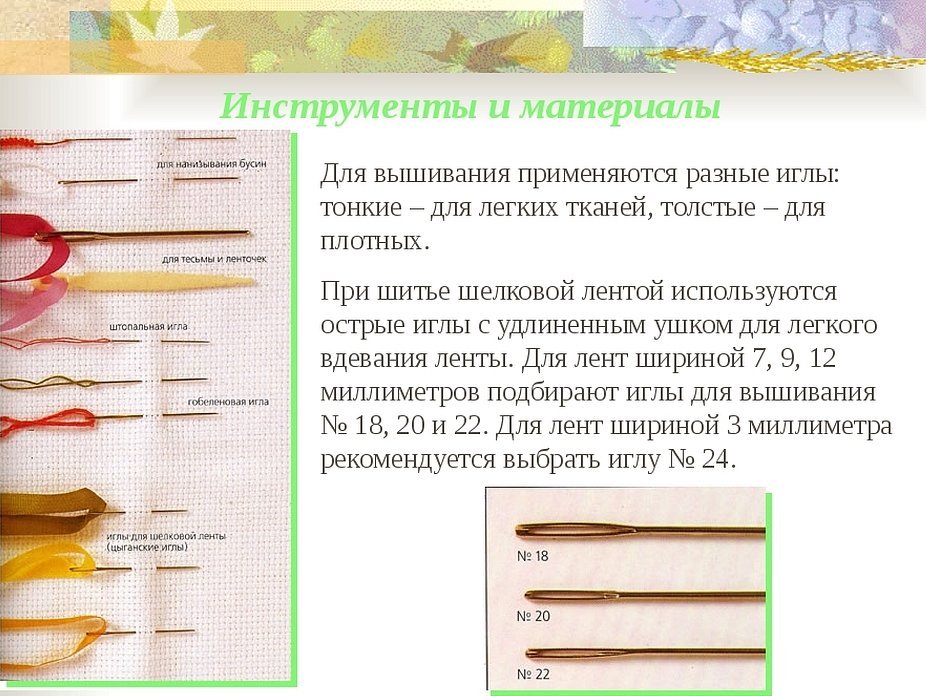
Selection of needles
The right choice of needle is the key to beautiful work. How to choose step by step:
- The eyelet should be large so that the strip can pass through without getting wrinkled.
- The needle should also be large enough to allow the holes to pass through the tape.
- It is recommended to use needles with a stainless steel coating.
The needle should not be a sewing needle under any circumstances. It will be physically impossible to insert the satin strip into it. And it will look untidy.
Selecting fabric for the base
You can embroider with satin not only on regular fabric, but even on leather and paper. But at the first stages of training, it is recommended to use linen or cotton. Unfortunately, the needlewoman has no right to make a mistake. Because the needle with the ribbon makes a large hole that will be visible. If there is a risk of ruining the canvas, take regular canvas for cross stitching.
Advice! It is recommended to use thick fabric for embroidery.
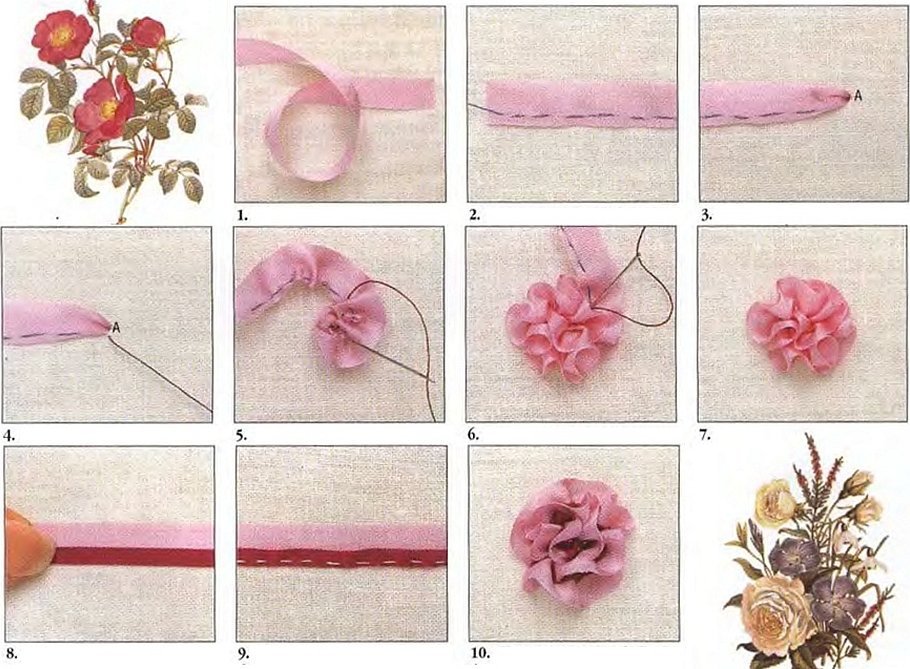
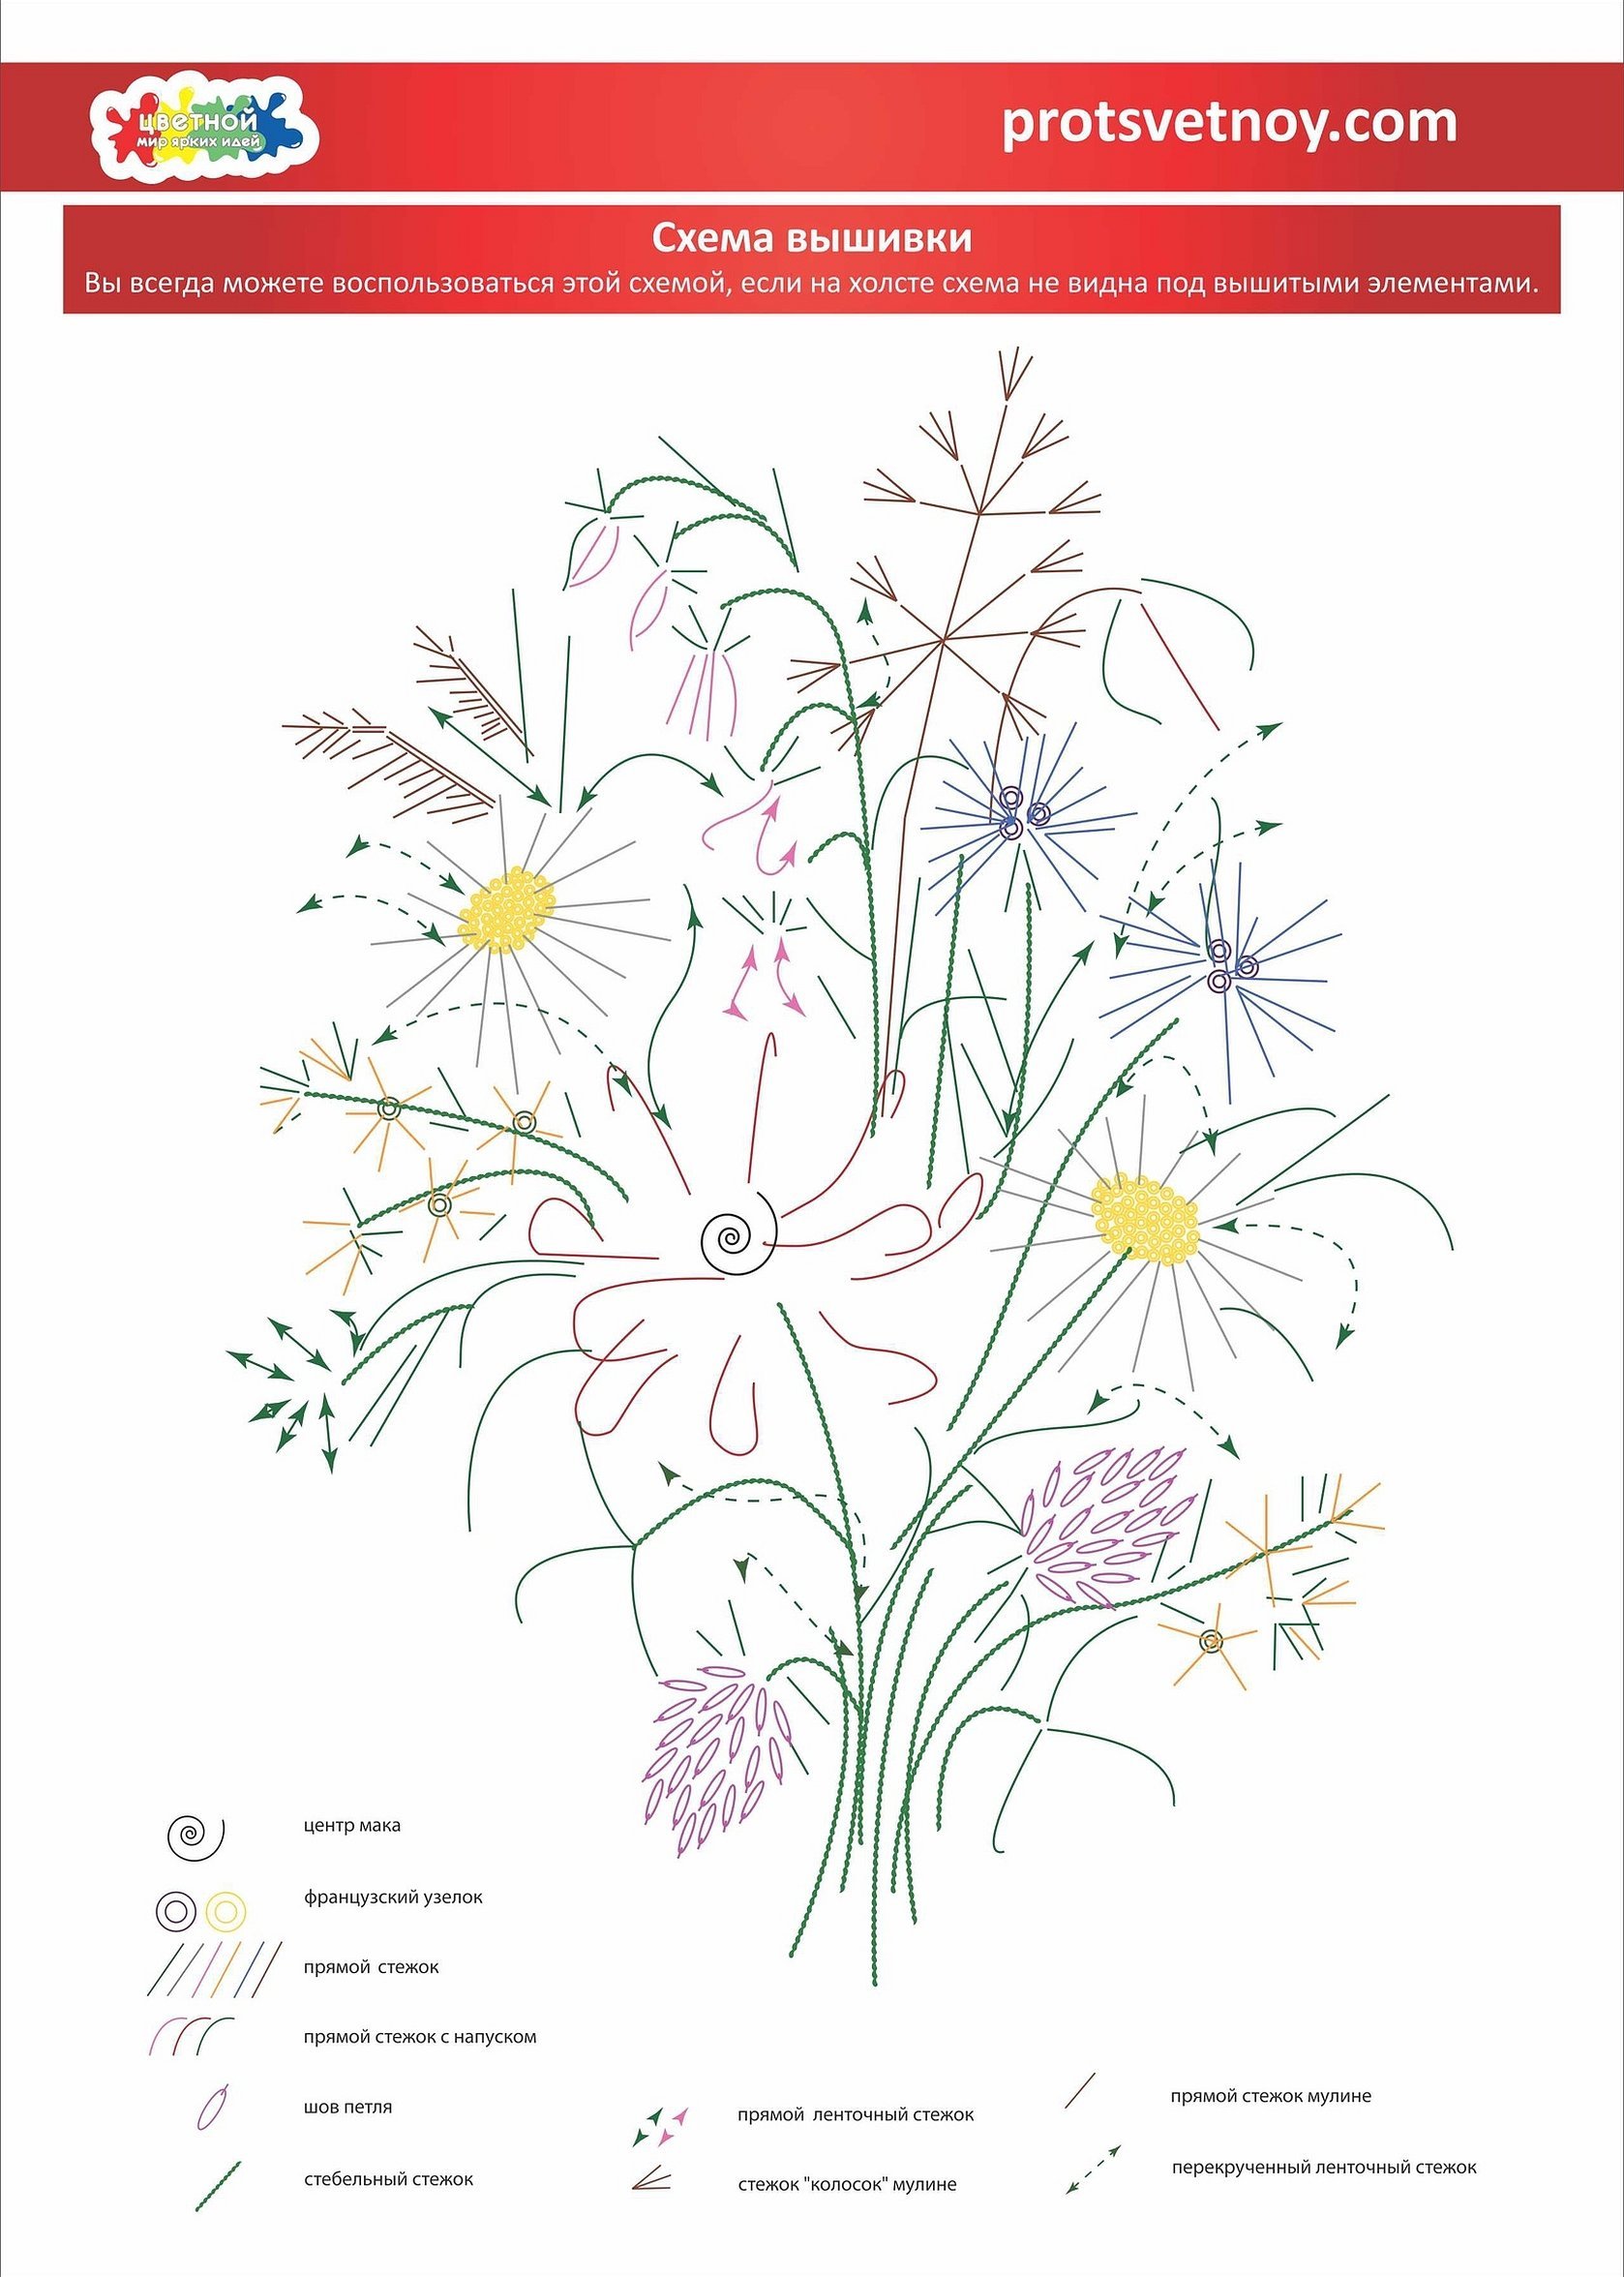
Methods of making stitches
The pasque flower looks interesting on the fabric, how to embroider it with ribbons depends on what stitches the craftswoman knows. Examples of basic stitches:
- Straight - thread the needle through the ribbon and make a stitch.
- Extended Twist - A straight stitch with a twist.
- With a curl - the needle is threaded into the ribbon.
- French stitch - wrap the ribbon around the needle and thread it back.
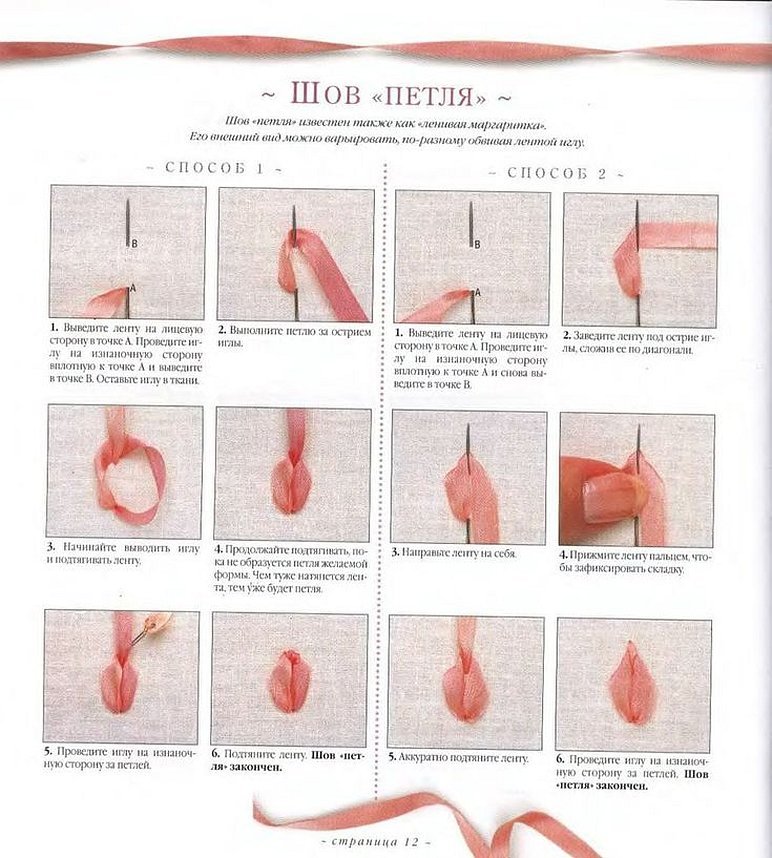
- An aerial stem is a loop secured at one end.
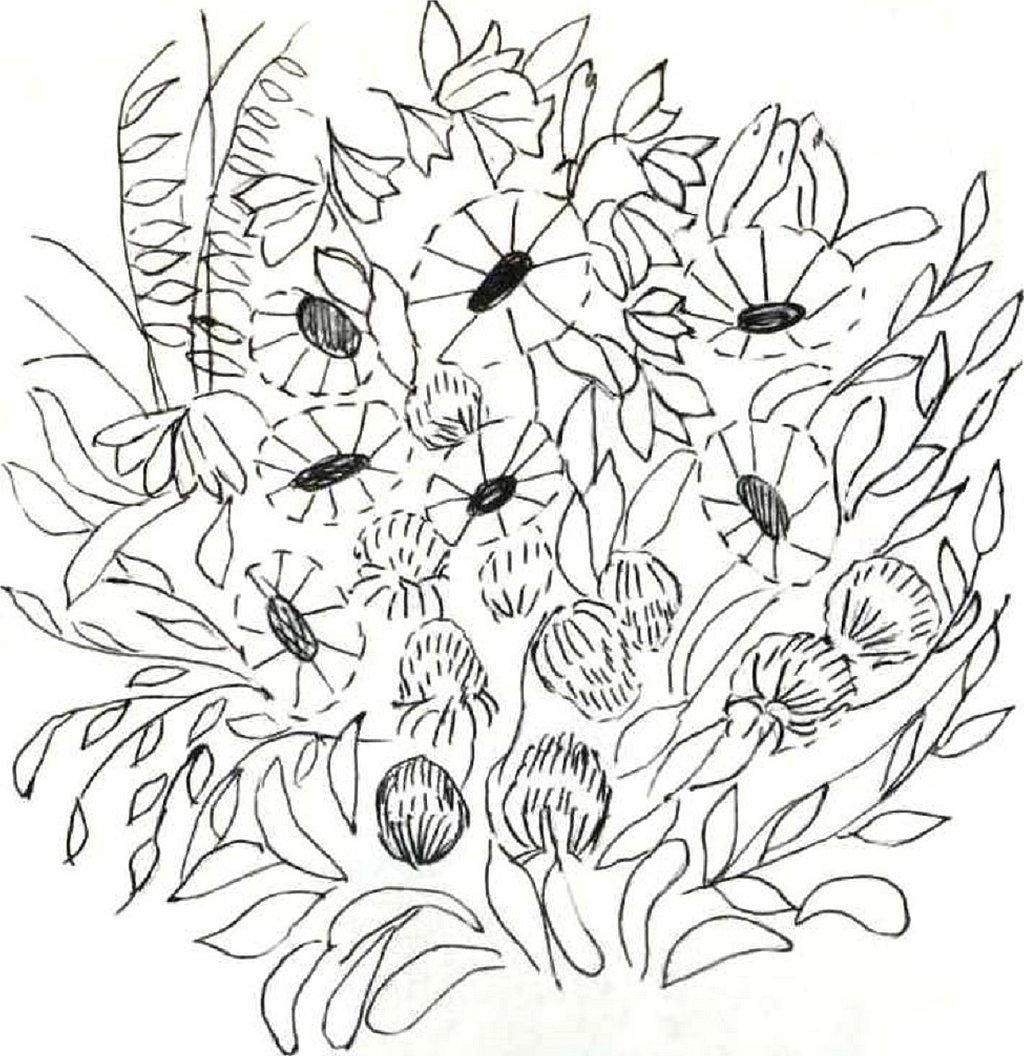
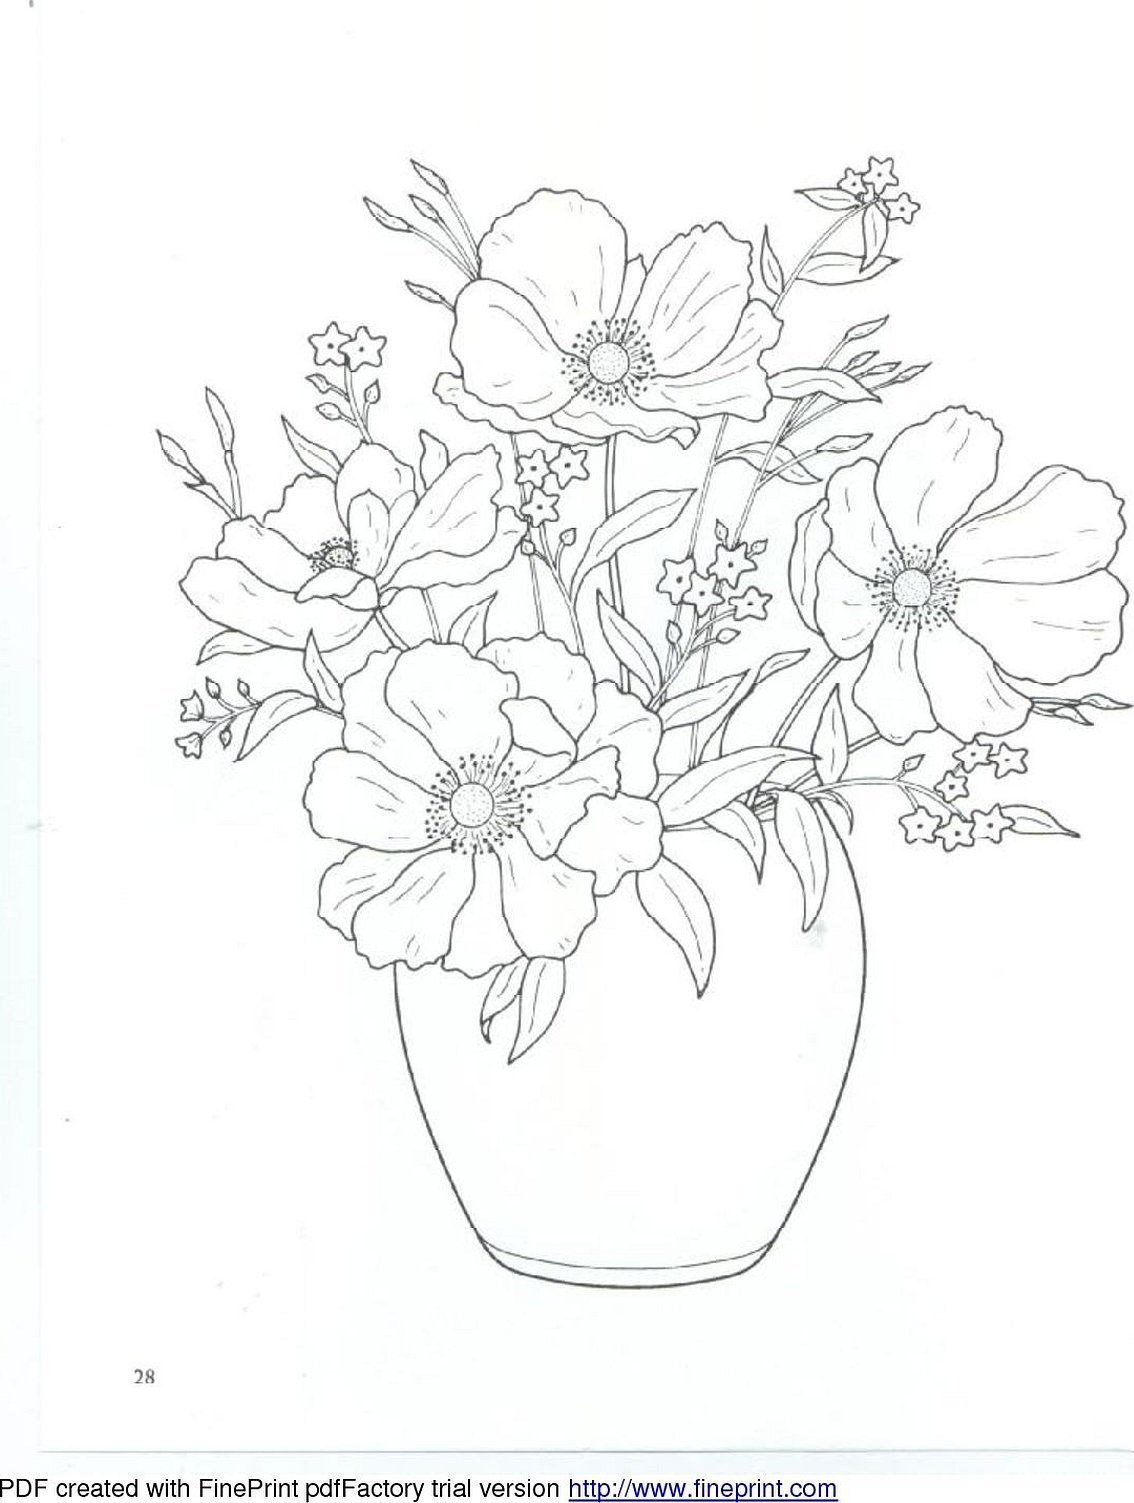
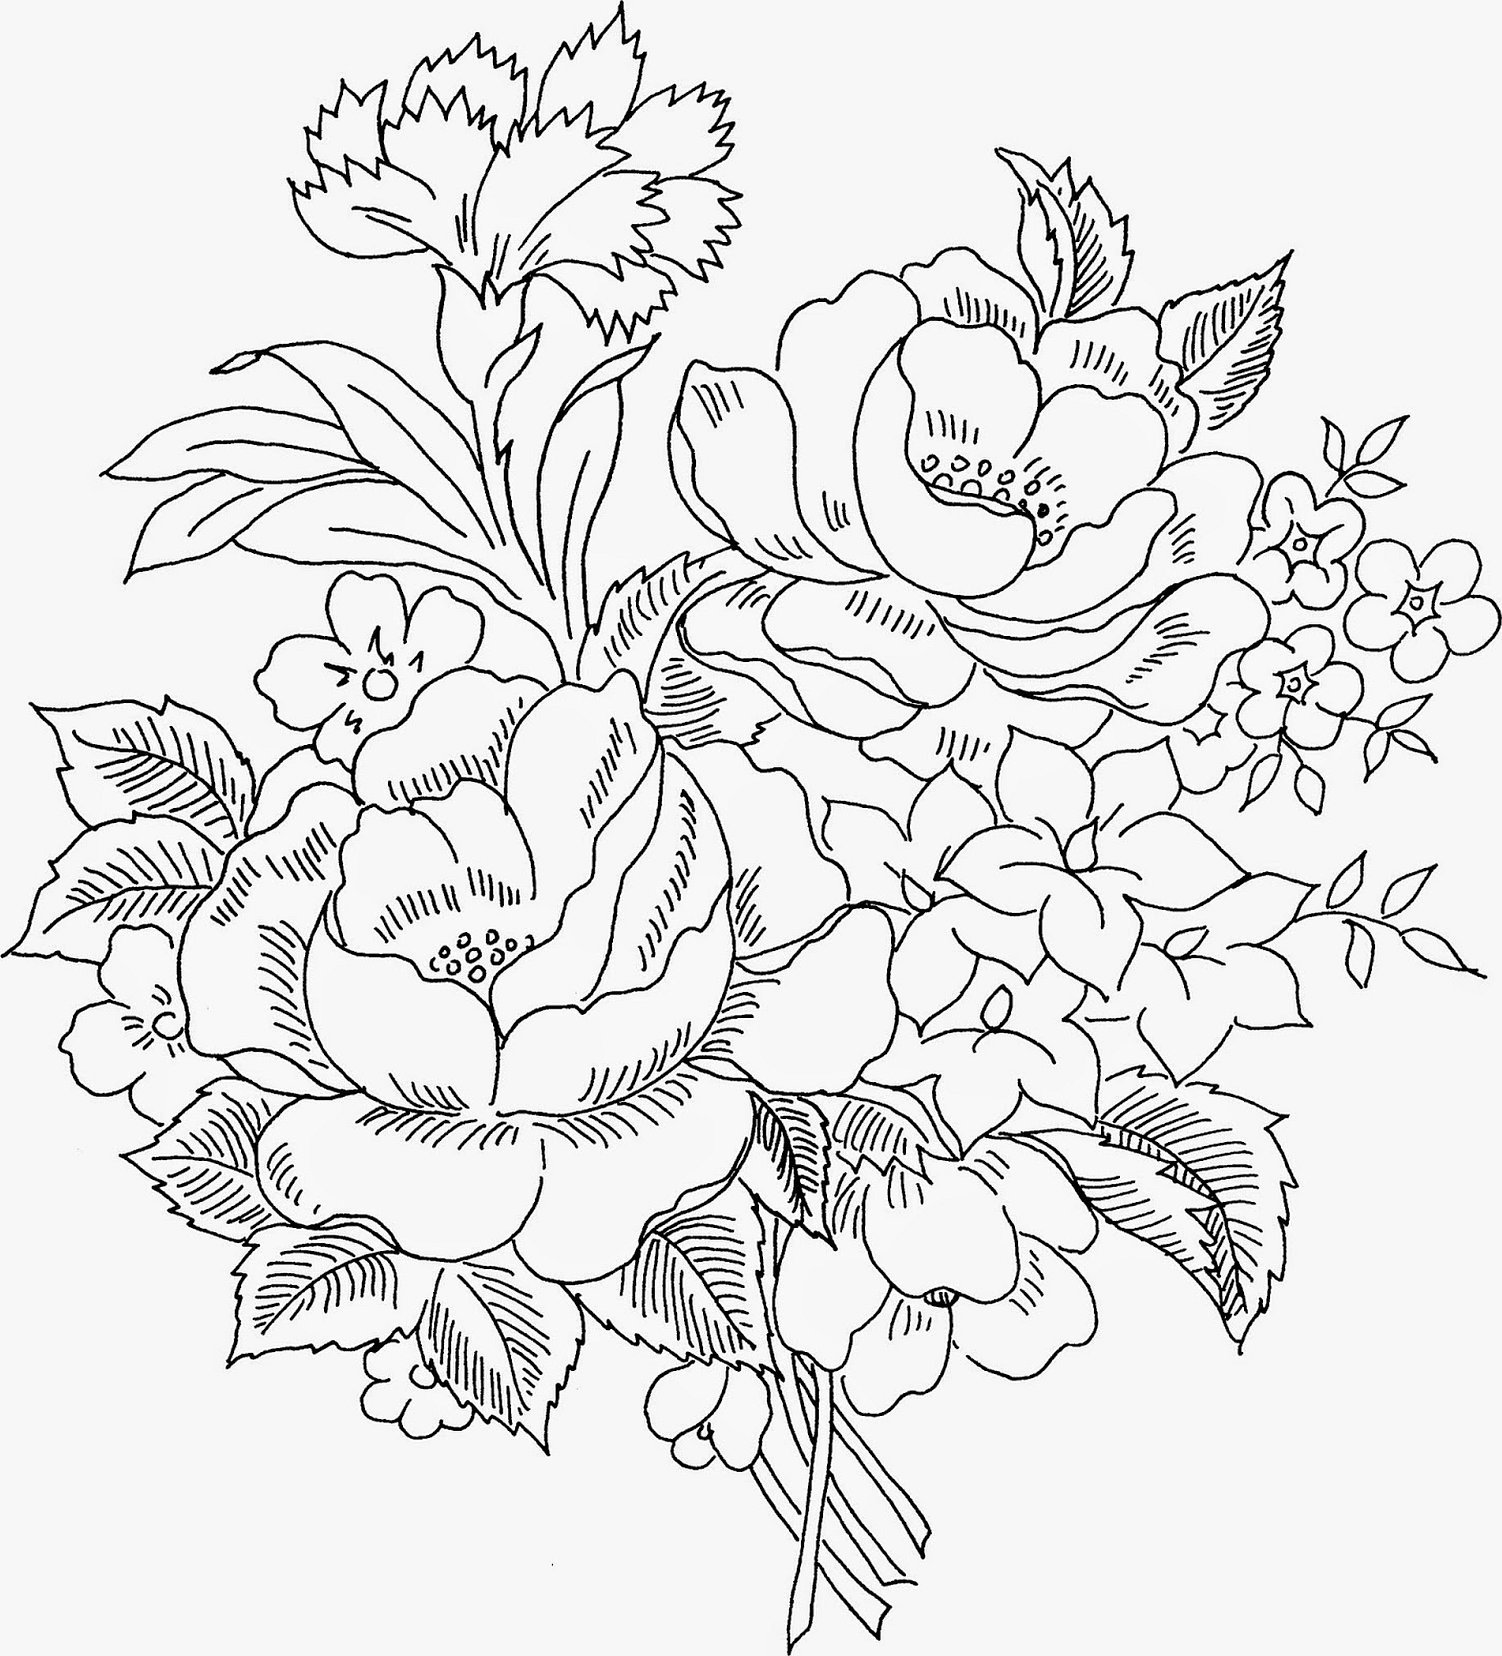
Patterns for embroidery of flowers with ribbons
Ribbon embroidery, whether wild flowers, roses or peonies, is embroidered according to a pattern. It does not look like a cross stitch pattern. There is no need to calculate anything here. The pattern is transferred to the fabric with disappearing chalk and then embroidered with satin. This type of embroidery is remarkable in that you can come up with an image yourself. At the initial stages of training, it is recommended to use ready-made patterns.
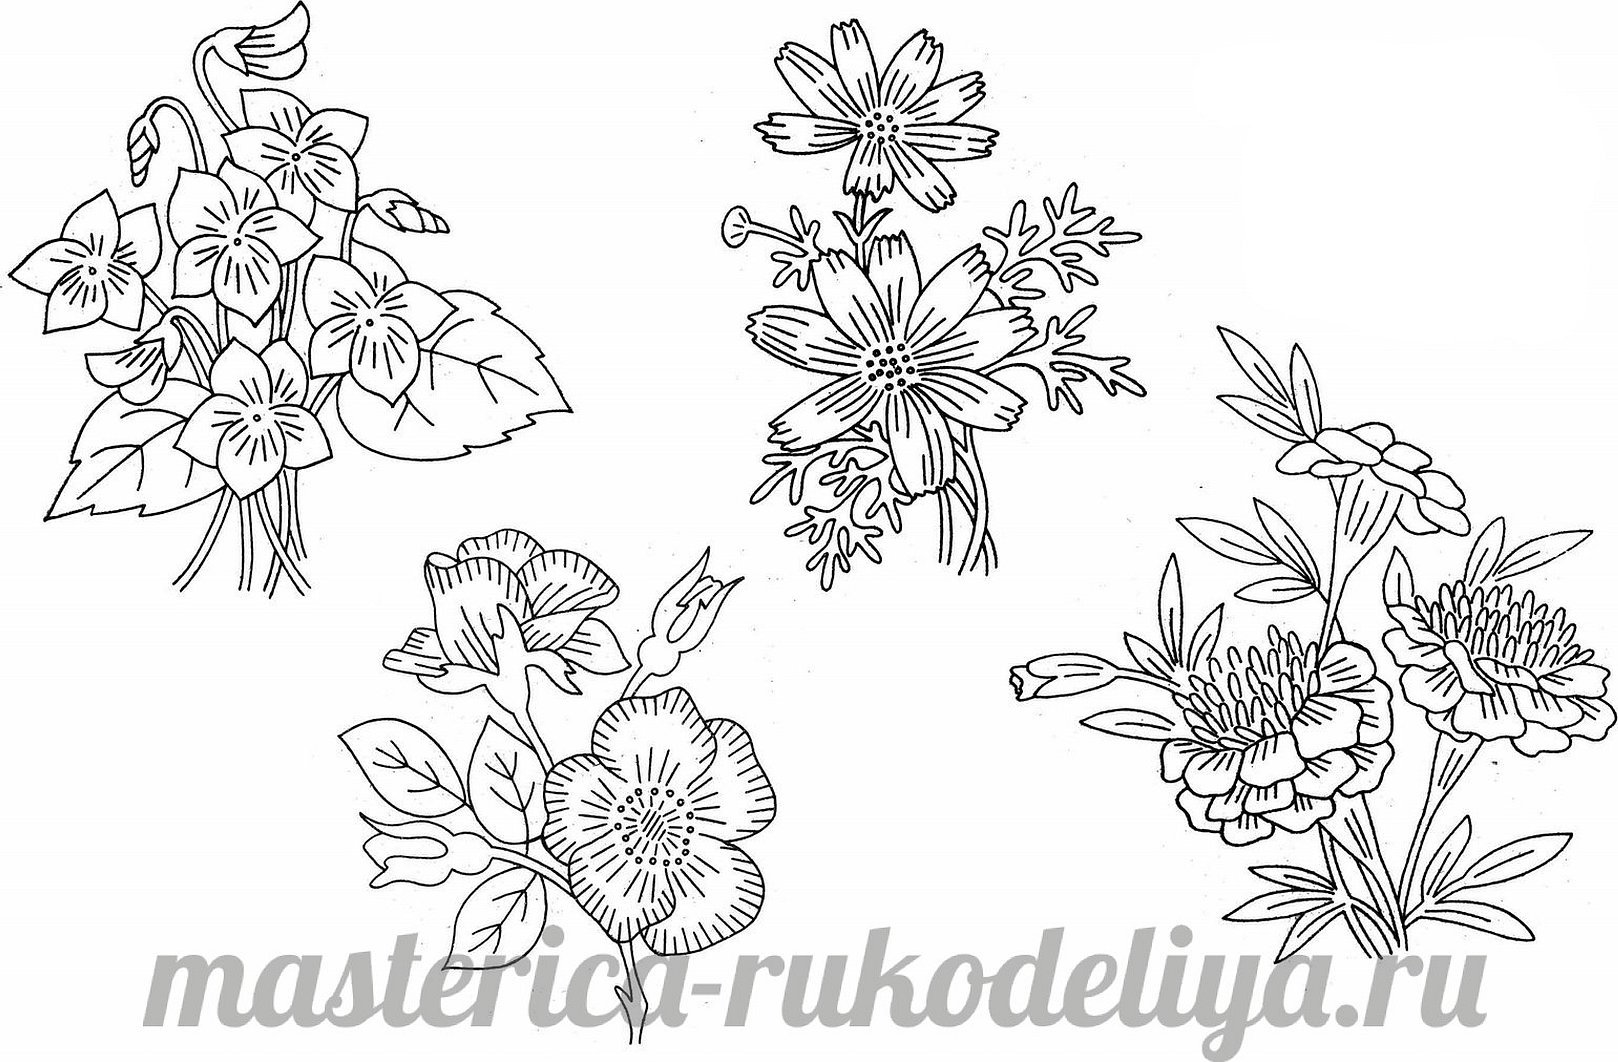
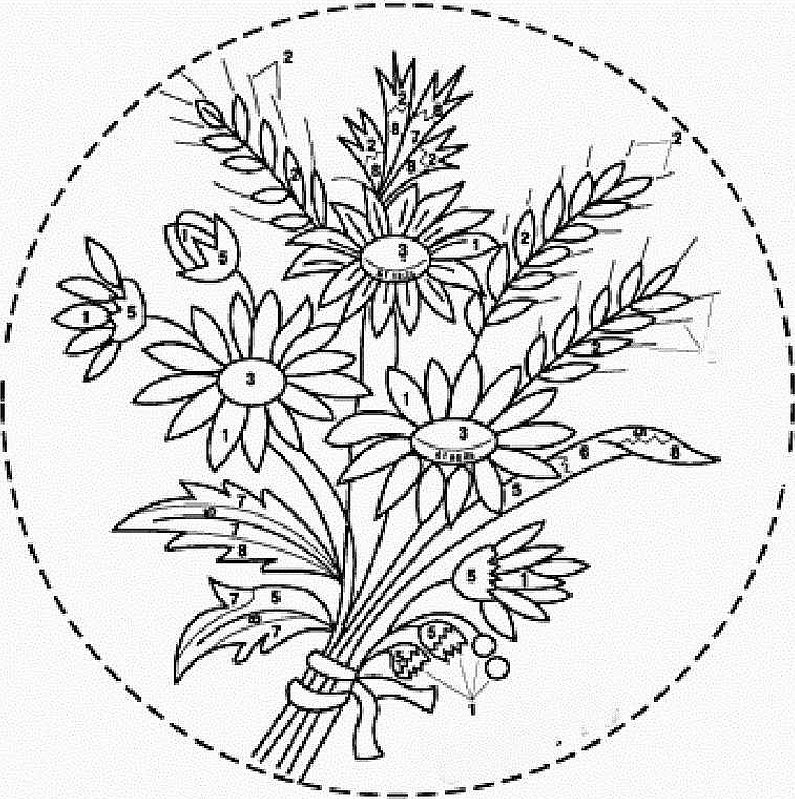
Wild flowers and herbs
Wild flowers are mostly small. Therefore, it is recommended to arm yourself with a thin ribbon. These are mainly violets, cornflowers, forget-me-nots and other small plants. Grasses are made with a simple straight stitch. You can add a satin stitch with combined embroidery. For flowers, use a French stitch. The pattern can be changed at will. Useful advice from craftswomen: it is recommended to make each petal a different size.
Bouquet of phloxes
A vase with phloxes looks impressive. To embroider the flowers, use a colonial knot. The needle is pulled through and placed over the strip. Pick it up from below and unfolded. Then the free end of the ribbon is thrown over the needle and a turn is made. Hold the knot with your fingers, pull the needle through the turns and bring it out to the wrong side. Pull the satin until an air knot comes out. Grass and leaves are embroidered with a straight knot.
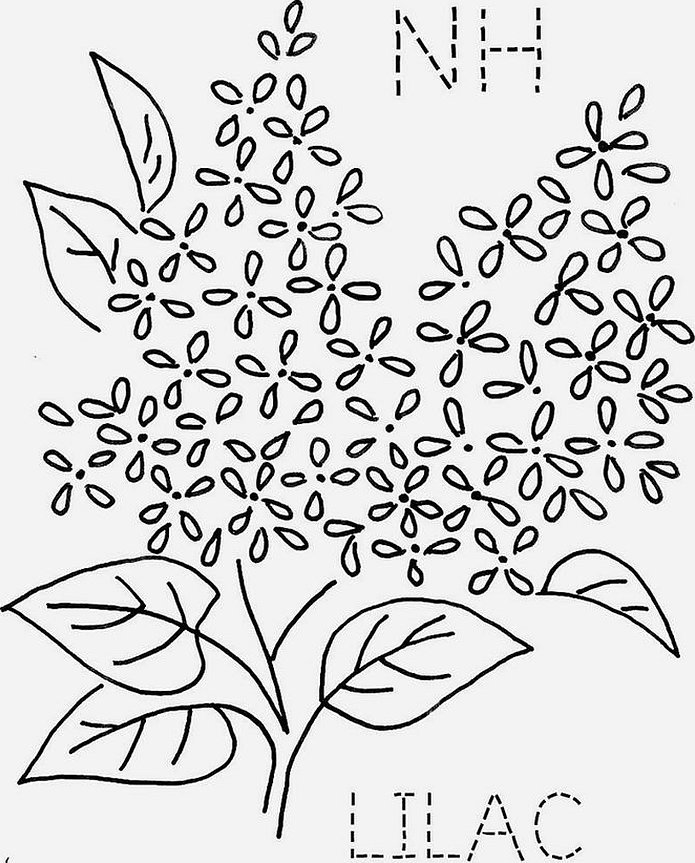
How to embroider lilac from satin ribbons
A beginner can even make lilacs with ribbons. To do this, take a strip of 4 or 6 millimeters. Bring it to the front side. Then draw it around the needle. Step back from the end of the ribbon by half a millimeter and insert the needle into the satin. You get a knot on the stem. Pull the material to the back side. Do the same for all the other flowers. It is recommended to take a ribbon of different shades. And make the flowers that are closer to the plan darker.
Small flowers
Cornflower can be beautifully combined with yellow ears of corn. The flower itself is embroidered with a 5 mm strip. It is brought out to the front side. The petal is laid out. It is grabbed with a thread. The satin is brought out to the back side below. Then the petals are made according to the same pattern. And the flower is ready. The ears of corn are embroidered with a simple basic straight stem.
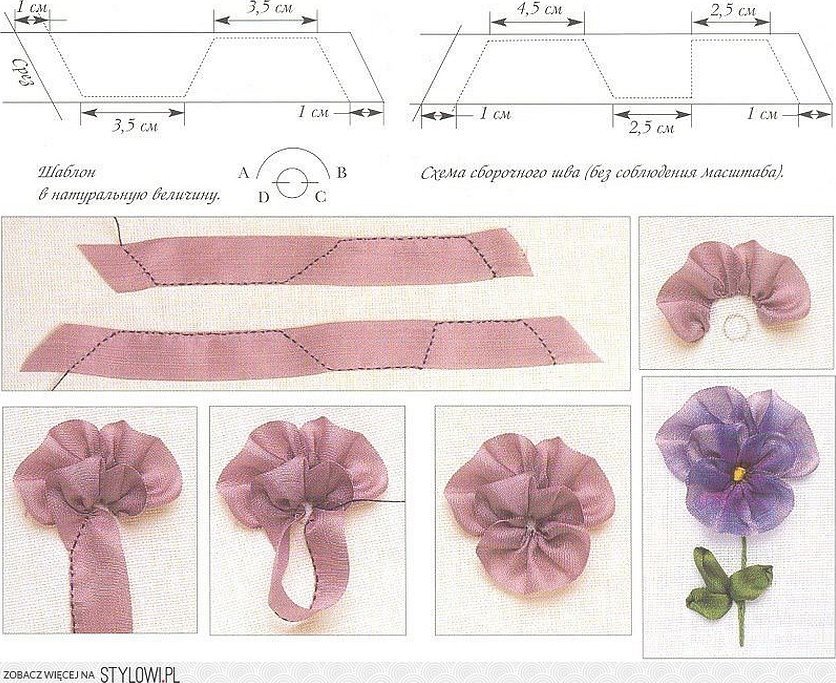
How to Embroider Pansies with Ribbons
Embroidering with ribbons in several layers will help to create beautiful pansies. It is recommended to take satin strips of medium width. For embroidery, use an air loop. First, form the bottom layer. It can consist of 5-6 loops. Then make smaller loops of the top layer. The grass can be embroidered with an ordinary stem from a thin strip.
Forget-me-not buds (French knot)
It is recommended to embroider forget-me-not buds with a French seam. To do this, pull the ribbon to the front side of the fabric. Leave the tip on the back side at one centimeter. Stretch the strip and throw it over the needle at a height of 1 cm from the fabric. Wrap the needle, continuing to stretch. Make 2 turns. Stick the tip of the needle 1 mm from the insertion point. Bring it to the back side and pull out the satin.

Beautiful peony with ribbons
In the MK embroidery of a peony with satin, ribbons of different widths are used. You need to cut the satin 7 centimeters long according to the width of the palm. Form the petals. Form 2 tendrils on a narrow ribbon. Round the ends. Make notches. Then make air stitches with a middle strip. Then make another level with a wide ribbon and finish with a core. The rose is embroidered in the same way.
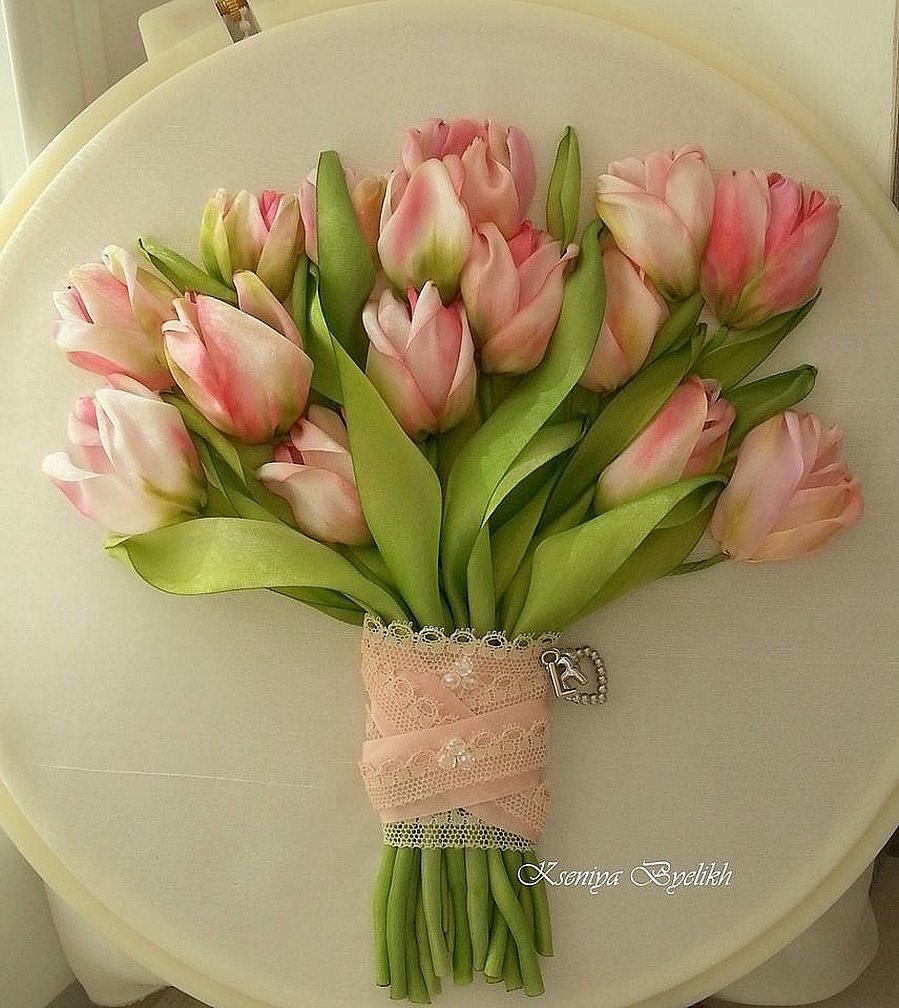
Embroidered tulips in a basket
The master class on creating tulips contains instructions on how to create the flowers themselves and the sequence of creating petals. The satin is pulled to the front side, then 5 centimeters are retreated from the edge. A hole is pierced and the satin is pulled. The straight stitch should not lie too tightly on the base. This is how the bud comes out. It can be formed from two voluminous stitches.
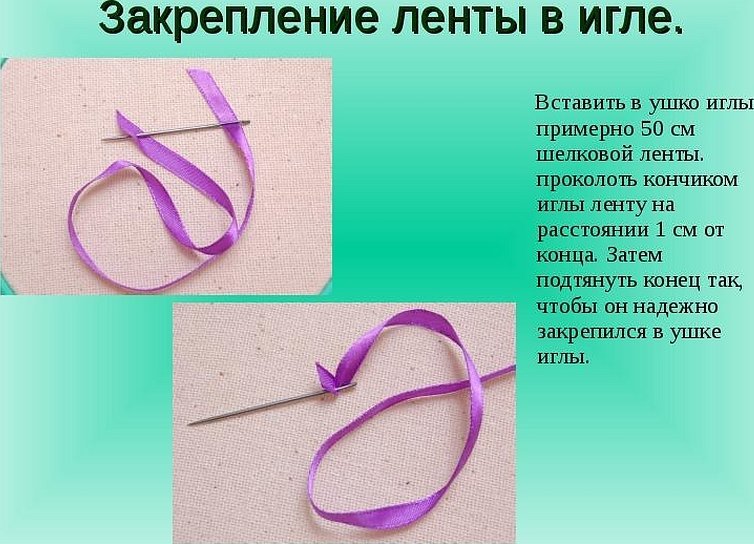
How to insert the tape into the needle
A bell or other flower must be formed correctly. To do this, follow the rules for fixing the satin in the needle and fabric. The satin is slightly burned. Inserted into the needle. Then the needle is inserted from the edge of the strip by 1 centimeter in the center. You get a sailboat. Pull the end of the burned strip. Tie a knot.
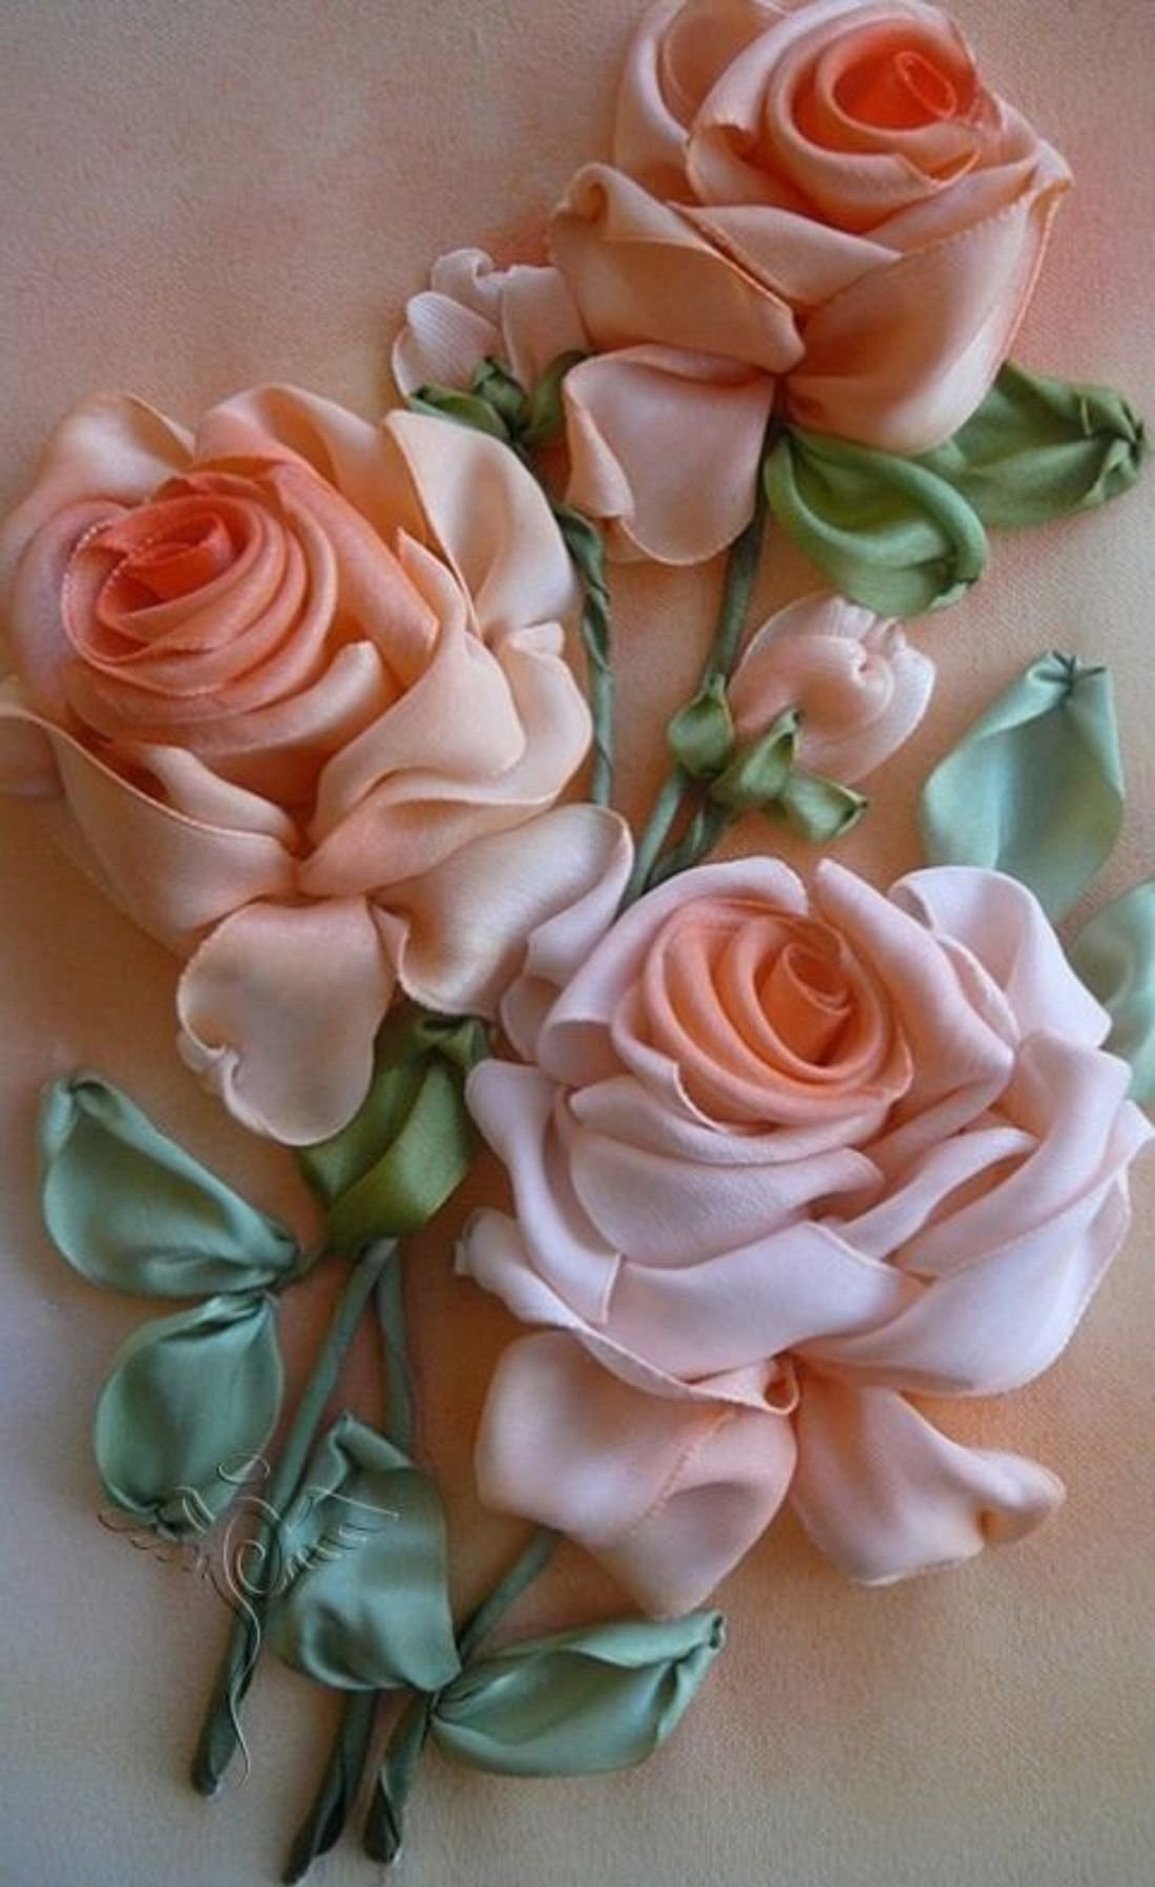
A sprig of rose made of satin ribbon
The ribbon for creating a rose is first twisted and the core is formed in the shape of a bud. Then another piece of the required length is taken. The needle is threaded through, twisted around the bud, making stitches. The rest of the flowers are created according to this principle. Then the stem and leaves are formed.

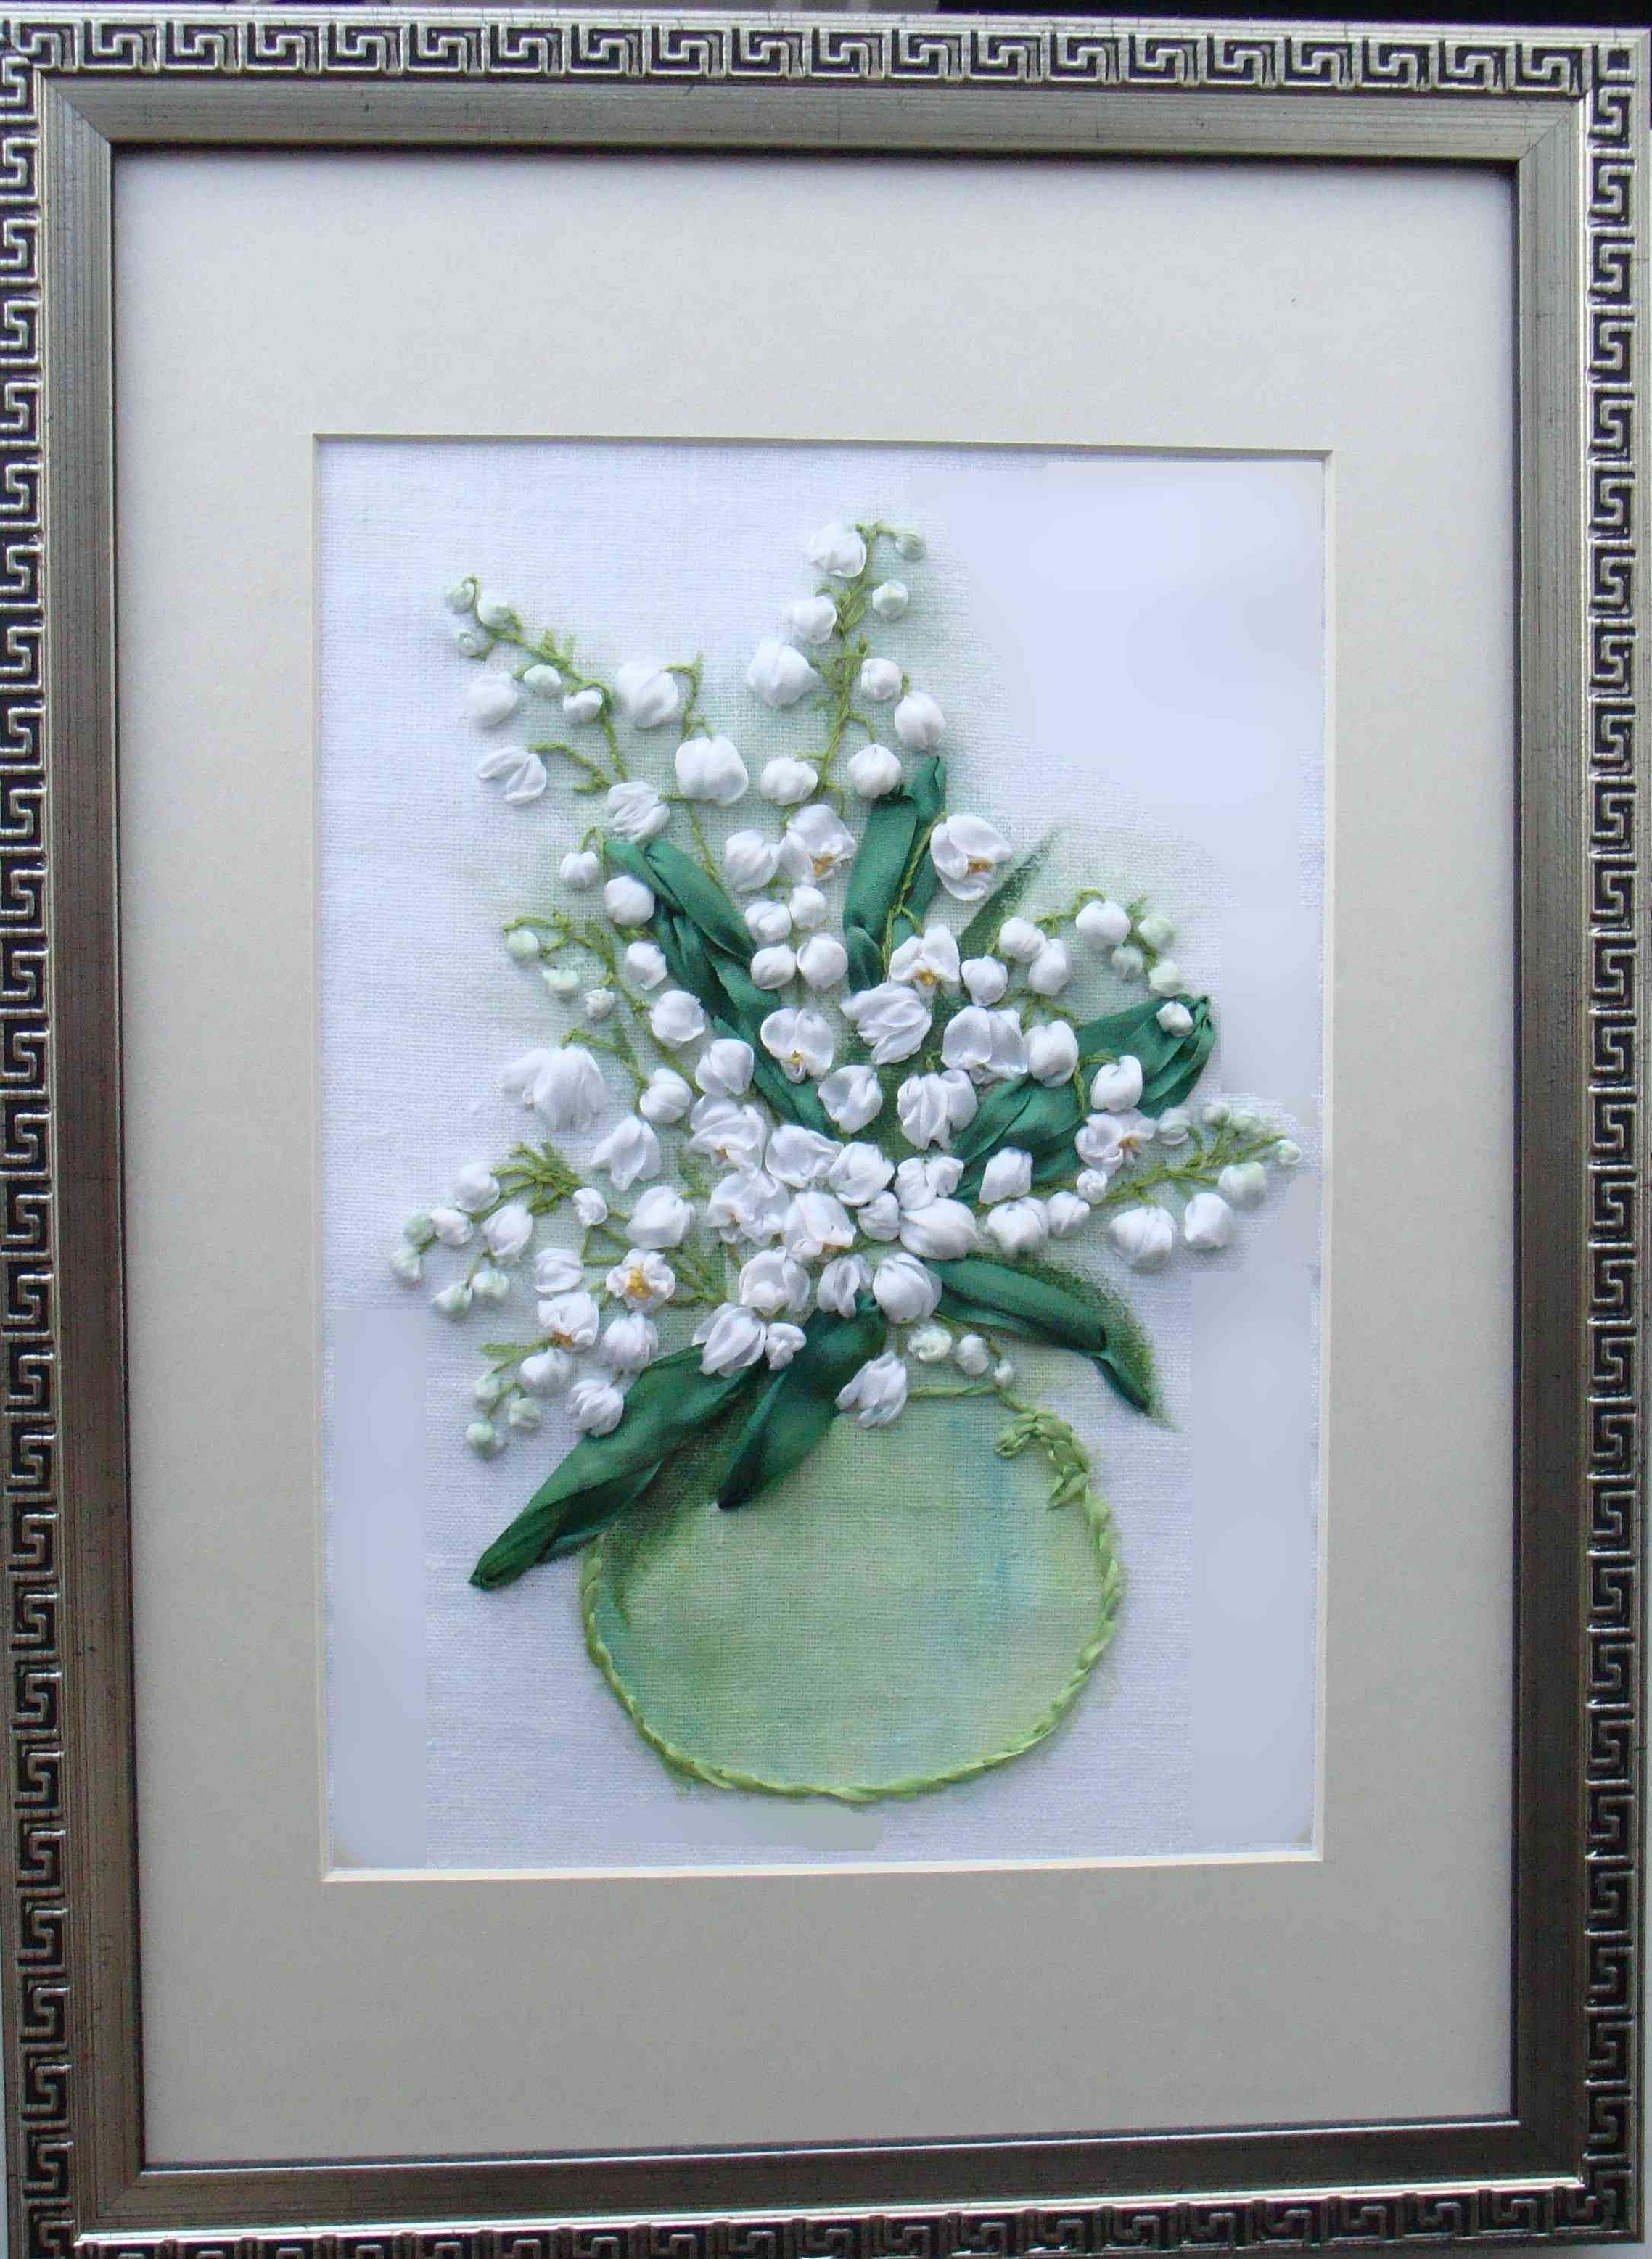
Lilies of the valley with satin ribbon
Meadow lily of the valley is made from a narrow ribbon. Make a twisted loop. Bring the ribbon to the front side closer to the top of the loop. Spread the petal using a stitch. Insert a pin into the loop at an angle from the right bottom to the left top. Make a curl by pulling. Fasten with a small stitch of white thread with another needle. Remove the pin.
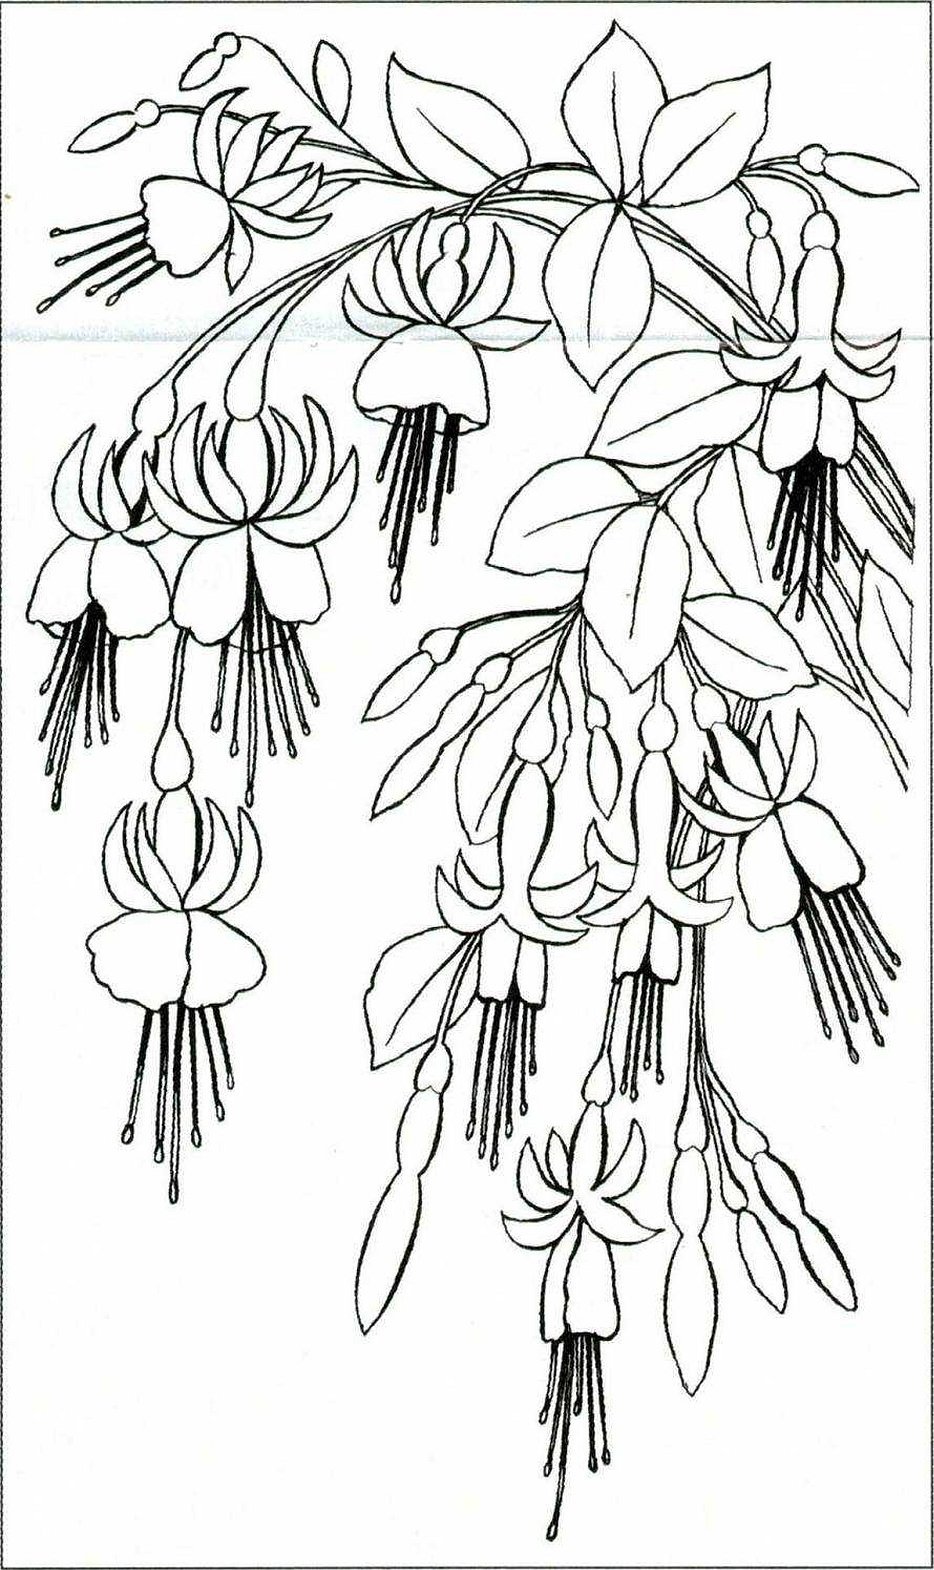
Fuchsia flowers
Poppy and fuchsia are among the most popular flowers that are embroidered with ribbons. For fuchsia, take pink ribbons. Form the fuchsia skirt. Put 2 straight stitches. Make stamens with embroidery threads. Over the lower petals, embroider a few more straight stitches of shorter length. Then form the buds in a darker tone.
Ribbon embroidery of daisies
There are many options for embroidering flowers with ribbons. You can also find daisies. This is an option for beginners. The needle is threaded through the ribbon. Straighten it. Make a stitch and bring the needle down. Make the loop a little airy. Bring the needle out next to the next petal you intend to stitch. Make another stitch. Do the same for all the other petals of the daisy.
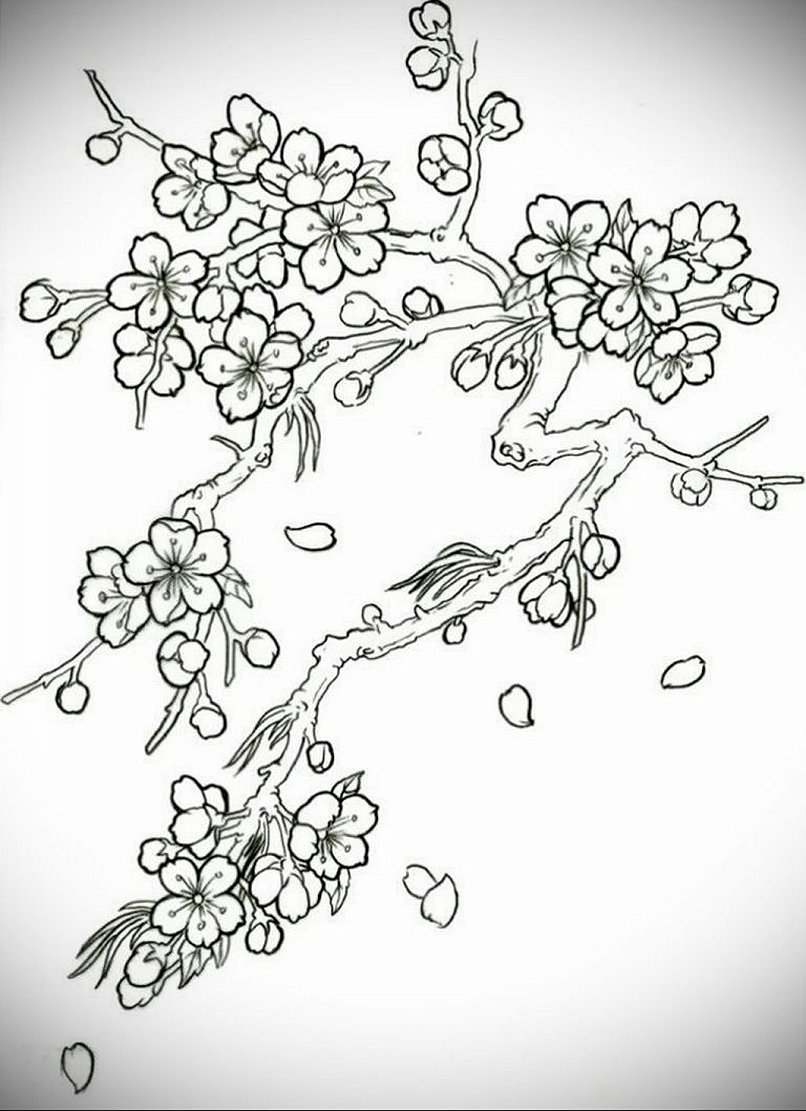
Japanese cherry blossoms in bloom
A master class on delicate sakura embroidery will help you create a spring picture. Flowers are formed with simple straight air stitches. You can take white ribbons and then color them a little. It is not necessary to embroider the branches with satin. They can be made with threads.
Ribbon embroidery is a simple way to make a three-dimensional picture. It is enough to know a few basic stitches. They can be used to create lush peonies and delicate miniature lilies of the valley. It is recommended to choose canvas as a fabric base at the initial stage of training. And then move on to thick linen.


