A real Waldorf doll cannot be bought in a store. The secret of the toy is that it is sewn entirely from natural materials by a mother for her baby. Inside, the toy is stuffed with sheep wool, which makes it soft. Even a novice needlewoman can handle sewing such a doll.
Description of Waldorf doll
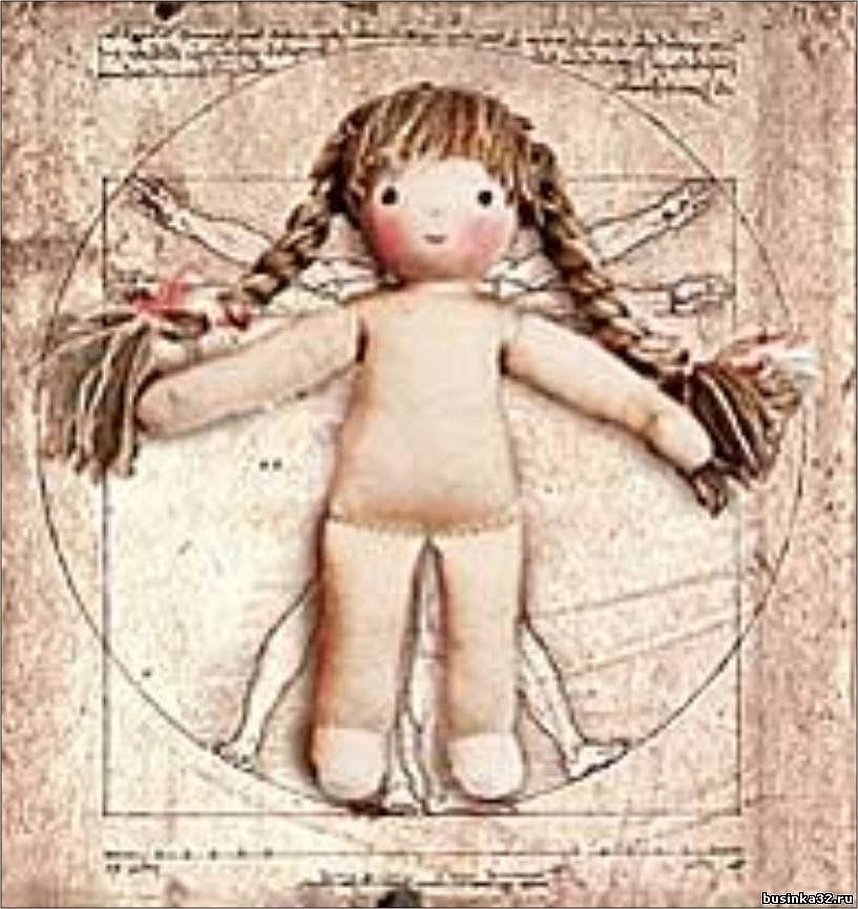
The Waldorf doll is designed by educators specifically for children, taking into account all the needs of the child. Each age has its own type of doll. It has the correct body proportions, which become more complex and detailed as the child grows older and becomes more aware of his physiology. The doll can be sewn or knitted. The face of the toy is not drawn, leaving room for imagination and giving the opportunity to endow it with any emotion during play. The entire philosophy of the Waldorf school is based on the harmonious and comprehensive development of personality and is aimed at the systematic development of children.
Different dolls are sewn for each age:
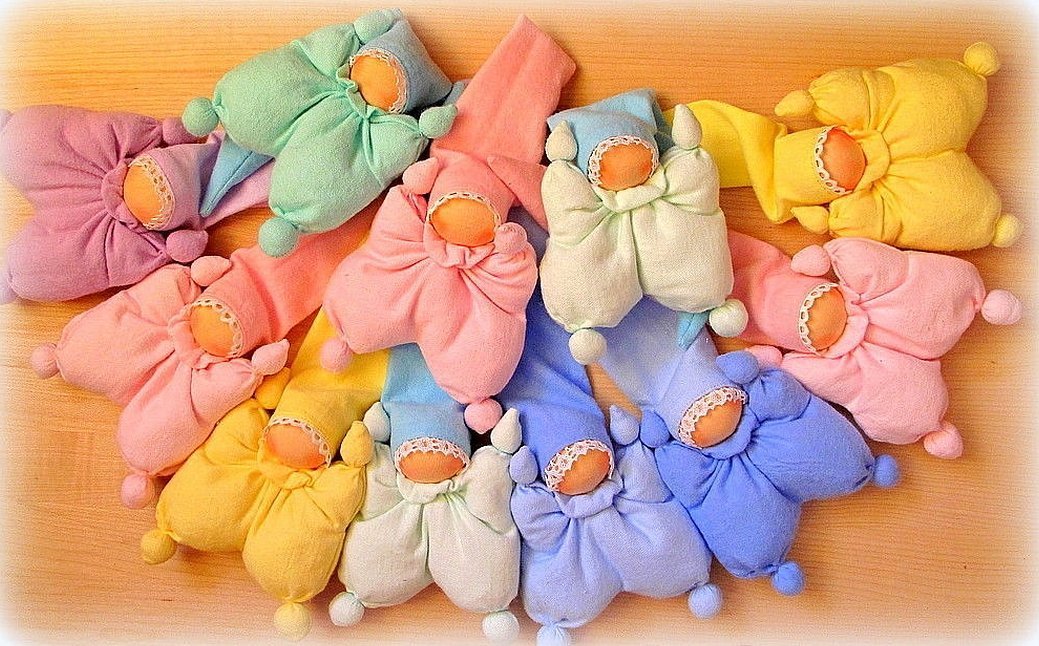
- From 3 months to a year - a butterfly doll. A simple body, similar to a jumpsuit for a baby. Usually a bell is sewn onto the cap, and wooden beads are put into the handles. It turns out to be a kind of teething rattle toy.
- From one to three years. This toy is already more like a doll, it can be swaddled or carried in a stroller, put to bed. It has hair and simple clothes that the child can take off and put on independently. The hairstyle is still static, because such a baby will not be able to braid his hair yet.
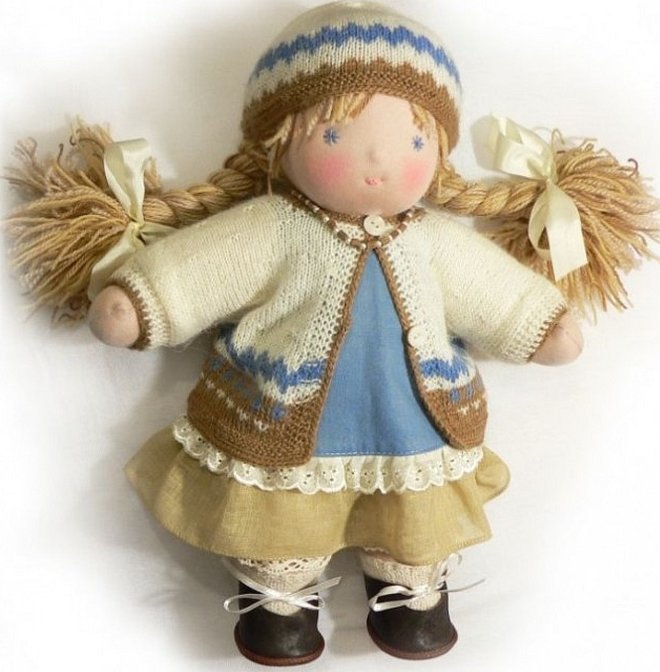
- From 3 to 7 years. The body parts are already drawn, the toy has a full wardrobe, hair made of woolen threads from which you can make hairstyles. Making such a doll is a labor-intensive process, but the result is worth it.
- From 7 years old. It is difficult to call it a classic Waldorf doll. It is also made of natural materials, but the facial and body features are drawn very clearly, and the hair is made of sheep wool and is very similar to real ones.
Please note! A Waldorf doll for older children is practically a work of art. Each piece is individual, with its own character and cannot be repeated.
Requirements for sewing Waldorf dolls
Sewing Waldorf toys with your own hands is not easy, but very interesting. When creating them, it is important to take into account the proportions of the child's body in accordance with his age and the type of toy. It is equally important to choose the right materials, because they must be natural. Light knitwear, close in color to the skin color, is used for the body. Fabrics such as linen, cotton or knitwear are suitable for clothing, the hair is made of woolen threads. As a rule, natural purified sheep wool is used for stuffing.
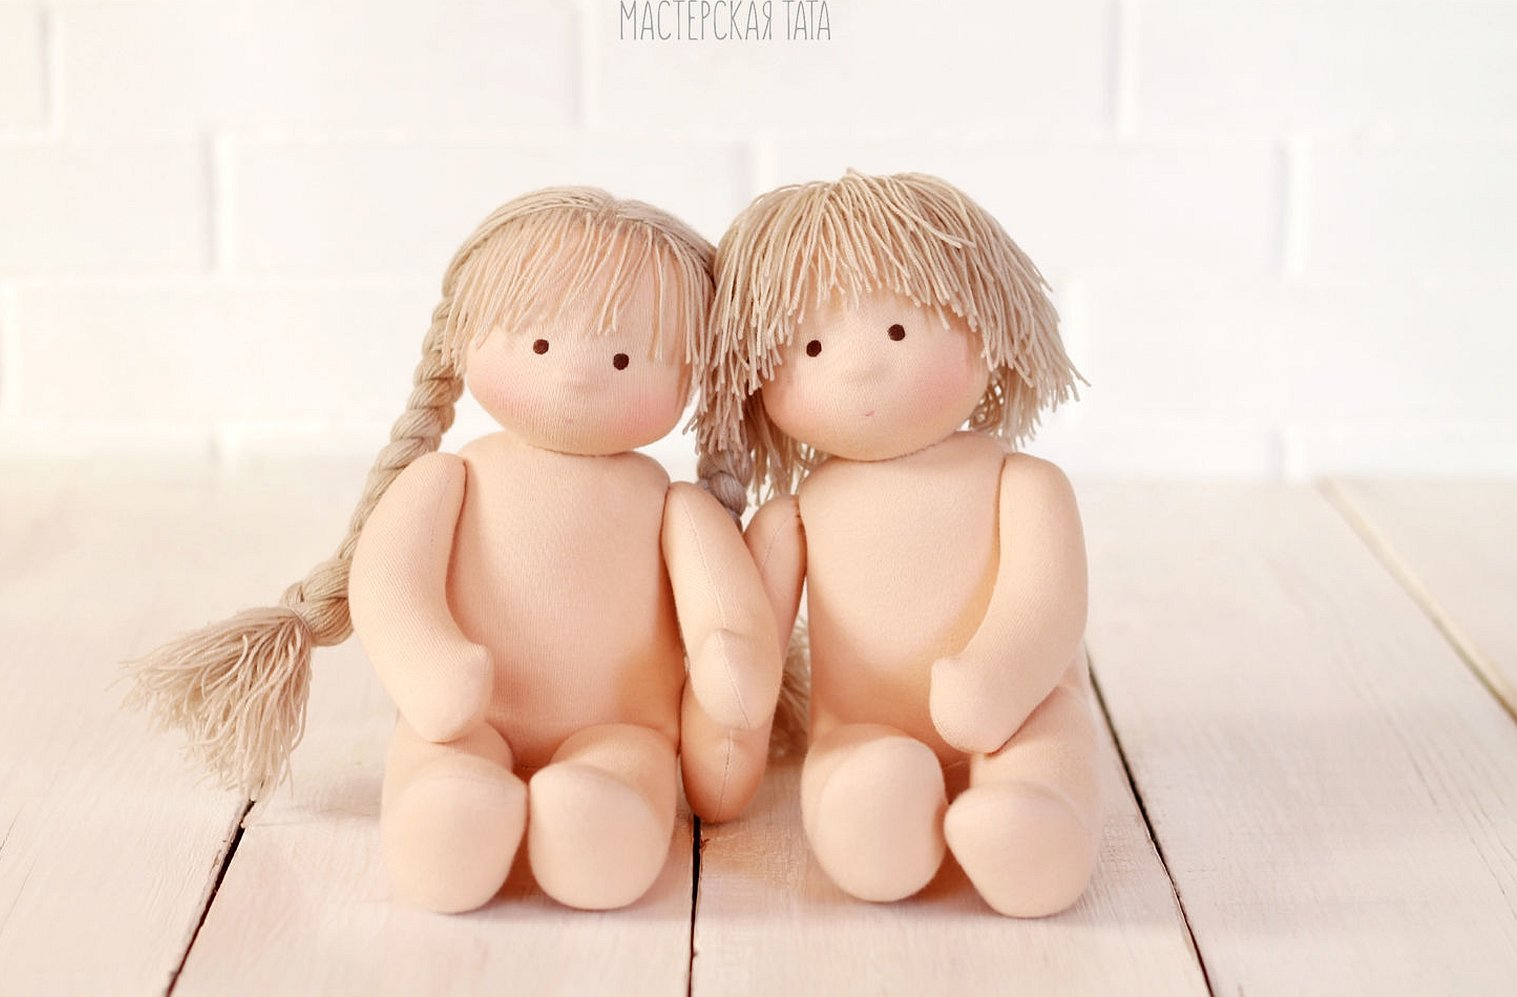
Depending on the type of doll, the face is either not drawn at all, or the eyes are indicated as dots and the mouth is a semicircular line. The face is drawn either neutral or friendly. The same goes for the body. For babies, body parts are only indicated, but for children from 3 years old, every detail is carefully drawn.
Please note! Each type of doll has its own sewing tutorial, but the work order is the same for all.
Choice of fabric and filling
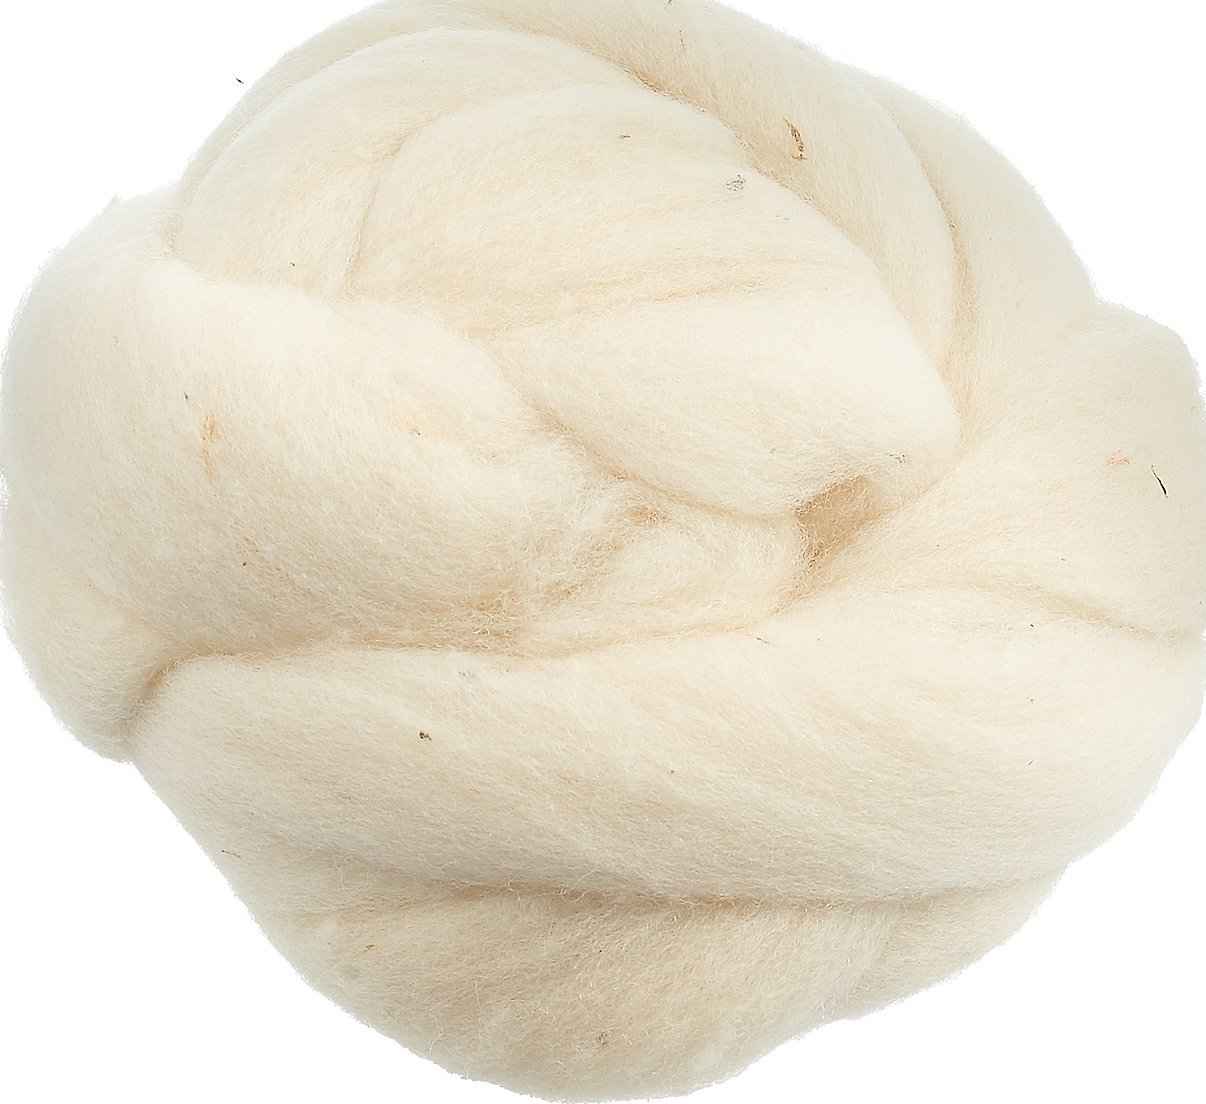
The main requirement when choosing materials is their natural composition. Sliver is used as a filler. This is sheep wool that has been specially processed, bleached and rolled into strips. In addition, wool has the ability to absorb odors, and it is very important for babies to feel the scent of their mother, even if she is not nearby.
For the head and body, you can use special doll knitwear, it stretches moderately and the color matches the skin color as much as possible. For a grown-up child, the colors can be any, but light shades are more suitable for babies. A doll sewn from various materials develops the child's tactile sensations, so when choosing fabric, you can show your imagination and use materials of different textures.
How to sew a large Waldorf doll: step-by-step master class
It is not difficult to sew a Waldorf doll using a master class, but it will require accuracy and patience. First of all, you need to prepare tools and materials:
- pattern;
- body fabric;
- clothing fabric;
- sheep wool;
- long needle;
- wool yarn;
- threads;
- scissors;
- pins;
- measuring tape;
- chalk;
- floss threads.
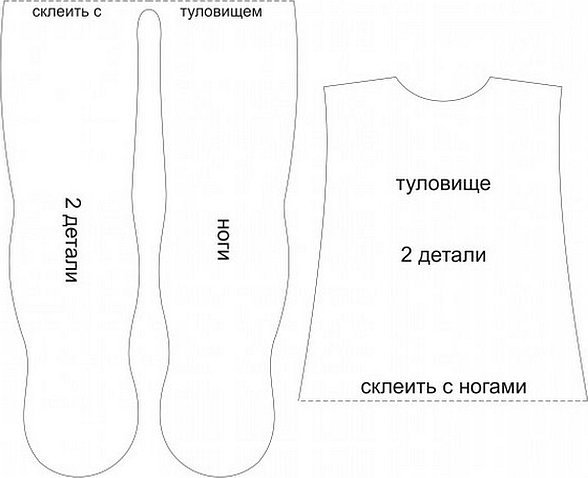
The finished pattern needs to be printed. It consists of 4 parts - arms, legs, head and body. You need to cut out 4 arm parts, 2 leg parts, 2 body parts, 1 head part.
Important! When cutting out the pieces, you need to make seam allowances of 0.5-1 cm.
How to make a doll head
Making a doll starts with the head. You can use a foam ball as a base for it. You can find such balls in craft stores, they come in different diameters. A skein of iris threads will also do. A step-by-step master class will help you make the head without any difficulties:
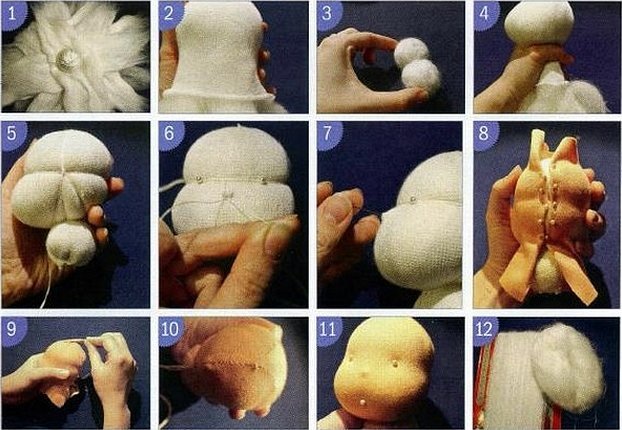
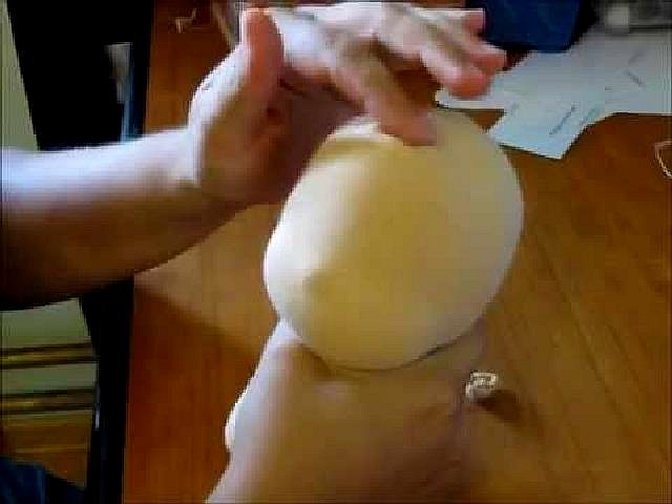
- First, you need to prepare the sliver by cutting 4 identical strips. Place them on top of each other, crossing them, and align the middle.
- Place a ball or skein of thread in the center. Wrap the ball in strips of wool so that it is completely and evenly covered.
- Connect the tails under the ball, tie with a thread and cut off the ends.
- The resulting ball must be measured and a rectangular piece cut out according to the size of the circle.
- Fold the rectangle and sew along the side. This will be the bottom layer of the doll's head. The face will be formed on it.
- The top part of the piece needs to be stitched with a basting stitch, pulled together and the rectangle turned inside out.
- Place the inverted part onto the prepared ball.
Hair, eyes and mouth
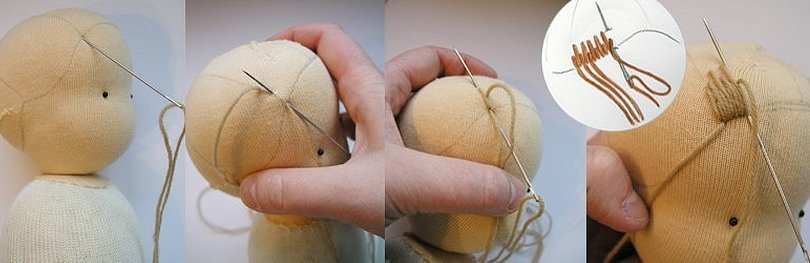
On the finished head piece, you need to form a face using threads:
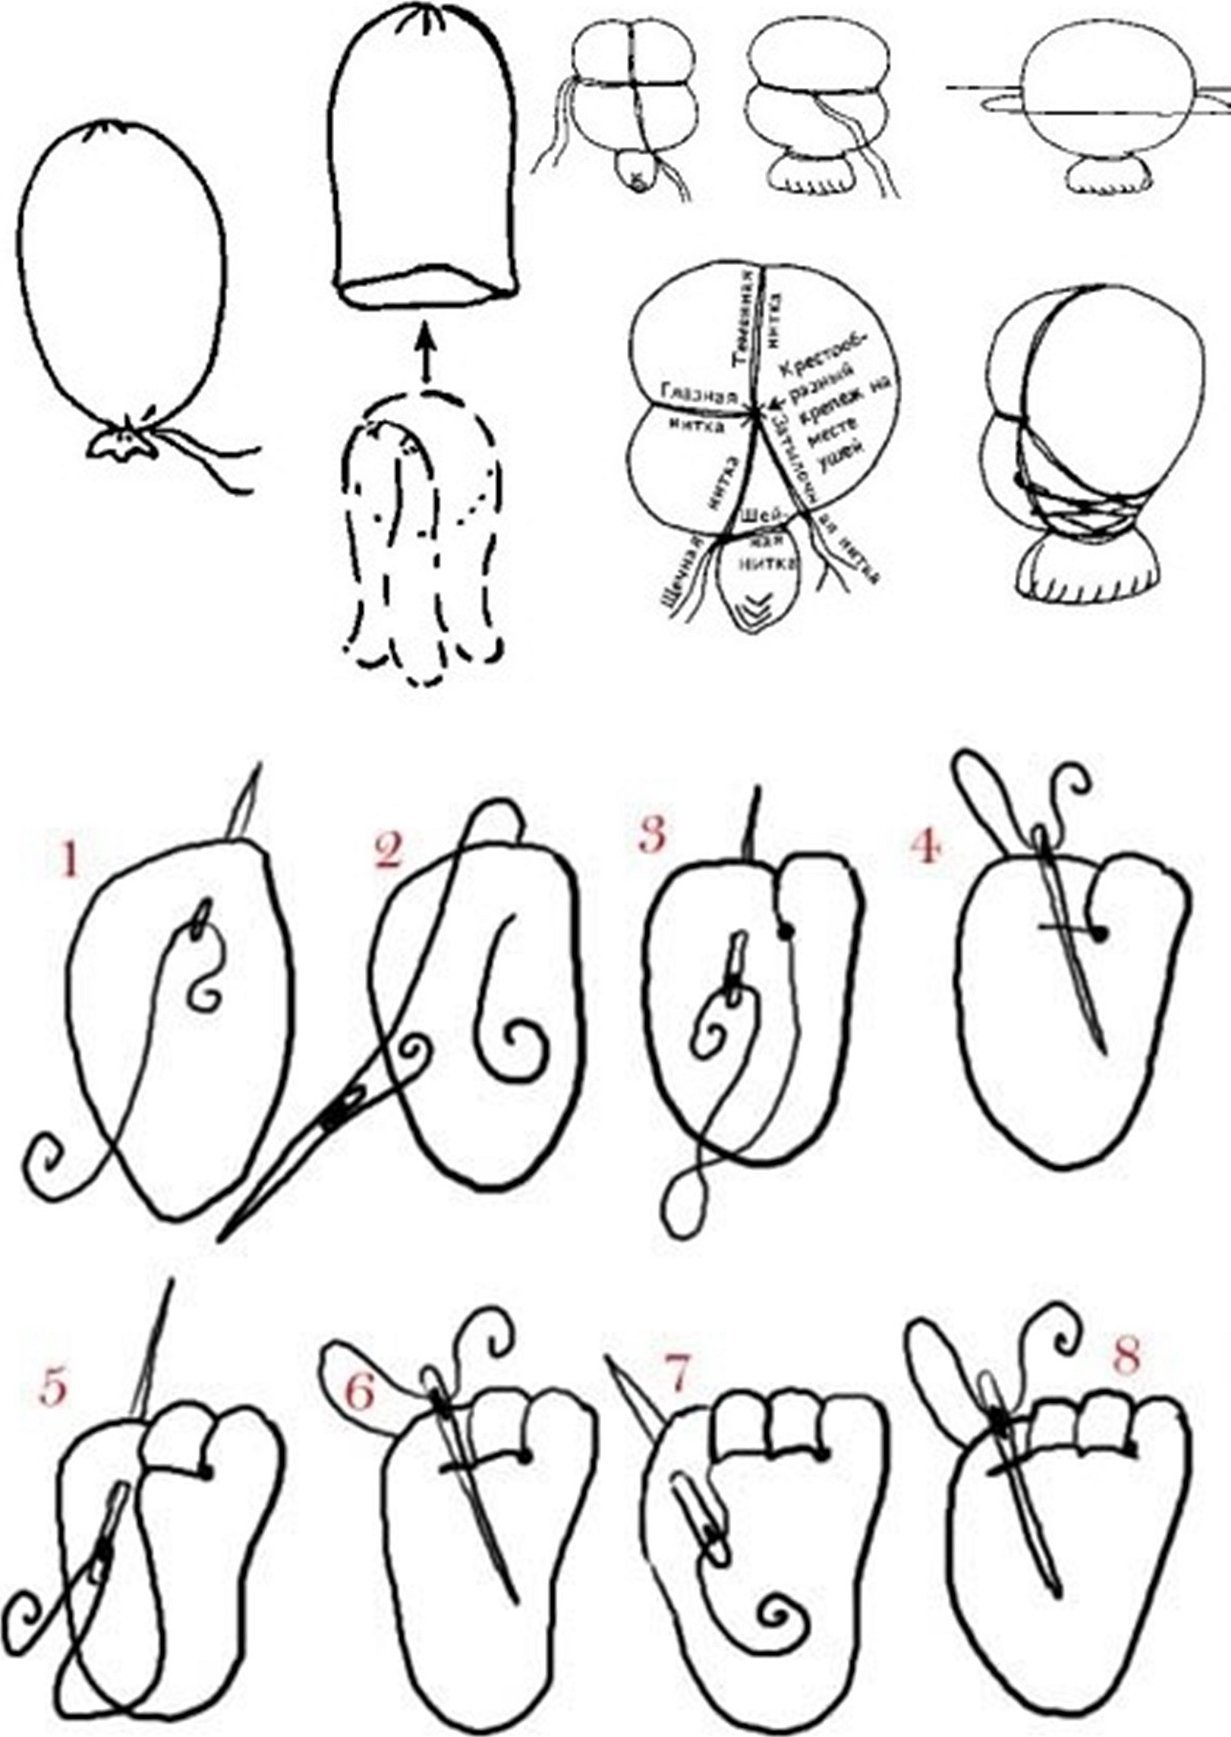
- Wrap the thread under the ball twice. This will be the doll's neck. Tie the thread on the side where the face will be. Do not cut the thread.
- Place the threads on the sides of the ball and make a vertical tightening, tie the threads at the top.
- Measure out a long thread, wrap it around horizontally twice in the center of the head and tie a knot in the area of the vertical tightening.
- Use a needle to join the tightening threads together with several stitches.
- At the second crossing of the threads, use a needle to make several joining stitches and leave a tail.
- Lower the threads at the back of the head in the ear area and tie them around the neck.
- Hook the vertical and back threads with a needle and pull them together. Do the same on the other side.
- Roll a small ball out of wool, place it where the doll's nose will be and sew it on.
The tightening is ready, the face of the future toy is formed.
The head piece should be sewn along the side and top seam, turned inside out. Next, you need to put the piece on the prepared head and remove excess fabric using pins. Remove the fabric, carefully turn it inside out and stitch in place of the pins. Excess fabric should be trimmed.
Put the finished part back on the workpiece, make 2 turns with the thread on the neck, tighten and tie the thread. Fasten the lower edges of the thread with a “forward needle” stitch. Mark the hair line with chalk, fasten the wool thread at the marked line. Make a stitch with a “back needle” stitch at a distance of 1 cm from the marked line. Make a stitch back in the same way, to the line. Sew to the end of the line. Make the bangs in exactly the same way, trim the “hair” if necessary.
Attach pins to the eyes and mouth. Use a pencil to outline the shape. In the marked places, use floss to embroider the eyes first, and then the mouth. To hide the knots in the thread, insert the needle under the hair and bring it out near the eye. You can use blush to rosy the cheeks.
Arms and torso
The details of the arms and body need to be transferred from the pattern to the fabric and cut out. The paired parts need to be sewn together, turned right side out and tightly stuffed with filler. The finished parts of the arms need to be attached to the lower part of the head using pins, check their symmetry. Carefully sew the arms on with small stitches. Sew the seam allowances with a coarse thread.
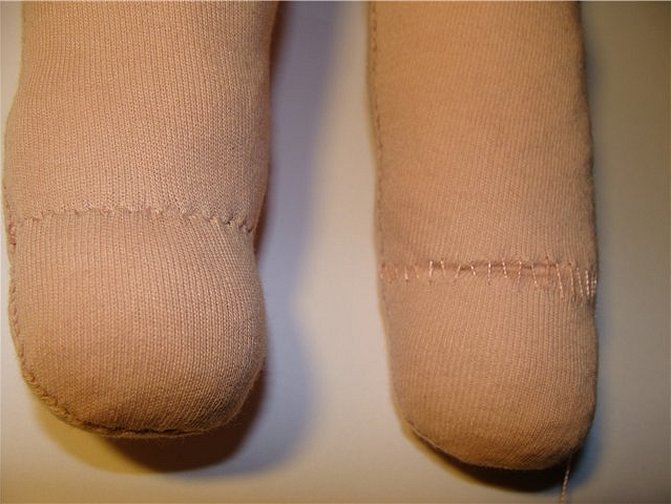
Connect the body parts with the legs, stitch. Turn right side out. First, stuff the part of the legs to form the feet. Before stuffing, it is advisable to mark with chalk the place where the feet end and check their symmetry. Then stitch the walls of the stuffed part. Stuff the remaining parts of the legs and stitch them with a running stitch at the beginning of the body.
The body itself needs to be tightly filled with stuffing and pinned to the base of the head. Connect all the parts and secure the body around the neck. To make a chubby toy, the body parts need to be stuffed as tightly as possible.
Important! All parts are connected and stitched with a blind stitch.
The doll is ready, now we can start making clothes for her.
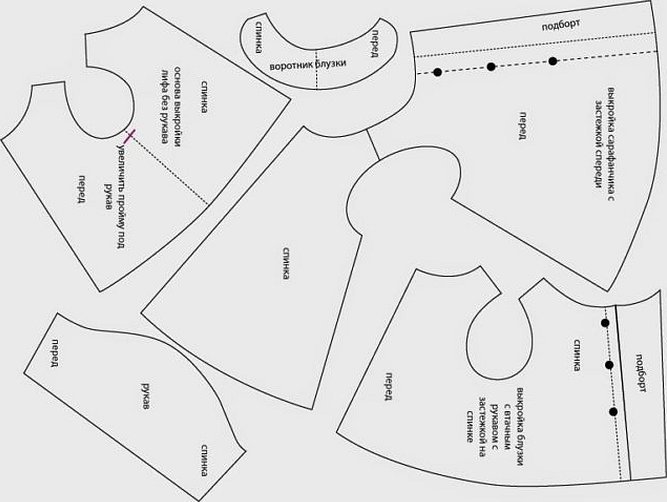
Doll clothes: diagram and pattern
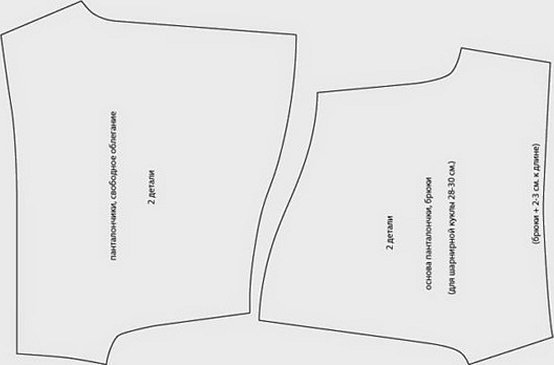
When sewing clothes for a doll, it is necessary to choose natural materials of light shades, especially if it is a toy for a small child. The clothes are varied - dresses, sundresses, shorts, T-shirts, trousers. Before transferring the pattern to the fabric, you need to do a "fitting" and check whether the sizes of the pattern and the doll match. It is necessary to provide seam allowances of 0.5 cm on each side. The clothes are sewn on a sewing machine or by hand. You can knit a hat for the head with knitting needles or a crochet hook.
With such a detailed description of all stages of work on the toy, sewing it will not be very difficult. Sewing will take time, but the baby will have a unique toy made by mom's hands with love and care.


