The satin stitch technique is as widespread as cross stitch. But unlike the latter, it is quite complex and requires a lot of time to master. This article talks about how to embroider satin stitch and what is needed for this.
- History of origin
- Embroidery tools
- Choice of fabric
- Basic rules
- Basic types of satin stitches
- Straight stitch
- Split stitch
- Loop stitch
- Stem suture
- Holbein stitch
- How to learn satin stitch embroidery
- Plain satin stitch
- Flat surface
- Russian (Vladimir) smooth surface
- Chinese stitch
- Embroidery Learning Kits
- Recommendations for beginners
History of origin
Embroidery with floss appeared in primitive times. Since then, it has become an important part of life around the world. The first ready-made patterns were very simple. But the desire to master the technique corrected these disadvantages, showing the world the satin stitch technique. In museums, you can see things embroidered with this method, which is more than 2 thousand years old. Even in our time, this method of embroidery is very popular.
There is an opinion that the technique of such embroidery first appeared in Ancient China in the 6th century BC. It is said that Chinese women from noble families embroidered on silk quite well.
The oldest items that have survived to this day were made using threads of silver, gold and hair. This technique had a strong influence on Japanese needlewomen. Over time, the embroidery technique reached Europe and later spread throughout the world.
Embroidery tools
To start embroidery, you need to prepare the following tools:
- The most important thing to buy is needles. They need to be selected depending on the thickness of the fabric and threads. It is advisable to use short needles with a wide eye, it is more convenient to thread the thread through it. Or you can use a special device for this. For example, for thin cotton it is advisable to use thin needles No. 1-3, for medium-density materials (chintz or thin wool) No. 4-8 is suitable, on thick fabrics (drape, felt) work with needles No. 9-12.
Important! The needle should be slightly larger than the embroidery thread.
- The use of a thimble is necessary to avoid unpleasant needle pricks. It is usually worn on the middle finger of the left hand. In the first days, it will be quite difficult to work with it, because it will seem to be in the way. It is important that the product is the size of the finger.
- It is essential to have a large metal ruler on hand.
- To cut the fabric, it is better to take a textile roller. It is sold in fabric stores.
- The hoop is used to stretch the material (it is more practical to work on such a canvas, and the pattern is denser and stronger). There are hoops made of different materials on sale. Wooden ones up to 20 cm in diameter are suitable for beginners.
Additional information! In addition to the tools, you need to choose the right fabric for the job. You can read about this below in the article.
Choice of fabric
The fabric for satin stitch embroidery can be of different colors and thicknesses (felt, cotton, calico or drape). After the fabric has been selected, it is necessary to select a set of needles for it. The thicker the material, the higher the needle serial number (the minimum is No. 1).
The easiest to do is white embroidery (light threads are used) and fairly thin materials. You can also apply embroidery to clothes or bed linen. In this case, you do not choose the fabric, but the object for work. For example, you can make some kind of wildflower on a child's hat or embroider a stole with patterns. The material must be of high quality, because cheap fabrics can start to crumble during work or holes will remain in them after each puncture with a needle. The best option for work is chintz or drape. If you need to decorate a pillow with embroidery, then take the thinnest needle and floss.
Basic rules
In order for the embroidery to be neat, you must adhere to the following rules:
- the fabric needs to be stretched as tightly as possible on the hoop;
- the stitches should completely cover the fabric so that there are no gaps;
- the stitches must be the same and go one after another;
- the edges of the pattern should be uniform and even;
- You need to start embroidering from the narrowest part of the pattern;
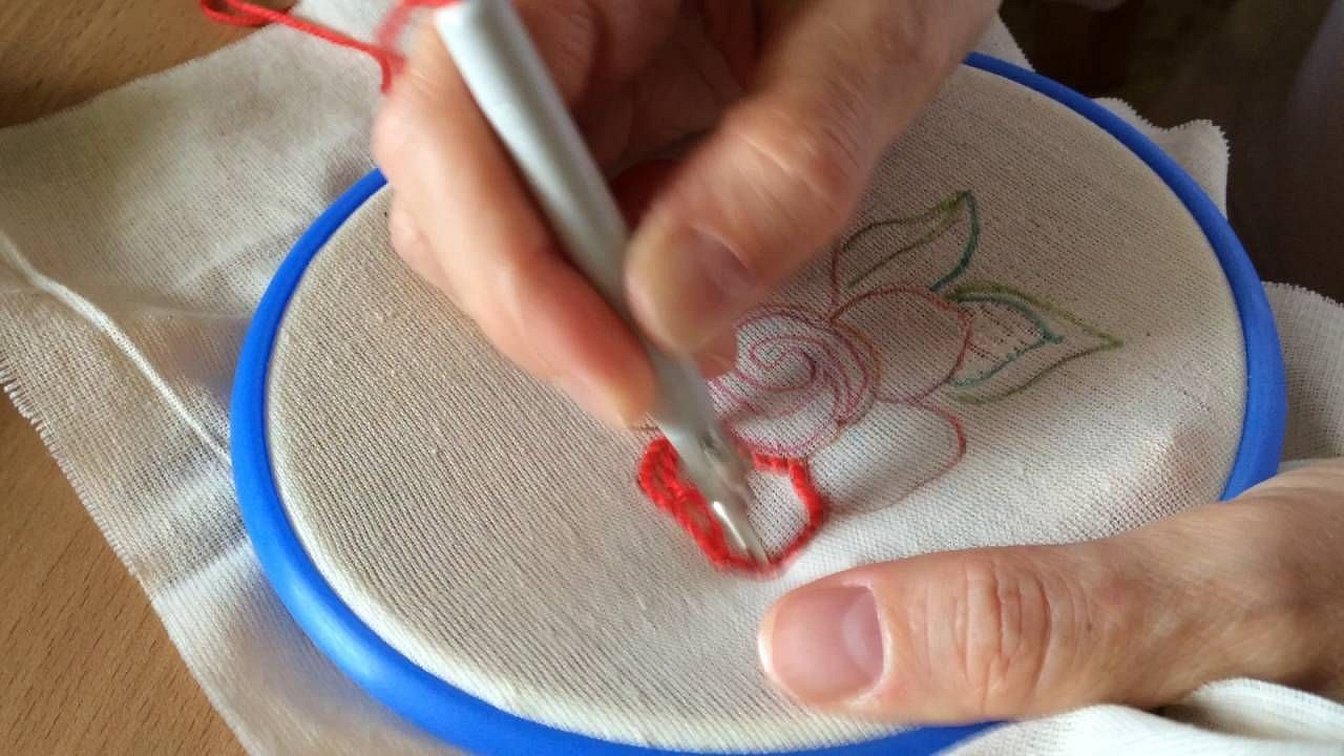
- Before starting work, it is recommended to draw the contour lines of future patterns on the fabric.
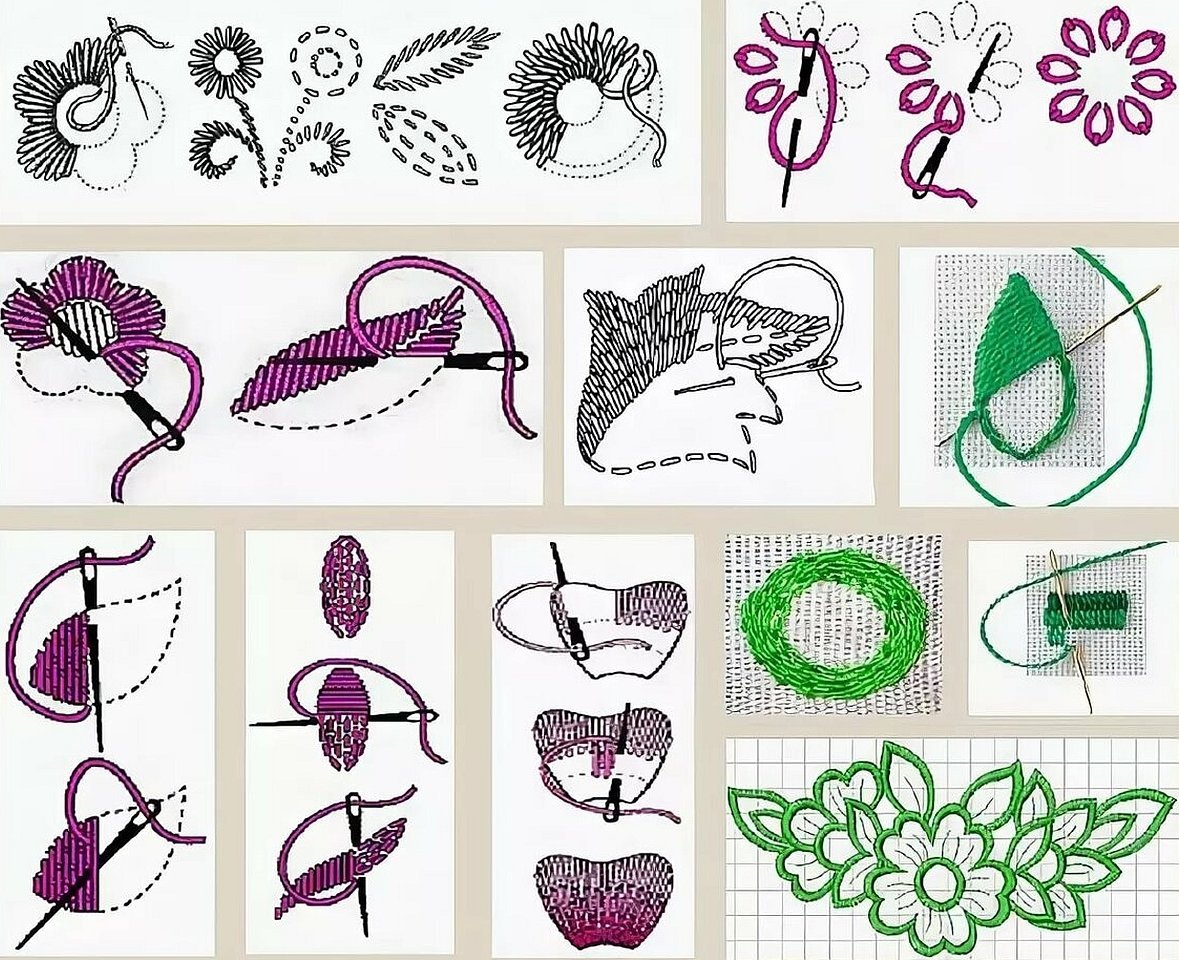
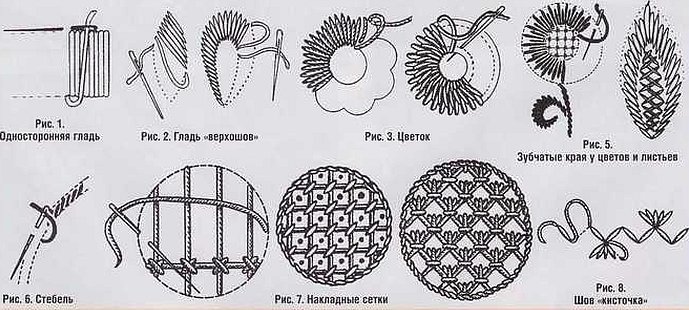
Basic types of satin stitches
Before starting work, beginning needlewomen need to study what types of stitches exist in the satin stitch technique.
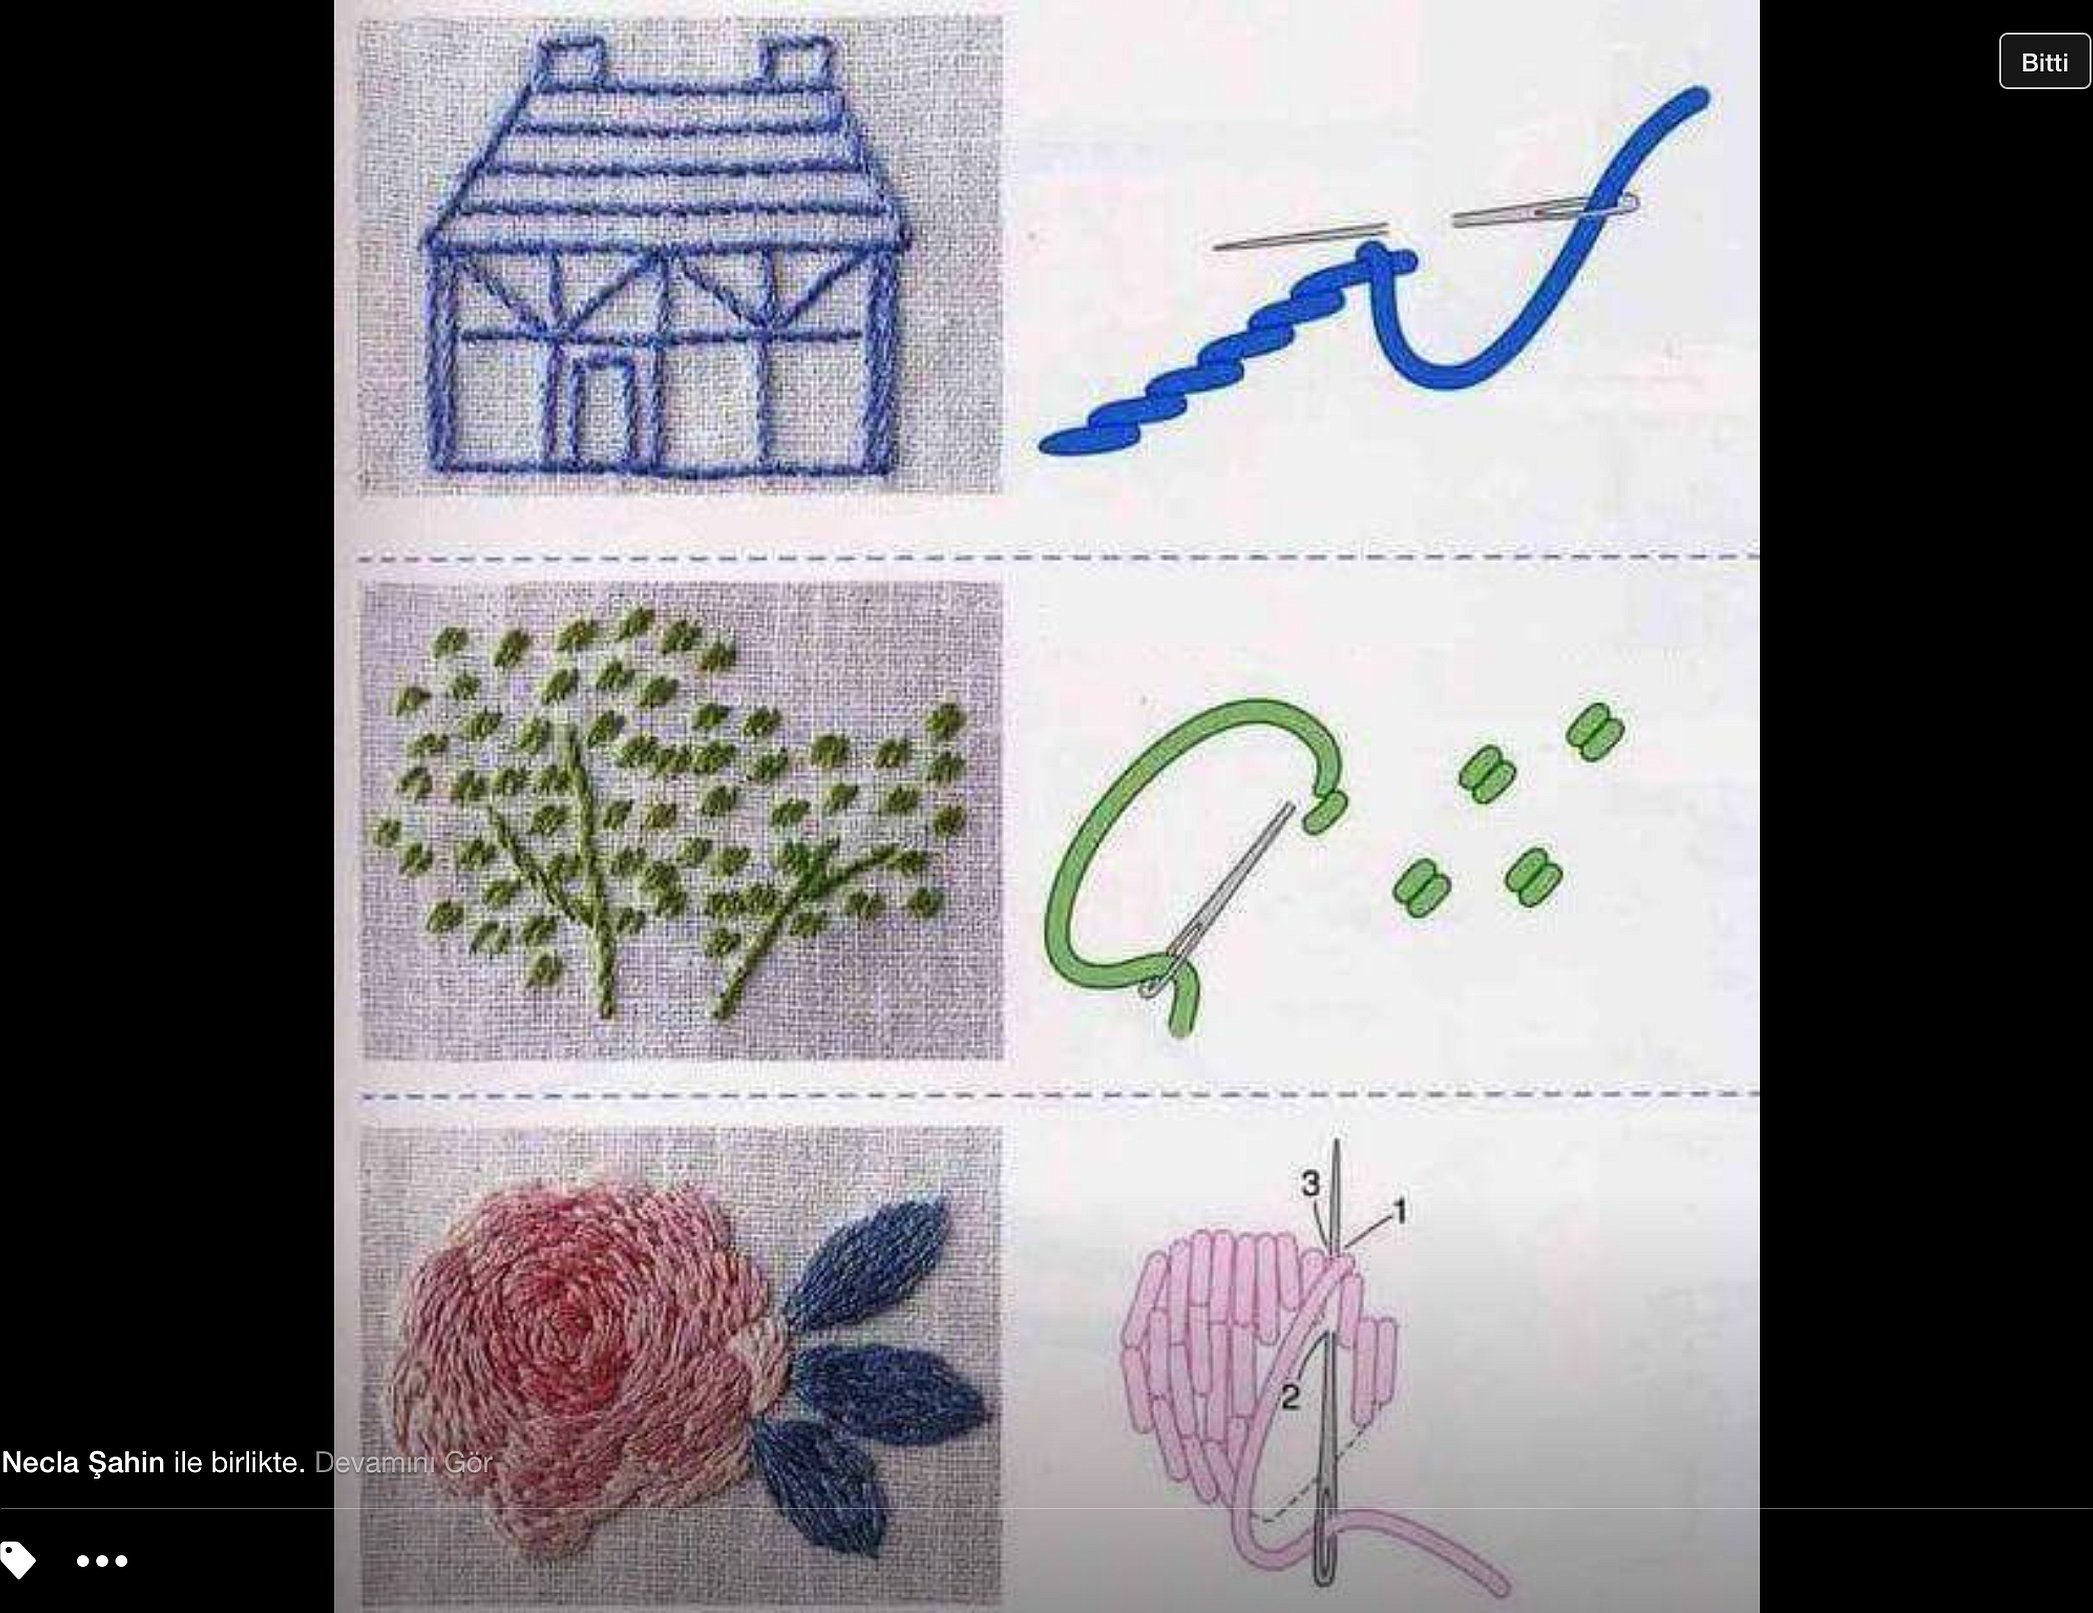
Straight stitch
Straight stitch is mainly used by needlewomen for large details or processing of image lines. The size can vary from one millimeter and reach seven to ten millimeters, while the direction of the seam is chosen at the discretion of the master.
Split stitch
It is used for processing contours and for filling the space. The first stitch is embroidered from the front side to the back side. Then from the back side the needle enters the center of the previous seam, dividing it.
Loop stitch
It is done in the direction from left to right by moving the needle from top to bottom. The thread must be brought to the front side at the bottom stitch mark, and then stitch the stitch with the needle in the direction from top to bottom (the thread must be under the needle) and pull the working thread until a loop appears.
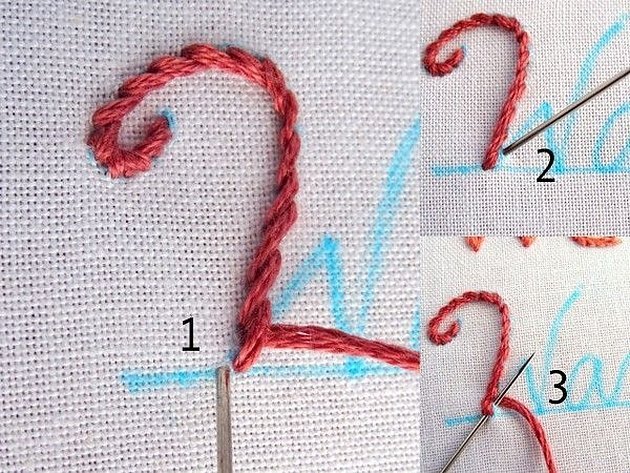
Stem suture
This stitch is made from stitches that overlap one another. This technique is the oldest.
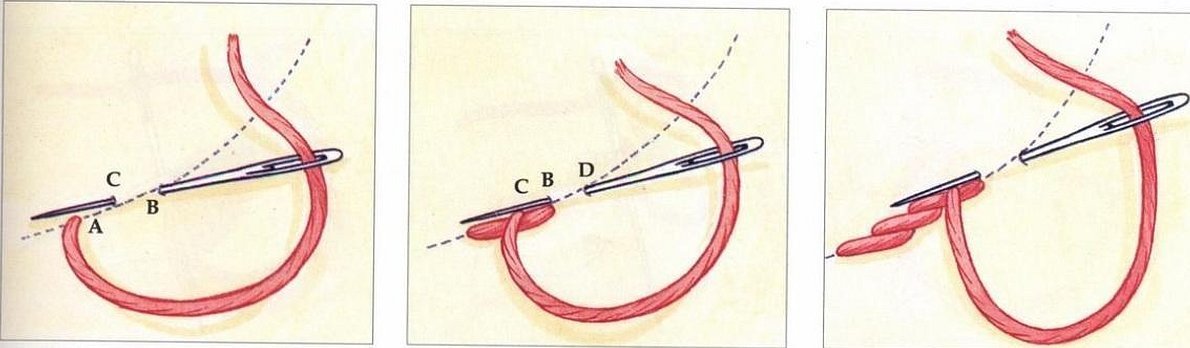
It has such a name because earlier this method was used to embroider plants and flowers. The stitch is practically made from the bottom up or from right to left. The needle with the working thread looks back, but comes out on the face of the canvas approximately in the center of the last stitch.
Holbein stitch
Quite often used in blackwork technique. Embroidery with this stitch is present in paintings by German artist Hans Holbein, that is why it is called that.
Additional information! Below you can read about the technique of performing satin stitch and the main nuances of the work.
How to learn satin stitch embroidery
To learn how to work with satin stitch, it is enough to look through several MK and read this article.
Plain satin stitch
Basic rules in plain satin stitch embroidery:
- embroidery is done on both sides;
- the finished drawing can be seen equally on both sides;
- all the details of the pattern are embroidered separately with seams located tightly next to each other;
- the size of the stitches and their direction are chosen independently;
- The best option for those who are just starting to get acquainted with satin stitch.
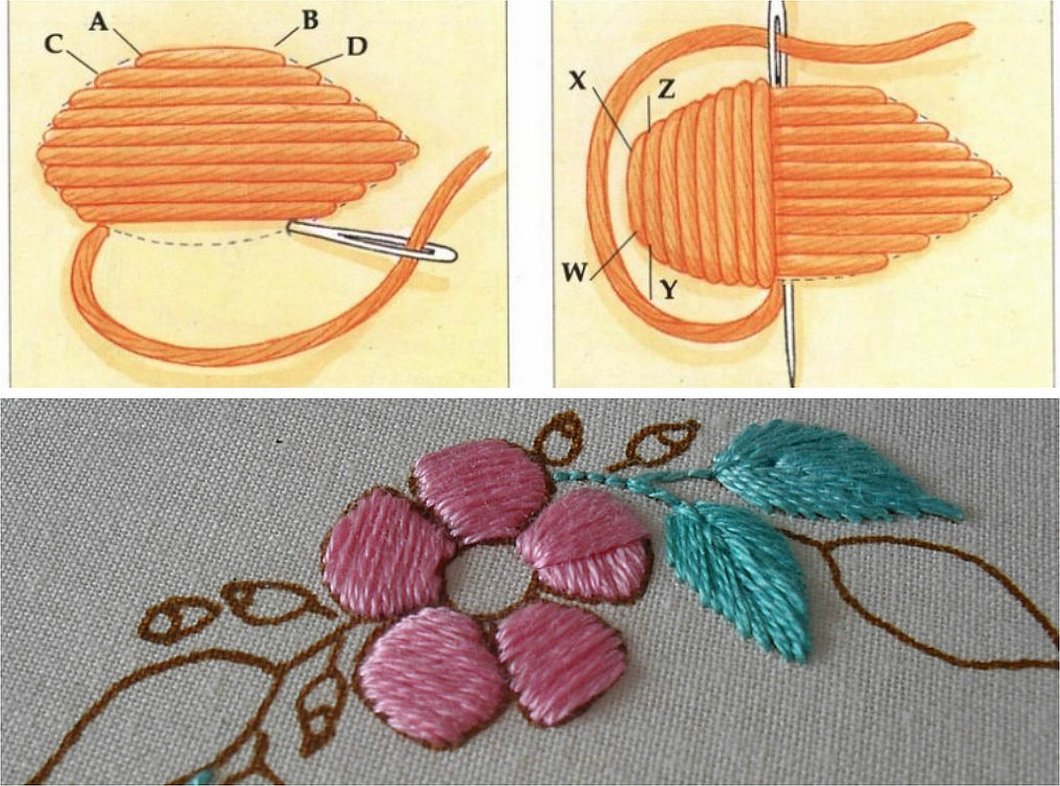
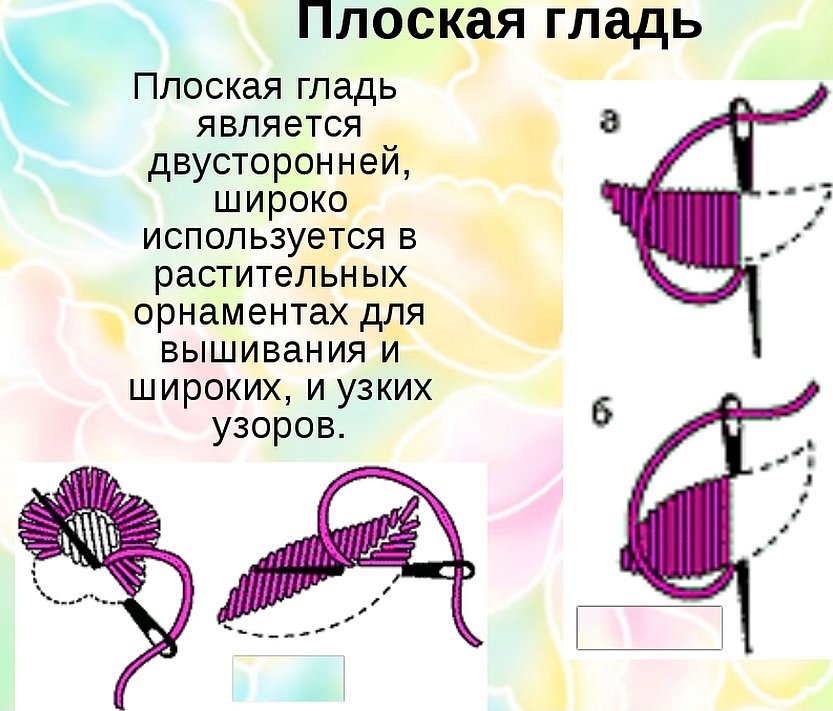
Flat surface
Work process:
- make stitches with thread across the width of the entire pattern parallel to each other, while there should be no gaps inside;
- you can choose the direction of the stitches yourself (if you need to embroider leaves, then the stitches go from the edge to the center;
- If you draw guide lines on the canvas in advance, it will be much easier to maintain the angle and direction of the seams.
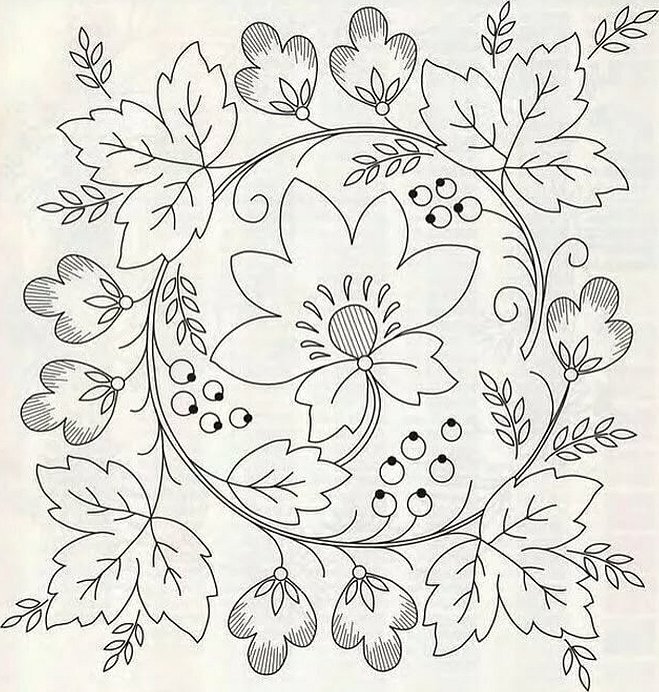
Russian (Vladimir) smooth surface
Rules for performing Vladimirskaya gladia:
- in this technique, an image or ornament is embroidered along the contour;
- longer stitches are made on the outside and short ones on the inside;
- In Russian satin stitch, mainly single-color threads (red, orange, white) are used.
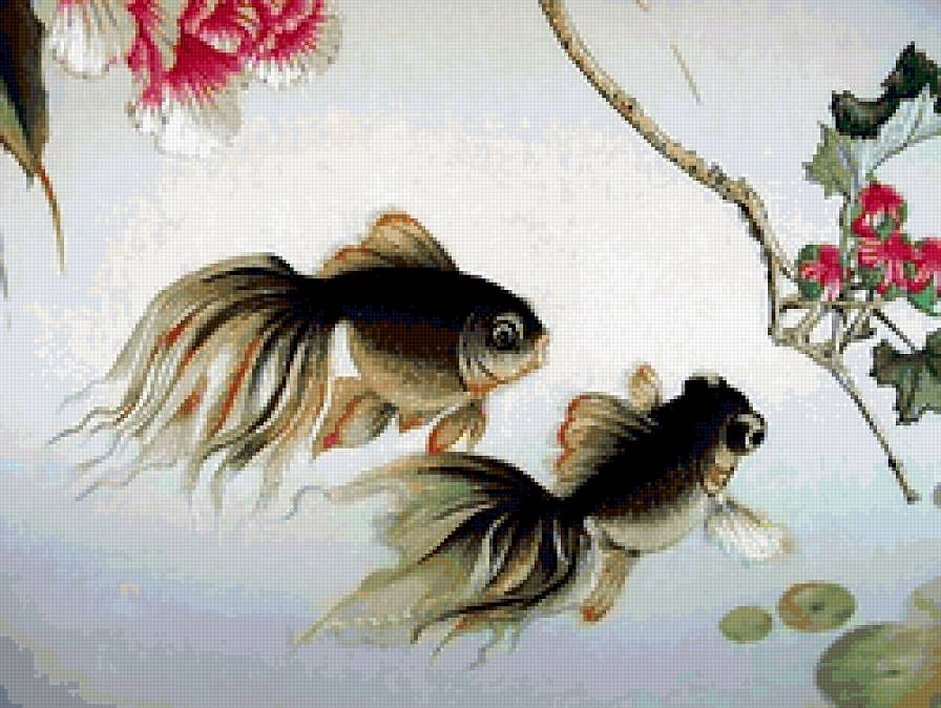
Chinese stitch
Nuances you need to know:
- the basis for working in the Chinese satin stitch technique is black satin or silk fabric;
- mainly Chinese motifs are used, hence the name (fish, birds, cherry trees);
- This method is only suitable for those who have already improved their satin stitch embroidery skills.
Embroidery Learning Kits
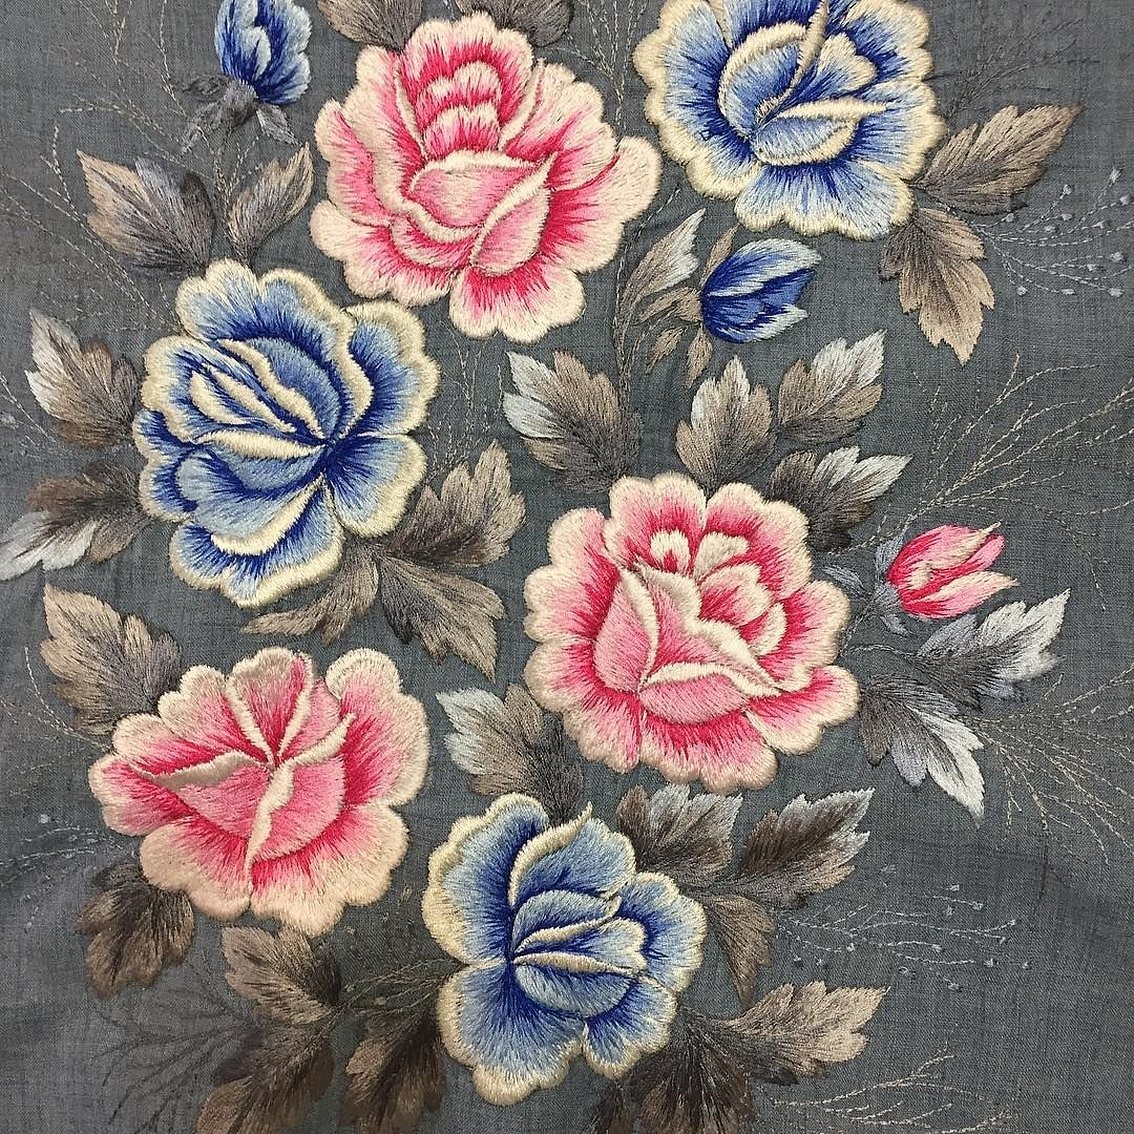
For beginners, it is advisable to take small sets. With large drawings, where there are as few small details as possible. For example, flowers, fruits or simple patterns are perfect. Prices for one small set start from 300 rubles. Therefore, you can find a suitable set for your budget. Ready-made sets for satin stitch embroidery have different levels of complexity. It is better for beginners to take the first level of work.
An embroidery kit usually includes:
- needles to match the size of the fabric;
- threads for drawing;
- instructions for use.
Important! Beginner kits are sold with a ready-made pattern on the canvas. Also, the stitch directions are often indicated on the diagrams to get a smooth pattern. Therefore, this option is perfect for new craftswomen.
Recommendations for beginners
It is not advisable to try to embroider a picture right away. First, you need to learn as many types of stitches as possible. Detailed video tutorials can be viewed on handicraft websites. It is worth initially trying to make individual details - leaves of various shapes, birds. And only after your hand is filled, you can make large pictures. It is advisable not to make blots, since it is very difficult to rip an unnecessary stitch later.
As with any hobby, it is necessary to adhere to the principle of "from simple to complex". You should not immediately try to do a large, labor-intensive job - there is a high risk of not coping with it or ruining the canvas.
Children's things can be decorated with animals, snowflakes or hearts. You can also embroider an artistic picture for the children's room.
Nowadays, you can buy a machine that does satin stitch embroidery itself. But as many have noted, it does not give the peace that comes with hand embroidery. Such devices are more often used in studios and in production.
It is also necessary to emphasize that washing of things with such embroidery is allowed in any mode. But if low-quality threads were used, there is a risk that after washing they will start to shine and crack in the sun. Therefore, there is no need to save money when buying materials for work.
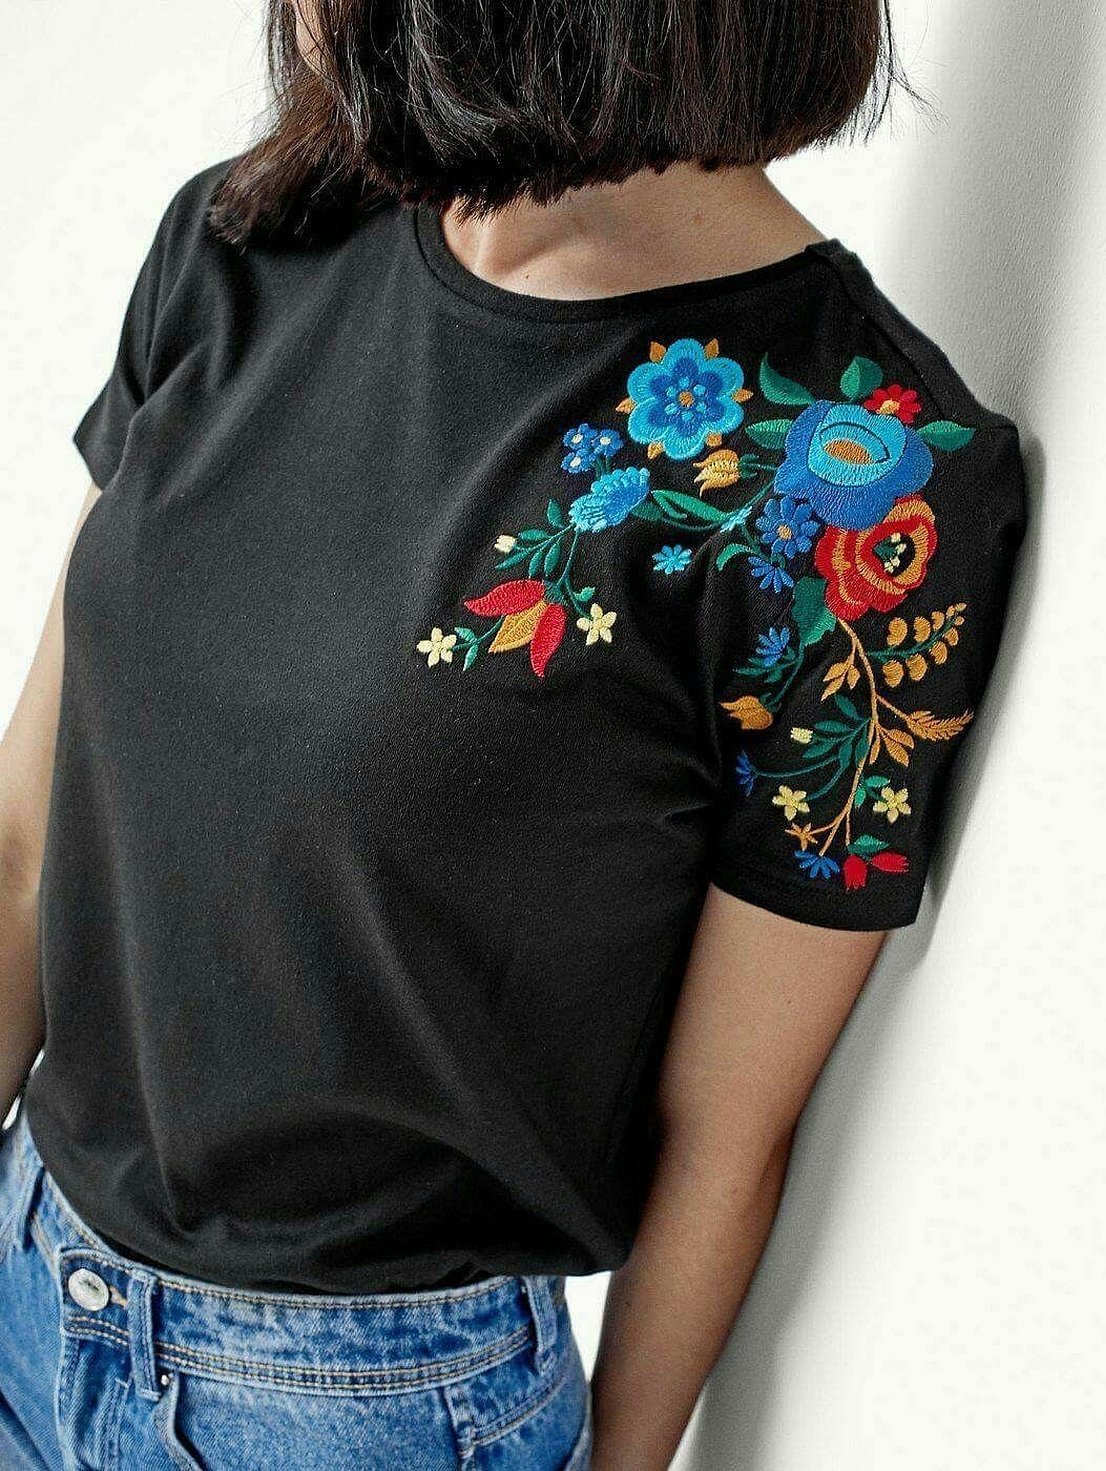
Satin stitch embroidery is quite easy for beginners. With its help, you can make not only pictures, but also decorate jeans, towels or bed linen.


